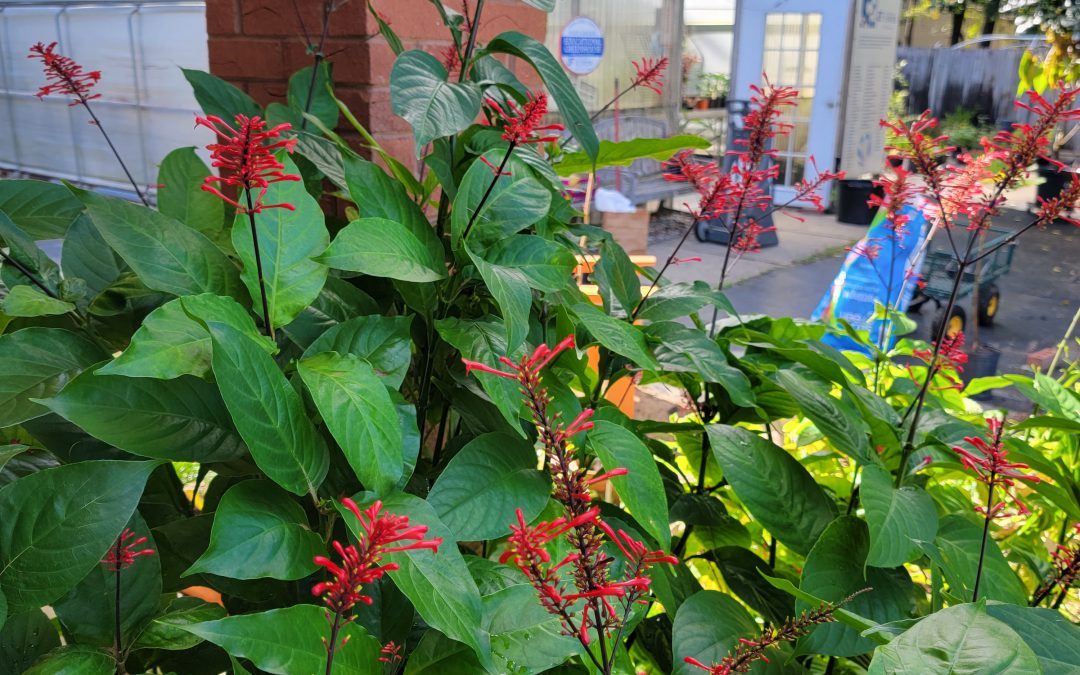
Looking to add something to brighten your landscape this autumn? Firespike (Odontonema strictum) is a prolific fall bloomer with red tubular flowers that are very popular with hummingbirds and butterflies. It’s glossy dark green leaves make an attractive large plant that will grow quite well in dense shade to partial sunlight. In frost-free areas, firespike grows as an evergreen semi-woody shrub, spreads by underground sprouts and enlarges to form a thicket.
Bright red blooms of Firespike
In zones 8 and 9 it usually dies back to the ground in winter and resprouts in spring, producing strikingly beautiful 9-12 inch panicles of crimson flowers beginning at the end of summer and lasting into the winter each year. Firespike is native to open, semi-forested areas of Central America. It has escaped cultivation and become established in disturbed hammocks throughout peninsular Florida, but hasn’t presented an invasive problem. Here in the panhandle, firespike will remain a tender perennial for most locations. It can be grown on a wide range of moderately fertile, sandy soils and is quite drought tolerant. Firespike may be best utilized in the landscape in a mass planting. Plants can be spaced about 2 feet apart to fill in the area quickly. It is one of only a few flowering plants that give good, red color in a partially shaded site. The lovely flowers make firespike an excellent candidate for the cutting garden and is a “must-have” for southern butterfly and hummingbird gardens. Additional plants can be propagated from firespike by division or cuttings. However, white-tailed deer love firespike too, and will eat the leaves, so be prepared to fence it off from “Bambi”.
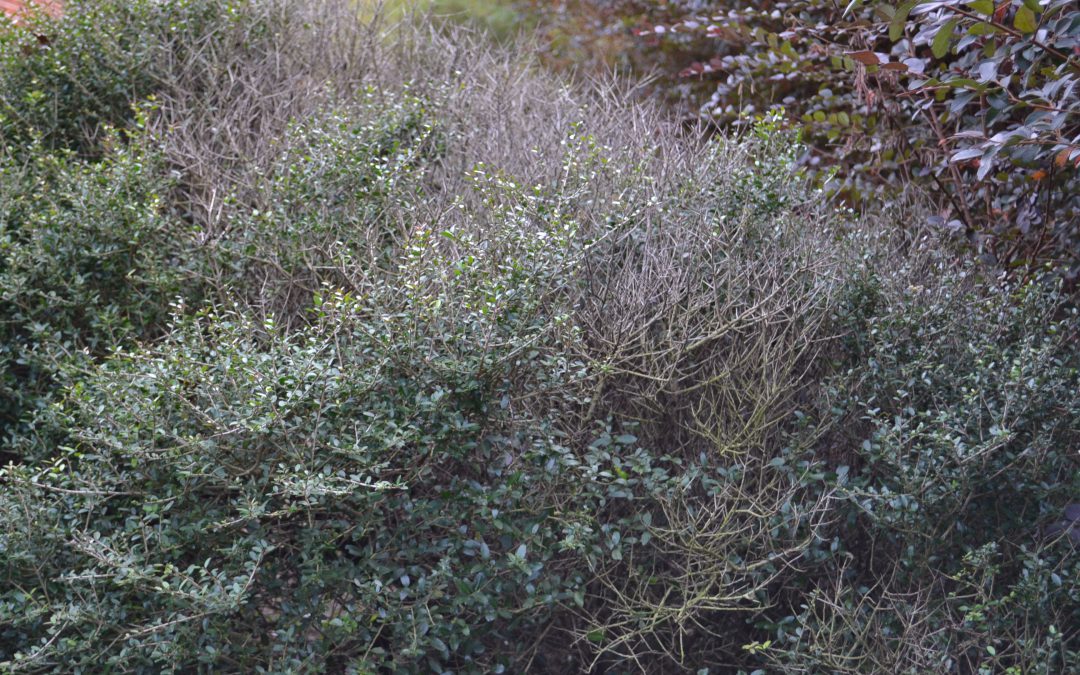
In the last couple of weeks, I’ve had multiple questions regarding trees and shrubs that aren’t looking too hot. These types of calls are common this time of year – it has gotten hot and dry, and plants have fully emerged from winter, causing issues that have been hiding under the surface during the dormant season to manifest as crown or branch dieback. While there are a wide variety of things that can cause dieback, in most cases a little detective work can help pinpoint the issue. Let’s look at a few of the most common causes of dieback and some corrective measures that may help restore the plants to health.
The first thing to do when you notice a plant in decline is nothing. Don’t try and oversaturate it with water. Don’t run out and dump a bunch of fertilizer around it. Many times, these panic measures exacerbate the stress the plant is already under. Instead, I encourage you to give us a call at your local UF/IFAS County Extension Office. We can likely help identify the cause of the problem through a site visit to your property or by you sending us diagnostic photos of the plant with a description of what’s been going on with it – the more information you can provide about the plant and the management practices it has experienced, the better (you can email diagnostic images/information to d.leonard@ufl.edu).
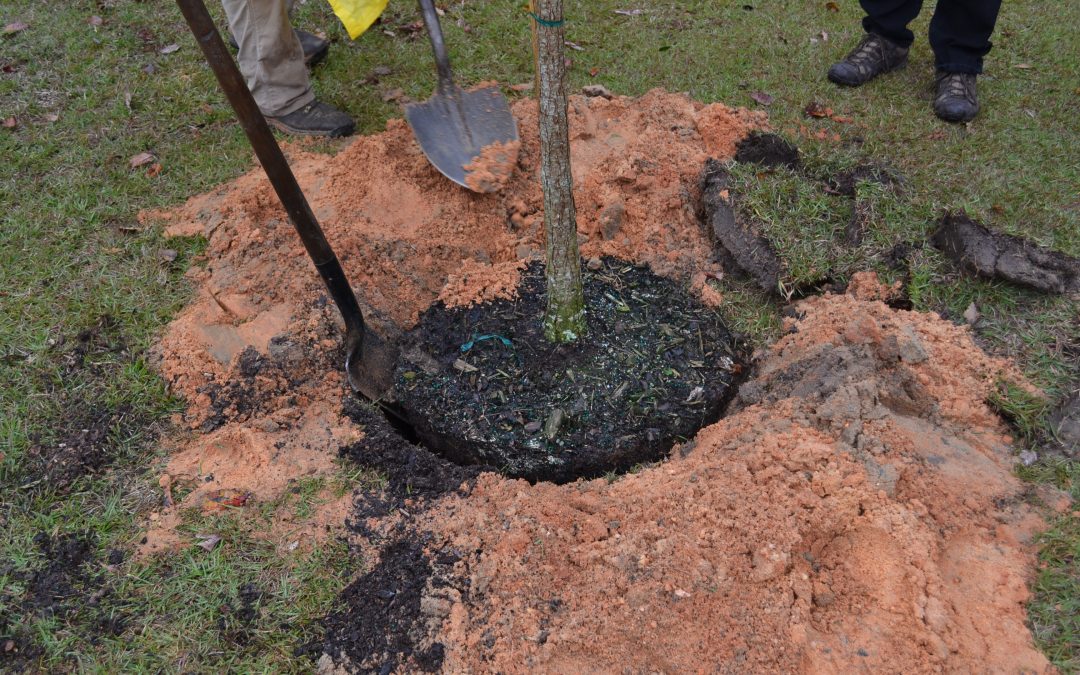
The most common cause of tree/shrub dieback that I see arises from improper planting practices. Most landscape plants should be planted at or just above the surrounding soil level, preferably where the topmost root arises from the trunk. To accomplish this, planting holes should be dug slightly shallower than the rootball’s height and about twice as wide. Planting any deeper than that is probably too deep and can cause problems like trunk and root decay, which lead to crown dieback. Unfortunately, once a plant is planted too deep, it cannot be corrected other than digging up and replanting at the proper depth, which may or may not be possible depending on the size of the tree. Another common issue that can arise after planting is girdling roots. This occurs when plants are grown in plastic containers and develop a root system that circles the inner wall of the pot. If not trimmed, the plant’s root system will continue to grow in this manner, eventually encircling the plant’s trunk, cutting off water and nutrient flow, and leading to crown dieback. Fortunately, this condition can be prevented by cutting, removing, or redirecting these roots at planting.
The next most common cause of plant dieback occurs due to soil disturbance by people. It’s easy to forget but the root zone of trees and shrubs can reach out several times farther than the plant is tall and is easily damaged. Disturbances to the root zone from digging or trenching near trees or compaction from prolonged vehicle travel over the area cause damage that might be slow to appear but can lead to plant decline. If you are doing construction or building near a shrub or tree, try to keep digging machinery as far out of the root zone as possible and avoid repeatedly parking or driving vehicles over the root zone area. Like below ground root damage, trunk damage that occurs from injury by string trimmers, mowers, or animal feeding activity can all disrupt the flow of water and nutrients in plants and prove deadly. There is no cure for this type of damage, so employing physical barriers to prevent damage is key.
The last major stress is environmental in nature and is caused by a water imbalance – either too much or not enough. Dry soil conditions during the planting and establishment phases (first several years after planting) should obviously be avoided if possible – keeping the developing rootzone moist and allowing plant roots to establish in their native soil is critical. Too much water can also cause problems for trees planted in poorly drained soil. Excessive moisture leads to root diseases, which ultimately presents as dieback in the canopy. If planting in an area that tends to stay wet, select a species of plant adapted for that sort of site – some species are more tolerant of “wet feet” than others. While many people expect disease and insect damage to be the cause of an unhealthy plant, they’re often not the biggest culprit and, if they occur at all, are generally secondary to one of the above issues.
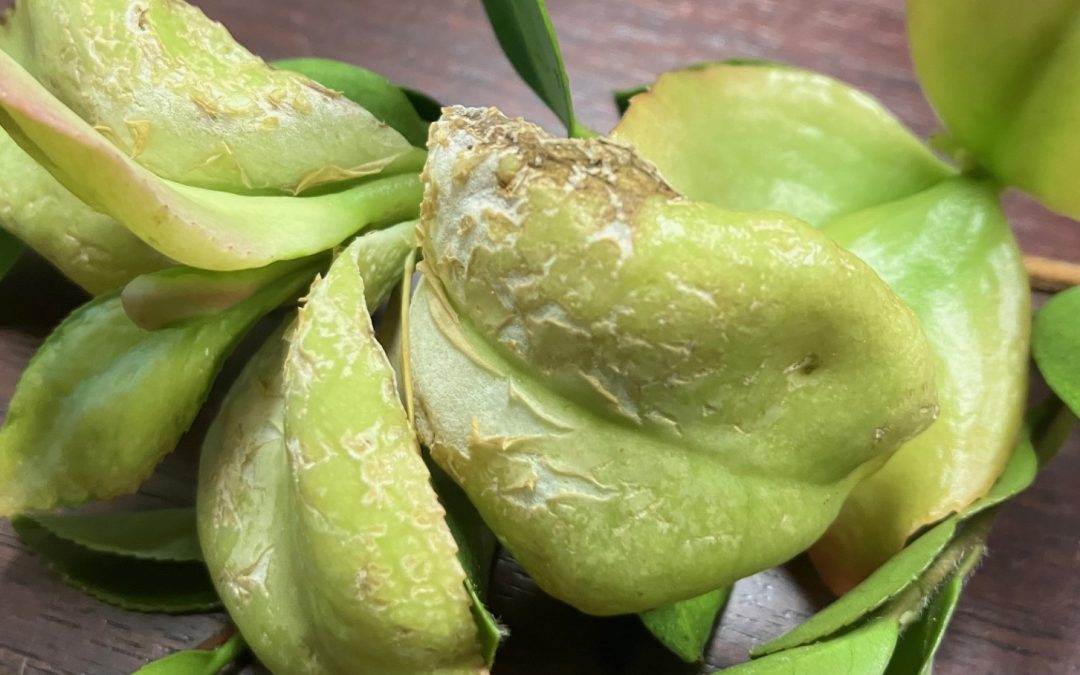
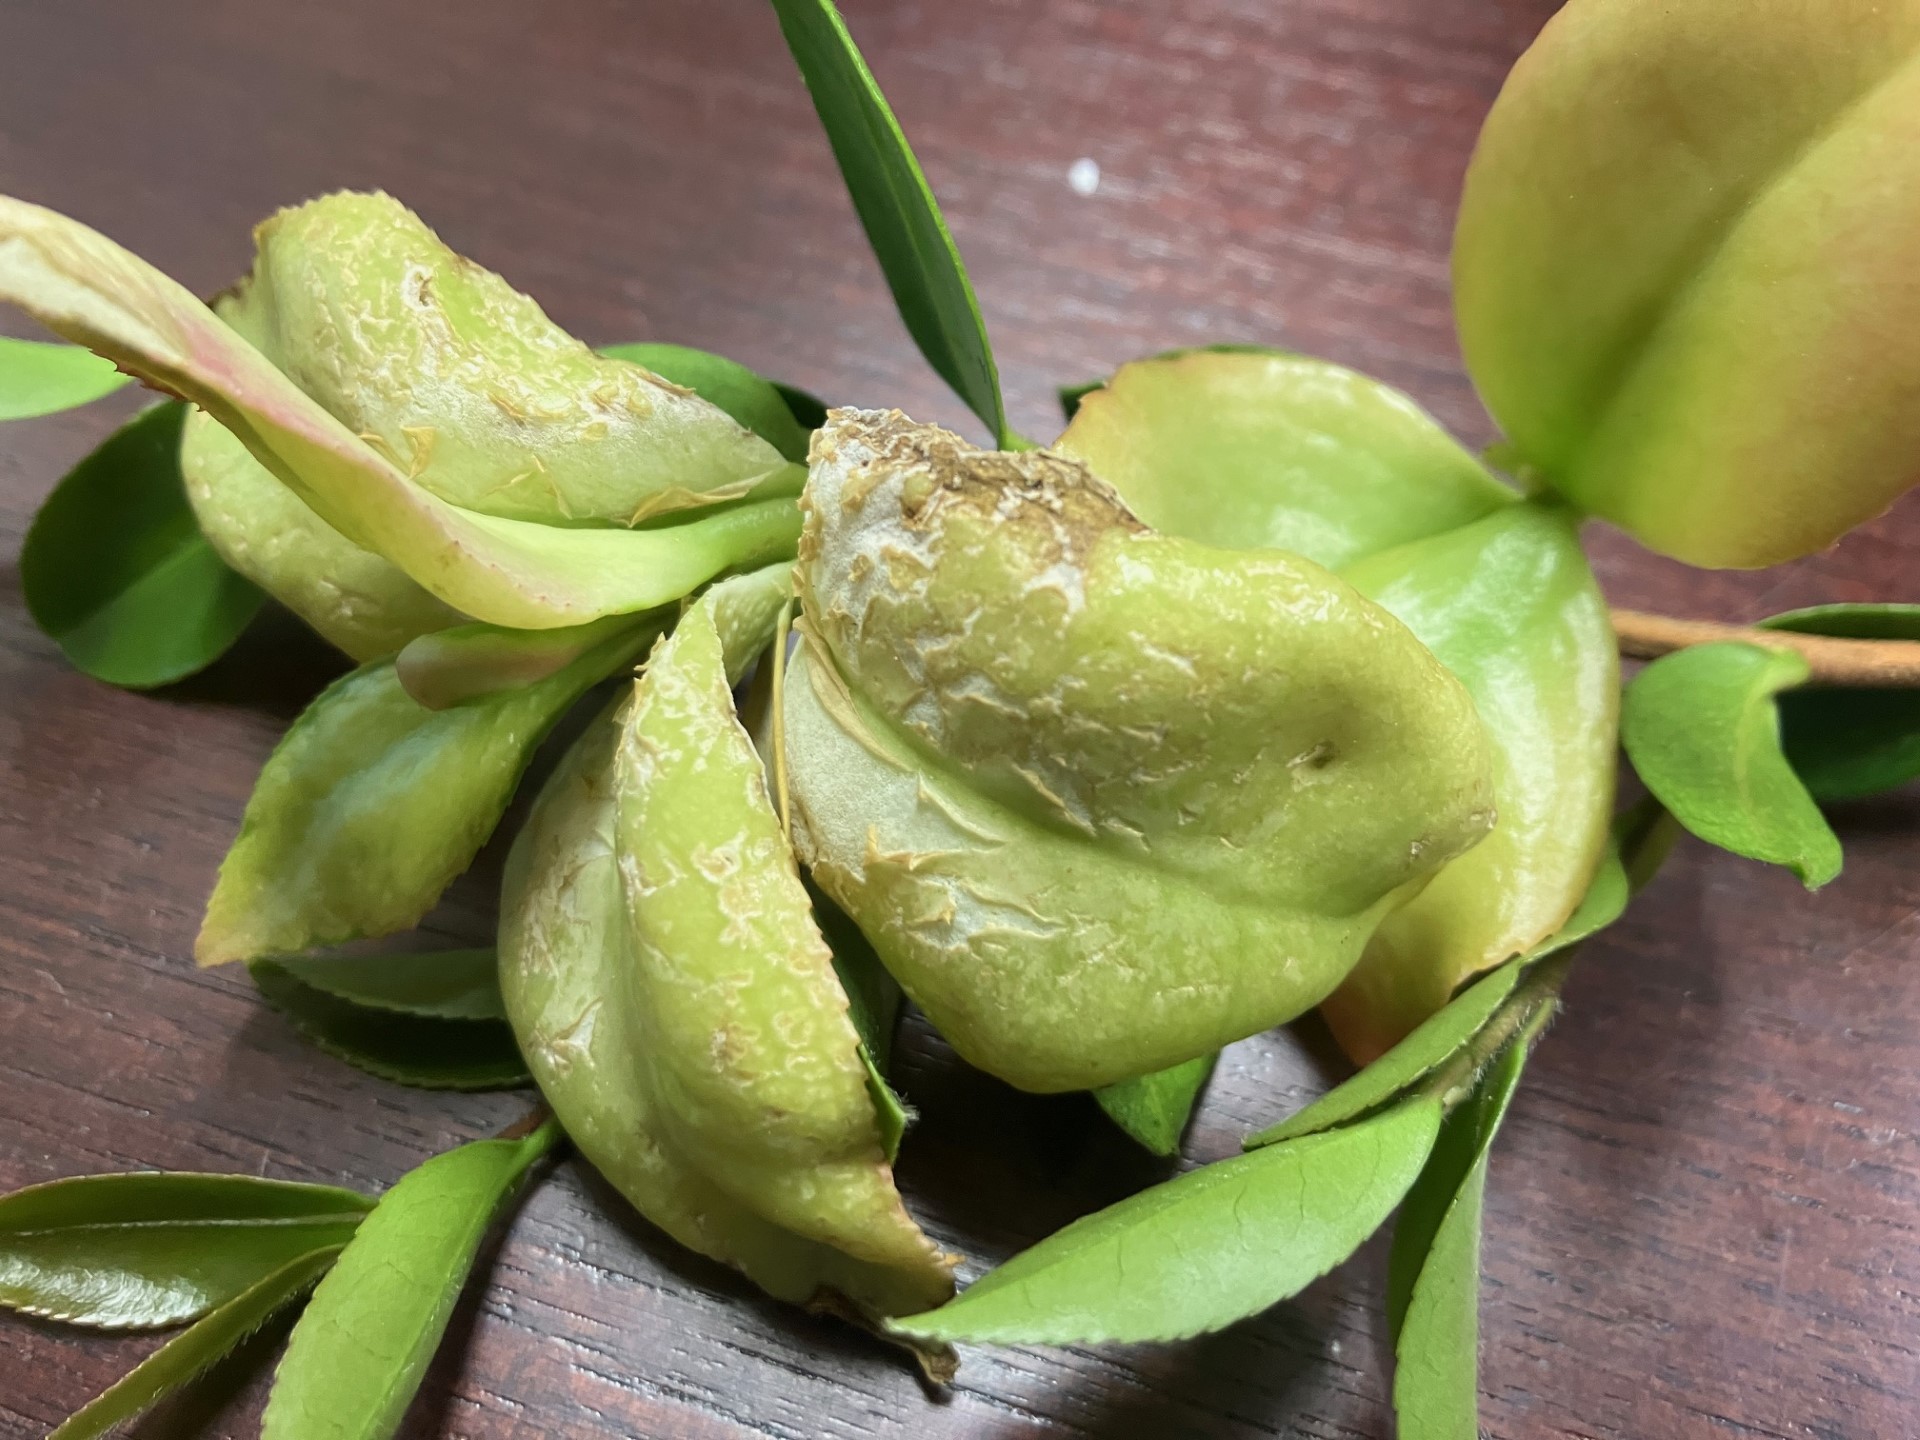
Extended spring weather with cool nights and frequent rain can be enjoyable for humans, but does strange things to plants, especially if dormant fungi are hanging around. Exobasidium vaccinii is a fungus that is believed to overwinter as spores attached to bark and bud scales. It can cause infection with the opening of buds in spring, creating odd shaped leaves and flowers that are referred to as galls. Infection is dependent on high humidity and moisture during bud break. Gall growth is due to plant cell division resulting from the stimulus of hyphal growth within host tissue. When galls are still soft, the fungus grows between epidermal cells, breaks the cuticle, and sporulates giving the gall a white cast. Either all or part of a leaf may become thickened, fleshy, and covered with a white bloom of spores. At first, diseased leaves are succulent and white, but they later shrink into hard, brown, gall-like bodies. Galls are composed of fungus-infected plant tissue. Older leaves are resistant to infection. Exobasidium vaccinii is most common in azaleas and camellias.
Photo by Sheila Dunning
But, other Exobasidium species are floating out there, and with just the right conditions they can deform other plants. That’s what caused this odd formation on one flower of a gardenia plant. In this case, the spores fused the sepals to the petals of the flower.
Photo by Margaret Stewart
While chemical controls are available, they would need to begin before symptoms appear and continue until the gall dried completely. It may be an option for the fastidious weather watcher with a good working knowledge of this disease. But, for the rest of the population, removing and destroying galls before they turn white is the best management practice to avoid having spores form and hang around until next spring. Proper pruning of the plants to improve air circulation will also reduce the chances of favorable conditions, should there be an extended cool, wet season next year.
Our winter season is a good time to install many trees and shrubs. Here is a basic review of a few planting practices to make sure that your new plants get off to the good start.
Article Written by Khadejah Scott, Horticulture & Ag/Natural Resources Agent, UF/IFAS Extension – Wakulla County
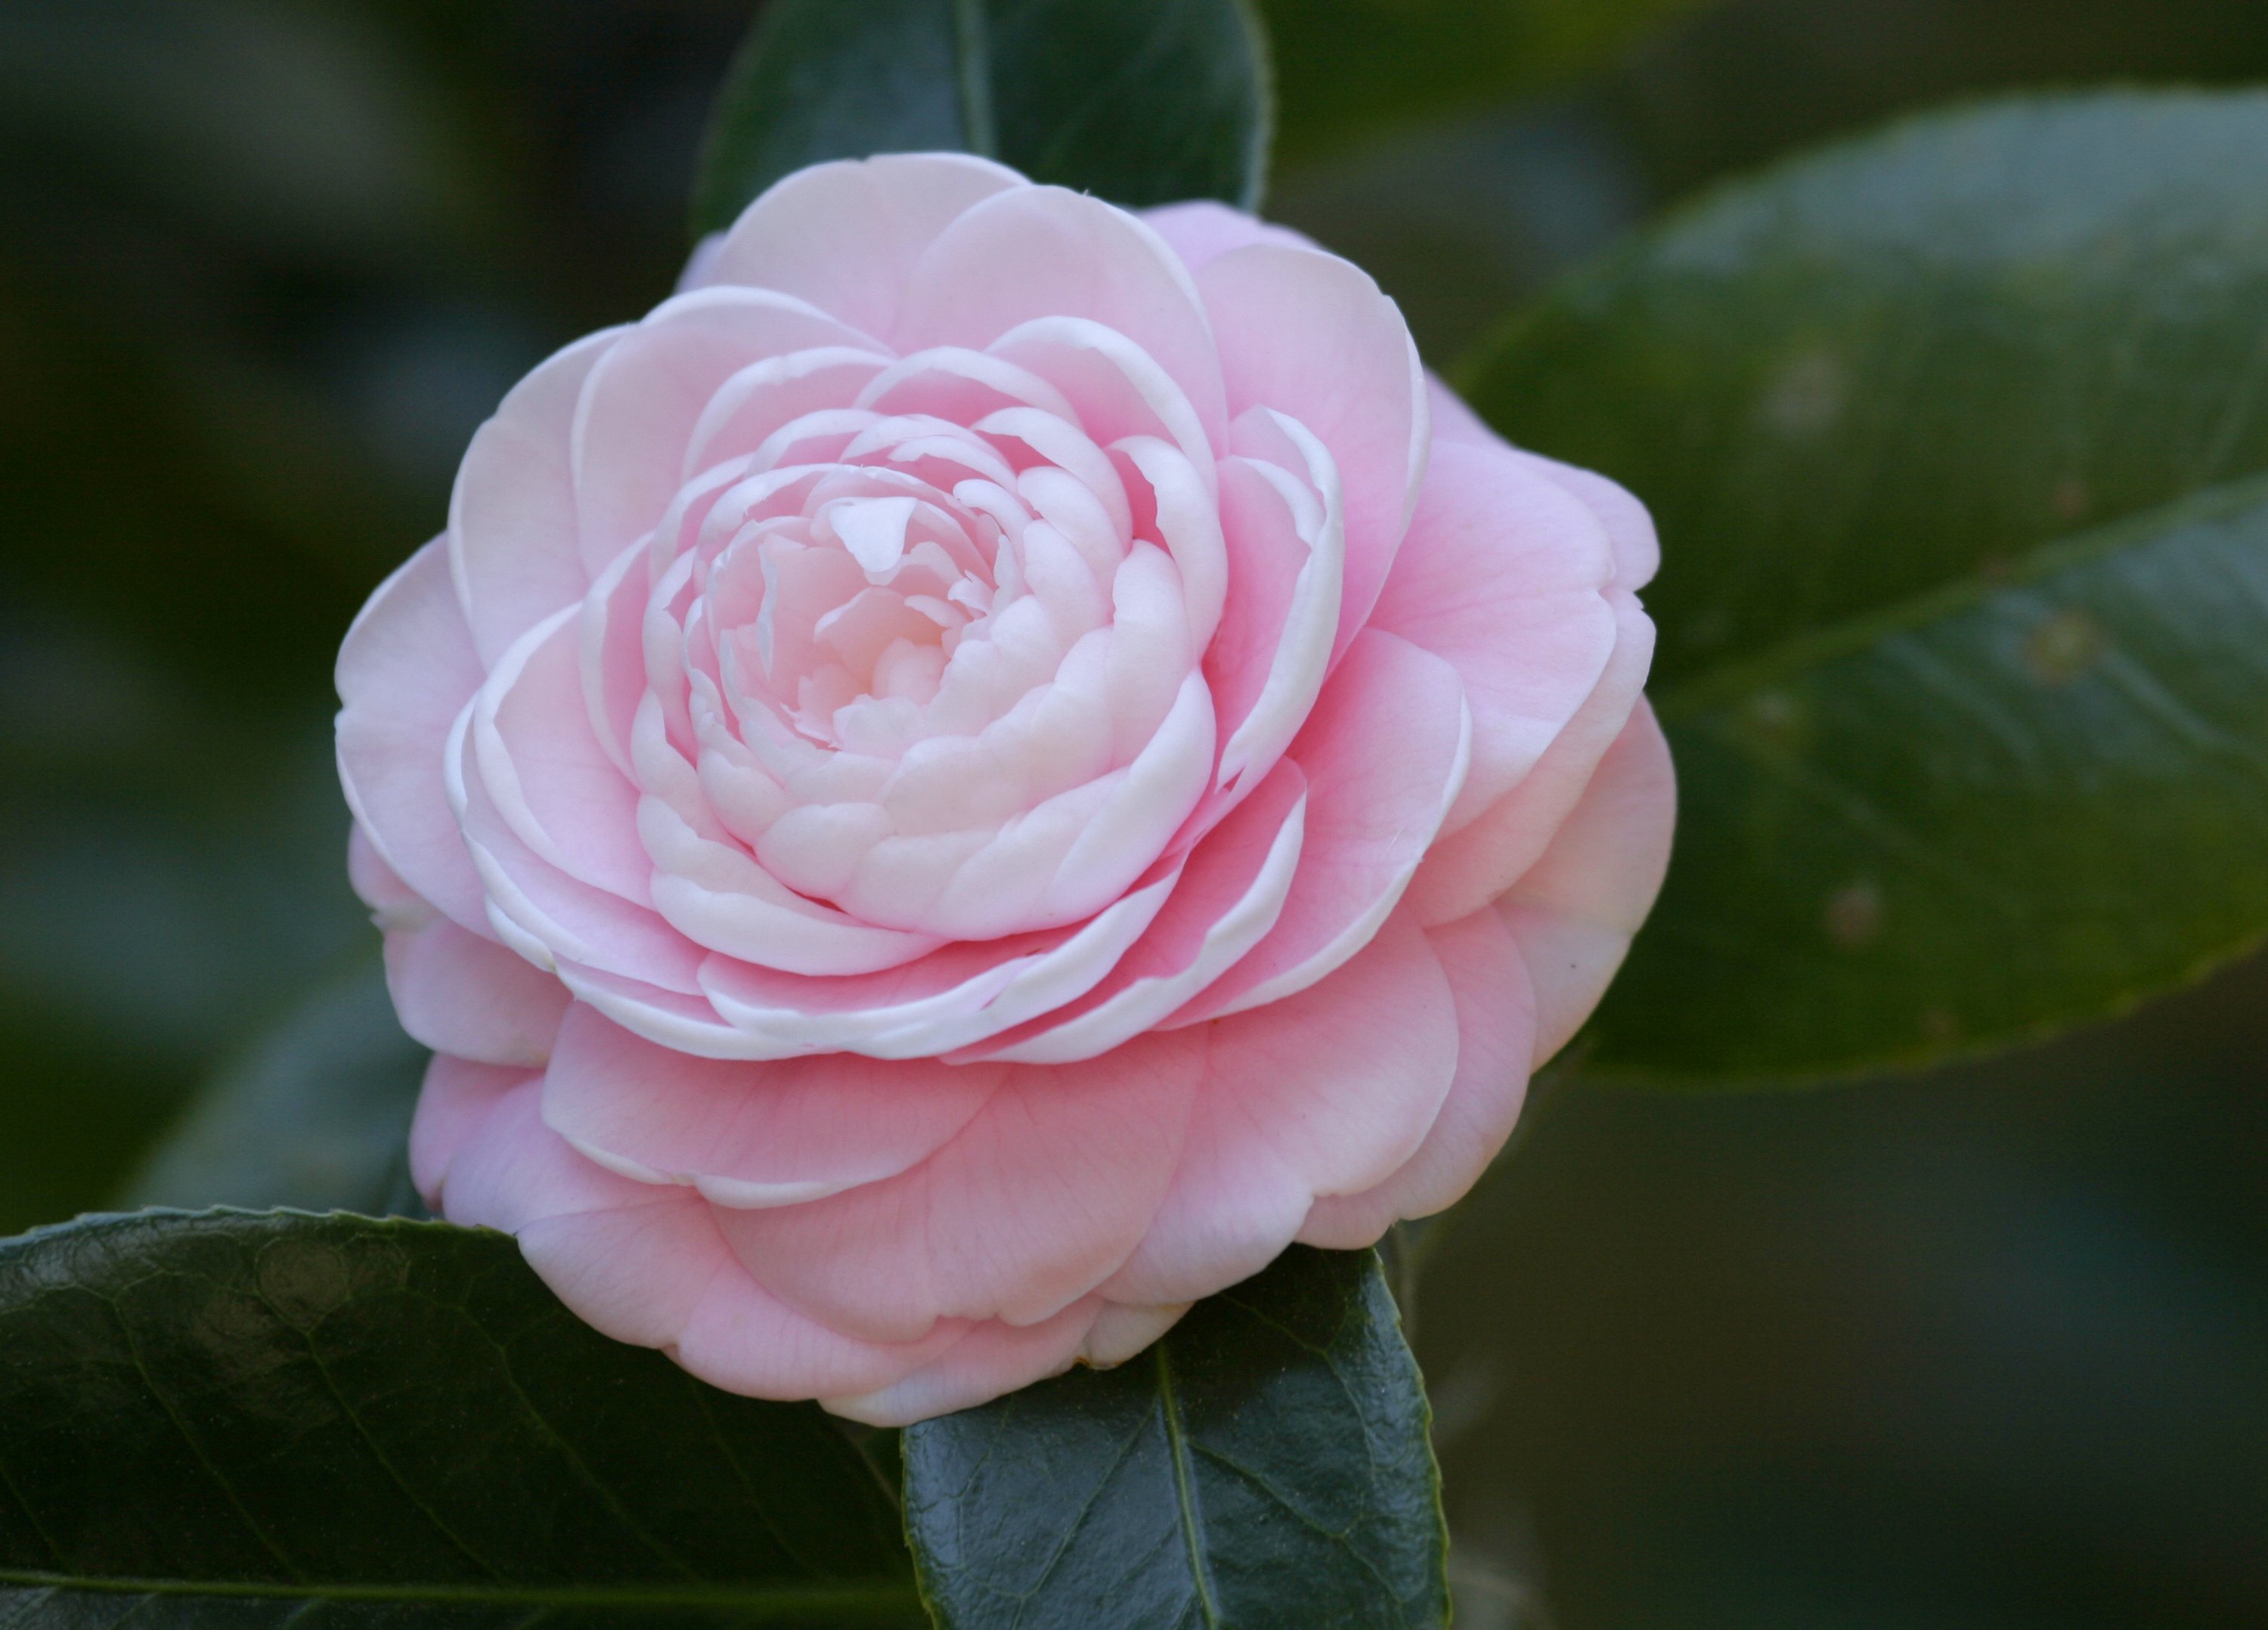
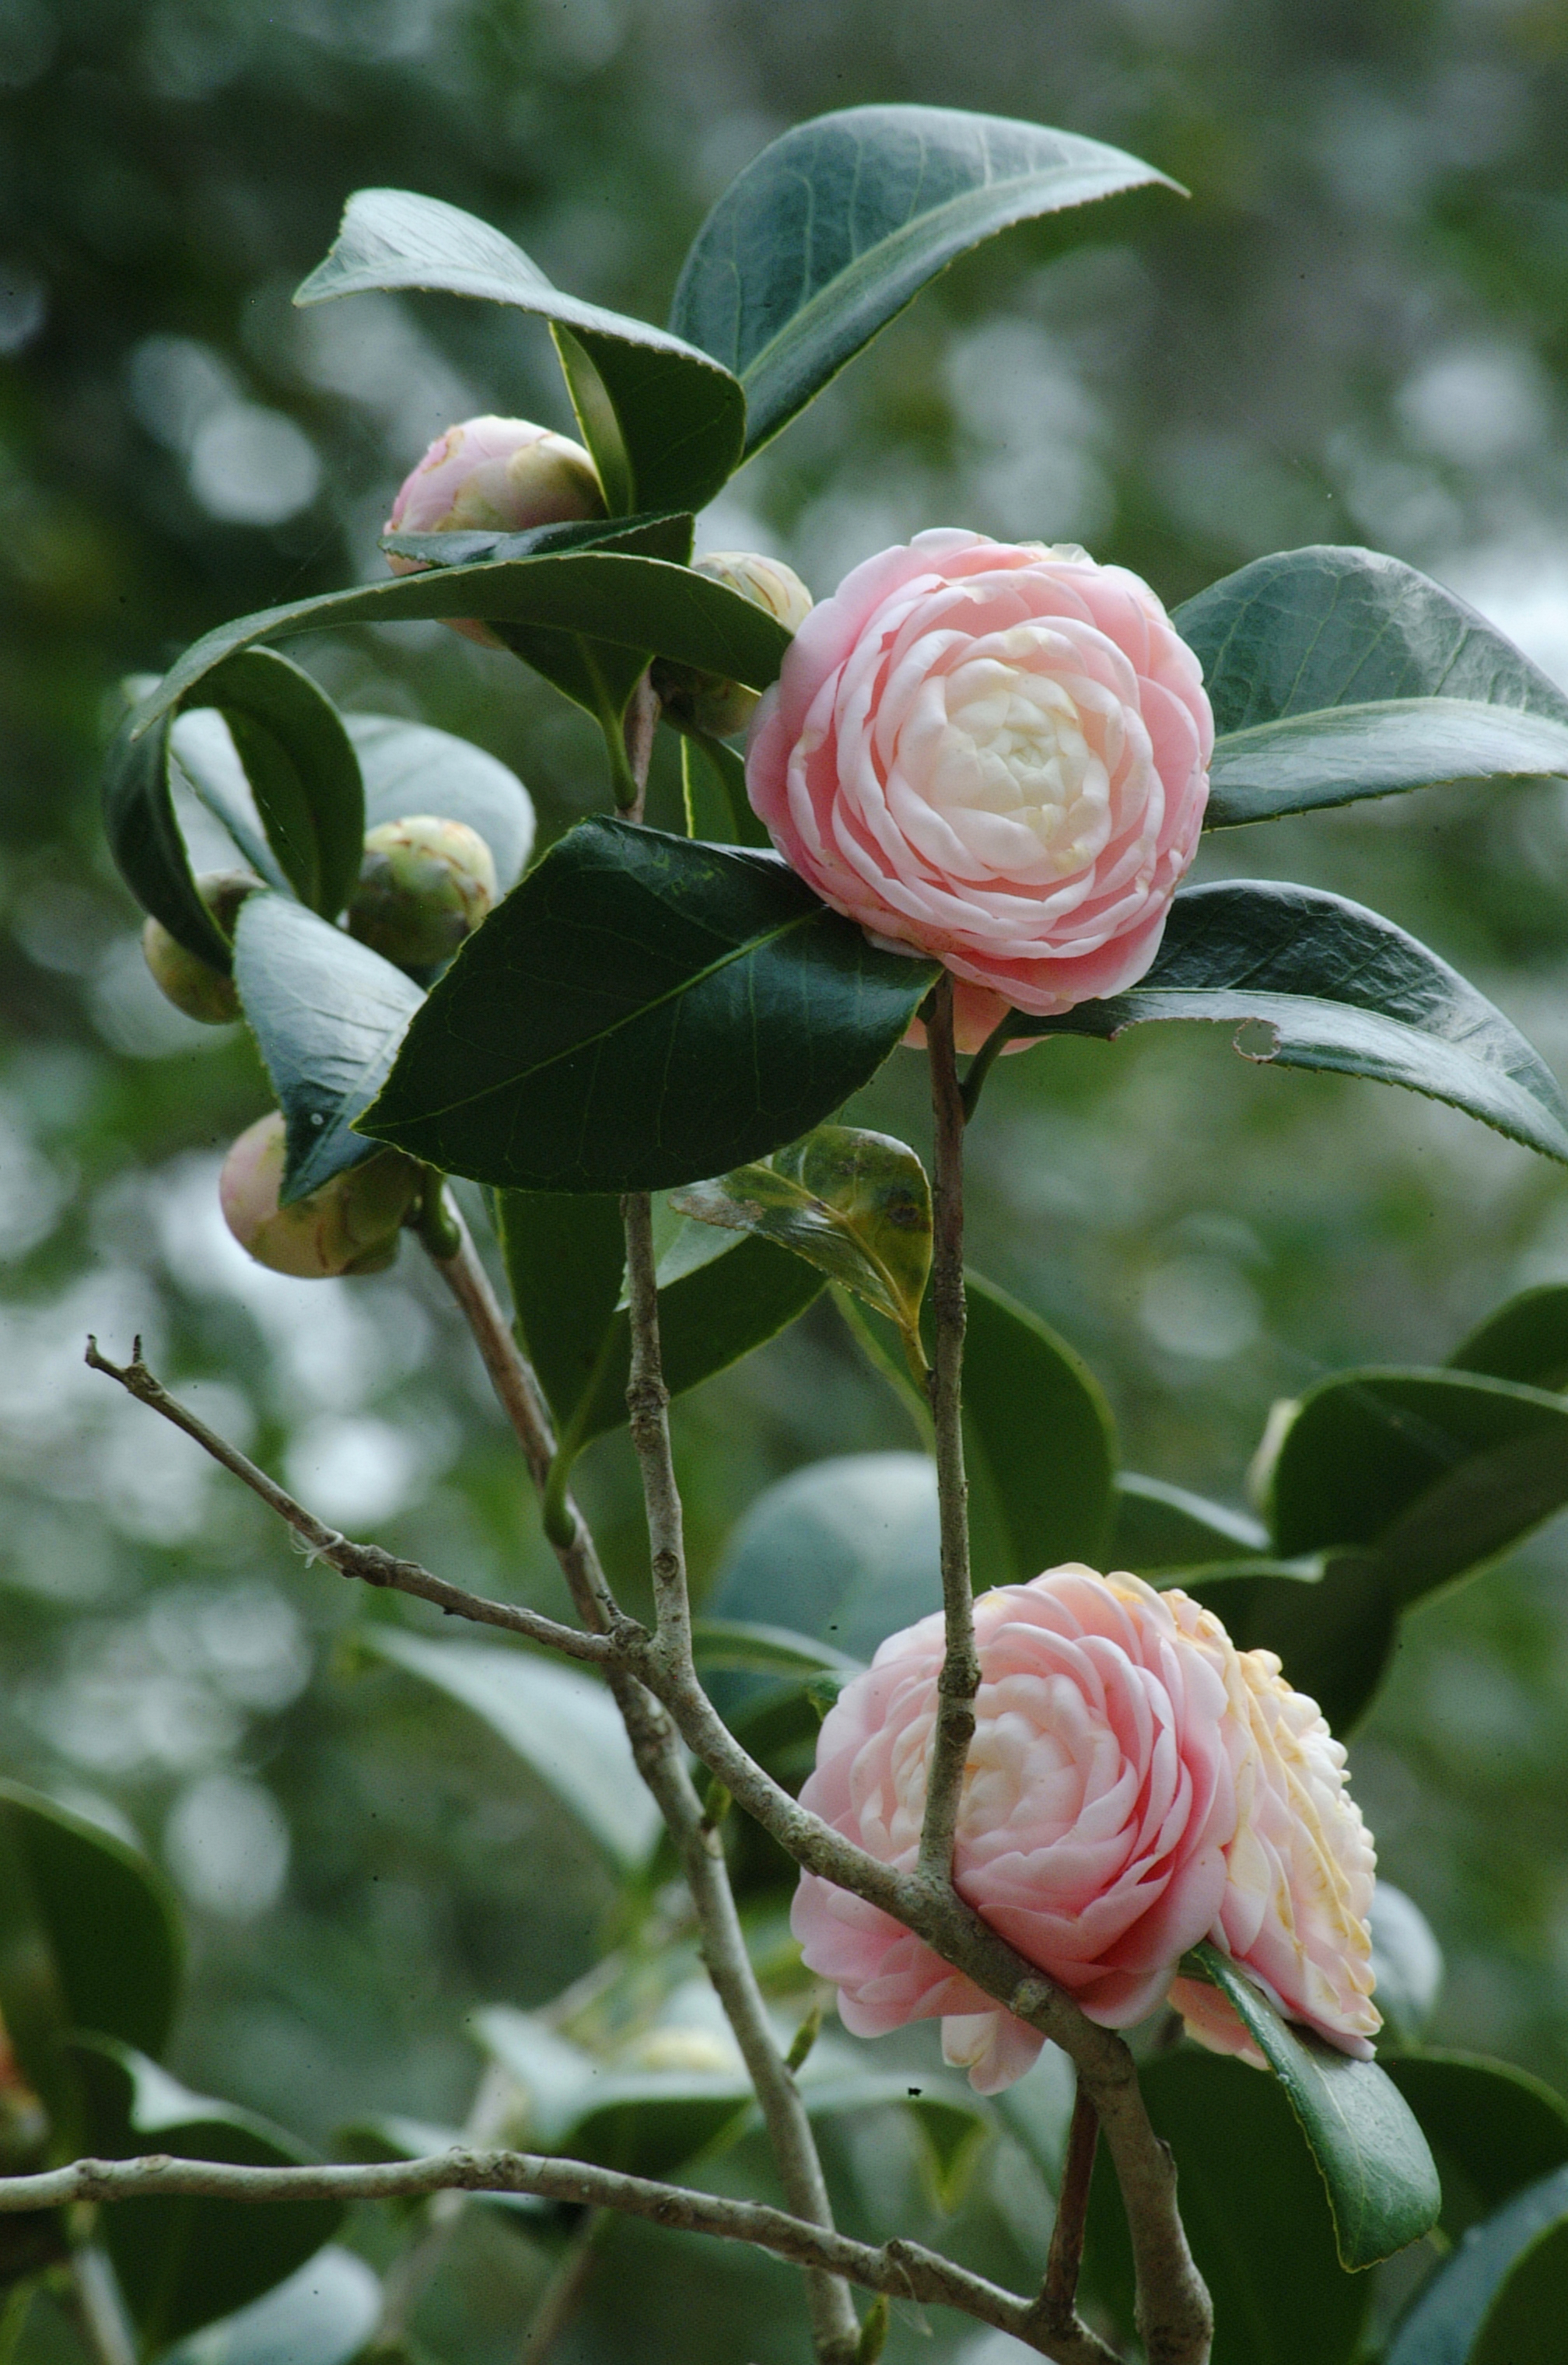
In the serene charm of winter, a beautiful flower comes to life, adding its beautiful blooms to gardens everywhere – the Camellia, often hailed as the “Rose of Winter.” Adorned with lush, glossy evergreen leaves and a tendency to bloom even when other plants are dormant, the Camellia showcases nature’s enduring strength and grace. Consider choosing and planting camellias this January to bring this touch of elegance to your own garden.
Camellia flowers. Photo by Marisol Amador, UF IFAS
Description: Originally from Asia, camellia plants first arrived in America in 1797 and were grown in greenhouses in New England. For over two centuries, they have proven to be reliable and valuable additions to the southern landscape. Their leaves are simple, thick, serrated (notched like a saw), alternately oriented, and usually glossy. These plants produce large, multicolored flowers that can grow up to 5 inches. The common name “camellia” refers to hybrids of Camellia japonica and Camellia sasanqua. Sasanqua types bloom from October to December, followed by japonica types, which bloom from December to March.
Landscape Uses: Camellias stand out when few other plants bloom in the fall and winter. Camellia blooms look similar to roses, as well as anemones and peonies. The rest of the year, camellias make excellent landscaping plants due to their glossy, evergreen foliage, intriguing patterns and textures, and low maintenance requirements. Camellias can be used as foundation plantings, screens, accent plants, background groupings, and hedges in the landscape. Mass plantings or clusters can yield the most significant benefit.
Photo by UF IFAS
Plant Selection: You can buy camellias from nurseries, plant sales, garden festivals, and camellia displays. Plant size and form vary significantly among varieties, ranging from small to big, spreading to upright. There is also a great variety of flower shapes, hues, and conditions, and new types are released yearly. A comprehensive list with descriptions and images is available from the American Camellia Society (https://www.americancamellias.com/care-culture-resources).
Care: To ensure the longevity of your camellias, choose a suitable location with bright, partial shade, protecting them from intense afternoon sun. Plant between November and February for optimal root establishment before summer. Use mulch to retain moisture and stabilize temperature fluctuations. Camellias thrive in well-drained, fertile soil with a pH between 5.0 and 6.5. While generally resistant to drought, consistent watering is necessary during prolonged dry periods. Apply acid-forming fertilizer twice a year, and prune lightly in early spring if needed.
Ultimately, camellias stand as enduring botanical treasures and timeless landscape companions. For more information about camellias, contact your local county extension office.