by Pat Williams | Mar 11, 2021
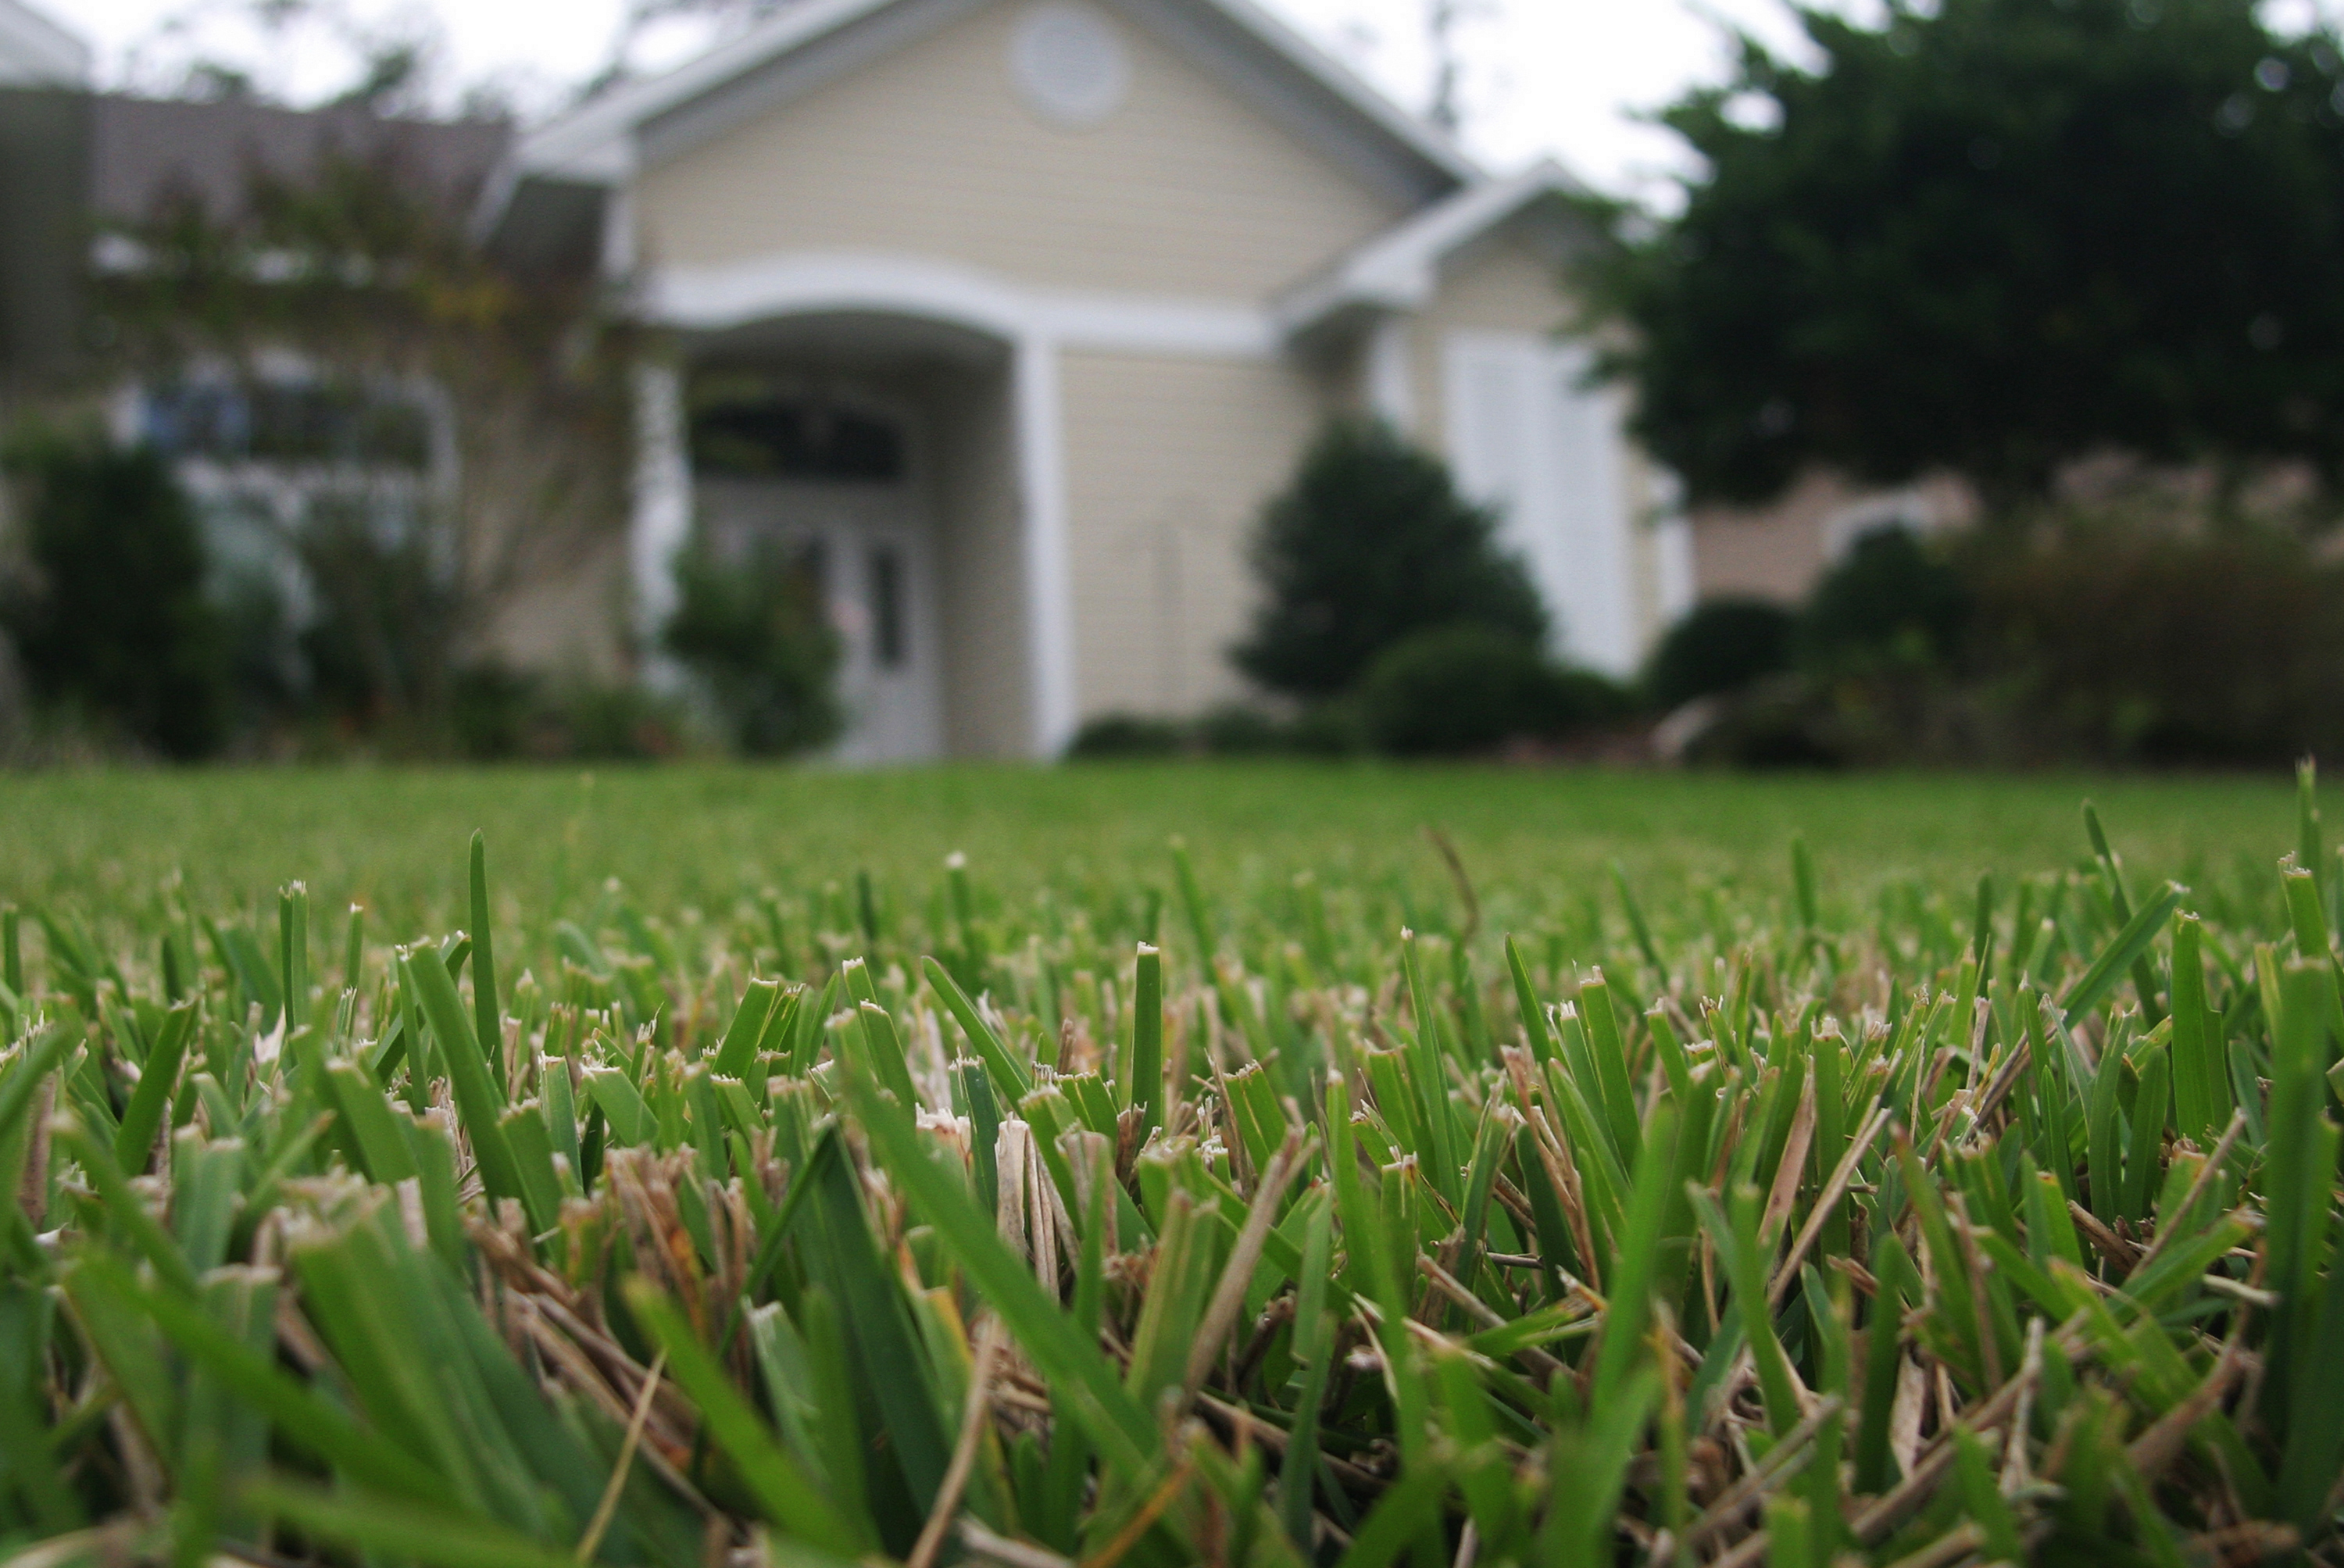
Our trees and vines are flowering and lawns are starting to green up naturally, but one glance at the calendar and it is still early spring. The last official frost date for the Florida panhandle can be into April depending on location. We know our day time and night time temperatures are still fluctuating every other day. We also know the stores and nurseries are stocked with shelves and pallets of fertilizer. So the big question is when can I fertilizer my lawn?
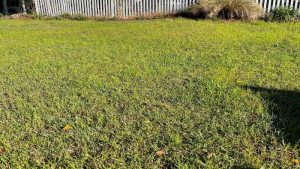
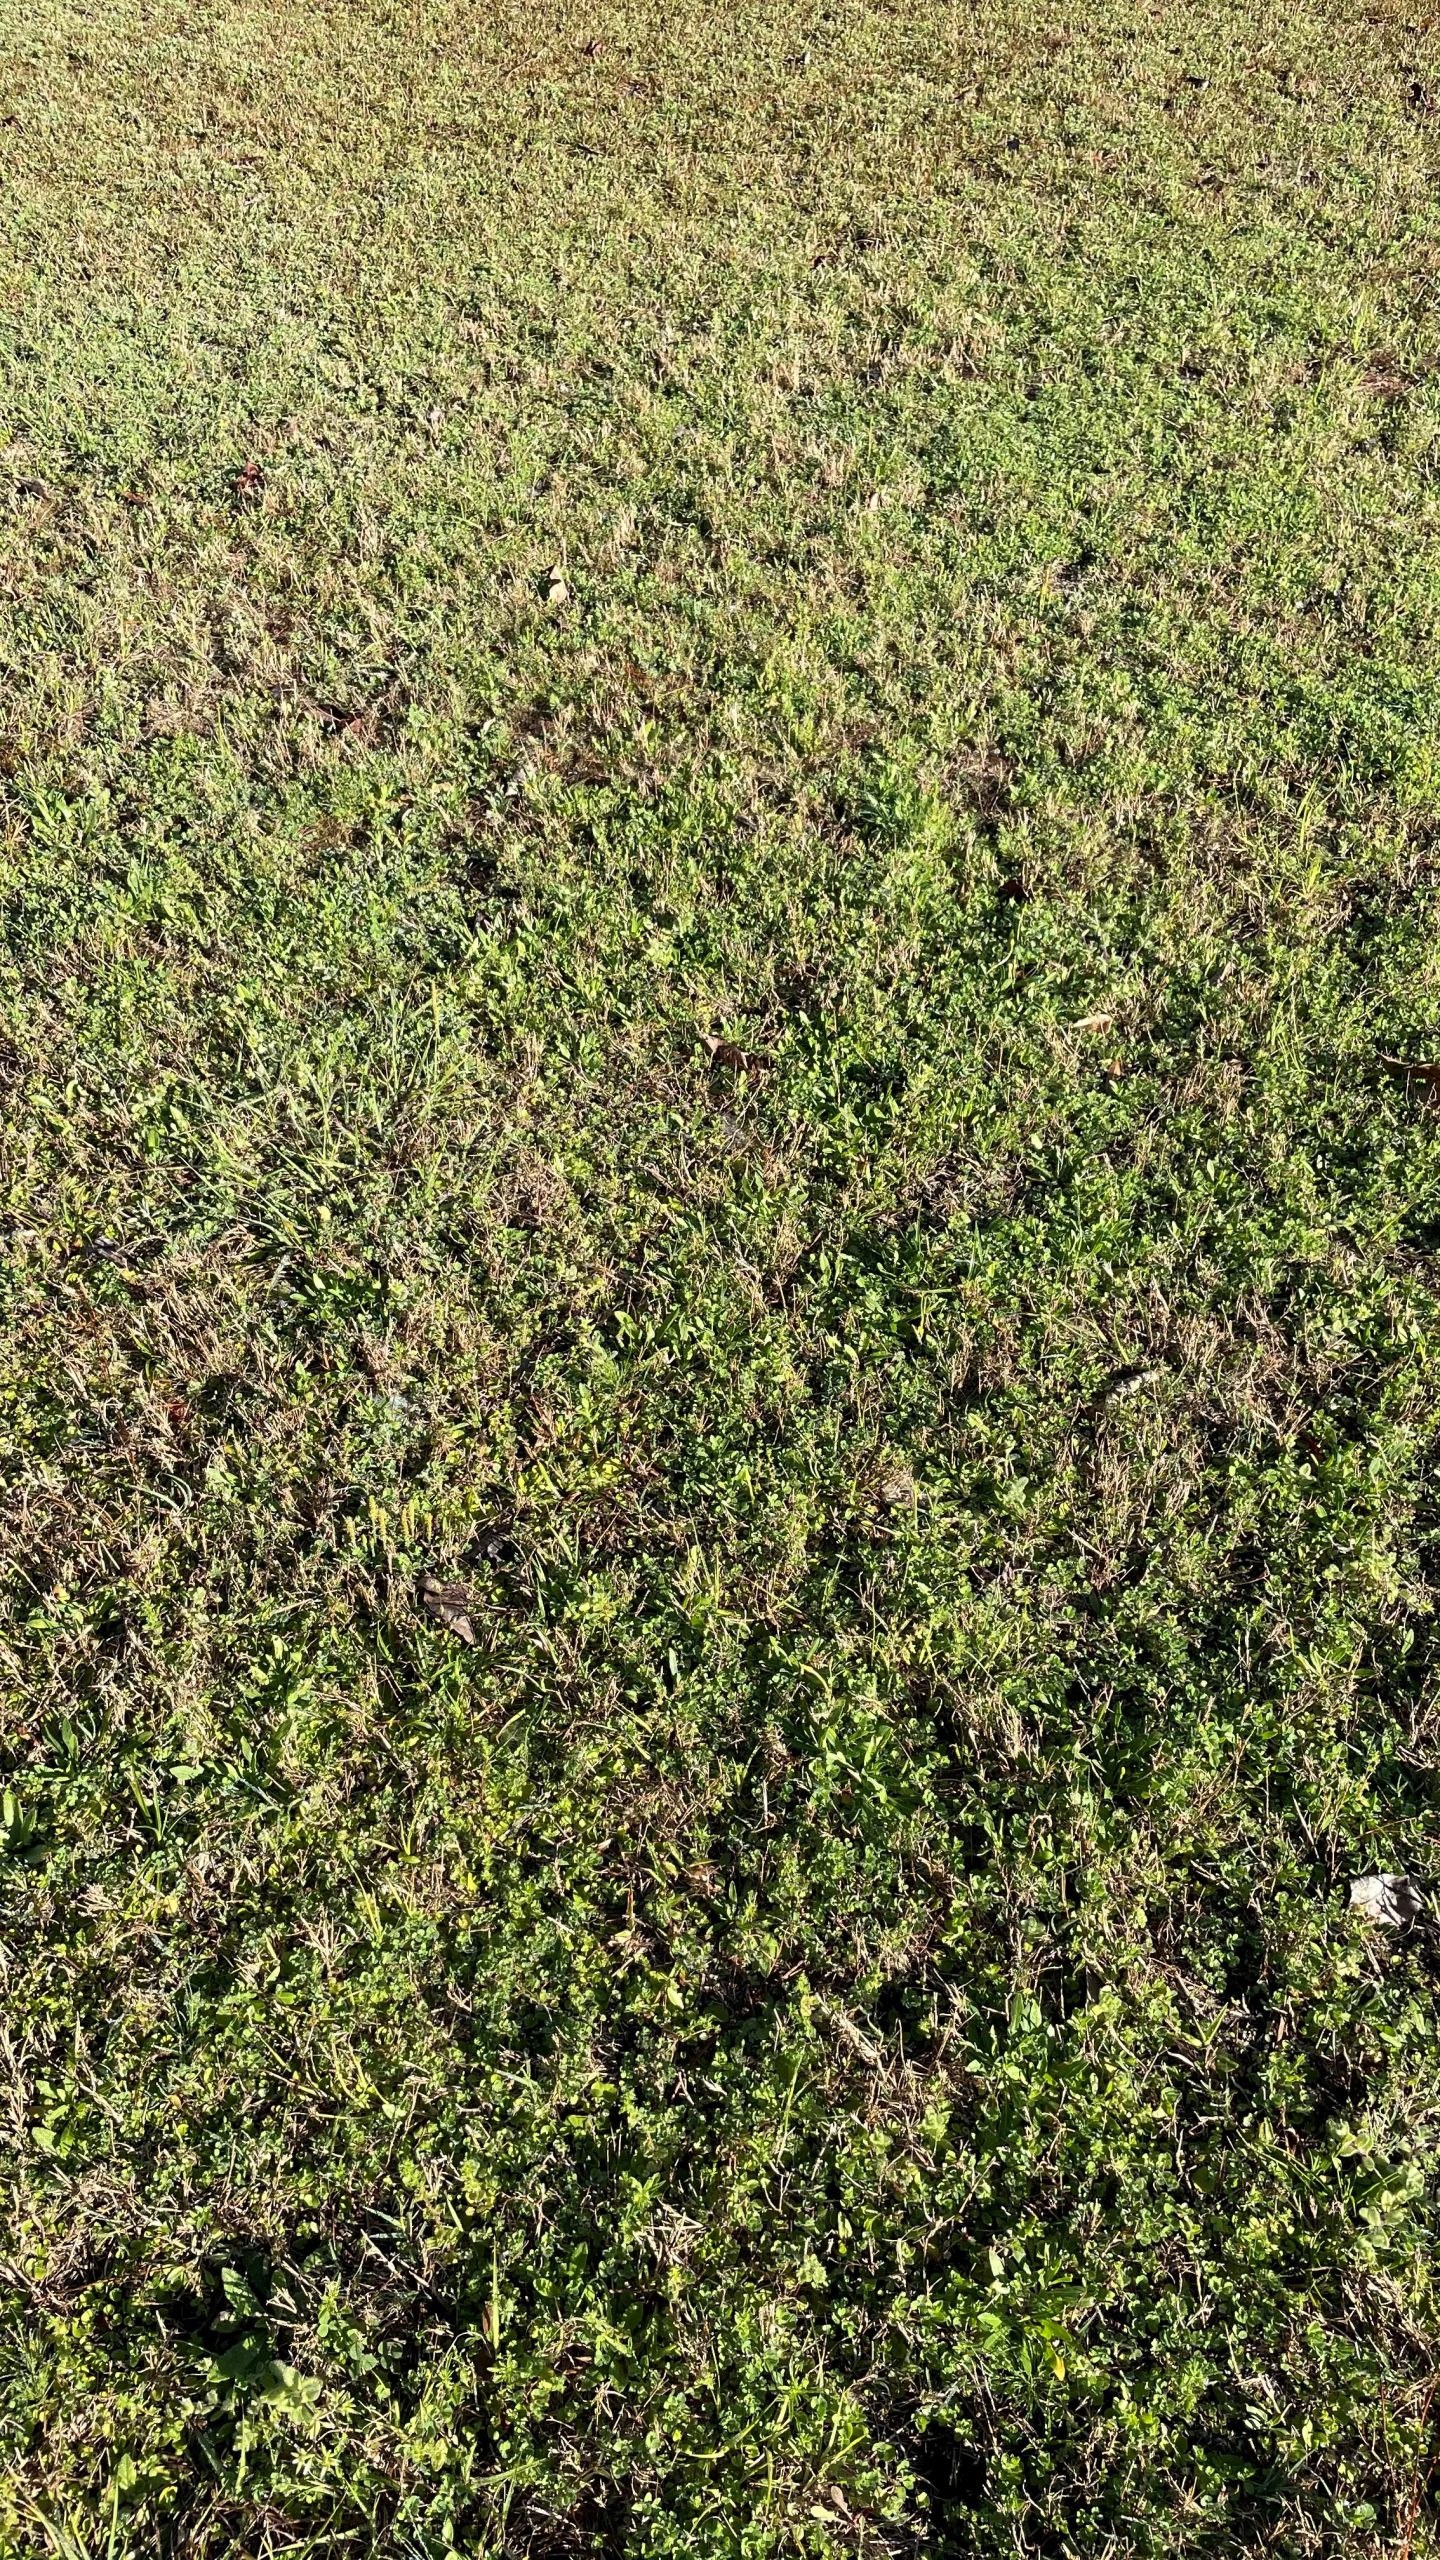
Overseeded ryegrass on a centipedegrass lawn.
My answer after years of practice is always it depends, but my non-scientific rule of thumb to homeowners is wait until you mow three weeks in a row and make sure you’re past the last frost dates for your area. If you need to mow three weeks in a row for height, then your lawn is actively growing and most likely we are into a temperature range good for fertilizer applications. If you apply fertilizer to a lawn that is dormant, the fertilizer will not be taken up by your roots and it can leach below the root zone wasting money while not improving the lawn and possibly causing environmental concerns.
With that said, there are some factors to consider. We always recommend doing a soil test first. This can be done in advance of spring. Your test results might indicate having sufficient nutrients in the soil, so not applying would save you money and the lawn would still look good. The soil test will also indicate what nutrients are in excess or lacking, then you can apply only the nutrients needed.
I have found that fertilizer is still very much misunderstood. When I ask homeowners whether they consider fertilizer to be medicine or a stressor, most will answer medicine and we all know if a little medicine is good, then a bit more is better. However, it is more accurate to think of fertilizer as a chemical stressor. If my lawn is unhealthy, then I force my lawn to grow and it can further weaken my plants. Think of it like this, if you’re not feeling well at night before you go to bed, should you consume one of those big energy drinks? Not if you want to sleep and hopefully feel better in the morning. Apply fertilizer when the lawn is ready and capable of having a positive response when spring fully arrives.
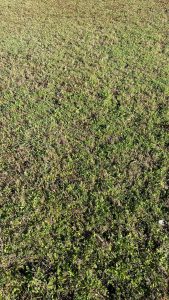
Wakulla County Extension office mixed species turf.
Here are some items you should know before you fertilize the lawn. Fertilizers used in Florida should have a license number that begins with F followed by a series of numbers. It is important to check your fertilizers before you apply. You need to know what type of turfgrass you have in your lawn. We have a lot of bahiagrass and centipedegrass lawns in the panhandle. Each will require a different regiment. You are only allowed to apply one pound of nitrogen per 1,000 square feet per application and you should never apply more than the recommended rate. I always refer to a childhood fable “The Tortoise and the Hare” when thinking about plant health. Slow and steady makes for a better lawn in the long run. This means you need to measure your lawn, understand how to calculate the nitrogen and then apply correctly with the right equipment and spreader patterns. We also recommend very little phosphorus (the middle number on the fertilizer bag 15-0-15) for Florida lawns. Our soils are usually sufficient and this is another item your soil test results will confirm.
Remember, your local Extension office is always here to help especially making sure you treat the lawn right. Think before you apply because your long-term goal is improving the lawn quality.
The Florida Fertilizer Label (https://edis.ifas.ufl.edu/ss170) and General Recommendations for Fertilization of Turfgrasses on Florida Soils (https://edis.ifas.ufl.edu/lh014). T. W. Shaddox, assistant professor; UF/IFAS Fort Lauderdale Research and Education Center, Ft. Lauderdale, FL 33314
Homeowner Best Management Practices for the Home Lawn (https://edis.ifas.ufl.edu/ep236). Laurie E. Trenholm, professor, Extension turfgrass specialist, Environmental Horticulture Department; UF/IFAS Extension, Gainesville, FL 32611.
Bahiagrass for Florida Lawns (https://edis.ifas.ufl.edu/lh006). L. E. Trenholm, professor, turfgrass specialist, Department of Environmental Horticulture; J. B. Unruh, professor, turfgrass specialist, UF/IFAS West Florida Research and Education Center; and J. L. Cisar, retired professor, turfgrass specialist, UF/IFAS Ft. Lauderdale REC; UF/IFAS Extension, Gainesville, FL 32611.
Centipedegrass for Florida Lawns (https://edis.ifas.ufl.edu/lh009). J. B. Unruh, professor, turfgrass specialist, UF/IFAS West Florida Research and Education Center; L. E. Trenholm, associate professor, turfgrass specialist, Environmental Horticulture Department; and J. L. Cisar, professor, turfgrass specialist, UF/IFAS Ft. Lauderdale REC; UF/IFAS Extension, Gainesville, FL 32611.
by Pat Williams | Jan 22, 2021
For all my years in the classroom, I never let students say the “d-word” when discussing soil science. In some instances, we had a “d-word” swear collection jar of a quarter when you used the term and even today, I hesitate from spelling the word out in text due to feedback from all those I have corrected. In case you still need a clue on the “d-word”, it ends in irt.
As a horticulturist for 46 years, I have read, heard, and been told many secrets to growing good plants. I still hold firm that without proper knowledge of how soil works, most of what we do is by chance. Soil is a living entity comprised of parent material (sand, silt, and clay), air, water, organic matter (OM), and microorganisms. It is this last item which makes our soils come to life. If you have pets, then you know they need shelter, warmth, air, water, and food. From this point forward think of soil microorganisms as the pets in your soil. If you take care of them, they will take care of your plants.
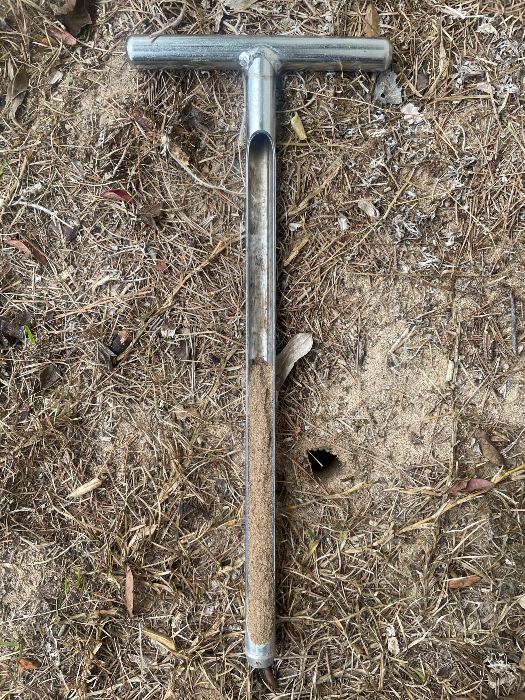
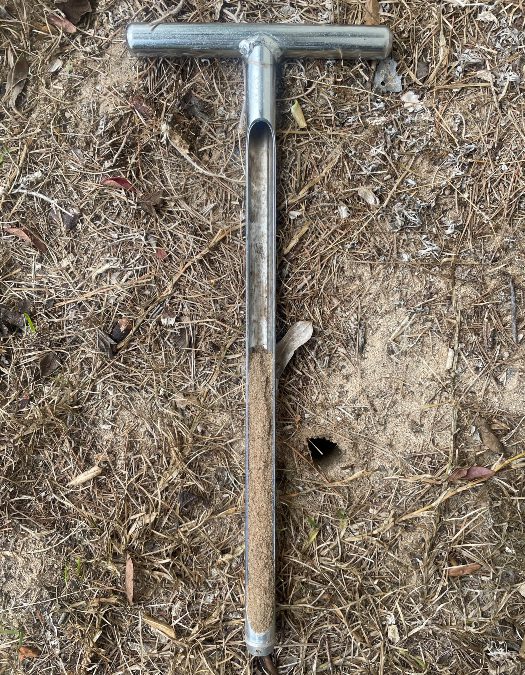
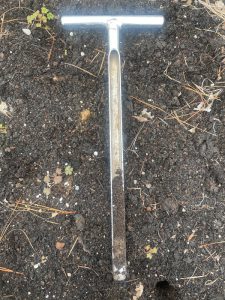
Sandy soil without any organic matter at the Wakulla County Extension office.
There is a huge difference in habitat from a sandy soil to a healthy soil with a good percentage of OM (5% – 10%). In one gram of healthy soil (the weight of one standard paper clip), you can have bacteria (100,000,000 to 1,000,000,000), actinomycetes (10,000,000 to 100,000,000), fungi (100,000 to 1,000,000), protozoa (10,000 to 100,000), algae (10,000 to 100,000), and nematodes (10 to 100) (1). A teaspoon of healthy soil can contain over four billion organisms (2). These microorganisms are part of the soil food web and they form a relationship between soil and your plants. They help convert nutrients to useable forms and assist with other plant functions.
The question becomes how to take care of your soil pets. For years we have performed practices that compromise these populations. Growing up we put all of our grass clippings in the weekly trash. We know now how valuable those clippings are and to leave them be. Two practices still common today though are tilling and raking leaves.
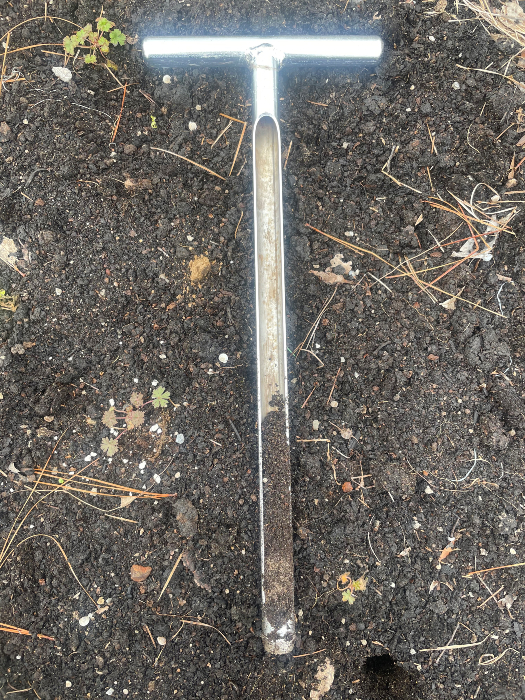
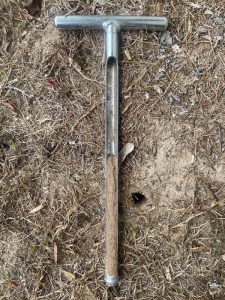
Master Gardener Volunteer vegetable bed with organic matter added.
Tilling has a limited purpose. If I place a layer of organic matter on top of the ground, then tilling incorporates the OM which feeds my pets. Excess tilling of soil introduces large amounts of oxygen which accelerates the breakdown of OM thus reducing our pet populations over time. Another adverse result from tilling is disturbing the soil structure (how the parent materials are arranged) which can reduce pore spaces thus limiting water percolation and root growth. There is a reason agriculture has adapted no-till practices.
Raking leaves (supposedly the sign of a well-kept yard) is removing large amounts of OM. Do you ever wonder why trees in a forest thrive? All of their leaves fall to the ground and are recycled by the microorganisms. Each of those leaves contains macronutrients (carbon, hydrogen, oxygen, nitrogen, phosphorus, potassium, calcium, sulfur, and magnesium) and micronutrients (boron, copper, chlorine, iron, manganese, molybdenum, nickel, and zinc) which are necessary for plant growth. You would be hard pressed to find all those nutrients in one fertilizer bag. So recycle (compost) your leaves versus having them removed from the property.
We are in our off season and tasks such as improving soil health should be considered now for soils to be ready in spring. Remember a little organic matter at a time and never work wet soils. As your OM levels build over the years, remember to change your watering and fertilizing schedules as the soil will be better adapted at holding water and nutrients. Soil tests are still recommended before fertilizing.
If you would like more tips on improving your soil, contact me or your local county horticulture extension agents. For a more in depth look at caring for your soils, read The Importance of Soil Health in Residential Landscapes by Sally Scalera MS, Dr. A.J. Reisinger and Dr. Mark Lusk (https://edis.ifas.ufl.edu/ss664).
- Chapter 2: Soils, Water, and Plant Nutrients. Texas Master Gardener Training Manual.
- The Importance of Soil Health in Residential Landscapes. 2019.
by Daniel J. Leonard | Sep 28, 2020
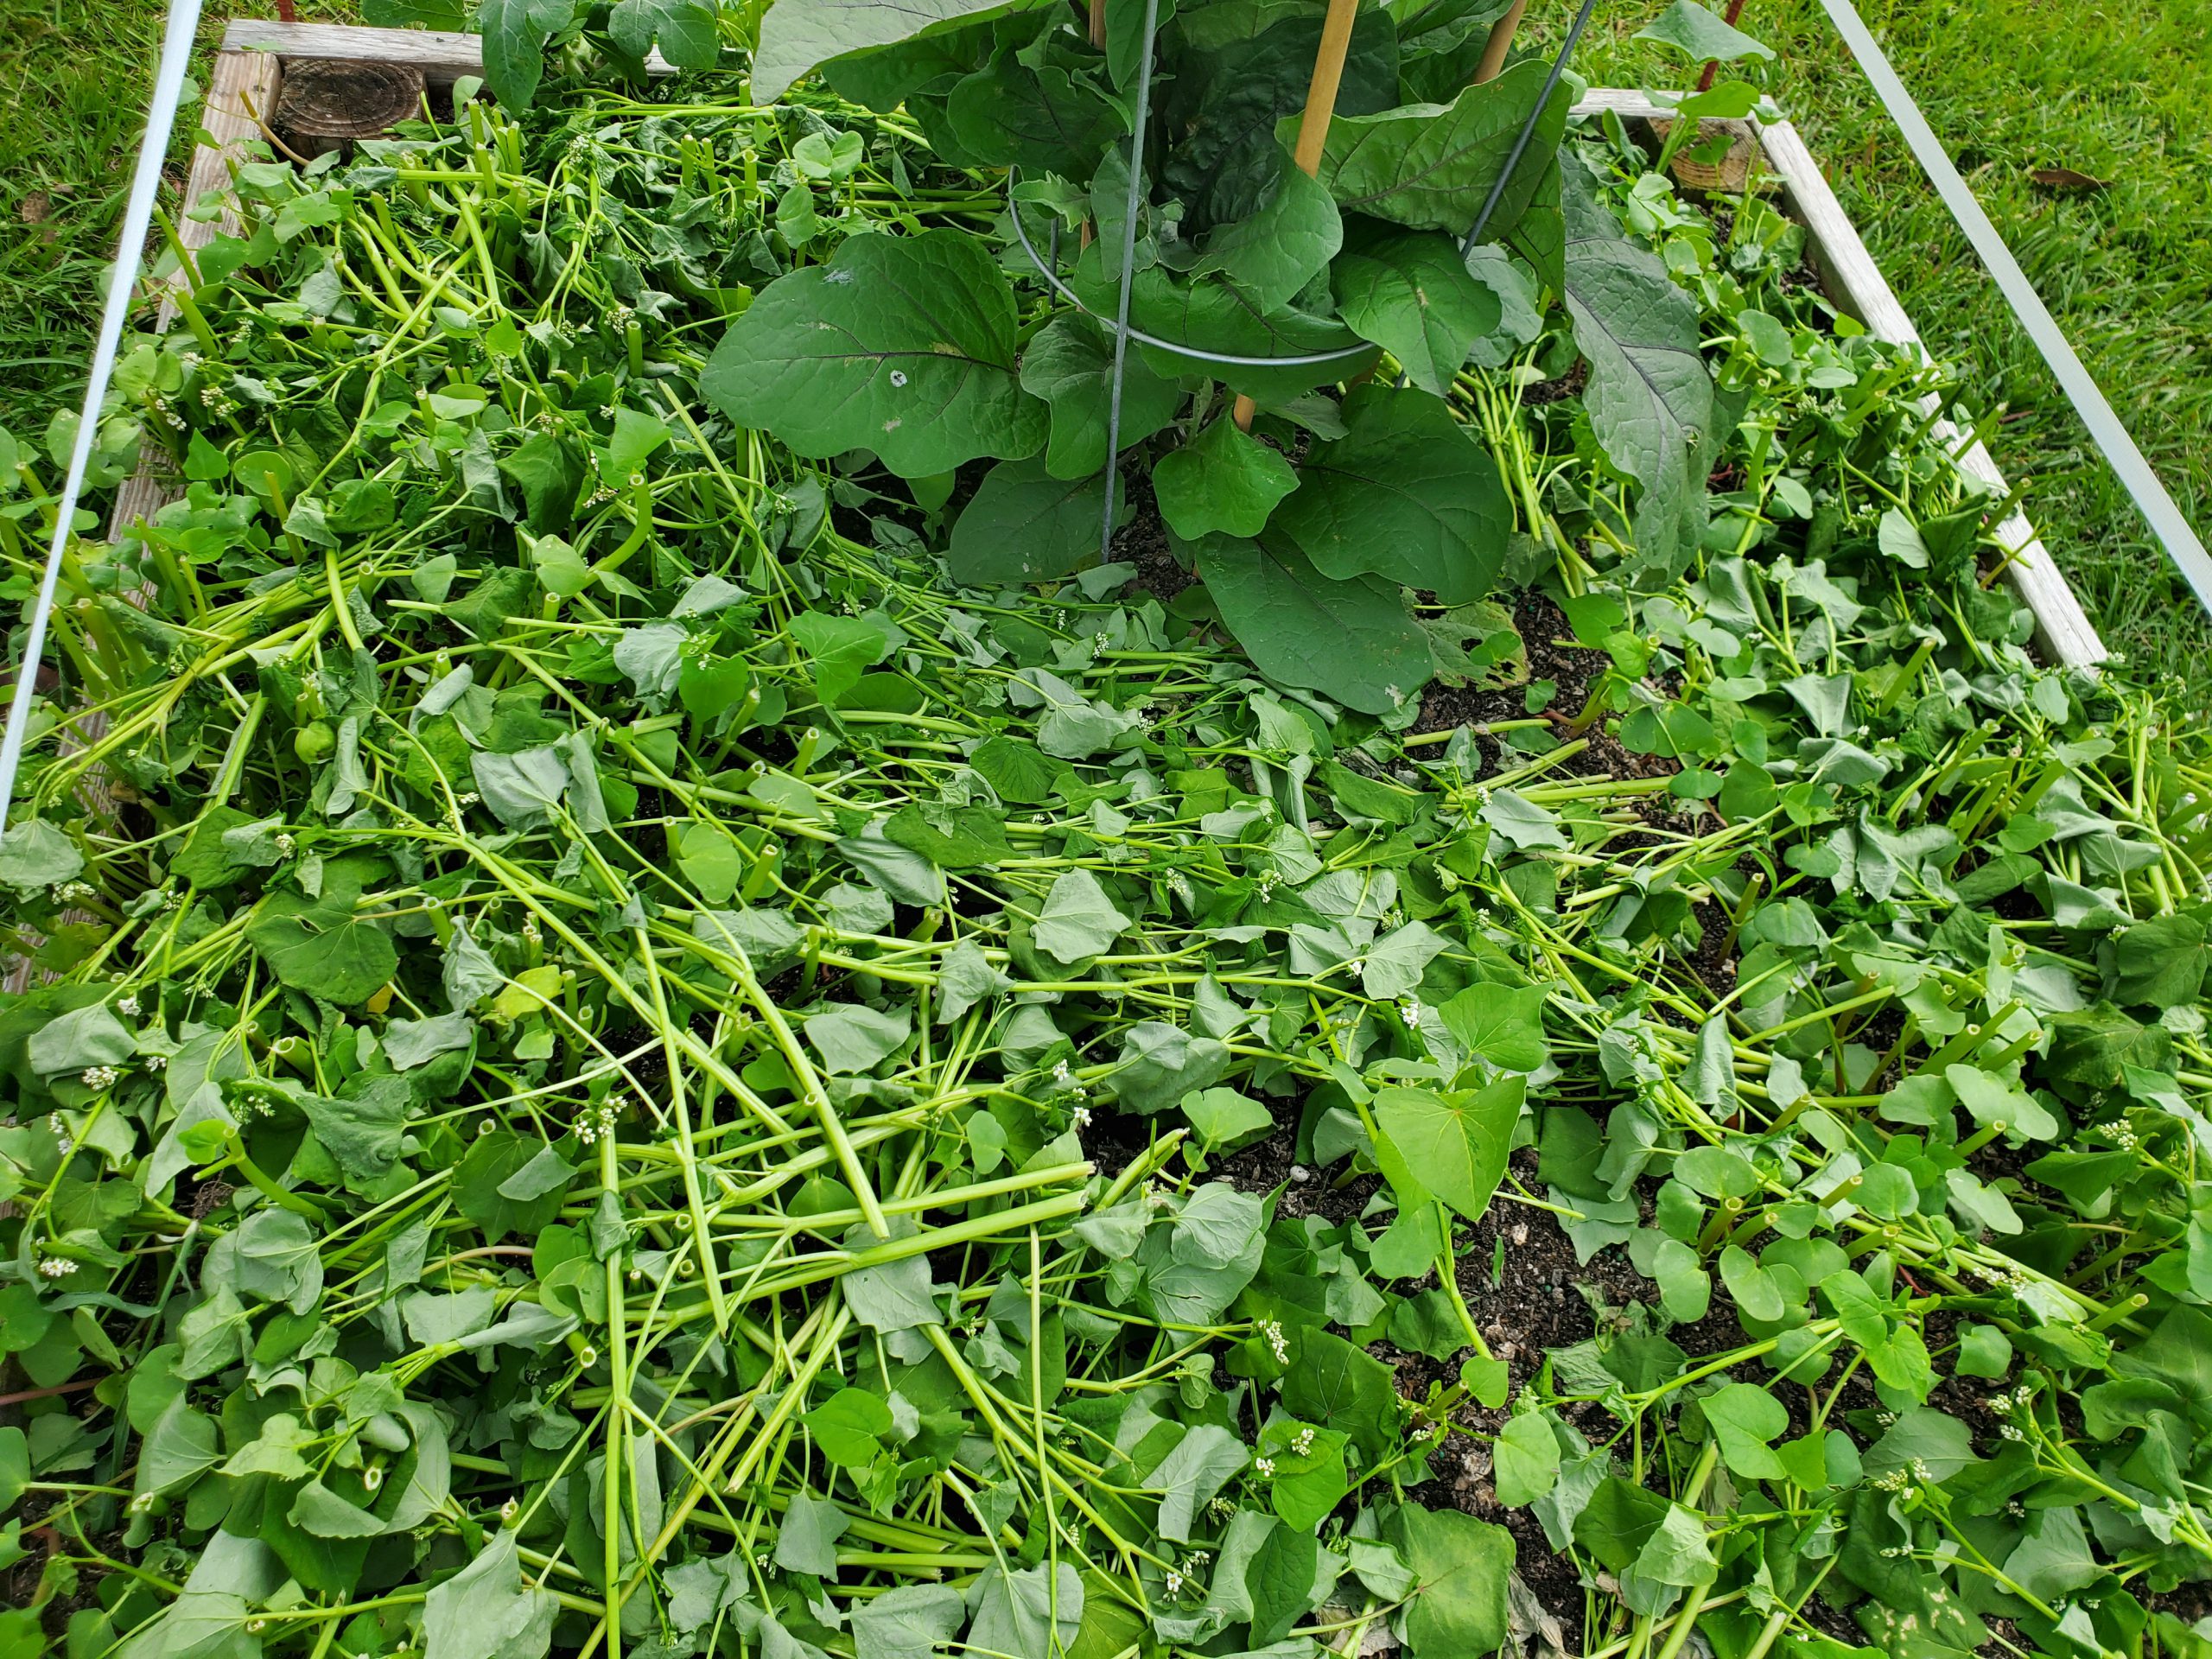
2020 has not been the most pleasant year in many ways. However, one positive experience I’ve had in my raised bed vegetable garden has been the use of a cover crop, Buckwheat (Fagopyrum esculentum)! Use of cover crops, a catch-all term for many species of plants used to “cover” field soil during fallow periods, became popular in agriculture over the last century as a method to protect and build soil in response to the massive wind erosion and cropland degradation event of the 1930s, the Dust Bowl. While wind erosion isn’t a big issue in raised bed gardens, cover crops, like Buckwheat, offer many other services to gardeners:
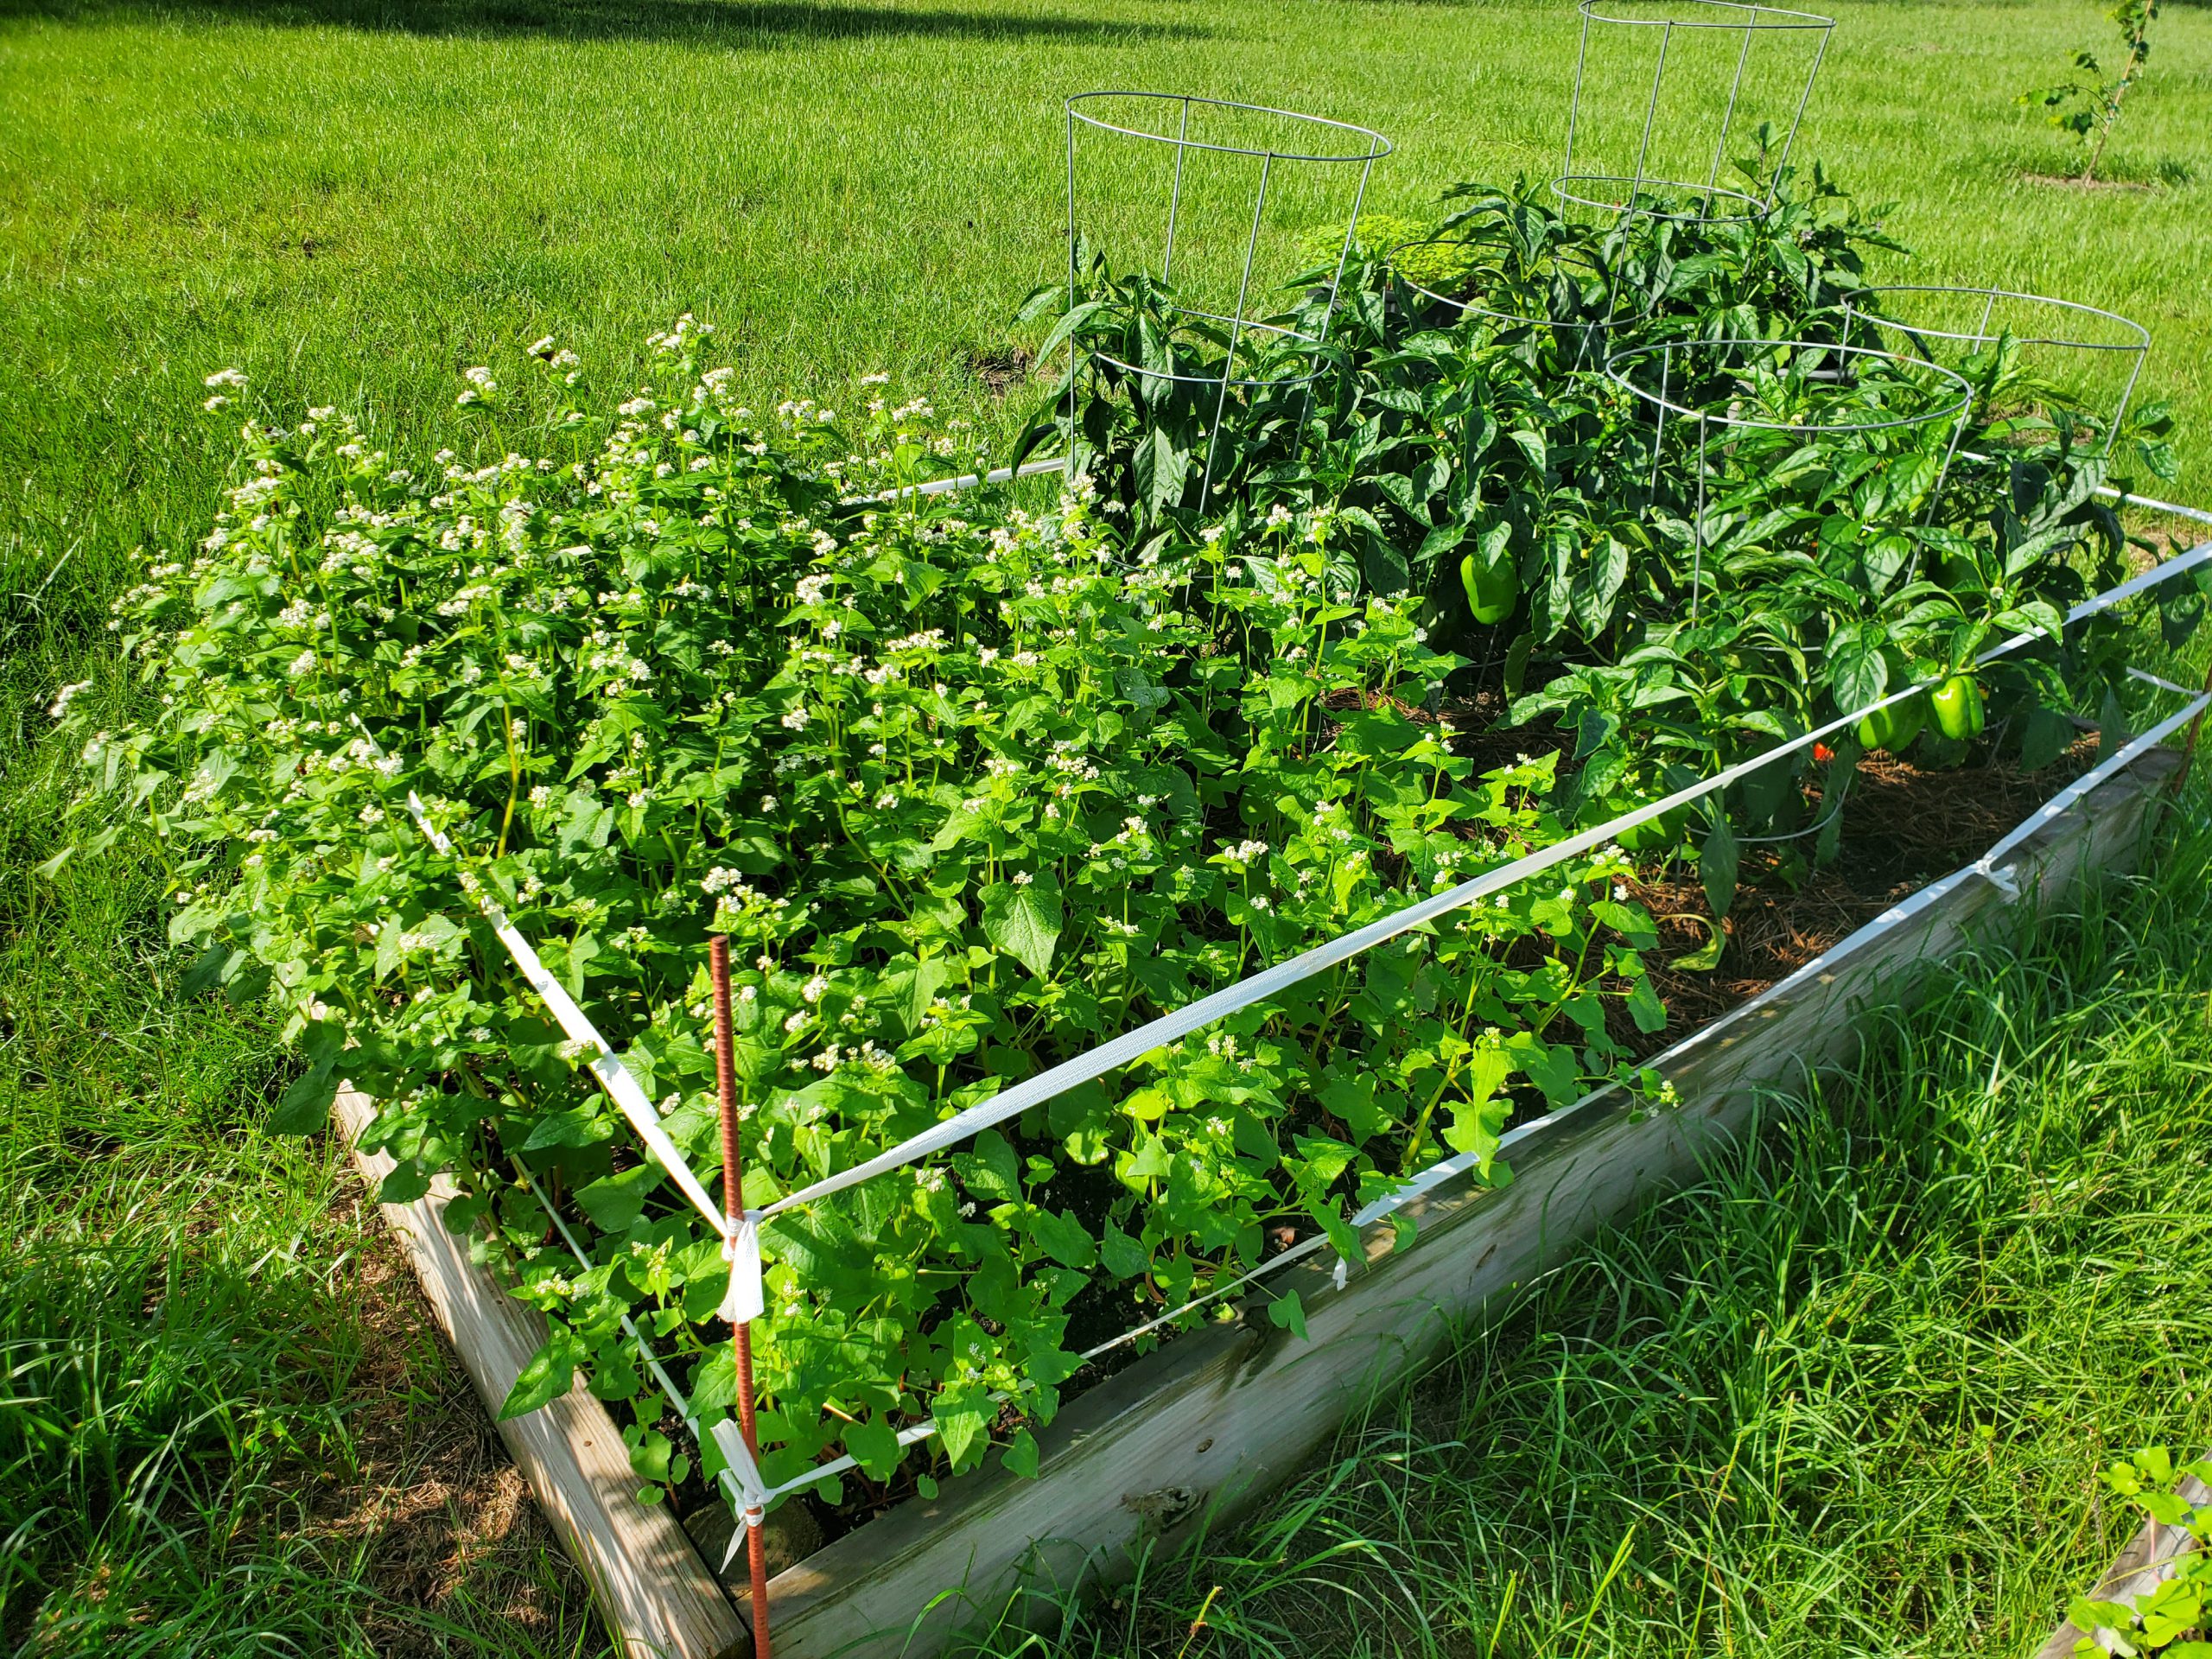
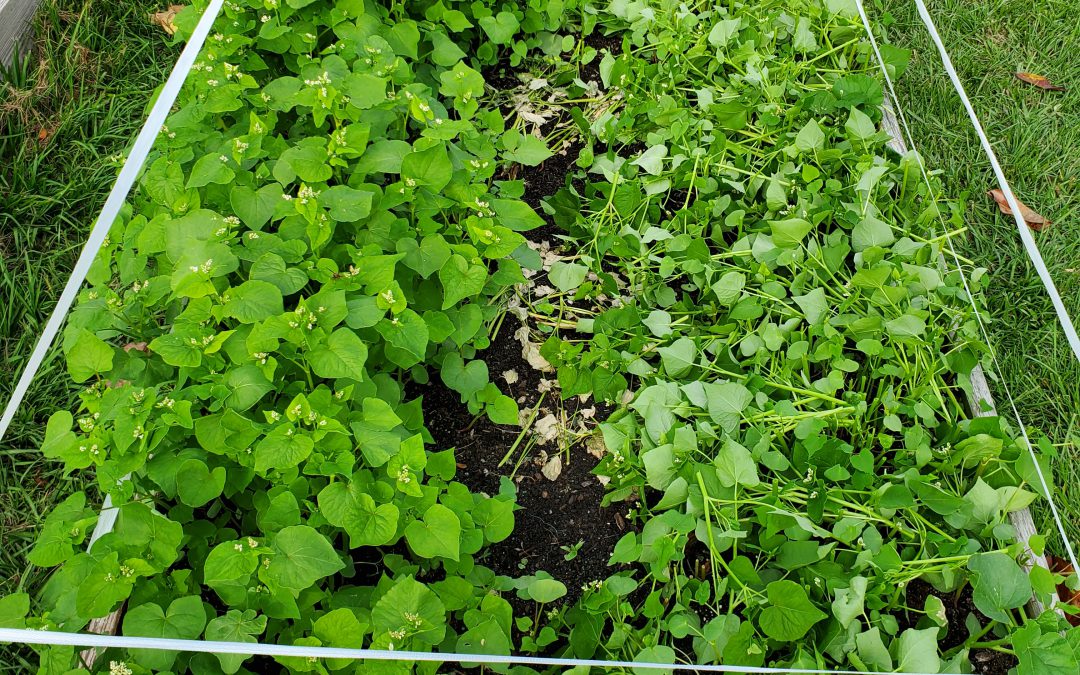
Buckwheat in flower behind summer squash. Photo courtesy of Daniel Leonard.
- Covers, like Buckwheat, provide valuable weed control by shading out the competition. Even after termination (the cutting down or otherwise killing of the cover crop plants and letting them decompose back into the soil as a mulch), Buckwheat continues to keep weeds away, like pinestraw in your landscape.
- Cover crops also build soil. This summer, I noticed that my raised beds didn’t “sink” as much as normal. In fact, I actually gained a little nutrient-rich organic matter! By having the Buckwheat shade the soil and then compost back into it, I mostly avoided the phenomena that causes soils high in organic matter, particularly ones exposed to the sun, to disappear over time due to breakdown by microorganisms.
- Many cover crops are awesome attractors of pollinators and beneficial insects. At any given time while my Buckwheat cover was flowering, I could spot several wasp species, various bees, flies, moths, true bugs, and even a butterfly or two hovering around the tiny white flowers sipping nectar.
- Covers are a lot prettier than bare soil and weeds! Where I would normally just have either exposed black compost or a healthy weed population to gaze upon, Buckwheat provided a quick bright green color blast that then became covered with non-stop white flowers. I’ll take that over bare soil any day.
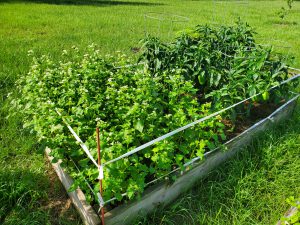
Buckwheat cover before termination (left) and after (right) interplanted with Eggplant. Photo courtesy Daniel Leonard, UF/IFAS Calhoun County Extension.
Now that I’ve convinced you of Buckwheat’s raised bed cover crop merits, let’s talk technical and learn how and when to grow it. Buckwheat seed is easily found and can be bought in nearly any quantity. I bought a one-pound bag online from Johnny’s Selected Seeds for my raised beds, but you can also purchase larger sizes up to 50 lb bags if you have a large area to cover. Buckwheat seed germinates quickly as soon as nights are warmer than 50 degrees F and can be cropped continuously until frost strikes in the fall. A general seeding rate of 2 or 3 lbs/1000 square feet (enough to cover about thirty 4’x8’ raised beds, it goes a long way!) will generate a thick cover. Simply extrapolate this out to 50-80 lbs/acre for larger garden sites. I scattered seeds over the top of my beds at the above rate and covered lightly with garden soil and obtained good results. Unlike other cover crops (I’m looking at you Crimson Clover) Buckwheat is very tolerant of imperfect planting depths. If you plant a little deep, it will generally still come up. A bonus, no additional fertilizer is required to grow a Buckwheat cover in the garden, the leftover nutrients from the previous vegetable crop will normally be sufficient!

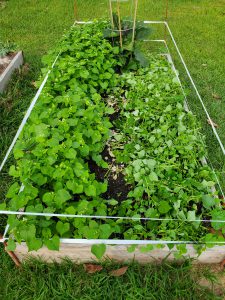
Buckwheat “mulch” after termination. Photo courtesy of Daniel Leonard, UF/IFAS Calhoun County Extension.
Past the usual cover crop benefits, the thing that makes Buckwheat stand out among its peers as a garden cover is its extremely rapid growth and short life span. From seed sowing to termination, a Buckwheat cover is only in the garden for 4-8 weeks, depending on what you want to use it for. After four weeks, you’ll have a quick, thick cover and subsequent mulch once terminated. After eight weeks or so, you’ll realize the plant’s full flowering and beneficial/pollinator insect attracting potential. This lends great flexibility as to when it can be planted. Have your winter greens quit on you but you’re not quite ready to set out tomatoes? Plant a quick Buckwheat cover! Yellow squash wilting in the heat of summer but it’s not quite time yet for the fall garden? Plant a Buckwheat cover and tend it the rest of the summer! Followed spacing guidelines and only planted three Eggplant transplants in a 4’x8’ raised bed and have lots of open space for weeds to grow until the Eggplant fills in? Plant a Buckwheat cover and terminate before it begins to compete with the Eggplant!
If a soil building, weed suppressing, beneficial insect attracting, gorgeous cover crop for those fallow garden spots sounds like something you might like, plant a little Buckwheat! For more information on Buckwheat, cover crops, or any other gardening topic, contact your local UF/IFAS County Extension Office. Happy Gardening!
by Mark Tancig | Jul 9, 2020
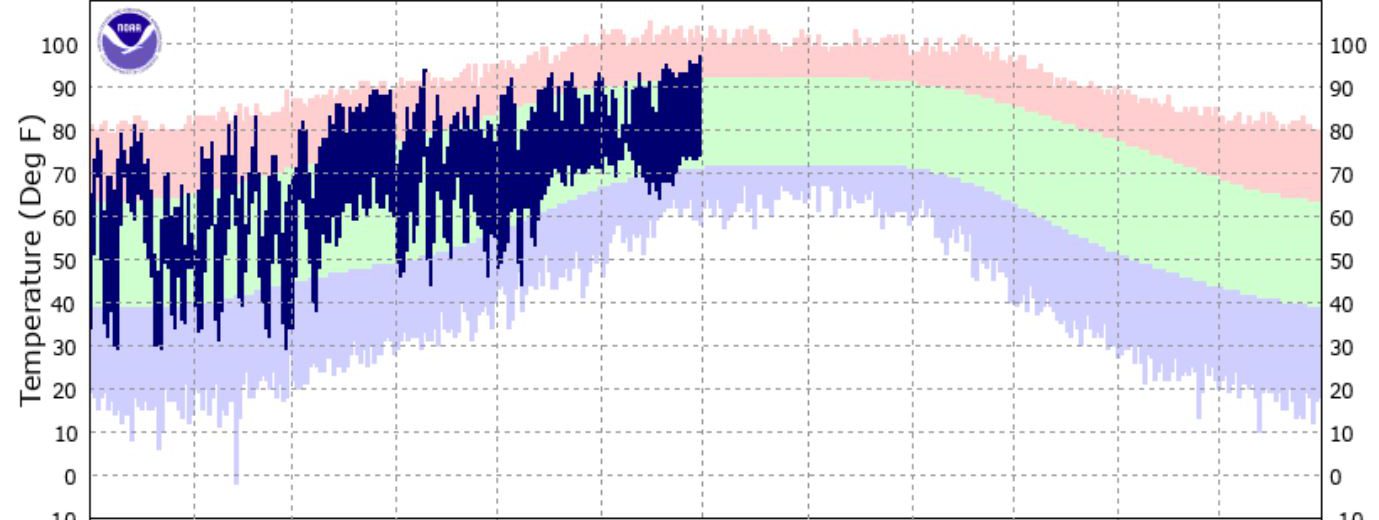
North Florida vegetable gardeners have made it to summer and now the plants and gardeners are starting to give in to the heat and humidity. The squash has likely succumbed to squash vine borers, many of the tomato varieties are having trouble setting fruit, stink bugs are all over, and gardeners easily wilt by noon. This is a good time to use our oppressive heat to your advantage in the vegetable garden by solarizing the soil.
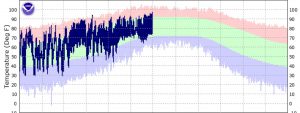
We have reached the peak of heat. Use it to your advantage in the garden. Source: National Weather Service.
Soil solarization is a method of pest control that creates a greenhouse to heat up the soil in an effort to drive away pests. Pests that can be reduced with soil solarization include weeds, various soil-borne fungal pathogens, and nematodes. Weed seeds can actually be killed by the increased temperatures, sometimes as high as 140 degrees Fahrenheit, while fungi and nematodes are merely driven deeper into the soil layer as they try to escape the heat. Although they are not killed, this can help vegetable gardeners as it may take these organisms 3-4 months to repopulate in high enough numbers to cause damage. Soil solarization can be considered another tool in your integrated pest management (IPM) toolbox, along with other cultural, physical, and chemical means of pest control.
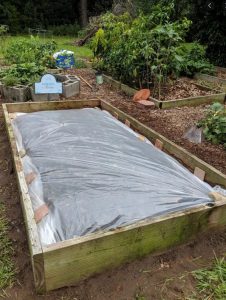
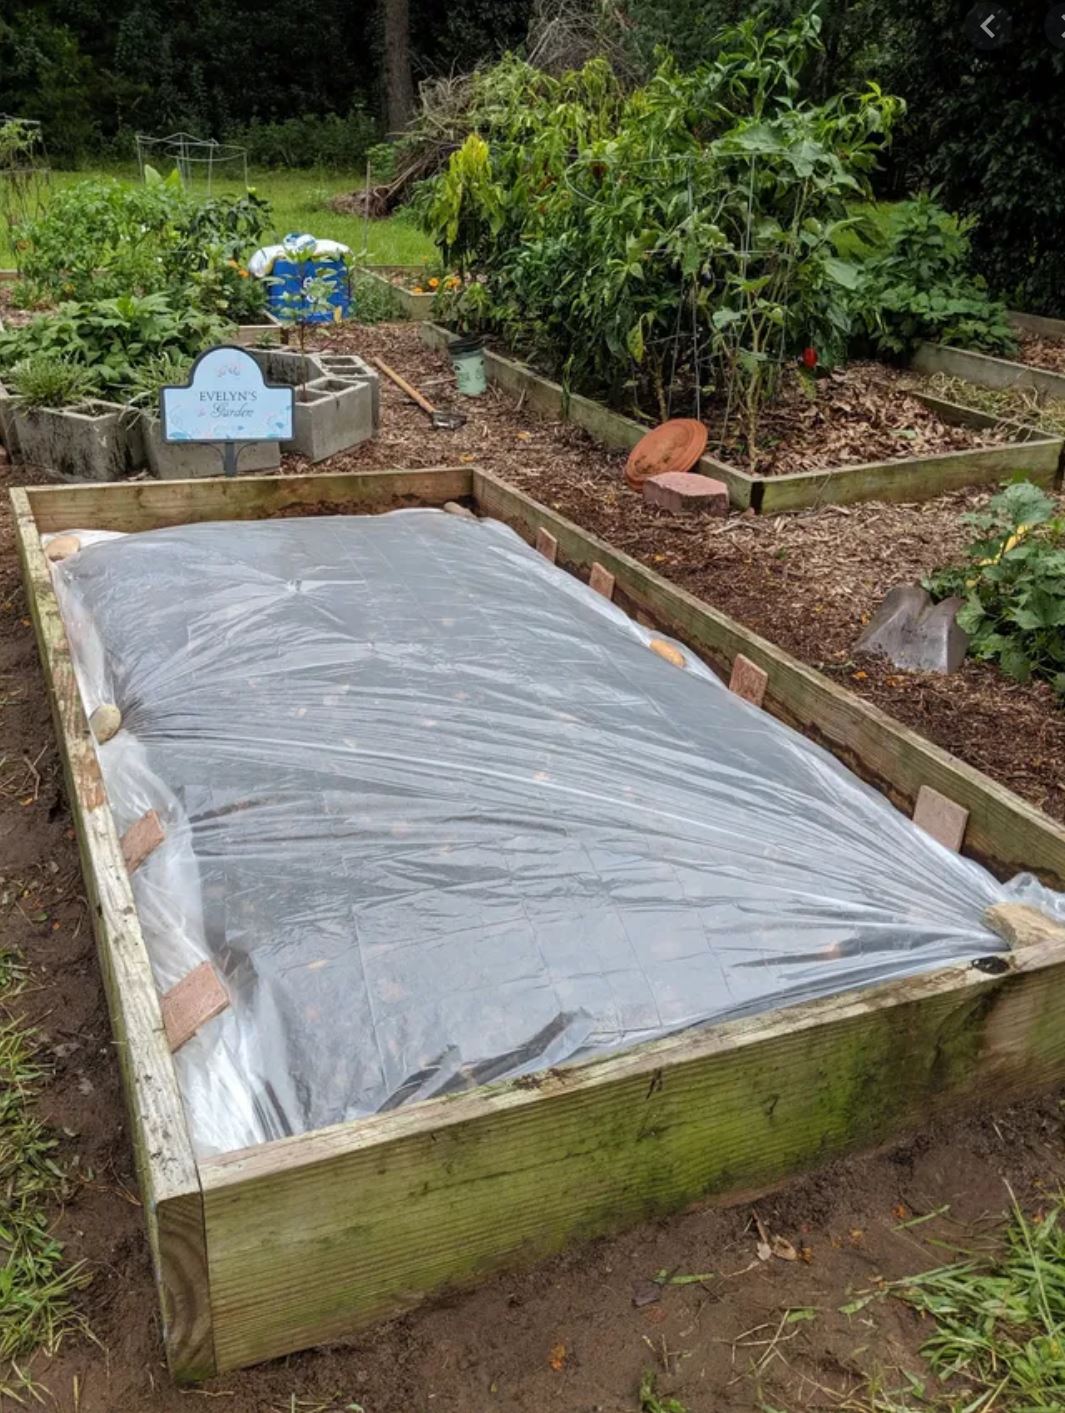
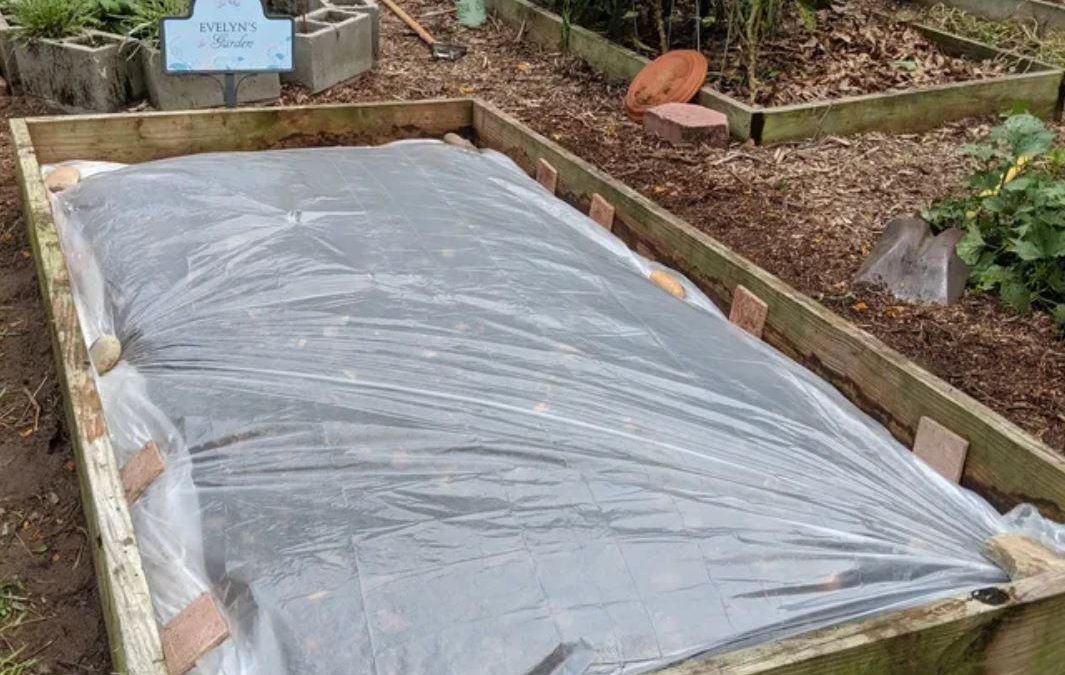
A raised bed being solarized over the summer. Source: Evelyn Gonzalez, UF/IFAS Master Gardener Volunteer.
To properly execute soil solarization, the site should be in full sun and the existing vegetation removed, either by hand or with a tiller or other implement. Tilling can help loosen the soil surface and allow heat to penetrate deeper in the soil horizon. Before being covered with plastic, the area should receive rainfall or be irrigated, as the water will help conduct heat to greater depths. The next step is to cover the area with plastic. Note that this can also be done over raised beds! Clear plastic is best for maximum solar radiation penetration. Black plastic will heat up mostly on the surface and opaque plastic sheeting may not let enough light in to get temperatures high enough. The plastic should be slightly larger than the area covered, as the edges will need to be buried to create an air-tight seal. It’s recommended to leave the plastic in place for at least six to eight weeks, just in time to begin fall gardening preparations.
It’s important to monitor the site while it’s “cooking” to look for any holes that might appear. Small holes can be repaired with duct tape, while large holes or rips in the plastic may require starting over. Overlapping strips of plastic is not recommended since too much heat will be lost.
You may be wondering what happens to all of the good soil microbes. Well, unfortunately, they are also either killed or suppressed. Fortunately, researchers have found that they are able to repopulate quicker than the pest organisms, especially in soils with a good amount of organic matter.
Much more information on soil solarization can be found in these two documents:
Introduction to Soil Solarization – https://edis.ifas.ufl.edu/pdffiles/IN/IN85600.pdf
Solarization for Pest Management in Florida – http://edis.ifas.ufl.edu/pdffiles/IN/IN82400.pdf
Also, please contact your local county extension office for more gardening tips.
by Ray Bodrey | May 27, 2020
Whether it’s the warm or cool season of the year, vegetable gardening is as popular activity as any. In writing articles, I usually discuss best management practices on a backyard garden scale. But, what if you don’t have much of a backyard?
Many Floridians live in apartments, condominiums, mobile home parks, or simply homes built on small parcel lots with little open gardening space. This doesn’t mean you can’t grow vegetables. You just have to be a bit creative and that’s when the fun starts. In addition to being an enjoyable activity, mini vegetable gardening can be practical and ornamental. Containers can fit almost anywhere in the landscape, such as porches, balconies, roof tops and that spot on your property where nothing seems to fit.

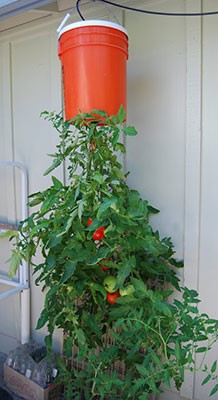
Tomato Bucket Gardening. Photo courtesy UF/IFAS Gardening Solutions.
There’s practically no limit to the kinds of containers one can use for mini vegetable gardening. Some examples are pots and pans, milk jugs, hollow concrete blocks, bushel baskets, trash cans, barrels, buckets and even plastics bags and “to go” food containers. As long as the container will hold soil and let excess water drain, you’re good to garden.
So, what can I use as a growing medium? Traditional garden soil will work fine. Mixing garden soil 1:1 with mushroom compost is also acceptable. Adding lightweight components to the soil mixture such as perlite or vermiculite will make it easier if you need move the container from time to time. This will also help with drainage. Sprinkling a handful of 6-6-6 or 8-8-8 fertilizer and gardening lime into the mixture will give plants much needed nutrients for development.
This growing medium will not require fertilizer applications very often. A small amount every two to three weeks should be adequate for most vegetable plants. Whether the fertilizer you choose is solution or dry form, be sure to use small amounts and water the product thoroughly into the root zone. A heavy application of fertilizer may cause plant burn.
So what vegetable crops grow best in containers? Most any crop will do well in containers. Some examples are tomato, pepper, eggplant, collard, cabbage, turnip, mustard, strawberry, broccoli, cauliflower and many herbs. Container gardening is a fun and rewarding hobby. You’ll enjoy both the activity and the delicious produce you’ve grown.
For more information contact your local county extension office.
Supporting information for this article was provided by Extension’s Emeritus Vegetable Specialist Jim Stephens of UF/IFAS Extension. More information can be found at this website: http://gardeningsolutions.ifas.ufl.edu/plants/edibles/vegetables/growing-vegetables-in-containers.html
UF/IFAS Extension is an Equal Opportunity Institution.