by Sheila Dunning | Jul 9, 2020
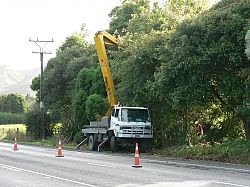
Utility tree trimming truck
With hurricane season upon us, evidence of preparation is all around us. Tree trimmers, contracted by the local electrical utility companies, have been removing trees, branches and other vegetation that is “too close” to power lines. Many homeowners are concerned over the practice.
In order to prevent power outages, the federally approved Vegetation Management Reliability Standard, FAC-033-2, requires utilities to manage vegetation growth along the path of power lines to prevent contact. A minimum clearance of fourteen (14) feet between trees and transmission lines in the right-of-way must be maintained at all times in order to achieve service reliability and public safety.
By Florida Statute 163, an electric utility is granted easement or right-of-way on private property in order to build and maintain electric power lines. Vegetation maintenance allows for the mowing of vegetation within the right-of-way, removal of trees or brush within the right-of-way and selective removal of tree branches that extend within the right-of-way by the electric utility personnel, licensed contractors or International Society of Arboriculture (ISA) Certified Arborists. The choice of how to trim trees and manage vegetation growth near a power line (e.g. pruning, herbicides, or tree removal) is primarily made by the electric utility, subject to state and local requirements and laws, applicable safety codes, and any limitations or obligations specified in right-of-way agreements. An individual may contact the utility company to obtain a copy of the right-of-way agreement for their property.
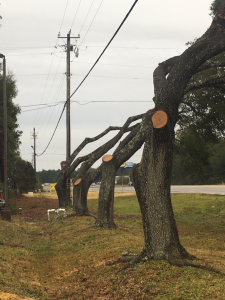
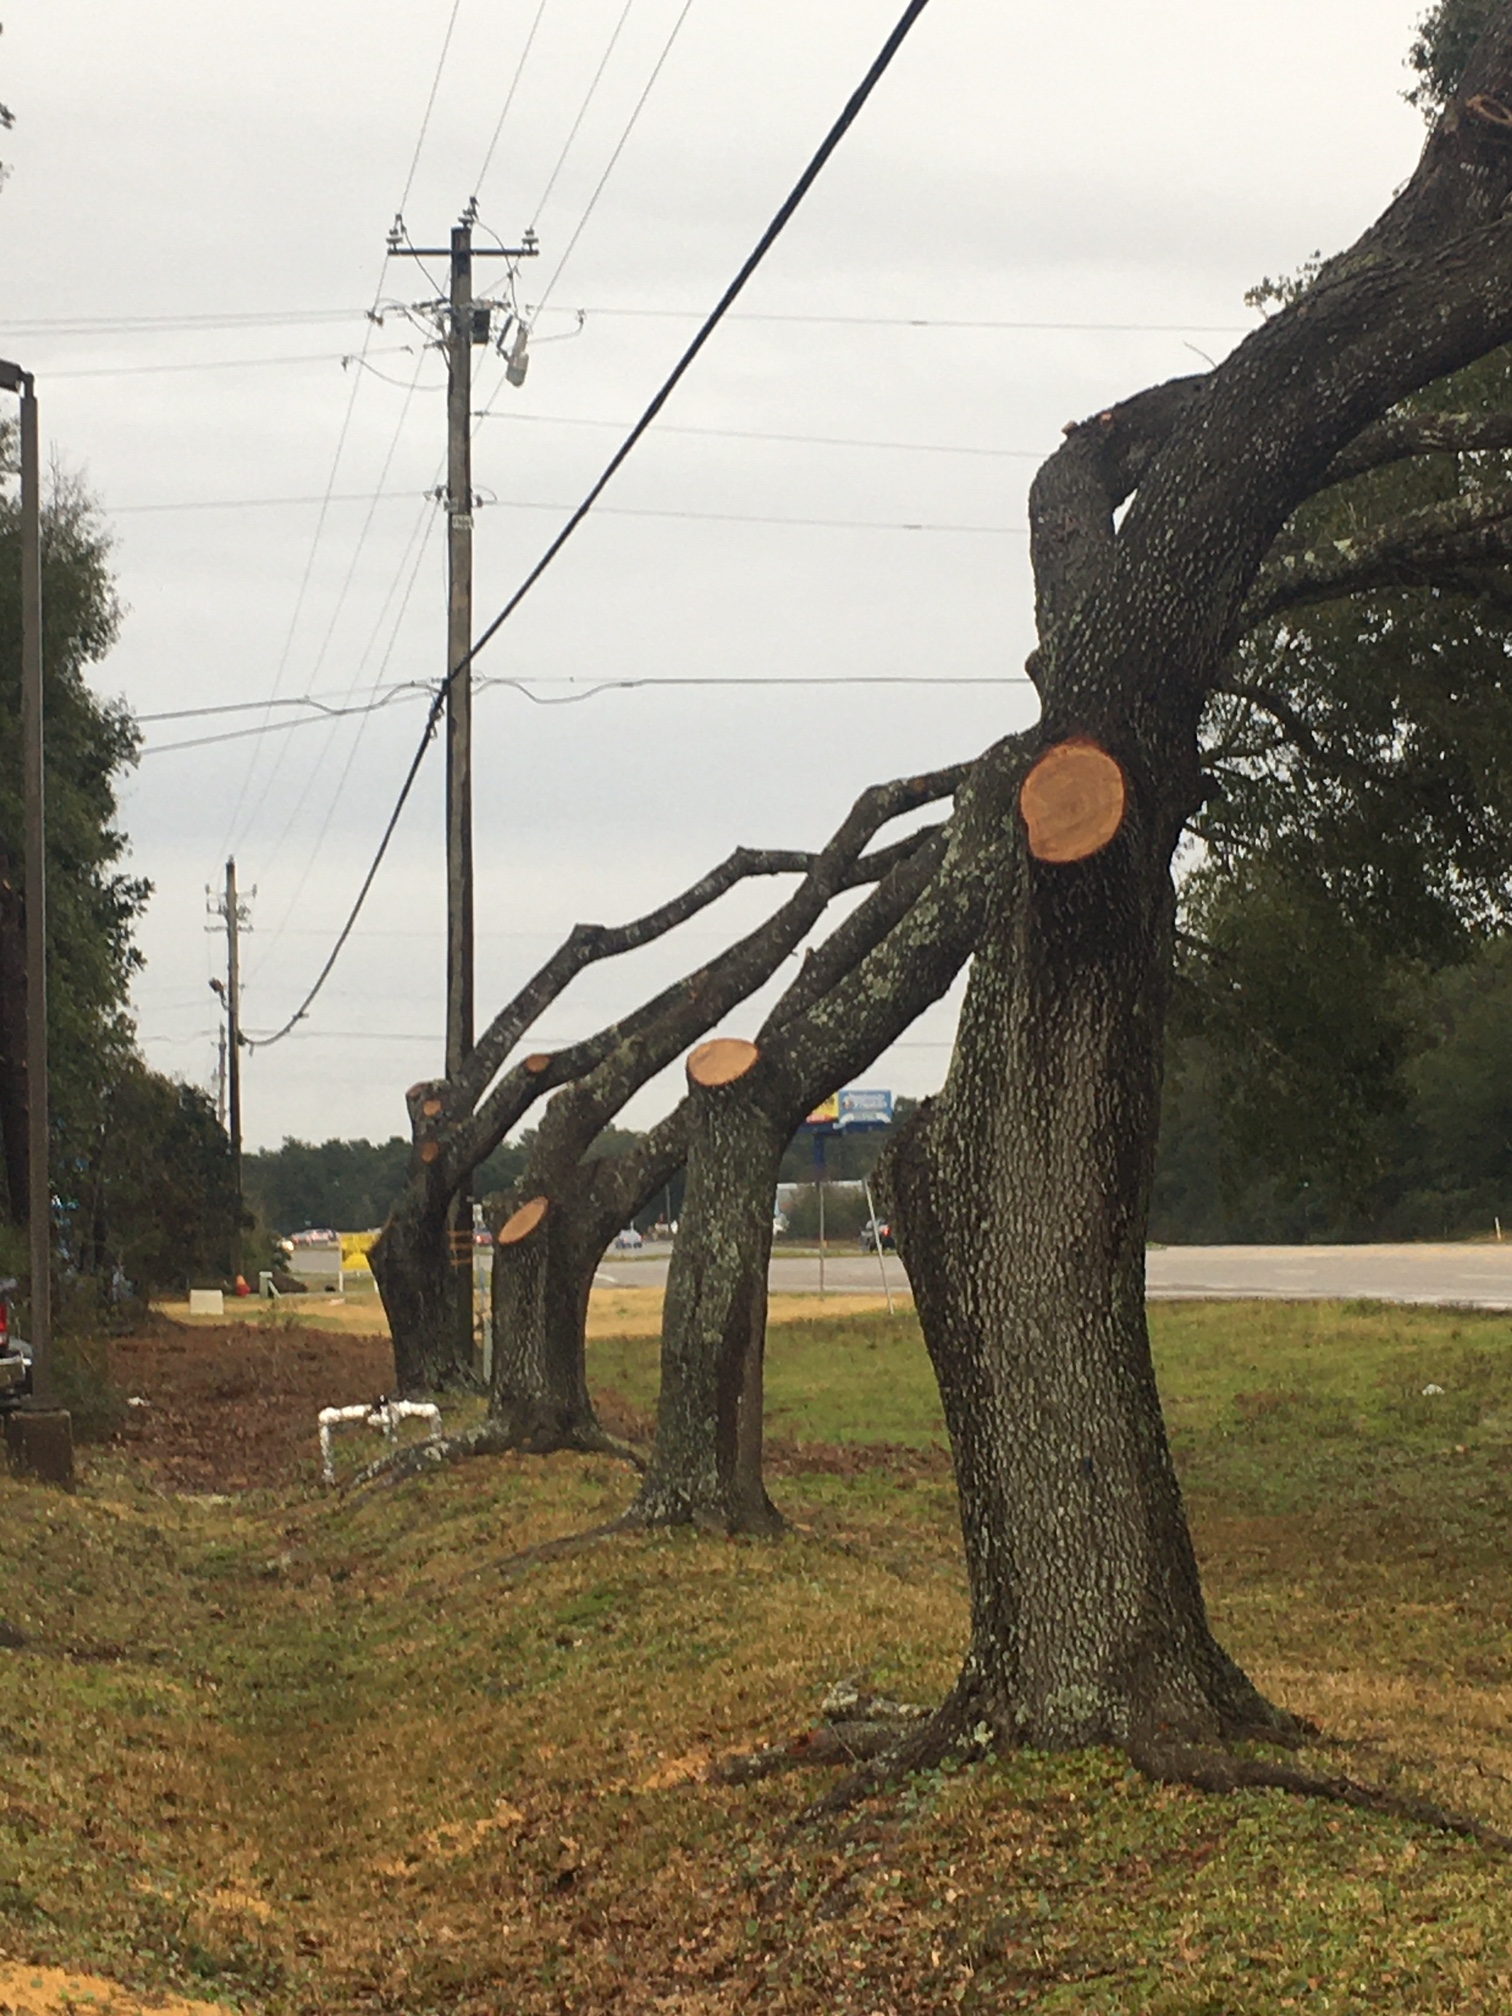
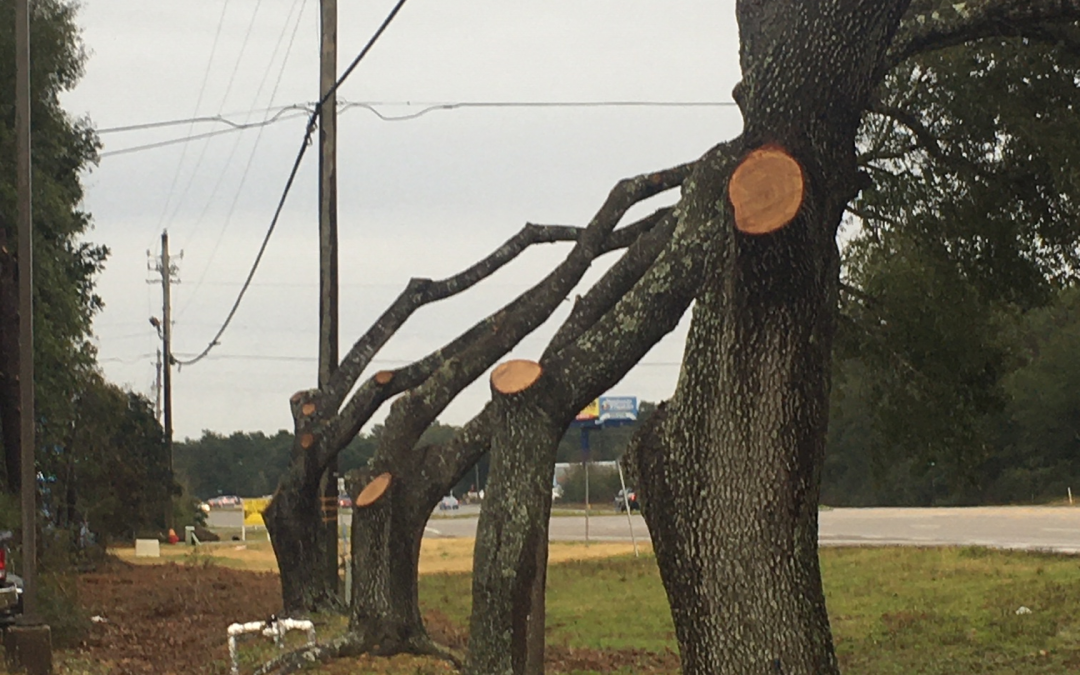
Over-pruned trees along power line
Sometimes, it appears to some that excessive vegetation has been removed. But, remember the utility companies are required to maintain the appropriate clearance “at all times.” For example, in the summer, power lines sag as they expand from rising air temperatures and heavy use. Also, wind and future growth must be taken into account when determining where to prune. Electric utilities usually prune or remove vegetation to a distance greater than the minimum clearances to account for all these factors. However, in many instances, removal of the tree would be more aesthetically pleasing and could avoid leaving a hazardous tree in the landscape. But, that is not part of their contract. That decision must be made by the property owner.
Tree trimming around power lines may seem like a local issue, but vegetation growth also affects interstate transmission lines. The U.S. Department of Energy estimates that electric utility service interruptions cost businesses and communities tens of billions of dollars annually. Tree contact with transmission lines was the leading cause of the August 2003 blackout that affected 50 million people in the Northeastern United States and Canada. In fact, that particular blackout prompted Congress to pass the Energy Policy Act of 2005, which lead the Federal Energy Regulatory Commission (FERC) to establish the Vegetation Management Reliability Standard.
Should we have a storm that impacts Northwest Florida, remember that the clearing of trees and branches provides faster access for first responders, line repair crews, and other emergency service personnel. So, as you watch the preparation work being done, think about where you will be planting a tree so that it can reach full maturity without threatening power lines, therefore, not requiring “ugly pruning!”
Spacing between trees and power lines
The urban forest is much different from a natural forest. Trees often develop a form that is more susceptible to breakage when grown in developed commercial and residential environments. As a result, trees need preventive pruning to develop strong structure. Research and observation show that well pruned trees can create a more wind resistant urban forest.
Pruning to create stronger tree structure is an ongoing process. To minimize the likelihood of tree damage it is necessary to reduce the length of limbs with a weak attachment to the trunk and to balance the canopy by reducing the length of limbs on the side where weight is concentrated. Do not remove interior branches, as this concentrates foliage at the tips of branches and causes them to break in strong winds.
Limbs that are more than ½ the diameter of the trunk and multiple trunks of similar size must be reduced in order to form strong branch unions and eliminate co-dominant leaders. A reduction cut is pruned back to a smaller lateral branch. Good pruning cuts avoid cutting into the collar. The collar is the swollen area at the base of the branch where it joins the trunk. The tissue is rich in energy reserves and chemicals that hinder the spread of decay.
Preventative pruning only applies to woody tree species. Palms need fronds to protect the bud and provide nutrients for growth. Arborists report that results from previous storms revealed that palms that had been “hurricane pruned” suffered more damage than those that were not pruned. Do not wait until the last minute to prepare your trees for hurricane season. Take action now. For more information on pruning visit: http://hort.ifas.ufl.edu/woody/pruning.shtml.
If you want professional help evaluating your trees or performing the proper corrective actions, visit: https://www.treesaregood.org/findanarborist to locate a Certified Arborist working in your area.
by Carrie Stevenson | Jul 1, 2020
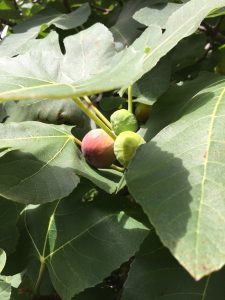
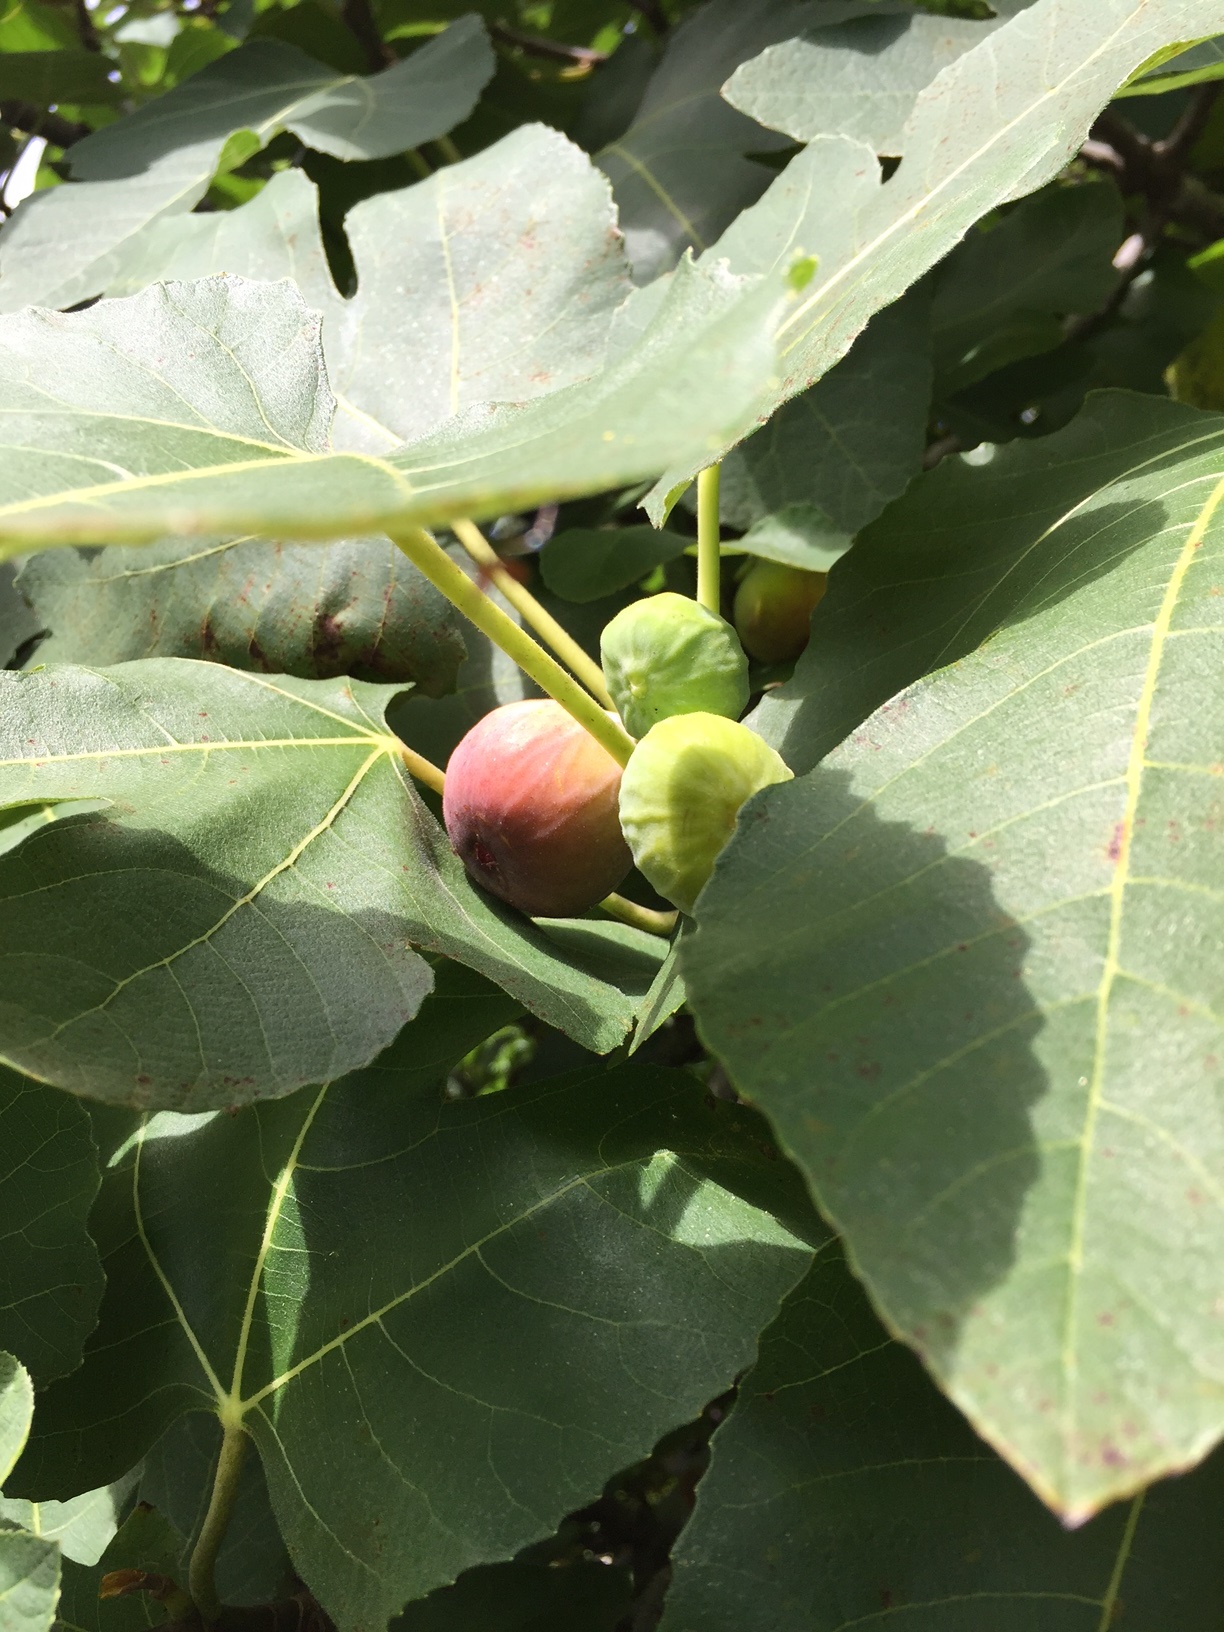
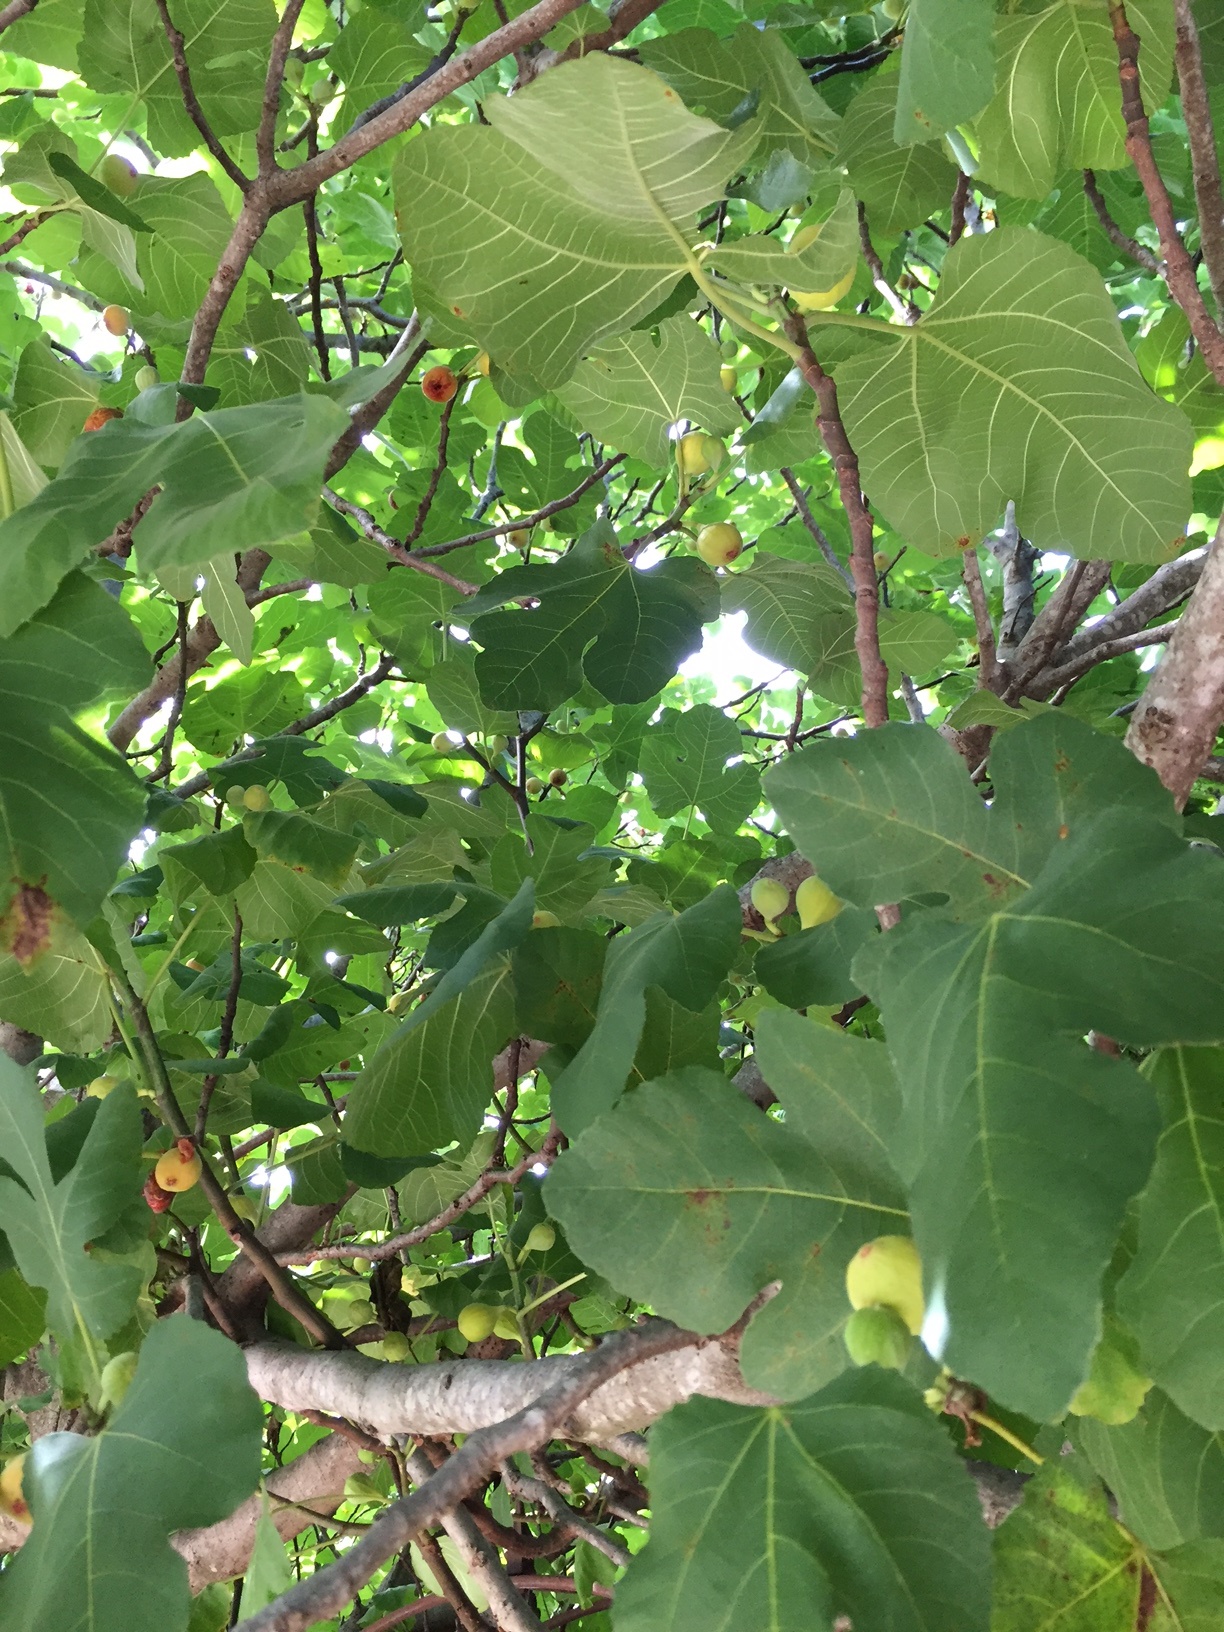
Ripe figs are a deep shade of pink to purple. Larger green figs will ripen in a few days. Photo credit: Carrie Stevenson
Summer is full of simple pleasures—afternoon rainstorms, living in flip flops, and cooling off in a backyard pool. Among these, one of my favorites is walking out my door and picking handfuls of figs right from the tree. Before we planted our tree, my only prior experience with the fruit was a Fig Newton—I’d never eaten an actual fig, much less one picked fresh. Now, they are my favorite fruit.
Native to Asia Minor and the Mediterranean, figs were introduced to Florida in the 1500’s by Spanish explorers. Spanish missionaries introduced these relatives of the mulberry to California a couple hundred years later. Figs are best suited to dry, Mediterranean-type climates, but do quite well in the southeast. Due to our humidity, southern-growing figs are typically fleshier and can split when heavy rains come through. The biggest threats to the health of the trees are insects, disease (also due to our more humid climate) and root-knot nematodes.
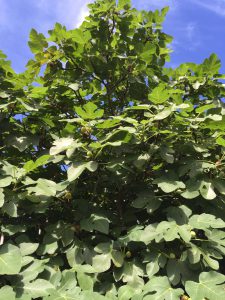
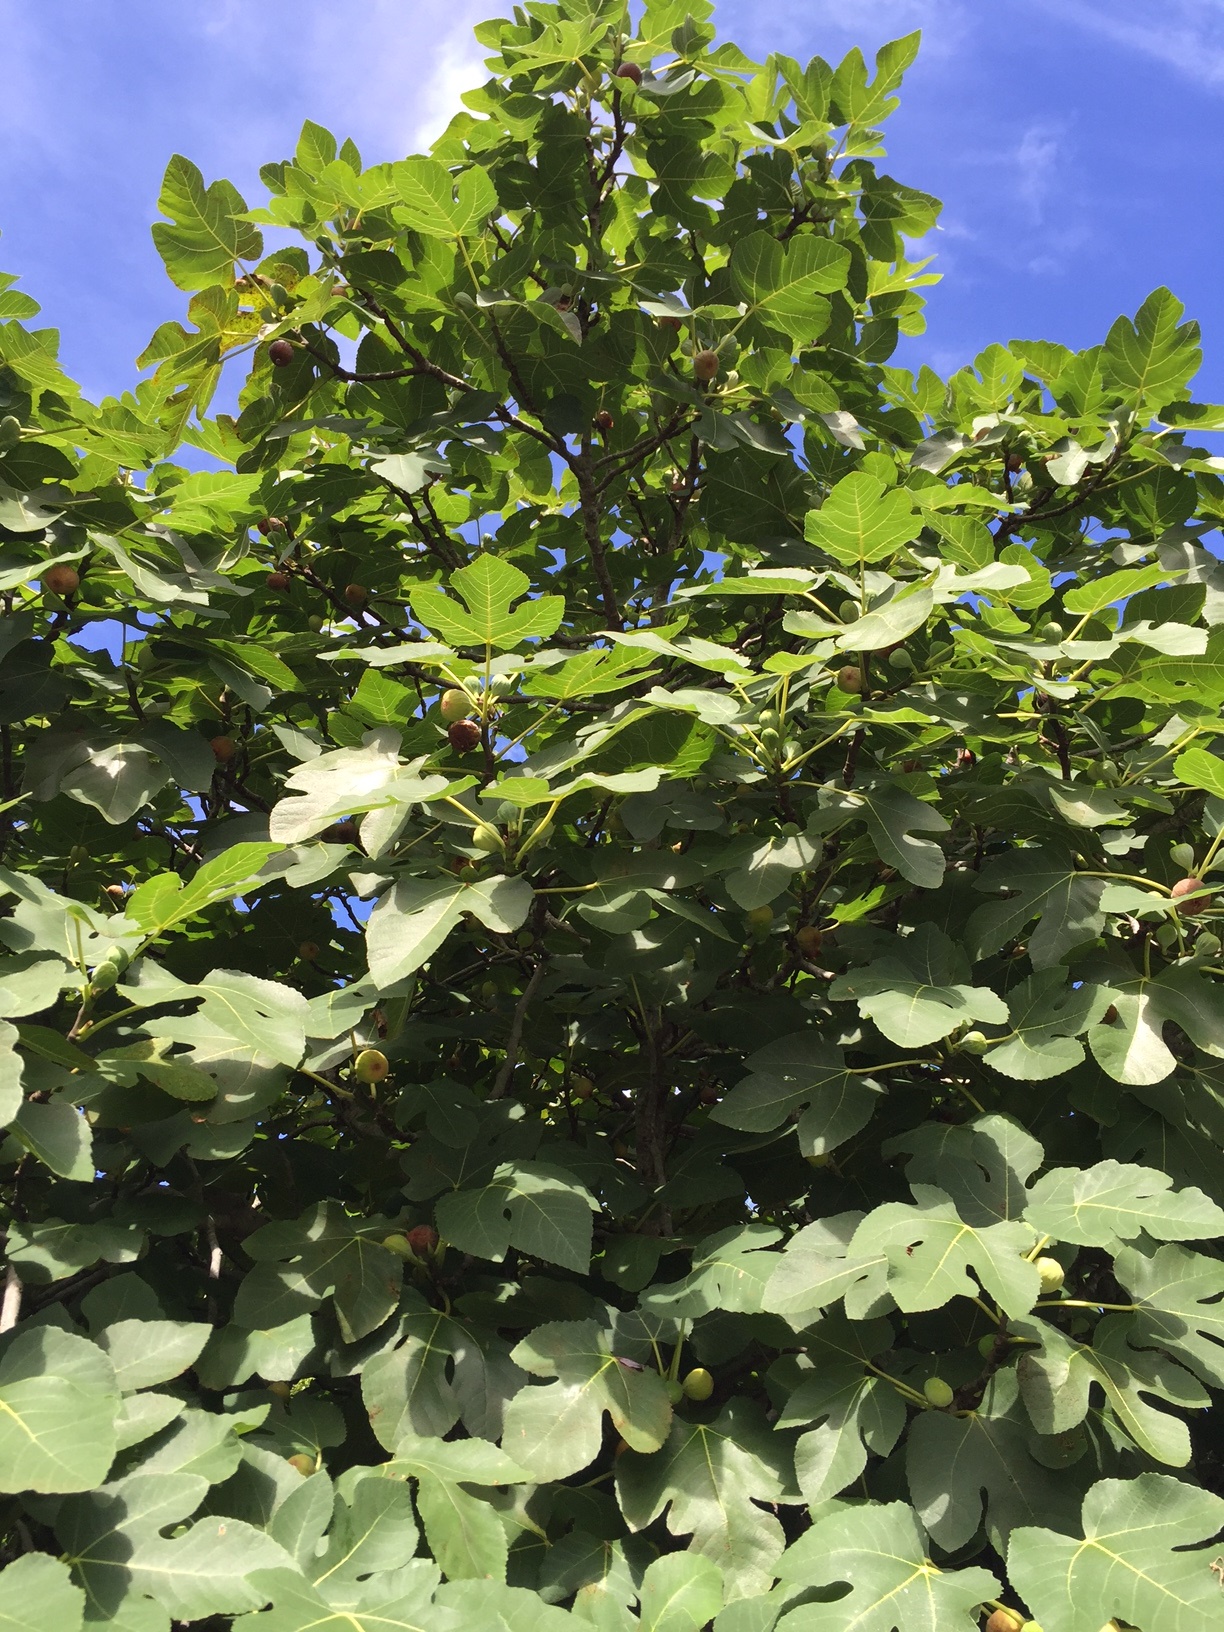
Fig trees can grow quite large and produce hundreds of fruit each year. Photo credit: Carrie Stevenson
Our tree started out just a couple of feet tall, but 15 years ago we replanted it along a fence in our back yard. It grew so large (easily 25 feet tall and equally wide) that it hangs over our driveway, making it handy to grab a few as I head out for a walk or hop in the car to run errands. The tree is in full sun at the bottom of a slope, and seems to be a satisfied recipient of all the runoff from our backyard. This position has resulted in a thick layer of soil and mulch in which it thrives. In the last year, we pruned it down to an arms-reach height so that we could actually get to the figs being produced.
We usually see small green fruit start to appear in early May, becoming fat and ripe by the second half of June. The tree produces steadily through early August, when the leaves turn crispy from the summer heat and there’s no more fruit to bear. The common fig doesn’t require a pollinator, so only one tree is necessary for production. The fiber-rich fig is also full of calcium, potassium, and vitamins A, E, and K. As it turns out, the “fruit” is actually a hollow peduncle (stem) that grows fleshy, forming a structure called a synconium. The synconium is full of unfertilized ovaries, making a fig a container that holds both tiny flowers and fruit in one.
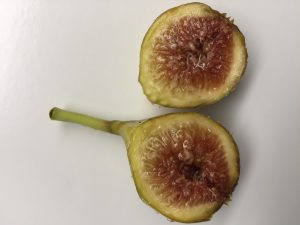
The insides of a fig show the small flowering structures that form the larger fruit. Photo credit: Carrie Stevenson
With the hundreds of figs we’ve picked, my family has made fig preserves, fig ice cream, baked figs and of course eaten them raw. We typically beg friends and neighbors to come help themselves—and bring a ladder—because we can’t keep up with the productivity. The local birds and squirrels are big fans, too. Often you can tell you’re near our tree from around the block, as the aroma of fermenting fruit baking on the driveway is far-reaching.
No matter what you do with them, I encourage planting these trees in your own yard to take full advantage of their sweet, healthy fruit and sprawling shade. As Bill Finch of the Mobile (AL) botanical gardens has written, “fresh…figs are fully enjoyed only by the family that grows them, and the very best figs are inevitably consumed by the person who picks them.”
by Larry Williams | Jun 23, 2020
The 2020 Atlantic Hurricane Season got off to an early start with some tropical storm activity before the season’s official June 1 start date. We live in a high wind climate. Even our thunderstorms can produce fifty-plus mile per hour winds.
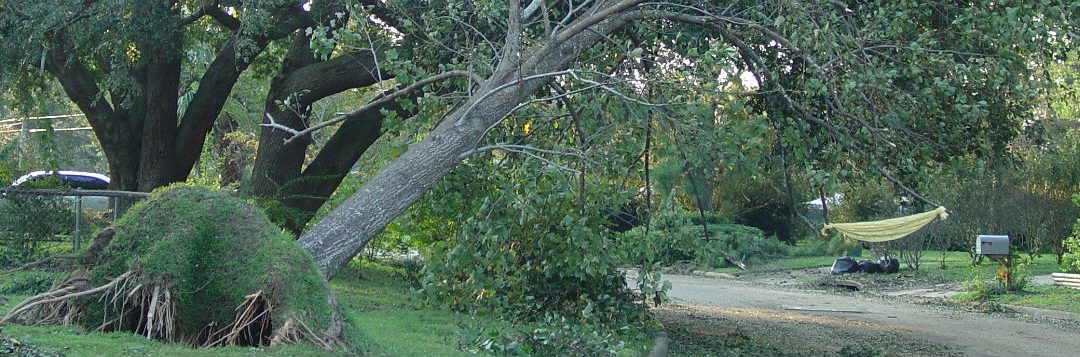
Storm damaged sweetgum tree. Photo credit: Larry Williams
Preventive tree maintenance is key to preparing for storms and high winds.
Falling trees and flying landscape debris during a storm can cause damage. Evaluate your landscape for potential tree hazards. Pruning or removing trees once a hurricane watch has been announced is risky and tree trimming debris left along the street is hazardous.
Now is a good time to remove dead or dying trees, prune decayed or dead branches and stake newly planted trees. Also inspect your trees for signs of disease or insect infestation that may further weaken them.
Professional help sometimes is your best option when dealing with larger jobs. Property damage could be reduced by having a professional arborist evaluate unhealthy, injured or questionable trees to assess risk and treat problems.
Hiring a certified arborist can be a worthwhile investment. To find a certified arborist in your area, contact the International Society of Arboriculture (ISA) at 888-472-8733 or at www.isa-arbor.com. You also may contact the Florida ISA Chapter at 941-342-0153 or at www.floridaisa.org.
Consider removing trees that have low wind resistance, are at the end of their life span or that have the potential to endanger lives or property.
Some tree species with the lowest wind resistance include pecan, tulip poplar, cherry laurel, Bradford pear, southern red oak, laurel oak, water oak, Chinese tallow, Chinese elm, southern red cedar, Leyland cypress, sand pine and spruce pine.

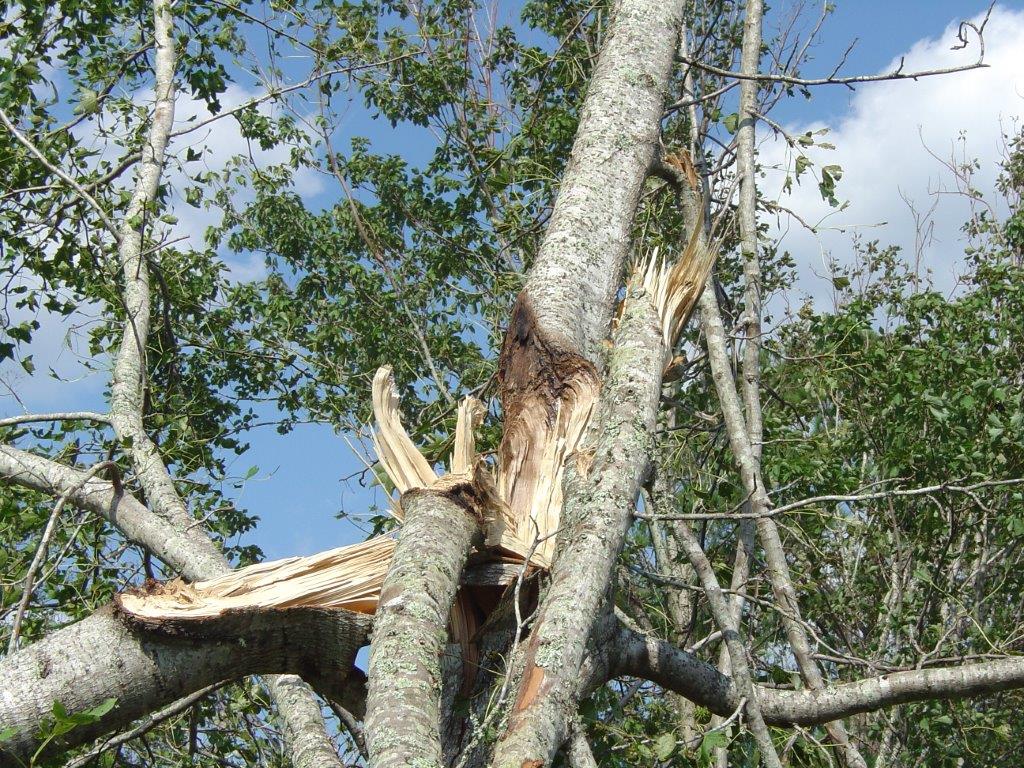
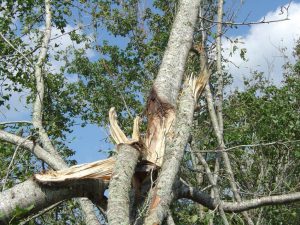
Broken pine from hurricane. Photo credit: Larry Williams
Pine species vary in their wind resistance, usually with longleaf and slash pines showing better survival rates than loblolly and sand pine. However, when pines become large, they may cause a lot of damage if located close to homes or other valuable structures. As a result, large pines are classified as having medium to poor wind-resistance. For this reason, it’s best to plant pines away from structures in more open areas.
Before and after a storm, tree removal requires considerable skill. A felled tree can cause damage to the home and/or property. Before having any tree work done, always make sure you are dealing with a tree service that is licensed, insured and experienced.
More information on tree storm damage prevention and treatment is available online at http://hort.ifas.ufl.edu/woody/stormy.shtml or from the UF/IFAS Extension Office in your County.
by Carrie Stevenson | Jun 4, 2020
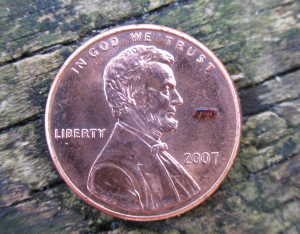
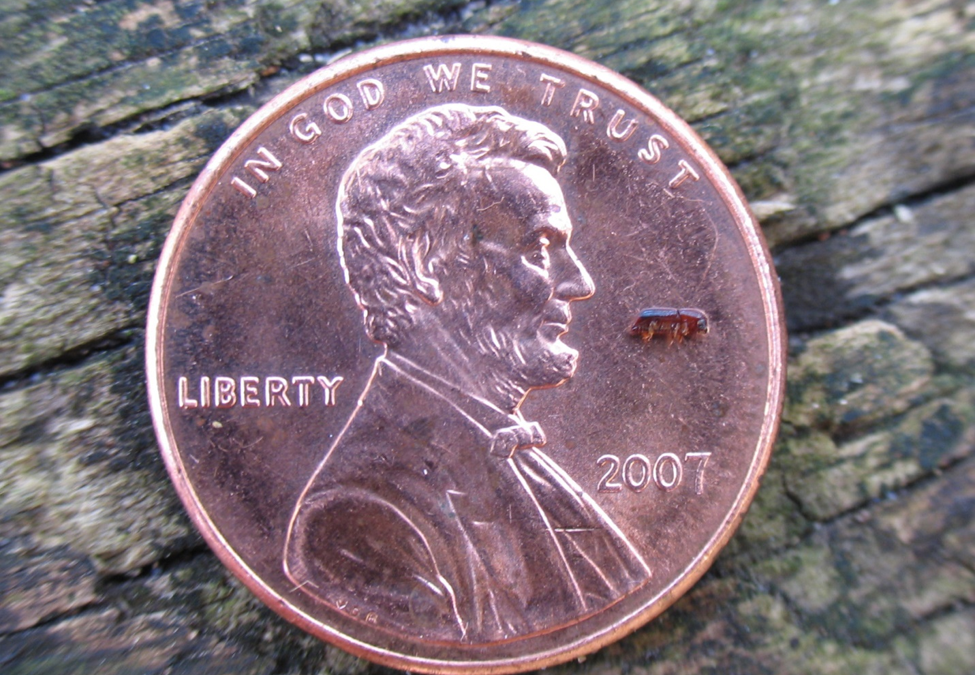
Fig. 1 An adult redbay ambrosia beetle compared to the size of a single penny. Credit: UF/IFAS File Photo.
While most bark beetles are important in forest ecology by recycling fallen dead trees and eliminating sick and damaged trees, some of them may impact healthy trees. A group of bark beetles that has become a major concern to forest managers, nurseries, and homeowners is the ambrosia beetle. Ambrosia beetles are extremely small, 1-2 mm in length, and live and reproduce inside the wood of various species of trees (Fig. 1). Ambrosia beetles differ from other bark beetles in that they do not feed directly on wood, but on a symbiotic fungus that digests wood tissue for them. Every year, non-native species of ambrosia beetles enter the United States through international cargo and we have now nearly forty non-native species of ambrosia beetles confirmed in the United States. Among them, the redbay ambrosia beetle (Xyleborus glabratus), originally from Southeast Asia, is the vector of the fungal pathogen causing laurel wilt, a disease that devastated the Lauracaea population in the southeastern USA, killing millions of redbay, swamp bay, sassafaras and silk bay.
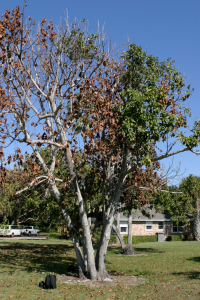
Fig. 2: A mature dooryard avocado tree with large sections of dead and missing leaves, caused by laurel wilt disease. Summer 2009 Impact Magazine image. Credit: UF/IFAS File Photo.
When these beetles attack a laurel tree, the symbiotic fungus is vectored to the tree’s sapwood after the beetle has tunneled deep into the tree’s xylem, actively colonizing the tree’s vascular system. This colonization leads to an occlusion of the xylem, causing wilting of individual branches and in a matter of weeks progresses throughout the entire canopy, eventually leading to tree death (Fig. 2). The laurel wilt disease has spread rapidly after the vector was first detected in Georgia in 2002. The redbay ambrosia beetle was first detected in Florida in 2004, in Duval County, attacking redbay and swamp bay trees. At this point, it is estimated that more than one-third of redbay in the U.S.A., 300 million trees, have succumbed to the disease.
Starting in 2017, we examined the efficacy of verbenone against redbay ambrosia beetle in live laurel trees in a natural forest setting. Verbenone is an anti-aggregation pheromone that has been used since the 1980’s to protect lodgepole pine. Verbenone also has the potential to be used over large areas and is currently being used to protect ponderosa pine plantations from the Mountain Pine Beetle in the western US.
We have found verbenone to be an environmentally friendly and safe tool to prophylactically protect laurel trees against redbay ambrosia beetle. Our protocol consists of the application of four 17 g dollops of a slow-release wax based repellent (SPLAT Verb®, ISCA technology of Riverside, CA) to the trunk of redbay trees at 1 – 1.5 m above ground level (Fig. 3). The wax needs to be reapplied every 4 months during fall and winter and every 3 months during spring and fall when temperature is higher. When compared to the control trees without repellents, we found that trunk applications of verbenone reduced landing of the redbay ambrosia beetle on live redbay trees and increased survivorship of laurel trees compared to untreated trees (Fig. 4). Verbenone should be considered as part of a holistic management system against redbay ambrosia beetle that also includes removal and chipping of contaminated trees.
If you have Redbay or other bay species on your property and are concerned about Laurel Wilt Disease or Redbay Ambrosia Beetle damage, contact your local UF/IFAS Extension Agents for help!
This article is courtesy of Dr. Xavier Martini and Mr. Derek Conover of the UF/IFAS North Florida Research and Education Center (NFREC) in Quincy.
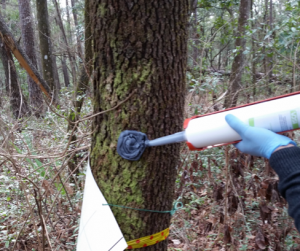
Fig. 3: Application of SPLAT Verb on a redbay tree during a field trial

Figure 4: (A): Cumulative capture of redbay ambrosia beetles Xyleborus glabratus following a single application of verbenone vs untreated control (UC). (B) Survivorship of redbay and swamp bay trees treated with verbenone on four different studies conducted in 2017 and 2018.
by Mark Tancig | Apr 30, 2020
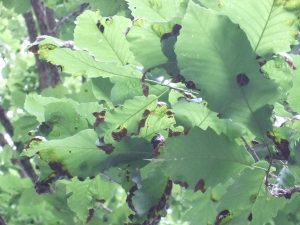
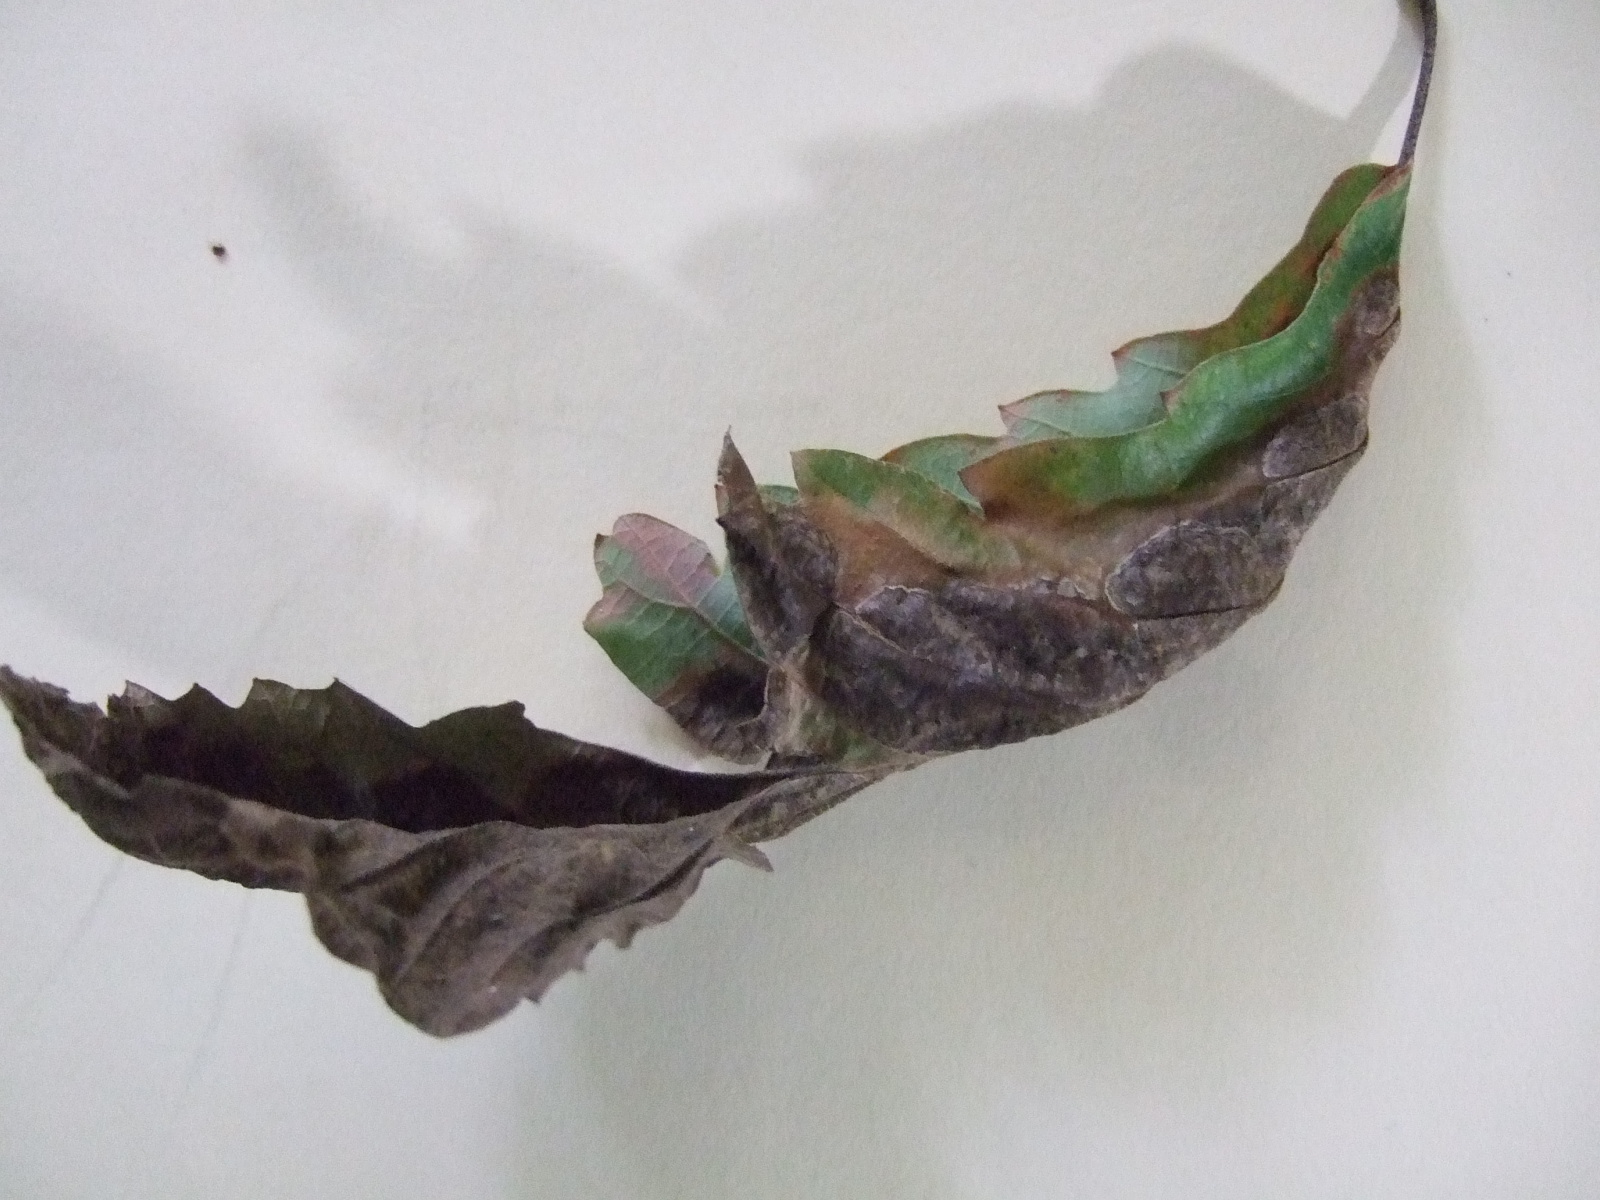
Symptoms of oak leaf blister on swamp chestnut oak. Credit: Gordon Magill.
Even during global pandemics, it’s a joy to be outside during the great north Florida spring we’ve been experiencing lately. As cold fronts come through with their rain bands, some packing a punch, they leave behind the most pleasant mornings, clear blue daytime skies, and crisp evenings. Unfortunately, we’re not the only organism that also enjoys those cool days. Many species of fungi are quite active this type of year as the rains, followed by warmer, yet not too hot temperatures, create the perfect conditions for fungal growth. Some of these fungi grow right on or in the plants we’d like to be enjoying for ourselves, stealing nutrients and causing plant decline or merely causing aesthetic damage. As this is an active time for certain species of fungi, local extension offices are getting more calls and questions regarding lawn and landscape damage due to fungal pathogens. A recent call was a new one for me and an example of a native fungi-plant interaction that looks bad but requires no intervention from us. It also highlights how correctly identifying a disease leads to the best action and can often save time and money and prevent unnecessary pesticides (in this case a fungicide) from entering the environment.
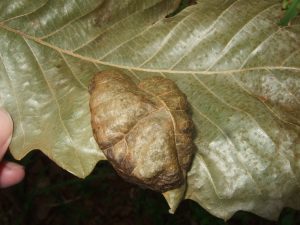
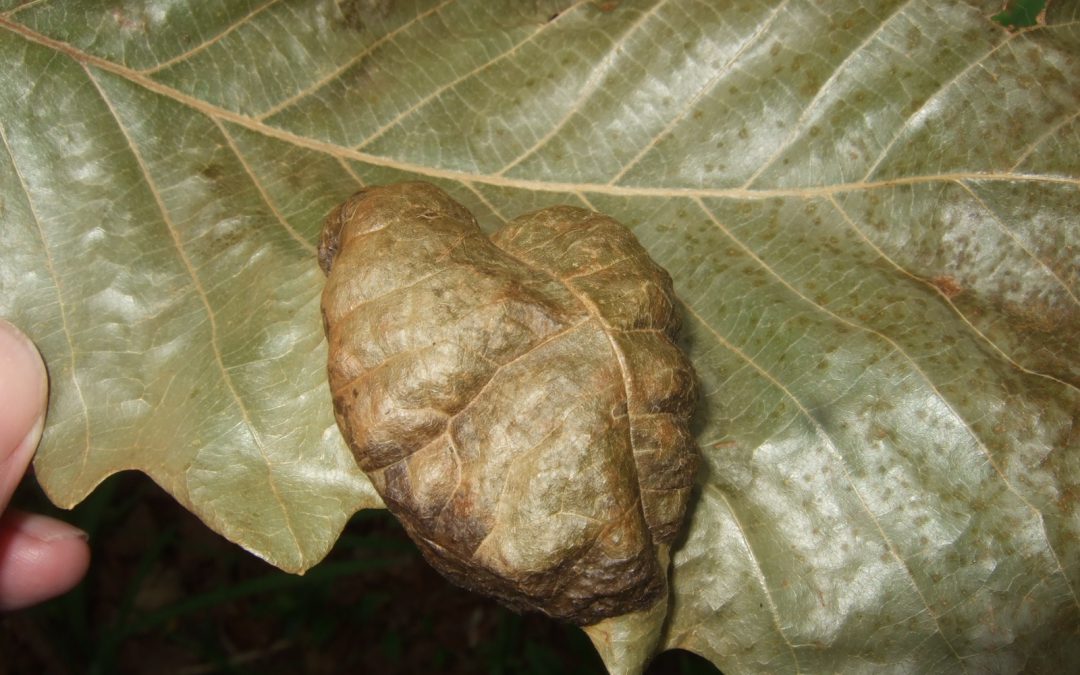
Close up of oak leaf blister on swamp chestnut oak. Credit: Gordon Magill.
The fungi and plant involved here was the oak leaf blister (Taphrina caerulescens) on a swamp chestnut oak (Quercus michauxii). It forms, you guessed it, blisters on the leaves of any of the oaks, though live oak (Quercus virginiana), laurel oak (Quercus laurifolia), and water oak (Quercus nigra) seem to be preferred hosts. The spores of the fungi, dormant since the previous summer/fall and which happen to get lodged in bud scales through wind and rain, germinate in cool, wet weather. The fungus then infects young leaves as they flush and its growth causes a disruption in the leaves’ development. This leads to the blistered look of the leaf tissue and, during extended periods of cool, wet weather, the entire leaf sort of shrivels, browns, and eventually falls off. Spores are eventually released from the fallen leaves to start the process over the next spring.
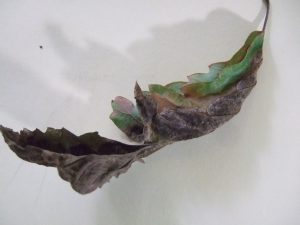
Severe oak leaf blister on swamp chestnut oak. Credit: Gordon Magill.
Though the leaves look pretty terrible, this fungal disease rarely causes plant health issues and the tree recovers just fine. Specimen trees that experience it year to year may be treated with a fungicide, but most homeowners can just let it go. Raking up and disposing of the leaves may help prevent further infections by reducing the number of spores released in the area.
As you enjoy another cool morning after an evening rainstorm, remember that the fungi all around you are also having a great day. You may want to look at your landscape plants and see if there’s anything abnormal going on. If so, take a photo and send it to your local extension office for help with identification and best methods of control, or, like in this case, just leaving it alone.
p.s. As I said this was a new one for me and I want to thank Stan Rosenthal, Extension Agent emeritus, for assisting with identification.