by Abbey Smith | Oct 24, 2024
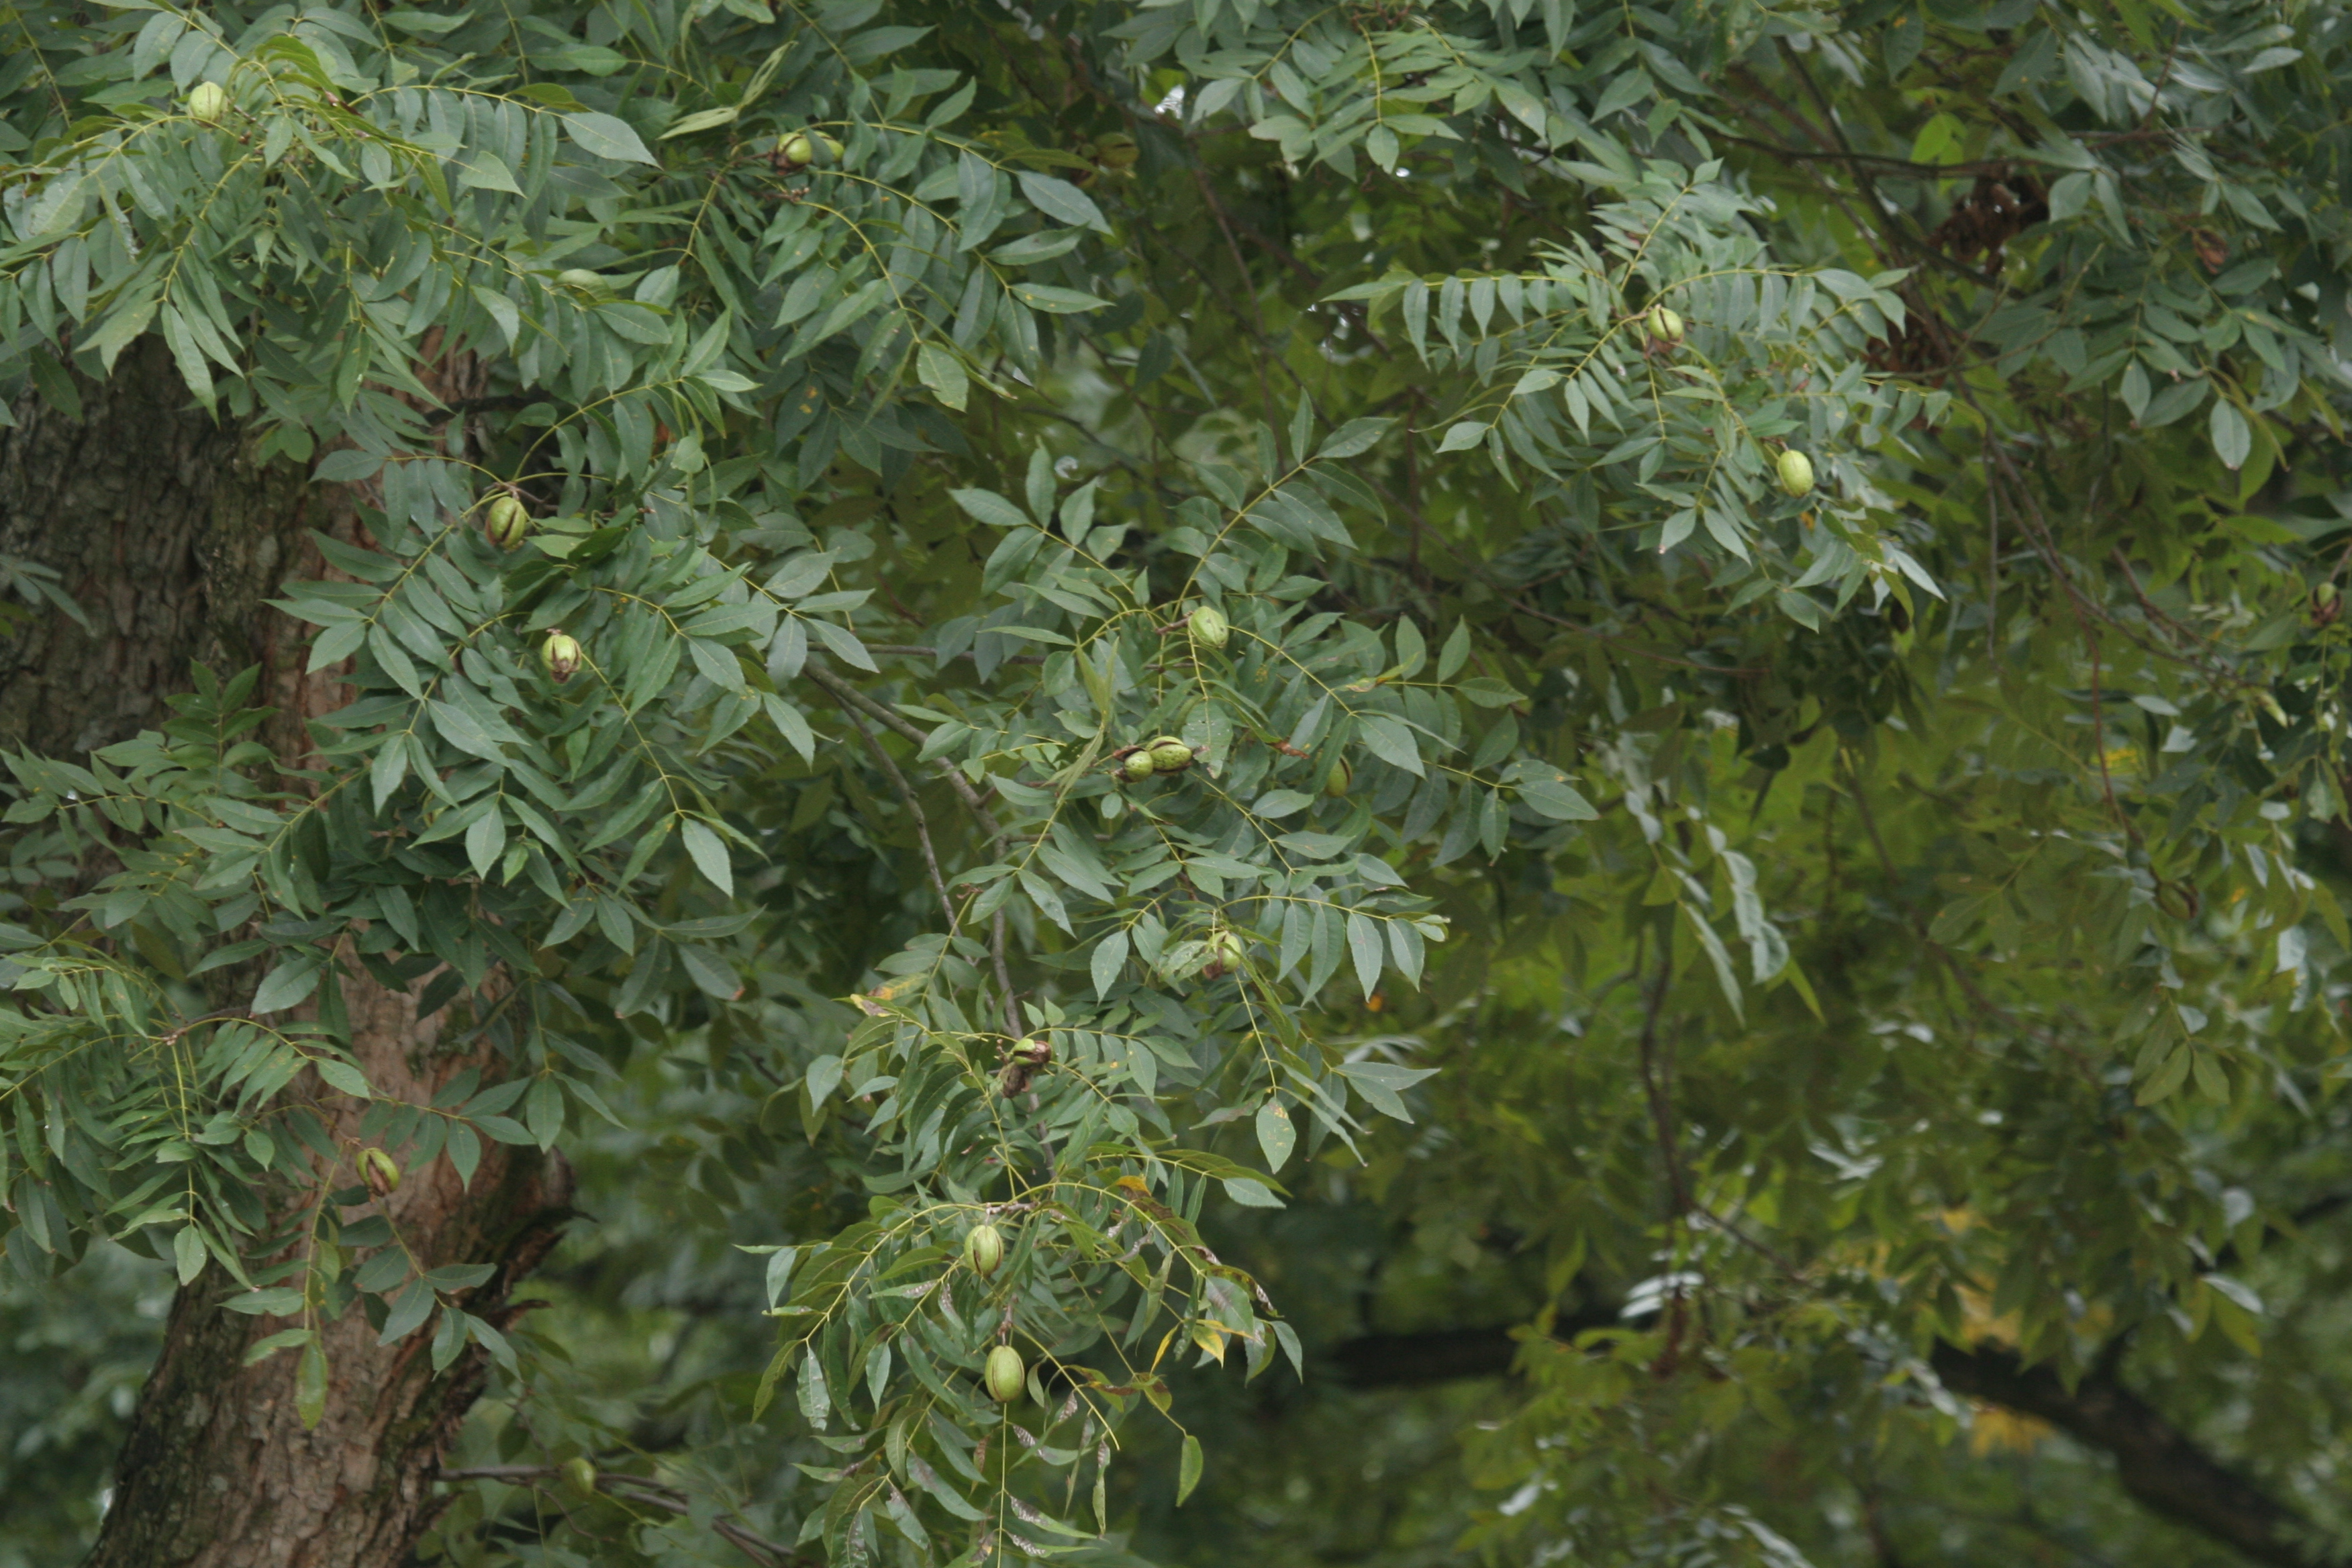
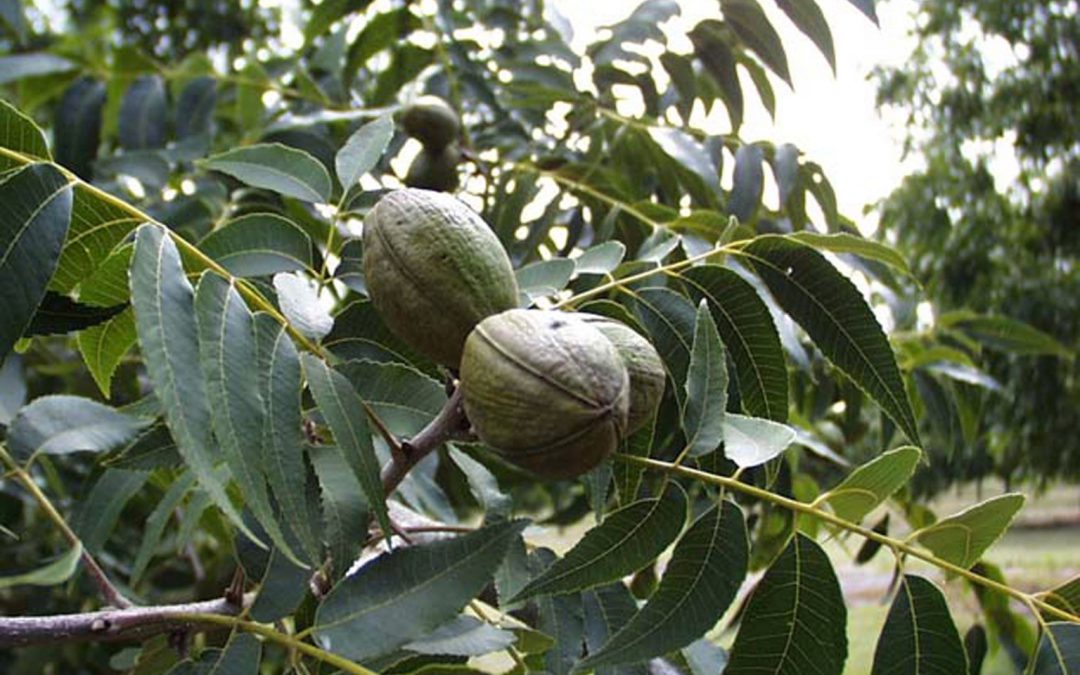
Pecan trees are a southern staple in the states of Alabama, Georgia, and North Florida, prized for their delicious nuts and gorgeous additions they make to the landscape. During October and November, we start to see the mature pecan nuts fall to the ground and these can be dried and stored for many months, making them a long-lasting and rewarding crop. Here is what you need to know to install pecan trees of your own at home.

Pecan tree grove in North Florida. UF/IFAS Photo: Thomas Wright.
Choosing the Right Variety
Florida’s warm climate and extended growing season creates excellent conditions for pecan trees. But not all pecan tree varieties thrive in Florida’s climate. Because of the humid conditions that the state presents, some varieties are more susceptible to common diseases such as pecan scab. The recommended varieties for Florida include:
- ‘Elliot,’ ‘Excel,’ ‘Lakota,’ and ‘Sumner’ are typically the first varieties to be recommended because they have an excellent resistance to pecan scab.
- ‘Cape Fear,’ ‘Caddo,’ ‘Desirable,’ and ‘Kiowa’ are recommended on a case-by-case basis due to their high quality nut production but will require constant scouting due to their low disease resistance. These varieties are typically seen on a commercial production scale.
- The ‘Stuart’ pecan tree produces high quality pecans, but it can take up to 10 years to see any signs of production, so it is not commonly installed into the home landscape.
When planting your pecan trees, be sure to purchase trees from reputable and certified nurseries to ensure healthy, disease-resistant plants that produce high-quality nuts.
Planting and Soil Requirements
Pecan trees need well-drained soil with a pH of 6.0 – 6.5. If you are unsure of your soil’s pH, it is wise to take a soil sample prior to installing your trees. Contact your local UF/IFAS Extension office for more information. Here are a few things to consider when planting pecans:
- Site Requirement: It is important to remember that pecan trees require full sun and plenty of space to grow, as they can reach at least 70 feet in height with a wide canopy. They will need to be planted away from structures and power lines.
- Planting Depth: Pecan trees should be planted during the dormant season (November-February) and require a planting hole no bigger than 2 feet wide and 2 ½ feet deep to allow the taproot to extend directly into the ground.
- Tree Spacing: Older trees need to be spaced at least 60 to 80 feet apart. But younger trees or newly planted trees need to be spaced not as far as this. Pecan trees must cross-pollinate to produce nuts, so they must be close enough to share their pollen but far enough apart to not hinder the other trees’ root growth. Initial spacing can range from 30 to 40 feet apart.
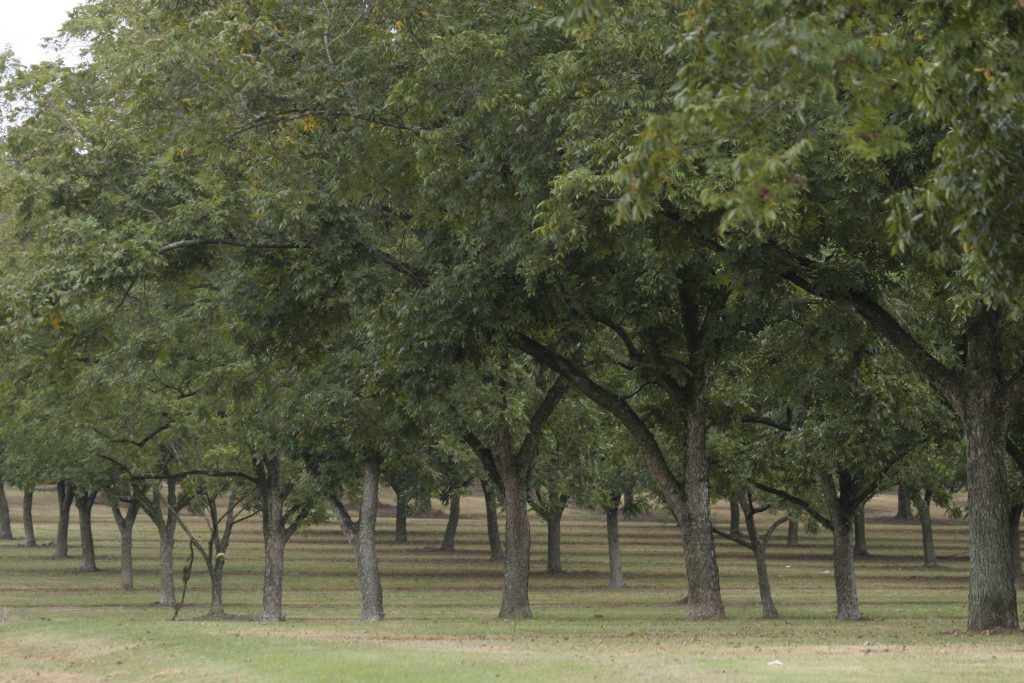
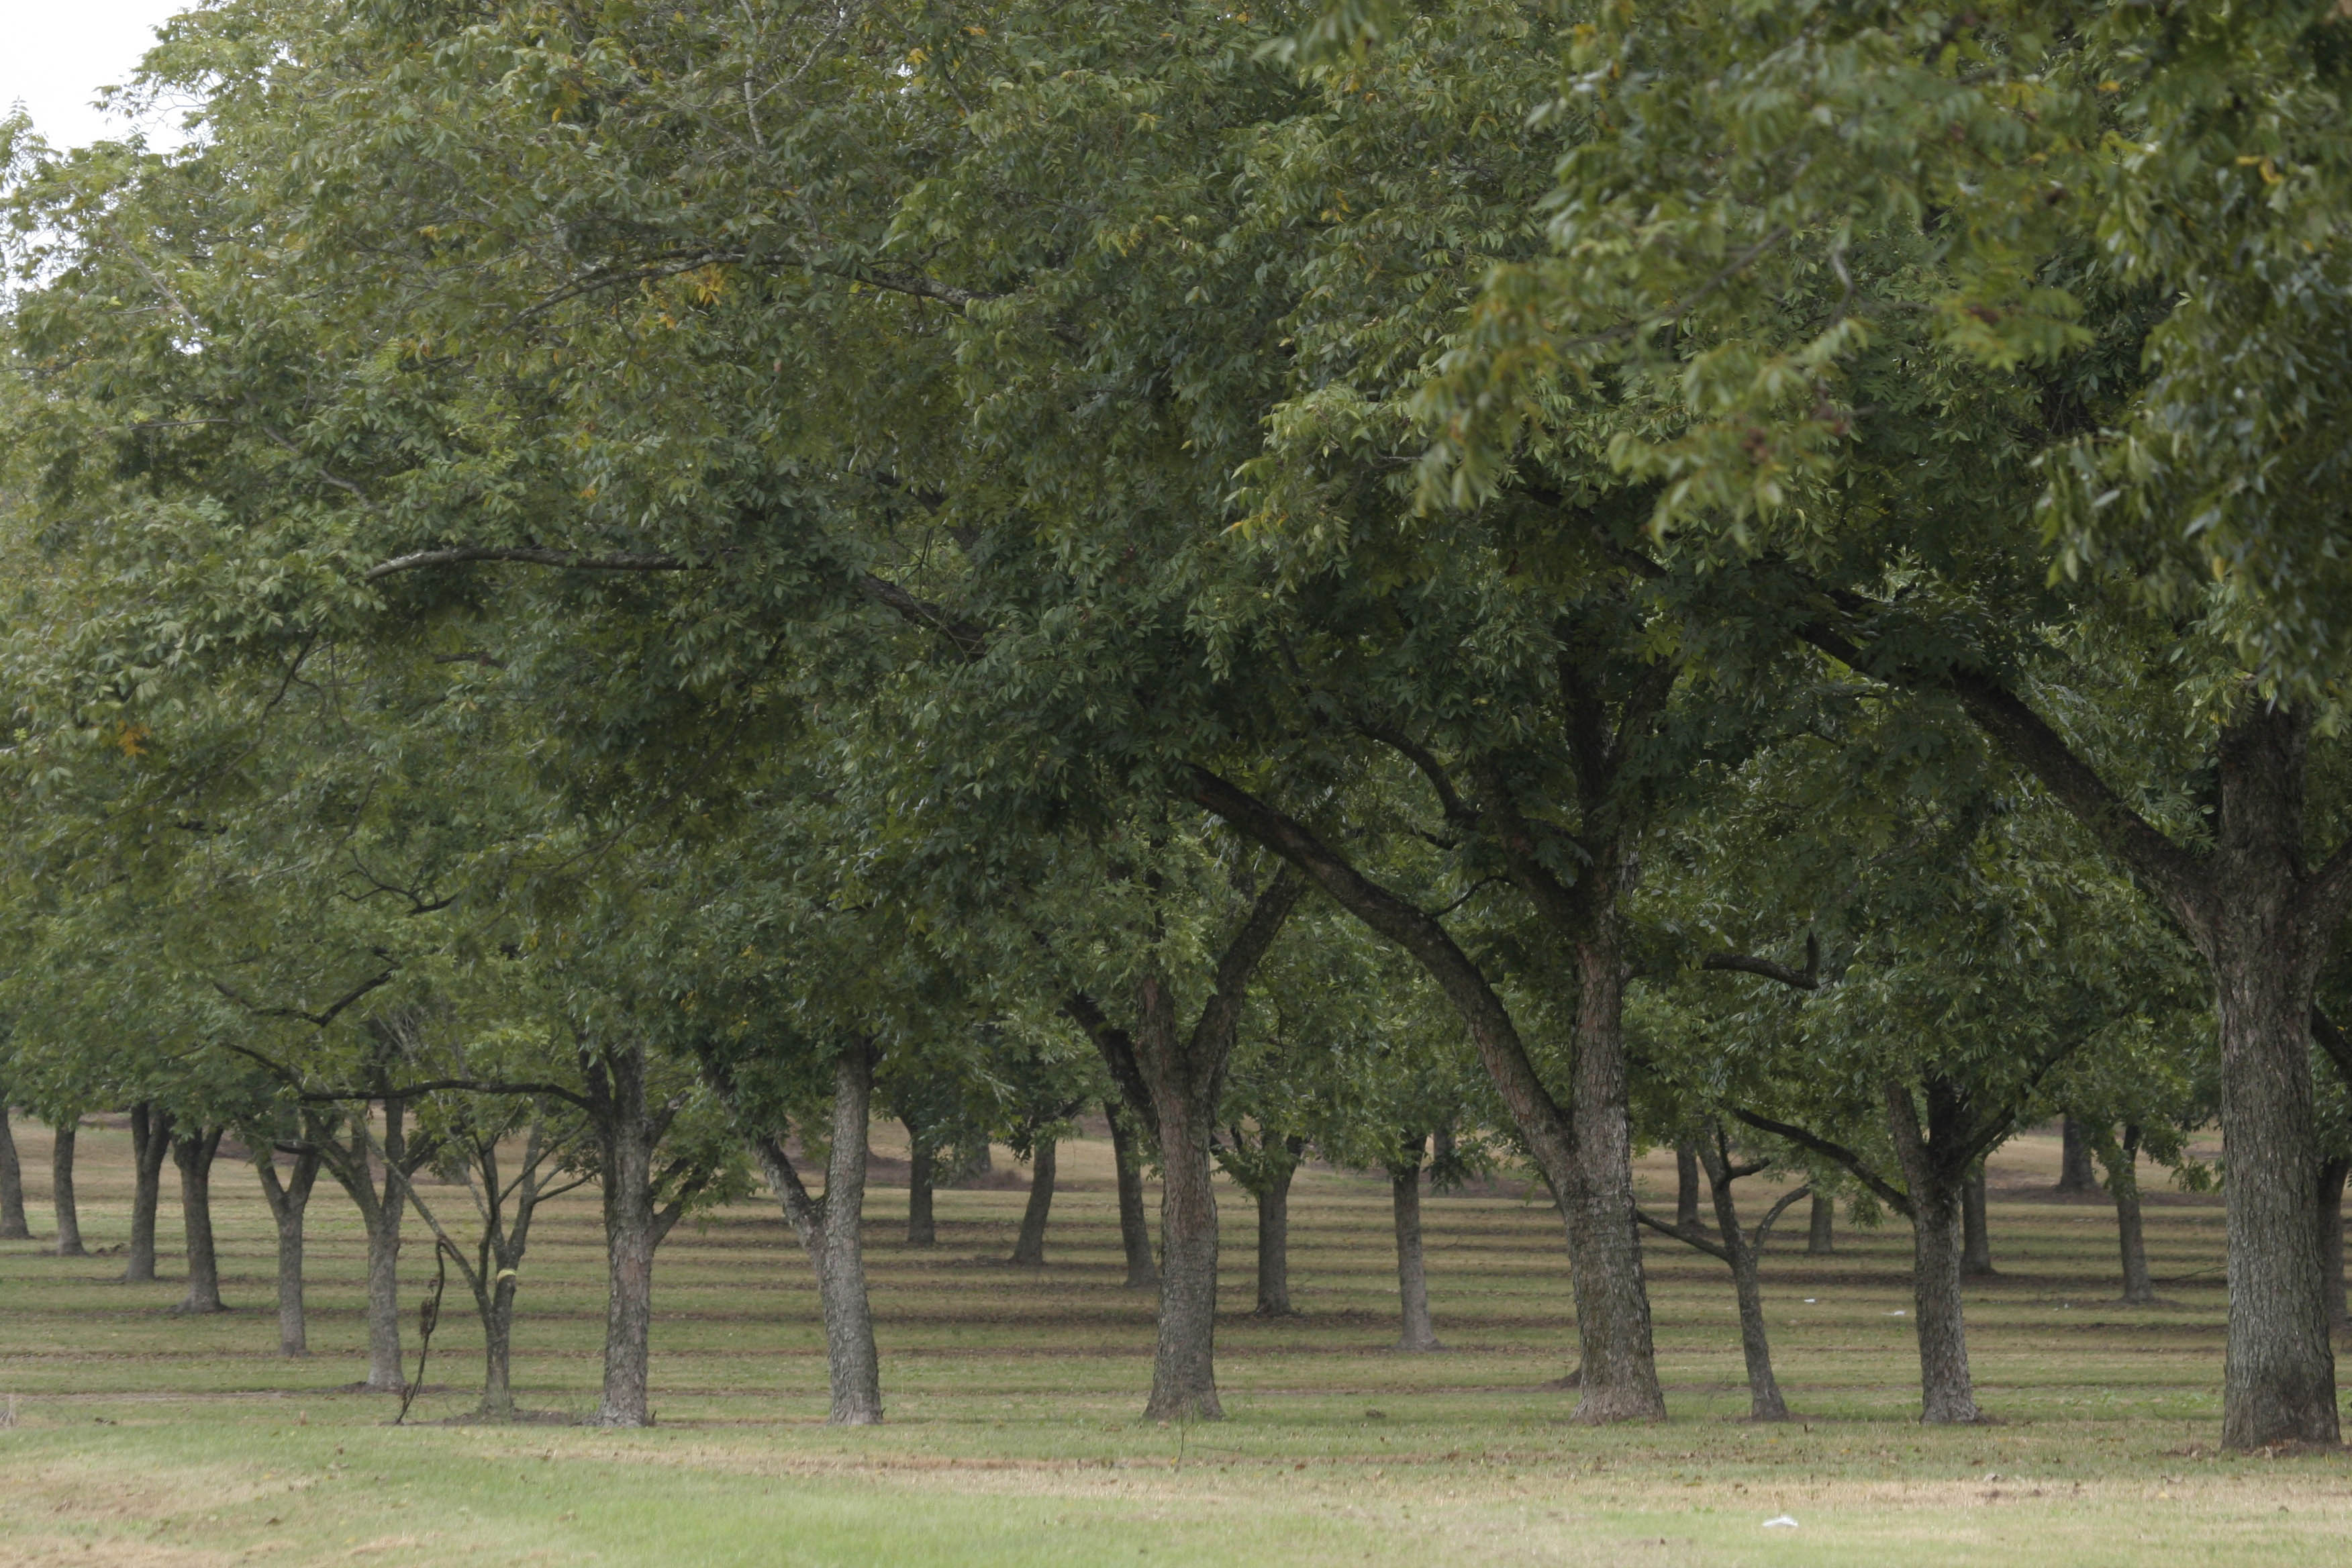
Pecan tree grove in North Florida. UF/IFAS Photo: Thomas Wright.
Fertilization and Watering
Young pecan trees need consistent watering after recently being transplanted to help establish their root system efficiently. Once established, pecan trees be relatively drought tolerant, but still benefit from deep watering during the dry periods. Irrigation is the most critical during the establishment of the first year. For the first 2 years of the tree’s life, they may require up to 10 gallons of water per day based on the current weather conditions. For fertilizer, apply 10-10-10 in early March through June. Fertilizer should be applied in a circle around the trunk of the tree. Avoid placing fertilizer directly against the trunk of the tree.
Growing pecan trees in Florida requires some planning and maintenance, but the rewards are well worth the effort. With the right variety selection, planting care, and attention to irrigation, you can have a bountiful harvest of homegrown pecans for your family to enjoy Whether you’re planting a single tree or a establishing a small orchard, pecan trees are a valuable and delicious to any Florida landscape. For more information, please visit:
https://edis.ifas.ufl.edu/publication/HS229
https://gardeningsolutions.ifas.ufl.edu/plants/trees-and-shrubs/trees/pecan/
by Joshua Criss | Oct 4, 2024
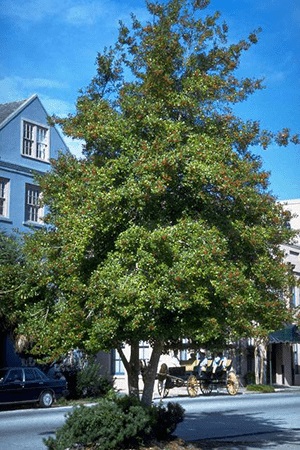
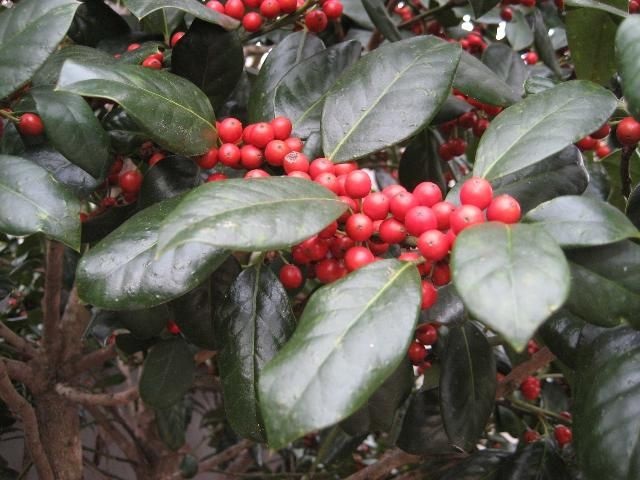
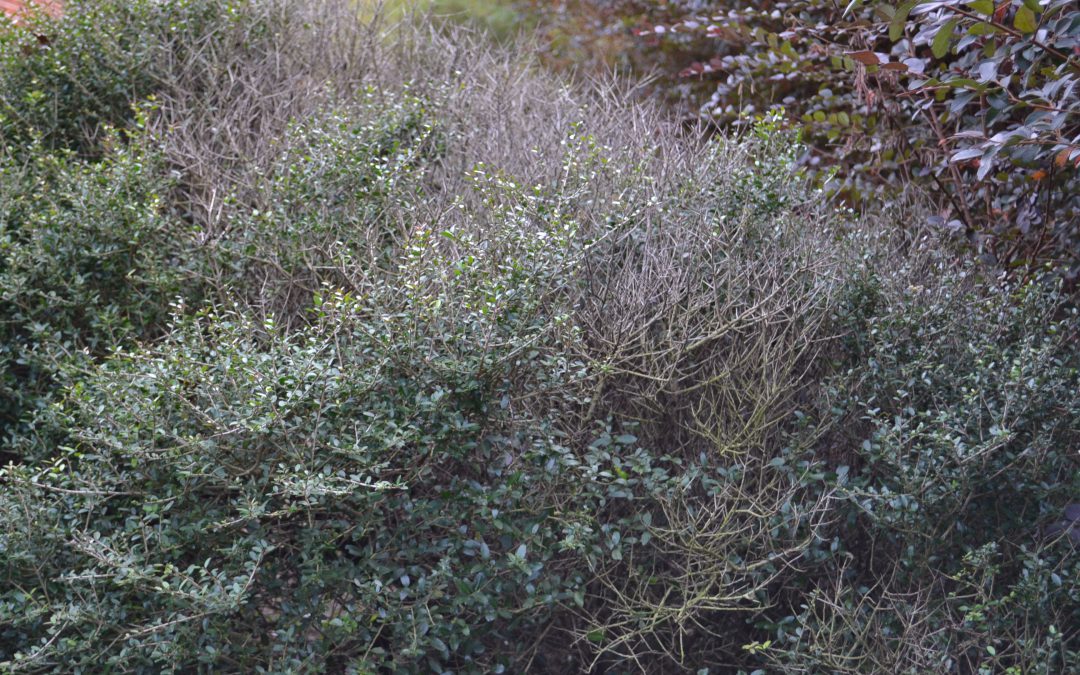
Winter color is not always easy to find here in Florida. While staple annuals such as snapdragons (Antirrhinum majus) require planning and extra effort in the autumn. Instead, envision a perennial powerhouse that will not only provide colorful berries when the temperature drops but is a pollinator magnet in the spring. The Holly tree (Ilex spp.) perfectly embodies this vision. These low-maintenance evergreens, with their waxy leaves and colorful berries, are a sight to behold in your landscape, whether as a hedge or an accent plant.
Where and How to Plant
Hollies generally prefer partial shade and well-drained soils. However, exceptions exist, such as the Dahoon holly (Ilex cassine), adapted to wetter environments. Whatever cultivar you place in your landscape, following the planting and care instructions is crucial. Plant it in a hole approximately one foot wider than the root ball. Dig deep enough to cover most of the root ball but shallow enough so the uppermost root is slightly above the soil line. This may be counterintuitive, but roots need air to thrive, and shallow planting allows infiltration in the rhizosphere. To regulate soil temperature and soil moisture, add a 2-3 inch layer of mulch around the base of the plant. It is critical to leave some space between the tree trunk and mulch.

Photo: Edward Gilman, UF/IFAS.
Cultural Practices for Success
Irrigation is critical to establishing these plants, which should take between 3 and 6 months. Once established, cease irrigation except in drought conditions. Don’t apply too much water in either case, as hollies will suffer with wet feet. Fertilizers should be applied twice yearly in March and September. Have your soil tested before applying fertilizer to ensure a complete nutrient profile.
Pruning is not routinely required with holly trees. It is advisable to remove dead, diseased, and dysfunctional branches. Dysfunctional branches are those that grow back toward the main leader of the tree. These risk rubbing against one another, causing wounds that may become infiltration sites for pathogens. You should also remove sprouts coming from the root zone, commonly called suckers.
Potential Issues
Pests and pathogens are infrequent in hollies and are usually the product of improper growing practices. Occasionally, scale or spittlebug insects can infest the tree. Their presence will be punctuated by the appearance of blackened leaves, which is a symptom of sooty mold. Scouting these plants often will allow early detection and control of these pests. Some pathogens may also affect these trees. Most often, these are fungi caused by excessive moisture. Look for dieback or strange growth patterns in the plant’s foliage. When you see these, make sure the roots are not waterlogged.

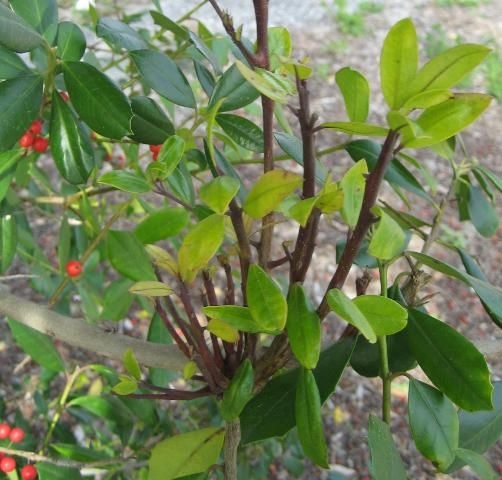
Photo: UF/IFAS
Summing Things Up
Hollies are an excellent and low maintenance addition to any landscape. Their berries and flowering patterns provide multiple seasons of interest and are a resource for birds and pollinators alike. For more information on Florida wildflowers, see these Ask IFAS documents, or contact your local extension agent for additional information on this and any topic regarding your gardens and more.
by Ray Bodrey | Sep 4, 2024
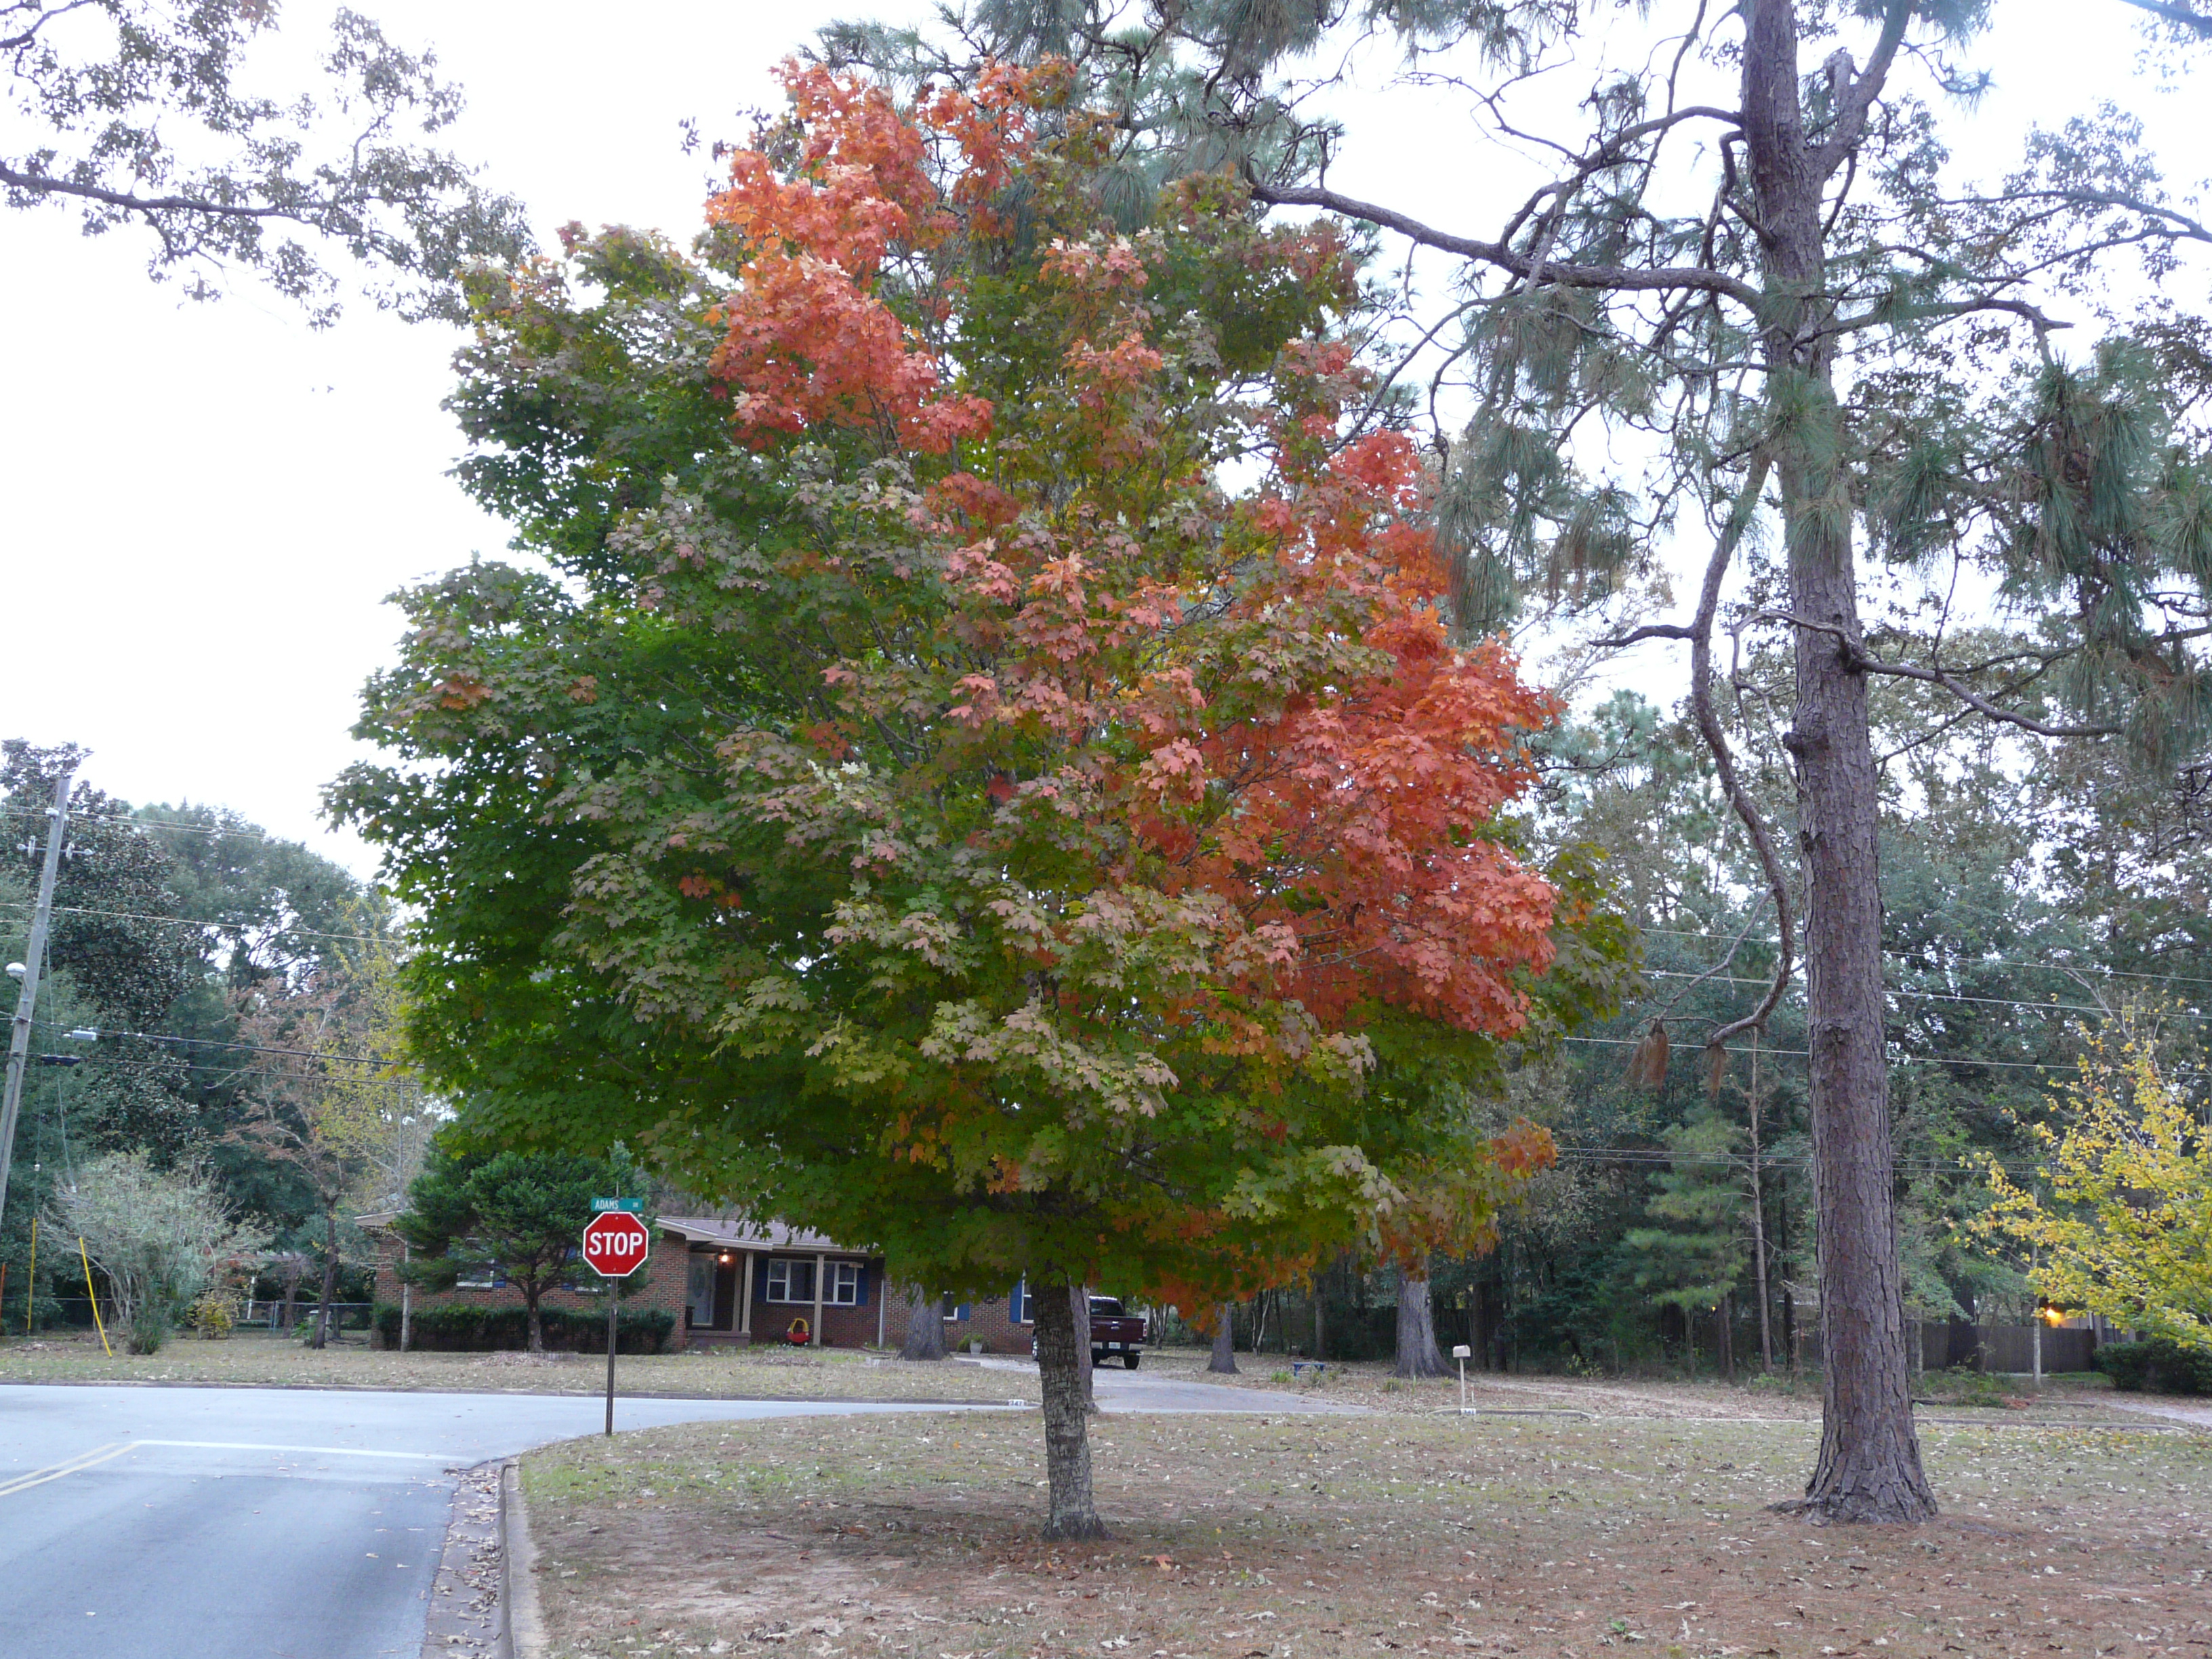
Fall is a season that is synonymous for two great joys in life…..football games and the changing leaf colors! However, in Florida we just don’t have the incredible burst of vivid fall leaf color as our northern neighbors enjoy each year, but we do have enough temperate region plants that can give us some seasonal change in foliage.
So what makes this brilliant display of autumn leaf color anyway? This seasonal change is brought on by a few variables, such as lower temperatures, shorter photo period/shorter days and chemical pigments found in leaf tissues. Some of the pigments that give autumn leaves their bright colors are actually present in the leaves as soon as they unfold as flush in early spring. But, during spring and summer, when the plants are growing vigorously, a green-colored material called chlorophyll dominates and shades out the other leaf pigments.
Chlorophyll plays on important role in a process called photosynthesis, which is the process by which plants capture energy from sunlight and manufacture food. Chlorophyll can also be found in water bodies and is an indicator of water quality. As plants get ready for cool season dormancy, the production on new chlorophyll decreases to almost being nonexistent. That’s when the before mentioned pigments, also called carotenoids, take over and make the leaves turn brilliant orange, red, purple and yellow.
There are some plants in the Florida’s landscape that do provide good fall color. Unlike most of the flowering shrubs, which hold their blossoms for only a brief period, the trees and shrubs that turn color in the fall will usually retain their varied hues for a month or more, depending on the weather.
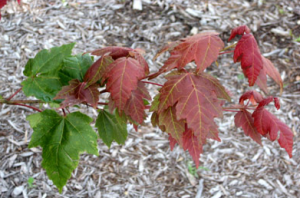
Red Maple. Credit. UF/IFAS Extension
What are some examples of trees that will lend fall color in your Panhandle landscape?
- Shumard Oak
- Turkey Oak
- Ginkgo
- Hickory
- Golden Rain Tree
- Red Swamp Myrtle
- Dogwood
- Red Maple (see photo)
- Sweet Gum
- Black Gum
- Crape Myrtle
- Tulip Tree
- Bradford Pear
- Cypress
What about annuals that provide color in the fall? Petunias, pansies and snapdragons will be in full bloom over the next few months.
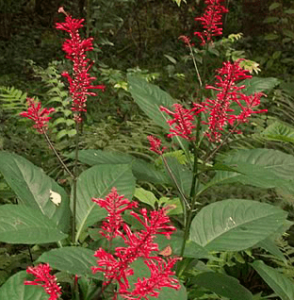
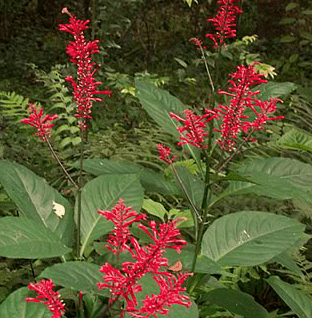
Firespike. Credit. UF/IFAS Extension
What about blooming perennials for fall? Salvia, firespike (see photo), chrysanthemum, beautyberry and holly are great for color in the fall and attract wildlife to your landscape.
A mix of these plants will ensure fall color in your landscape. For more information contact your local county extension office.
Information for this article was provided by Patrick Minogue, Forestry Specialist with UF/IFAS North Florida Research and Education Center, as well as the UF/IFAS Gardening Solutions: https://gardeningsolutions.ifas.ufl.edu/design/outdoor-living/gardening-for-fall-color/
by Sheila Dunning | Jun 13, 2024
You may recognize the arrival of summer because of the intense buzzing sound coming from the trees. It can last all day long, with changes in the pitch and pattern of the screaming.
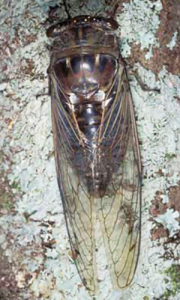
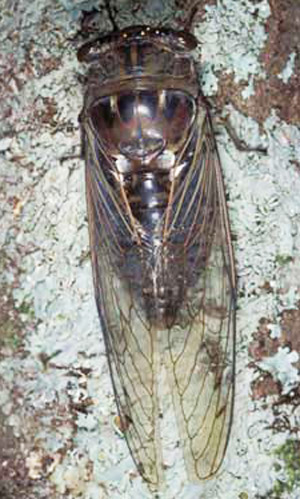
Dusk-calling cicada, Tibicen auletes (Germar). Total length (head to tips of forewings) is 64 mm (about 2 1/2 inches). Photograph by Lyle J. Buss, University of Florida.
Cicadas are large (3/4” – 2 ½”) winged insects with stocky bodies and bulging eyes. They spend the vast majority of their lives underground, emerging in massive numbers for just a few weeks to mate and lay eggs. This behavior often earns them the name “locusts,” which entomologically they are not.
In much of the eastern United States, periodical cicada (Magicicada spp.) broods rise up out of the ground every 13 or 17 years. In the summer of 2024, two different broods (one group of 13-year cicadas and one group of 17-year cicadas) will arrive at the same time across 16 states. The closest to us will be mid-lower Alabama. Approximately one trillion insects are anticipated. This only happens once every 221 years.
By emerging in large numbers, the cicadas are able to reduce the potential of being eaten by predators. Though many will be lost to birds and killer wasps, enough will survive to be able to reproduce.
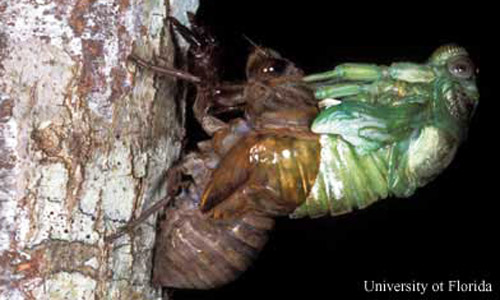
Unlike the broods of periodical cicadas, populations of Florida’s 19 cicada species produce adults every year. However, the nymphs still spend several years developing underground. The nymphs use their piercing-sucking mouthparts to feed on the xylem sap in the roots of trees. The feeding can weaken already stressed trees. Most trees tolerate the damage quite well. After gaining enough nutrients, the nymphs wait for the soil to warm enough (approximately 64° F. at six inches deep) before crawling out of the ground, climbing up the tree trunk, and molting into adults with wings. You can often find the empty shed exoskeleton still hanging on the tree trunk.
The adult male spends all day being as loud as possible in order to attract the girls. Each species has its own song. Large numbers of insects create more noise. Male cicadas have a pair of tymbals located on the sides of their abdomen. Tymbals are corrugated regions of the cicada’s exoskeleton that can be vibrated so rapidly that the clicking sound becomes a high-pitched buzz. Cicadas with the best abs get the girls and reminds all the humans that summer is here.
To learn more about cicadas and train your ears to the different species call go to: https://entnemdept.ufl.edu/creatures/misc/bugs/cicadas.htm
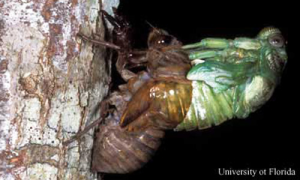
Cicada (Tibicen sp.) escaping its nymphal skeleton. The cast skeleton will remain attached to the tree. Once free, the adult will expand its wings, darken, and fly away. Photograph by Lyle J. Buss, University of Florida.
by Daniel J. Leonard | May 9, 2024
In the last couple of weeks, I’ve had multiple questions regarding trees and shrubs that aren’t looking too hot. These types of calls are common this time of year – it has gotten hot and dry, and plants have fully emerged from winter, causing issues that have been hiding under the surface during the dormant season to manifest as crown or branch dieback. While there are a wide variety of things that can cause dieback, in most cases a little detective work can help pinpoint the issue. Let’s look at a few of the most common causes of dieback and some corrective measures that may help restore the plants to health.
The first thing to do when you notice a plant in decline is nothing. Don’t try and oversaturate it with water. Don’t run out and dump a bunch of fertilizer around it. Many times, these panic measures exacerbate the stress the plant is already under. Instead, I encourage you to give us a call at your local UF/IFAS County Extension Office. We can likely help identify the cause of the problem through a site visit to your property or by you sending us diagnostic photos of the plant with a description of what’s been going on with it – the more information you can provide about the plant and the management practices it has experienced, the better (you can email diagnostic images/information to d.leonard@ufl.edu).
The most common cause of tree/shrub dieback that I see arises from improper planting practices. Most landscape plants should be planted at or just above the surrounding soil level, preferably where the topmost root arises from the trunk. To accomplish this, planting holes should be dug slightly shallower than the rootball’s height and about twice as wide. Planting any deeper than that is probably too deep and can cause problems like trunk and root decay, which lead to crown dieback. Unfortunately, once a plant is planted too deep, it cannot be corrected other than digging up and replanting at the proper depth, which may or may not be possible depending on the size of the tree. Another common issue that can arise after planting is girdling roots. This occurs when plants are grown in plastic containers and develop a root system that circles the inner wall of the pot. If not trimmed, the plant’s root system will continue to grow in this manner, eventually encircling the plant’s trunk, cutting off water and nutrient flow, and leading to crown dieback. Fortunately, this condition can be prevented by cutting, removing, or redirecting these roots at planting.
The next most common cause of plant dieback occurs due to soil disturbance by people. It’s easy to forget but the root zone of trees and shrubs can reach out several times farther than the plant is tall and is easily damaged. Disturbances to the root zone from digging or trenching near trees or compaction from prolonged vehicle travel over the area cause damage that might be slow to appear but can lead to plant decline. If you are doing construction or building near a shrub or tree, try to keep digging machinery as far out of the root zone as possible and avoid repeatedly parking or driving vehicles over the root zone area. Like below ground root damage, trunk damage that occurs from injury by string trimmers, mowers, or animal feeding activity can all disrupt the flow of water and nutrients in plants and prove deadly. There is no cure for this type of damage, so employing physical barriers to prevent damage is key.
The last major stress is environmental in nature and is caused by a water imbalance – either too much or not enough. Dry soil conditions during the planting and establishment phases (first several years after planting) should obviously be avoided if possible – keeping the developing rootzone moist and allowing plant roots to establish in their native soil is critical. Too much water can also cause problems for trees planted in poorly drained soil. Excessive moisture leads to root diseases, which ultimately presents as dieback in the canopy. If planting in an area that tends to stay wet, select a species of plant adapted for that sort of site – some species are more tolerant of “wet feet” than others. While many people expect disease and insect damage to be the cause of an unhealthy plant, they’re often not the biggest culprit and, if they occur at all, are generally secondary to one of the above issues.
For more information about crown dieback or declining landscape plants, contact your local UF/IFAS County Extension office. Happy gardening!