by Mark Tancig | Nov 13, 2025
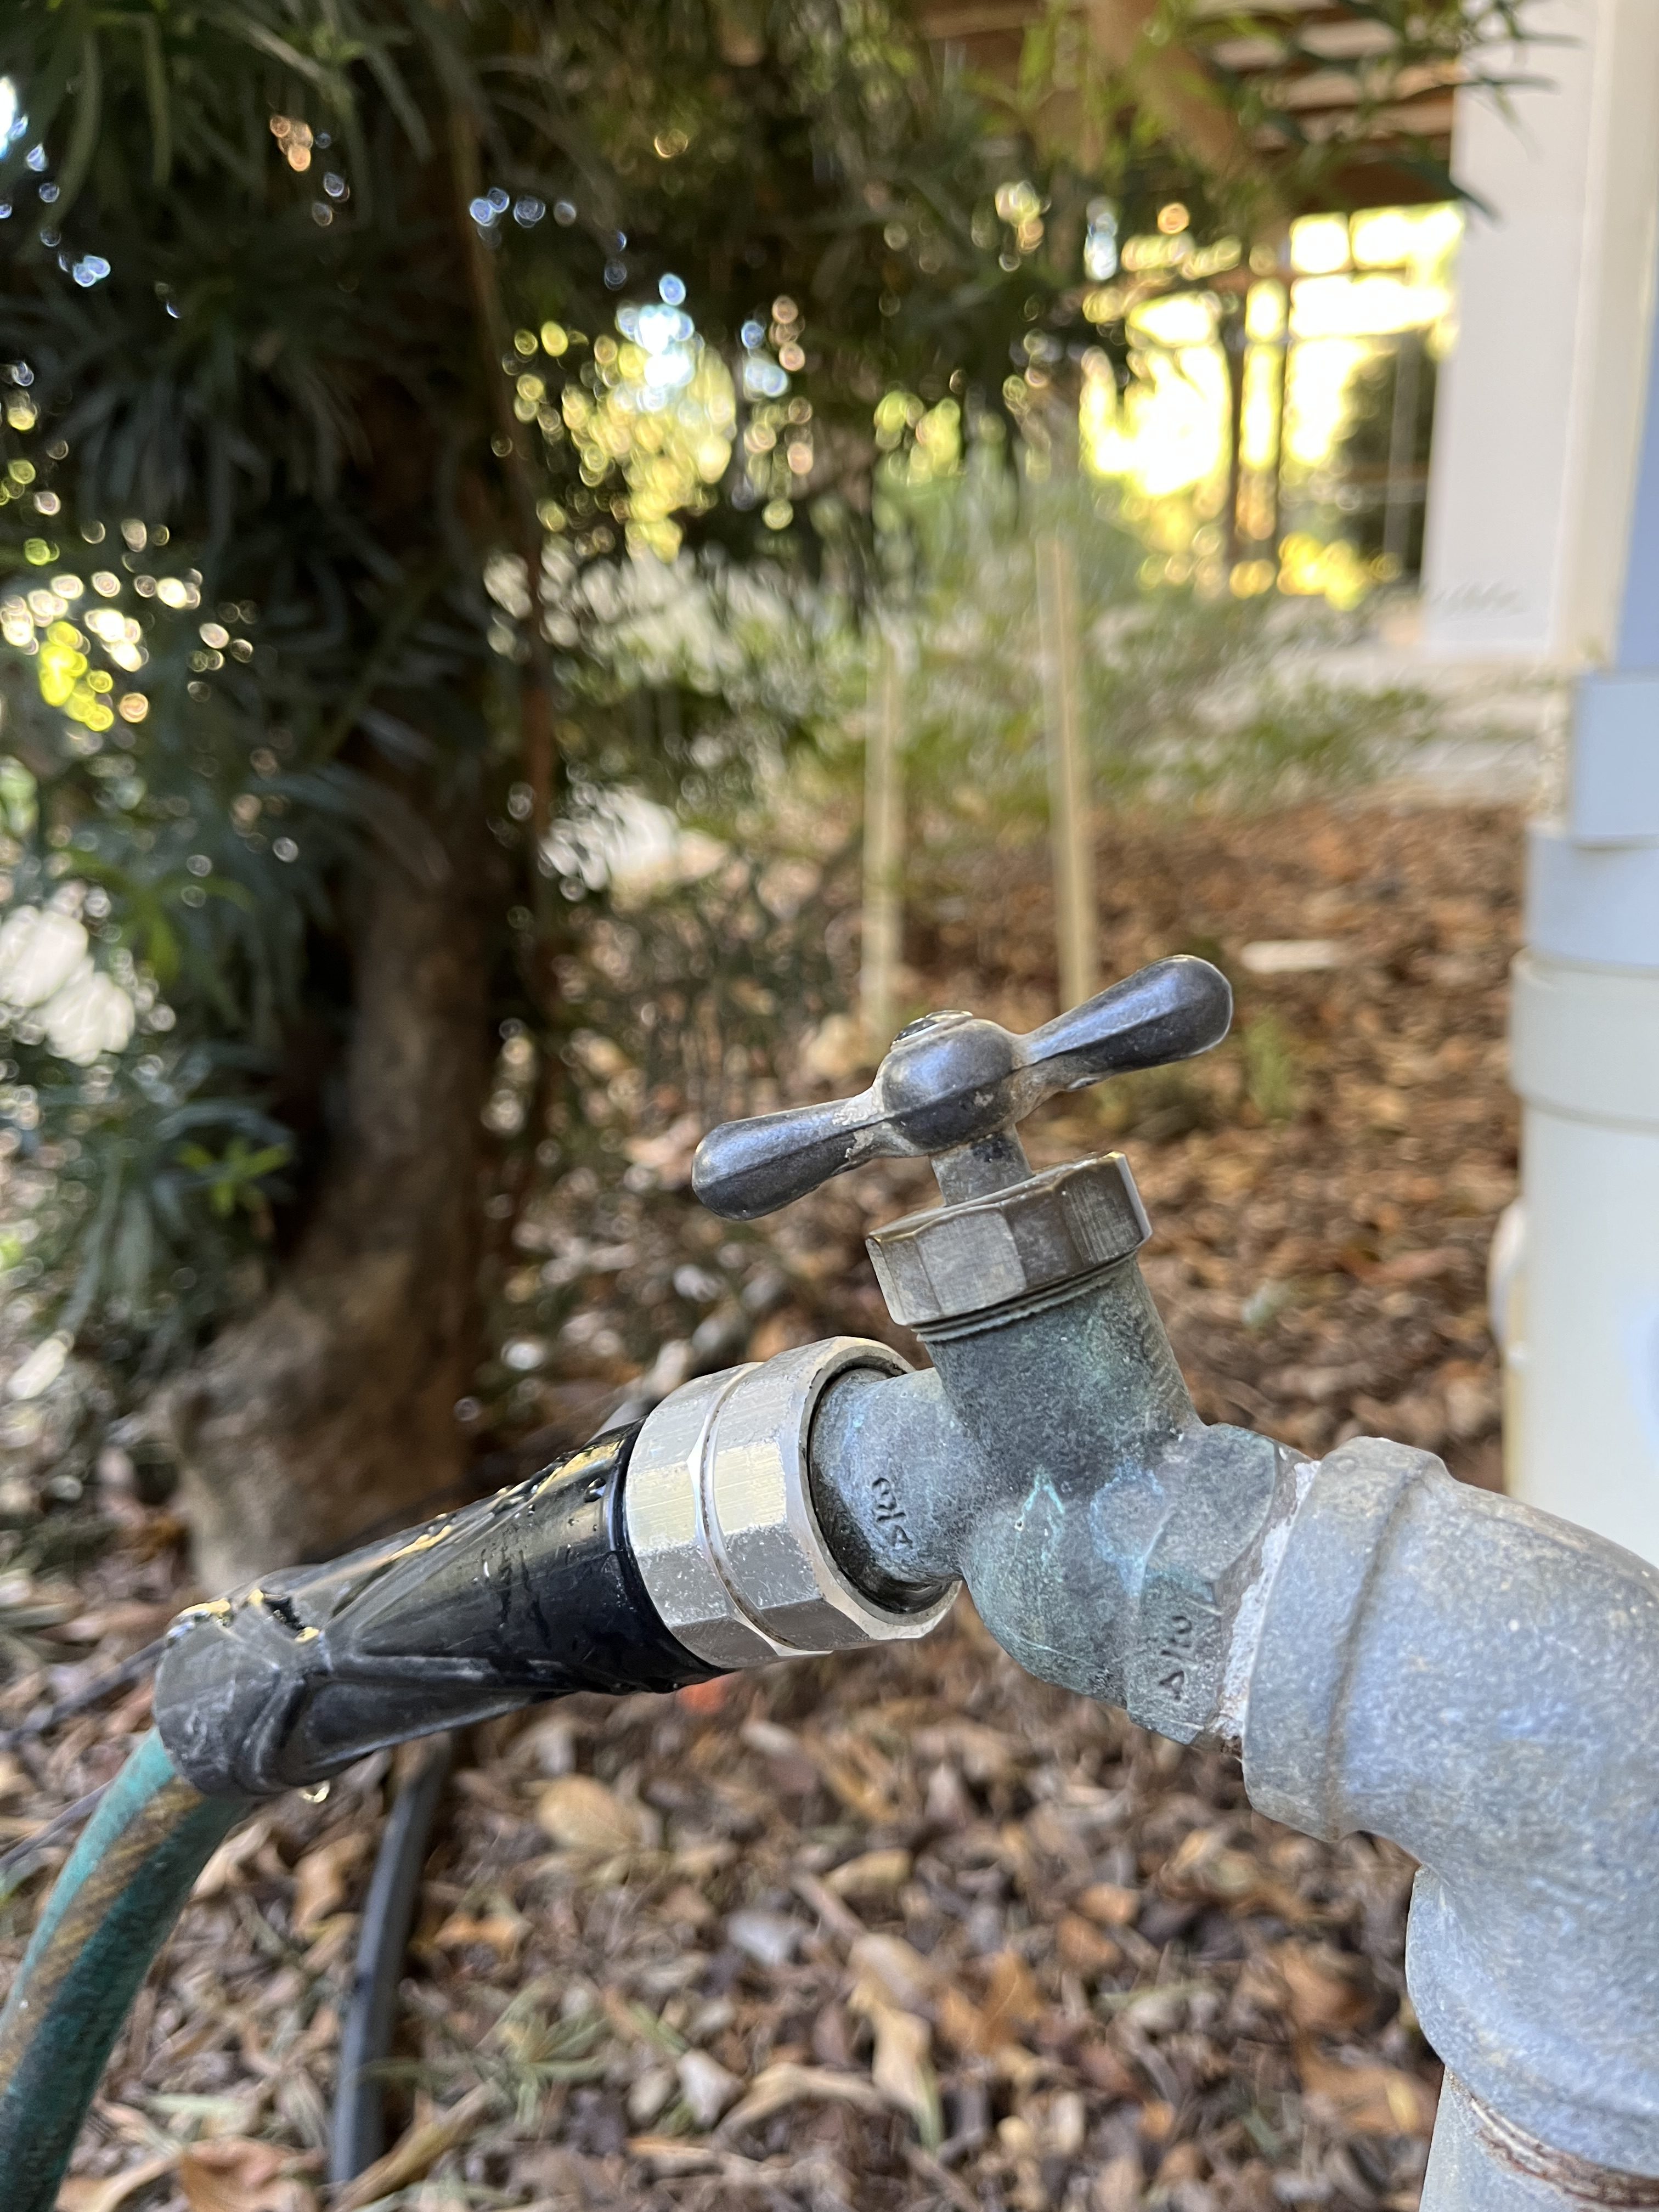
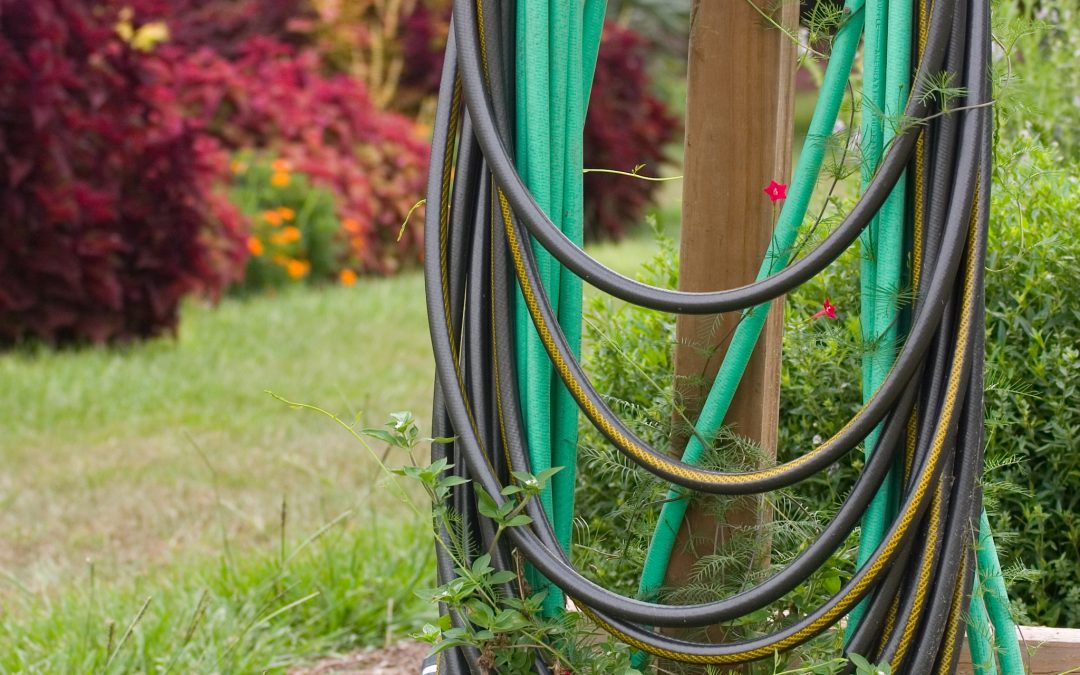
A common site in the garden – multiple hoses pieced together. Be aware of galvanic corrosion! Credit: Tyler Jones, UF/IFAS.
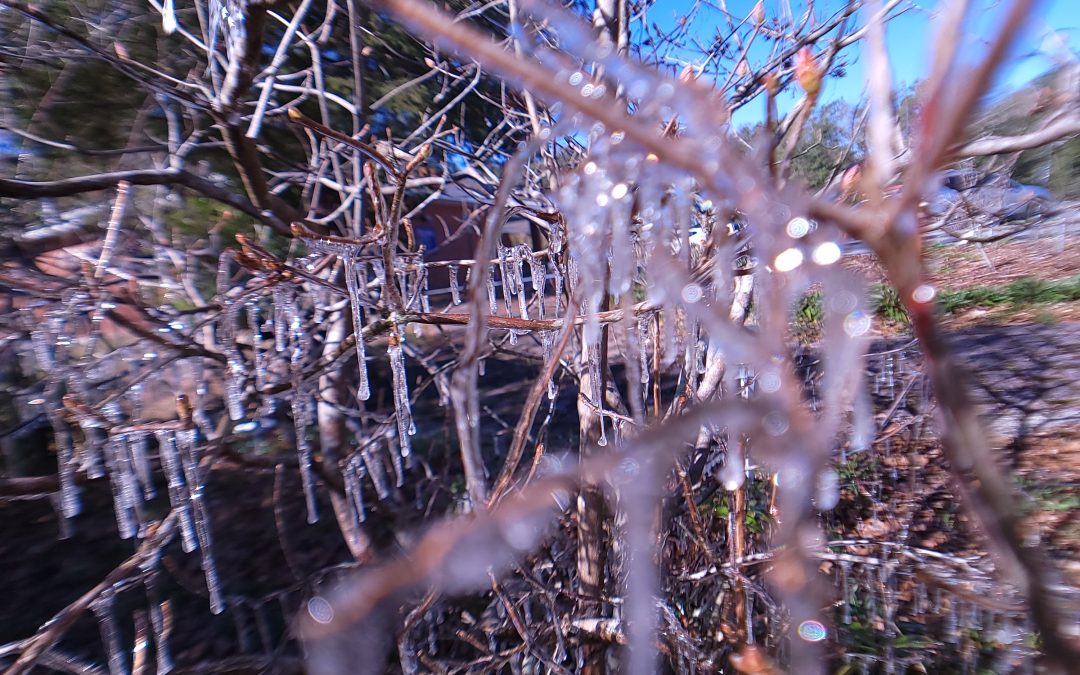
It was the best of times, it was the worst of times. It was a nice day in the garden, but when you go to disconnect the hose, it is somehow stuck to the spigot, connector, or other hose. You go and get the pliers, but the hose just doesn’t budge. If this has happened to you, then you now know of the chemical reaction that can occur between aluminum and brass hose fittings. Hopefully, this is just two hoses stuck together, and you can cut them off and replace them with new ends. If the hose is connected to the spigot and won’t budge, you may want to contact a plumber before you create a bigger problem.
While knowing the name of this chemical reaction, galvanic corrosion, doesn’t help you while you curse these hose fittings, it is yet another scientific discovery in the garden. Galvanic corrosion occurs when two dissimilar metals are in electrical contact with each other in the presence of an electrolyte. The metals must be dissimilar in their electrochemical voltage. I know, you just want to disconnect hoses, not learn physics, but this stuff is interesting! Basically, aluminum is pretty reactive, especially when joined up with brass, bronze, copper, and even stainless steel. In the case of our hoses, the water acts as an electrolyte thanks to the calcium present in our delicious and abundant limestone aquifer groundwater. You put all these together and, bazinga, you have the aluminum hose end corroded into your brass hose end so strongly that no pliers will ever unlock them.

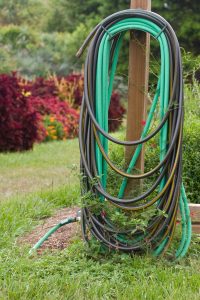
This won’t work out well for too long! Aluminum hose end on a brass spigot will lead to galvanic corrosion. Credit: Mark Tancig, UF/IFAS.
So, what do you do to prevent this? The easiest way to prevent galvanic corrosion from ruining your nice day in the garden is to only purchase products with the same material as your spigots. Brass spigots, hose bibs, and hose ends have been the industry standard, while aluminum hose endings seem to be more of a recent occurrence. Aluminum is cheaper, so you can understand why the hose companies would be interested in switching. If you already have two different materials, first check and see if you can get them disconnected. If not, start purchasing new hoses that match the spigot and/or connector. If you can get them disconnected, one method to prevent galvanic corrosion is to just disconnect them regularly to avoid them fusing. Not sure if you’ll remember? You can also use a plastic connector between the hoses to make sure the two metals don’t touch each other or switch out the aluminum hose ends with replacement brass or plastic ends, found at most hardware stores.
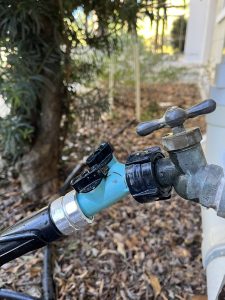
A quick fix is to place a plastic connector between the dissimilar metals. Credit: Mark Tancig, UF/IFAS.
Now that you’ve learned about galvanic corrosion, it’s time to get back to gardening. Good luck with those hoses! If you have other gardening questions, please contact your local extension office.
by Daniel J. Leonard | Nov 13, 2025
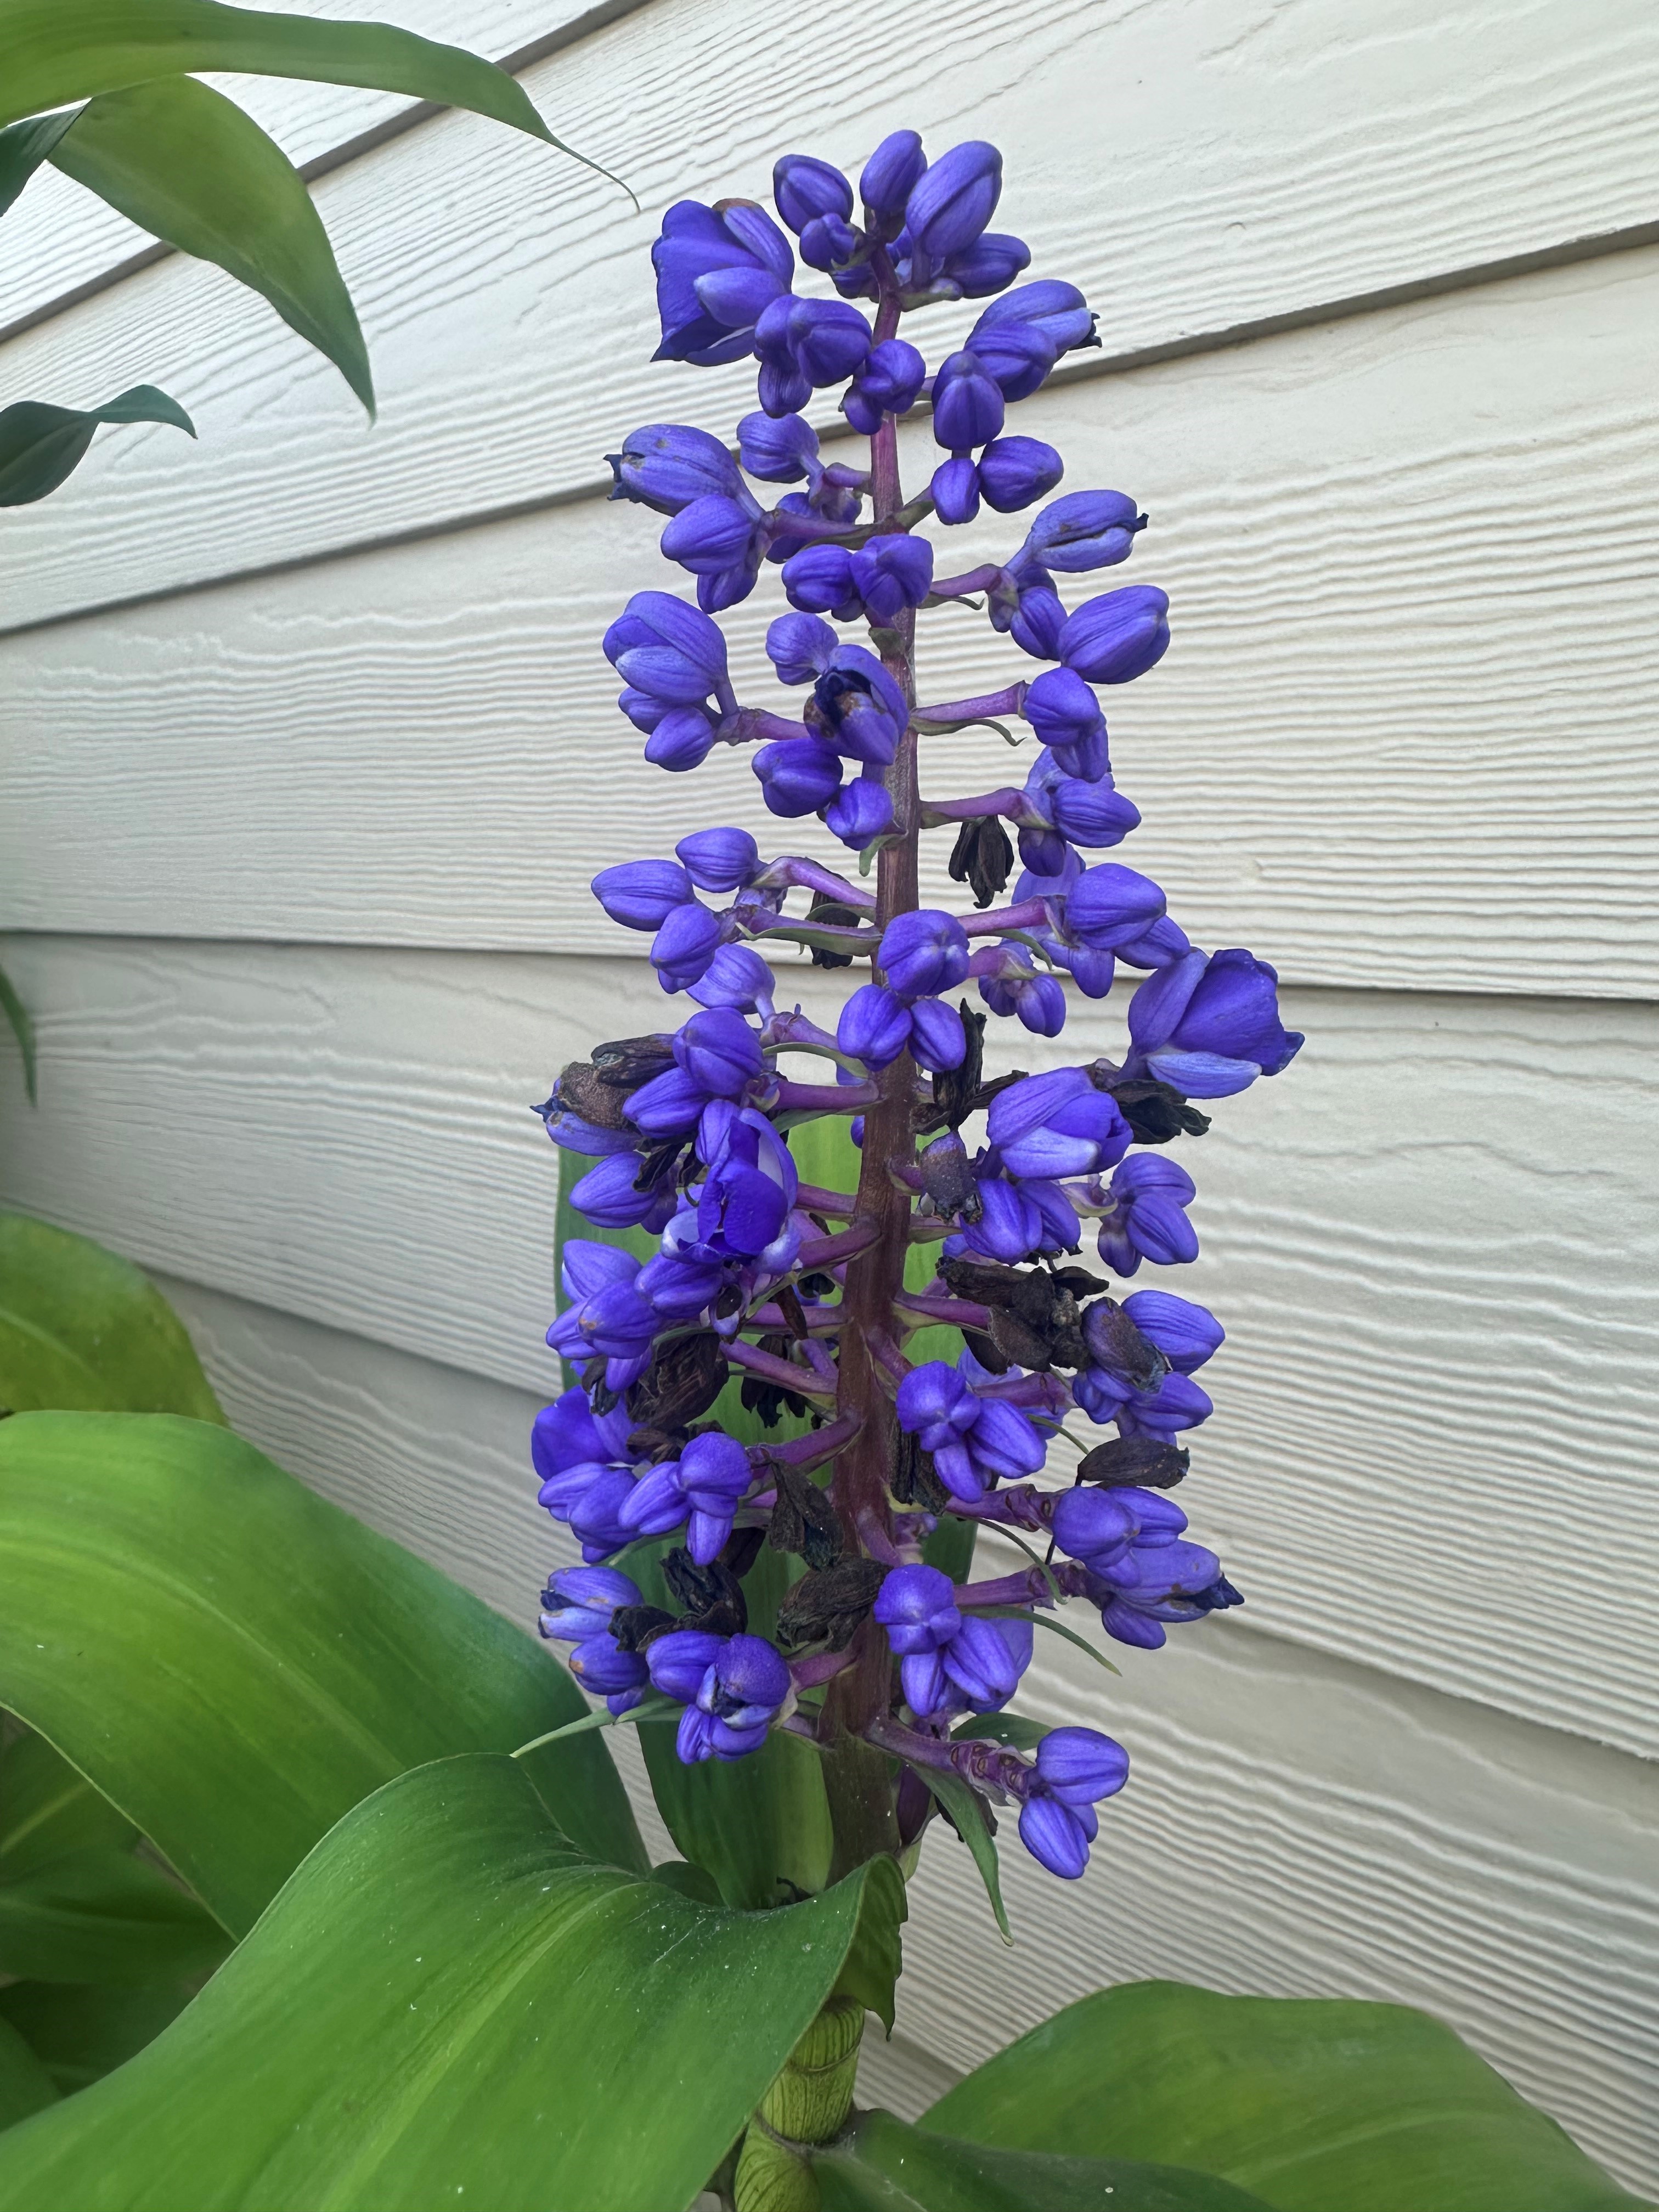
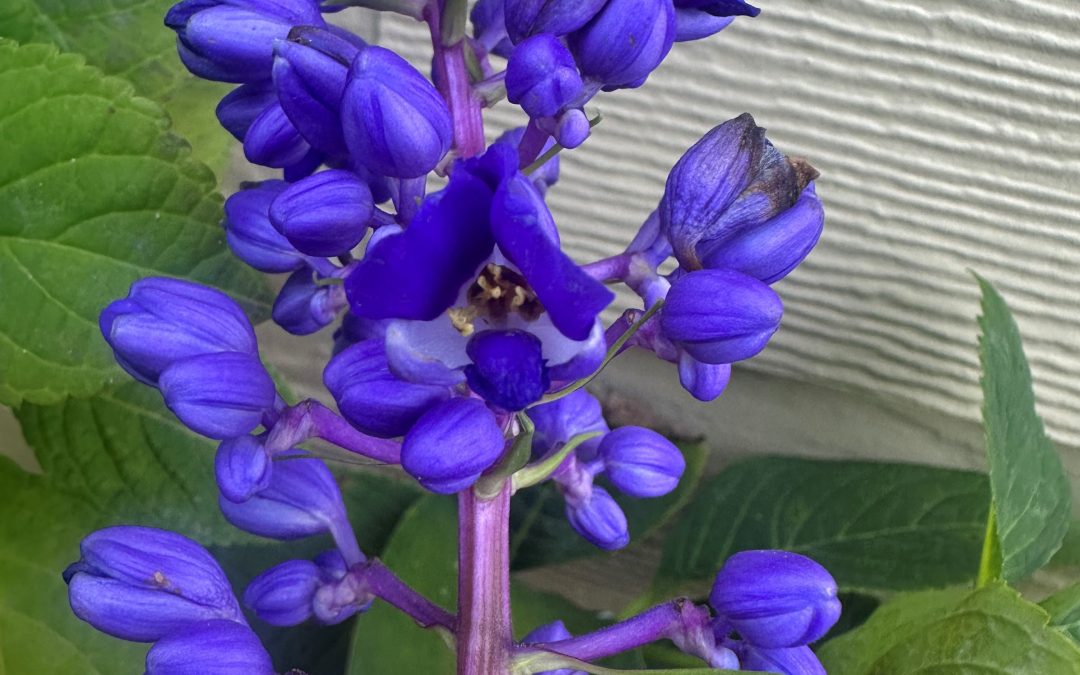
Fall is in the air. Halloween decorations, candy corn, mums… houses and landscapes are decked out in shades of yellow, orange, and red. However, one of the Panhandle’s absolute easiest perennials bucks the trend of autumnal hues, sports flowers of deep, brilliant blue, and is blooming right now – Blue Ginger (Dichorisandra thyrsiflora).
Blue Ginger is an unusual landscape plant for several reasons. First, the name Blue Ginger is a little bit of a misnomer. The spreading perennial species, native to southern Brazil and hardy into our zone 9, isn’t a true ginger at all, rather it resides in the Spiderwort plant family Commelinaceae, making it a close relative of other blue/purplish hued plants like Purple Heart Plant and Spiderwort. Second, it’s 10” flower spikes emerge here when few other landscape plants do (October) – after many of our summer annuals have finally sputtered out but before sasanquas and other cool season bloomers make their appearance. Rounding out Blue Ginger’s unique role in fall Panhandle landscapes is the color of its flowers. Simply calling them blue does the otherworldly color a disservice. Imagine the most striking, deep, brilliant blue you can and that will get you in the neighborhood. A Blue Ginger in flower has to be seen to be fully appreciated!

Blue Ginger flower spike. Photo courtesy of Daniel Leonard.
Adding to the appeal is that Blue Ginger is exceptionally easy to grow. However, the species does have specific growing condition needs. The ideal landscape placement for Blue Ginger is a shady oasis protected from the hot afternoon sun and blustery breeze that keeps its roots cool and moist and its succulent leaves from excessive drying. My specimen has performed excellently for over a decade on the north wall of an outbuilding, in relatively rich soil, mulched well to retain moisture, and shielded by a nearby fence. It has been years since I’ve either fertilized or watered it and the plant returns each summer, growing to about 4’ in height, and blooms each October, asking for nothing in return. One must remember the saying “Right Plant, Right Place”, as Blue Ginger can be the easiest plant ever to cultivate or a problem child that never performs like you want it to, all depending on where one sites it in the landscape.
If Blue Ginger has one drawback, it’s that it is uncommon in the nursery trade. When shopping for one, choose independent nurseries who are known to have a wide assortment of plants, maybe even a greenhouse/tropical section. I’ve never once seen Blue Ginger in a large chain nursery or box store. The best, cheapest, and most fun method of obtaining one though is to get a friend that has one to give you a cutting of their plant, as the stems root easily into new plants!
Think outside the box this fall and add some blue to your landscape with Blue Ginger. Give it a protected shady spot and a little water and it will reward your landscape with brilliant blues every October for years to come. For more information about Blue Ginger or any other horticultural topic, contact your local UF/IFAS County Extension office. Happy Gardening!
by Carrie Stevenson | Nov 6, 2025
A spectacular array of blazing star in bloom. Photo credit: Troy Springer, Florida Wildflower Foundation
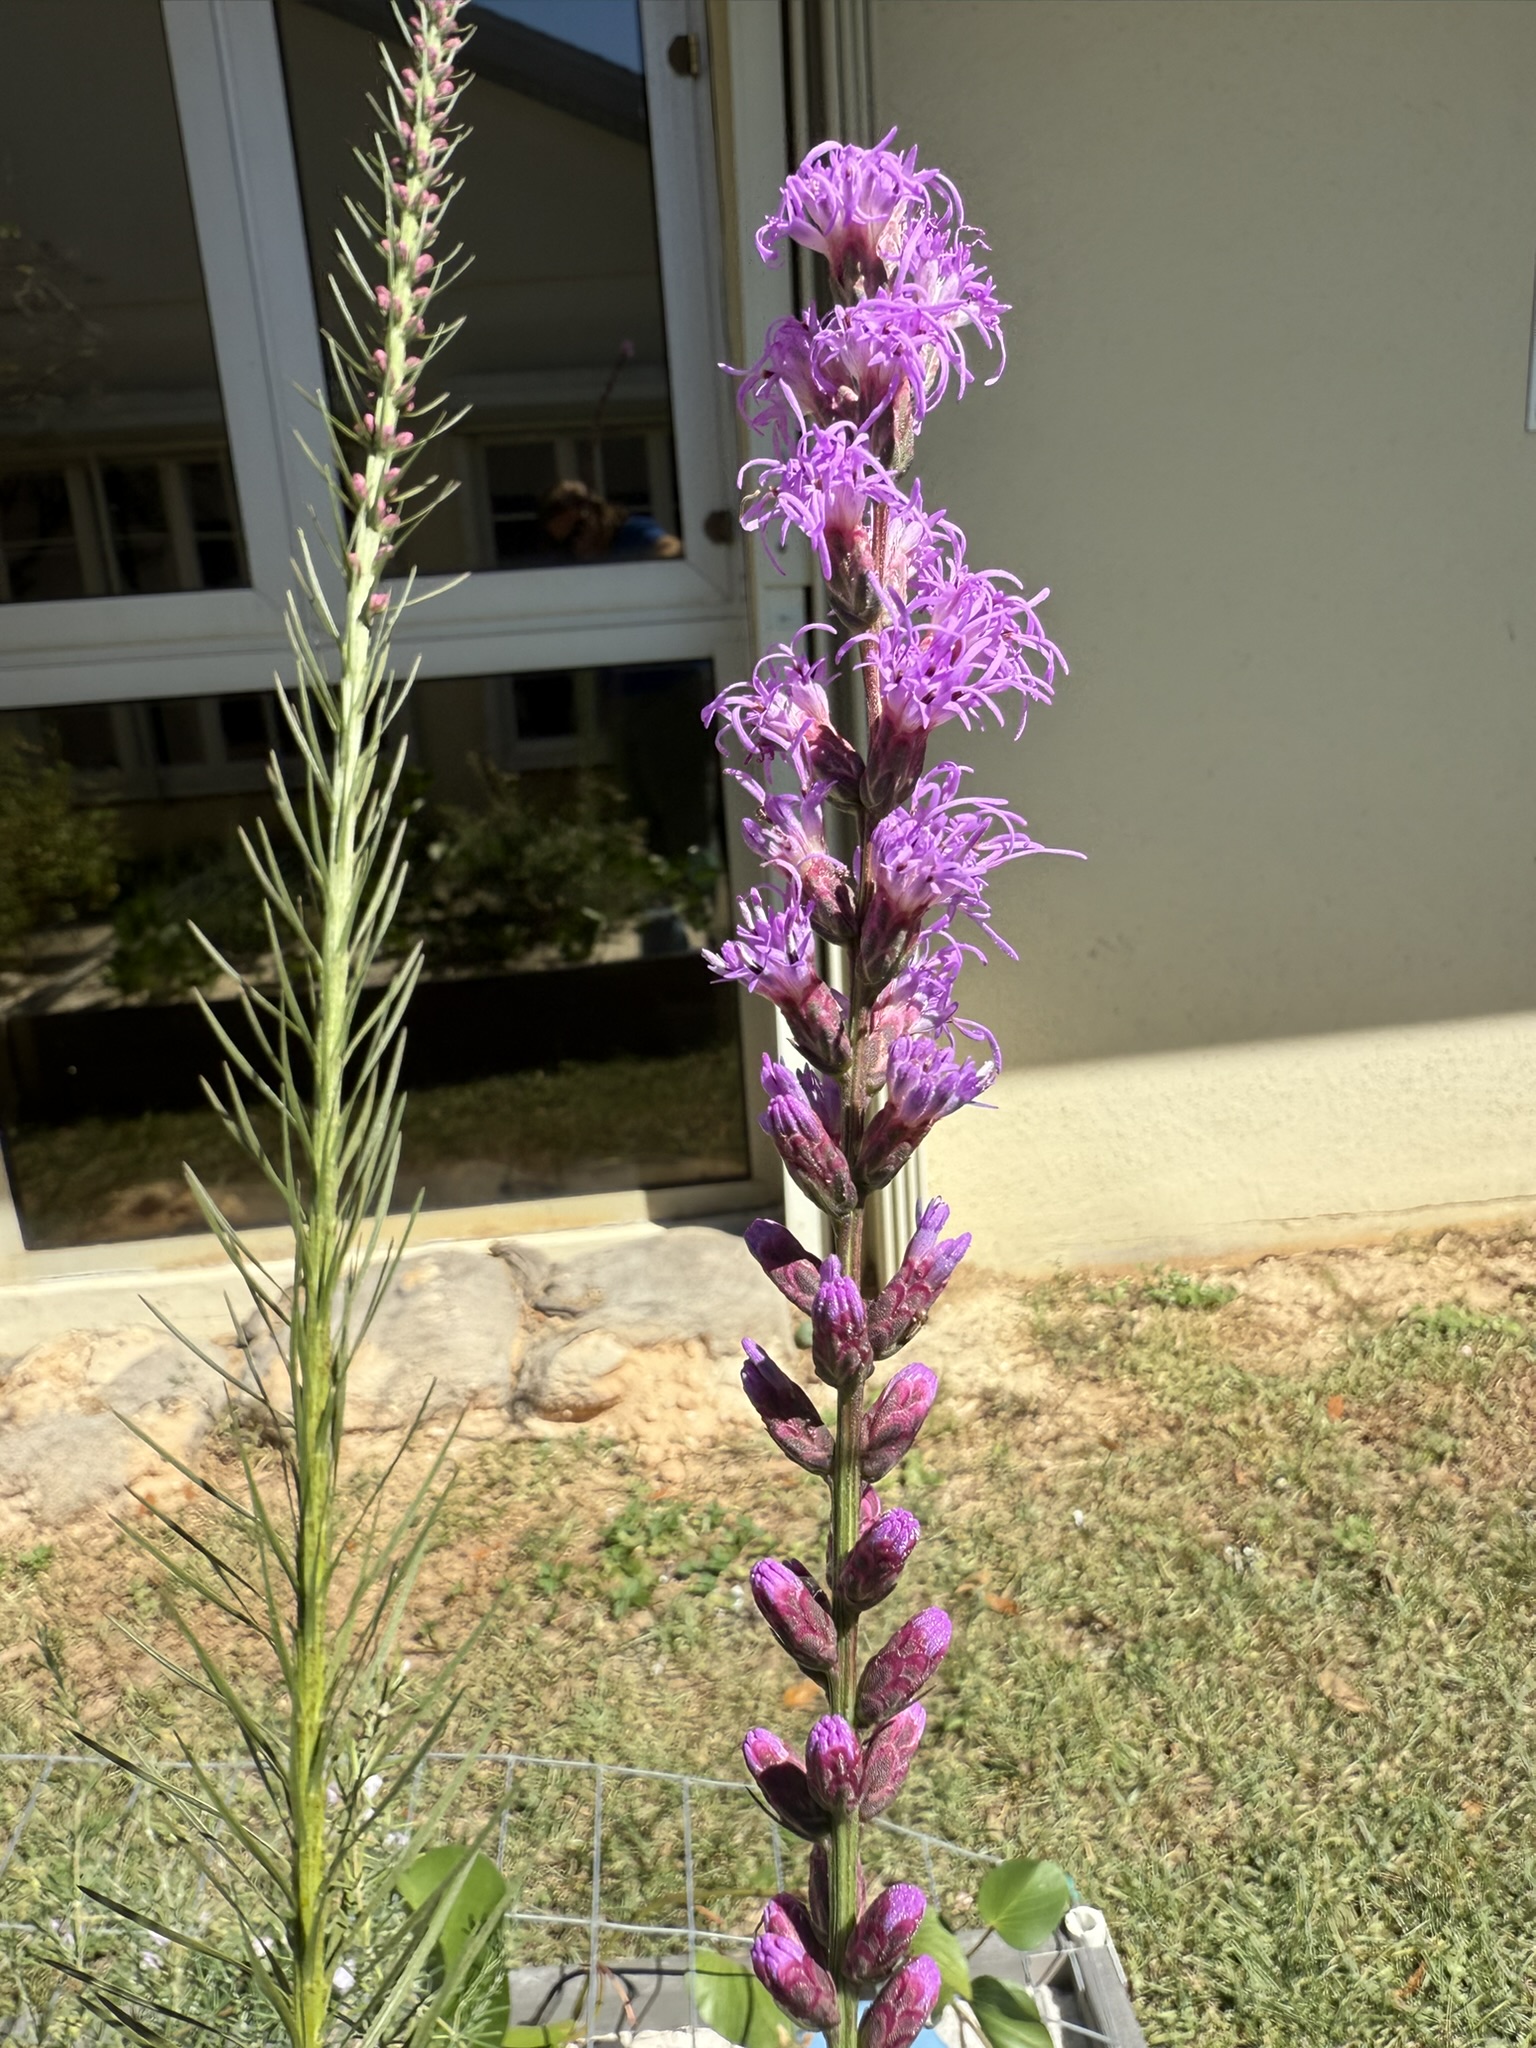
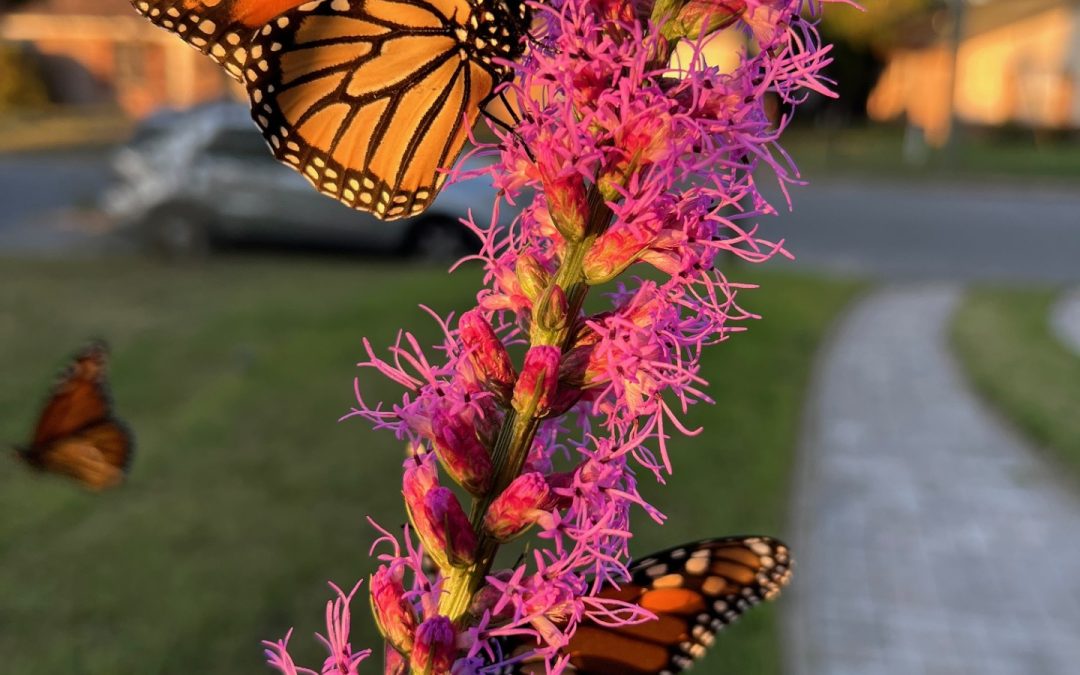
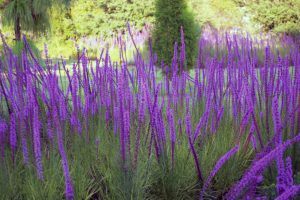
Walking through a northwest Florida wildflower prairie in autumn, the star of the show is Liatris. Known as dense gayfeather or blazing star, this tall (up to 7’!) stunner of a plant is covered up with clusters of small purple flowers. The flowers are are composed of tiny, frilly five-petaled florets. Each cluster may have groups of up to 18 flowers at a time, crowding the stalk with color.
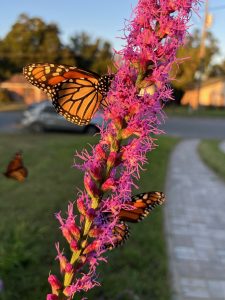
Migrating monarchs feed on blazing star in late fall. Photo credit: Whitney Scheffel
Before blooming, the spiky grasslike structure grows upright and produces a series of dozens of green leaflets, similar in form to rosemary.
While delicate in appearance, the blazing star is a hardy plant adapted to a wide range of habitats. Some varieties can grow in the pure sand of beach dunes and scrub, while Liatris spicata thrives in the soggy wet soils of bogs and pine flatwoods. The species is known for attracting bees, butterflies, and hummingbirds, so it makes a great addition to a pollinator garden. The flowers perform best in full sun.

Side-by-side, the bottlebrush-like blazing star plant before and after blooming. Photo credit: Carrie Stevenson, UF IFAS Extension
Blazing star is particularly impressive in a large group, so you can plant dozens together (by seed or container) for a beautiful effect. After blooming deep purple this time of year, they’ll turn a goldish bronze that adds to the interesting fall color of a garden. Liatris will also re-seed every year after dying back in the winter.
There are many plants native to the United States known commonly as colic root, including blazing star. This nickname arose from its traditional medicinal use treating stomach cramps. Additional uses of a tea made from the plant were used for everything from sore throats and kidney issues, while an incense made from dried roots was burned for sinus relief.
by Joshua Criss | Nov 6, 2025
Another North Florida winter is here! With that comes a new plants from leafy greens to snapdragons. It also means the inevitable freeze is on the way. It is prudent for all gardeners to review what needs to be done to protect your non-freeze hardy plants.
Hardiness Zones
Before we get into what actions you may need to take, let’s examine plant hardiness zones. These are geographic areas created by the US Department of Agriculture defined by their average extreme minimal temperature. In the Panhandle these are zones 8b through 9b. In winter we will likely see low temps between 15 – 30 degrees depending on your zone. Sourcing plants appropriate for your zone can mitigate quite a bit of cold damage in your landscape. If you like plants susceptible to the cold, you can interplant them to add a little protection.
Microclimates
Find and utilize your yard’s microclimates. Areas under larger trees are likely to remain warmer in the winter. This is also true behind a windbreak, or near a structure with high sun exposure. Look around your yard and plant any cold sensitive plants in these areas.
This area is likely to have multiple microclimates. UF/IFAS Photo
Full Season Plant Care
Cold protection begins with warm season plant care. Pay close attention to the irrigation and fertilization needs of your landscape plants. Apply these properly to ensure stress free plants moving into the colder months as these will perform better as the mercury begins to drop.
Imminent Freeze Actions
Ok, now that everything is planned, we know our microclimates, and we’ve cared for our landscape through the year let’s see what can be done when a freeze is imminent.
Water the morning prior to a freeze event. Wet soils retain warmth better than dry. That heat will be re-radiated through the freezing night keeping your plant slightly warmer. Adding some mulch will aid this effort. Watering again the next day will break any ice formed in the soil. Keep in mind that prolonged saturation could be detrimental to root systems. Scout your plants regularly after using this strategy to ensure plant health.
Protect potted plants by bringing them indoors. Those that are too big to move should be padded with extra mulch, and clustered together when possible. Make sure to move them back in place when the warmth returns.
For those trees with graft points (i.e. Citrus), tree wraps may be used as protection. If you don’t have these, pile mulch around the base of the tree to insulate the graft. The idea here being that even if the branches above the graft succumb to the cold, the tree can rebranch above the graft thus keeping the desired fruit of that tree.
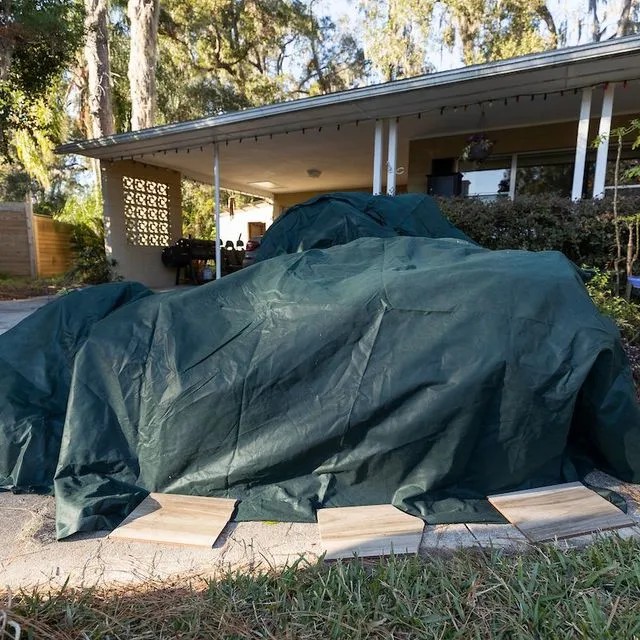
Finally, cover your plants. Covers are more useful for frost than freezing temps but are better than direct exposure to cold air. Keep these off the plant’s foliage while ensuring they reach all the way to the ground. Think ghosts over lollipops. Taking them to the ground will capture any heat radiated out of the soil overnight. The addition of lights underneath the cover can help keep that area a little warmer. Be very cautious when doing this as too much heat under the cover could be dangerous.
Plants covered above the foliage, and to the ground. UF/IFAS Photo
You may see some nurseries apply irrigation via sprinklers through the freeze as protection. While this method does work, it requires some specialty equipment. Additionally, you’ll need to apply the water prior to the freeze setting in and continue until the temps return. It not a practical solution for homeowners.
Once the cold passes, keep an eye on your plants. Wait until you see new growth before pruning damaged plant tissue. If in doubt you can slightly scrape the bark. If the cambium beneath the scrape is green, it is still alive.
For more information on cold protection or any other horticultural topic contact you local UF/IFAS Extension office.
by Ben Hoffner | Nov 5, 2025
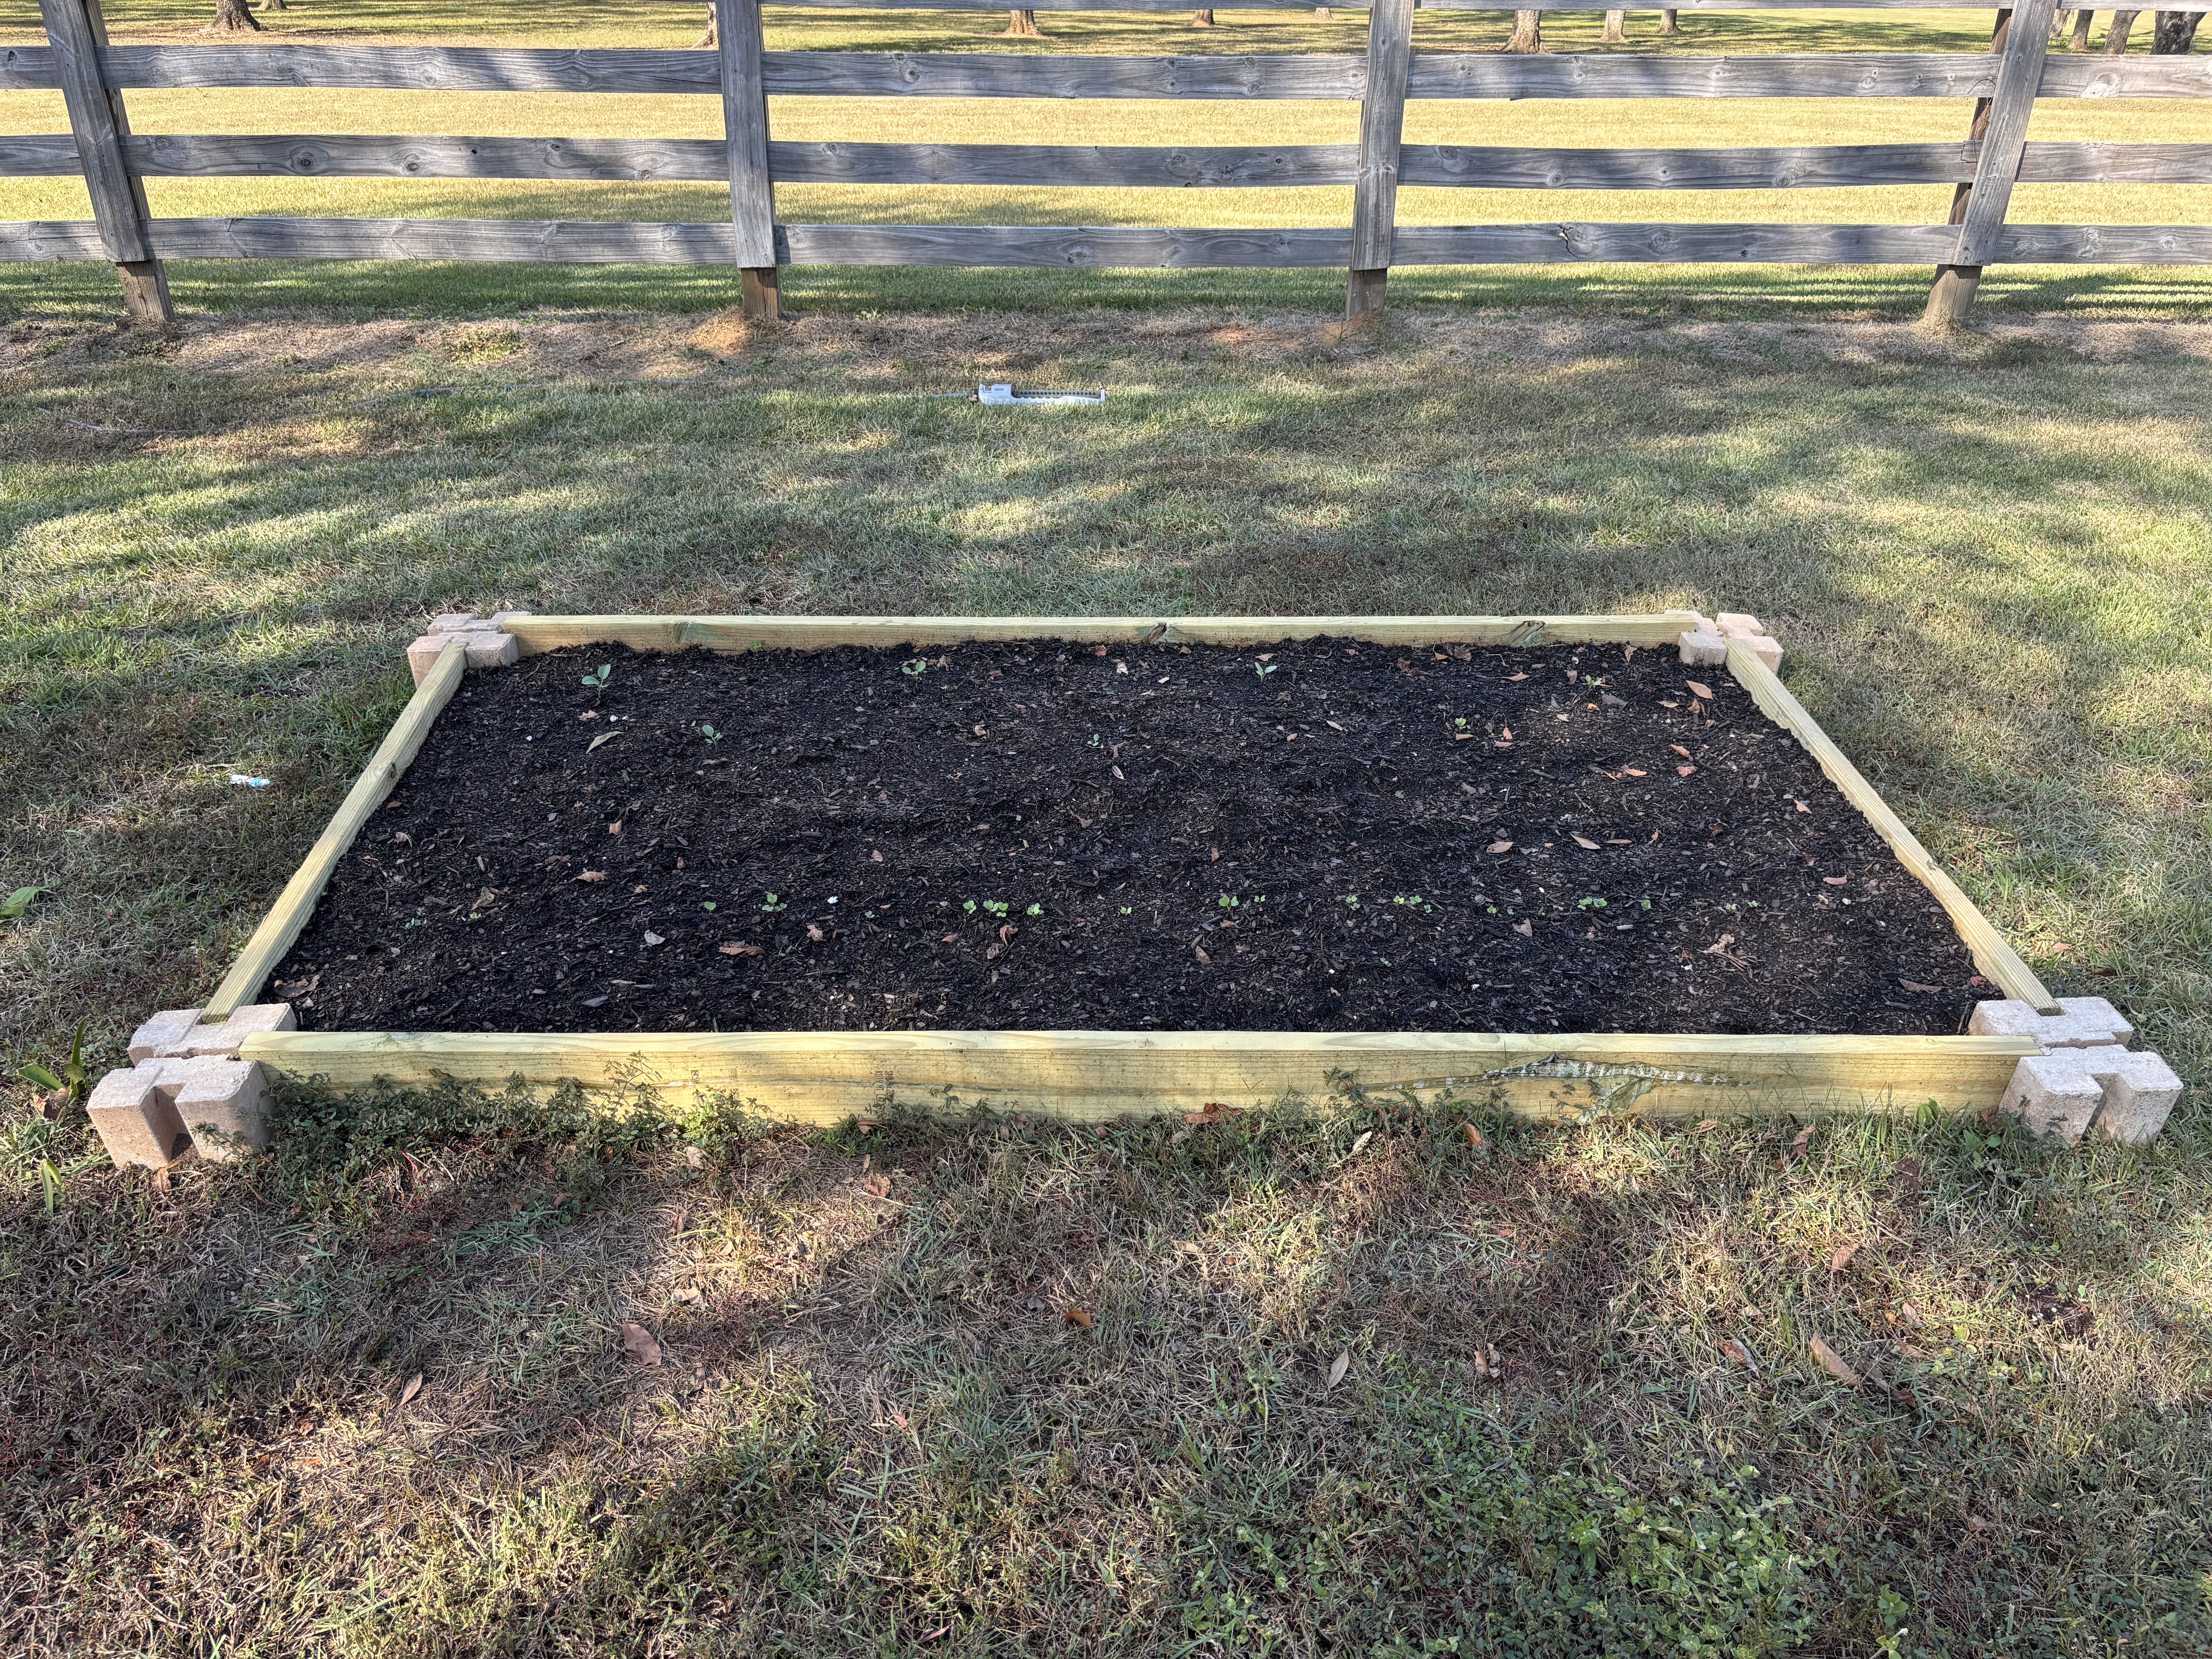
When making plans for a fall or spring garden it is important to consider which methods of planting and raising your crops will work best for you. Traditional ground plots can be very effective but like with anything there can be negatives. Issues with space and soil fertility will be your biggest challenges with ground plots. Raised Beds are a very popular choice for several reasons like being aesthetically pleasing, mitigation of poor or no soil, decreases runoff/erosion, positive use of space, and maintenance.
Site Selection – Before creating your raised bed there should be a couple of key factors that are considered. Sunlight is the most important factor. Areas where the raised beds are constructed must have full sun for a minimum of 5 to 6 hours per day for best results. It is ideal to have morning sun do it less intense heat in the morning and dries due off the plant. Staying clear of structures, large trees, tree lines will help to have ample sunlight. Access to a water source close by is imperative for a successful raised bed. Make sure it is placed on well drained level ground away from tree roots that could compete with your crops.
Construction – The most “traditional” raised bed structure are made with wood. Consider pressure treated vs. non-treated wood. Pressure treated wood post 2004 is unlikely to contaminate food crops and will have a longer shelf life. Non-pressure treated will be a less up-front cost but will end up costing more overtime due to having to replace the boards earlier and more often. Screws and nails are appropriate methods to secure the corner but be sure to dispose of them correctly. Concrete corner blocks found at stores like Lowes or Home Depot have become a popular mothed to secure the corners. A 4’x8’ bed is the most popular size due to easy maintenance and construction. To construct this sized bed all you will need is three 2”x6”x8’ boards and four concrete corner blocks. After the outline of the bed has been created, you will need to create a base layer to kill the grass below, so it does not grow up through the soil. You can use materials like cardboard or mulch to accomplish this. The raised beds should be filled with either a mix made for raised beds or a 50-50 mix of compost/organic matter and topsoil. 1 cubic yard of material will fill a 4’x8’ raised bed.
Raised beds can be an effective and fun way to garden at home. Consider all factors discussed to make sure your raised beds are successful. For more information on raised beds contact your local UF/IFAS Extension Office. 
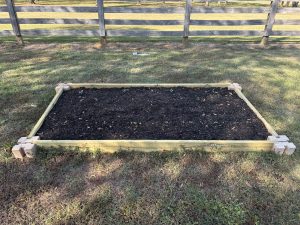
4’x8′ Raised bed – Photo taken by Ben Hoffner – Jefferson