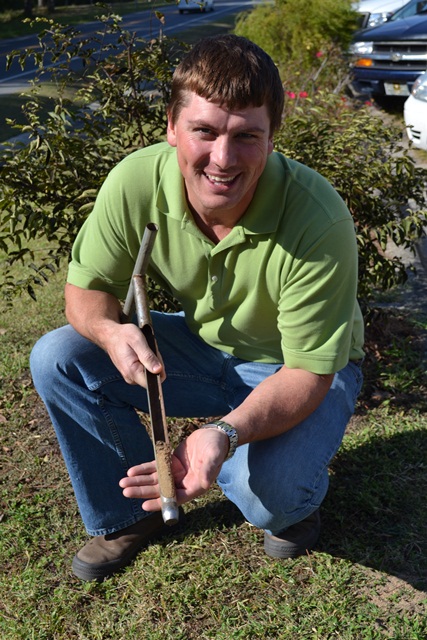
by Eddie Powell | Apr 1, 2014

Soil Sampling may save you time and money!
As spring approaches, many Florida homeowners are gearing up to grow their own vegetables. The most frequently asked question this time of year is, “why do I need to fertilize my soil?” The answer is simple – – not all nutrients are present in the right amounts to support good plant health.
North Florida is a prime example of an area lacking certain nutrients, since the soils in this area are generally infertile and acidic. Especially with all the rain from this past year! Therefore, soils must be tested and appropriate amounts of lime and fertilizer must be applied to the soil for adequate plant growth. If this is not done then the crops will suffer from inadequate plant growth and yield will suffer.
Most vegetable crops grow and perform best at a pH range, 6.0-7.0. A soil sample must be taken to determine soil pH. Feel free to bring one of those samples by your local University of Florida IFAS Extension office for your soils pH results. If the pH extends far below or above this range, then crop productivity will be significantly reduced. This happens because the crop cannot utilize the fertilizer properly. In other words, this causes the plant to use too much of some nutrients (like manganese, zinc, and iron) that are required in very small amounts and too little of some nutrients (like nitrogen, phosphorus, and potassium) that are required in larger amounts. The plant system becomes upset so to speak and does not function well and some plants may even die.
To avoid having your crop suffer because of a lack of fertilizer, contact your local University of Florida IFAS Extension Agent and ask he/she to help you select the best kind of fertilizer for your crop. After you have selected the correct fertilizer, make sure to ask your agent to assist you with the following:
- Be aware of the correct amount to be applied to the area where you plan to grow your vegetable crops
- Understand how to apply the fertilizer to the soil so that your plants will use it properly for an excellent crop yield.
Points to remember:
- For vegetables, keep your soil pH range between 6.0 -7.0 so that your crop can uptake the fertilizer properly
- Make sure to apply the correct amounts of fertilizer to the soil so that your plants will not suffer but produce high quality produce.
by Mary Salinas | Jan 7, 2014
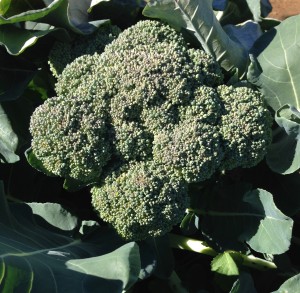
Broccoli, a popular winter vegetable. Photo by Mary Derrick, UF IFAS
In the Florida panhandle, we are fortunate to be able to grow crops throughout the year. The key is to know what to plant at the various times of the year.
Vegetables that can be planted now include beets, broccoli, cabbage, carrots, cauliflower, Chinese cabbage, collards, kale, kohlrabi, lettuce, green onions, English peas, radish and turnips. For those that are started from seed, especially carrots and radish, sow seed every 2 to 3 weeks to stagger the harvest.
During this cool time of the year, take stock of the vegetable garden area and decide if changes need to be made, such as moving or adding on to it. This is a good time of year to do the heavy labor before the warm, sweaty weather sets in. A popular choice is to add raised beds for growing herbs and vegetables. An advantage of a raised bed is that the garden starts with clean, rich soil that is weed and pest free. Grass and weeds do not have to be dug out for the garden; they can simply be covered by heavy groundcloth, newspaper or cardboard and the raised bed is placed on top.
[important]Consider getting a soil test if one has not been done within the past few years. Always get a soil test before adding lime – it will indicate if lime is needed and exactly how much to apply for best results. The cost is only $7 through the University of Florida. Contact the local Extension office for a soil test kit.[/important]
Stepping outside of the vegetable garden for a moment, for those interested in deciduous fruit such as peaches, pears and apples this is a great time to plant trees to give their roots time to develop before the warm, dry spring months. Be sure to select varieties that are proven performers for North Florida.
For further information please see:
Florida Vegetable Gardening Guide
Gardening in Raised Beds
Soil Sampling and Testing for the Home Landscape or Vegetable Garden
Deciduous Fruits for the Home Gardener in North Florida and North Central Florida

by Larry Williams | Oct 21, 2013
I tried growing Brussels sprouts for the first time a few years ago. I enjoy vegetable gardening and thought I’d try something a little different. To be honest, I wasn’t too happy with the results – nothing like starting an article on a positive note.
Actually, I don’t think I did too badly but overall I couldn’t decide if the results were worth the effort. Before I completely discourage you from trying this vegetable in your garden, I better give you some of the positives.
They are considered fairly easy to grow. They require about the same growing conditions and care as cabbage. Technically they are a type of cabbage. But instead of forming one large head, as cabbages do, they form many tiny heads along their tall stems. The round vegetable sprouts are about the size of walnuts. Each sprout resembles a miniature head of cabbage, with its layers of tightly packed leaves and central core.
Brussels sprouts are considered a cool season crop. They require cool weather for best growth. They should be grown in the winter garden in Florida. Now is a good time to plant this crop. If they are grown when temperatures are warm, the sprouts tend to be soft and open rather than solid and tightly packed.
Brussels sprouts can be started from seeds or small plants. But it may be hard to find plants for starting. Seeds can be planted directly in the garden or germinated in flats. If you start seeds in flats, plant about 25 seeds to a foot of bed and cover them with about half an inch of soil. When seedlings emerge, thin them to about an inch apart. They’re ready to plant in the garden when they’re about three or four weeks old. Plant them 30 inches apart in rows that are three feet wide.
Follow good gardening practices in watering, fertilizing and monitoring for pests.
Your sprouts are ready to harvest when they reach walnut size and feel firm. Usually, the first sprouts, near the bottom of each plant, are ready within three months. Don’t leave them on the plant too long or they’ll become yellow and tough.
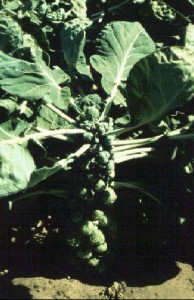
Brussels Sprout Plant
Photo Credit: UF/IFAS Extension
If you have space in your garden to devote to one crop for a minimum of three months (I left mine in the garden for five months), you might do okay with Brussels sprouts. Keep in mind they will still be producing in spring when it’s time to start planting your spring garden. The length of time it took to get a decent amount of Brussels sprouts was probably what I disliked the most about this crop.
by Mary Salinas | Jul 7, 2013
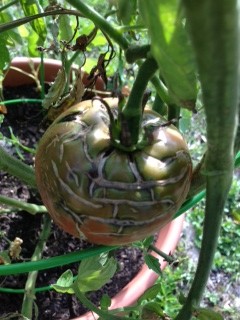
Imagine this scenario: After you have heavily invested in your tomatoes, cracks appear on your previously perfect fruit just as they are starting to ripen.
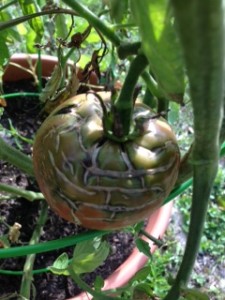
Cracking in Cherokee Purple tomato
Credit: Mary Derrick, UF/IFAS
How frustrating! Depending on the severity of the cracking the fruit will still ripen and be edible, although blemished. However, if cracking is severe, insect and disease pests may take advantage of the weakened skin and feast on the tomato.
Why does this happen?
When tomato plants have fluctuations in the amount of available water in the soil, the skin becomes susceptible to cracking. This occurs when tomatoes are allowed to dry out, then heavily watered. The excess in available moisture causes the inside of the fruit to grow more rapidly than the skin, thus cracking appears. As tomatoes grow toward maturity, they become more prone to cracking. Wide fluctuations in air temperature can also contribute to cracking.
Avoid cracking in your fruit by following these simple suggestions:
• Keep your plants evenly moist through regular irrigation and mulching
• Shade fruit with ample foliage cover
• Select varieties or hybrids that are known to resist cracking
• Harvest susceptible tomatoes at an earlier stage of development and ripen indoors.
Happy Gardening!
For additional information follow these links:
Tomatoes in the Florida Garden
Physiological, Nutritional, and Other Disorders of Tomato Fruit
by Eddie Powell | Jul 1, 2013
The key to eating home grown delicious vegetables, is selecting the correct time to harvest. Below are some of the easiest ways to identify the correct time to pick your most common summer veggies.

- Snap Beans: Pick them before you can see the seeds bulging. They should snap easily into two. Check daily. It doesn’t take long for beans to go from tender to tough.
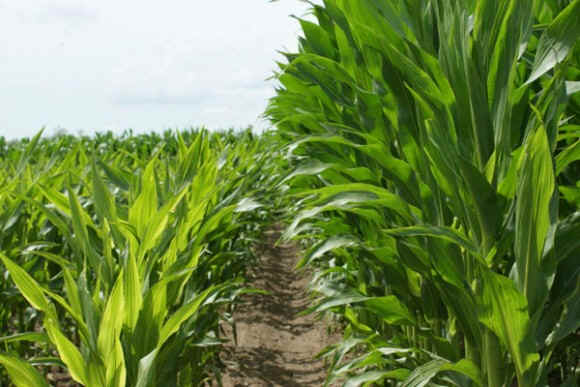
- Corn: Usually 3 weeks after the silks form, they will turn dry and brown. The kernels should exude a milky substance when pricked.
- Cucumber: Cucumbers race to the harvest with zucchini. Check daily and harvest young. Timing and length will vary with variety. The fruits should be firm and smooth. Overripe cucumbers can be very bitter or pithy, even before they start to turn yellow.
- Eggplant: Slightly immature fruits taste best. The fruits should be firm and shiny. Cut rather than pull from the plant.
- Muskmelon (cantaloupes): The general rule of thumb is that the color should change to beige and the fruit will ‘slip’ from the vine when lifted. You should also be able to notice a sweet smell when ripe.
- Peas: The pea pods should look and feel full. Peas are sweeter if harvested before fully plumped. Peas really need to be tasted to determine if they are sweet enough.
- Pumpkins: Once the pumpkins have turned the expected color and the vines are starting to decline, check to make sure the skin has hardened enough that poking it with your fingernail will not crack it. You don’t want to pick your pumpkin too soon, because it will stop turning orange once its cut, but don’t leave them out if a hard frost is expected.
- Squash: Pick young and check often. The skins should be tender enough to poke your fingernail through.
- Tomatoes: Harvest tomatoes when they are fully colored and slightly soft to the touch. Gently twist and pull from the vine.
- Watermelon: The white spot on the bottom of the melon should change to a deep yellow when ripe. Some people can hear a change in the sound made when the melon is thumped with the finger. It should make a hollow sound when ripe, but this is a skill that must be developed.
For more information about projected harvest times, check out the Florida Vegetable Production Guide, published by UF / IFAS Extension. Enjoy and share your garden’s bounty, happy harvesting.