by Matthew Orwat | Jun 14, 2022
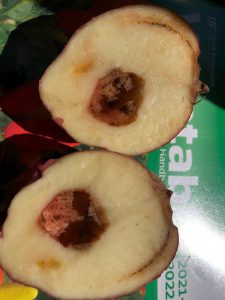
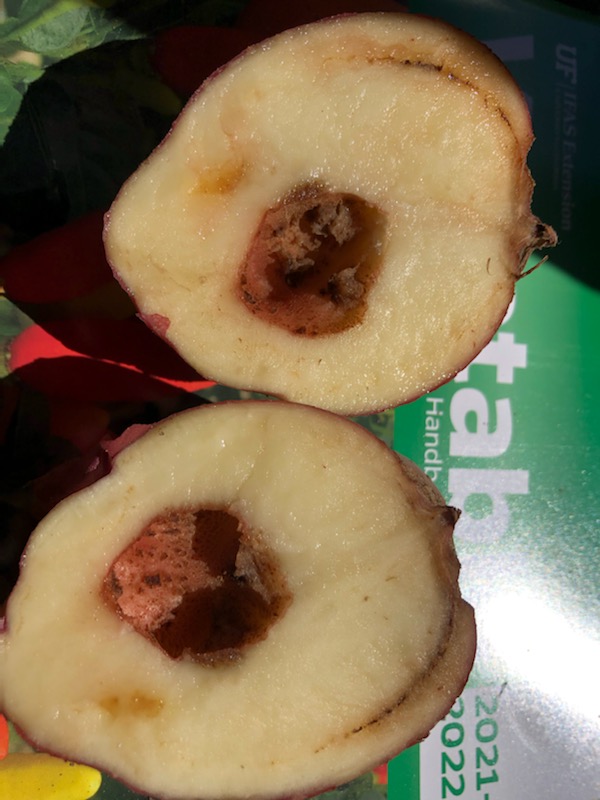
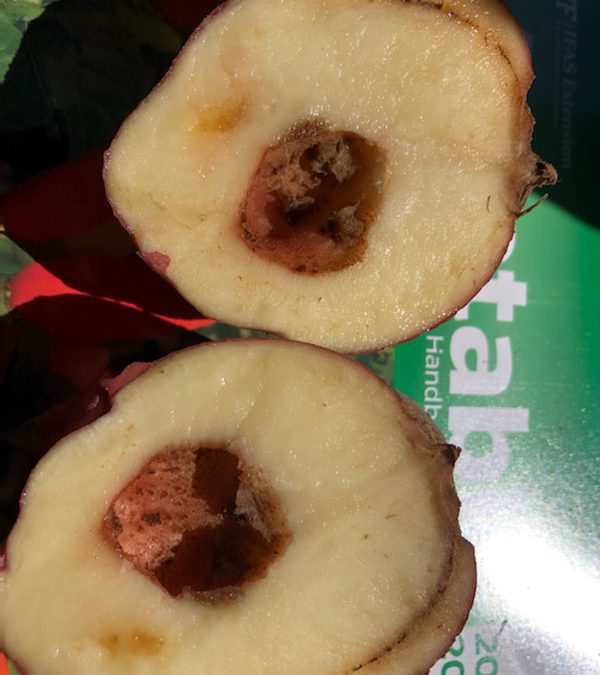
Typical Hollow Heart condition as seen on this Red Lasoda potato. Image Credit: Matthew Orwat, UF/IFAS
One of the most frustrating things about gardening is finding something wrong with a crop that cannot be fixed. I witnessed this last week when checking on a problem with some recently harvested potatoes.
Sometimes potatoes that look perfect on the outside might not be perfect on the inside. Unfortunately, this is the case when potatoes are afflicted by the physiological disorder “hollow heart” or “brown center”.
The disorder that causes hollow heart or brown center in the potato tuber manifests when cells die inside while potatoes are growing too quickly or unevenly, such as when recovering from environmental stress or over fertilization.
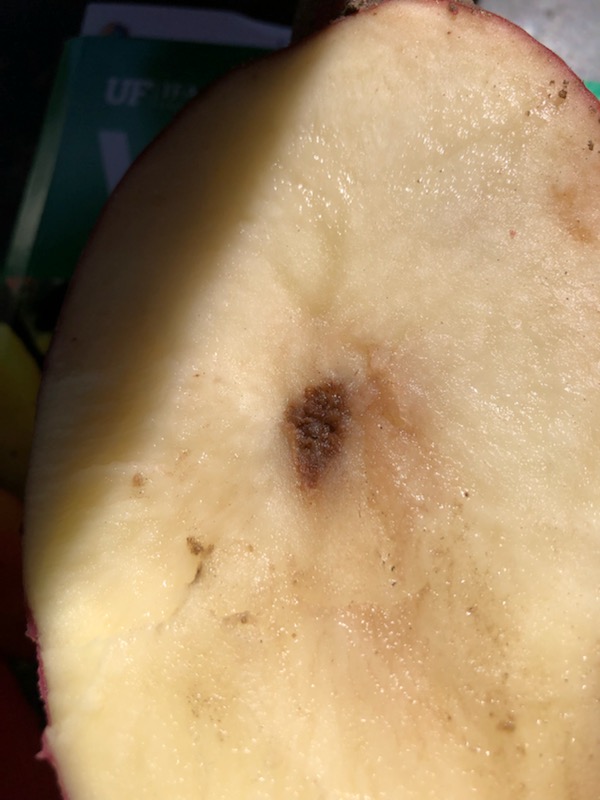
Weather extremes during tuber development cause plant stress. Weather conditions that may cause brown center are early season cool nights, which cause soil temperatures to be below the mid-50s for around a week or longer. Soil moisture at 80% or greater may also cause the same brown center symptoms.

Typical Brown Center condition as seen on this Red Lasoda potato. Image Credit: Matthew Orwat, UF/IFAS
Hollow heart is typically caused by swings from low to high soil moisture and overapplication of nitrogen. To mitigate this condition, consistent irrigation practices and spit fertilizer applications have been shown to be effective.
Additionally, if hollow heart or brown center is a typical problem for a given growing area, selection of cultivars that are less susceptible to this condition is beneficial, since there is quite a bit of variation among cultivars / varieties.
The final message is one of good news, if brown center or hollow heart is noticed at potato harvest this year, there are steps that can be taken to mitigate this issue for future growing seasons.
For more information, please check out the reference for this article, UF/IFAS publication HS945 “Potato Physiological Disorders—Brown Center and Hollow Heart”
by Matt Lollar | Jun 9, 2022
This article was written by Kacey Aukema, University of Florida/IFAS Extension – Walton County.
I recently met with a home gardener who brought in tomato plants showing strange symptoms on the leaves. Together we puzzled over the odd leaf-curling symptoms that were affecting their tomato beds, but not other areas of the garden. Upon further investigation it was revealed that hay, used as mulch, had recently been spread around the tomatoes, but not in other areas of the garden. It quickly became apparent that the symptoms were likely related to herbicide residual on the hay that was used. The herbicide aminopyralid was the potential culprit. In this case the residual herbicide was not enough to outright kill the growing tomato plants. However, it was interfering with their growth and development and is a cautionary tale reminding us how important careful sourcing of hay used in mulch or compost can be.
What is aminopyralid and how does residual herbicide affect non-target plants through mulch, compost, etc.?
Aminopyralid is a herbicide active ingredient found in several popular pasture products such as GrazonNext™, Milestone™, Chapparral™ and similar products. This and other similar chemicals have residual activity and can be retained in plant tissues, animal manure, and soil, which makes them a very useful for controlling certain troublesome broadleaf weeds in grass pastures for an extended period of time. Unfortunately, this residual activity increases the potential for causing trouble in vegetables or other crops when hay or animal manure from aminopyralid treated pastures is mistakenly used for mulch, compost, etc. In Florida, aminopyralid containing pasture herbicides are often used as the “go to” for control of hard to control weeds like horsenettle and tropical soda apple which are potentially toxic to livestock. Tomatoes, potatoes, and eggplant are in the same genus (Solanum) as those weeds and are therefore very susceptible to this herbicide as are many other vegetable and other broadleaf crops.
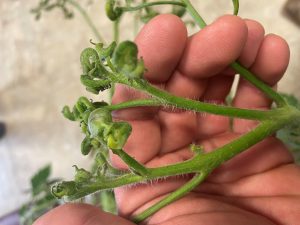
Residual aminopyralid damage on a tomato plant. Photo Credit: Kacey Aukema, University of Florida/IFAS Extension – Walton County
How can I know if hay is safe to be used for mulch or compost?
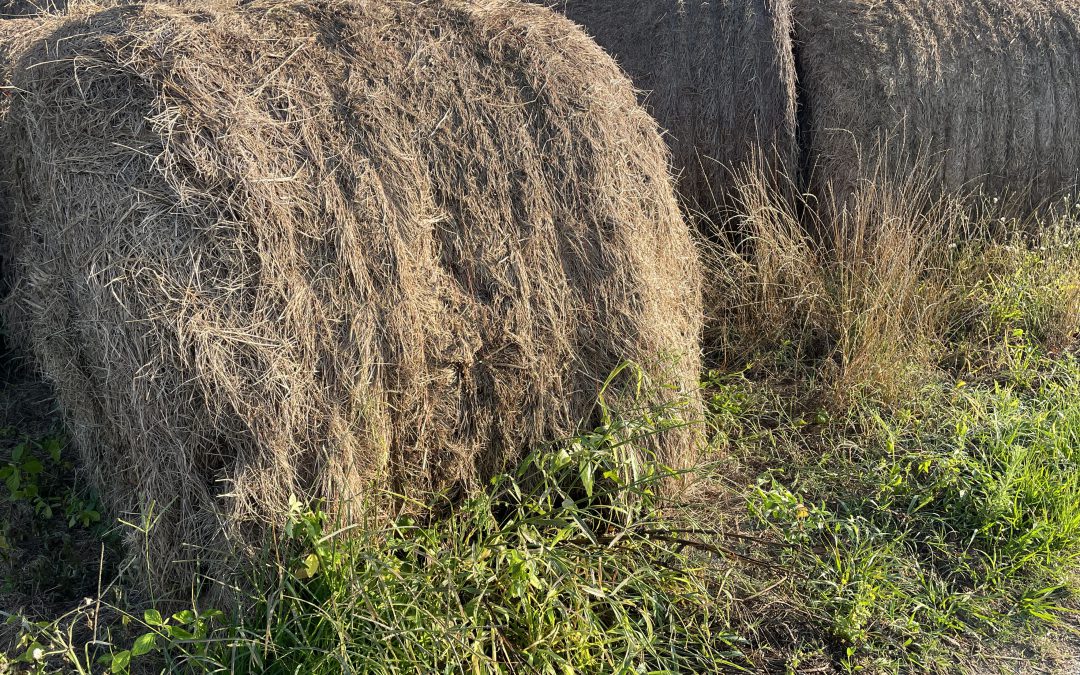
Before acquiring hay to be used as mulch or to compost for vegetable beds, be sure to ask if the hay is free of herbicides with residual activity. Find out what was sprayed on the field in the last two seasons before the hay was harvested. Given that hay destined to be used as mulch or compost is usually old and spoiled, management history of a particular hay bale is likely to be hard to pin down. Do not trust hay to be used for mulch or compost in vegetable beds if prior spray management details are unknown. Also consider that well-stored hay may retain residual herbicide better and for a longer period of time than weathered hay, as the active ingredient is less subject to weathering and biological breakdown.
Those who use broadleaf herbicide products with residual activity such as those containing aminopyralid are subject to follow herbicide label guidelines. For instance, supplemental labeling of GrazonNext HL™ (including FL, AL, and GA) indicates that hay/straw from fields sprayed in the past 18 months should not be used for compost, mulch, or mushroom spawn. When in doubt refer to the label of the particular herbicide product used on hay you purchase for any restrictions and/or reach out to your local county extension agent if you have questions about a specific herbicide product. Relevant use restrictions and considerations like in this example should be conveyed between hay producer and buyer.
Perhaps you already have some hay for mulch/compost with an unclear management history, or you would like to double-check and be sure that it is safe. How could one test it to see if it was safe to use? There is a test called a “bioassay”, conducted by growing susceptible plant seedlings like tomatoes or beans in small pots with the hay/compost/mulch in question incorporated into the potting soil. Then, the test plants can be observed to see if any herbicide symptoms develop to know whether the material is safe to use, before using the hay over a larger area or garden where there would be more risk. For more information on how to conduct a bioassay see: Herbicide Residues, in Manure, Compost, or Hay. Similar in-field bioassays are also recommended when rotating areas out of pasture and into other crops when pasture herbicides with residual activity were used. If susceptible crops like peanuts are grown in areas where such herbicides were used in the recent past they can be damaged, as in this case in an older Panhandle Agriculture Newsletter post.
When used according to label instructions, herbicides with residual activity are very useful for control of broad-leafed weeds in pasture and hay fields and may reduce the spread weeds through seed coming in on purchased hay. However, problems can emerge when hay from fields treated with these products change hands without the use restrictions and considerations being adequately explained. Therefore, caution should be taken by both producer and buyer to avoid damaging sensitive crops when hay or livestock manure are used for mulch or compost.
by Matthew Orwat | Jun 9, 2022
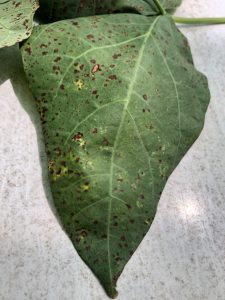
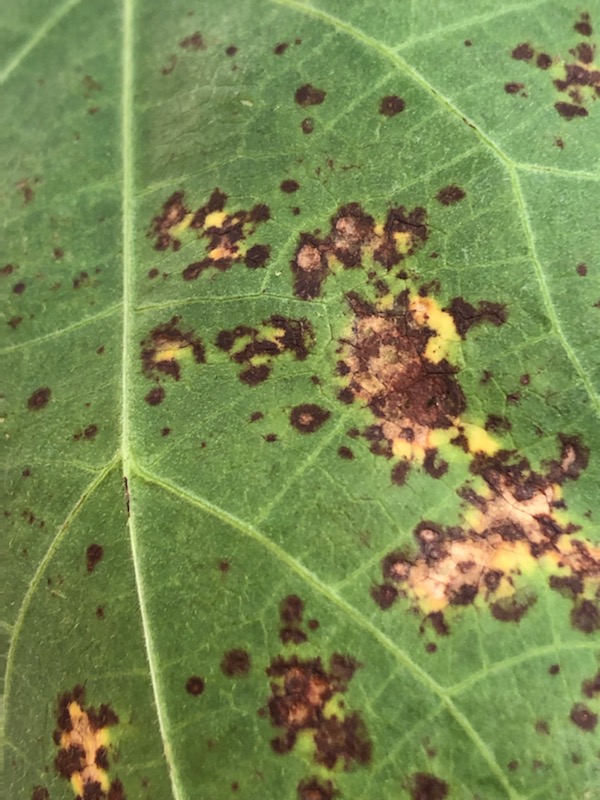
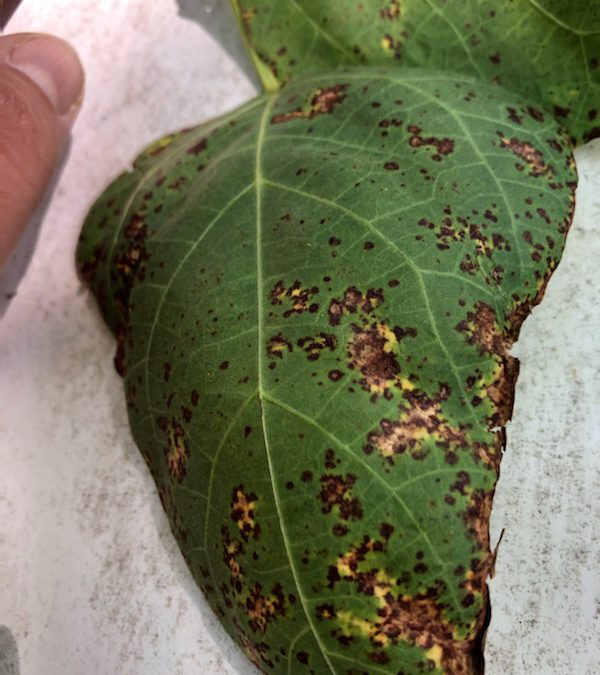
Snap Bean leaf with common bacterial spot – Image Credit Matthew Orwat, UF/IFAS Extension
As snap bean season is winding down and daytime temperatures regularly approach the lower 90s, common bacterial blight is making its presence known. In March or April, when snap bean plants are young and full of fresh growth, vegetable gardeners would never guess that their leafy plants could turn spotty and ugly during harvest time.
That is exactly what happens when daytime temperatures steadily remain in the mid-80s and low-90s, and nighttime temperatures are in the lower 70s. The perfect storm for this bacterial disease occurs when these temperatures combine with afternoon and evening showers, creating sticky, humid nights perfect for the proliferation of the causal agent, Xanthomonas campestris pv. Phaseoli.
Common bacterial blight begins showing up on older leaves first and then slowly spreads to younger growth and pods. If plants are left untreated, disease progression will continue if rainy nights and warm daytime temperatures continue. If weather conditions are consistently dry, daytime temperatures are above 90 and overhead irrigation is limited to mornings or eliminated, the blight will stop progressing to new growth. This disease may also be transmitted by insects.
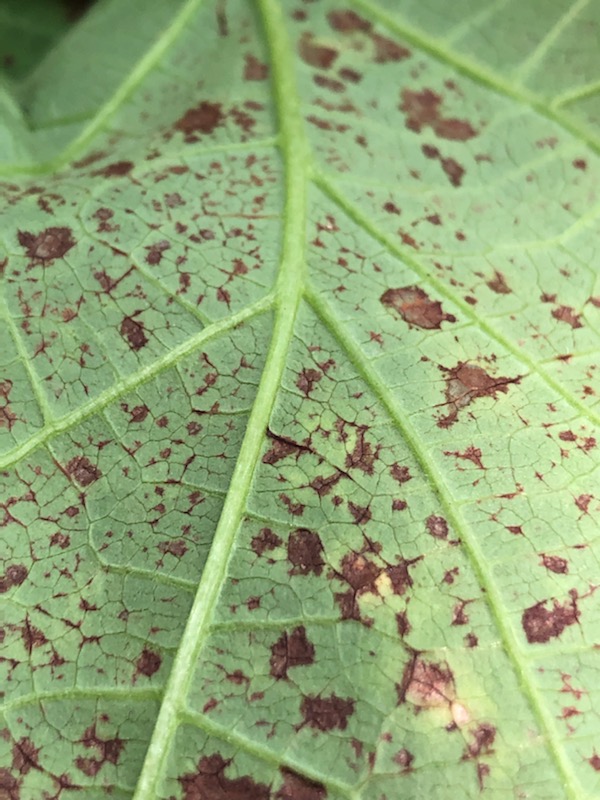
Note the brown, water-soaked spots on the underside of this leaf, typical of a bacterial infection – Image Credit Matthew Orwat, UF/IFAS Extension
If conditions favorable to common bacterial blight exist, preventative sprays of copper fungicide will work to

Snap Bean leaf with common bacterial spot – Closeup – Image Credit Matthew Orwat, UF/IFAS Extension
reduce infection and damage to crop, but there is no product to cure what has already been infected.
One of the best techniques available to manage common bacterial blight in beans is to rotate crops regularly so that legumes are not grown on the same ground year after year. This is easily accomplished in a diverse home garden with different raised beds or garden plots.
To learn more about common bacterial blight of bean follow these links to the NFREC Plant Pathology U-Scout page or read IFAS Extension PUBLICATION #PP-62

by Stephen Greer | Apr 14, 2022
We all must begin somewhere in horticulture, including growing yummy vegetables of your own to enjoy and share. This activity, or is it passion, has a long colorful history while most of the time provides an exceptional food source. It can be a bit daunting the first time you try and maybe even the others to follow with determining what, when, where and how to plant for a future harvest.

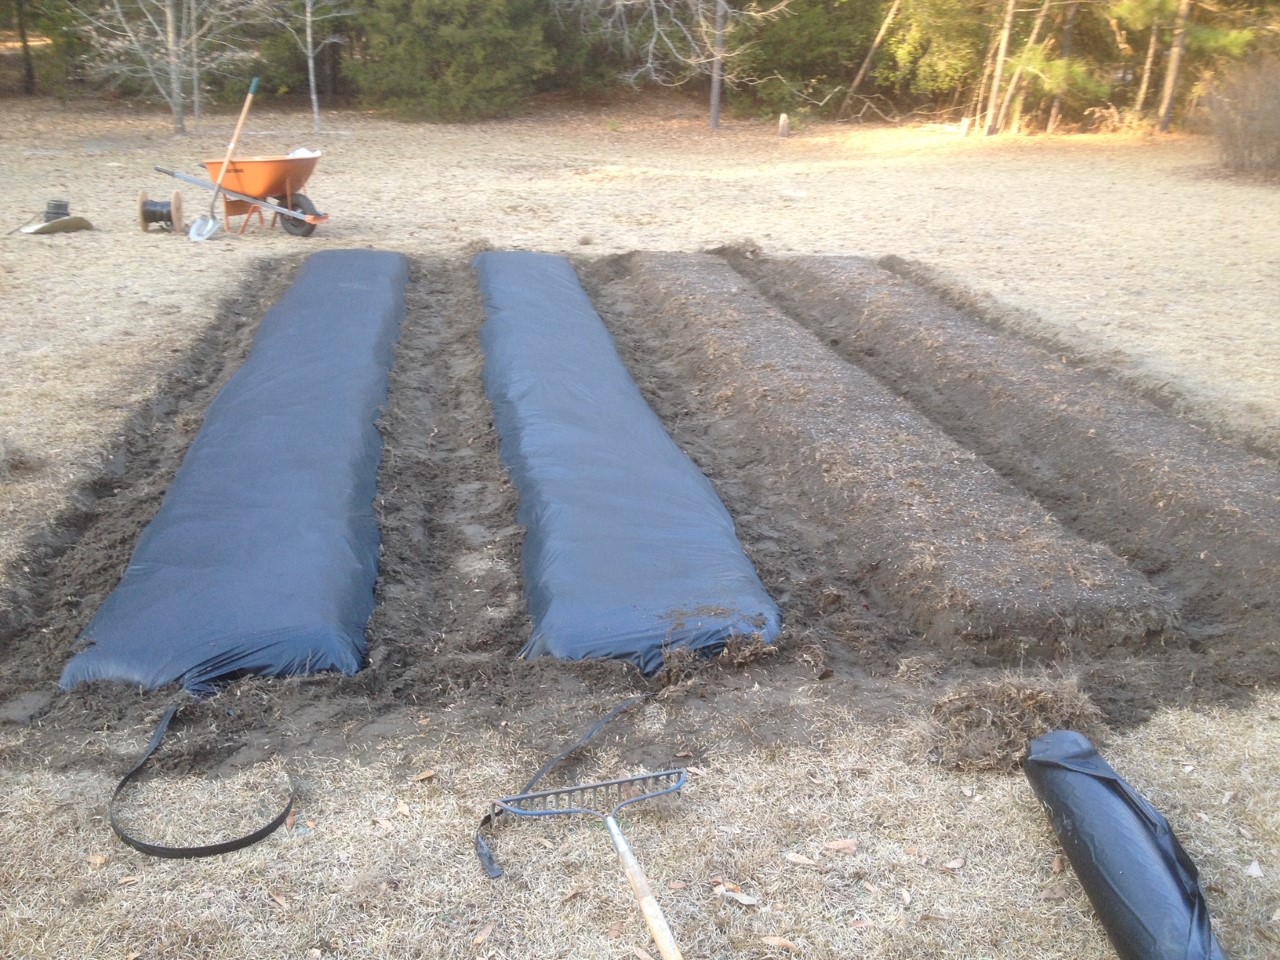
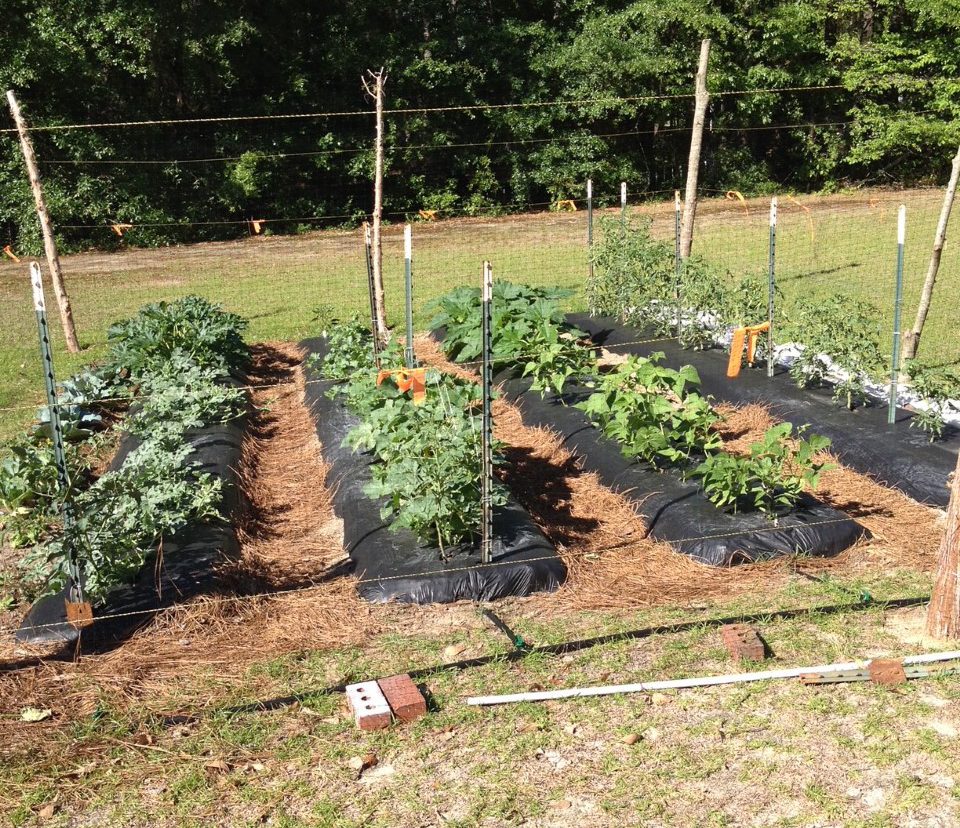
Raised Bed Vegetable Garden with Drip and Black Plastic. Photo Credit: Stephen Greer, UF/IFAS Extension – Santa Rosa
Selecting that convenient site in full sun easy with access to check on the plants progress. Things you will need to consider are the number of hours of direct sun the garden area will receive. Most garden vegetables will need at least eight hours of sunlight. Many of the leafy greens can be grown with less than eight hours with the least amount of sun at six hours. All others will need eight or more hours of sunlight. Water is a critically important part of successful vegetable garden. Too little water and the plants will not survive well and produce little and too much will reduce or end plant production. A general rule is one inch of water a week during the growing season. This can come from rain or irrigation and likely is a combination.
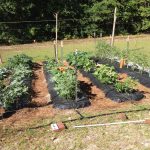
Mid-Spring Production with Managed Irrigation. Photo Credit: Stephen Greer – UF/IFAS Extension – Santa Rosa
Planning your garden before doing anything else is critically important. Take out a paper and pencil and sketch out how you want to plant your garden and what you want to grow. Start by drawing rows and labeling each row. Think about spacings between plants in the rows and between rows. Do you plan to plant everything in the ground, raised beds or on a trellis? More effective space utilization can occur by planting two- or three-foot-wide beds to plant multiple narrow rows that can be managed and harvested from both sides of the bed. Some plants to think about growing this way are leafy greens such as lettuce, kale, onion and others.
Going vertical to grow vine type plants like beans, cucumbers, early spring peas and others can be a fun part of gardening. This type of gardening allows for more space use over the same ground area. Other plants can be grown in the same bed depending on the light.
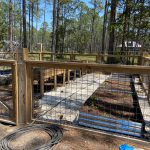
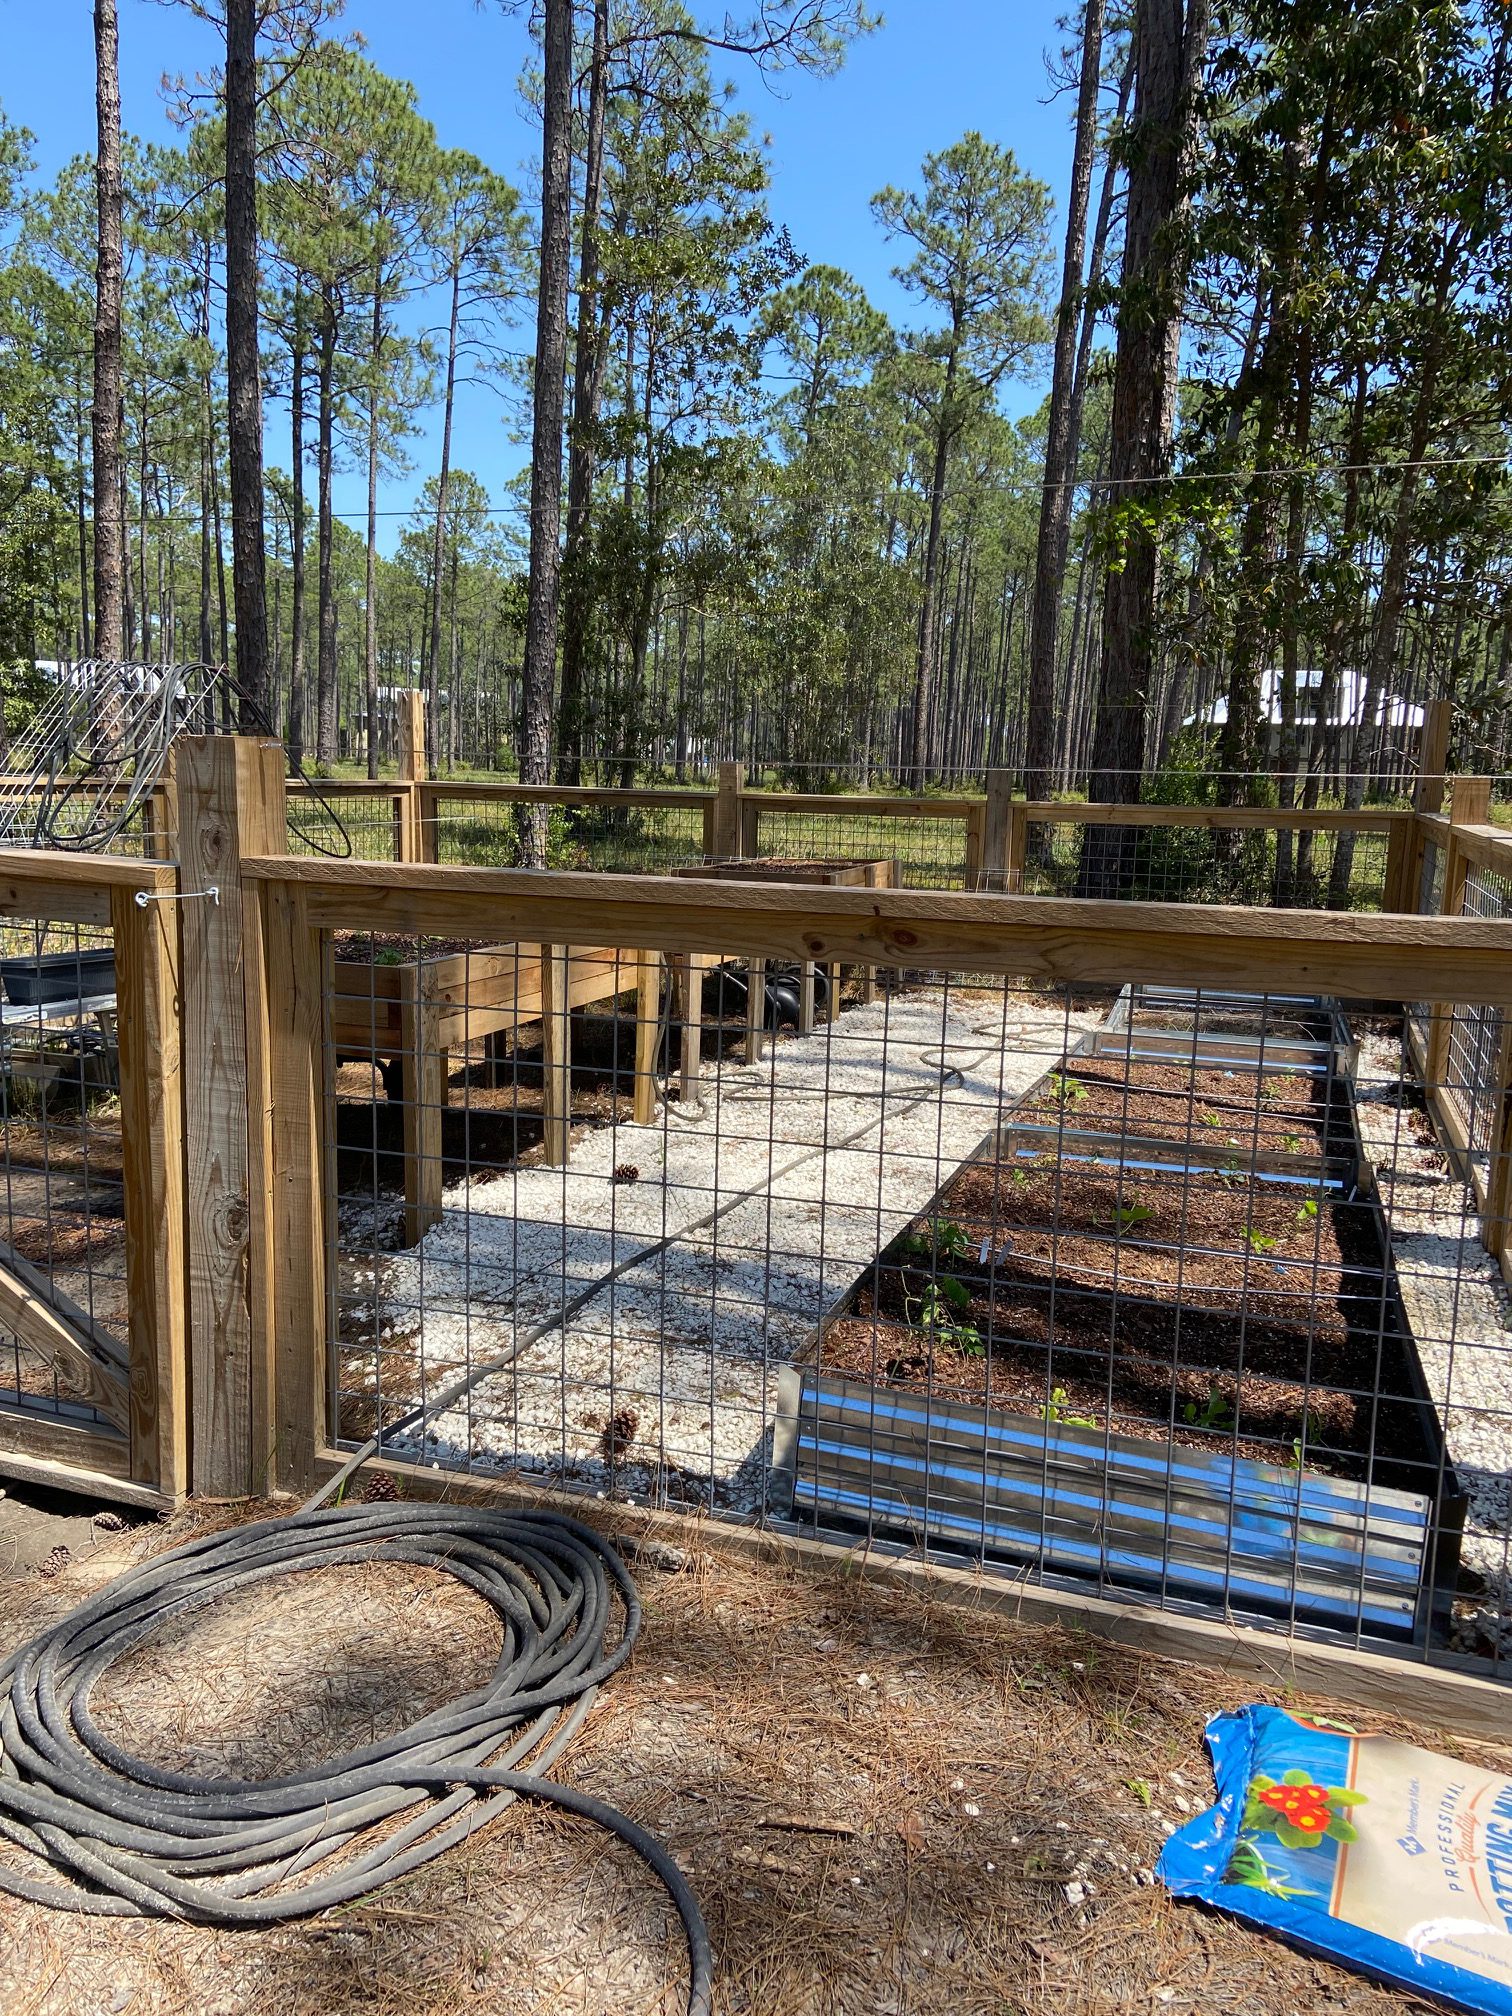
Multiple Types of Raised Beds. Photo Credit: Stephen Greer, UF/IFAS Extension – Santa Rosa
If you have interest in growing with raised beds, there are a number of materials that are used to build the beds. First do not use old railroad ties as they will leach chemicals into the soil that the vegetables can possibly take up or contaminate your soil. I have seen all kinds of creative materials used including cedar wood, plastic boards or preformed beds, even old whiskey barrels with legs built under. Do not forget all kinds of planting containers are available in the marketplace. Make sure there are drain holes in the bottom to allow the water to properly move through.
This is just the beginning of vegetable gardening. Other things to plan involve when to plant, what to plant, what is the budget, use seeds or transplants, depth of planting, watching for plant pests, harvest, storage and so on. Enjoy your gardening adventure!
by Matthew Orwat | Mar 31, 2022
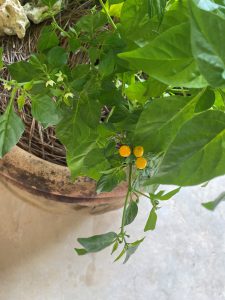
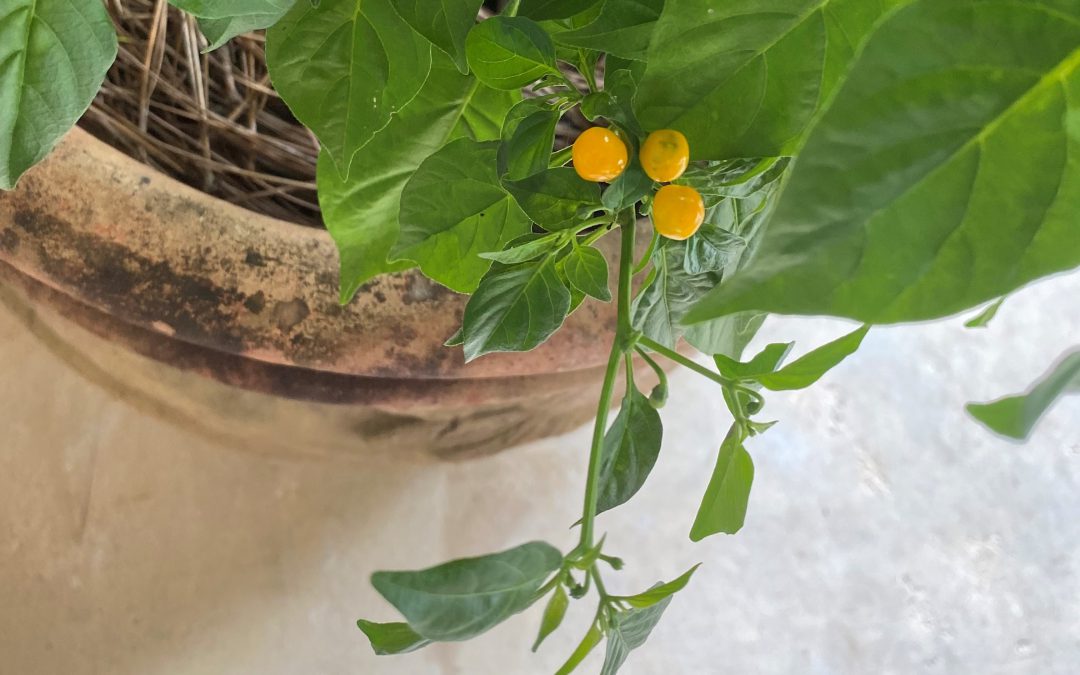
Fruit of the charapita pepper. Image Credit: Stephanie Gainer, UF / IFAS Extension Master Gardener Volunteer
As spring has officially sprung, my mind has been turning to what delectable delights we may be able to grow this year in our Extension Demonstration Vegetable Garden. A few years ago, I was introduced to the very flavorful pepper, aji charapita (to be referred to as charapita) by one of my master gardener volunteers, Stephanie Gainer. When we met Stephanie and I discovered we both shared a love for spicy cuisine, so she introduced me to the charapita. I thought I had heard of all the peppers in cultivation, but when I heard this unusual flavorful pepper, I was astonished!
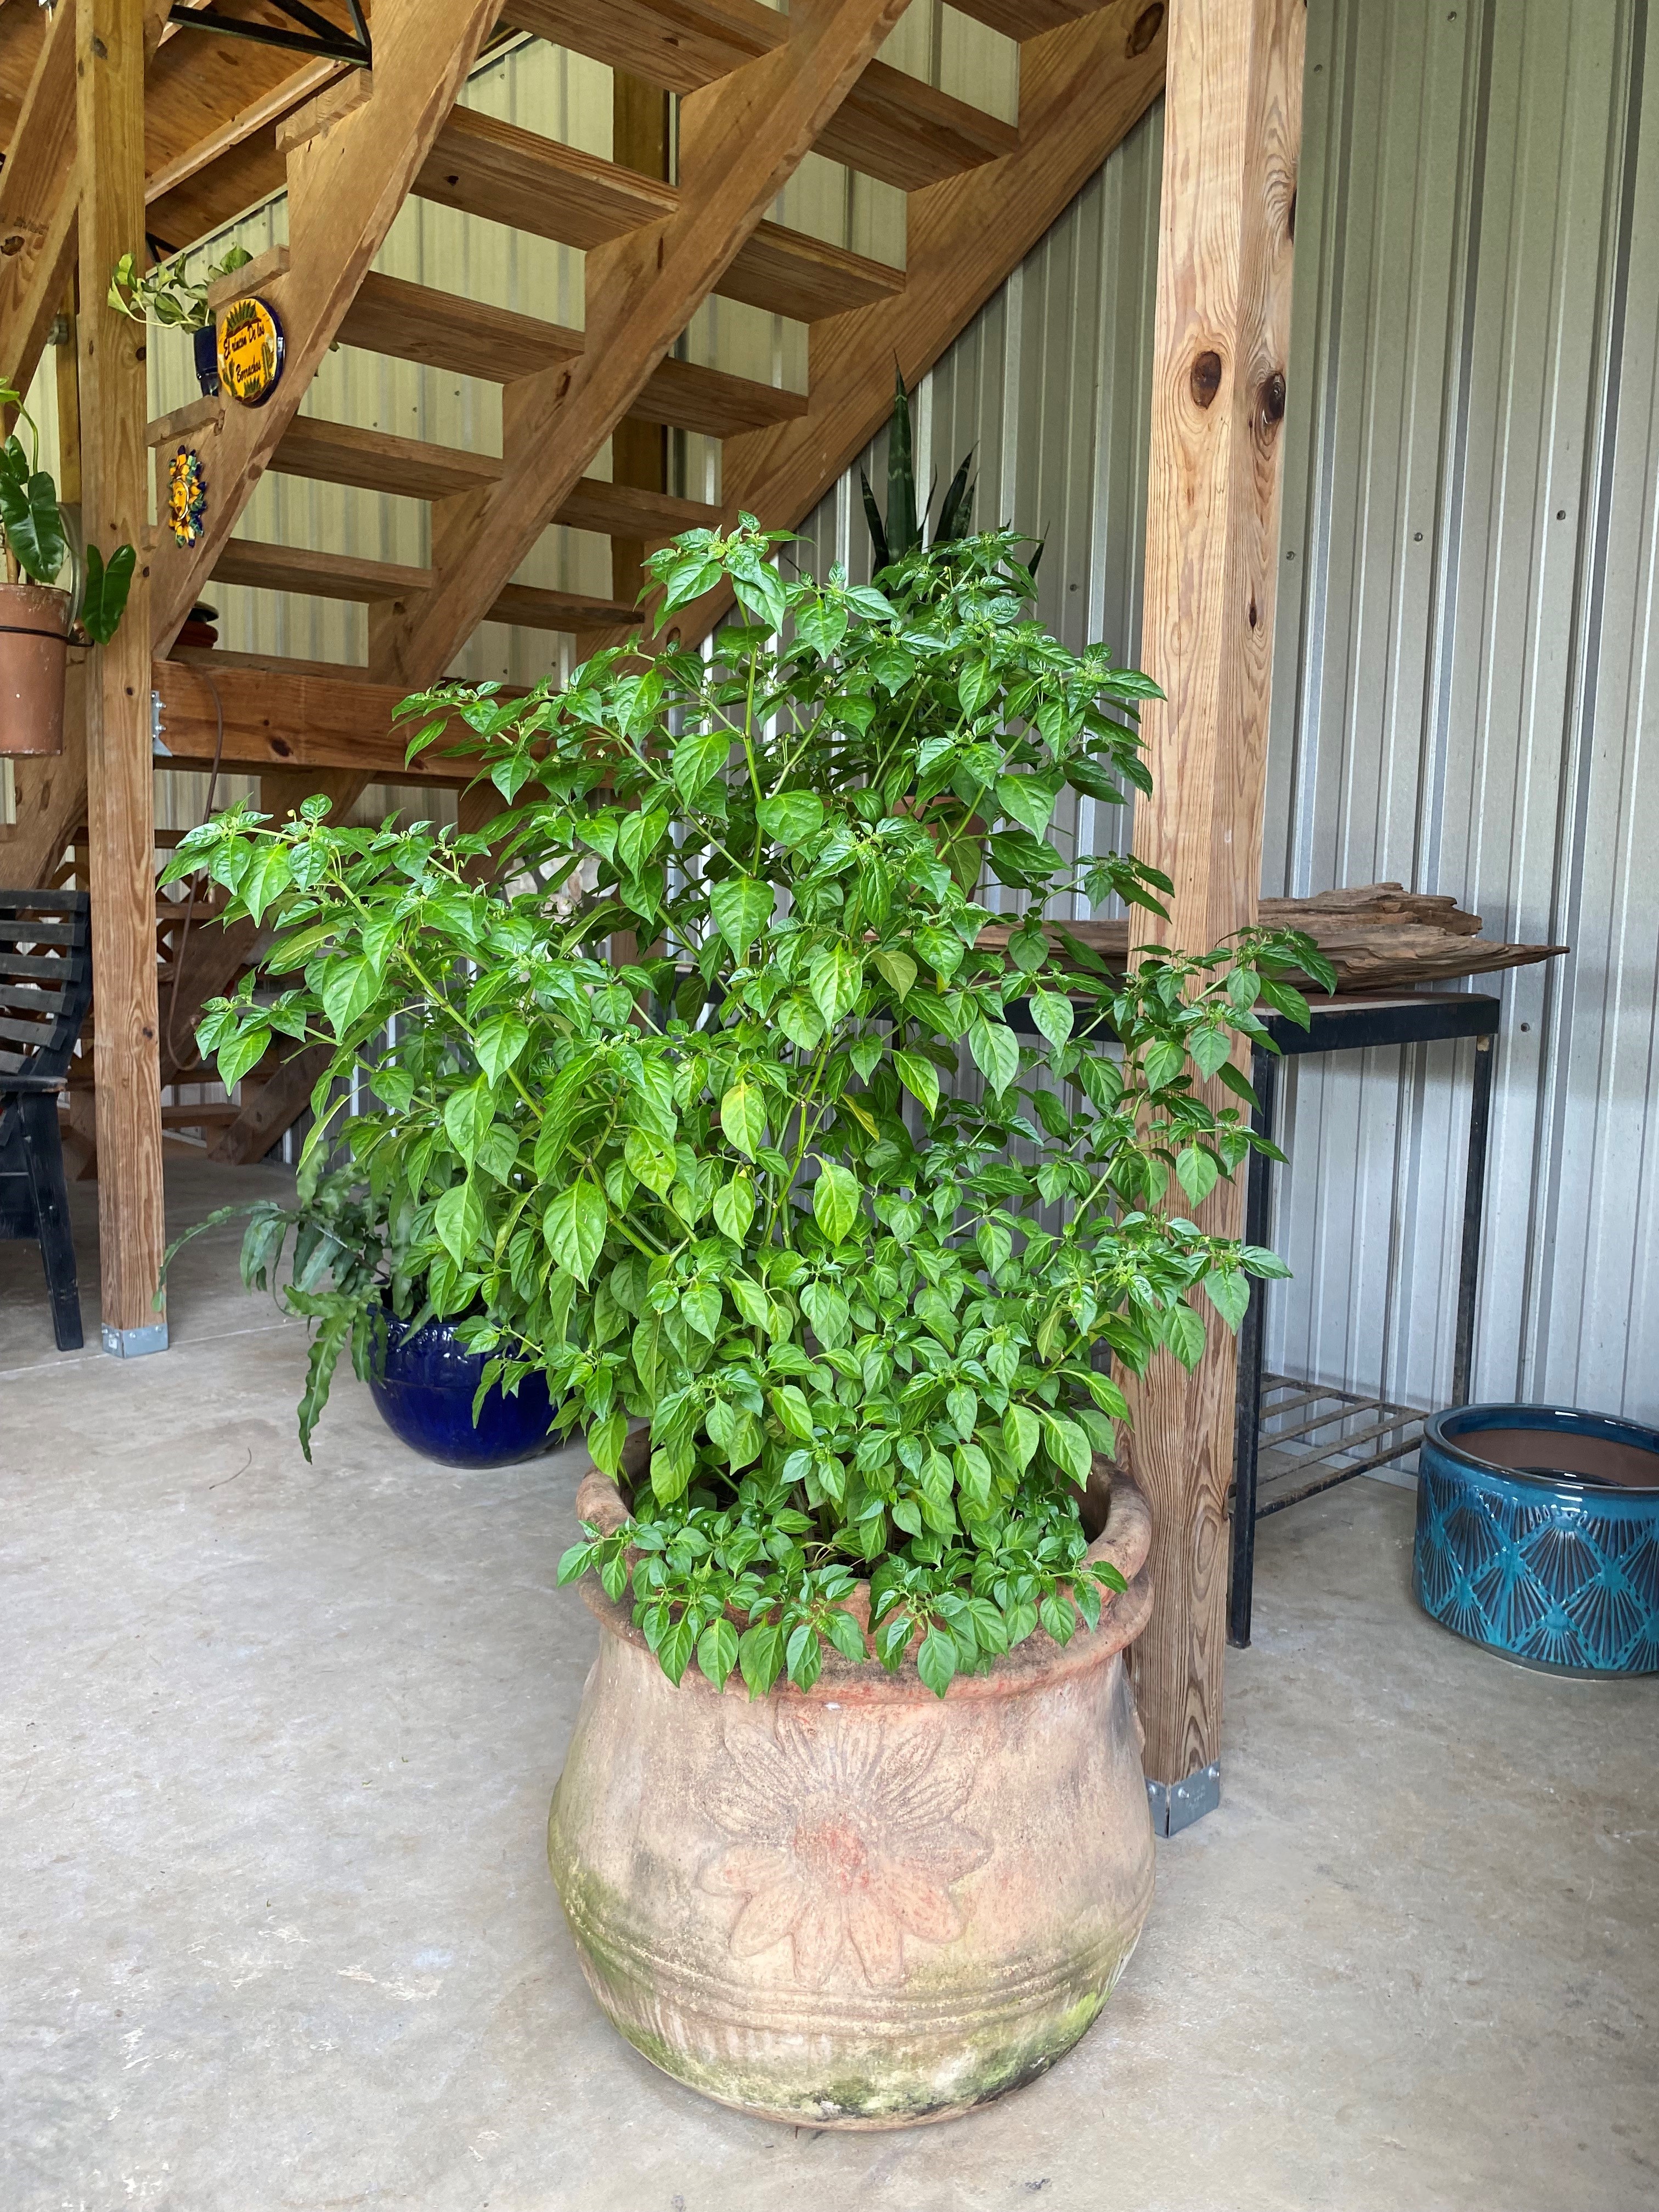
The charapita pepper is a small pea sized pepper that begins purplish brown and is a bright orange/yellow when ripe. It is a native of the Peruvian Amazon and holds the designation of being the most expensive pepper when sold by dry weight. Reasoning for this is two-fold, since it is very difficult to germinate, and the fruit is very small in size. They also require warm nights to fruit, so production is not suited for every climate. Also, we have found that they do best in the central Florida Panhandle when given afternoon shade after 6-8 hours of full sun in the morning. Aside from these requirements, cultivation is very similar to other hot peppers. As a compact plant, it is ideal for container culture.
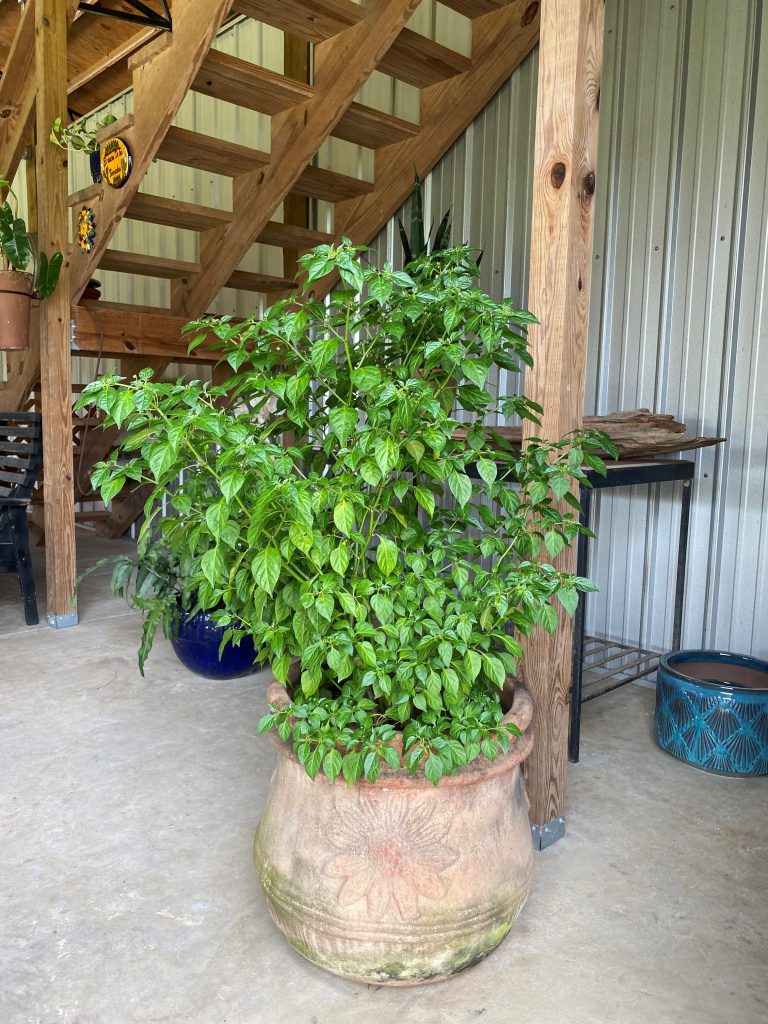
Large but compact charapita pepper plant in a container. Image Credit: Stephanie Gainer, UF / IFAS Master Gardener Volunteer
When germinating seed, it is recommended to grow them indoors, 8-12 weeks before the last frost date in your area, in a very sunny location with a heating pad at the base of the starting pots. Once temperatures are consistently above 50°F during the night it is ok to set them out in the garden.
As with other hot peppers, they should be fertilized with a standard vegetable fertilizer blend at planting and periodically thereafter based on the needs of the plant in ones individual garden.
Charapita has a unique citrus and tropical fruit aroma and taste, providing the usual heat associated with cayenne peppers (about 50,000 Scoville heat units). It is often used fresh in small amounts when flavoring rice and seafood dishes but is also used as a dried ingredient for chili and grilled meat preparations. Some have said it is best added at the end of cooking. Most likely, it would be an excellent addition added fresh to finely chopped salads, to spice up traditional chimichurri or in Pico de Gallo.
In the central Florida Panhandle, we have been unsuccessful at overwintering plants so far, but others by the coast or in central or south Florida might have more success.
For more information about growing peppers in your home garden, please follow this link for a Gardening Solutions publication on the topic.
An Extension colleague of mine, Gary Bachman of Mississippi State University, has penned this excellent article about specialty peppers with a great pickling recipe for charapita. Happy growing!