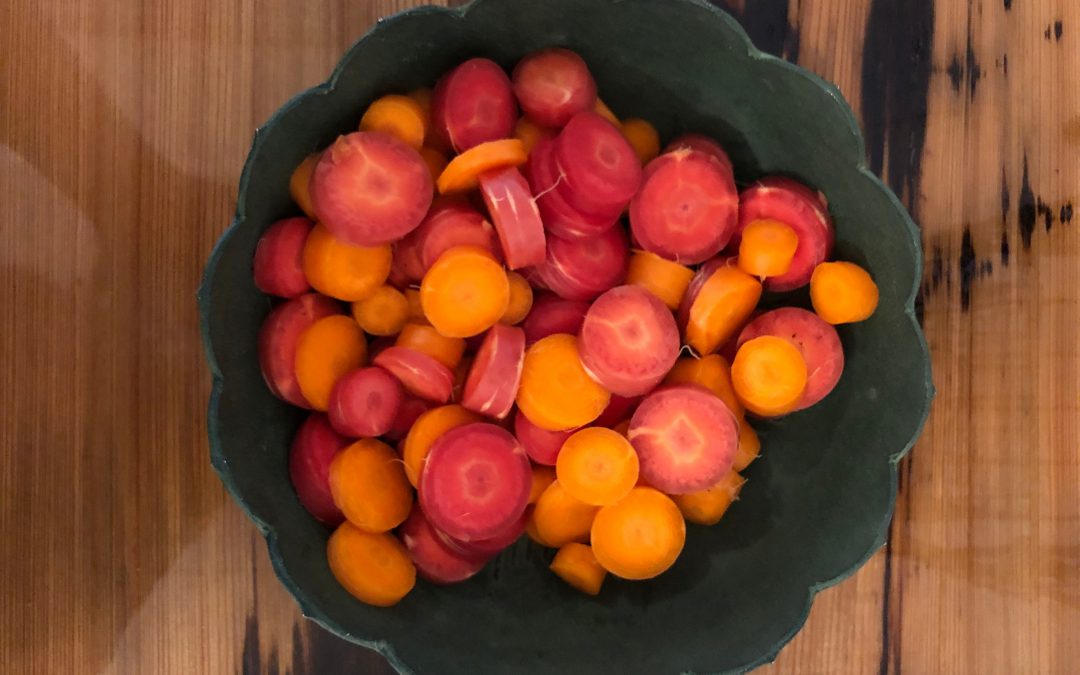
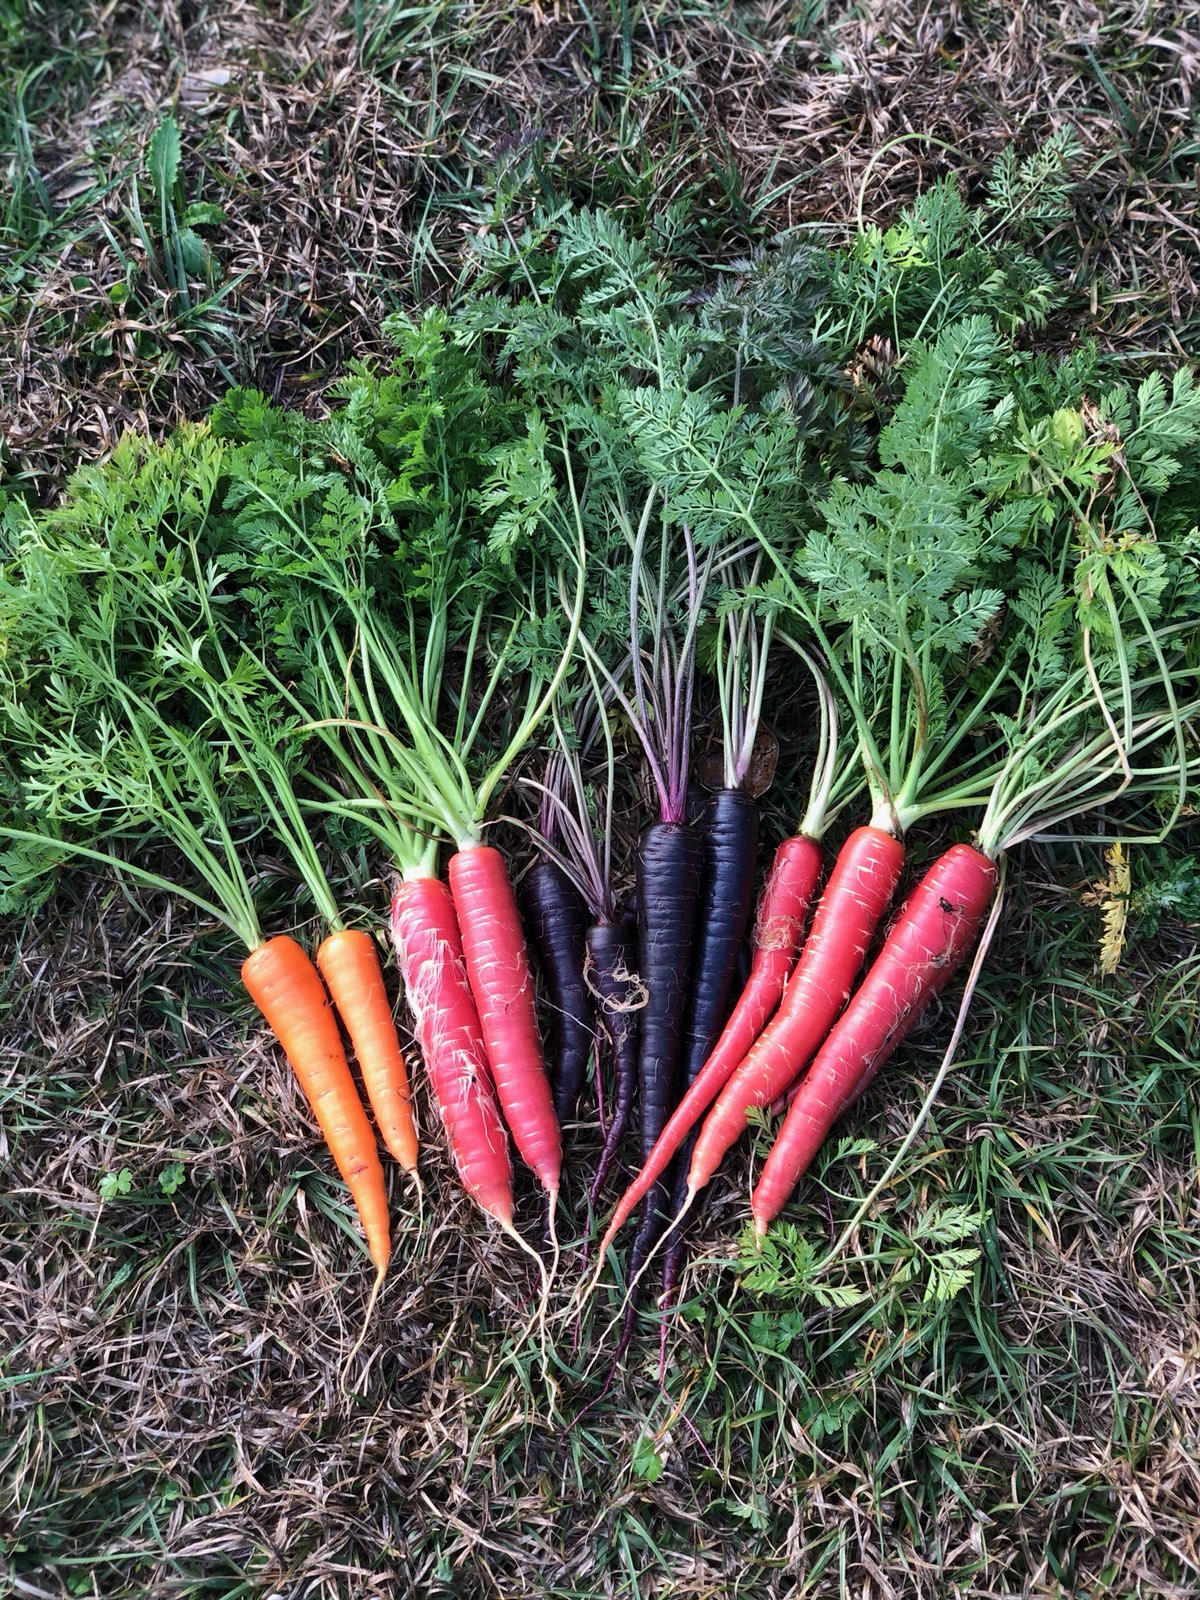
Carrots are synonymous with a few things: Bugs Bunny, old wives’ tales about improving eyesight, and the color orange. For centuries, orange colored carrot varieties have been the industry standard and still dominate store shelves. These days though, choices for consumers are ever expanding and thankfully home garden carrot variety selection has participated in this phenomenon! With a little searching, gardeners can now source and plant any color and/or type of carrot they desire. For instance, this winter, I planted carrots of various types in various shades of orange, purple, and red. Through this experience, I also found that not all colored carrots look, cook, or perform the same. The following is a quick primer on carrot types followed by my review of the four varieties ‘Bolero’, ‘Red Sun’, ‘Deep Purple’, and ‘Malbec’ after a season of growing.
There are three main types of carrots regardless of color: Imperator, Nantes, and Chantenay. Imperator types are the extra-long, durable, sweet tasting carrots most often found in stores and are suited best to deep, loose soils. Nantes type carrots are medium length and cylindrically shaped, often with a blunt tip. Sometimes called “storage” carrots, Nantes types are easy to grow and tend to store well for long periods of time after harvest and retain their flavor well. Finally, Chantenay type carrots are excellent performers in shallower beds or soils as they are a bit shorter, possessing a conical shape with roots wider at the top and tapering to the tip, making a deep soil bed a bit less critical. I primarily grow Imperator and Nantes types as I find they give you a little more bang for the buck if you have a deeper (>6”) raised bed. Now, on to the variety reviews.
‘Bolero’ – I always have this carrot in my garden. An extremely versatile Nantes type carrot that has been a consistently high yielder for me whether I grow it in pots or in a traditional raised bed. Typical for a Nantes type, ‘Bolero’ stores very well in the refrigerator and will change your culinary life if you’ve only ever eaten carrots purchased from a store. They are excellent either fresh or cooked, with a complex, sweet taste. If I could only grow one carrot, it would be this one.
‘Malbec’ – Colored carrots have a poor reputation as far as flavor is concerned. ‘Malbec’ is the first non-orange carrot that changed my mind. This Imperator type is as flavorful as they come, deep red throughout, and is easy to grow. For some reason, ‘Malbec’ has been hard to come by the last two years, but if you spot seeds in a catalogue, online, or on a store shelf, it is well worth a purchase!
‘Red Sun’ – Winter 2020 was my first experience with ‘Red Sun’, a brand-new Nantes type carrot from Bejo Seeds. I only planted this variety because I initially could not source ‘Malbec’. Having said that, I was very pleased with ‘Red Sun’. The carrots were extremely vigorous, had excellent top and root growth and mostly held their own with ‘Malbec’ flavor-wise in the kitchen also. I would purchase ‘Red Sun’ again!
‘Deep Purple’ – Wow, they weren’t kidding when they named this variety! Most purple carrots are colored on the exterior but fade to a “normal” orange at their core. Not ‘Deep Purple’! This Imperator type is strikingly dark purple, almost black. Even the tops have a purple hue to them! Cooking them was also an interesting experience. Most colored veggies, peppers, carrots, and others lose their hue when cooked. Not this variety. Not only did ‘Deep Purple’ retain its color after cooking, my hands and cutting board turned a shade of indigo when preparing and, once put in a pan to sautee with other veggies, the juice from ‘Deep Purple’ dyed all the other veggies a deep violet! While I wouldn’t grow ‘Deep Purple’ as my main crop carrot, it definitely has a place in the garden as a tasty novelty.
Carrots are among the easiest to grow, most rewarding vegetables in the winter garden. Next fall, plant a variety of carrots in your home garden and enjoy the many types, colors and flavors that this tasty veggie has to offer! For more information on the above mentioned varieties, home carrot gardening in general, or any other horticultural topic, contact your local UF/IFAS County Extension office. Happy Gardening!
Daniel Leonard, Horticulture Agent at UF/IFAS Extension Calhoun County, answers commonly asked questions about raised bed gardening. In the video he discusses construction materials, the type of soil to use, fertilization, crop rotation, cover crops, and smaller container gardens.
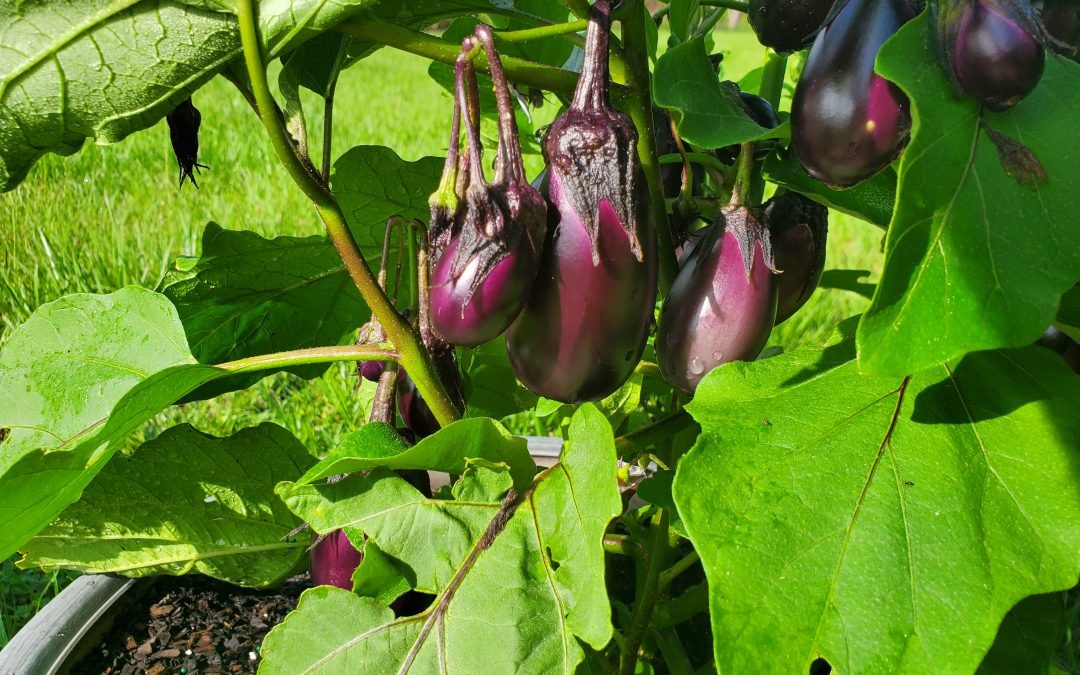
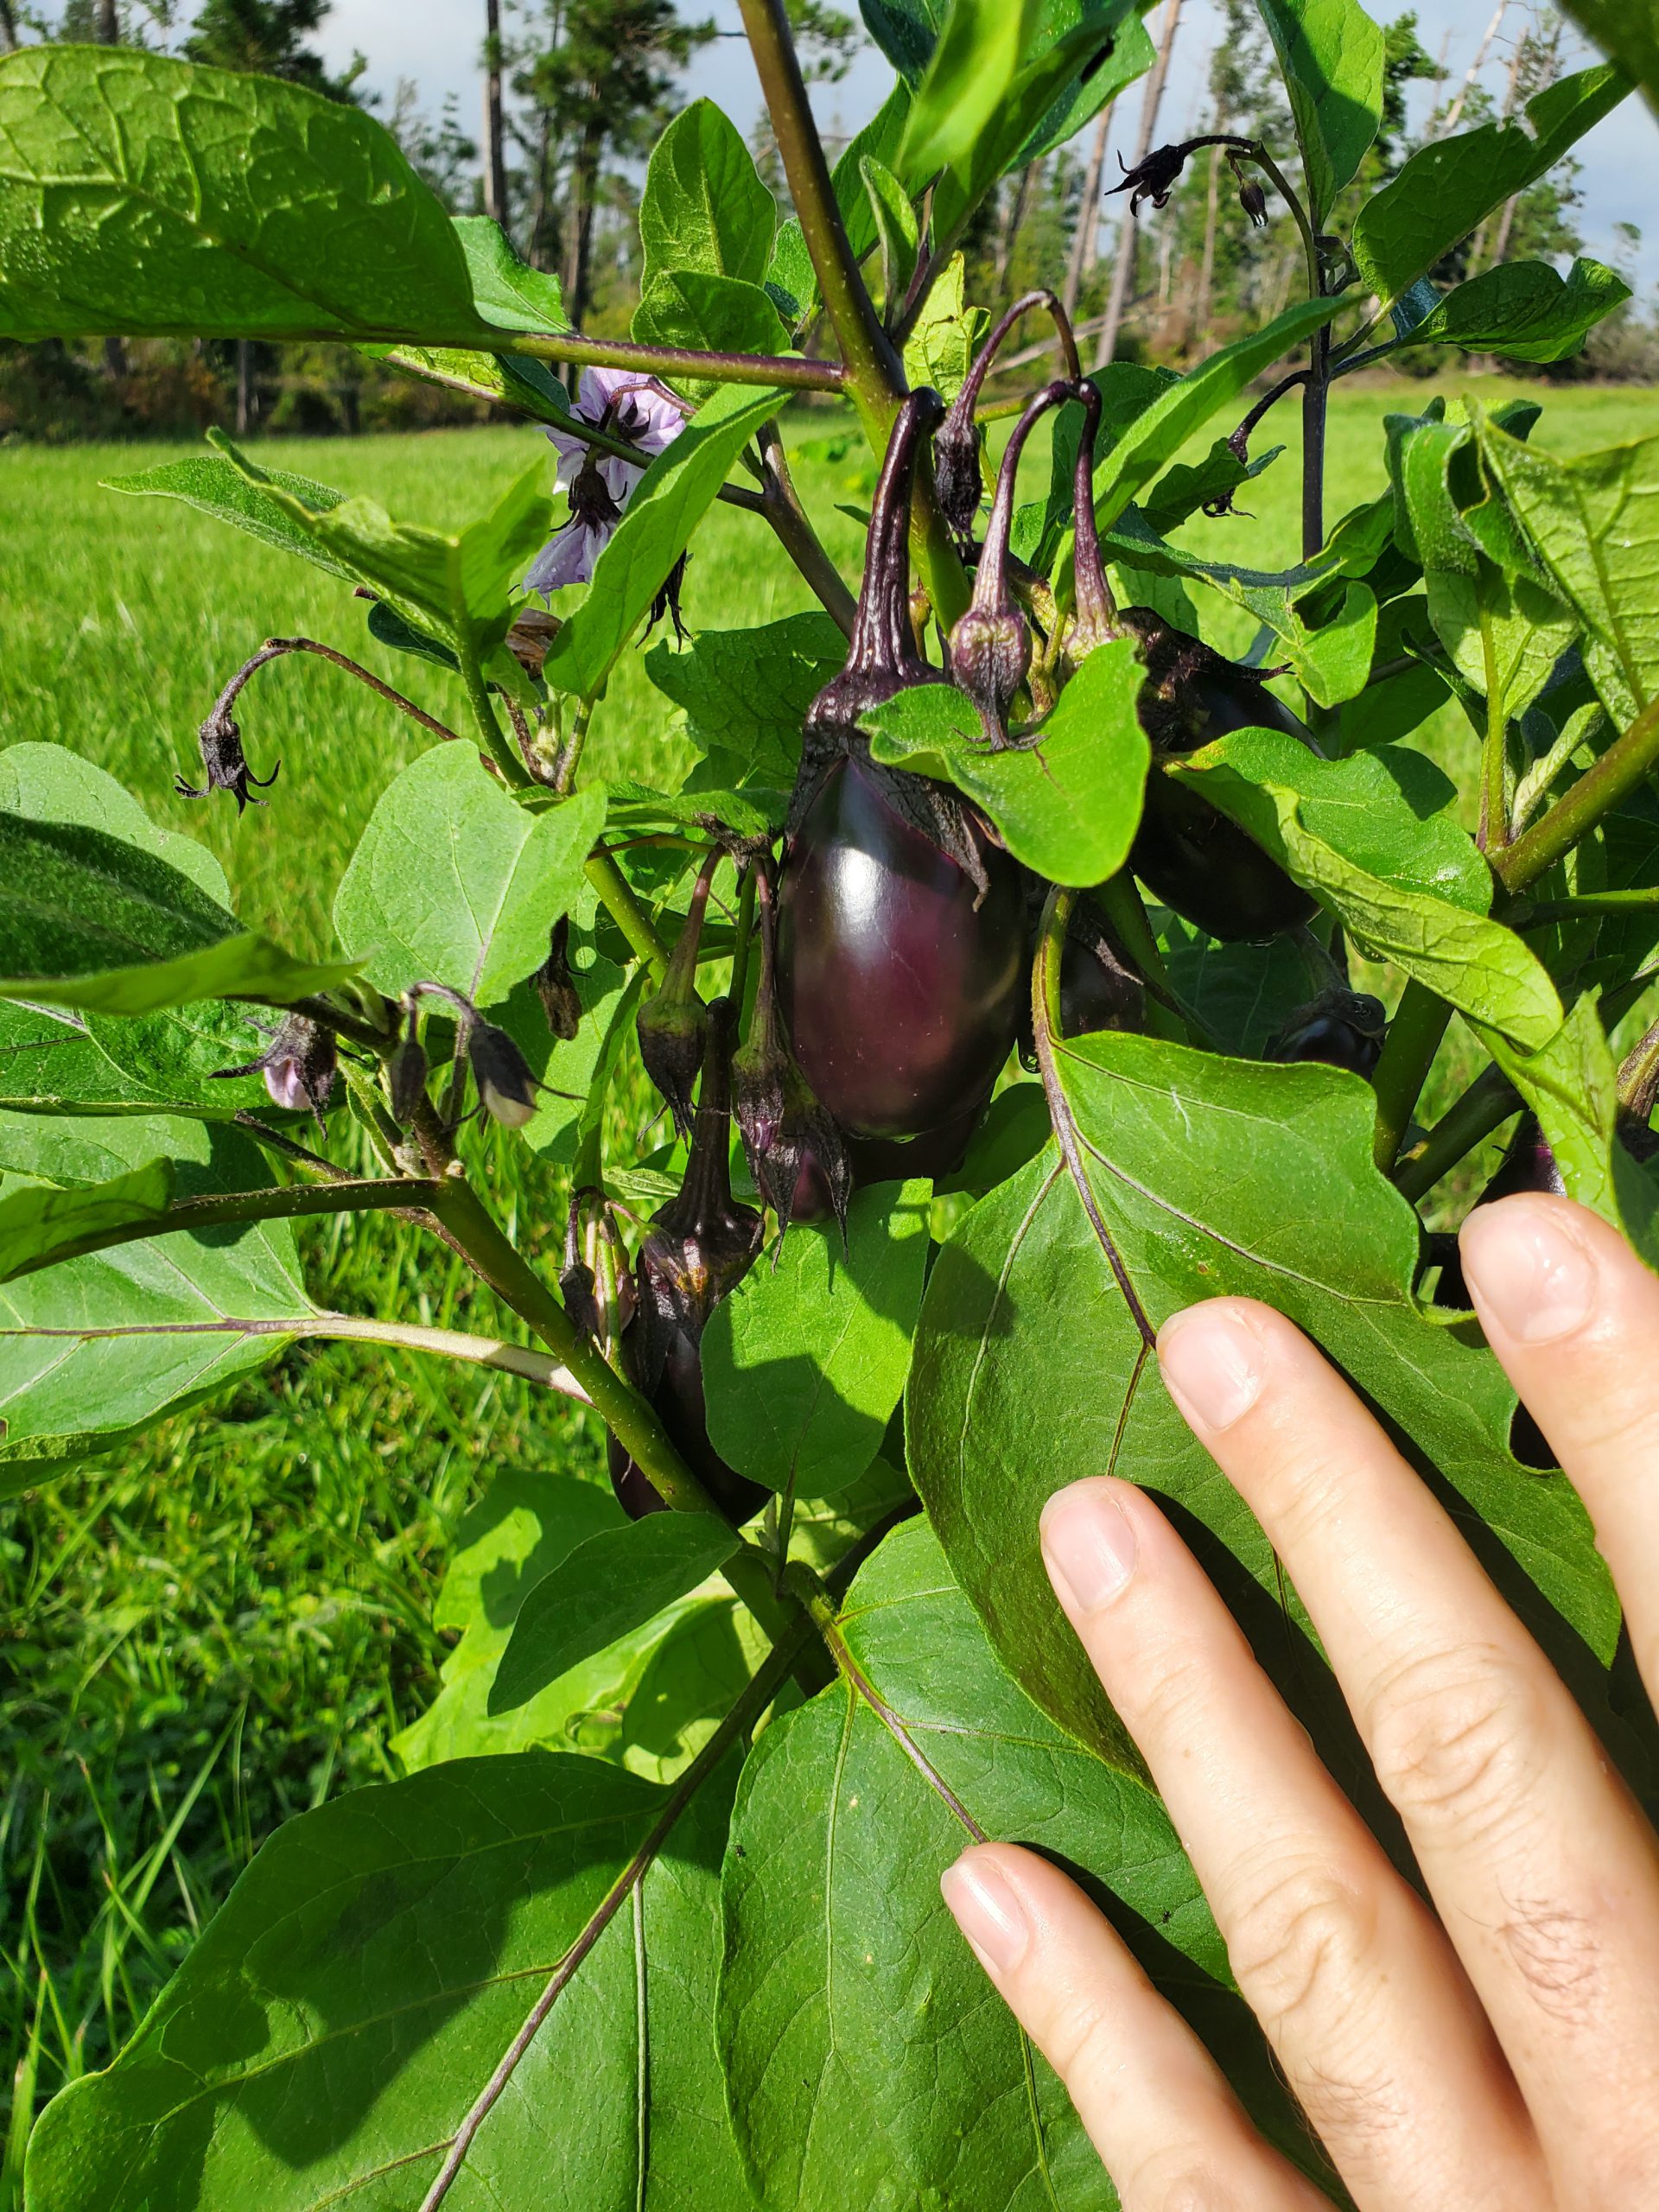
In my ongoing search for low-maintenance vegetable varieties that perform well in small spaces, like my raised bed garden, I decided to try a newish Eggplant variety called ‘Patio Baby’ this summer. Developed by PanAmerican Seed and winner of the 2014 All-American Selections Vegetable- edible category, I was drawn to ‘Patio Baby’ due to the advertising claims made that it was a true miniature variety, perfect for growing in containers, only reaching 20” or so in height and producing both “early” and abundant fruit. I’ve been very pleased with the performance of this extremely unique variety so far in my informal backyard trial and definitely think it deserves consideration in your garden too!
‘Patio Baby’ fruit ready for harvest in September 2020. Photo courtesy of Daniel Leonard.
The first observation when seeing a mature ‘Patio Baby’ is how small the plant is, leaves, flowers, fruit, everything. Compared to a standard ‘Black Beauty’ variety, ‘Patio Baby’ plants measure maybe a third as tall and wide. Where a “normal” eggplant fruit might be slightly larger than a softball and often have spines on their calyxes (the green part that connects the purple fruit to the stems), ‘Patio Baby’ fruit are roughly the size of a large chicken egg and totally spineless! I find this smaller plant and fruit size to have several perks. Vegetable plants that grow 2’ tall and wide are just about perfect for raised bed gardening. If you don’t require a large quantity of eggplant, you won’t have to sacrifice an entire bed’s space to ‘Patio Baby’ like you would with the standard varieties. Also, ‘Patio Baby’ fruit won’t bend or break branches and are held strongly on the plants, with no need for staking, another bonus when space is at a premium. Finally, I find it much easier to harvest, handle and prepare the small, spineless ‘Patio Baby’ fruit in the kitchen. Think of them as a “personal pan” eggplant. As I’m the only one in my house who eats much eggplant, I waste a lot less fruit cooking these little guys!
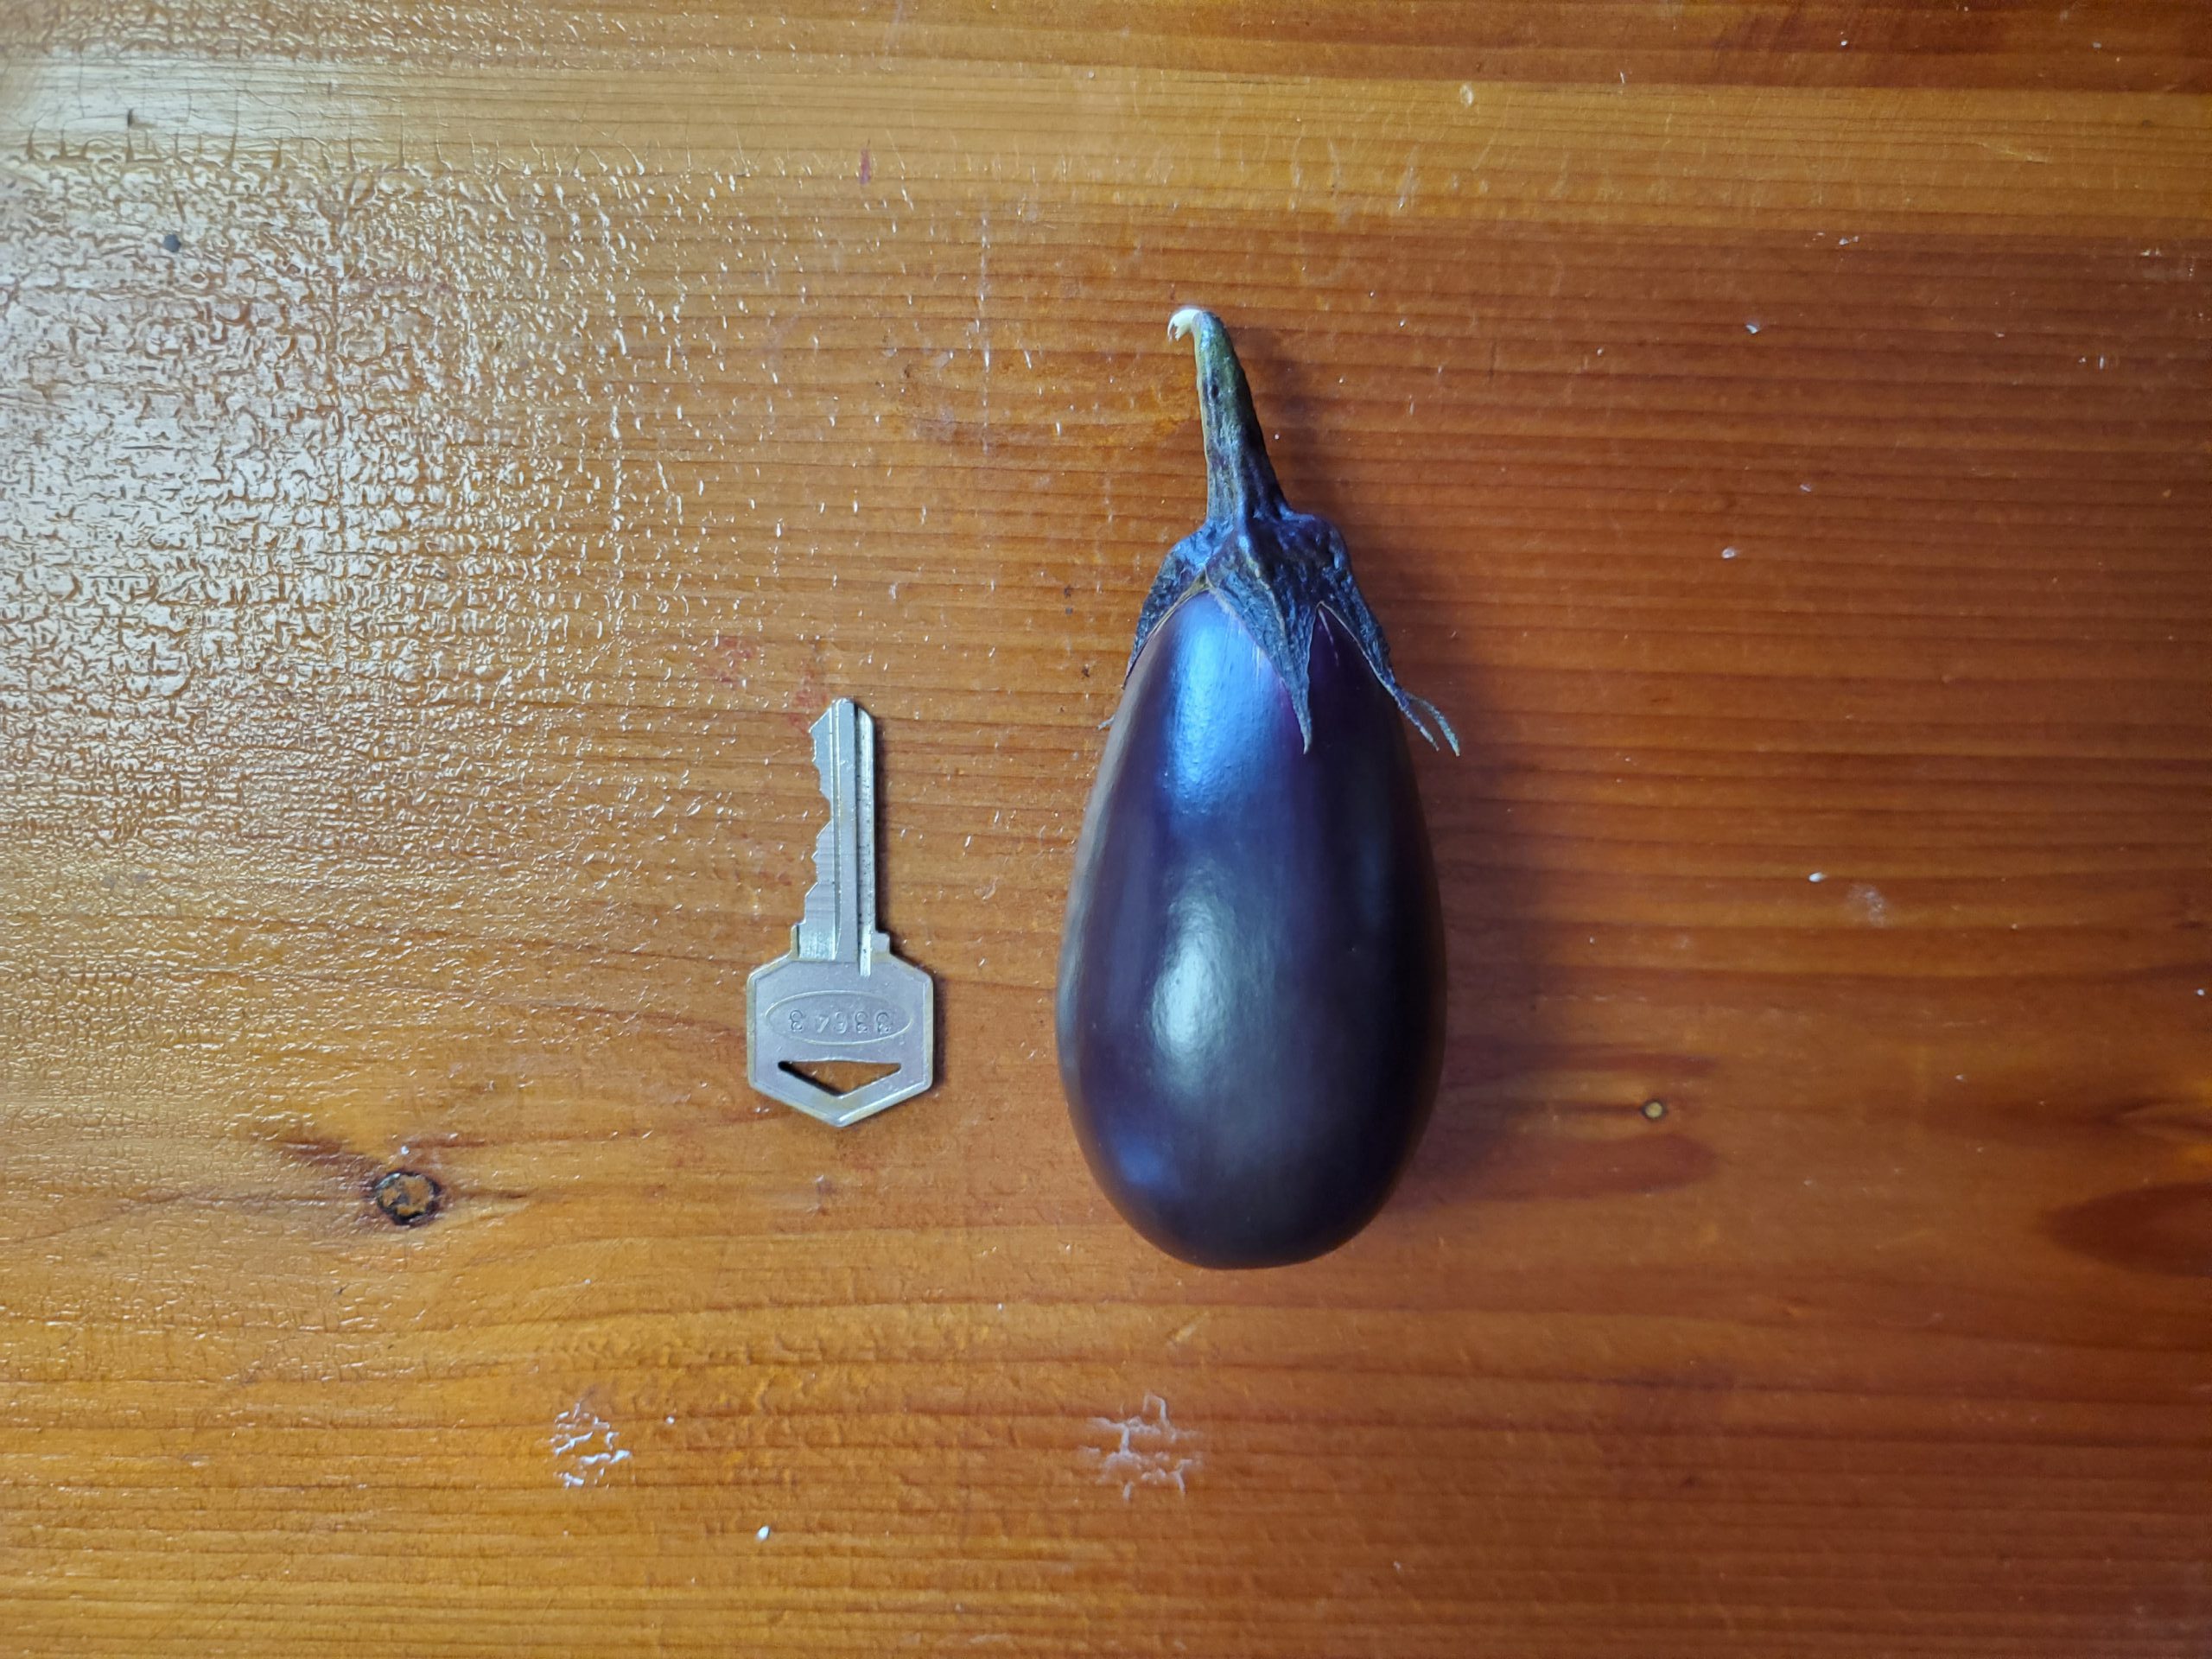
‘Patio Baby’ mature fruit. Standard house key used as a size reference. Photo courtesy of Daniel Leonard.
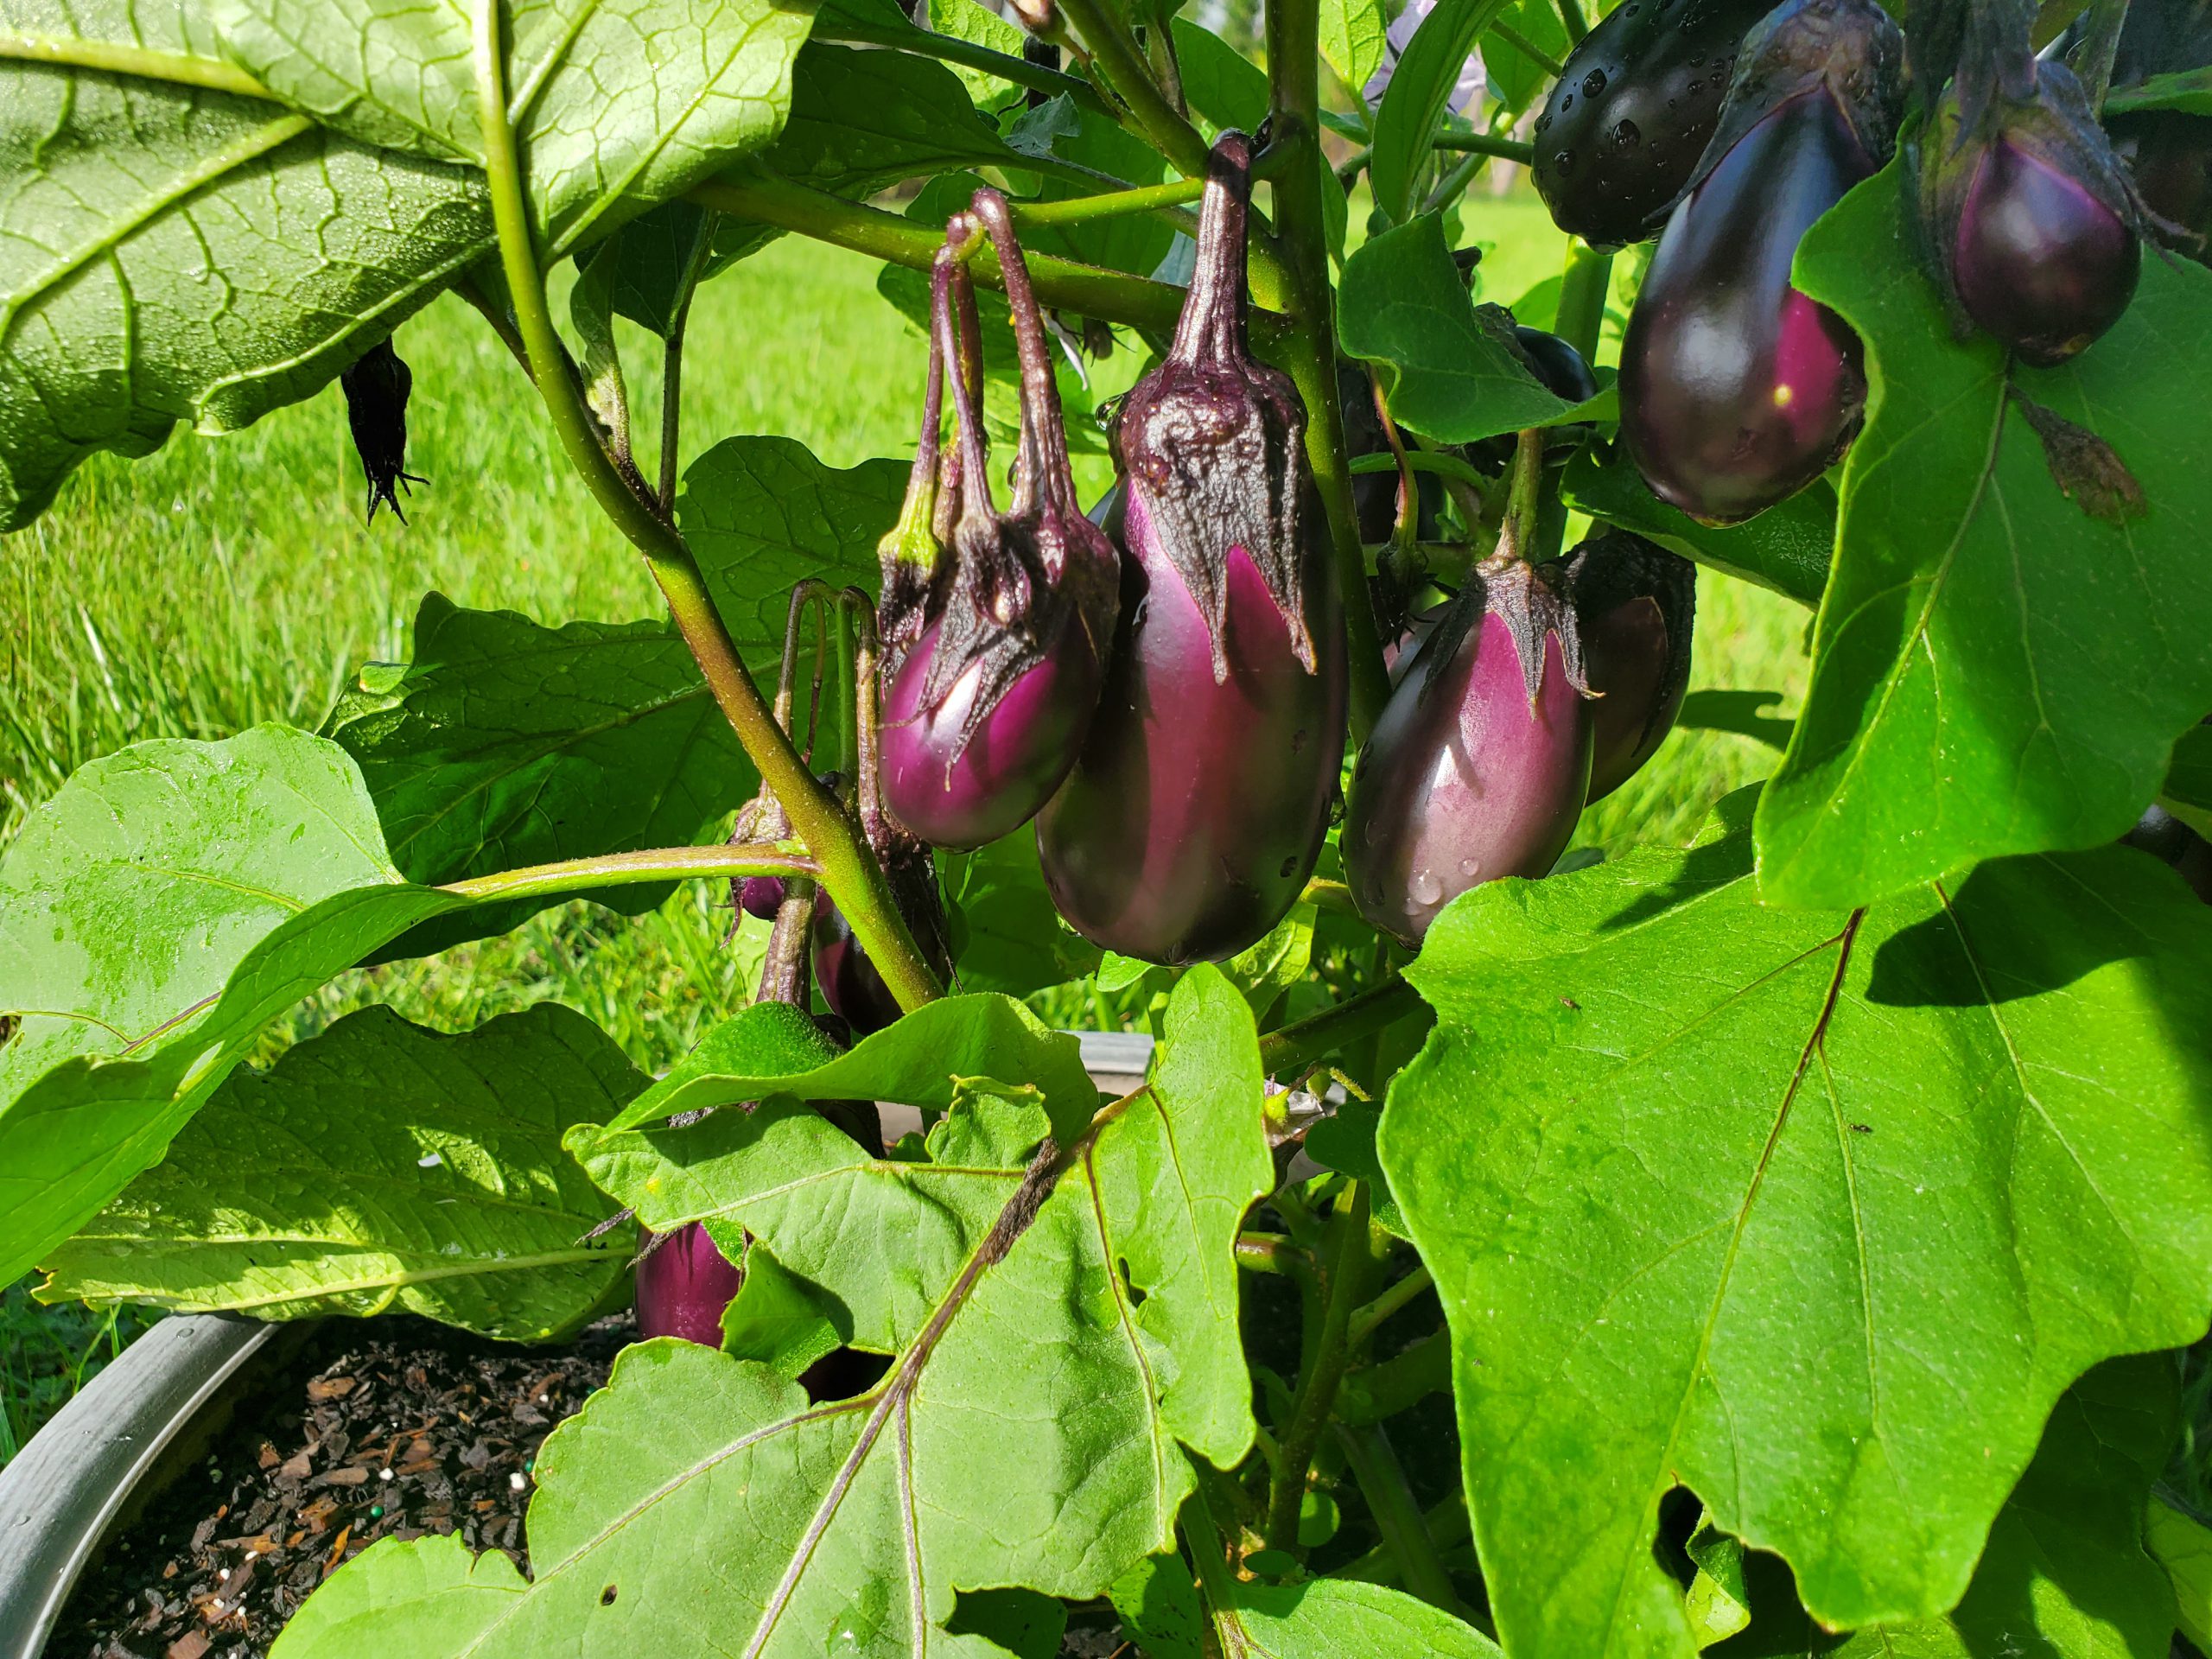
‘Patio Baby’ Eggplant also lives up to its reputation of being exceedingly easy and quick to grow. I purchased a packet of ‘Patio Baby’ seed from Johnny’s Selected Seeds in June and planted three in a 20” diameter decorative pot next to my raised bed garden during the first week of July, behind summer squash that had recently expired in the heat of late June. After sprouting, the plants grew strongly and, true to form for most Eggplant varieties, were bothered by no serious pest or disease issues other than the normal stinkbugs and occasional caterpillar that plague summer gardens in Florida. Around 8 weeks from sowing seed in the soil, cute, egg-shaped fruit were ready for harvest! Over the next three or four weeks, my single plant produced around 50 of the cute little fruit. More than enough for me and plenty to share, the goal of my gardening endeavors.
‘Patio Baby’ produces lots of fruit in a small package! Photo courtesy of Daniel Leoanrd.
If you’ve run out of space in your raised bed garden, just want a single plant for your back porch or simply want to try a novelty vegetable variety, my experience this summer deems ‘Patio Baby’ Eggplant is an excellent option! For an eggplant that is space-efficient, very early and heavy producing, and comes in a more easily harvestable, kitchen-friendly package, try ‘Patio Baby’. For more information about raised bed gardening, vegetable varieties or any other horticultural topic, contact your local UF/IFAS County Extension Office. Happy Gardening!
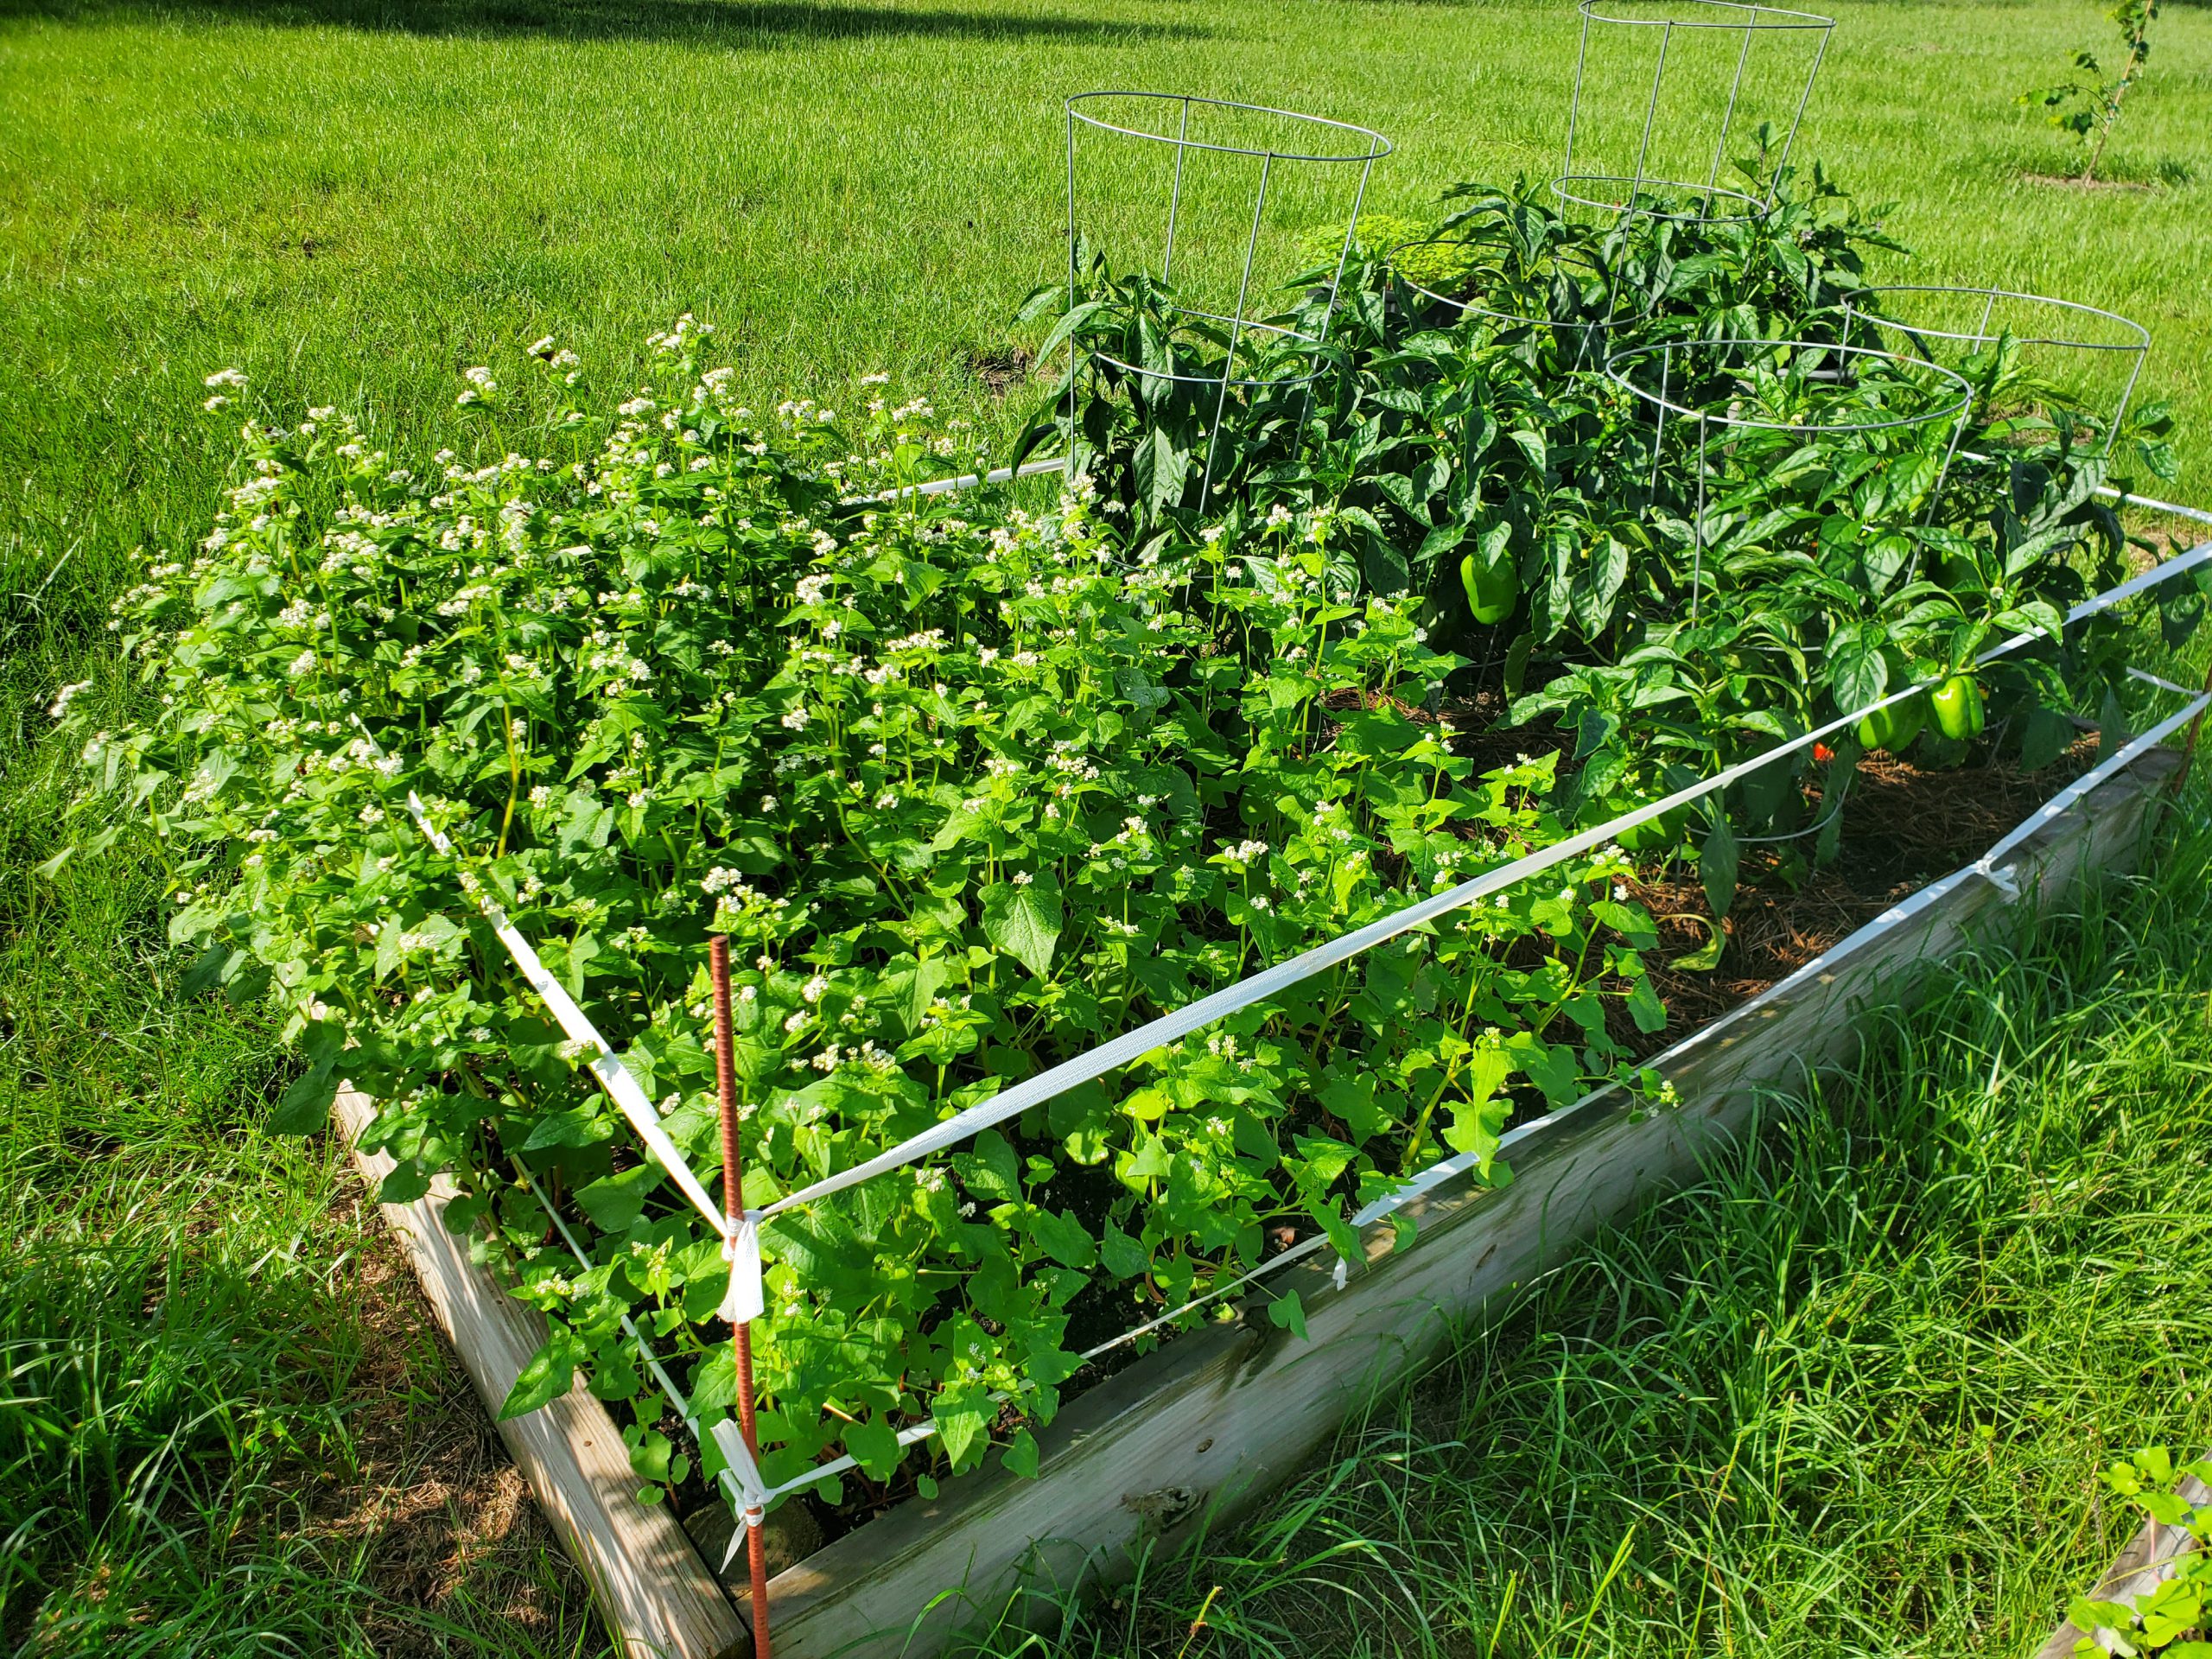
2020 has not been the most pleasant year in many ways. However, one positive experience I’ve had in my raised bed vegetable garden has been the use of a cover crop, Buckwheat (Fagopyrum esculentum)! Use of cover crops, a catch-all term for many species of plants used to “cover” field soil during fallow periods, became popular in agriculture over the last century as a method to protect and build soil in response to the massive wind erosion and cropland degradation event of the 1930s, the Dust Bowl. While wind erosion isn’t a big issue in raised bed gardens, cover crops, like Buckwheat, offer many other services to gardeners:
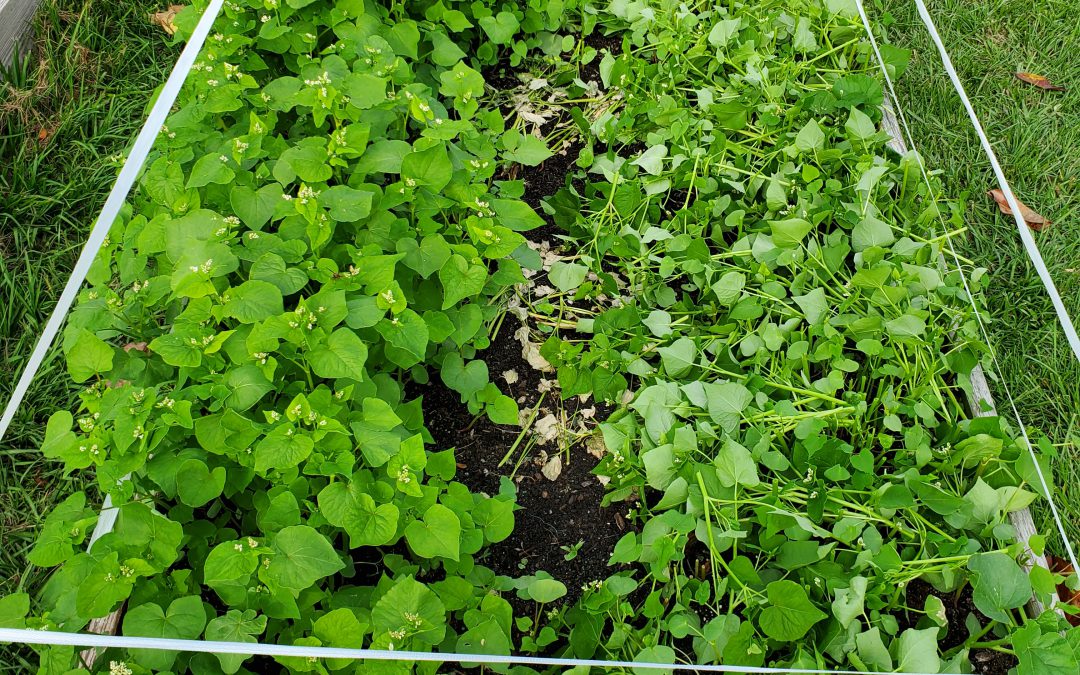
Buckwheat in flower behind summer squash. Photo courtesy of Daniel Leonard.
Covers, like Buckwheat, provide valuable weed control by shading out the competition. Even after termination (the cutting down or otherwise killing of the cover crop plants and letting them decompose back into the soil as a mulch), Buckwheat continues to keep weeds away, like pinestraw in your landscape.
Cover crops also build soil. This summer, I noticed that my raised beds didn’t “sink” as much as normal. In fact, I actually gained a little nutrient-rich organic matter! By having the Buckwheat shade the soil and then compost back into it, I mostly avoided the phenomena that causes soils high in organic matter, particularly ones exposed to the sun, to disappear over time due to breakdown by microorganisms.
Many cover crops are awesome attractors of pollinators and beneficial insects. At any given time while my Buckwheat cover was flowering, I could spot several wasp species, various bees, flies, moths, true bugs, and even a butterfly or two hovering around the tiny white flowers sipping nectar.
Covers are a lot prettier than bare soil and weeds! Where I would normally just have either exposed black compost or a healthy weed population to gaze upon, Buckwheat provided a quick bright green color blast that then became covered with non-stop white flowers. I’ll take that over bare soil any day.
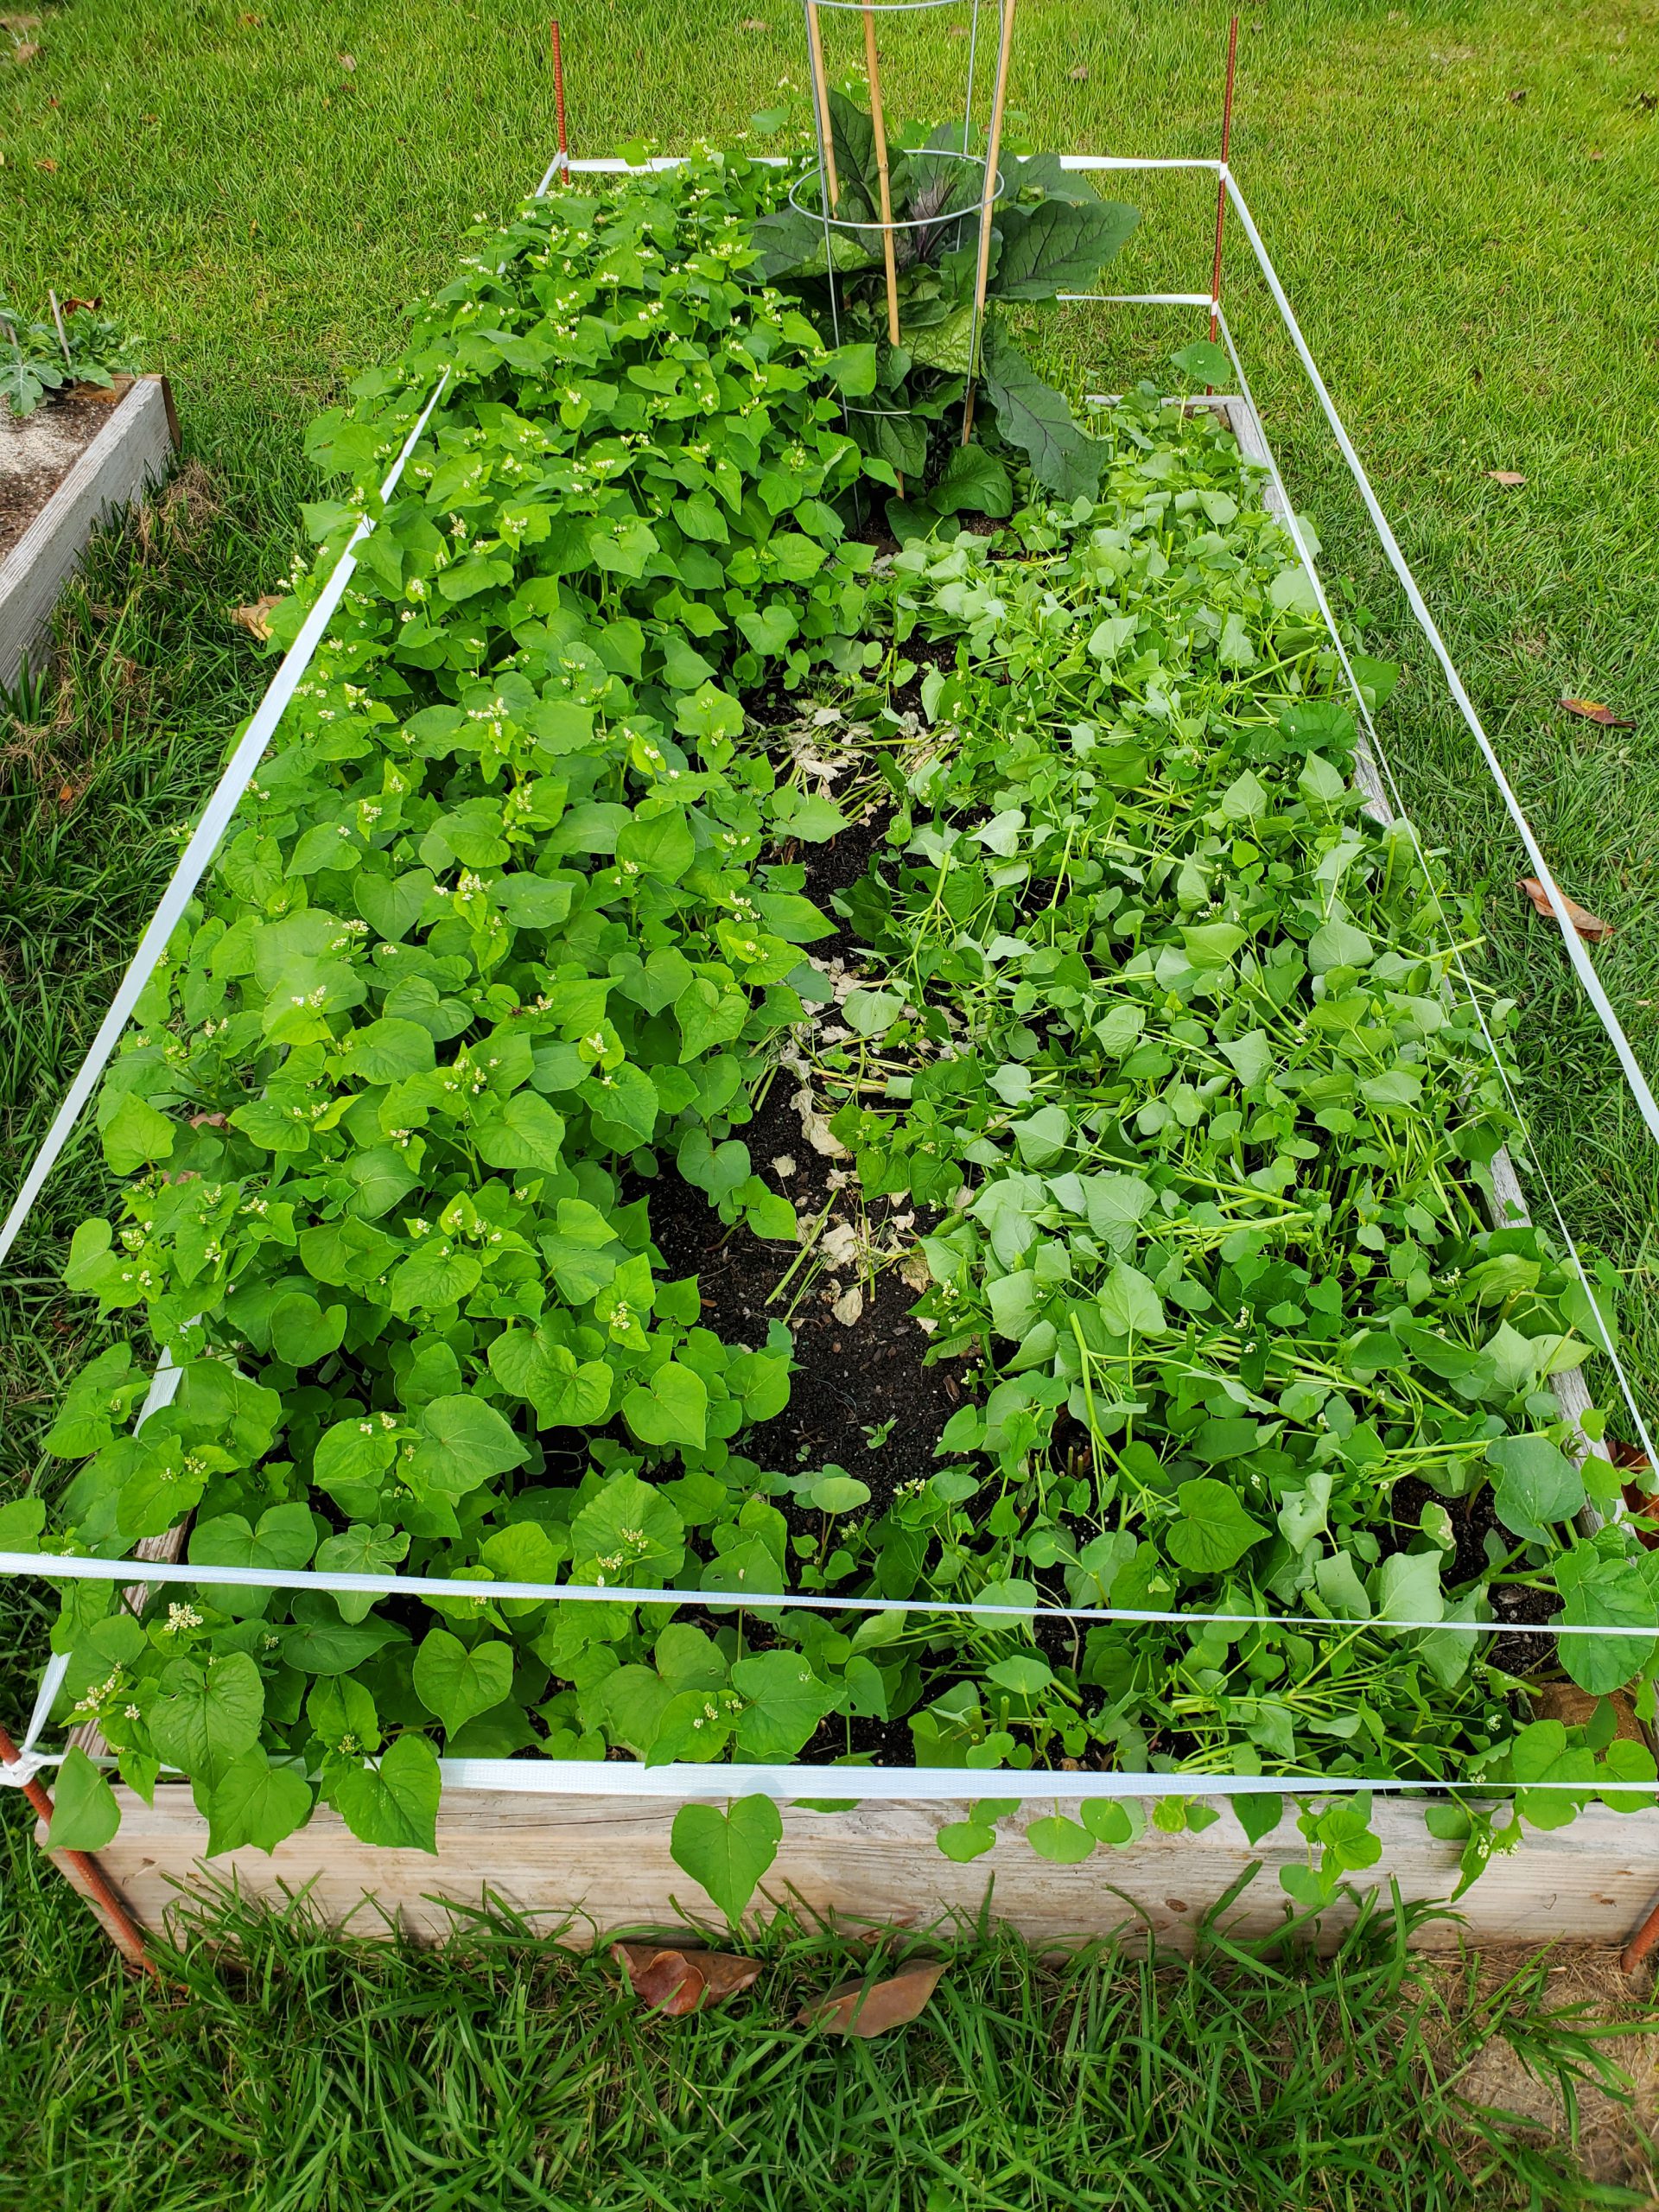
Buckwheat cover before termination (left) and after (right) interplanted with Eggplant. Photo courtesy Daniel Leonard, UF/IFAS Calhoun County Extension.
Now that I’ve convinced you of Buckwheat’s raised bed cover crop merits, let’s talk technical and learn how and when to grow it. Buckwheat seed is easily found and can be bought in nearly any quantity. I bought a one-pound bag online from Johnny’s Selected Seeds for my raised beds, but you can also purchase larger sizes up to 50 lb bags if you have a large area to cover. Buckwheat seed germinates quickly as soon as nights are warmer than 50 degrees F and can be cropped continuously until frost strikes in the fall. A general seeding rate of 2 or 3 lbs/1000 square feet (enough to cover about thirty 4’x8’ raised beds, it goes a long way!) will generate a thick cover. Simply extrapolate this out to 50-80 lbs/acre for larger garden sites. I scattered seeds over the top of my beds at the above rate and covered lightly with garden soil and obtained good results. Unlike other cover crops (I’m looking at you Crimson Clover) Buckwheat is very tolerant of imperfect planting depths. If you plant a little deep, it will generally still come up. A bonus, no additional fertilizer is required to grow a Buckwheat cover in the garden, the leftover nutrients from the previous vegetable crop will normally be sufficient!
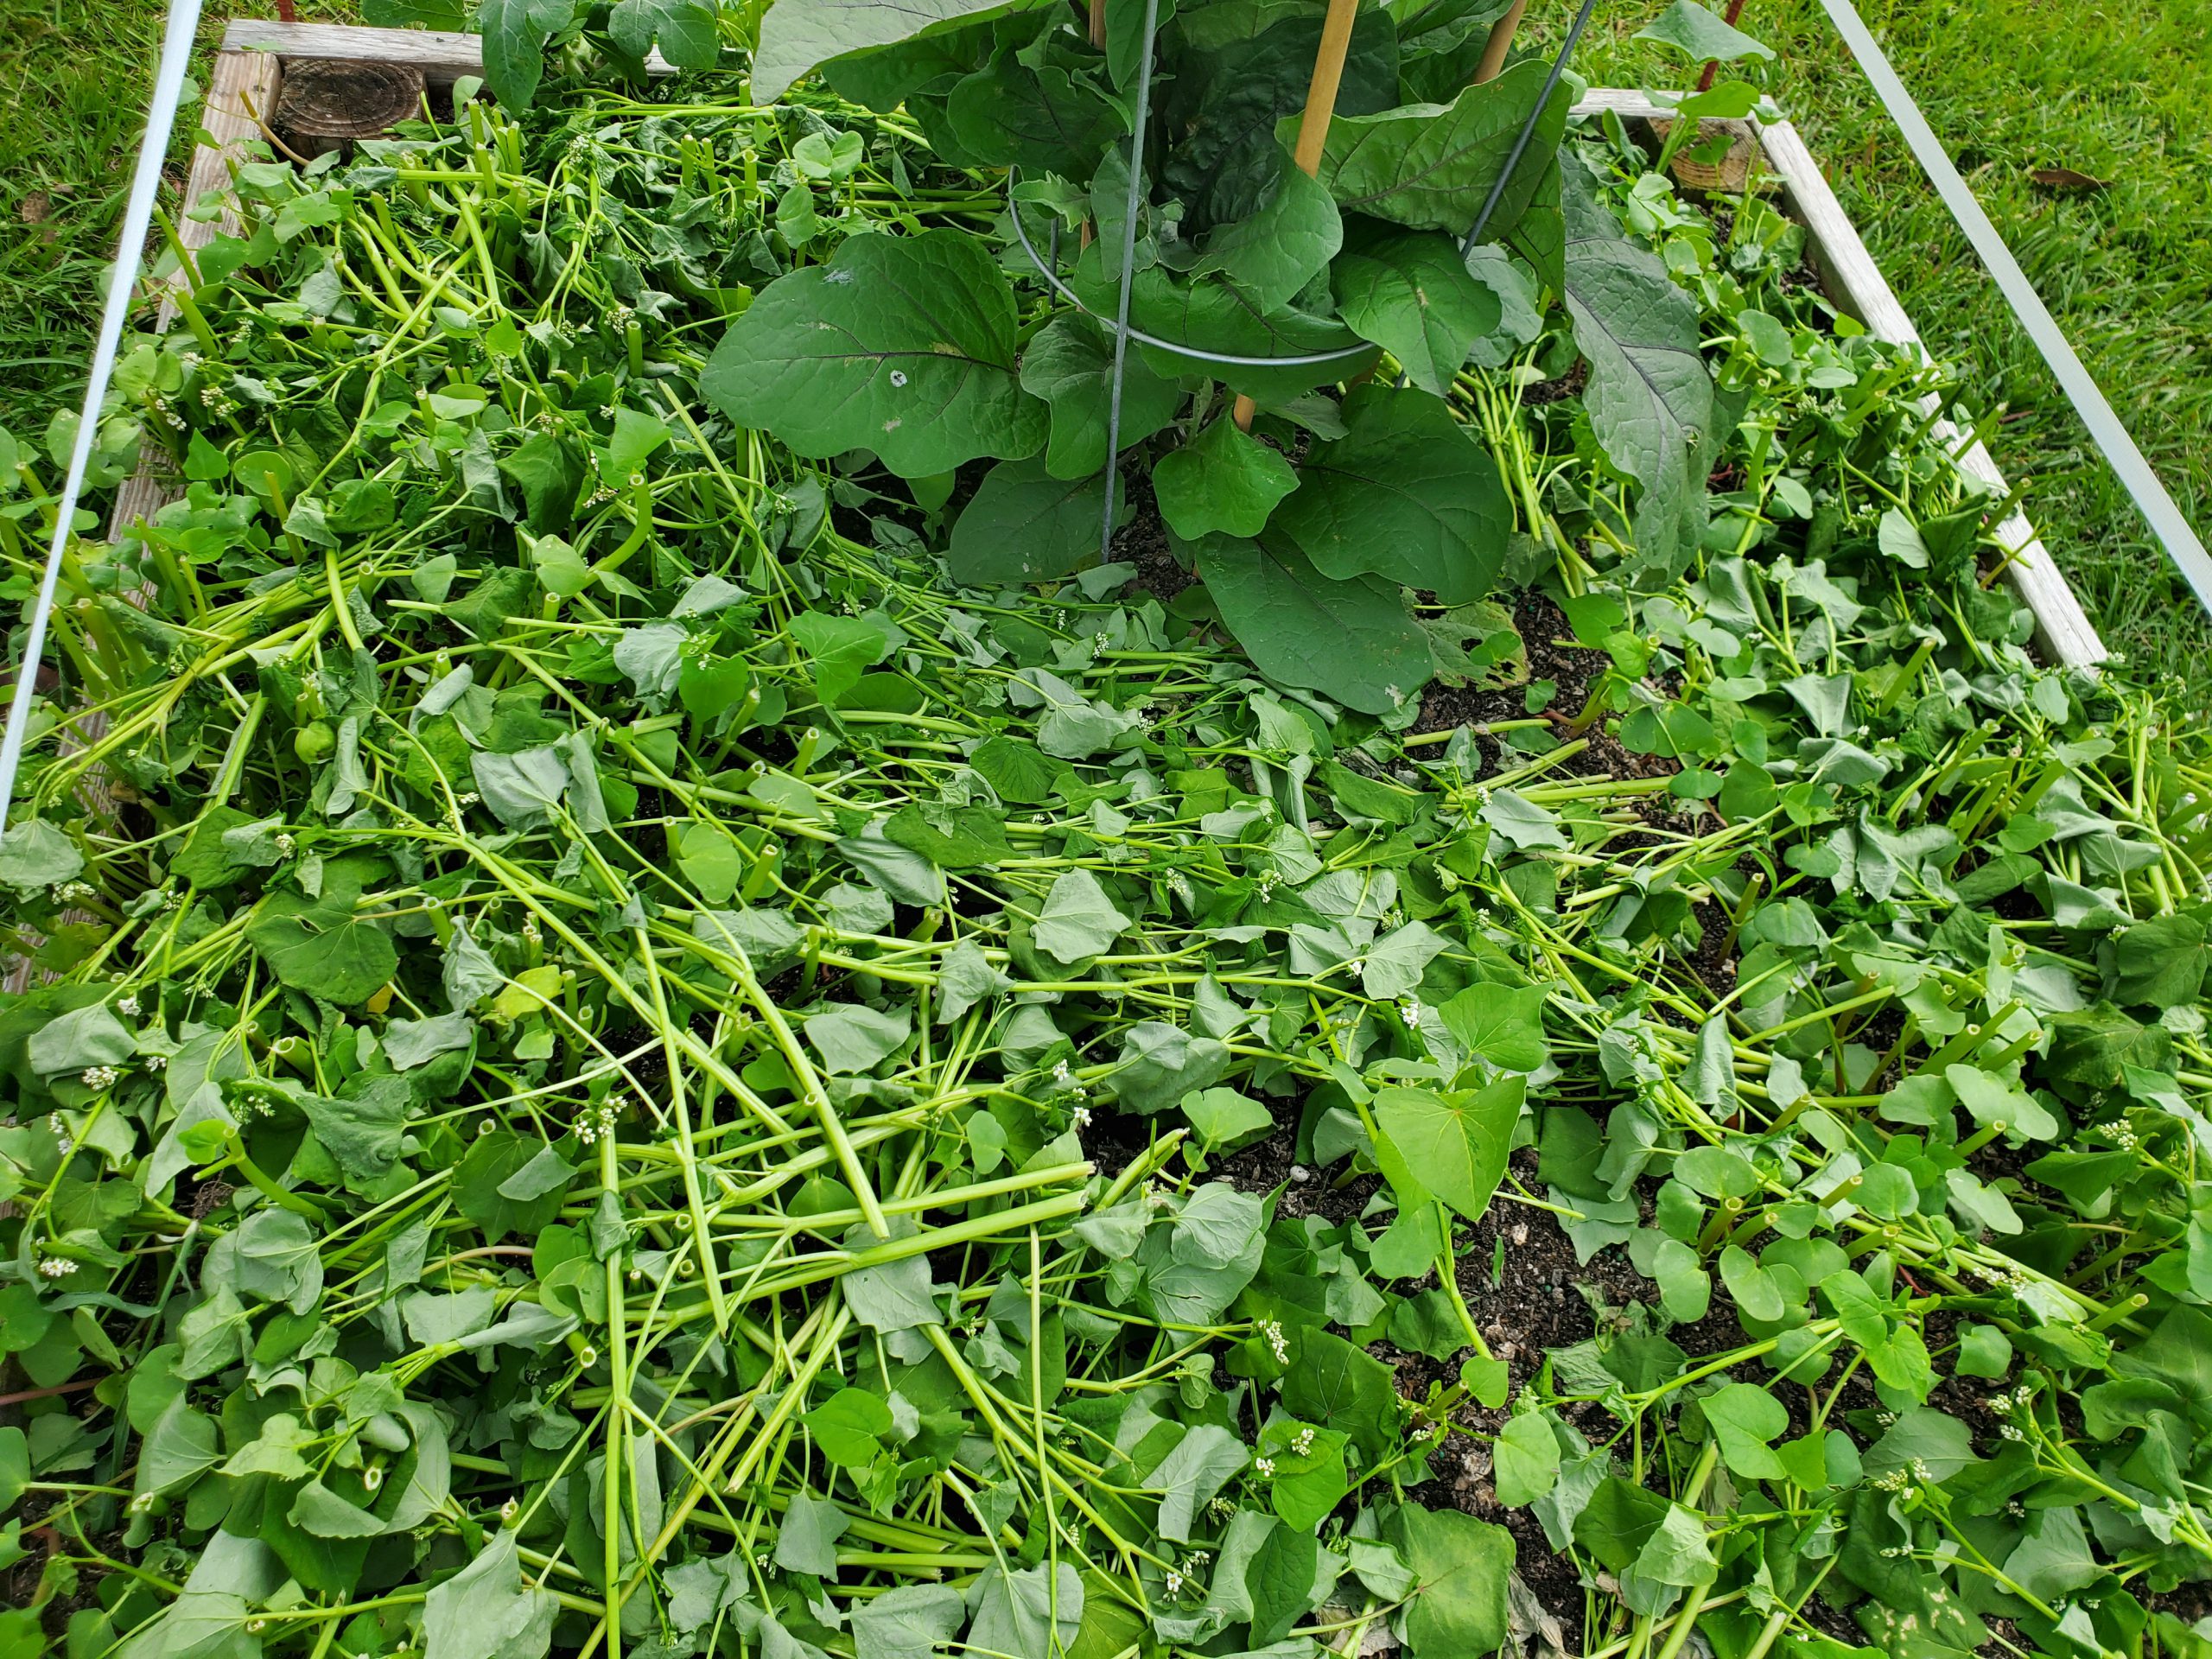
Buckwheat “mulch” after termination. Photo courtesy of Daniel Leonard, UF/IFAS Calhoun County Extension.
Past the usual cover crop benefits, the thing that makes Buckwheat stand out among its peers as a garden cover is its extremely rapid growth and short life span. From seed sowing to termination, a Buckwheat cover is only in the garden for 4-8 weeks, depending on what you want to use it for. After four weeks, you’ll have a quick, thick cover and subsequent mulch once terminated. After eight weeks or so, you’ll realize the plant’s full flowering and beneficial/pollinator insect attracting potential. This lends great flexibility as to when it can be planted. Have your winter greens quit on you but you’re not quite ready to set out tomatoes? Plant a quick Buckwheat cover! Yellow squash wilting in the heat of summer but it’s not quite time yet for the fall garden? Plant a Buckwheat cover and tend it the rest of the summer! Followed spacing guidelines and only planted three Eggplant transplants in a 4’x8’ raised bed and have lots of open space for weeds to grow until the Eggplant fills in? Plant a Buckwheat cover and terminate before it begins to compete with the Eggplant!
If a soil building, weed suppressing, beneficial insect attracting, gorgeous cover crop for those fallow garden spots sounds like something you might like, plant a little Buckwheat! For more information on Buckwheat, cover crops, or any other gardening topic, contact your local UF/IFAS County Extension Office. Happy Gardening!
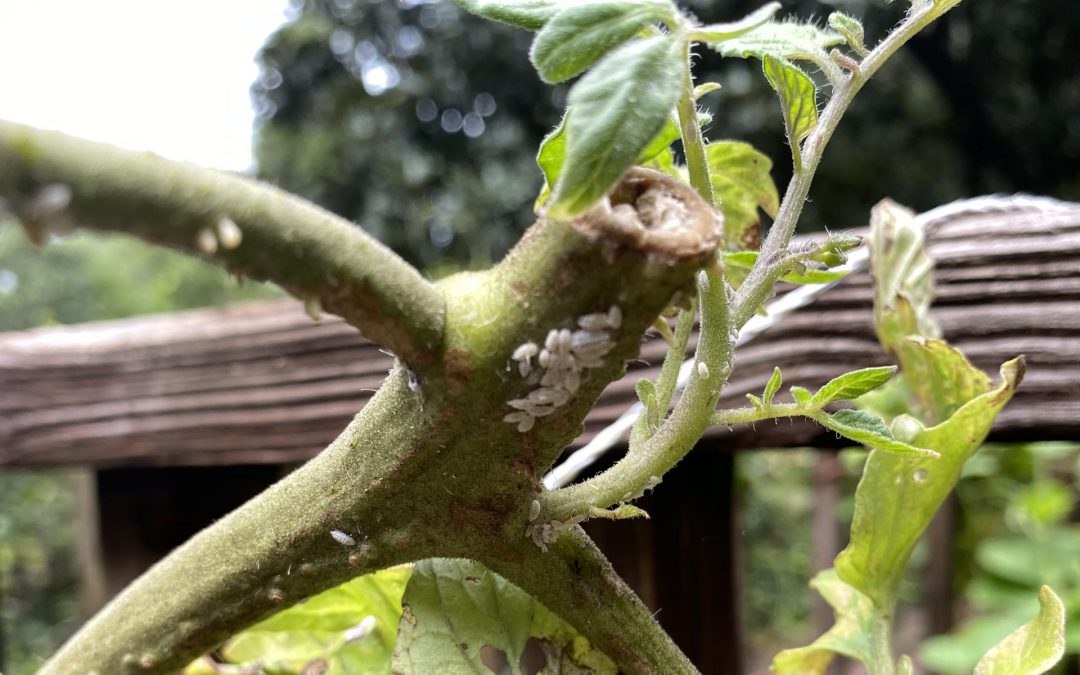
A common question for gardeners at the end of the season is if one should till the soil or use no till practices. Opinions vary regarding this question, even among Extension Agents. However old crops harbor insects, both good and bad. This phenomenon was noticed on some recently cut back tomato plants. The intention was to cut the leftover spring garden tomatoes back to encourage fall production. Instead, a host plant for mealybugs was provided.
Mealybugs on a tomato plant. Photo Credit: Matt Lollar, University of Florida/IFAS Extension – Santa Rosa County
Mealybugs are soft-bodied insects that possess a covering of flocculent, white, waxy filaments. They are about 1/8 inch in length and usually pinkish or yellowish in color. Mealybugs have piercing-sucking mouthparts which they use to siphon fluids from the leaves, stems, and sometimes roots of many ornamental and vegetable plants. Mealybug damage produces discolored, wilted, and deformed leaves.
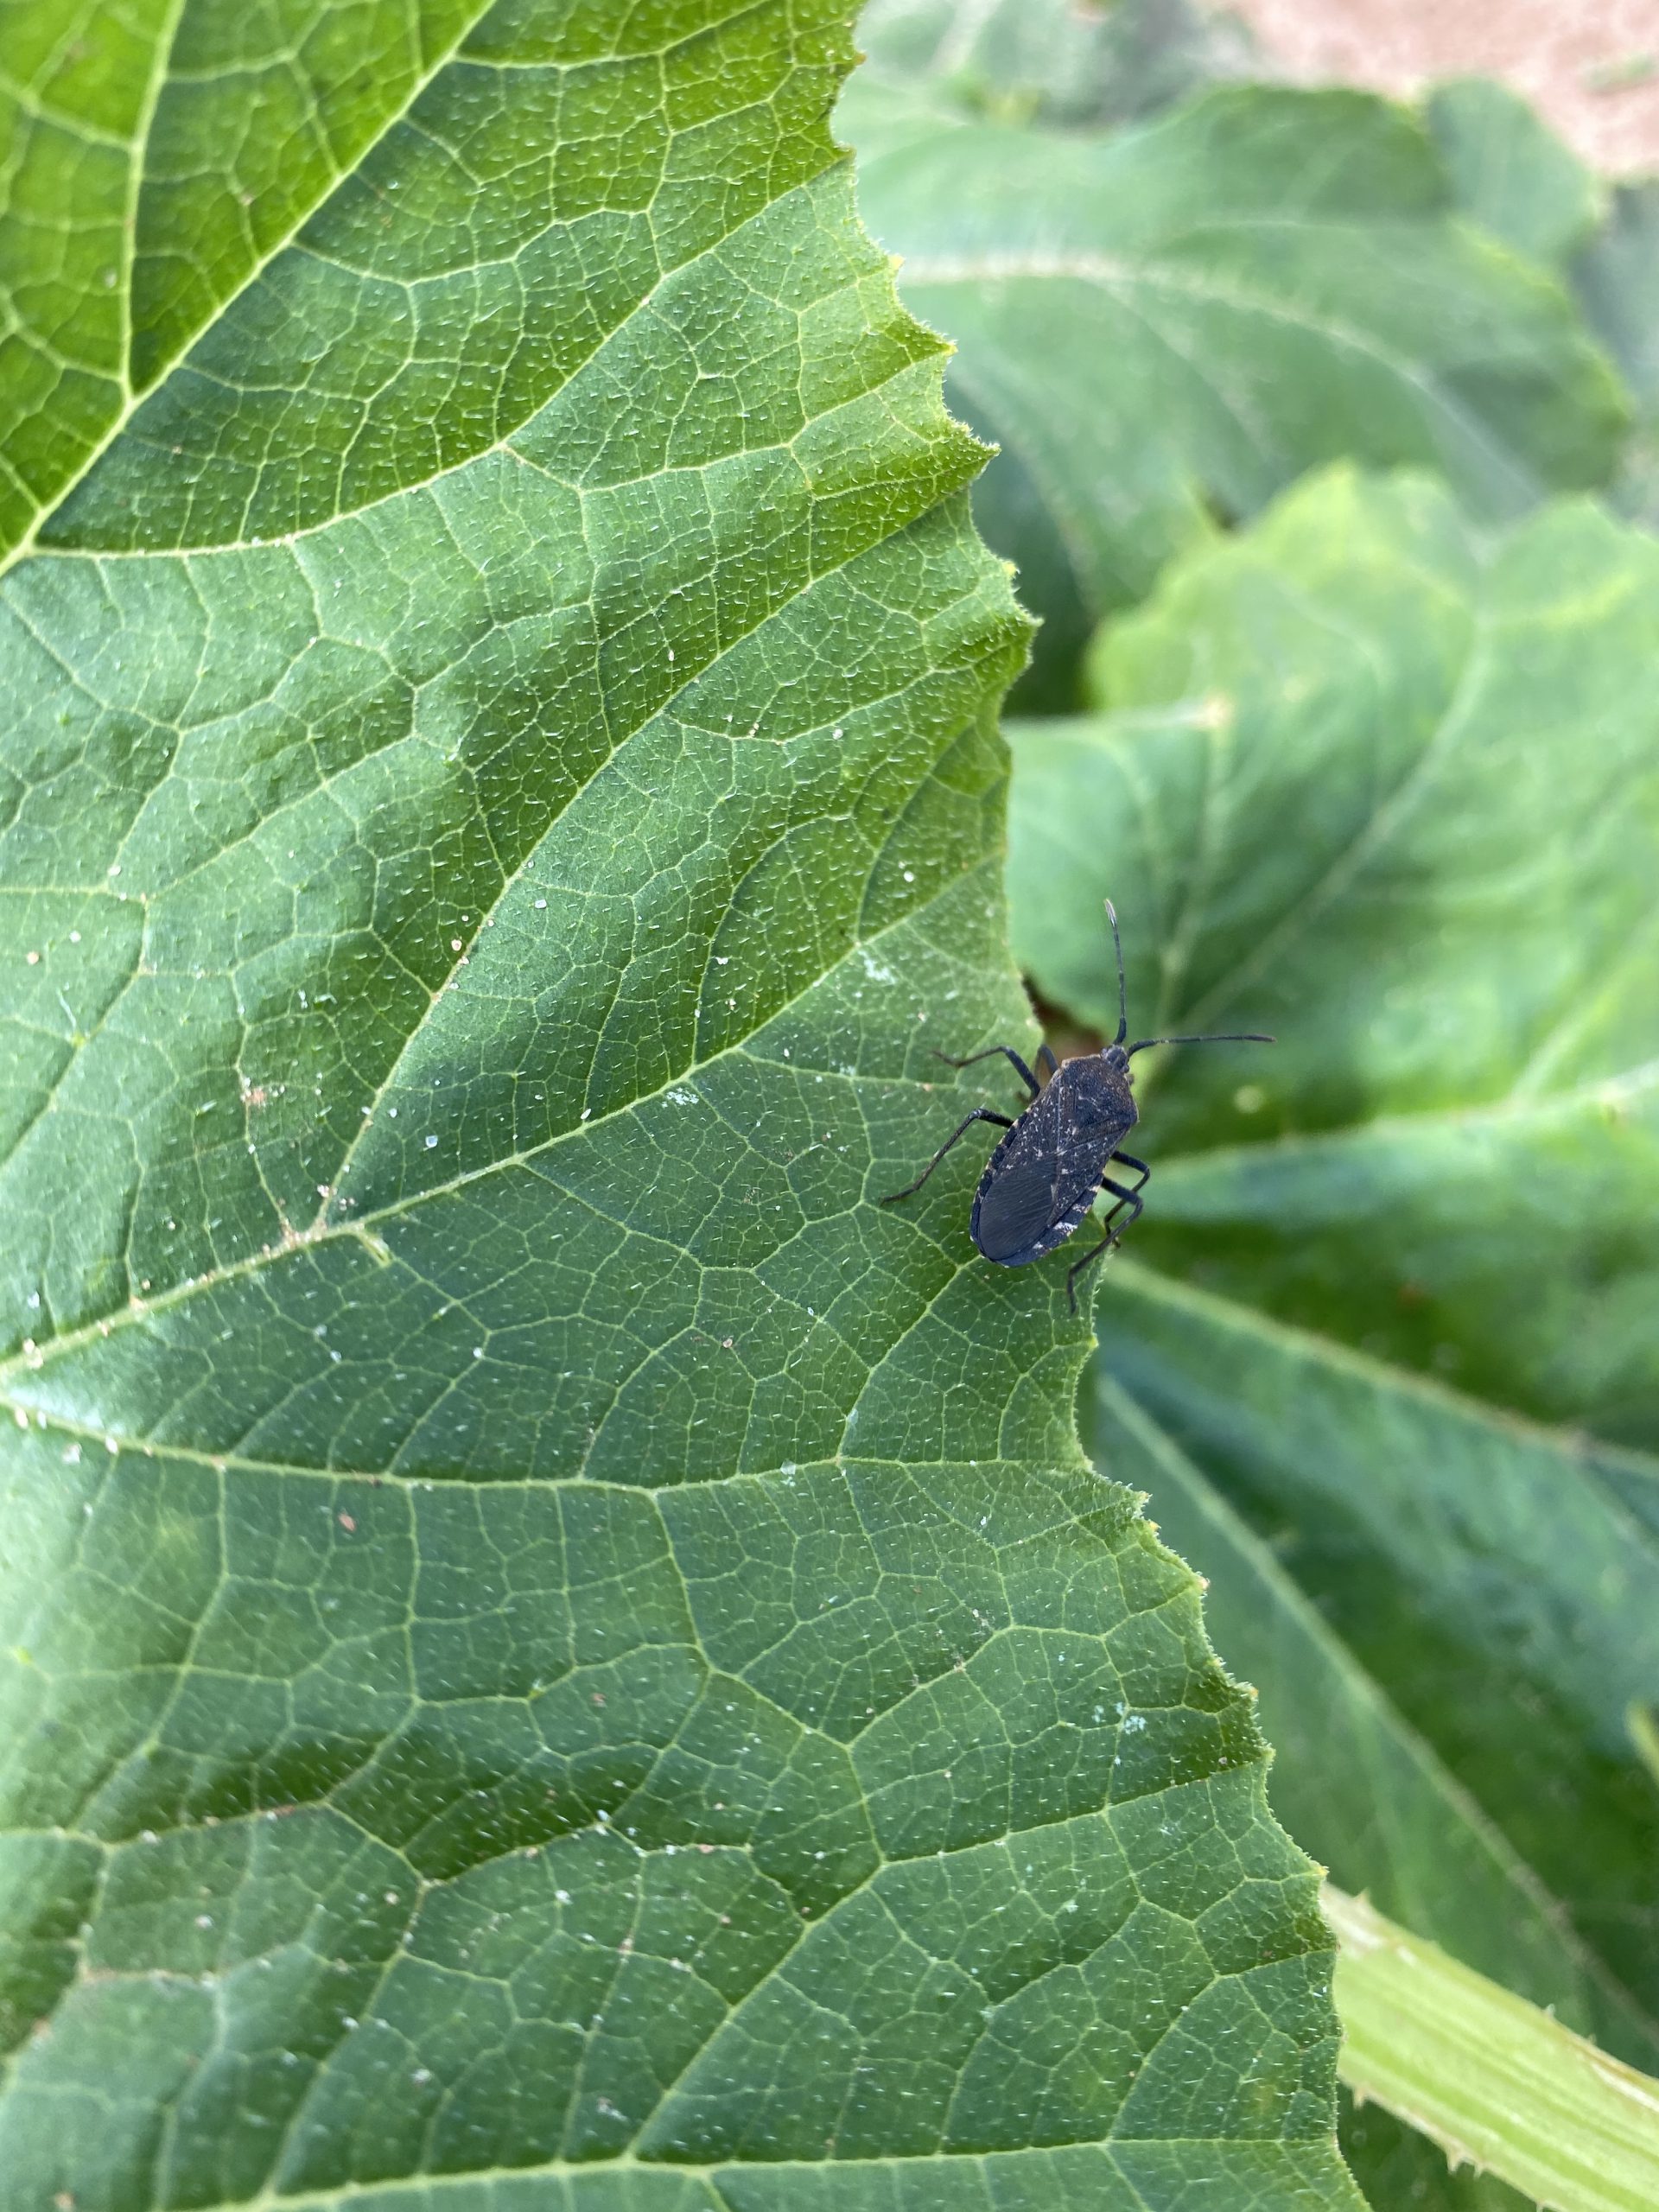
One very common example of an insect pest likely to claim residence in your garden’s crop residue, are squash bugs. They like to overwinter on squash, cucumber, and other cucurbit crop residue. If you choose to not till your garden and leave a portion of last seasons crop in your garden, then you should consider applying an insecticide to your spent crop at the end of the season. A product containing a pyrethrin or pyrethroid as an active ingredient would be a good broad spectrum insecticide to control any pest that may reside on plant residue. More information on pyrethrins and pyrehtroids can be found at the EPA webpage: Pyrethrins and Pyrethroids. If you choose to apply an insecticide, it is important that you follow the information on the label regarding pollinator protection. Another option is to plant a trap crop on the edge of your garden to help attract pest insects away from your desired crops. More information on trap crops can be found in the EDIS Publication: Intercropping, Pest Management and Crop Diversity.
An adult squash bug on a zucchini leaf. Photo Credit: Matt Lollar, University of Florida/IFAS Extension – Santa Rosa County
So the answer to the till or no till question is…it depends. It is really up to the gardener. Yes, the residue from crops will add nutrients and organic matter to your soil, but it could also increase pest pressure in your garden. If you don’t plan to remove crop residue and don’t plan to till, then keep an eye out for what could be hiding in your garden.