by Daniel J. Leonard | Jul 23, 2020
I enjoy starting my garden from seeds. Ordering seed opens so many more options relative to the limited old-fashioned seed and transplant selections that line garden shelves. Picking newer, improved varieties has several other advantages as well, including increased disease resistance, earlier fruiting, unusually colored/shaped fruit, and generally more vigorous plants. One of the most exciting days of the year in my house is when the cardboard box full of the season’s seed packets comes in the mail! However, I garden exclusively in small, 4’x8’ raised beds and only need a couple of plants of each veggie variety to fill the fridge with fruit; meaning I always have leftover seeds in the packets! In the past, I’ve thrown the excess seed away and chalked it up to the cost of gardening in small spaces, but this spring, as seeds became somewhat hard to come by and several of the varieties I normally grow were out of stock, I started saving and storing my leftover seed packets for future seasons to ensure I have what I want! You can save and store seeds too, here’s how.
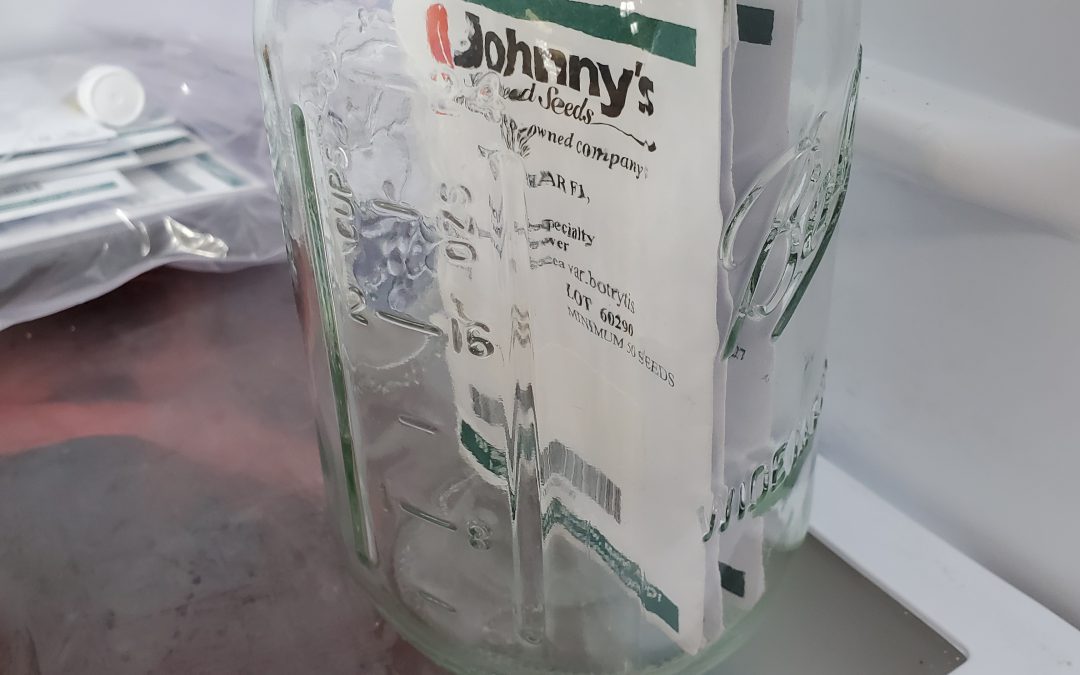
Cauliflower seed waiting for the fall garden in the author’s refrigerator.
Properly storing your leftover seeds is a relatively simple process. While seed longevity definitely varies somewhat according to species, regardless of how they are treated by you, remembering the following few tips can help improve the stored seeds’ viability and vigor for the next season.
- Store Cool. Seeds like to be stored in a refrigerator around 40 degrees F. Seeds stored warmer, near room temperature, or colder, as in a freezer, will decline much more rapidly than those in the fridge.
- Keep it Dry. Humidity or moisture in the seed storage area is a sure way to reduce the shelf life of seeds. Store dry in plastic bags or glass containers and add a dessicant. Dessicants help keep storage containers dry and can be found for around $1 each from various online purveyors, making them a cheap insurance policy for your home seed bank!
- Don’t Store Pelleted Seed. These days, you can buy pelleted seed for many of the smaller seeded vegetable varieties, like lettuce and carrots. The pelleting process and materials used, while making it easier for old eyes and those of us with fumbling fingers to plant, reduces seed longevity. Do your best to plant all the pelleted seed you purchase. If you store pelleted seed, don’t say you weren’t warned when next season’s germination is poor!
- Plant All Stored Seed the Next Season if Possible. Remember, that while most non-pelleted vegetable species’ seed can remain viable in storage for more than a year, it’s best to only store seeds until the next season and use them up. Regardless of how well you store them, seed germination percentage (how many in the lot will sprout when planted) and vigor (how strong the germinating seedlings are) decline in direct proportion to time spent in storage.
- Plant Old Seed Heavy. As germination rates in storage may have declined, it’s best to plant stored seed a little thicker than you normally might. If you need a squash plant in a certain spot, instead of just planting one seed, put three or four in the hole to ensure you get a plant. You can always thin extras later, but time lost replanting cannot be regained.
By following these few simple tips, you can waste a lot less seed and ensure that you have what you want to plant for the following year! As always, if you have any questions about saving and storing seed or any other agriculture or horticultural topic, please contact us at the UF/IFAS Calhoun County Extension Office. Happy Gardening!
The following resources were used as references when writing this piece and may prove helpful to you also, check them out:
- Johnny’s Selected Seeds Seed Storage Guide: https://www.johnnyseeds.com/growers-library/tools-supplies/seed-storage-guide.html
- Seeding the Garden EDIS Publication: https://edis.ifas.ufl.edu/vh026#:~:text=Storing%20Leftover%20Seeds,better%20than%20in%20the%20refrigerator.
by Ray Bodrey | May 27, 2020
Whether it’s the warm or cool season of the year, vegetable gardening is as popular activity as any. In writing articles, I usually discuss best management practices on a backyard garden scale. But, what if you don’t have much of a backyard?
Many Floridians live in apartments, condominiums, mobile home parks, or simply homes built on small parcel lots with little open gardening space. This doesn’t mean you can’t grow vegetables. You just have to be a bit creative and that’s when the fun starts. In addition to being an enjoyable activity, mini vegetable gardening can be practical and ornamental. Containers can fit almost anywhere in the landscape, such as porches, balconies, roof tops and that spot on your property where nothing seems to fit.

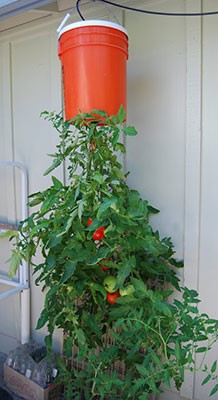
Tomato Bucket Gardening. Photo courtesy UF/IFAS Gardening Solutions.
There’s practically no limit to the kinds of containers one can use for mini vegetable gardening. Some examples are pots and pans, milk jugs, hollow concrete blocks, bushel baskets, trash cans, barrels, buckets and even plastics bags and “to go” food containers. As long as the container will hold soil and let excess water drain, you’re good to garden.
So, what can I use as a growing medium? Traditional garden soil will work fine. Mixing garden soil 1:1 with mushroom compost is also acceptable. Adding lightweight components to the soil mixture such as perlite or vermiculite will make it easier if you need move the container from time to time. This will also help with drainage. Sprinkling a handful of 6-6-6 or 8-8-8 fertilizer and gardening lime into the mixture will give plants much needed nutrients for development.
This growing medium will not require fertilizer applications very often. A small amount every two to three weeks should be adequate for most vegetable plants. Whether the fertilizer you choose is solution or dry form, be sure to use small amounts and water the product thoroughly into the root zone. A heavy application of fertilizer may cause plant burn.
So what vegetable crops grow best in containers? Most any crop will do well in containers. Some examples are tomato, pepper, eggplant, collard, cabbage, turnip, mustard, strawberry, broccoli, cauliflower and many herbs. Container gardening is a fun and rewarding hobby. You’ll enjoy both the activity and the delicious produce you’ve grown.
For more information contact your local county extension office.
Supporting information for this article was provided by Extension’s Emeritus Vegetable Specialist Jim Stephens of UF/IFAS Extension. More information can be found at this website: http://gardeningsolutions.ifas.ufl.edu/plants/edibles/vegetables/growing-vegetables-in-containers.html
UF/IFAS Extension is an Equal Opportunity Institution.
by Daniel J. Leonard | Apr 1, 2020
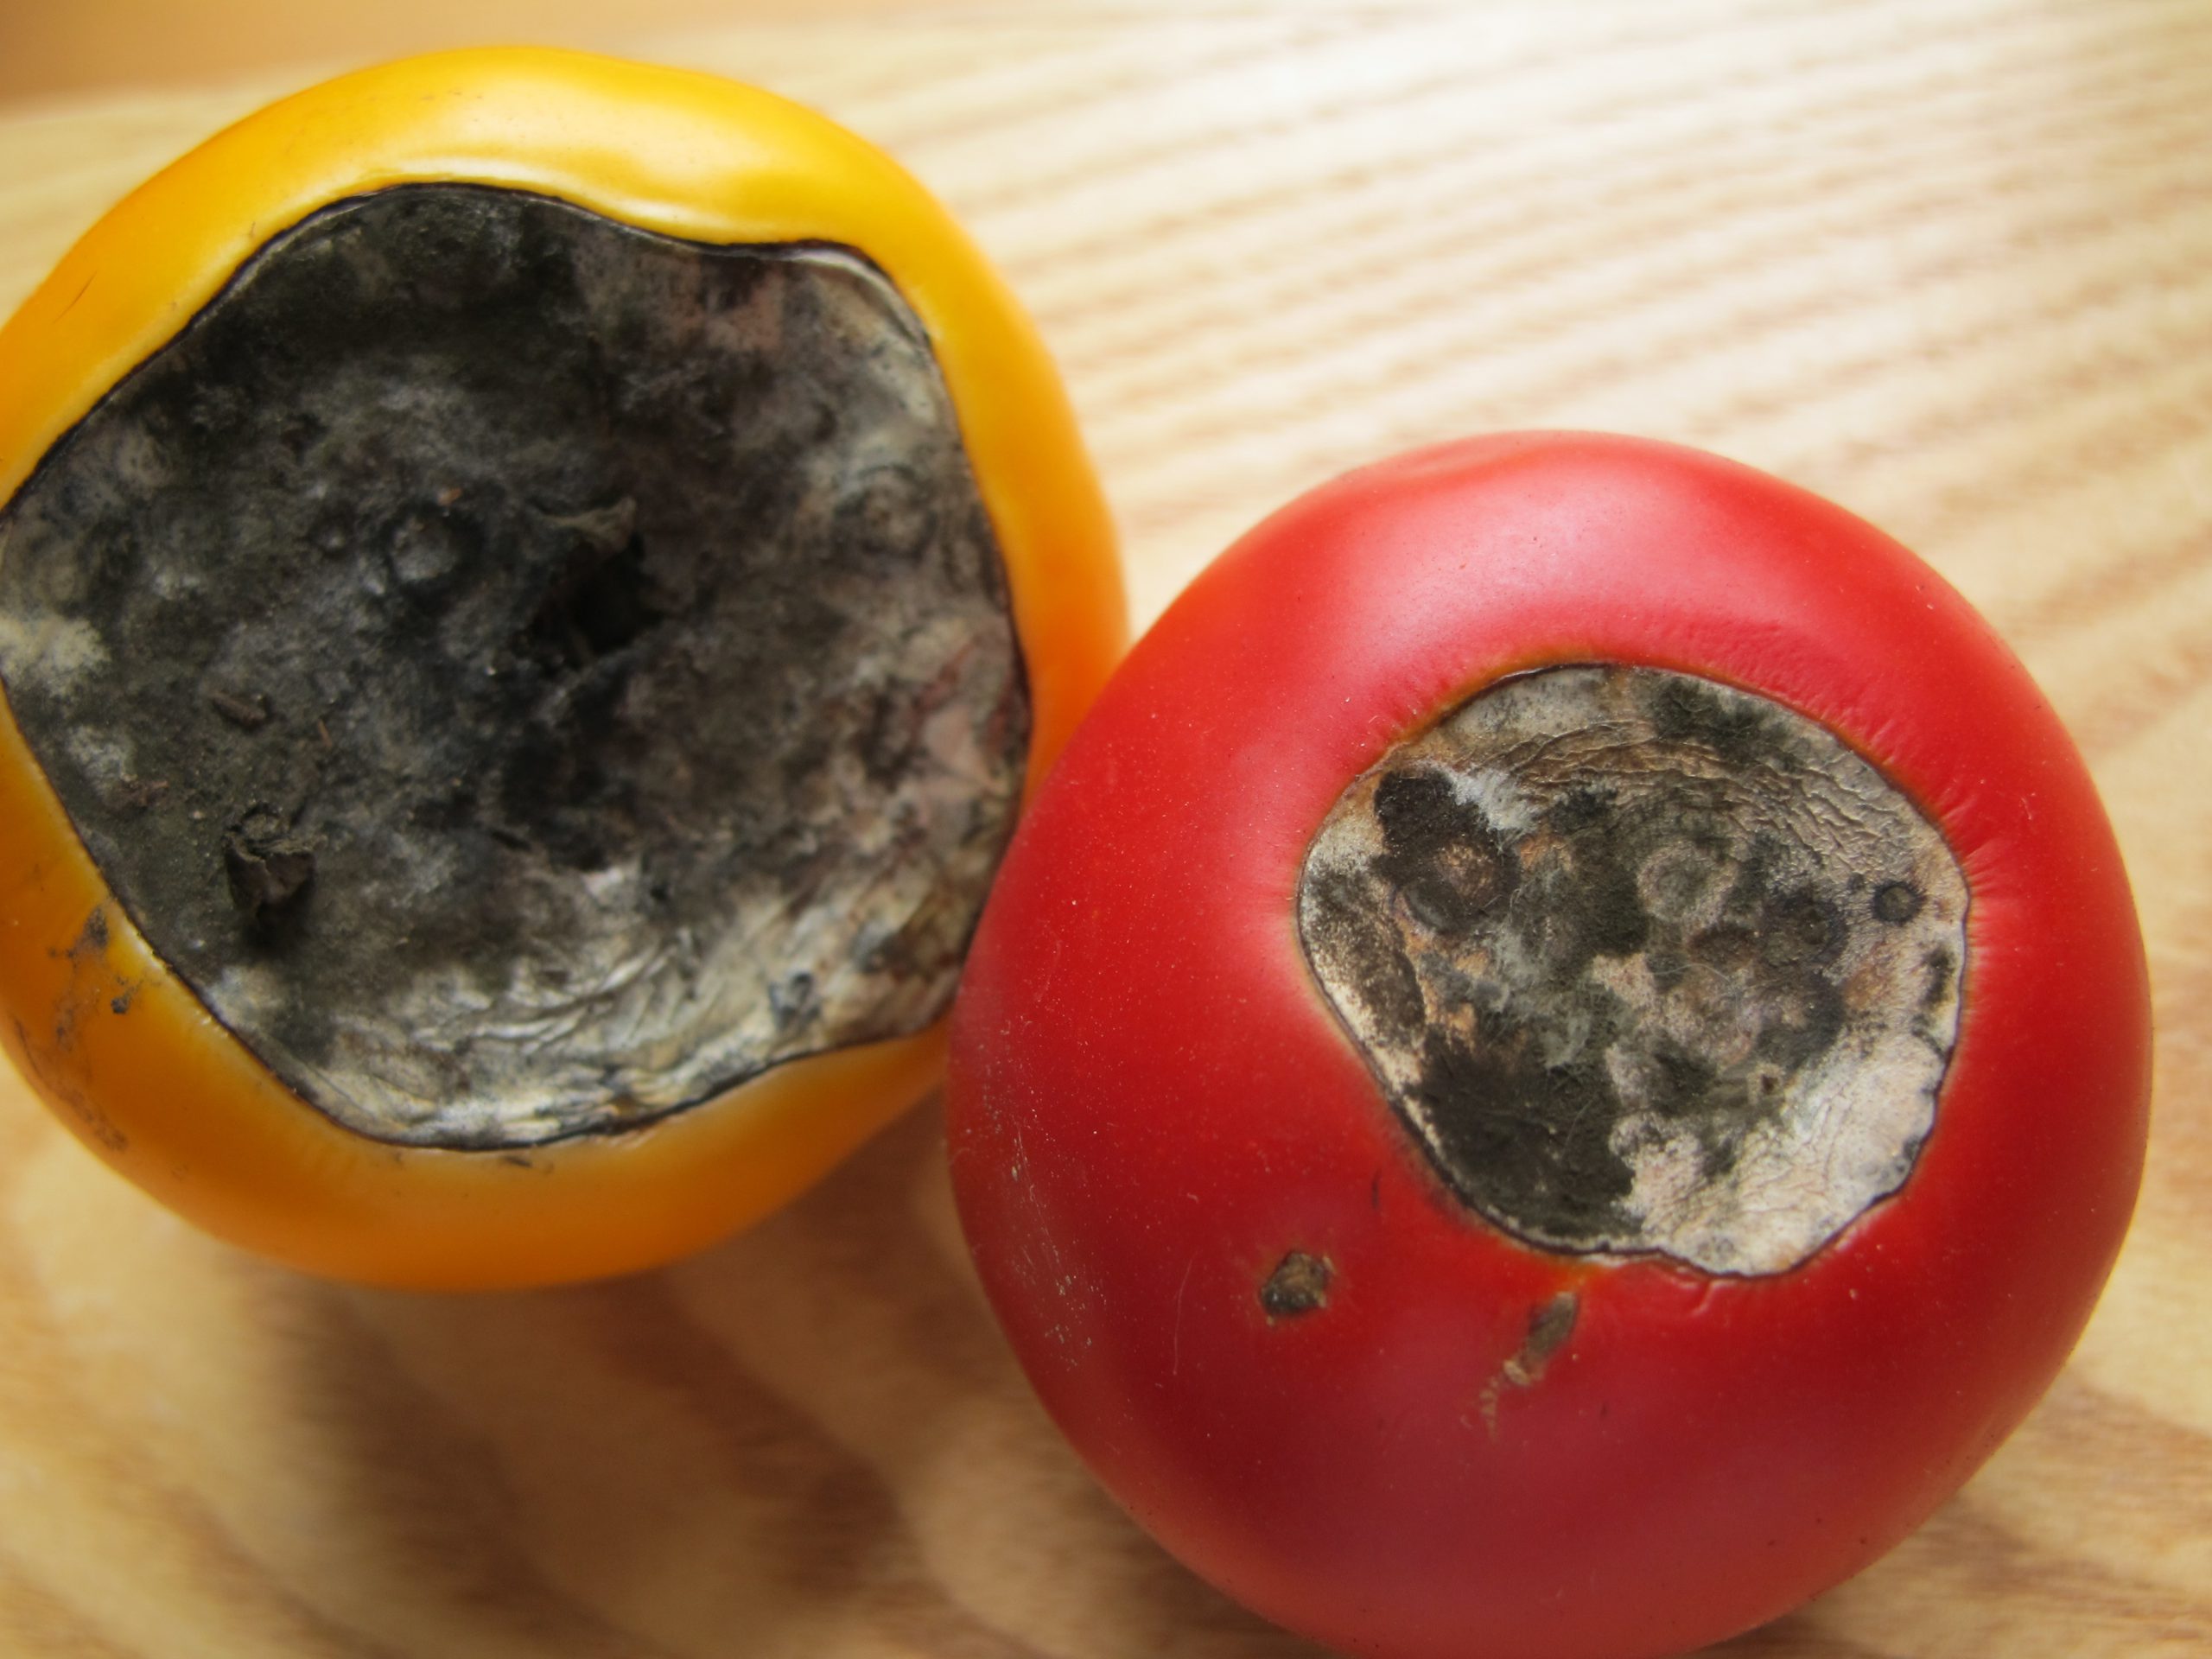
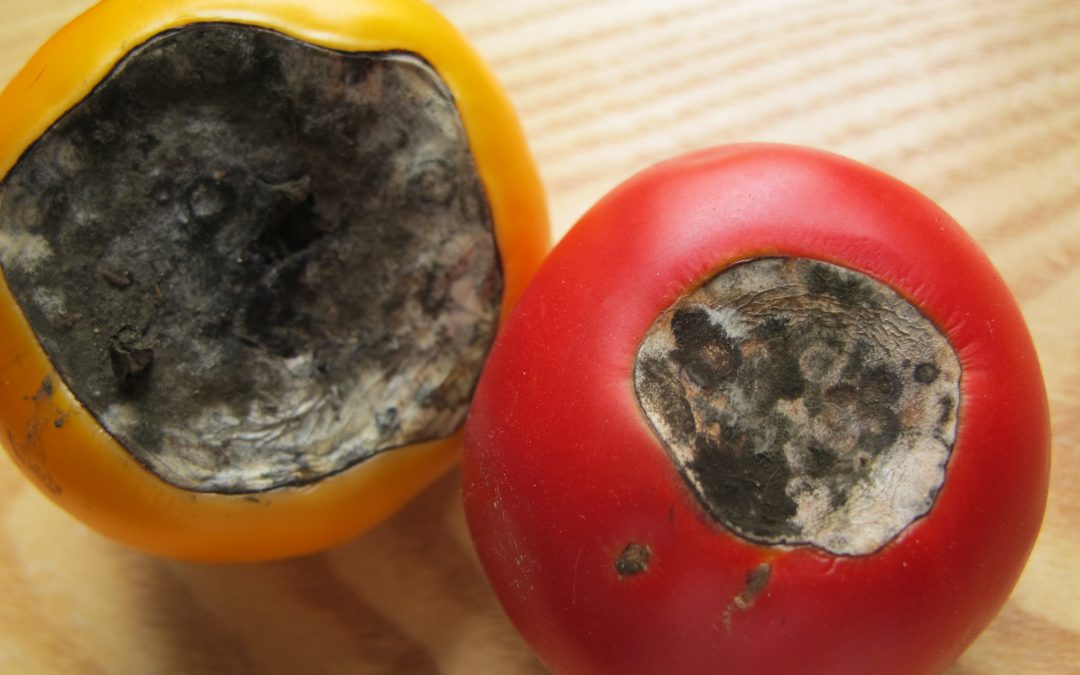
There aren’t many more frustrating things than growing seemingly healthy tomatoes, those plants setting an abundance of flower and fruit, and then, once your tomatoes get about the size of a golf ball, having the fruit rot away from the base. This very common condition, called Blossom End Rot (BER), is caused one of two ways: by either a soil calcium deficiency or disruption of soil calcium uptake by the plant. Fortunately, preventing BER from occurring and then realizing an awesome crop of tasty tomato fruit is relatively simple and home gardeners have a couple of possible preventative solution!
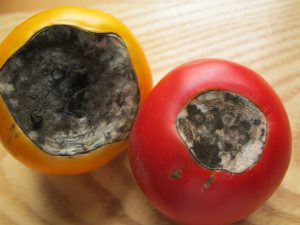
Blossom End Rot damage. Photo Courtesy Larry Williams, Okaloosa County Extension.
- Soil Test & Lime if Needed. The only way to really know if your soil calcium level is sufficient is through a soil test. A complete soil test through the UF Soil Lab or other lab measures both raw nutrient levels and pH. Testing for pH is especially critical. For calcium, either already in the soil or in a supplement you apply, to be available to tomato plants, soil pH needs to be between 6.0-7. In more “acidic” soil pH below 6, nutrients like iron and aluminum become more available to your tomato plants, outcompeting calcium for uptake into the roots. We don’t want that. If your soil test indicates a pH below 6, it will give a lime recommendation somewhere between 3-5 lbs/100 ft sq of garden area to raise the pH to the sweet spot between 6.0-7.0 where your tomatoes will thrive.
- Use a Non-Lime Calcium Supplement. If you’ve had your soil tested and your pH is fine, adding more lime as a calcium supplement isn’t helpful. Using lime as an additional calcium source can actually lift pH above that 6.0-7.0 zone and cause other problems. At this point, once pH is where we want it, I like to add a non-lime calcium supplement. There are lots of options here. Traditional fertilizers labeled for tomatoes and veggies tend to have a good calcium content in the 6-10% range and work great. However, if you’re into organic gardening or just don’t need the extra nutrient value of a complete fertilizer, Gypsum is a good calcium supplement and is widely available. Regardless of which non-lime source you choose, apply at planting or shortly after and follow label rates for best results.
- Water Properly. Consistent watering is key in helping ward off BER. Though we know BER is generally

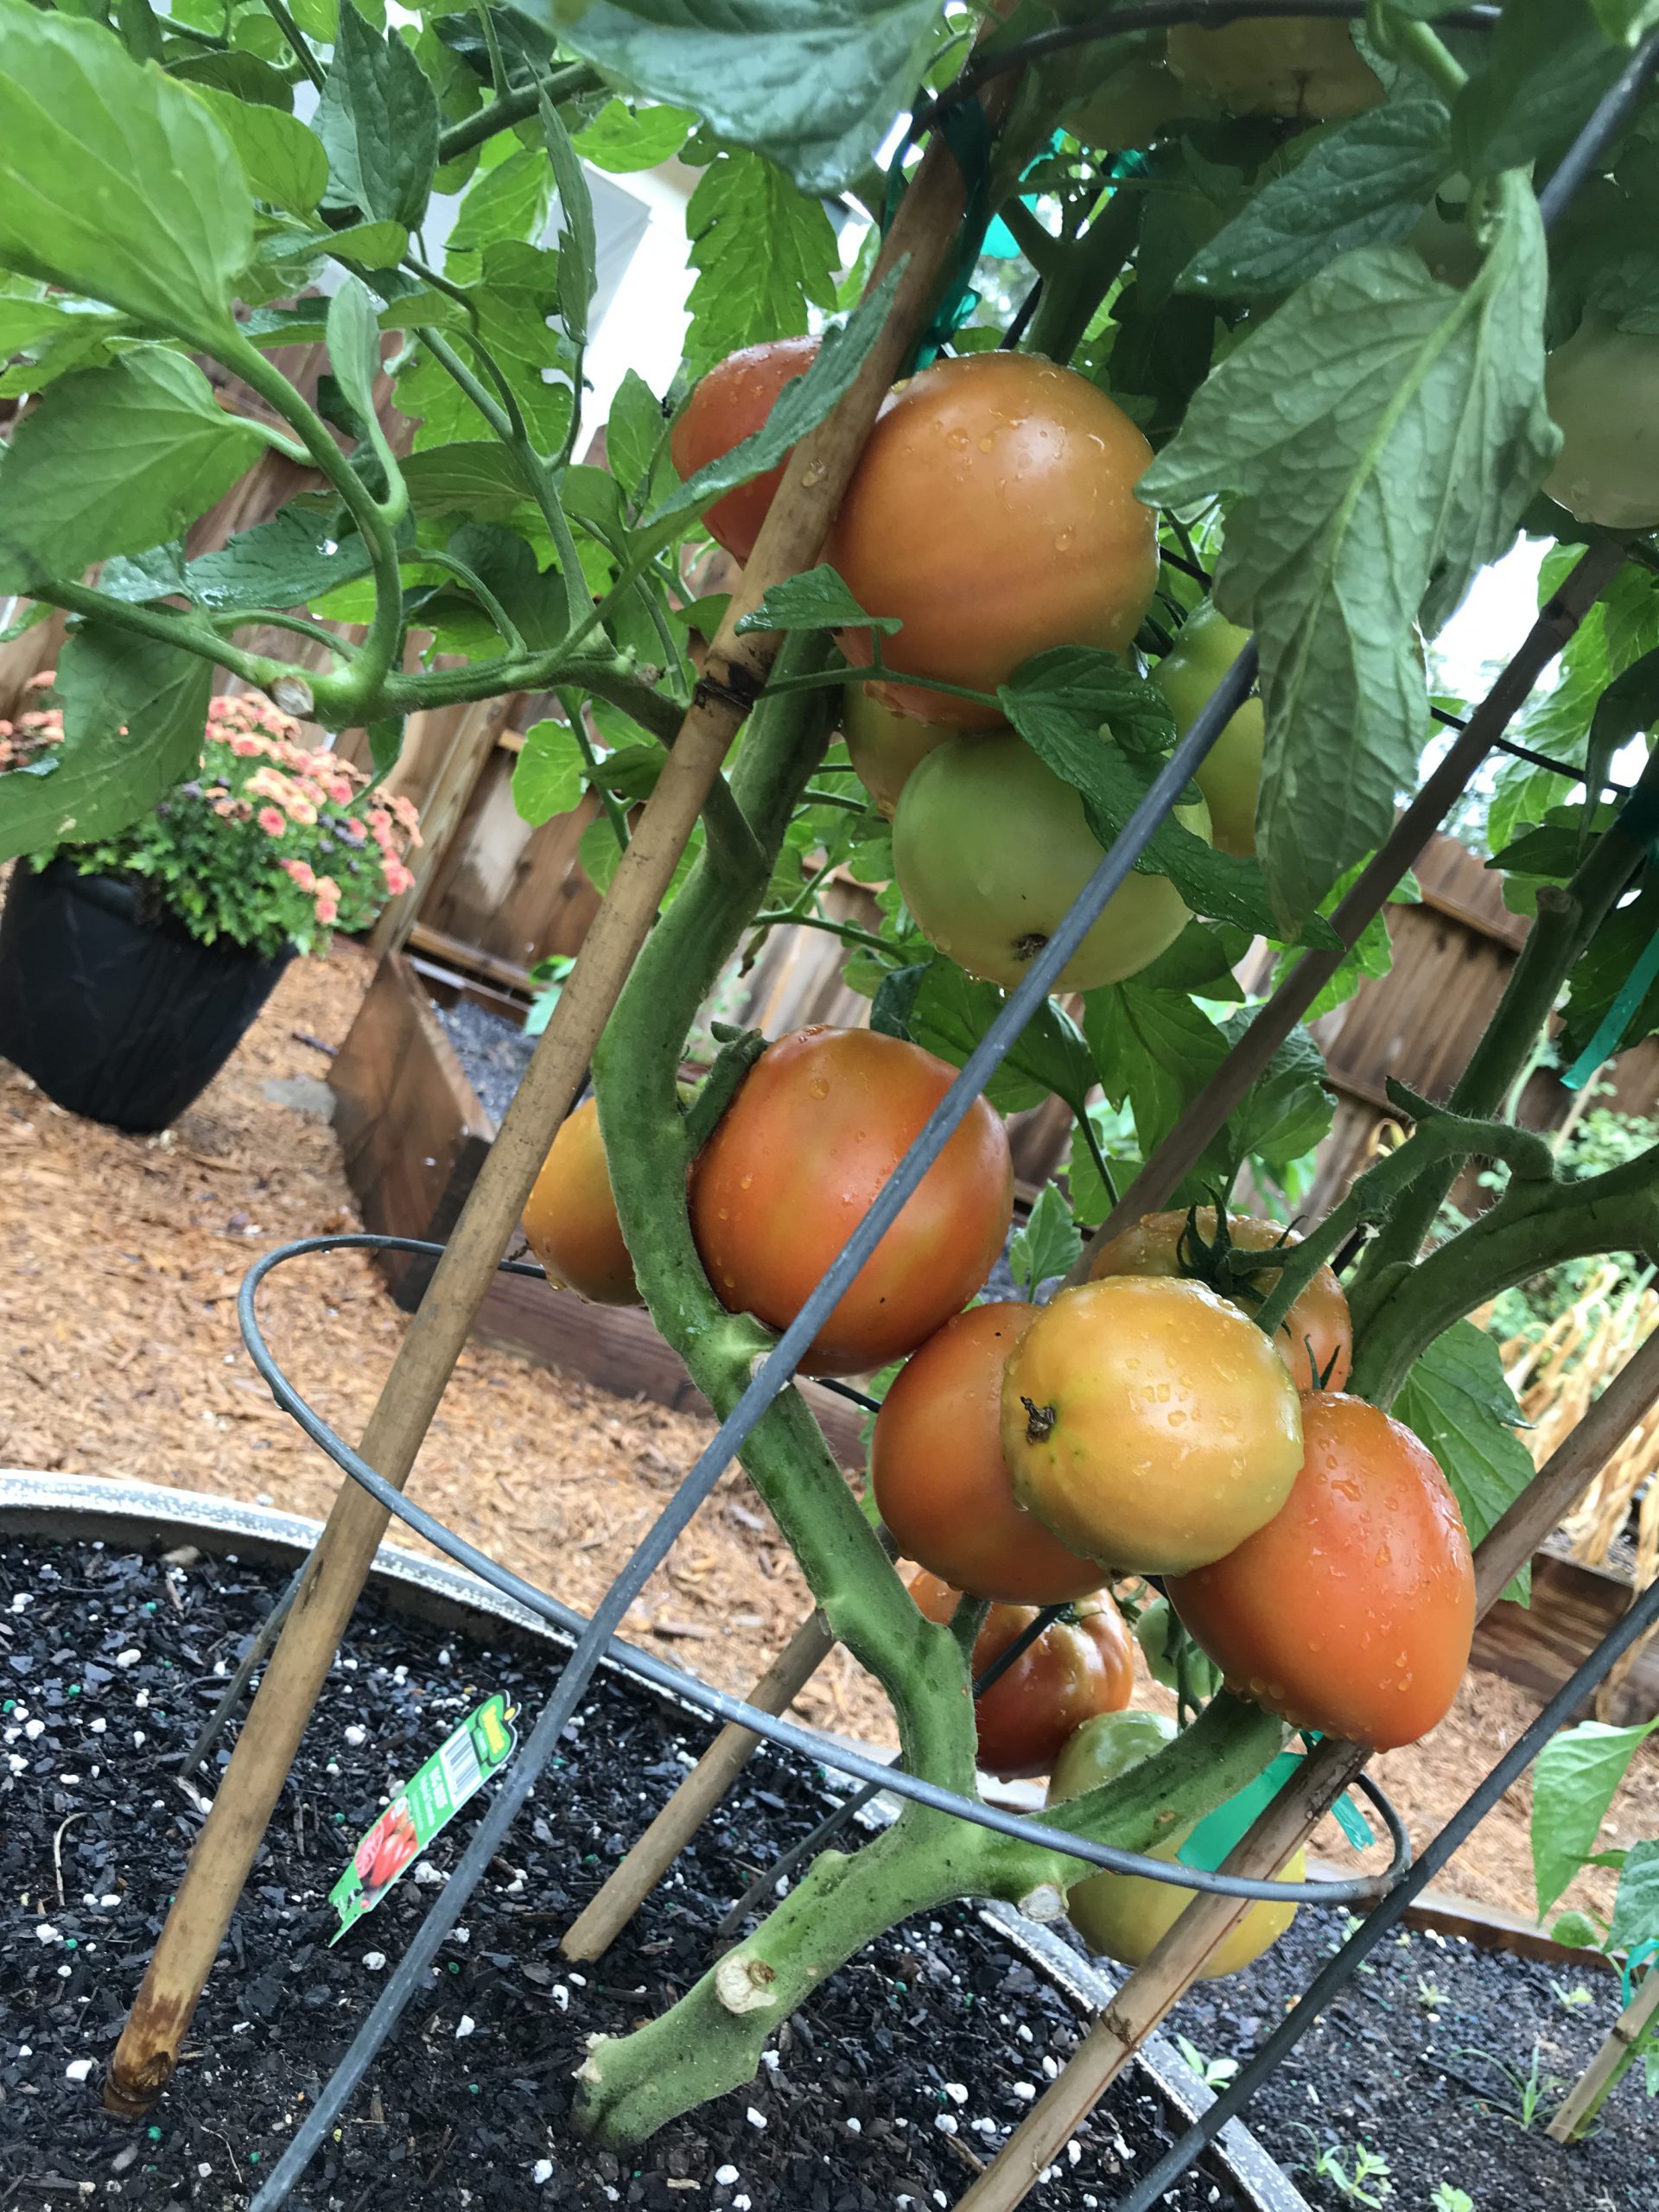
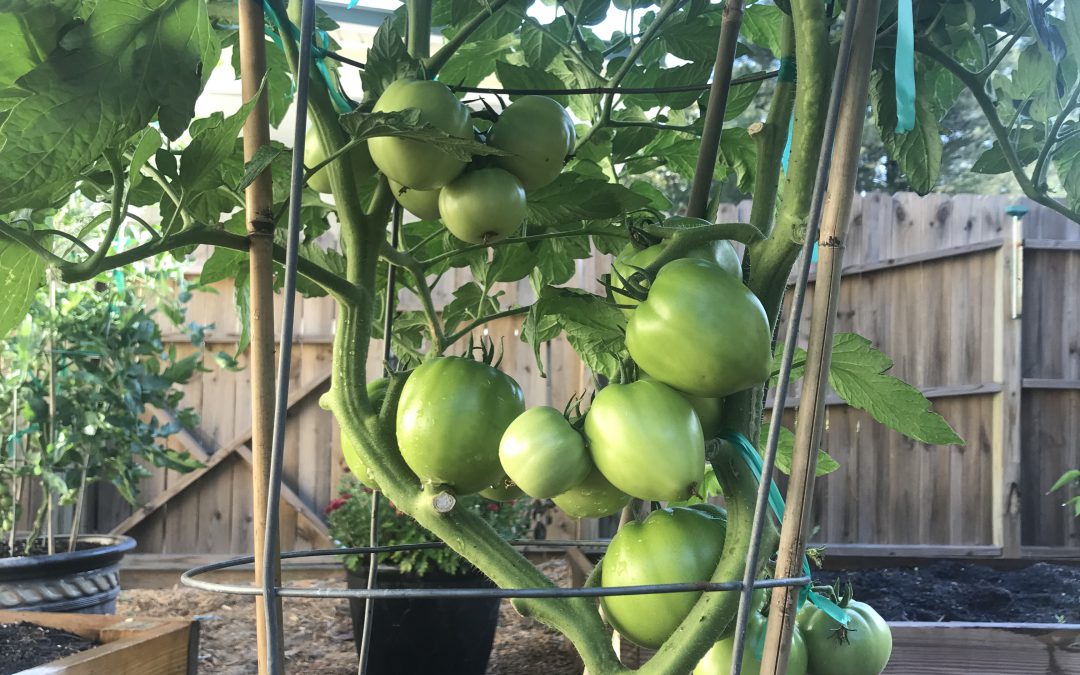
Healthy ‘Big Beef’ tomatoes grown in 2019 with a pH of 6.5, amended with Gypsum at planting, and watered regularly each day! Notice no BER. Photo courtesy the author.
caused by calcium deficiency, it can be induced by creation of distinct wet and dry periods from non-regular watering, interfering with calcium uptake and availability to the plant. So, while you may have adequate soil calcium, if you don’t water correctly, the condition will happen anyway! It’s also good to keep in mind that mature tomato plants use large quantities of water daily, so during the heat of summer, plants in containers may need to be watered multiple times daily to maintain consistently moist soil. Think about it, you don’t drink 8 glasses of water when you wake up and then never drink again throughout a hot day. A tomato is no different. Allowing your plants to wilt down before providing additional water ruins productivity and can induce BER.
Blossom End Rot, while one of the more destructive fates of tomatoes, is totally preventable by a little legwork early in the growing game from you! Soil test and change pH with lime if needed, add a shot of calcium through a tomato blend fertilizer or non-lime supplement like gypsum, and water regularly! Do these three things and you’ll be well on your way to a great crop of early summer tomatoes. If you have any questions about tomato blossom end rot or any other horticulture or agricultural topic, please don’t hesitate to reach out to us at the UF/IFAS Calhoun County Extension Office. Take advantage of this beautiful spring weather and get in the garden today! Happy gardening.
by Daniel J. Leonard | Aug 20, 2019
Though Okra (Abelmoschus esculentus) fruit isn’t much more than a thick green hull, slime and seeds and the plant itself is impossibly irritating to the skin, few plants are as integral to Southern heritage. In my mind, okra is among the best vegetables Panhandle gardeners can grow. Not only is it a gorgeous plant – Okra belongs to the Mallow family which also includes beauties like Hibiscus and Cotton – but it’s exceedingly versatile in the kitchen, excellent fried, grilled, roasted, boiled (though you have to acquire a taste for slimy textures to enjoy this method) and most famously, as a thickening agent in Cajun gumbo. Because of this exalted status in Southern culture, whether you enjoy eating okra or not, it’s almost mandatory here to include the plant in one’s garden. Most gardeners stick with the old standard varieties such as ‘Clemson Spineless’ or ‘Cowhorn’ and there is nothing wrong with them, however, these plants are almost too prolific for most gardens (growing upwards of 6-7’), especially for those of us growing in the close confines of raised beds. In the search for a less rambunctious but still ultra-productive cultivar, this summer I trialed ‘Jambalaya’, an F1 hybrid developed by Sakata Seed in 2012, with impressive results!
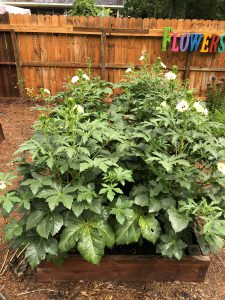
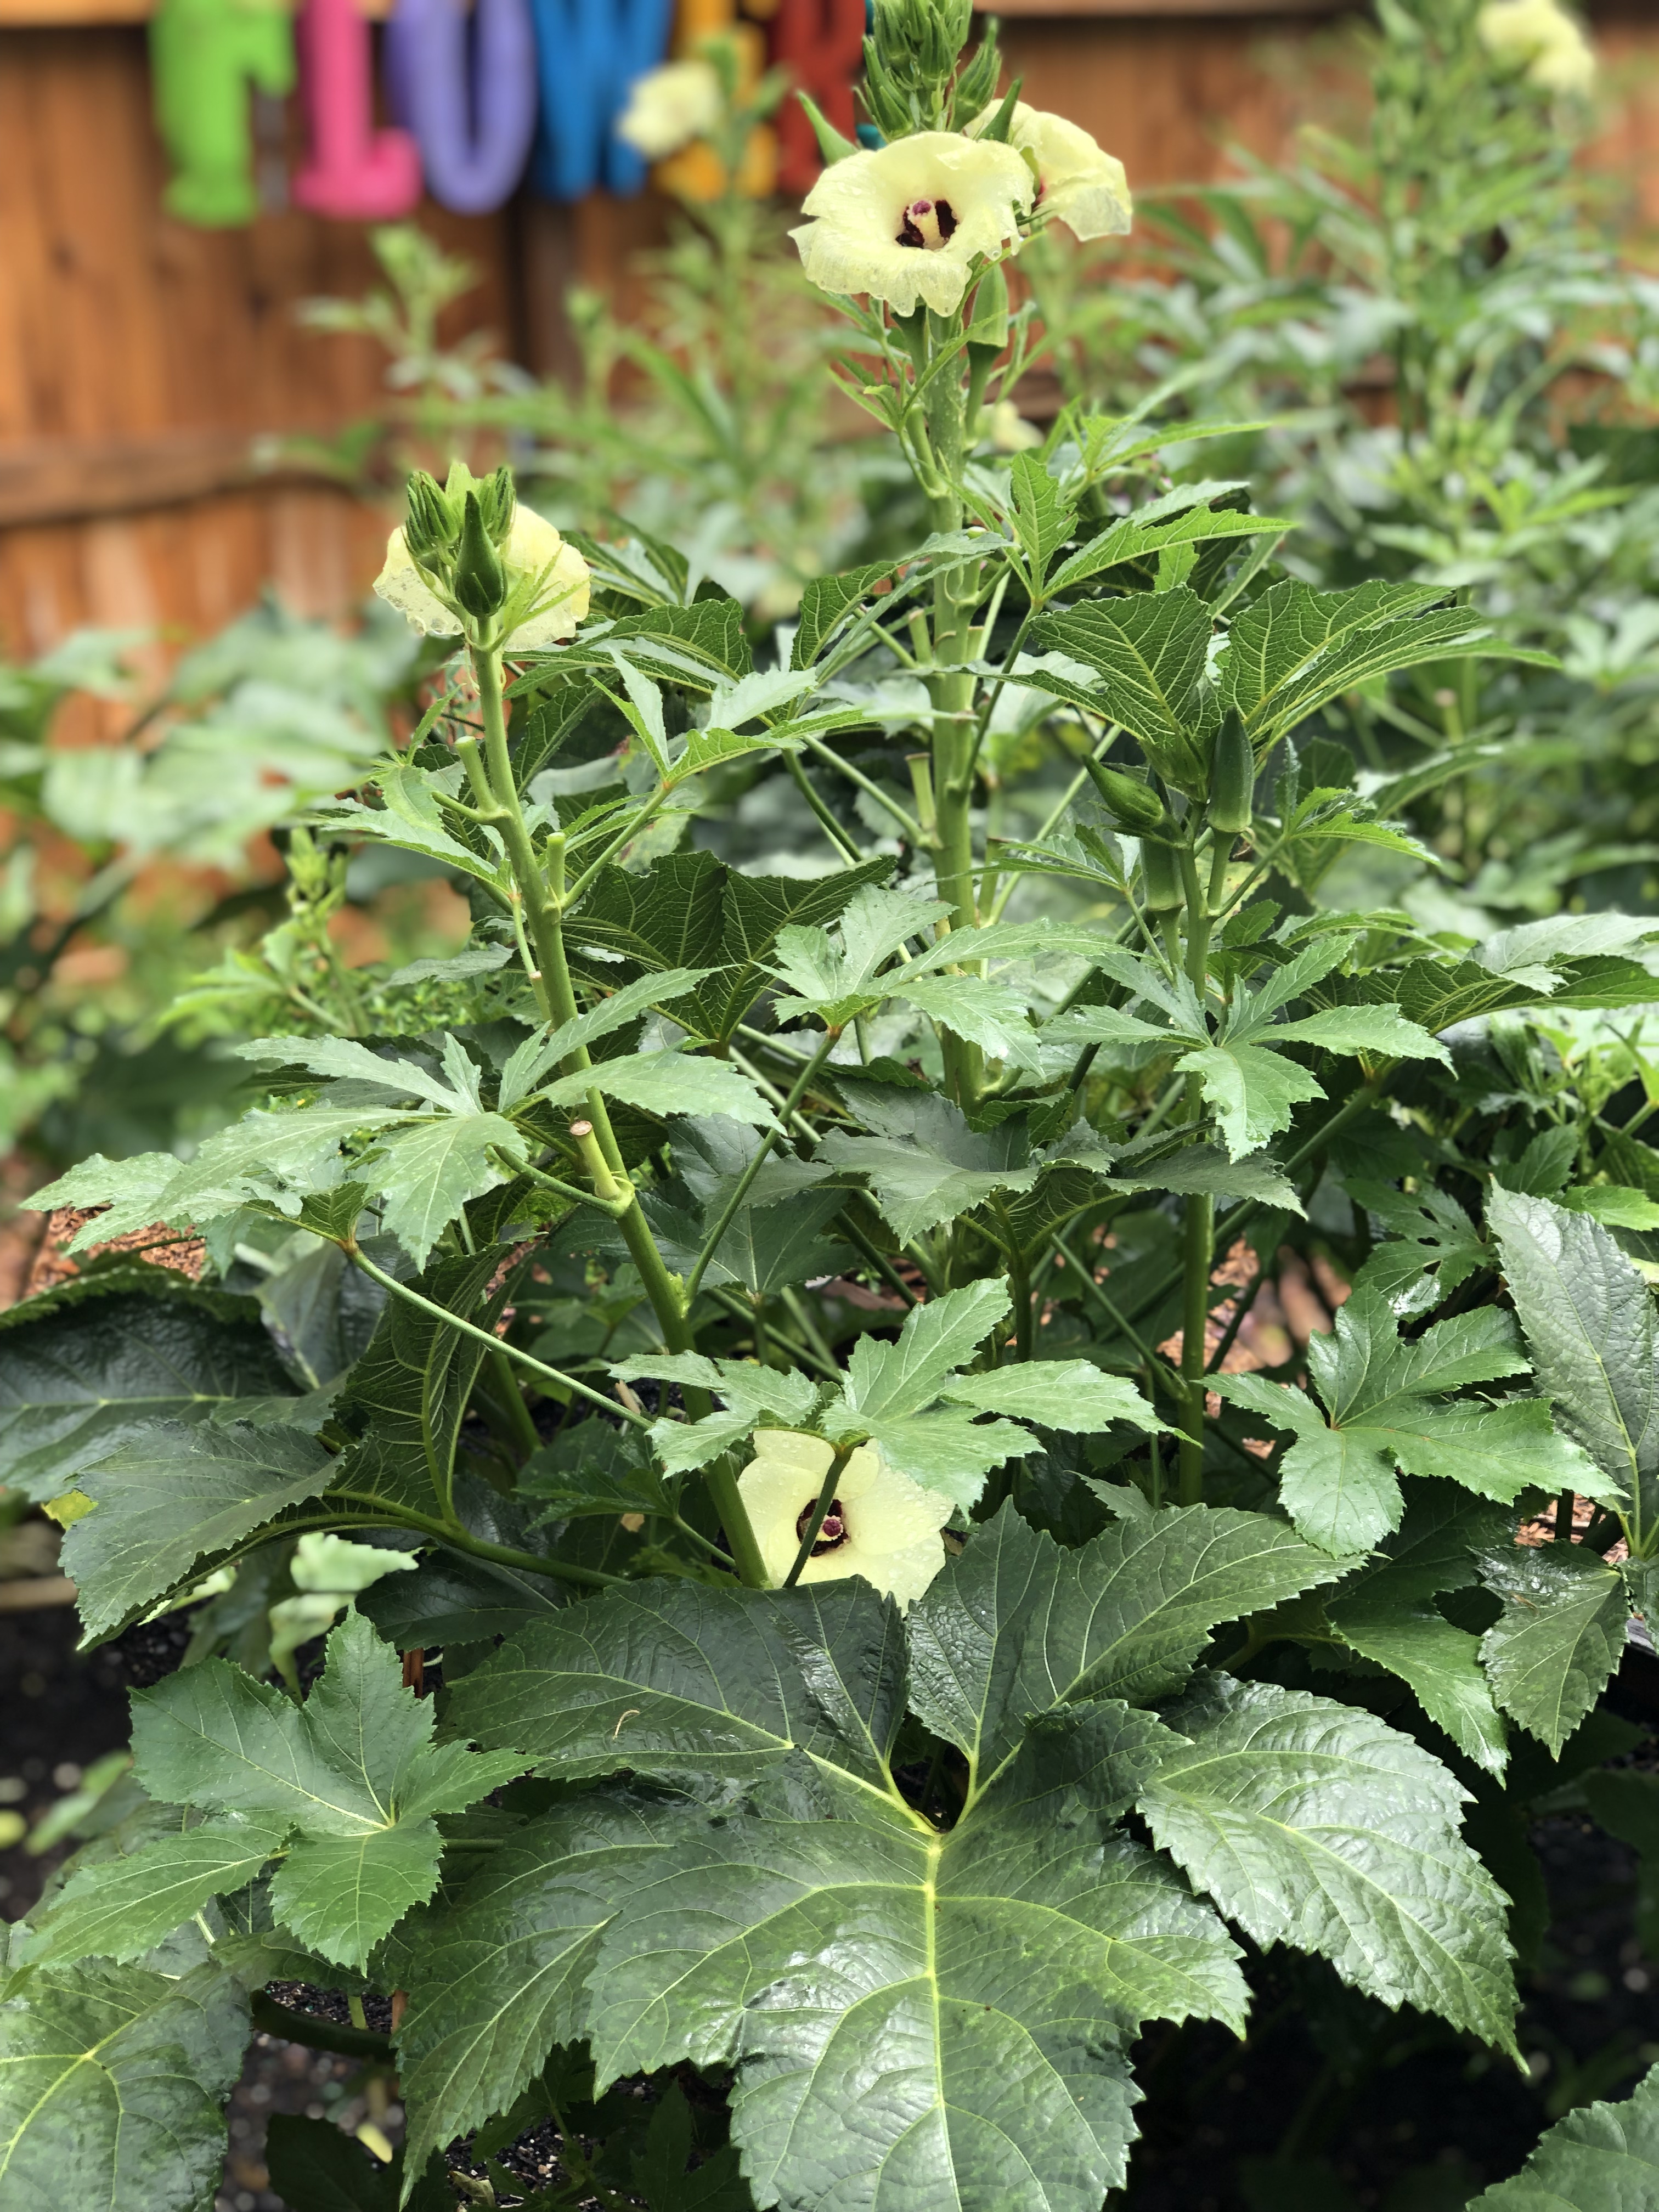
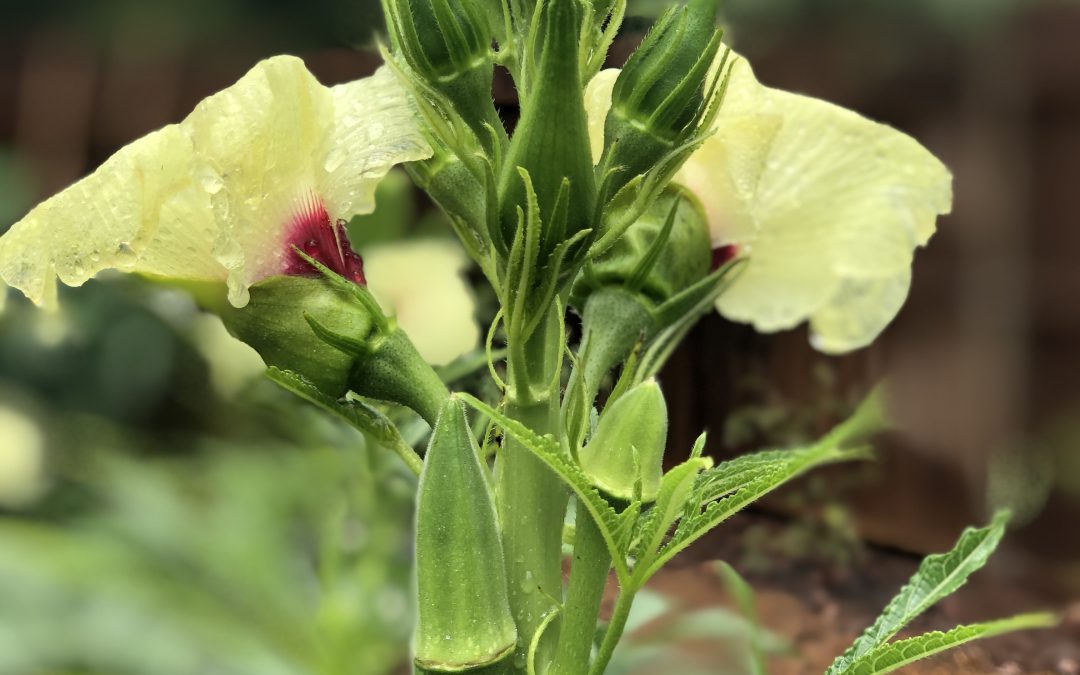
‘Jambalaya’ Okra in the author’s garden.
From my experience growing the cultivar this summer, ‘Jambalaya’ merits consideration in the garden, and is a must for raised bed gardeners, for two primary reasons. First, it was bred to be compact and is considered a dwarf cultivar. This is an awesome attribute, as I typically end the growing season picking okra from a small ladder! Most seed purveyors tout the plant as reaching a maximum height of 3-4’ and while this estimate might be a little conservative, I can attest that ‘Jambalaya’ is greatly reduced in height compared to the standard cultivars. The second advantage of growing this variety is that it begins producing very early relative to its peers and bears heavily. ‘Jambalaya’ fruit begin to ripen in about 50 days, about ten days to two weeks earlier than ‘Clemson Spineless’, a definite advantage if rotating behind a late maturing spring crop like potatoes as I typically do. Though ‘Jambalaya’ is a dwarf plant, in no way are yields reduced. My specimens have produced continuously since late-July and will continue to do so as long as adequate fertility and consistent harvesting are provided.

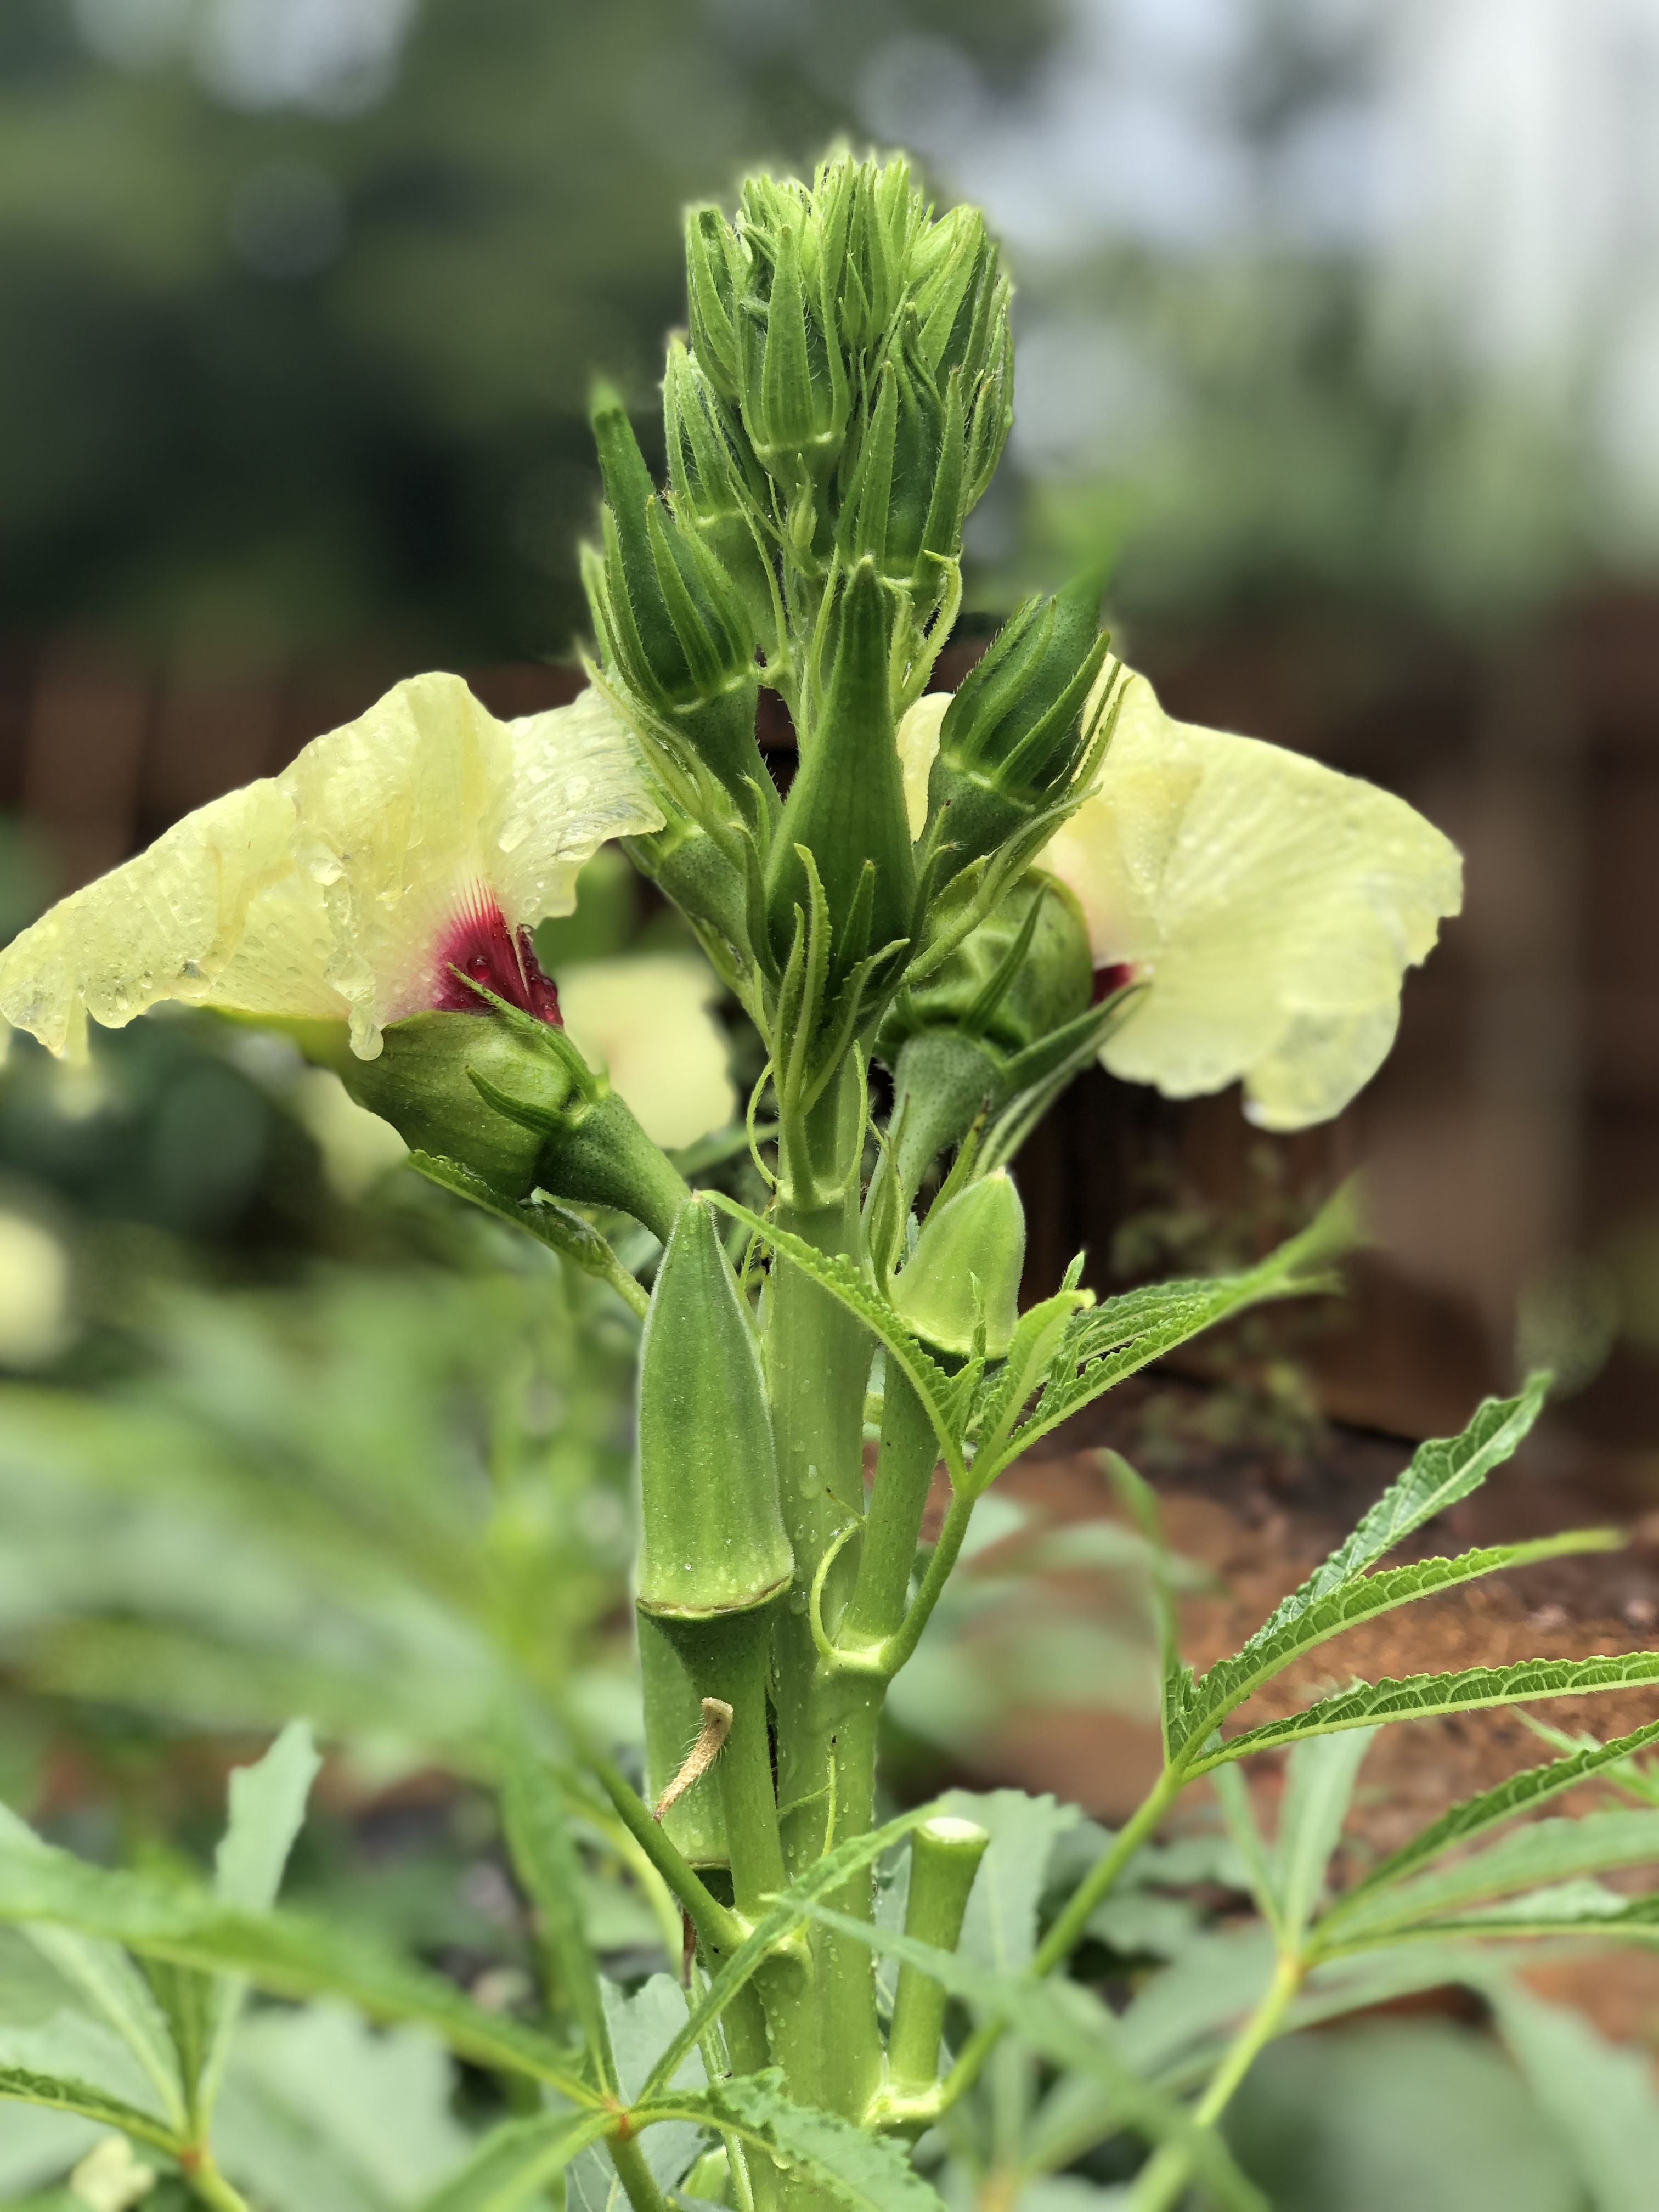
‘Jambalaya’ flower & fruit production.
Like any other okra cultivar, ‘Jambalaya’ has a couple of basic requirements that must be met for plants to thrive. In general, all okra cultivars love Southern summers and patience sowing seed is recommended, allow the soil to warm to at least 70 degrees before planting. Okra also prefers full sun, at least 6 hours per day, any less and yields will be reduced and plants will stretch towards the light. Belonging to the Mallow family, okra requires consistent moisture, particularly when in the flowering and fruiting phase. Finally, it is critical to keep up with your okra harvest as the plants produce! Okra pods grow quickly and should be harvested when they are no more than 3-4” long and still tender, larger pods are tough to the point of being inedible!

‘Jambalaya’ in the author’s garden.
Whether you’re new to the okra growing game or you’re a seasoned gumbo gardener, I highly encourage you to give ‘Jambalaya’ Okra a look next summer. While ‘Jambalaya’ is available through many seed sources, Johnny’s Selected Seeds sells a conveniently small package perfect for backyard gardeners, though they’ll be happy to provide larger quantities as well. In ‘Jambalaya’ you’ll find a nice compact plant that won’t outgrow your space, provide you a summer long harvest of tender green pods, and will rival the ornamentals in your landscape for the title of prettiest plant on your property! Happy gardening and as always, if you have questions about vegetable gardening or any other horticultural or agronomic topic, please contact your local UF/IFAS County Extension office!
by Daniel J. Leonard | May 27, 2019
Talk to nearly any Panhandle gardener and one of the first things brought up in conversation is the difficulty growing large, beefsteak/slicing tomatoes (Solanum lycopersicum) in their home garden. Large tomatoes are indeed among the more challenging garden vegetables in North Florida, affected by myriad pests, pathogens and abiotic issues. However, giving up growing this garden favorite is unwarranted as success can be had by following a couple of often overlooked, simple steps to ward off potential problems.
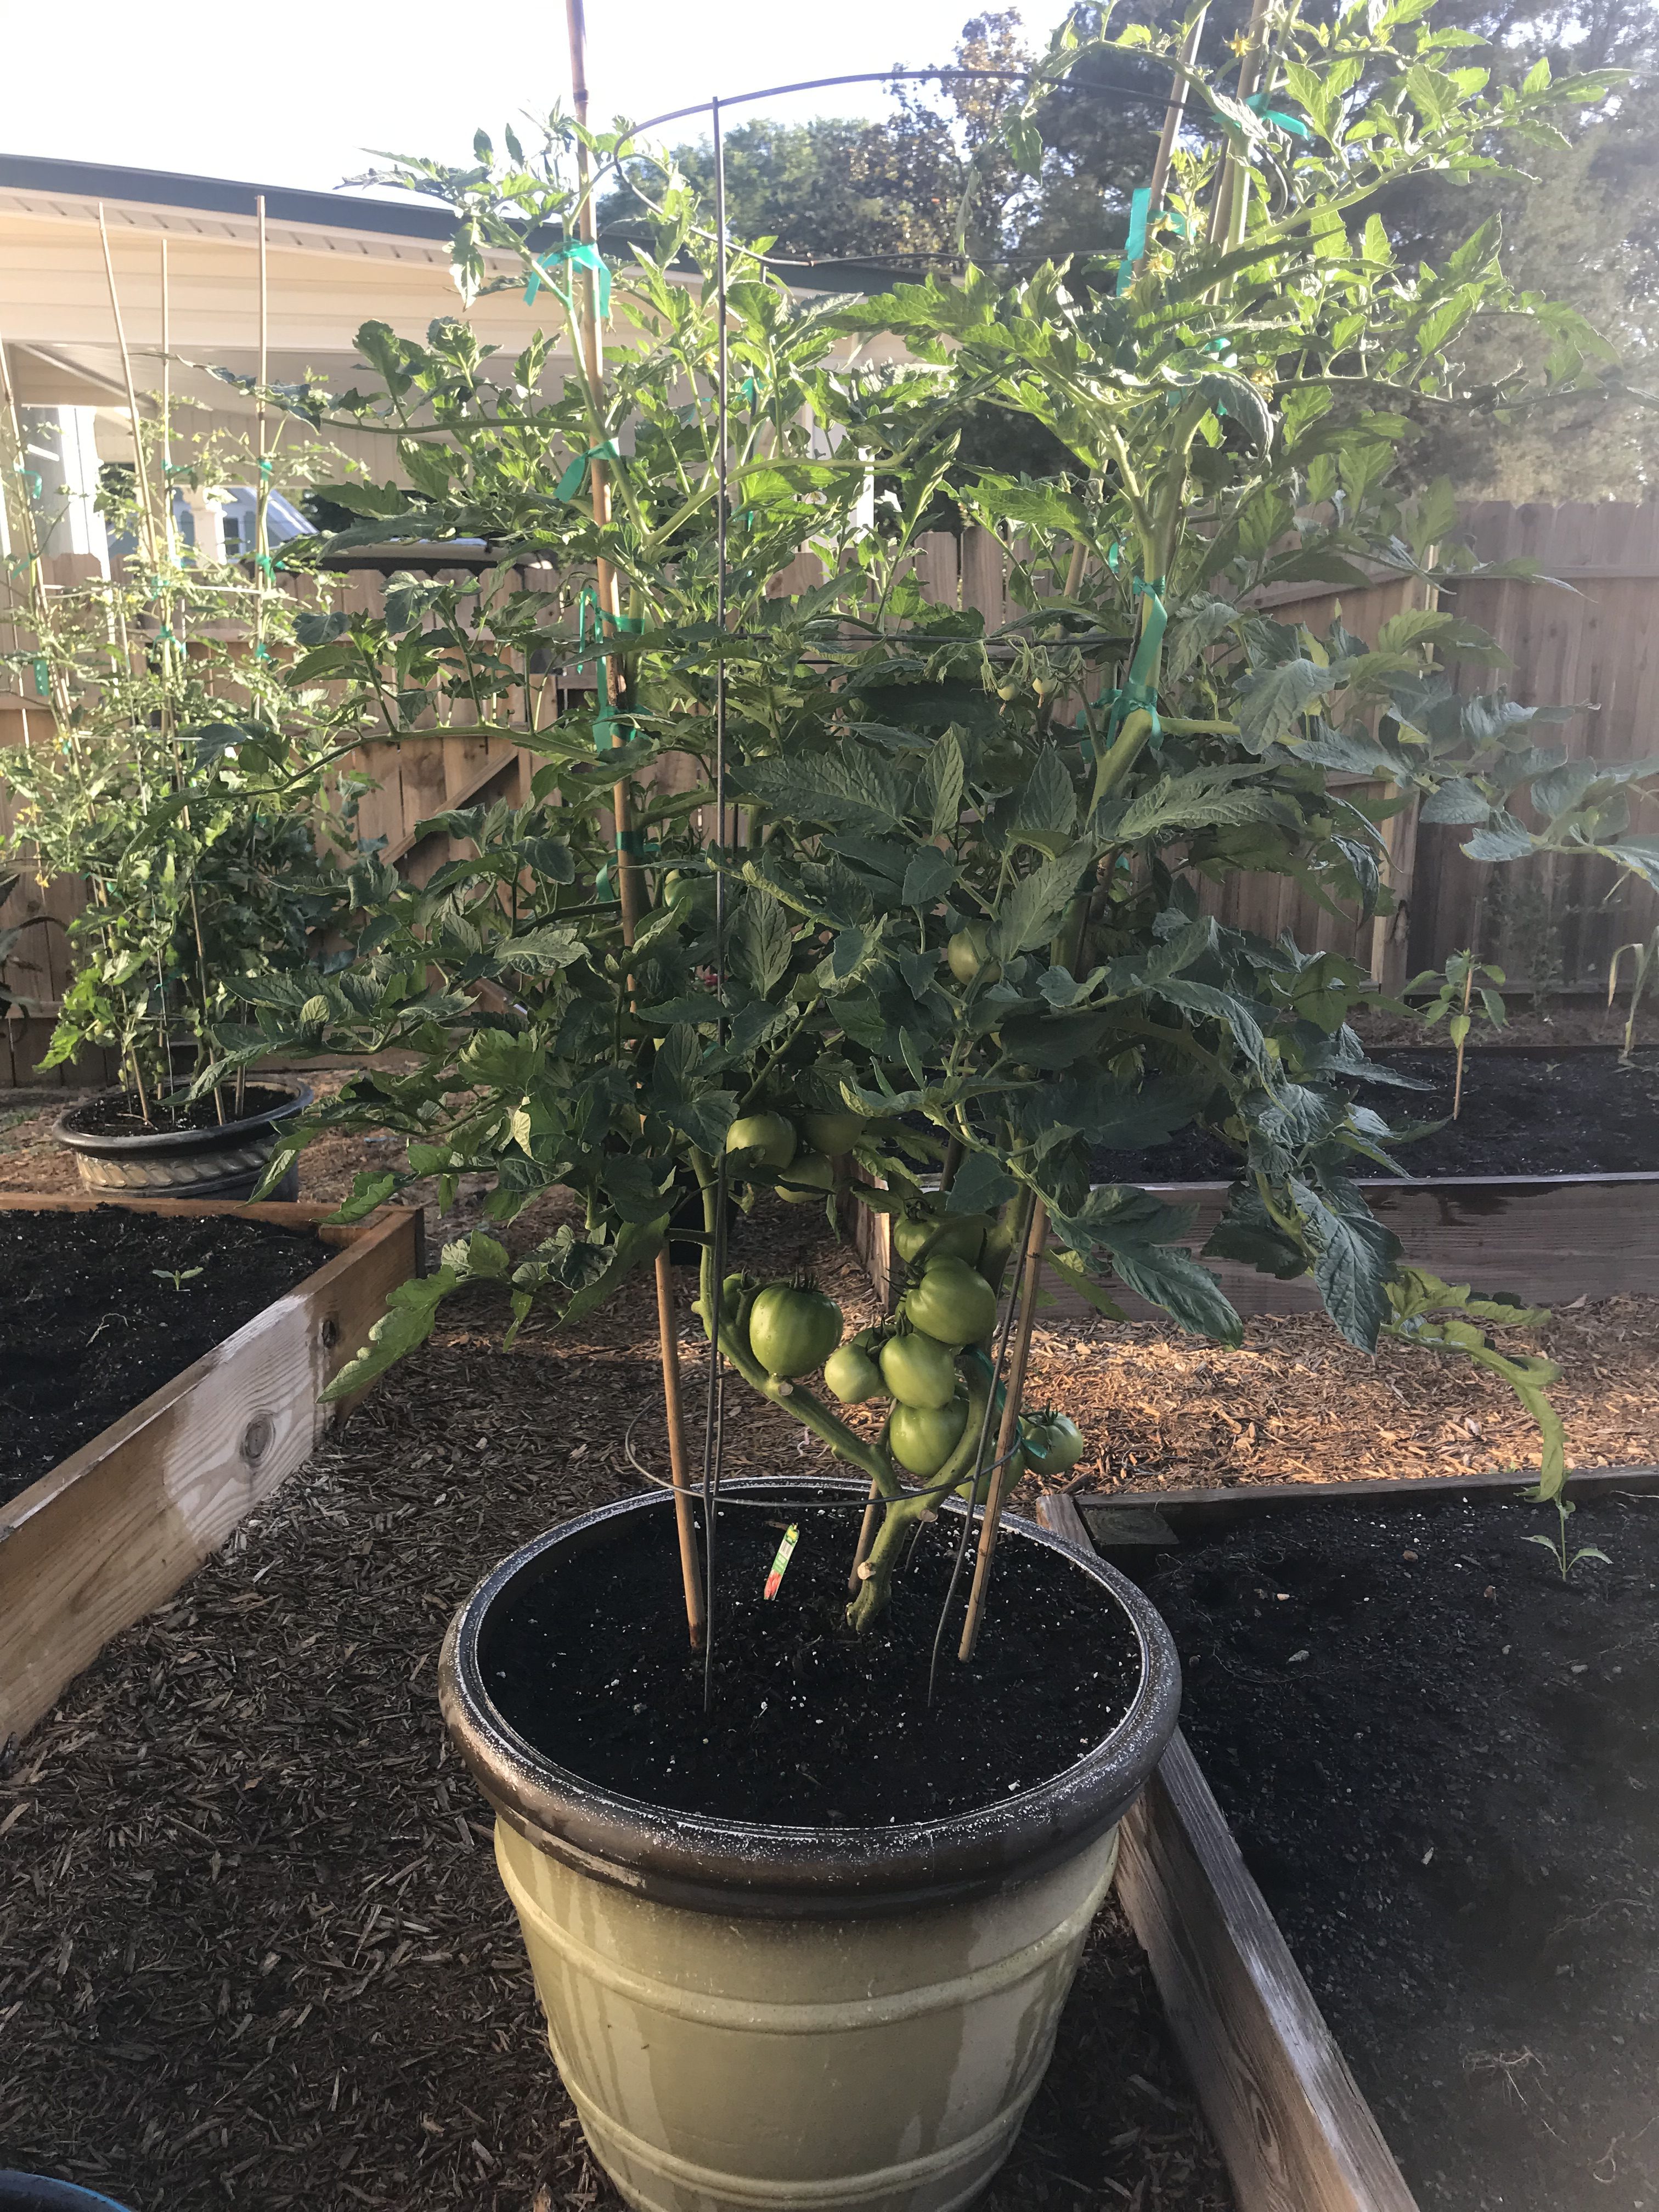
Choose Resistant Cultivars – One of the major recent gardening trends is the rise of heirloom veggies, particularly heirloom tomatoes. While many of these varieties certainly are interesting and often possess superior flavor/texture, heirlooms are, as a group, extraordinarily susceptible to disease in our climate. Fortunately for gardeners, there are a number of excellent varieties available with large resistance profiles to many common diseases and a similar taste profile to heirloom favorites! ‘Big Beef’ (pictured), ‘Better Boy’, ‘Celebrity’, and ‘Skyway’ are just a few of the many great cultivars with extensive disease resistance available as transplants at garden centers or as seed from quality online seed vendors.

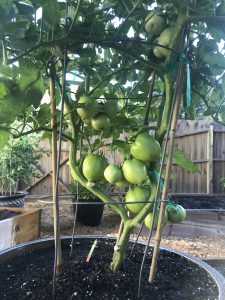
Tomato ‘Big Beef’ in 15 gallon decorative container
Start Early – Once, you’ve selected the proper cultivar, the next key is to get them in the ground early! I’m convinced one of the primary reasons folks fail with tomatoes is waiting for “traditional” garden planting dates. For instance, an old tradition in the South is to plant your garden on Good Friday before Easter. However, according to Johnny’s Selected Seeds Southeast Sales Representative Blake Thaxton, tomatoes should be germinated and growing in the garden no later than March 15. Mr. Thaxton notes two primary reasons for this, the most important being pest/disease avoidance. Beefsteak tomato varieties take around 70 days from planting to harvest, so a March 15th planting date yields ripe tomatoes around the third or fourth week of May, when pest/disease pressure is still manageable. Pests and disease occurrence becomes exponentially worse in the Panhandle as May trickles into June and July, therefore it is critical that your fruit begin ripening prior to this onslaught. An important second motivation to plant early is that tomatoes stop setting fruit when nighttime temperatures rise above 75°F. At these temperatures, tomato pollen is rendered sterile and though the plant will continue flowering, no fruit will be set.
Mulch – Another overlooked best management practice in backyard veggie gardening is mulching! Those of us who tend flower beds already know many benefits of mulch like soil temperature moderation, weed prevention, and moisture conservation. But for tomato growers, mulch has another benefit – disease prevention! Several serious diseases that affect tomato are soil-borne pathogens (i.e. Early Blight, Late Blight, Bacterial Spot, etc.). These pathogens find their way onto plants either indirectly via water splashing from soil onto leaves or direct contact from leaves and fruit resting on the soil. To prevent these pathogens from infecting plant tissue, apply an organic mulch (preferably wheat straw or tree leaves) under and around plants. This simple step goes a long way toward season-long, yield-saving disease prevention.
Consistent Watering – Everyone knows plants need water but what you might not know is that irrigation consistency makes a huge difference in plant health, particularly tomatoes. Consistent watering is key in helping ward off one of the most frustrating tomato maladies, blossom end rot (BER) – you know, the one where the bottom end of your perfectly good tomato fruit turns to a brownish mush! Though BER is caused by calcium deficiency, the condition is commonly induced by creation of distinct wet and dry periods from non-regular watering, interfering with calcium uptake and availability to the plant. So, while you may have adequate soil calcium, if you don’t water correctly, the condition will happen anyway! It’s also good to keep in mind that mature tomato plants use large quantities of water daily, so during the heat of summer, plants in containers may need to be watered multiple times daily to maintain consistently moist soil. Think about it, you don’t drink 8 glasses of water when you wake up and then never drink again throughout a hot day. A tomato is no different. Allowing your plants to wilt down before providing additional water ruins productivity and can induce BER.
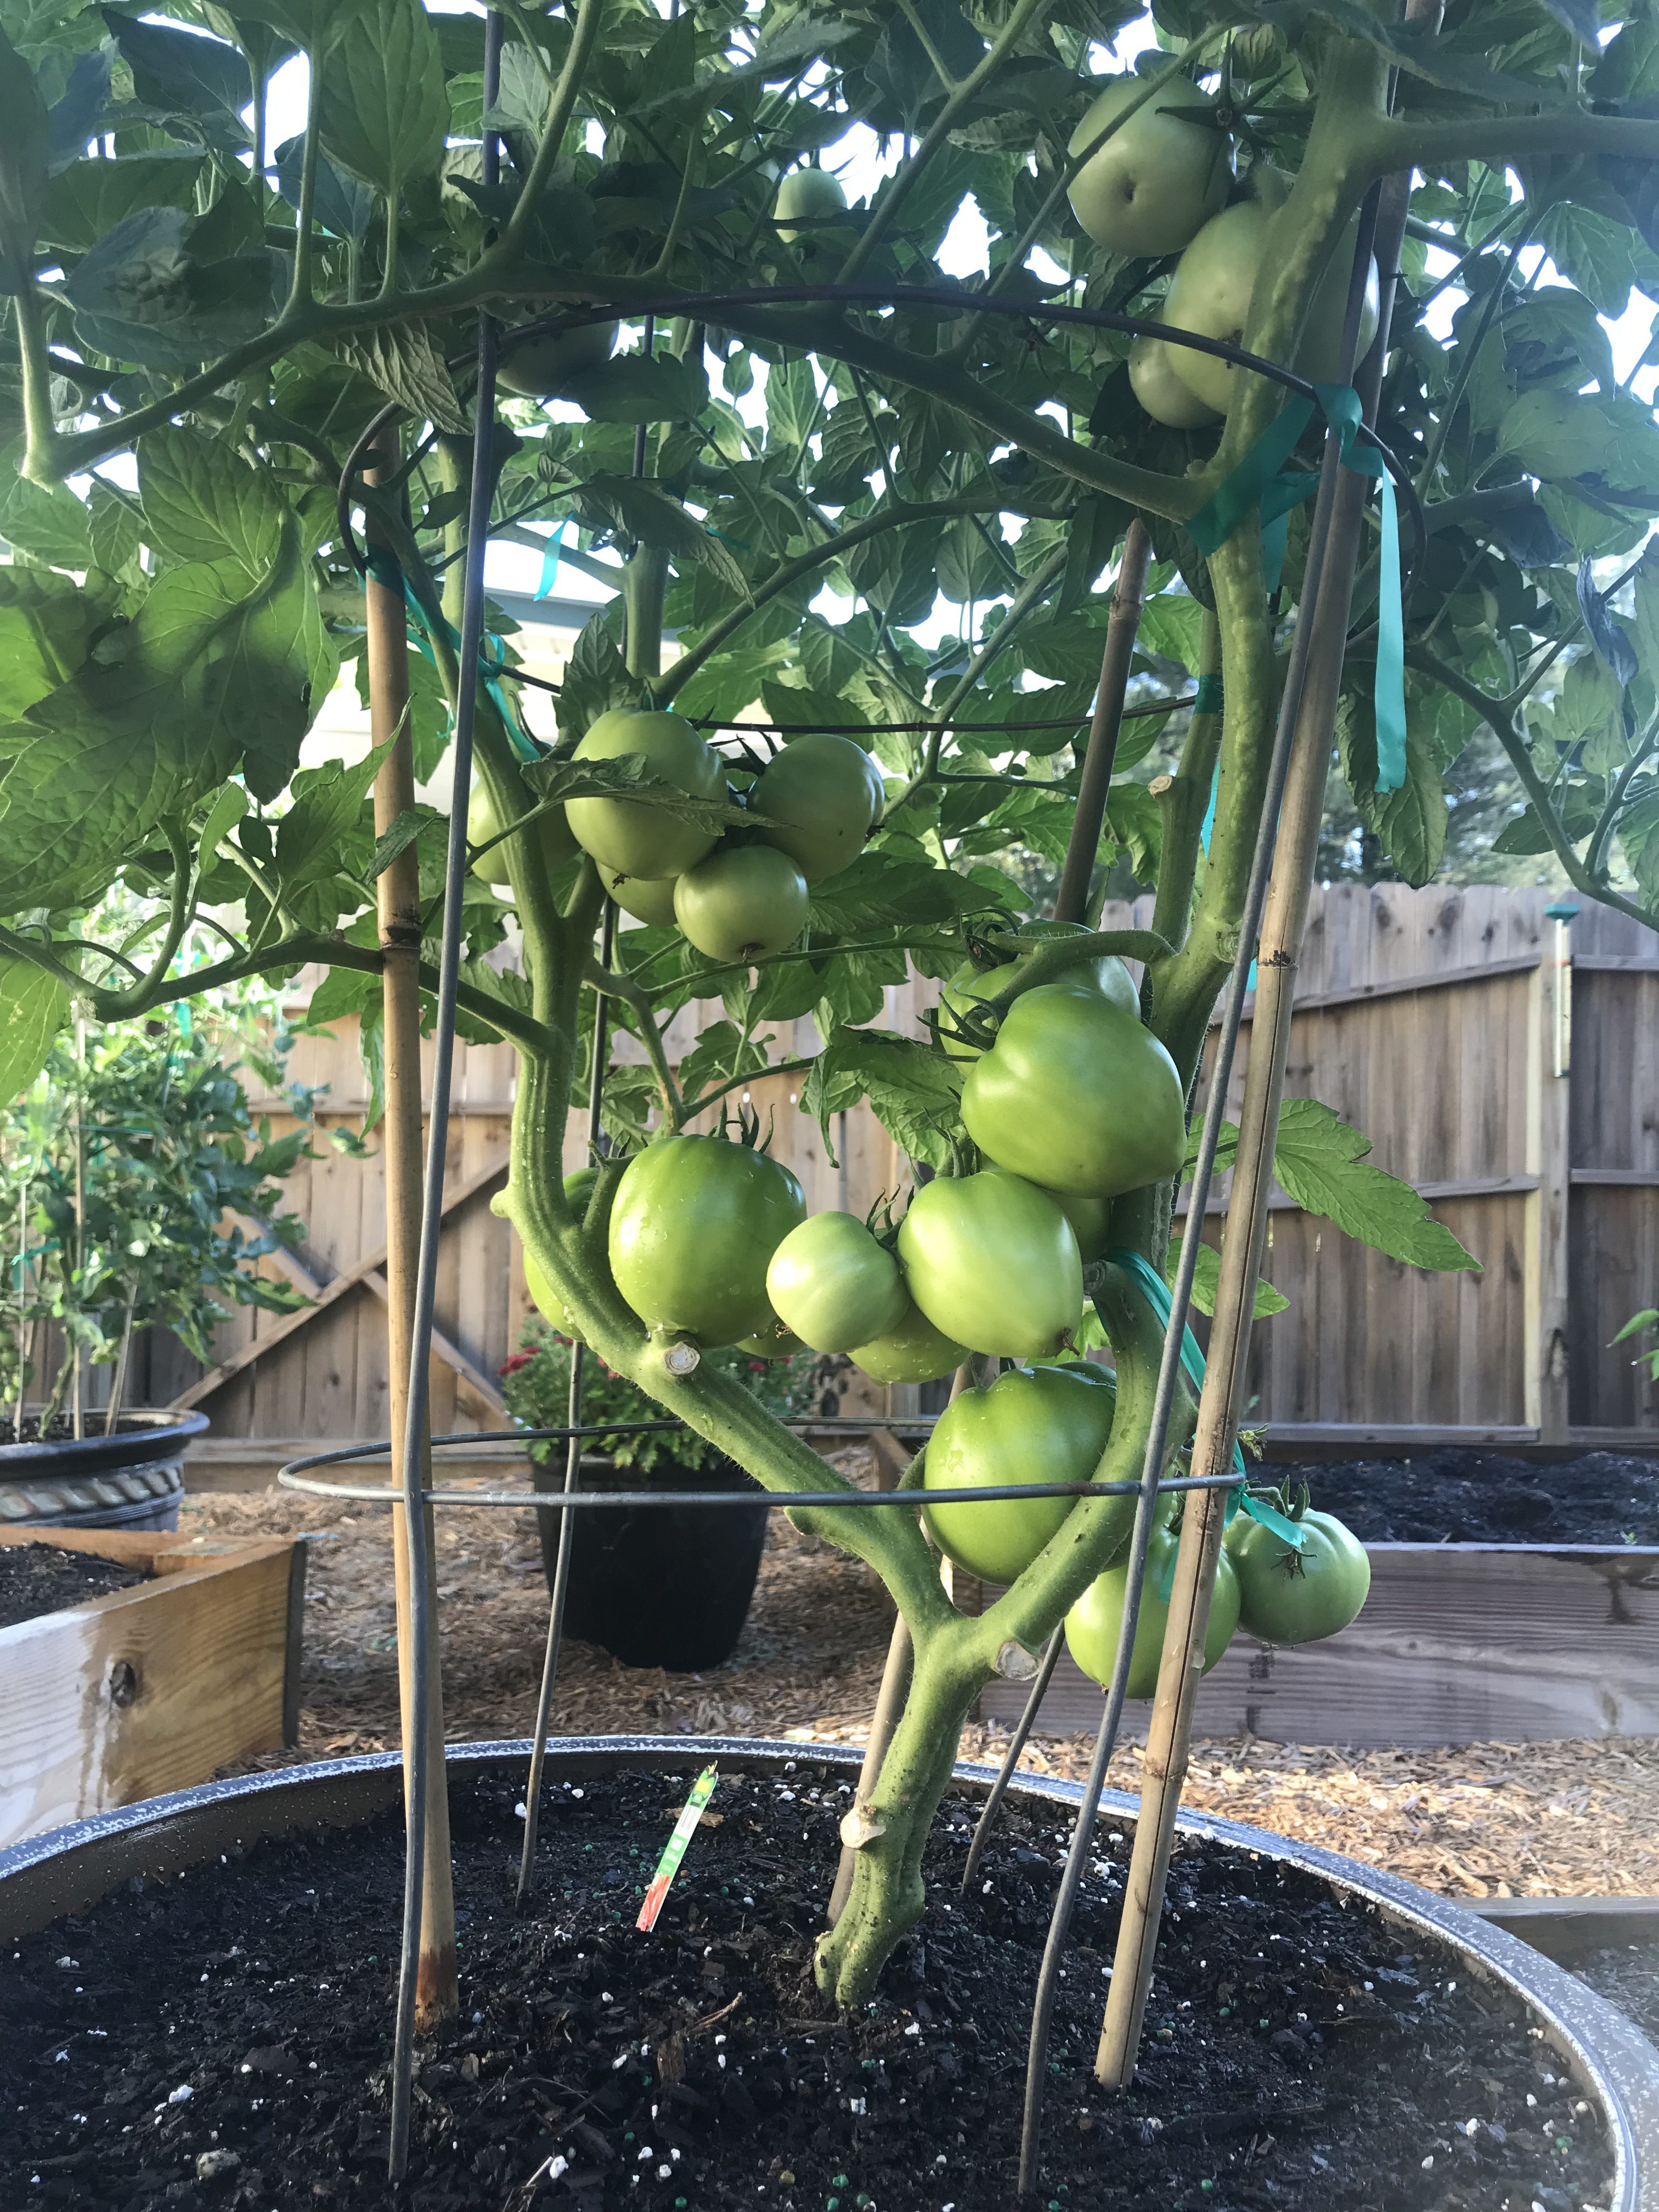
Tomato ‘Big Beef’ demonstrating pruning for soil clearance and airflow.
Pruning – I get it. Once you’ve nursed your baby tomato from a wee transplant or seed into a rapidly growing and flowering plant, it seems counter-intuitive to break out the pruners, but to keep your tomato plant as healthy as possible for as long as possible, that is what you must do! Pruning tomatoes should accomplish two things. First, remove the bottom layer of foliage from the plant base, so that water will not readily splash onto the lowest remaining leaves. (I tend to remove all leaves up to the second set of flowers 8-12” from the soil’s surface.) As with mulching, this prevents bacterial and fungal pathogens from spreading easily from the soil surface onto your plant. Second, tomato plants, especially the vigorous indeterminate varieties, often grow more foliage than is necessary for fruit production. This excess foliage can prevent airflow and trap moisture in the canopy of the plant, promoting disease. To open up the canopy and allow for more airflow, I prune off leaves that grow from the primary stems inward to the center of the plant. The idea is to keep the inside of the plant open while allowing enough leaves to power photosynthesis and shade the developing fruit below.
Tomatoes are notoriously hard to grow, but by following a few easy preventative practices, gardeners can greatly increase their chances of realizing harvestable fruit come summer. Please keep in mind that this is not an exhaustive list that will ensure disease-free plants over the entire growing season (you should also get a soil test to make sure your pH and soil fertility are correct and ideally you’d never work in your tomatoes when they are wet, etc., but this is a good place to start!). However, a little bit of planning and prevention early in the season can make growing tomatoes a lot less frustrating! As always, if you have questions regarding tomatoes or any other horticultural topic, please contact your local UF/IFAS Extension Office. Happy gardening!