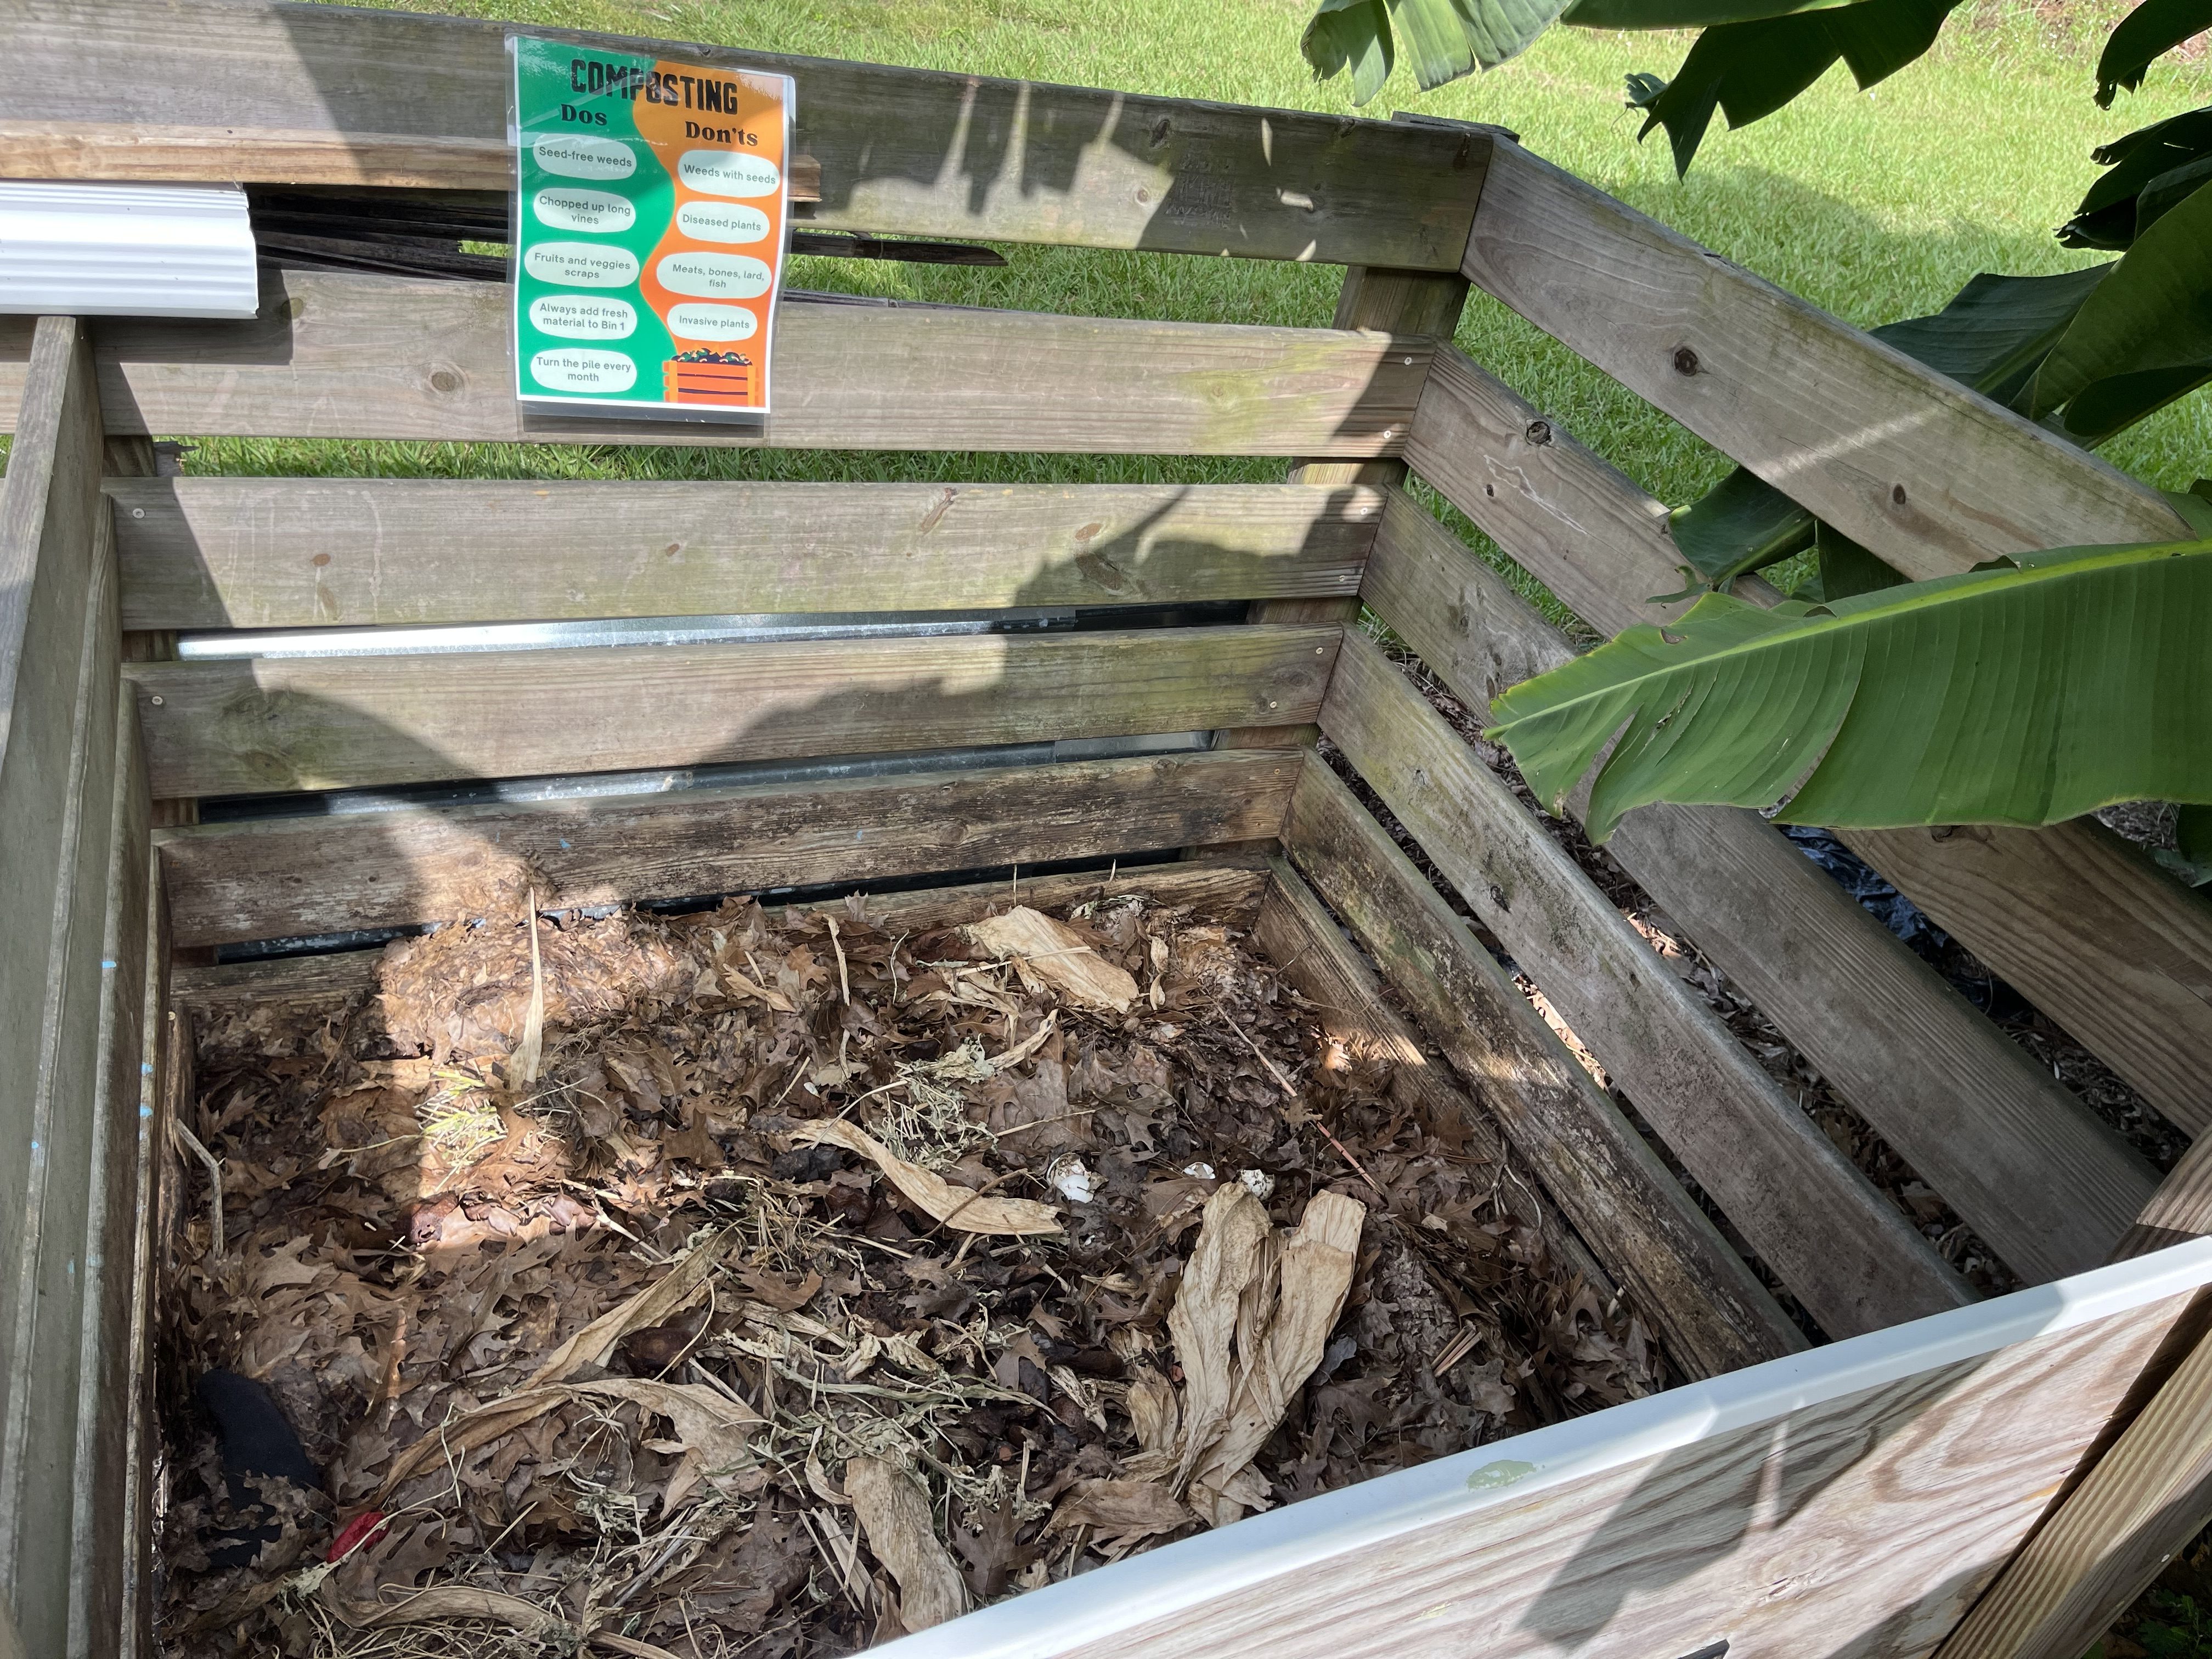
A simple wooden bin provides airflow and space for layering “browns” and “greens” to create balanced compost at home. Photo by Molly Jameson.
The Dirt on Compost: Hot and Worm Composting at Home
Every week, many of us dump spoiled food or leftovers into the trash and haul yard waste to the curb, not realizing that all of that organic material could be turned into something incredibly useful. Composting is the answer. It’s a simple, natural process that transforms food scraps and yard debris into a rich soil amendment that feeds your plants and improves soil health.
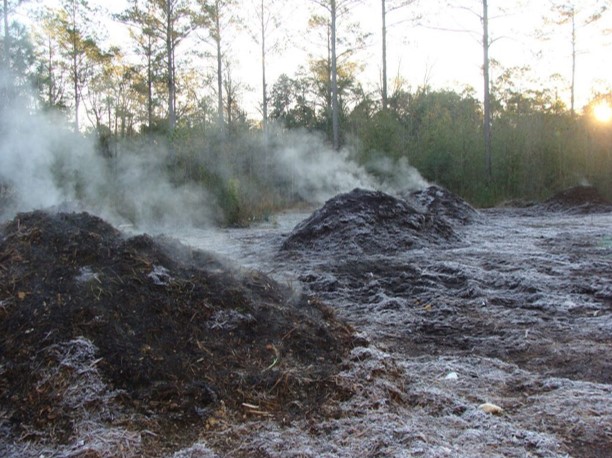
Microbial activity generates heat as organic matter breaks down, causing visible steam to rise from active thermophilic compost piles on cool mornings. Photo by Turkey Hill Farm.
There are two main ways to compost at home: thermophilic (hot) composting and vermicomposting (composting with worms).
Thermophilic composting is the classic backyard method that relies on heat-loving microbes to break down organic material. With the right mix of “browns” (carbon-rich materials like dried leaves, cardboard, and straw) and “greens” (nitrogen-rich materials like vegetable scraps, coffee grounds, and grass clippings), the pile heats up to between 130–160°F. This high heat speeds up decomposition and kills weed seeds and harmful pathogens. Turn the pile occasionally and keep it moist, and in a few months, you’ll have dark, earthy compost ready to mix into your garden beds.
Hot Composting Fun Facts
Food scraps and yard waste make up nearly 30% of what we throw away, most of which could be composted instead.
Microbes in a hot compost pile can double their population every 20–30 minutes under the right conditions.
A compost pile needs at least one cubic yard (3x3x3 feet) of material to build enough mass to heat up properly.
Steam rising from a compost pile on a chilly morning isn’t smoke – it’s water vapor from microbial activity.
Red wiggler earthworms transform food scraps into nutrient-rich worm castings. Photo by Leon County.
Vermicomposting is a little different – and a bit squirmier. This method uses red wiggler earthworms (Eisenia fetida) to process kitchen scraps into a fine, nutrient-rich material called worm castings. Earthworm bins can be kept indoors or outside in a shaded area, making them a great option for those with limited space. It’s clean, odor-free when managed properly, and a surprisingly fun way to recycle your food waste.
Worm Composting Fun Facts
Red wigglers can eat up to half their body weight in food scraps each day.
Worms breathe through their skin and need moist bedding to survive and stay active.
Worm castings contain five times more nitrogen and seven times more phosphorus than average topsoil.
Worm castings contain beneficial microbes that help suppress certain plant diseases in soil.
Finished vermicompost is dark, crumbly, and nutrient-rich – the result of red wigglers breaking down organic waste. Photo by John Edwards.
Both methods keep organic material out of the landfill, reduce methane emissions, and build healthier soil – something every gardener can appreciate.
If you’d like to learn even more about composting and hear additional fun facts about how nature recycles, join UF/IFAS Extension Agents Mark Tancig and Molly Jameson for The Dirt on Compost: Hot & Worm Composting at Home on Wednesday, November 12, from 6:00 to 8:00 p.m. at the Leon County Extension Office (615 East Paul Russell Road).
As we transition from the dog days of summer into (hopefully) the cool weather of fall, it is a great time to consider the nutrient levels of your garden soil. One of the best things you can give your garden is the foundation of healthy soil, but to do that you may have to add some things over time. A natural way to boost your garden’s nutrient levels is through composting. But what exactly is compost and where can you get it?
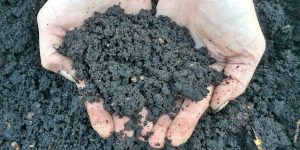
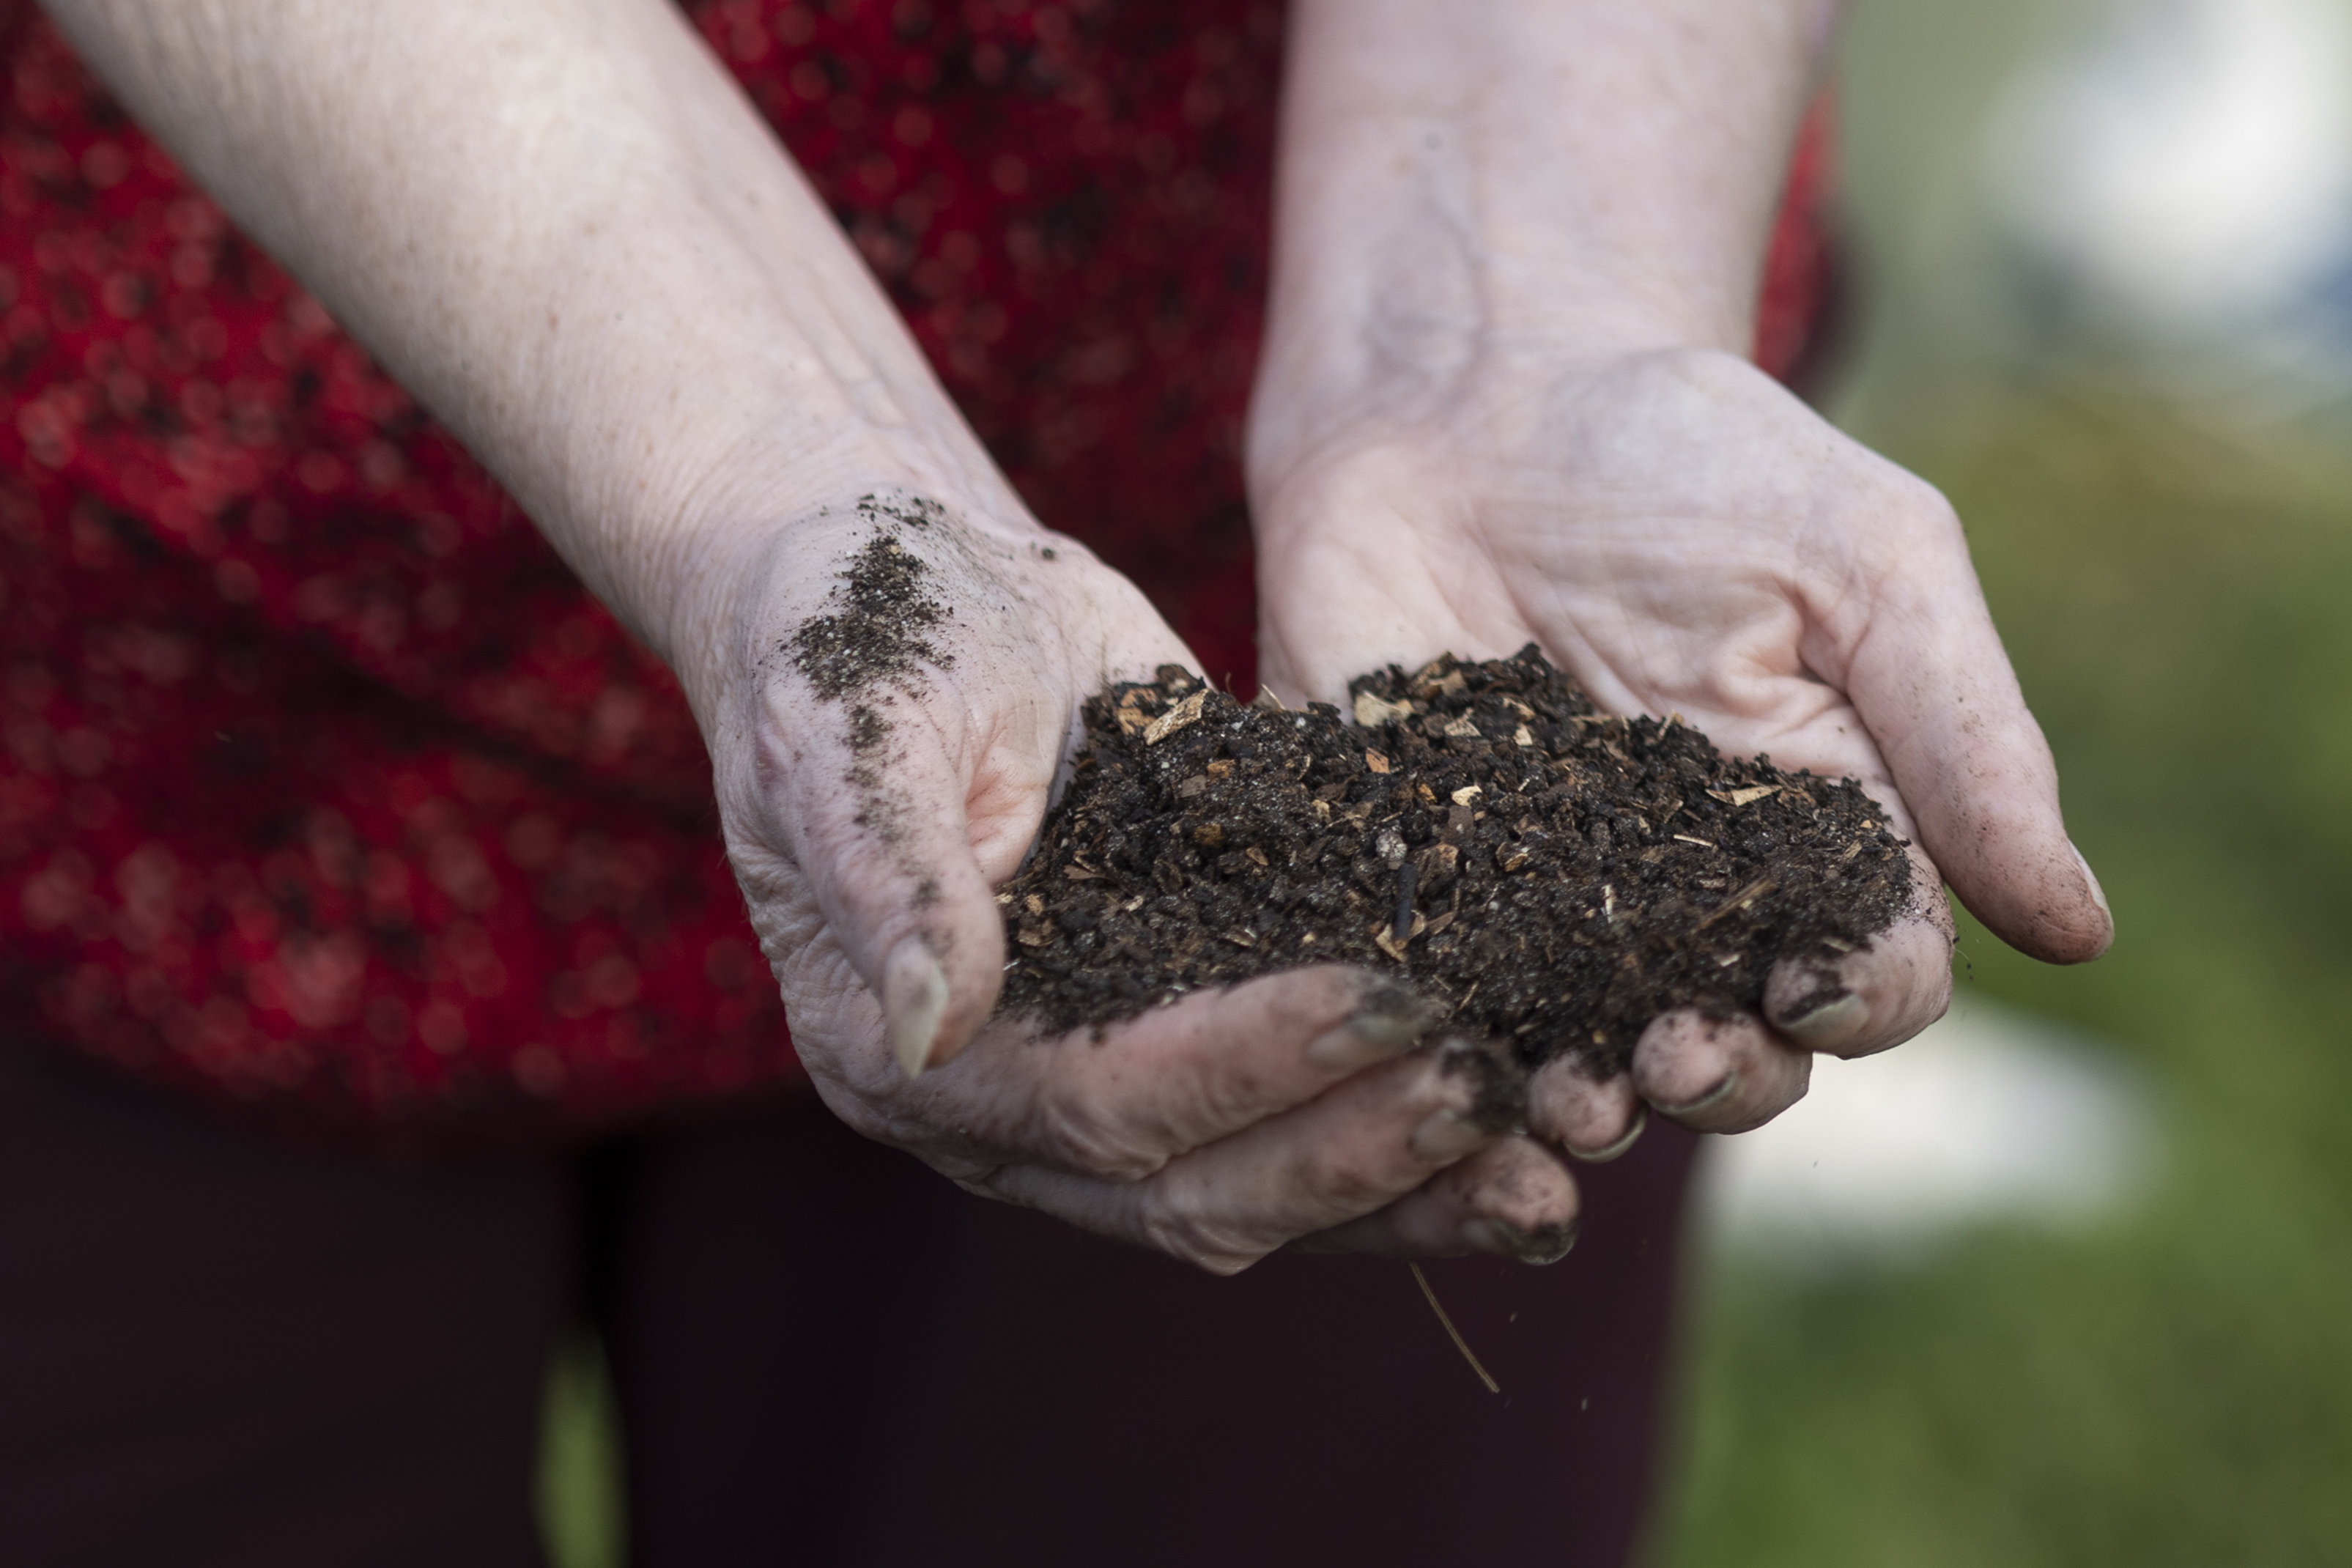
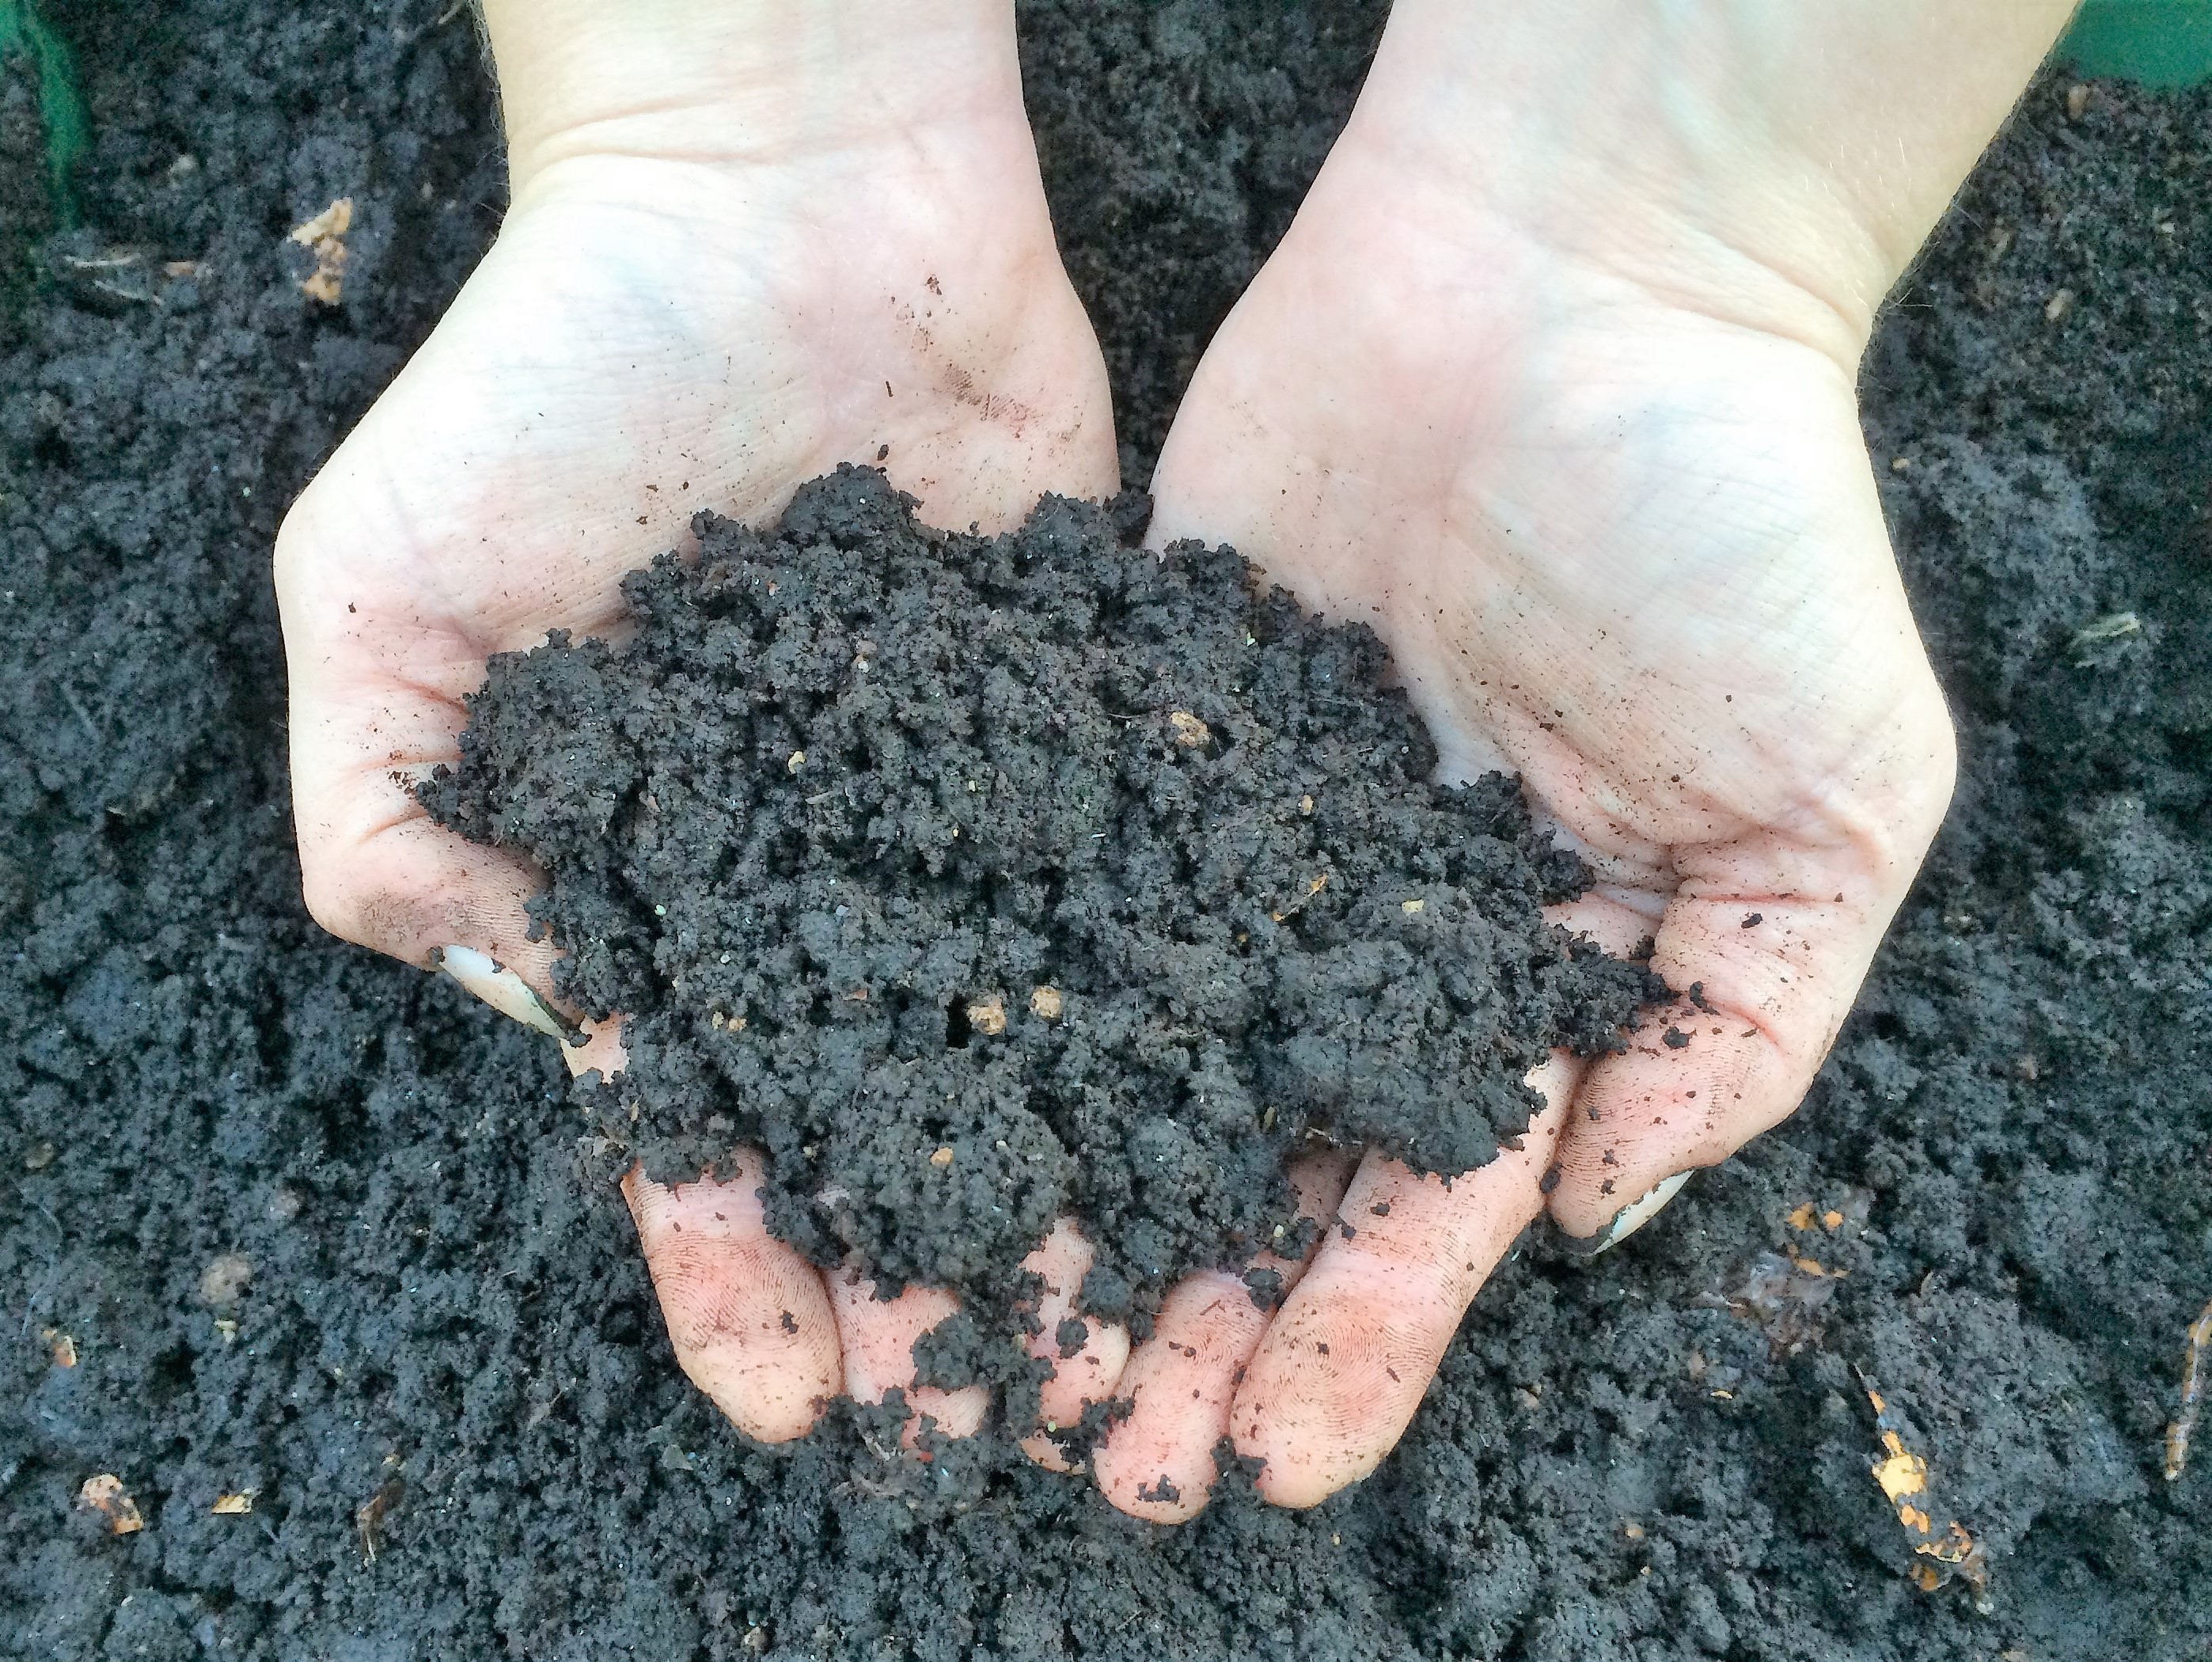
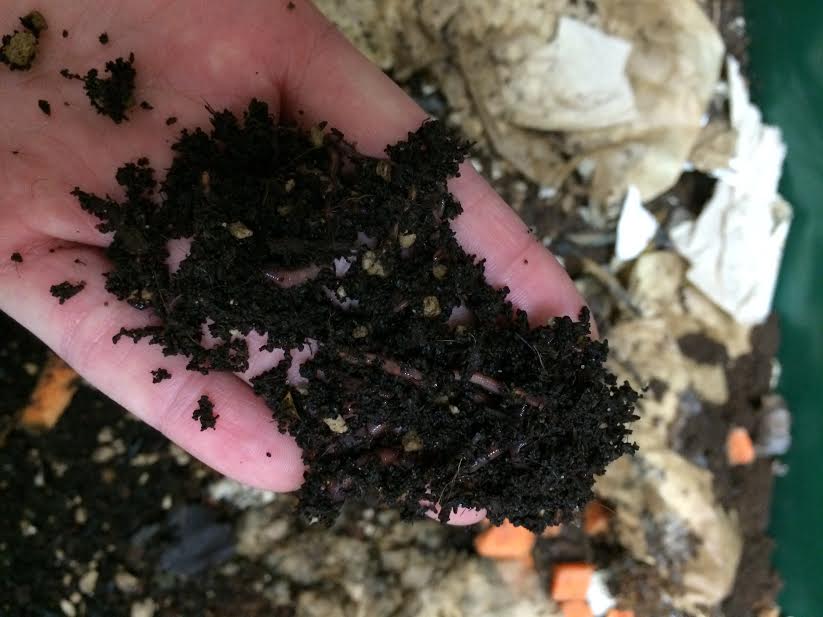
Handful of finished compost soil. Photo Credit: UF/IFAS Tyler Jones
Compost is often referred to as “black gold” by gardeners because of its nutrient dense consistency. And even better, you can make your own compost from home. Compost is the makeup of an even ratio of carbon and nitrogen by-products that naturally decompose over time to create a brown-soil like substance. Carbon products are often referred to as “browns” and nitrogen products “greens.” Examples of browns are straw, cardboard, and old leaves. Green materials are often food scraps, lawn clippings, and animal manures. Compost can be added and tilled into your garden or depending on the type of compost, it can also be used as a potting soil alternative.
It is easy to create a compost bin at home. It does not have to be fancy or expensive to create. Some people opt for a pre-made compost tumbler bin to make turning their pile easier, while others use old wood pallets for their siding. You can even create a vermicompost bin inside a storage tote and use worms to do the composting for you. There are many possibilities. But it is important to note that bins do create a slight odor, because they are breaking down waste products. Location of your bin should be kept in mind if you don’t want close neighbors or even family members making complaints about the smell. However, if there is a strong odor overtaking, it could indicate an issue with the bin and will need to be addressed. Keeping a 1:25 ratio of greens to browns will keep odors at a minimum.
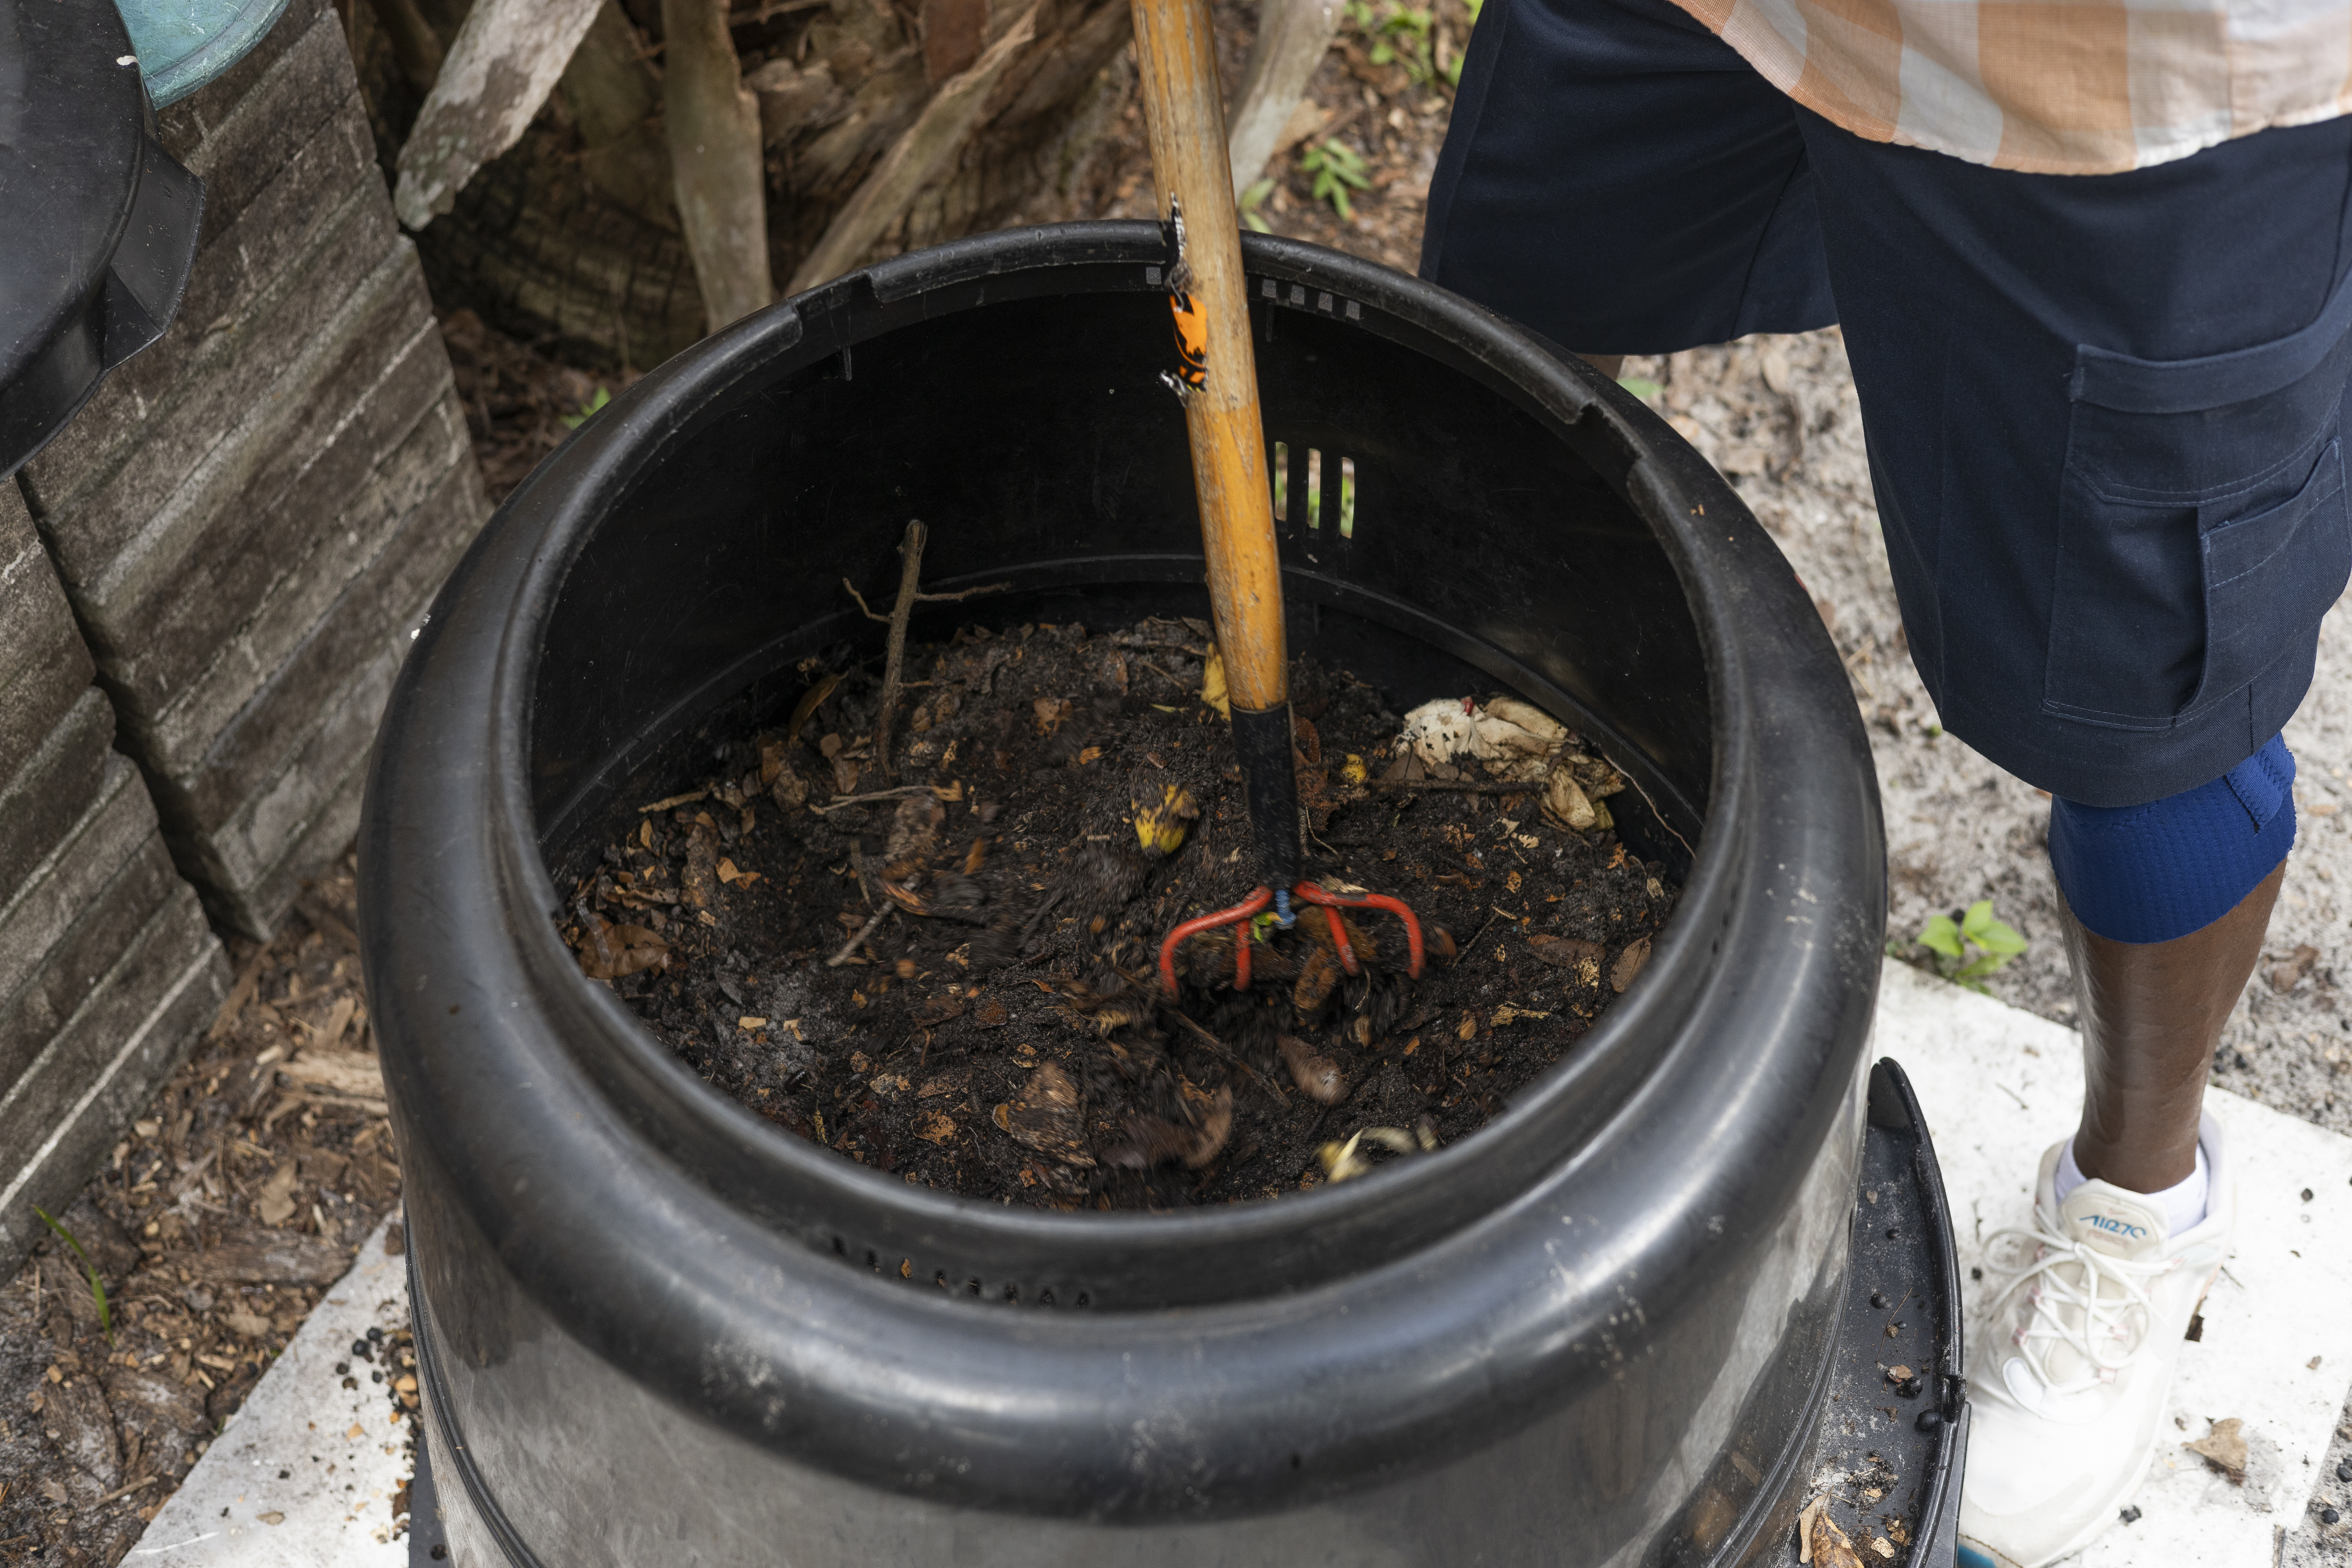
A compost bin being stirred. Photo Credit: UF/IFAS Cat Wofford
If you are interested in hearing more about compost and getting a hands-on demonstration on how to build a compost bin at home, the Jackson County Master Gardener Volunteers are hosting an informational workshop called Backyard Composting 101 on September 20 at 9:00 am at the Jackson County Extension Office. Admission is $7 per person. Space is limited for this class, so be sure to call 850-482-9620 to pre-register today.
Vermicomposting is an eco-friendly method for recycling organic waste, improving soil fertility, and boosting plant health. Photo by UF/IFAS.
In a world increasingly focused on sustainability, vermicomposting has quietly emerged as a simple, eco-friendly method to reduce waste and enhance garden soil health. This natural process involves specialized earthworms that convert kitchen and garden waste into nutrient-rich vermicompost, often dubbed “black gold.”
Beyond the environmental benefits, vermicomposting brings tangible advantages to your garden. When integrated into your garden soil, vermicompost enhances soil structure, improving water retention and reducing soil compaction. Moreover, it serves as a slow-release fertilizer, converting nutrients into readily available forms for plant roots. Vermicompost also enriches your soil ecosystem by introducing beneficial microorganisms that help suppress soil-borne pathogens, fostering a healthy environment for your garden and landscape plants.
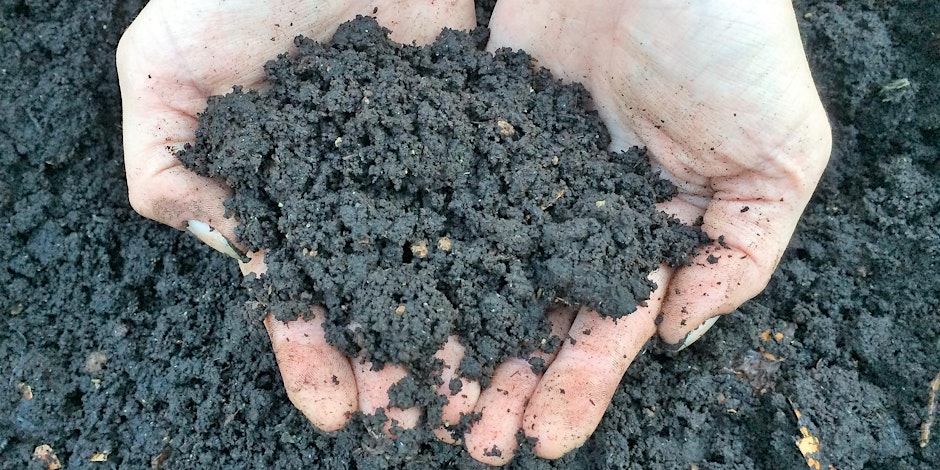
Finished vermicompost has a crumbly, earthy texture that enhances soil structure, improving its water retention and aeration properties for healthier, more resilient plants. Photo by UF/IFAS.
Below is a summary of the components needed to successfully vermicompost at home.
Worm Bin: Choose a dark-colored, breathable bin that is no deeper than 20 inches. The size of your bin should align with the amount of food waste you produce weekly. As a general guideline, you’ll need approximately 1 sq. ft. of surface area for every pound of weekly food waste. If you’re building a vertical system, consider using three 10-gallon bins, which work well for this purpose.
Worms: You’ll need approximately 1 lb. of Eisenia fetida worm species, which equates to about 1,000 worms, for every 1 sq. ft. of surface area in your bin.
Bedding: Choose moistened carbon-rich organic materials such as newspaper strips with plant-based ink, leaf litter, shredded corrugated cardboard, or coir for bedding. Fill the bin about one-third full of bedding or create a layer no thicker than 6 inches.
Grit: To aid in digestion, mix in one handful of regular soil when you’re starting a new bin.
Food: Worms have a taste for chopped vegetable scraps and most fruits, as well as coffee filters/grounds, leaves, crushed eggshells, and plain grains. As your worm population becomes established, begin feeding them slowly and ensure the food is being consumed before adding more. Smaller food pieces, with greater surface area, are easier for worms to digest. In general, 1 lb. of worms can consume roughly 1/3 lb. of food per day once they are well-established.
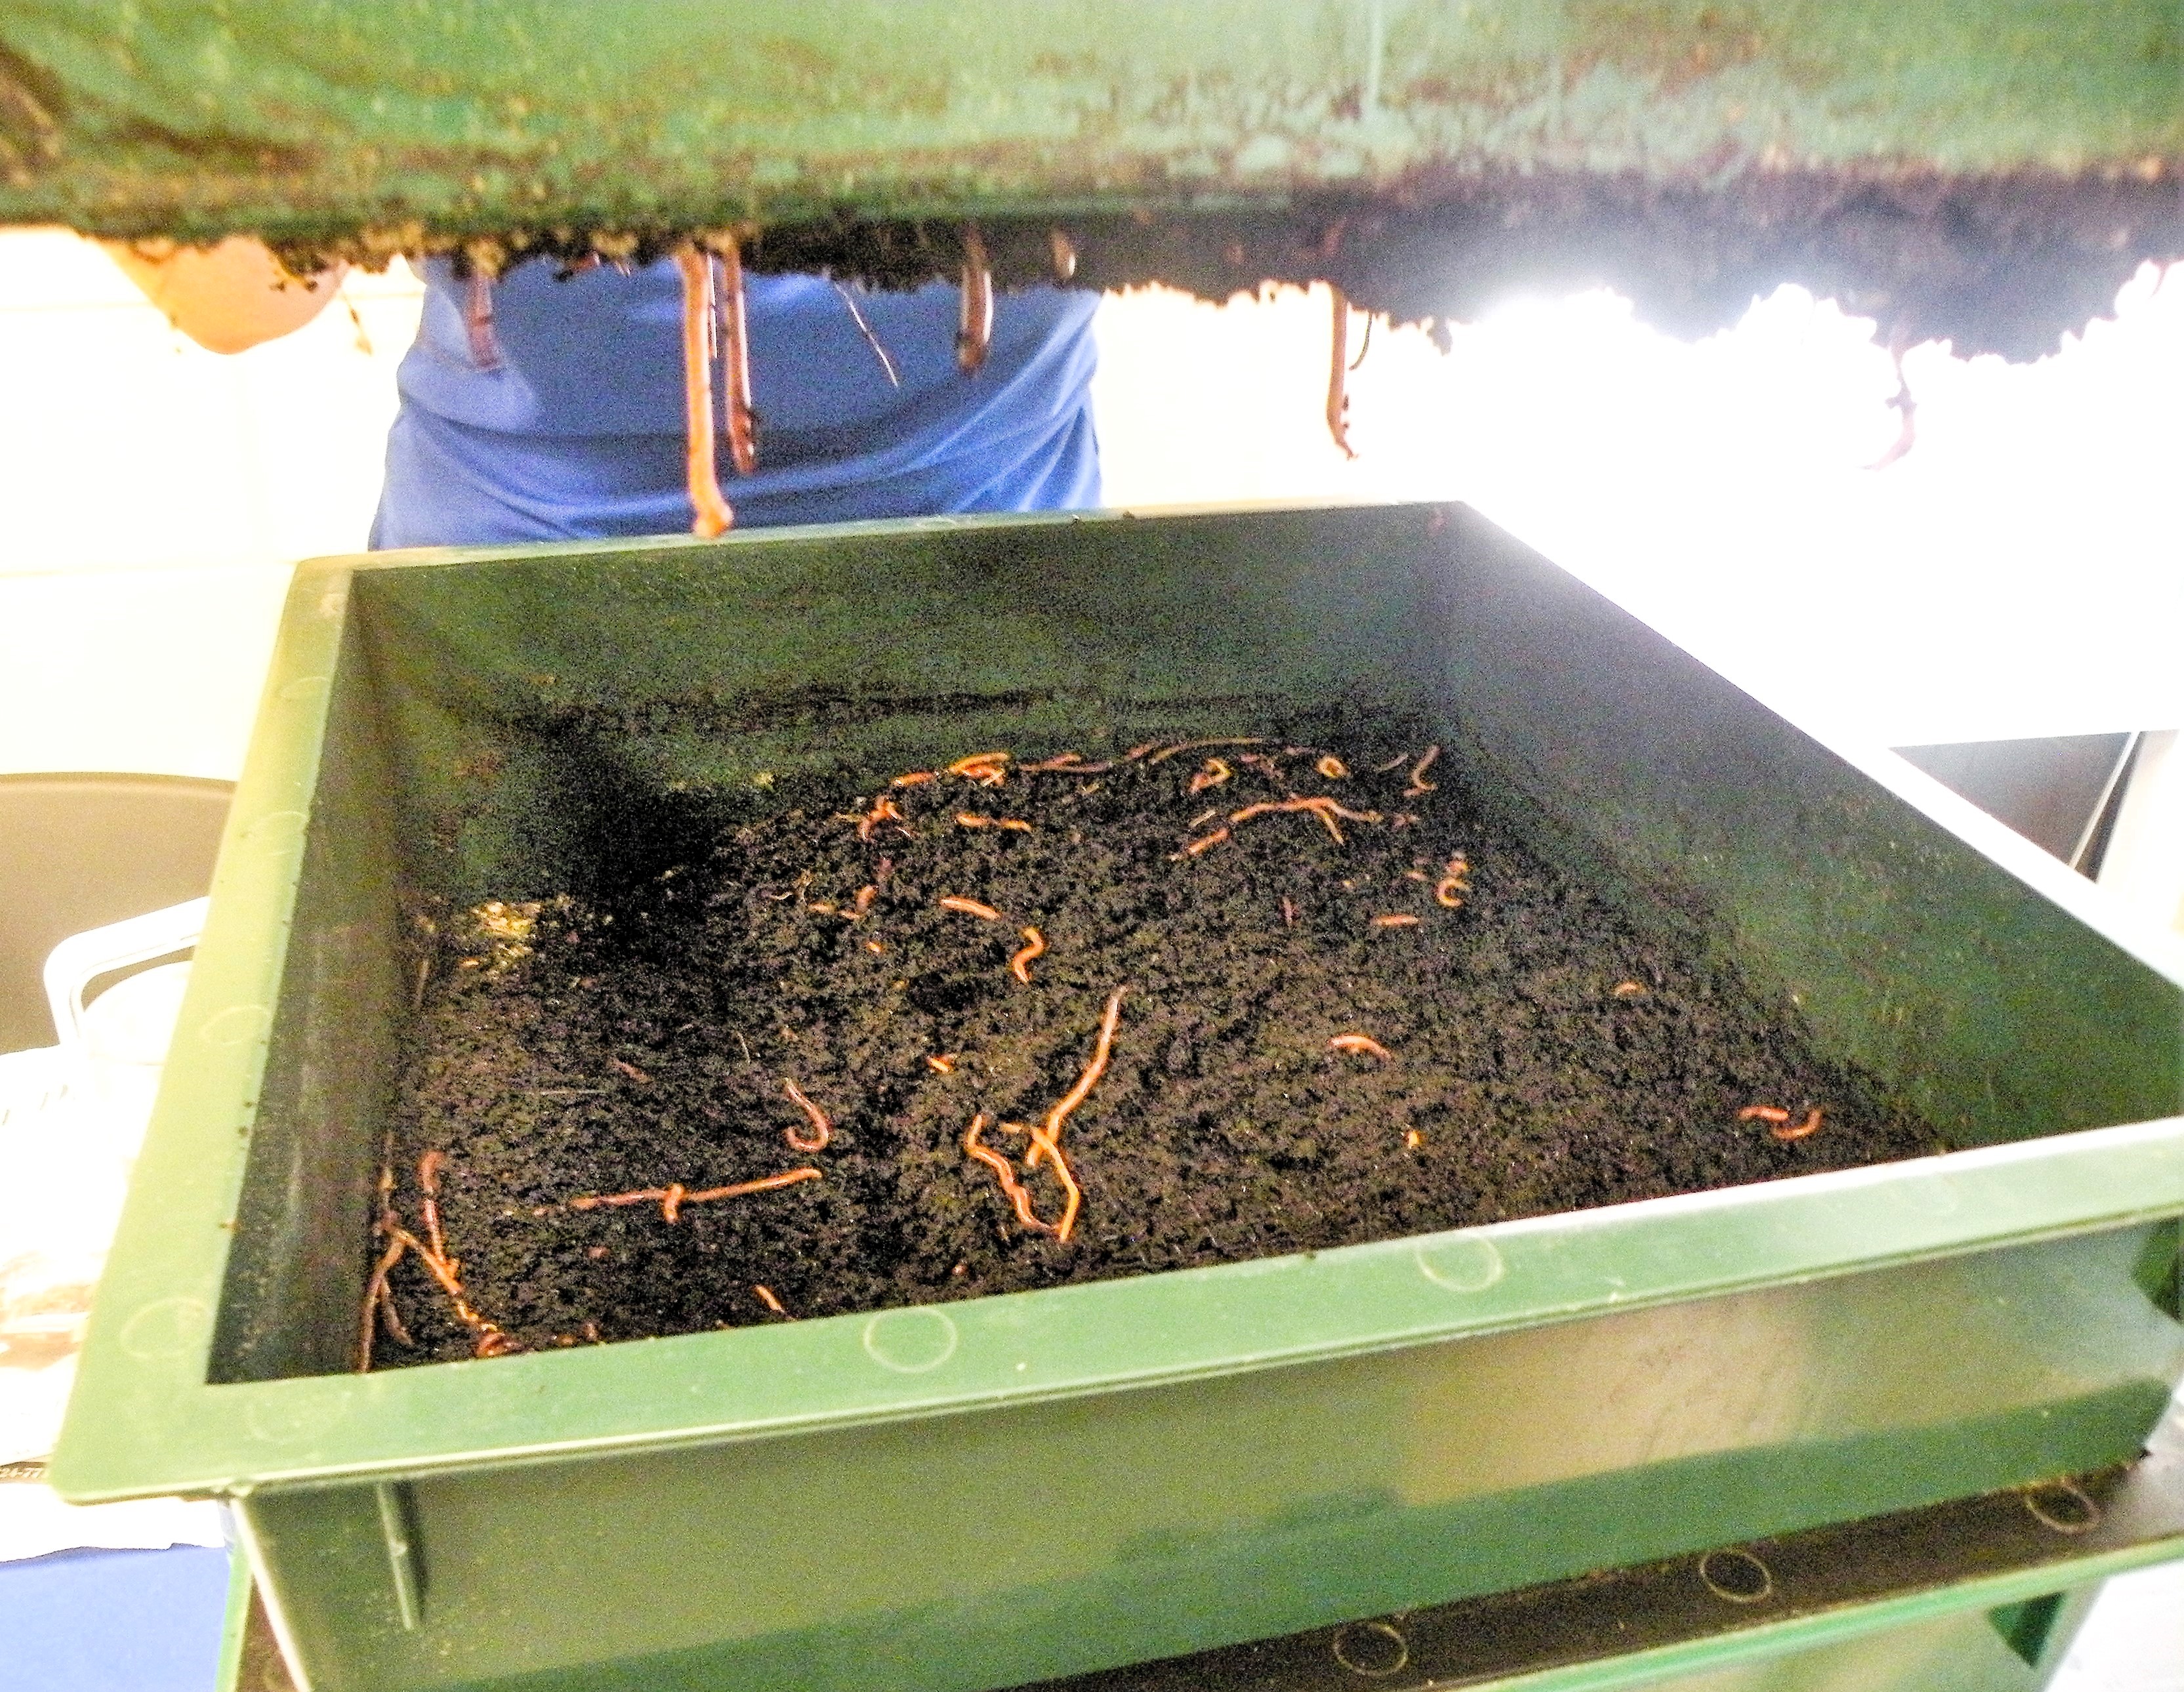
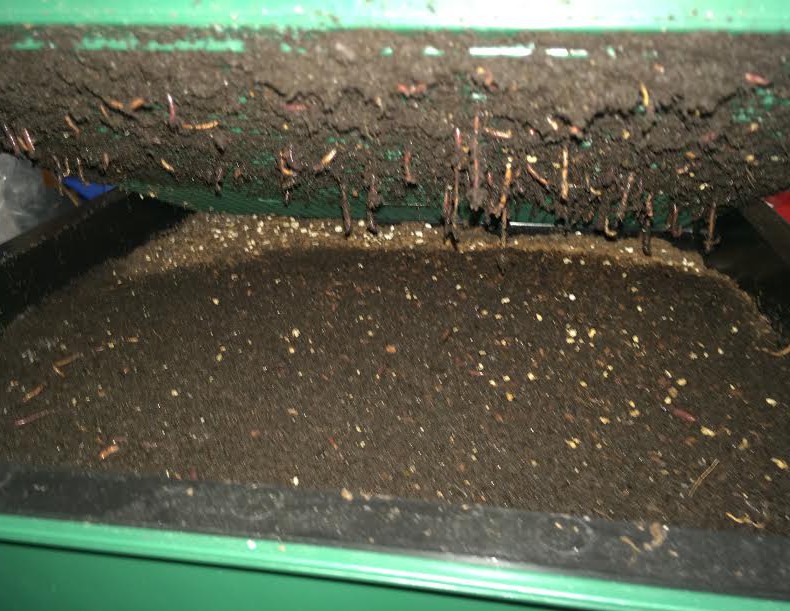
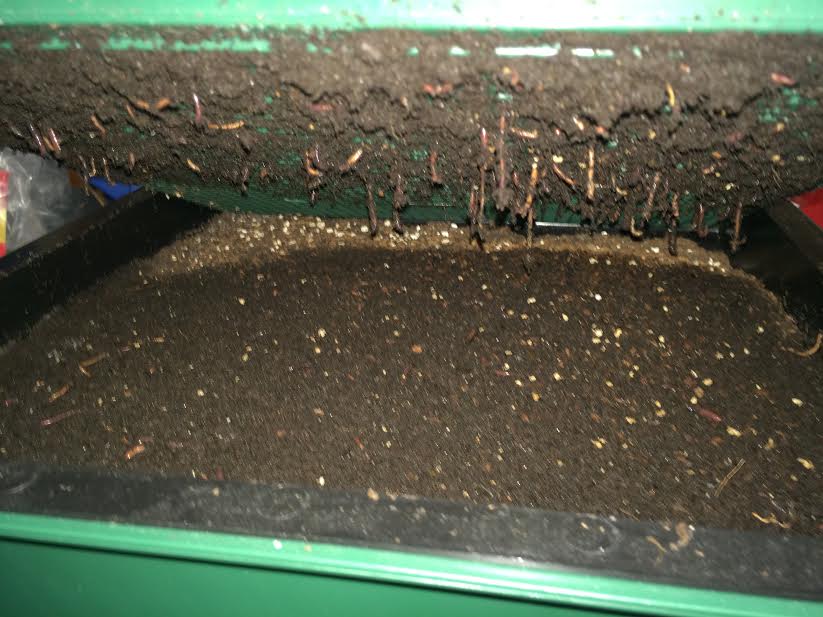
Red wigglers hanging through the bottom bin of a “Worm Factory” vermicompost system. Photo by Molly Jameson.
What if I told you there was a way to create compost indoors? No pitchfork required, no hot steamy temperatures, a simple mix of ingredients, and it would fit right under your kitchen sink? As long as you can convince your family to have worms in the house… you can start vermicomposting.
Vermicomposting uses a type of worm called red wigglers. These worms specialize in digesting organic matter, can digest their own body weight in food each day, and can double their population within months. It is, therefore, a wonderful way to responsibly dispose of food waste and can reduce your garbage by more than a third. Microorganisms inside the worms are actually doing most of the work, and the “castings” excreted are teaming with beneficial microbes and nutrients that will condition your soil and make the plants in your garden shine.
You can easily construct a vermicompost bin at home, but you can also purchase one online. Bins should hold about five gallons for one to two people or ten gallons for three to four (Rubbermaid containers work nicely). Your container should not exceed 12 inches in depth, as red wigglers do not like to burrow deeply. You will also want good aeration, so drill holes in the bottom of the bin and either place the bin in another container or put the bin on bricks and use a tray underneath to capture escaped materials. Either way, you will want a lid – as worms do not like light and need moisture – but they also need to breathe, so make sure it is not airtight. Be sure your bin is never in direct sunlight or in a location that regularly exceeds 80°F.
To get started, you will need about 1,000 worms, which weighs about one pound. Red wigglers can also be purchased online, at local nurseries, and some bait shops. Better yet – if you know vermicompost enthusiasts, they may be happy to share.
Before you purchase your worms, you want to prepare your worm bedding. Shredded newspaper and coconut fiber (coir) – which you can find at your local nursery – work great. You will also need to add a small scoop of garden soil to inoculate your bin with microbes. To get started, lightly moisten your bedding material and fill your bin about two-thirds full.
Finished worm castings will be dark, slightly moist, and will have an earthy smell. Photo by Molly Jameson.
Now it is time to add the food. Worms love vegetable scraps, most fruits, moldy bread, coffee filters and grounds, tea bags, and crushed eggshells. Chop their food into small pieces for fastest consumption. Foods to avoid include meat, dairy, large amount of citrus, and onion peels. Start out slow, and put the chopped food in the corner of your worm bin. Once your worms are settled, maintain the bin as half bedding, half food scraps. If your bin looks too dry, add more food. If your bin looks too wet, add more bedding or hold back on food a few days. Bad odors will develop only if the worms are overfed.
Give your worm bin about three to four months, and then you can begin to harvest. Add a handful of castings to potting mix or a thin layer directly to your garden. Give vermicomposting a try – your plants will thank you, your trash will not stink, and you will reduce your global impact.
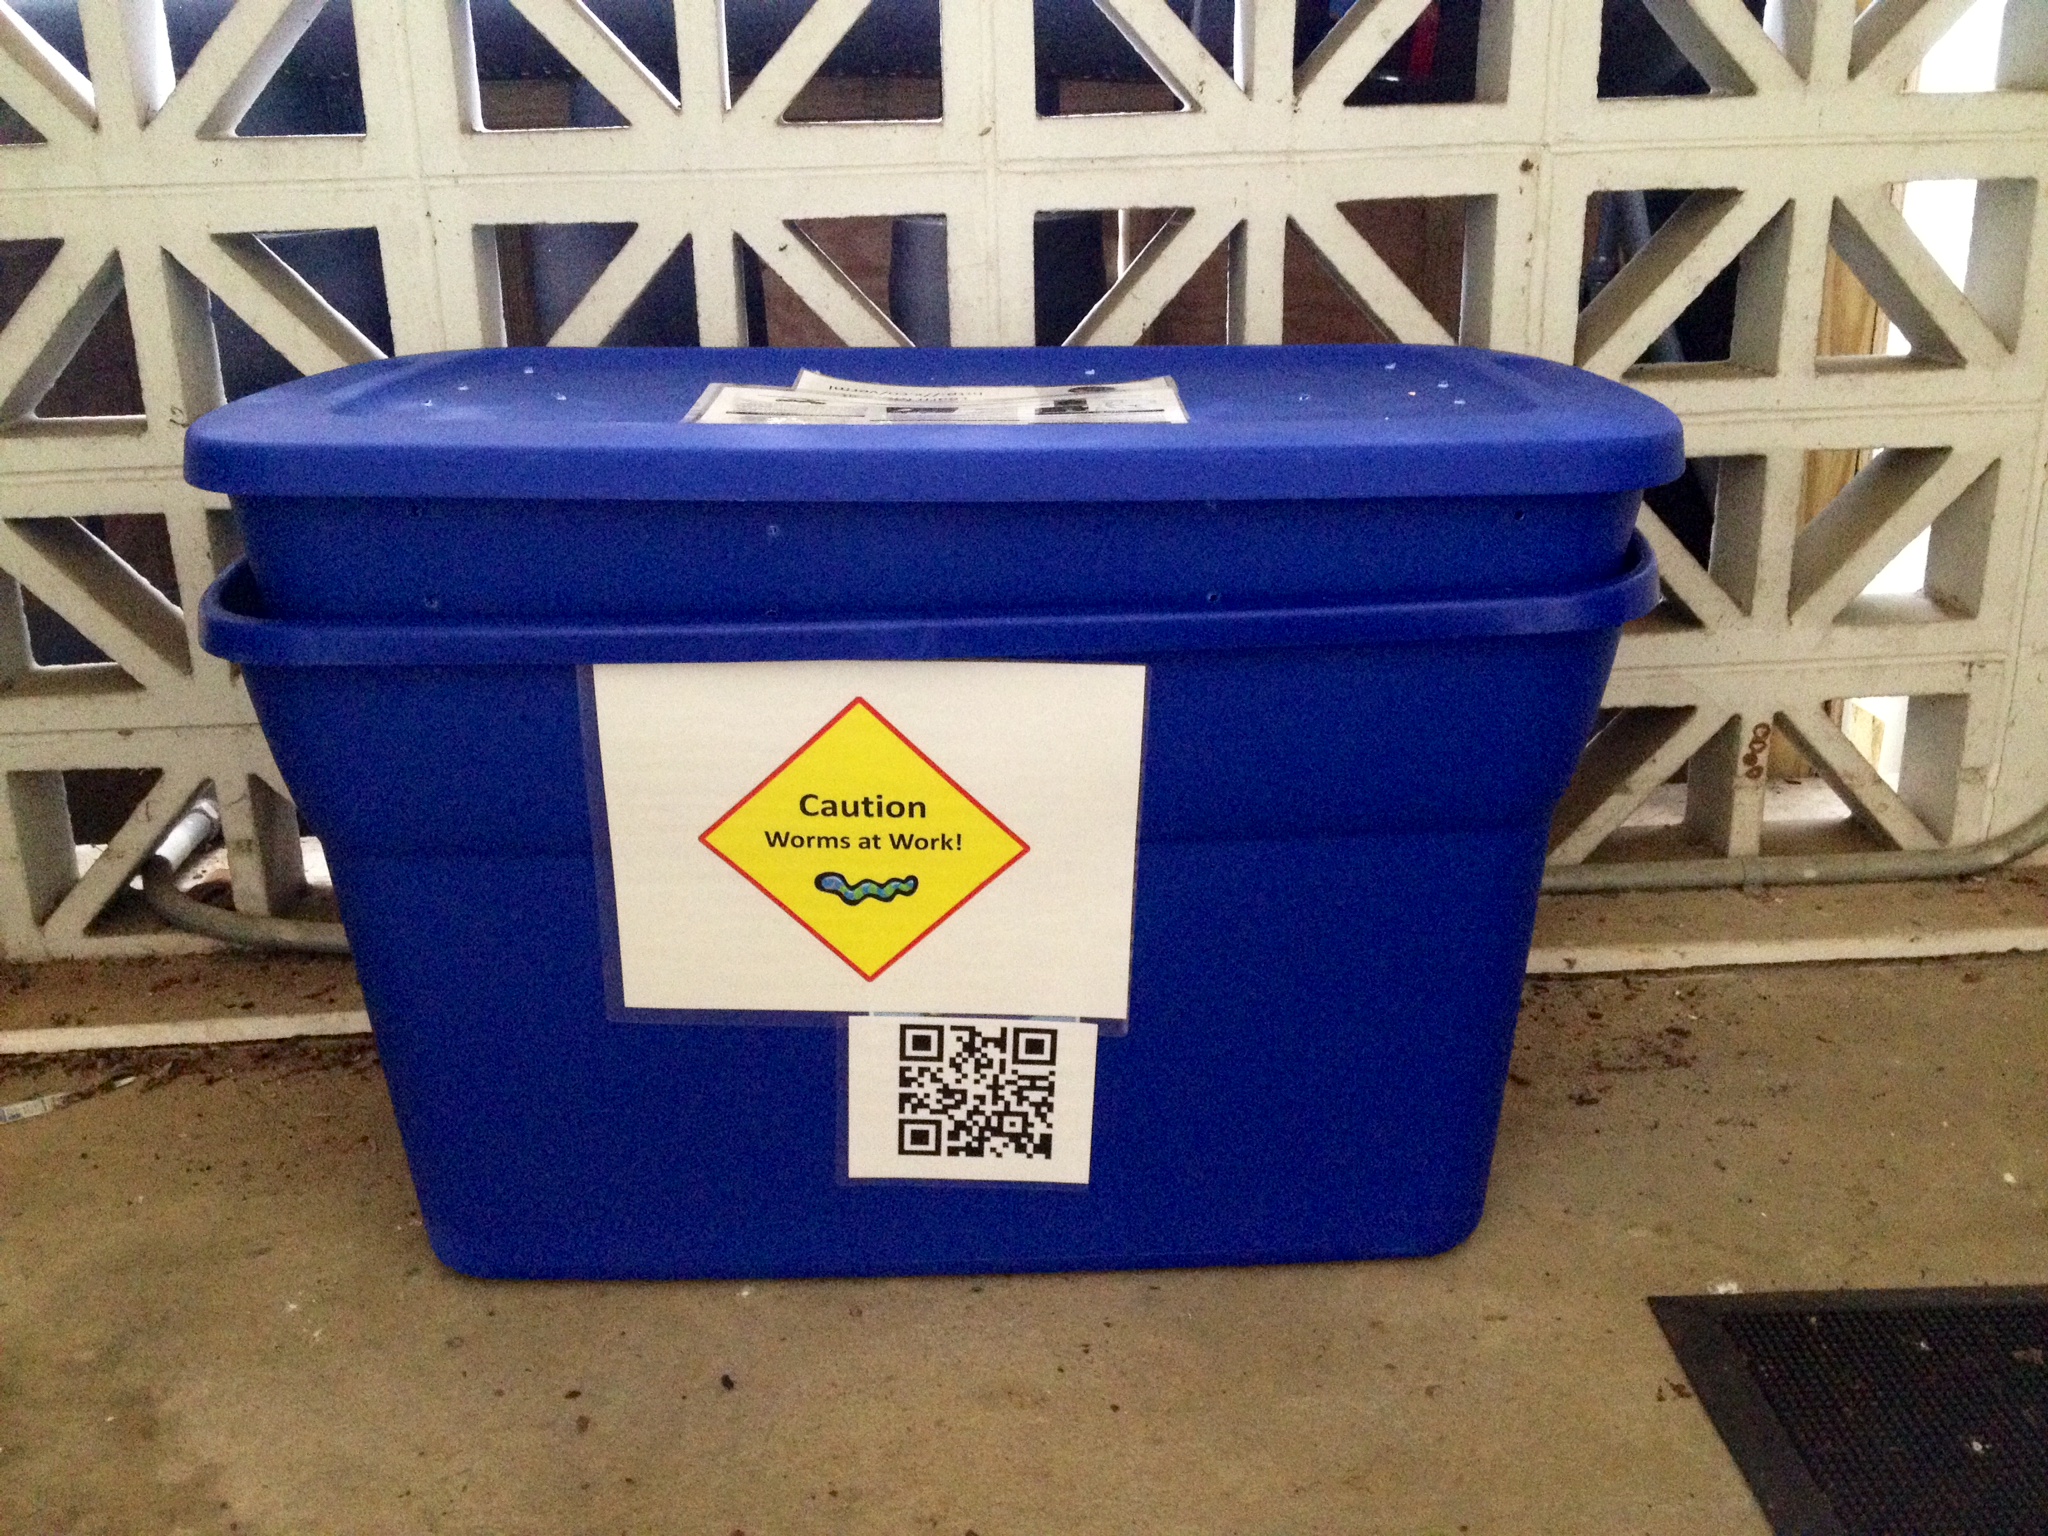
Vermicomposting bin at the Leon County Extension Office.
It’s difficult to see, but our worms are hard at work composting leftovers!
Many home gardeners may have thought about composting, but may not have the time, the space or, let’s face it, the patience. Well then vermicomposting is ideal to satisfy those conditions! Vermicomposting is the process of using worms and micro-organisms to turn food waste into a nutrient-rich compost called worm castings. Worm composting bins can take up less space than traditional composting bins and can even be kept inside.
Bins can be purchased or made at home, for those who want to compost on a budget. If the home gardener is planning on making their own there are a few things that should be considered. Make sure that the container won’t absorb too much water (such as cardboard), because worms need to stay moist. The container should also be made of a non-clear material. A good example would be 1-18 gallon plastic (not clear) container or a Styrofoam container with a lid. Holes need to be drilled about 4 inches from the top of the bin. Covering the air holes with a type of screen is a good idea to prevent the escape of the composters.
After the bin has been constructed bedding (shredded newspaper, etc.) will need to be placed at the bottom. The bedding should be moistened and then potting soil added on top of that. This will provide a good living habitat for your worms. The Number of worms that need to be added will depend on the container size. When getting worms, make sure to use red wigglers (Eisenia fetida) or African Nightcrawlers (Eudrilus eugeniae). Unlike earthworms found in the garden, these worms thrive in composting bin conditions. They can usually be found at bait stores or local worm farms.
Now its time to put them to work! Worms can be fed daily or weekly. One pound of worms can be fed about half a pound of kitchen scraps per day. When adding scraps avoid using animals products like eggs, cheese or meat. The ideal meal should include small scraps of vegetables, fruits, coffee grounds, bread and paper. When adding the scraps be sure to bury them under the soil. Store the worm bin in an area that does not receive direct sunlight and stays at a constant temperature of about 60 to 80 degrees. Be sure to have a lid for your container, this will keep light out and will also help prevent the appearance of flies. One pound of worms can turn 65 pounds of garbage into garden compost in about 110 days. Compost should be harvestable in a matter of months!
Vermicomposting is a great way to compost for those living in an apartment or those that have kitchen scraps as a main source of compost materials. Worm castings are used just like normal compost. Add them to plants and gardens as a soil amendment, use them in potting soil, or make a compost tea.