by Mary Salinas | Jun 21, 2013
We love our native magnolias in part because they are tough, easy to care for trees. The mainstay of southern gardens, they grace us with attractive thick, waxy leaves year round and sublimely fragrant and graceful blooms.
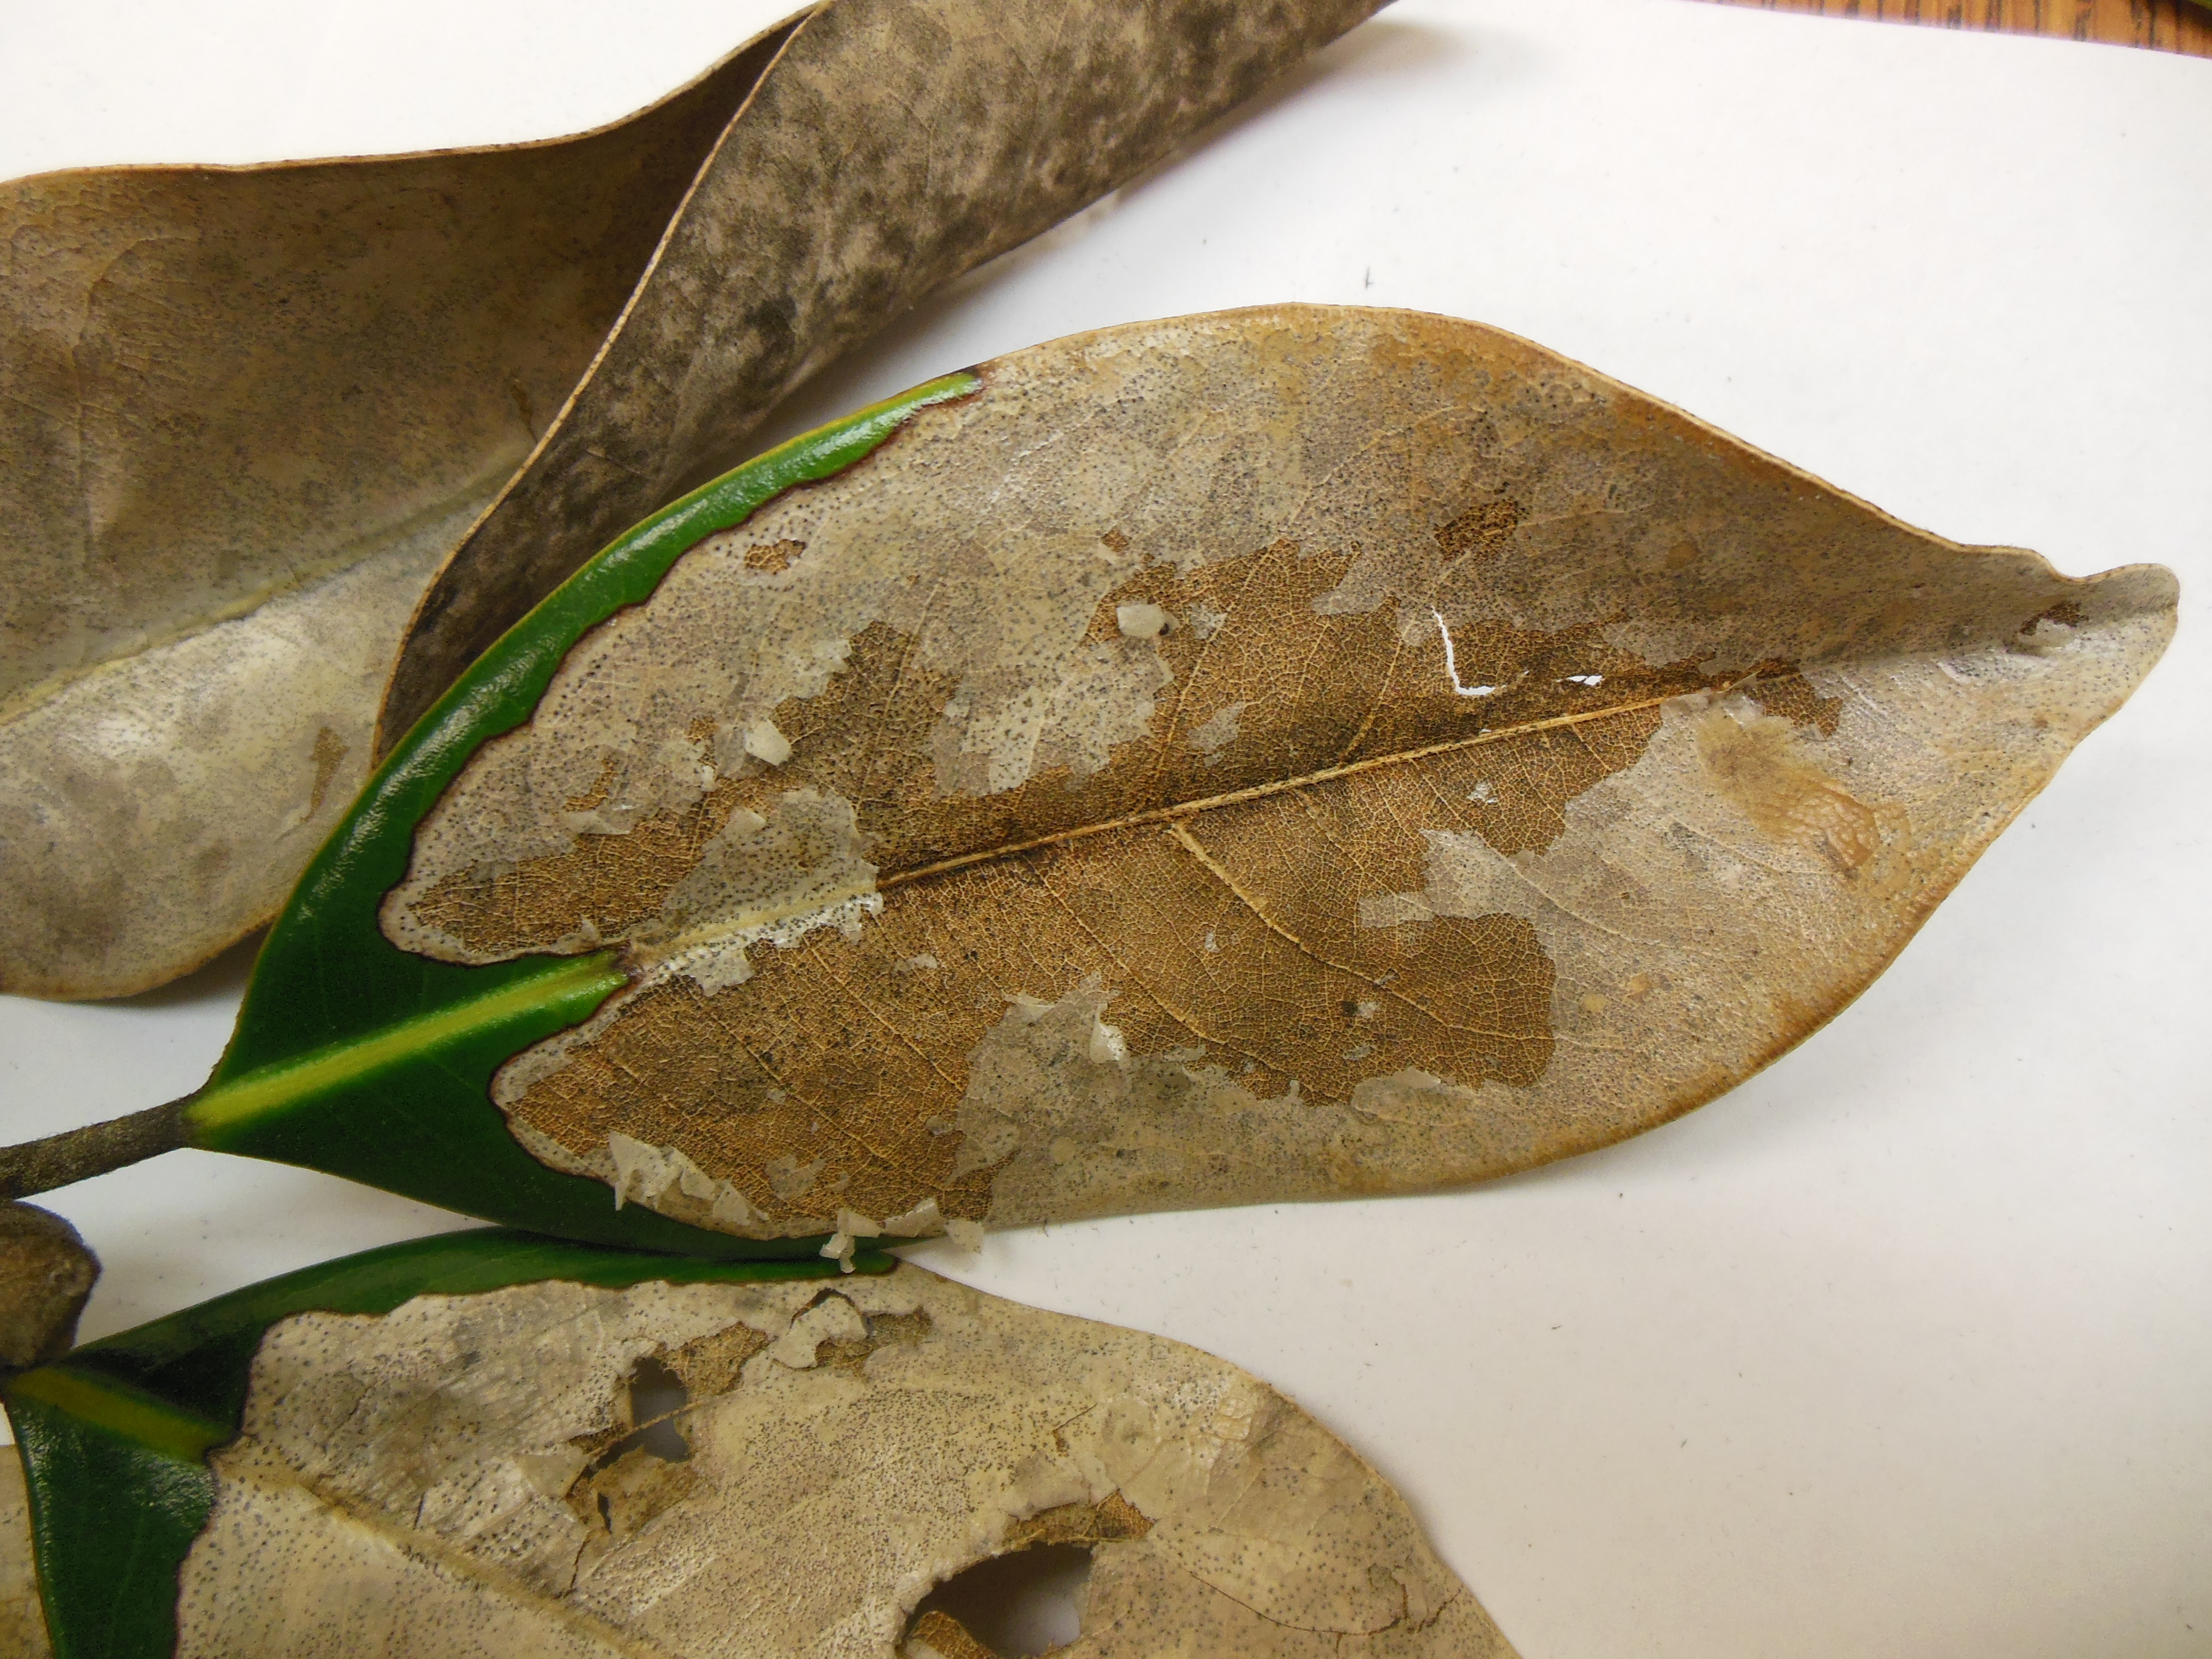
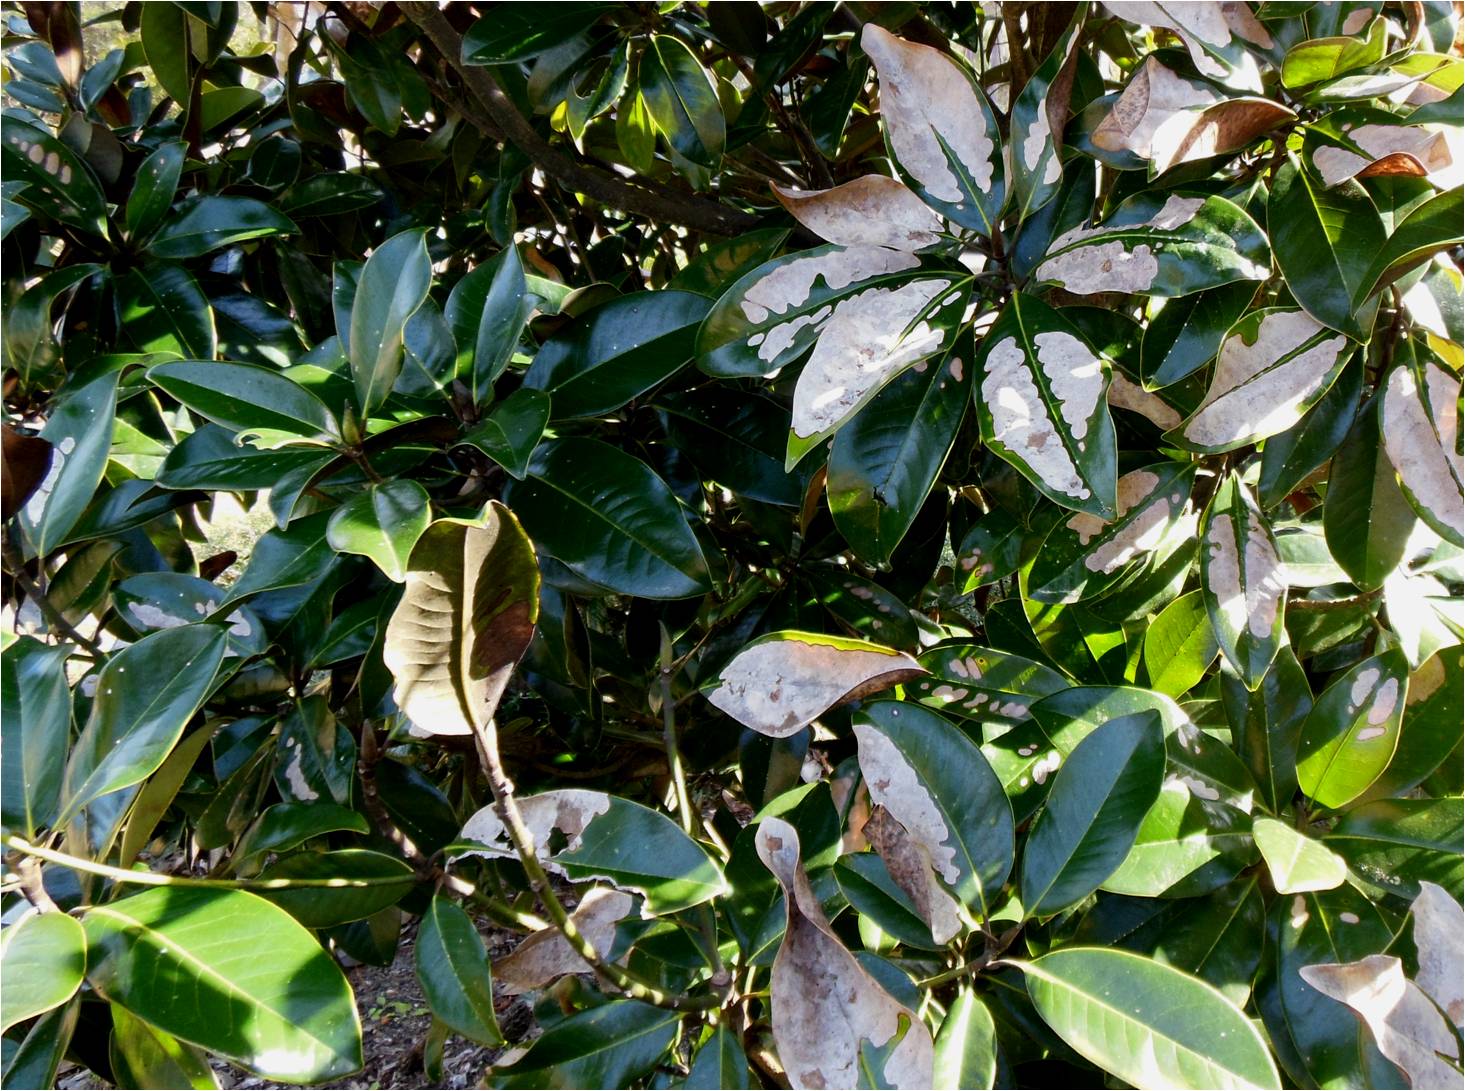
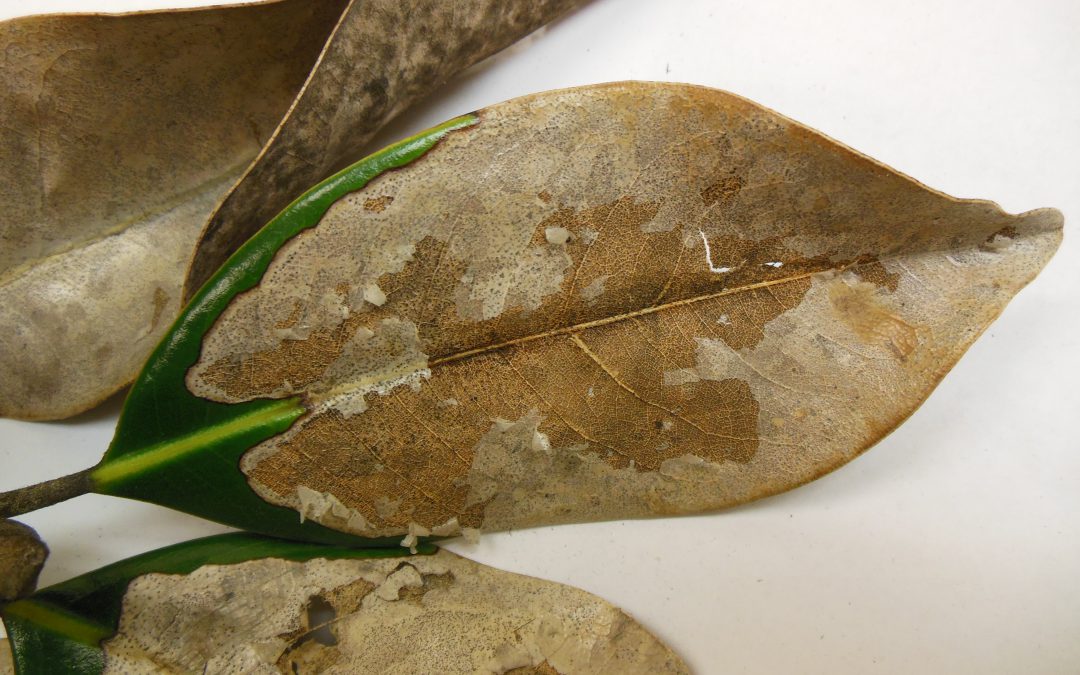
However, this past spring brought conditions that encouraged a fungal leaf disease known as anthracnose, most noticeably on the southern magnolia, Magnolia grandiflora. Affected leaves develop large irregular dead patches with a clearly defined border. The dead patches are a brownish gray and will flake and eventually deteriorate and fall away from the rest of the leaf. Fortunately it is rare for the disease to affect all branches of the tree and infection is somewhat spotty as you can in the photograph below.

Credit: Mary Derrick, UF/IFAS Extension
Conditions that favor the development of anthracnose in magnolia are the cooler, moister conditions that the panhandle experienced this early spring. Spores overwinter on affected branches and in leaf litter and travel to their new hosts through rain, wind and splashing water.
View this article to learn more about the Southern Magnolia
[important]The good news is that this disease is rarely a serious threat to the long term health of the magnolia. [/important]
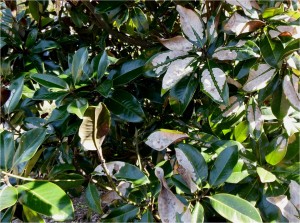
Credit: Mary Derrick, UF/IFAS Extension
But in order to avoid another infection next spring, remove and dispose of as many affected leaves as possible from the tree and certainly those that have fallen. Avoid irrigation that wets the leaves because the consistent presence of moisture on the leaf is a perfect incubator for anthracnose. Ensure that there is sufficient air flow around the trees. Fungicidal treatment is generally not warranted.

by | Jun 21, 2013
Gardeners crave color in shady areas of their landscapes just as much as they do in sunny areas. Unfortunately, shade-loving plants generally are not so flamboyant, and the selection of colorful bedding plants for shady gardens is limited.
Thank goodness for caladiums. Even in fairly heavy shade they can be counted on to provide color through the summer.
Modern cultivars are primarily derived from caladium bicolor and its hybrids with other caladium species. They are grouped under the name Caladium x hortulanum. Caladiums belong to the arum family, which provides us with many tropical landscape plants and houseplants.
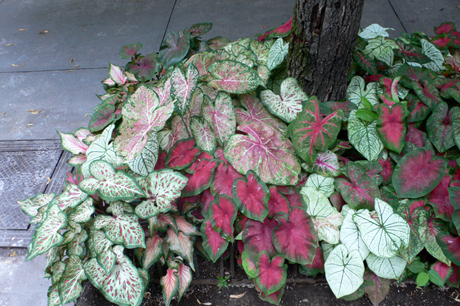
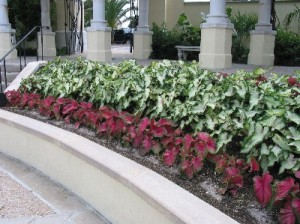
Multiple Varieties of Caladiums in Various Colors.
Caladiums are grown for their attractive foliage, which is produced from knobby brown tubers gardeners often call bulbs. The 6-inch to 12-inch, heart-shaped leaves emerge from the ground on arching stems that are generally 1 foot to 2 feet tall.
The foliage may be splashed with combinations of white, pink, rose, red, burgundy, chartreuse or green – often with several colors combined in wonderful patterns. These bright leaves, with their bold texture, embellish our shady gardens from May until October, when the tubers go dormant.
Caladiums also are remarkably free from major insect or disease problems and thrive in hot, humid weather.
They grow best in shade to part shade (two hours to four hours of direct sun, preferably morning sun). In those conditions they produce lush growth with large, colorful leaves.
Some cultivars are tolerant of more sunny conditions and are successful in beds receiving part to full sun (six hours or more of direct sun), but do avoid hot, dry, sunny locations.
Caladium plants you purchase at nurseries usually have been grown in shady greenhouses, so the foliage often will scorch or burn if you plant them into beds that receive too much direct sun. This results in brown areas and holes literally burned into the leaves. If the cultivar is sun-tolerant, new foliage eventually will emerge and adapt to the sunnier conditions, but I still think caladiums planted in full sun always seem to look stressed.

Typical Caladium Tubers Ready for Planting
You can buy caladium tubers now and plant them directly into well-prepared beds. By now, some nurseries have caladium tubers on special sales at a good price, and since our growing season is so long, it is not too late to plant them.
Caladium plants also are available growing in 4-inch to 6-inch pots. They will provide immediate color in the landscape. Plant them about 8 inches to 12 inches apart, and they will grow larger and more beautiful through the summer.
Careful bed preparation will ensure healthy, robust plants. Turn the soil in the area to be planted and then incorporate a 2-inch to 4-inch layer of organic matter such as compost, rotted manure or peat moss. Next, lightly sprinkle the area with an all-purpose fertilizer, following the directions on its package, and rake it into the upper few inches of the soil. As an alternative, a little slow-release fertilizer can be placed around each tuber as it is planted into the bed.
Caladium plants should be planted with the top of the root ball level with the soil of the bed. Plant unsprouted tubers about 2 inches below the soil surface. When planting tubers, you should see growing points or even pinkish-white sprouts on the knobby side of the tuber. That side is planted up. The smoother, rounded side is the bottom of the tuber.
Once they are planted, mulch the bed with 2 inches of your favorite mulch and water in. Keep beds of caladiums well watered during the summer, especially those receiving lots of sun.
The colorful, tropical foliage of caladiums combines beautifully with impatiens, begonias, torenias, liriope, ferns, achimenes, gingers and other shade-loving plants. They generally are more effective when a single color or cultivar is used in a bed or an area of the landscape. If several colors are used, they are most effective when masses or groups of each color are combined in the planting.
In late September or October, cooler temperatures encourage caladiums to go dormant. When grown with poor growing conditions, particularly in areas of deep, heavy shade, the plants will likely produce small, weak tubers that may not return well, whether they are left in the ground or dug and stored. Under the right circumstances and with proper care, however, the tubers you planted this summer can be dug in the fall and planted next April or left in the ground to provide a beautiful display again next year – and for years to come.
All types of caladiums thrive here when they are planted in partly shaded locations. The cultivar you choose is a matter of your individual taste.
Keep in mind that if you are going to be planting caladiums in a sunny location, try these cultivars for better success: Candidum Junior, Carolyn Whorton, Fire Chief, Rosebud, White Queen, Jackie Suthers, Lance Whorton, Miss Muffet, Mumbo, Pink Gem, Red Frill, Sea Gull and Florida Sweetheart.
by Beth Bolles | Jun 17, 2013
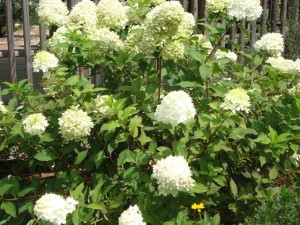
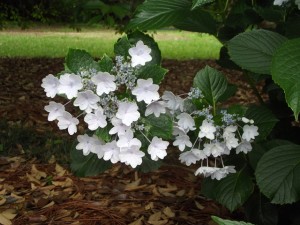
There are a couple of possibilities for gardeners who are looking for something a little different than the old favorite French hydrangea. If you want to make your neighbor’s and gardening friends envious, consider adding one of the following selections to your garden.
The first to consider is the ‘Limelight’ hydrangea (Hydrangea paniculata) which is a hardy shrub and performs well in sunshine. New leaves emerge each spring and large greenish-white blooms emerge in the summer. Blooms may offer a color change into the fall, adding a delicate pink shade. This hydrangea should definitely be installed where it can be viewed and can grow 6-8 feet in height with a similar spread. Once established, it can be tolerant of some drought but will require moisture during extended dry periods.
If you have a garden with more dappled shade, the ‘Fuji Waterfall’ hydrangea is a good selection. This hydrangea will require a soil with more consistent moisture and will offer interesting lacecap blooms that appear to cascade over the dark green leaves. Growth will have a layered look with plants reaching about 3 to five feet in height.
For more information on newer selections of hydrangeas for our climate visit the University of Florida publication New Hydrangeas for North and Central Florida: Bigleaf and Mountain Hydrangeas
by Matthew Orwat | Jun 17, 2013
Although black or white streaks are shocking when they appear on an otherwise healthy lawn, the incidence of slime mold is rarely harmful.
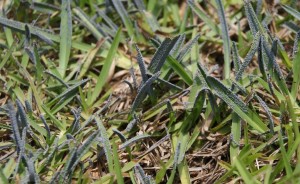
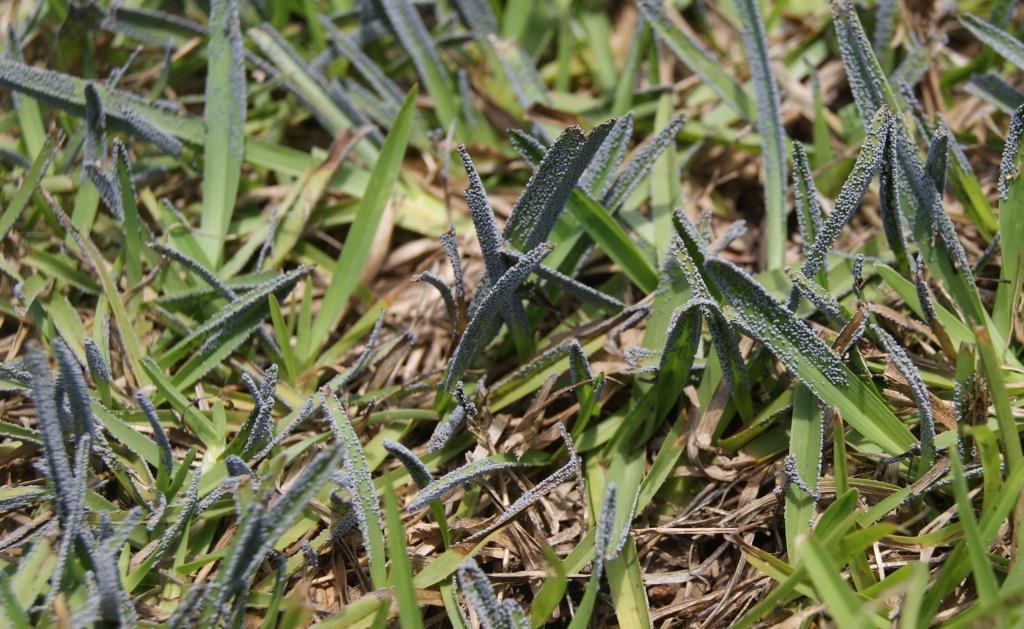
Closeup: Slime Mold in Centipedegrass. Image courtesy Matthew Orwat
Slime mold is actually caused by the reproductive structures of an array of different organisms, classified as plasmodia or Protista, which are regularly present in the soil. They are often mistaken for fungi. The different types are referred to as myxomycetes or dictyosteliomycetes. They usually appear on warm humid days in late spring or early summer after extended periods of rain. This extended period of heat and humidity, as is currently being experienced in the Florida Panhandle, initiates the perfect climate for slime mold development.

Slime Mold in Centipedegrass. Image Courtesy Matthew Orwat
As depicted in the picture above, slime mold makes the lawn look like it was just spray-painted with black or grey paint. The round fruiting bodies, called sporangia, carry the spores which will give rise to the next generation of the “mold”. After a few days the sporangia will shrivel up, release the spores and leave no noticeable trace on the lawn.
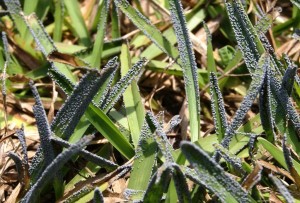
Slime Mold Sporangia. Image Courtesy Matthew Orwat
Currently, no fungicide exists to control slime mold because chemical control is not necessary. An excellent method to speed up the dissipation of slime mold is to mow or rake the lawn lightly. This will disturb the spores and hasten their departure. Another effective removal method is to spray the lawn with a forceful stream of water. This process washes off the slime mold sporangia and restores the lawn to its former dark green beauty.
Excessive thatch accumulation also increases the probability of slime mold occurrence.
For more information consult your local county extension agent or read the Alabama Cooperative Extension publication Slime Mold on Home Lawns.