by Beth Bolles | Apr 3, 2025
The Northwest District Agents discussed foodscaping by answering questions submitted by program participants. Included are the panelist’s answers along with supporting publications for the questions. You may view the session on YouTube at https://www.youtube.com/watch?v=wEMXmaZqRTU
- Suggestions for only 4-6 hours of sunlight in an oak tree hammock.
Bell peppers can grow in some shade in containers or in the ground. Leafy lettuces for the cooler months.
Publication: Peppers in the Shade, https://edis.ifas.ufl.edu/publication/HS368
- What is the best citrus for North Florida?
Satsuma would be a cold hardy selection with delicious fruit. Owari and Brown Select grow well in Panhandle. Tangerine and Meyer lemon is intermediate in cold hardiness. Start fruit in about a year but remove those early to but energy into the tree. Look for harvesting fruit in about 3-5 years. Look at our citrus publication for citrus fertilization with a fertilizer that contains zinc and iron.
Soil test to match plants with the right locations.
Publication: The Satsuma Mandarin, https://edis.ifas.ufl.edu/publication/CH116
- What fruit trees can I grow?
Choose a variety adapted to our area. Peaches, pears, plums, some citrus, Pineapple guava, Loquat. Choose ones with chill hours for our area. Look at Auburn and Georgia selections rather than Florida selections which are more adapted to central and south Florida.
Publication: Dooryard Fruit Varieties, https://edis.ifas.ufl.edu/publication/MG248
- What about companion planting?
One plant will benefit another – attracts beneficials, provides chemicals for a purpose. Use a trap crop that attracts insects to catch them before they move to your desirable fruit.
Marigolds is an example of use around some edibles to reduce nematodes.
Publication: Companion Planting, What is It? https://nwdistrict.ifas.ufl.edu/hort/2023/02/21/companion-planting-what-is-it/
- I need to add soil to my native/food garden. What are considerations?
Sandy soils may need some amendments. Compost should be mixed in and not grow straight in compost. Maybe add ½ inch.
Soil test first so you don’t add too much nitrogen through amendments.
Publication: Soils and Fertilizers, https://sfyl.ifas.ufl.edu/lawn-and-garden/soil-and-fertilizer/
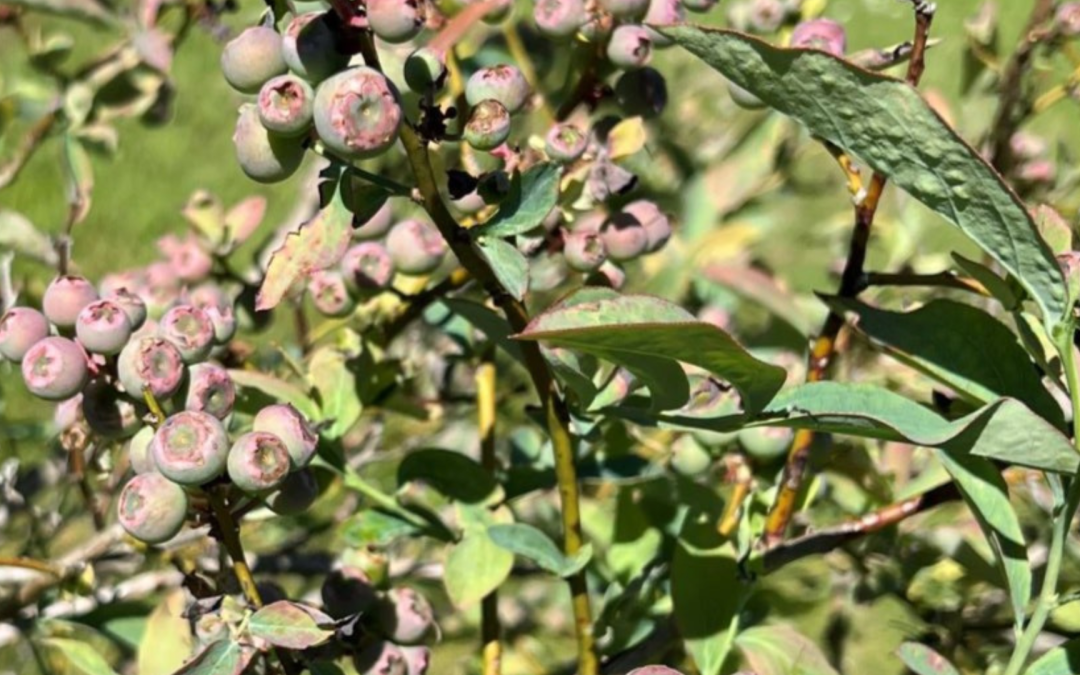
- I have 3-4 blueberry bushes and they are 2-4 years old and haven’t fruited. What is wrong?
Know the cultivar so you are sure they have a cross pollinator. Need the right conditions too. Blueberries set in the fall so if fall pruning, you may have cut off flowering structures. Soil pH is critical. Blueberries like acidic soil and they will struggle in higher pH soils.
Publication: Blueberry Gardener’s Guide, https://edis.ifas.ufl.edu/publication/MG359
- How do I grow lavender in the landscape?
Lavender likes low humidity and drier conditions. Soil should be well drained and plants need good air circulation. Maybe try Phenomenal lavender. Grow in a pot that is very well drained and don’t amend soil when planting in the ground. Prune as needed to open up plant.
Publication: Lavender, https://edis.ifas.ufl.edu/publication/FP337
- Which apple trees grow best in North Florida?
You can grow a tree but it does not produce well due to lack of proper chill hours. Try the Shell apple which is more adapted to north parts of the counties.
Our area may get 500-600 hours of chill generally.
Publication: Dooryard Fruit, https://edis.ifas.ufl.edu/publication/MG248
- What about edibles near saltwater?
Many edibles won’t like saltwater intrusion. Cowpeas, black eyed peas are the most salt tolerant. Some of the cuburbits (squash, pumpkin, zucchini, gourds) can tolerate some salt.
Grow some plants in a protected area or in containers. Consider some of the shrubby edibles that match the pH at the coastal sites.
Publication: Soil Salinity and Vegetables, https://sfyl.ifas.ufl.edu/media/sfylifasufledu/miami-dade/documents/disaster-preparation/post-hurricane-and-disaster/Soilsalinityinfodraft.pdf
- How to protect plant from insects without pesticides, including squirrels?
Reduce stressed by planting in the right spot and providing care. You will also have many diverse plantings in a foodscape to allow beneficial to help manage pest. Monitoring the garden is very important to catch problems early and physically remove. Consider safer options when pesticides are needed that are labeled for food crops.
Might use some screening for small mammals and fencing for large animals. Motion activated sprinklers and scare devices such as ribbon, foils. Chemical repellents that contain capsaicin.
Publication: Natural Products for Pest Control, https://edis.ifas.ufl.edu/publication/IN197
- Publication: Deterrents for Nuisance Wildlife, https://edis.ifas.ufl.edu/publication/UW371
- What are the most common vegetables for small spaces?
Some plants will need at least 12 inches of depth such as tomatoes. Lots for winter edibles do well in small spaces and containers. Consider a patio version of the plant. There are small selections of Pineapple guava and Pomegranate although they may produce smaller fruit.
- How easy is it to grow in containers?
You can grow in the ground with good soil and if you can work with plants on the ground.
Containers allow you to create the right soil environment easy. You do have to manage water carefully as the heat builds up.
Publication: Growing Vegetables in Containers, https://gardeningsolutions.ifas.ufl.edu/plants/edibles/vegetables/growing-vegetables-in-containers/
- What are the best tomatoes for the area?
Determinate and cherry will perform a little better. Choose early or mid producing plants to get fruit
Panelist’s favorites are:
Everglades and Sungold, Early Girl, Cherokee Purple is an heirloom
- What edibles can handle full sun?
Most fruit plants like sun since they are needing lots of energy. Water must be available when rainfall is lacking.
- Three fruit trees have not produced in 3 years. What do we need to do?
We really need to know what they are first. Do they need a plant for cross pollination? Are they flowering but not fruiting? How are they planted? Deep planting will cause a plant to struggle. Contact your Agent for more help.
- Will glyphosate residues from a fall application carry over to spring?
Chemicals are regulated extensively so follow the label directions for safety. There should not be residue issues with this pesticide.
Try to manage weeds with other techniques like mulches, handpulling, directed watering, soil solarization, etc.
Publication: Use of Glyphosate and Herbicide Alternatives for Weed Control in Florida Landscape Planting Beds, https://edis.ifas.ufl.edu/publication/ep580
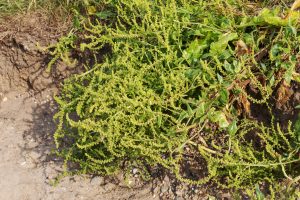
- What are some native plants for foodscaping?
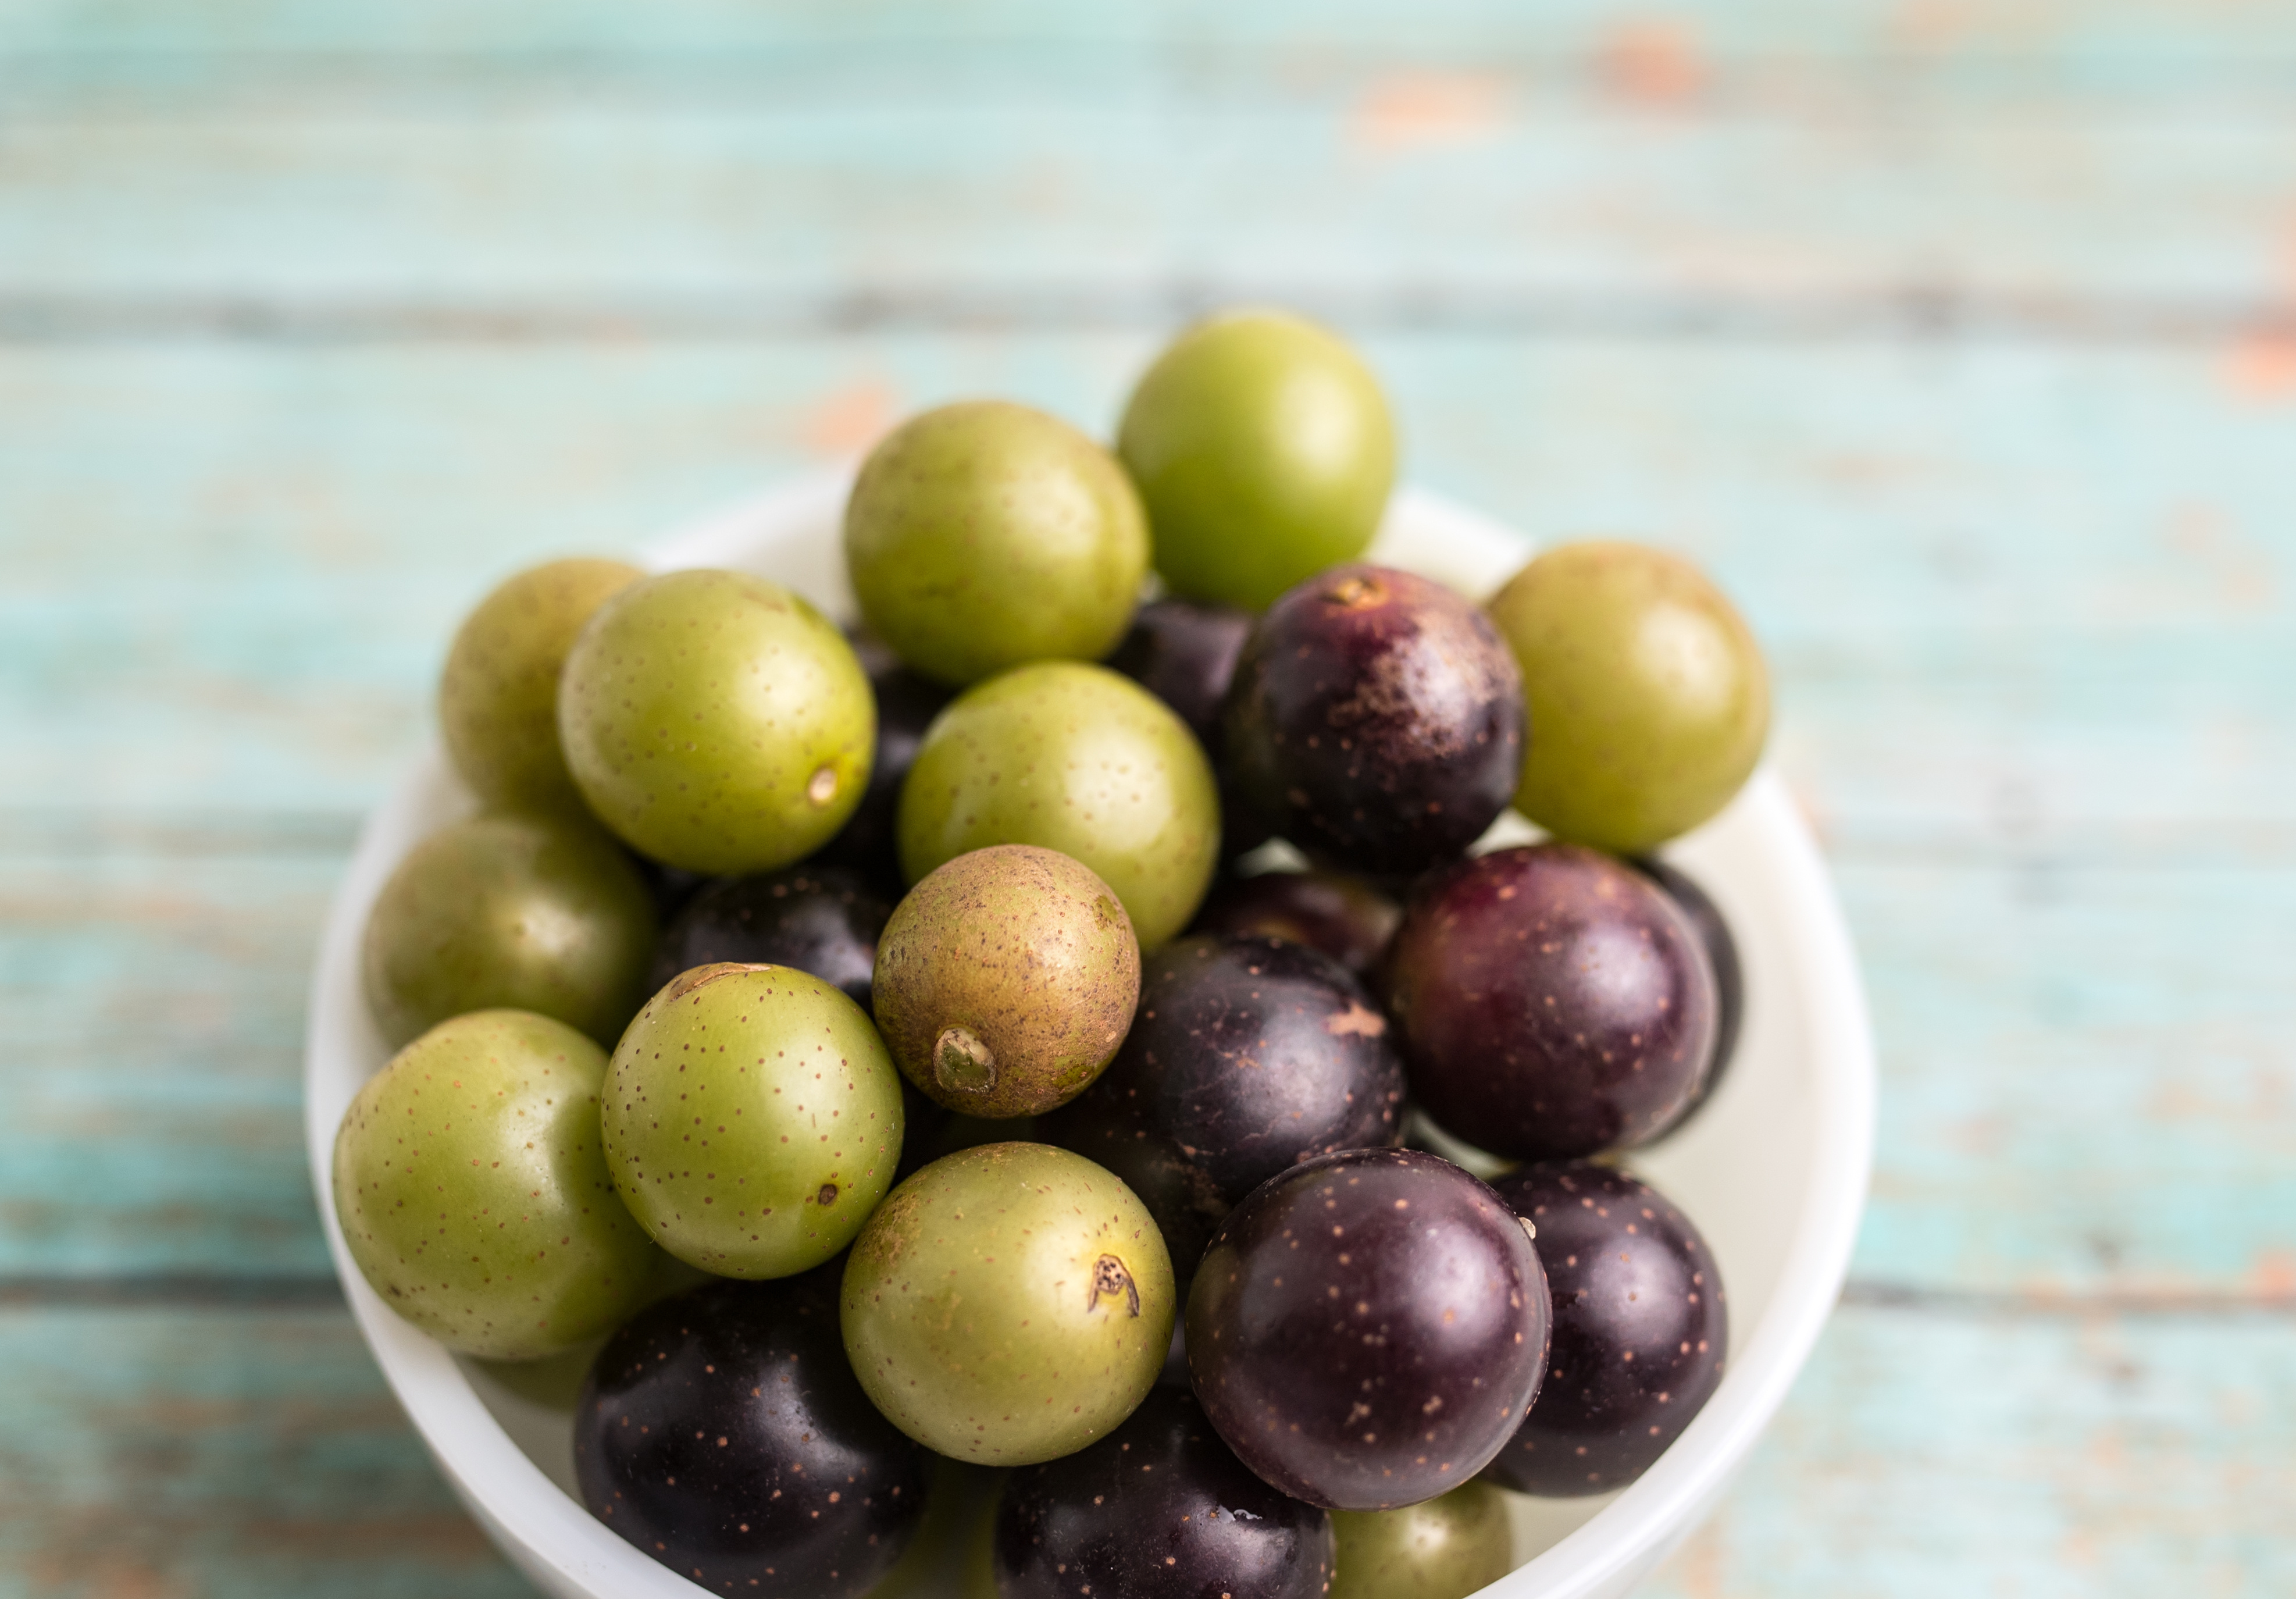
Blueberries, blackberries, Chickasaw plum, pecans, persimmons, Maypop, Mulberry.
Use native plants to attract animals such as beautyberry.
- Where can we find compost?
Cotton gin to get cotton gin trash will need to be composted first. Manure from equestrian centers or zoos. Make sure it is composted too.
Peanut processing facility.
Escambia County has bloom compost from ECUA.
- Note: Amended soil with compost can be flammable. Ash can benefit garden if needed. Test soil pH first so you don’t add too much.
by Muhammad Shahid | Oct 17, 2024
Persimmon harvesting, ripening, and preservation strategies
Persimmons fruits are renowned for their delicious, sweet taste, making them incredibly tasty and nutritious. They are native to China but have spread worldwide, especially in temperate and subtropical climates. These fruits have been cultivated for thousands of years, primarily for their sweet flesh, which varies in texture from firm to custard-like, depending on the variety and level of ripeness. Persimmons are a rich source of vitamins, particularly vitamins A, C, and E. They also contain dietary fiber, which is beneficial for digestive health. They also have anti-inflammatory properties and reduce the risk of chronic diseases like heart disease and cancer.
Astringent vs non-astringent varieties
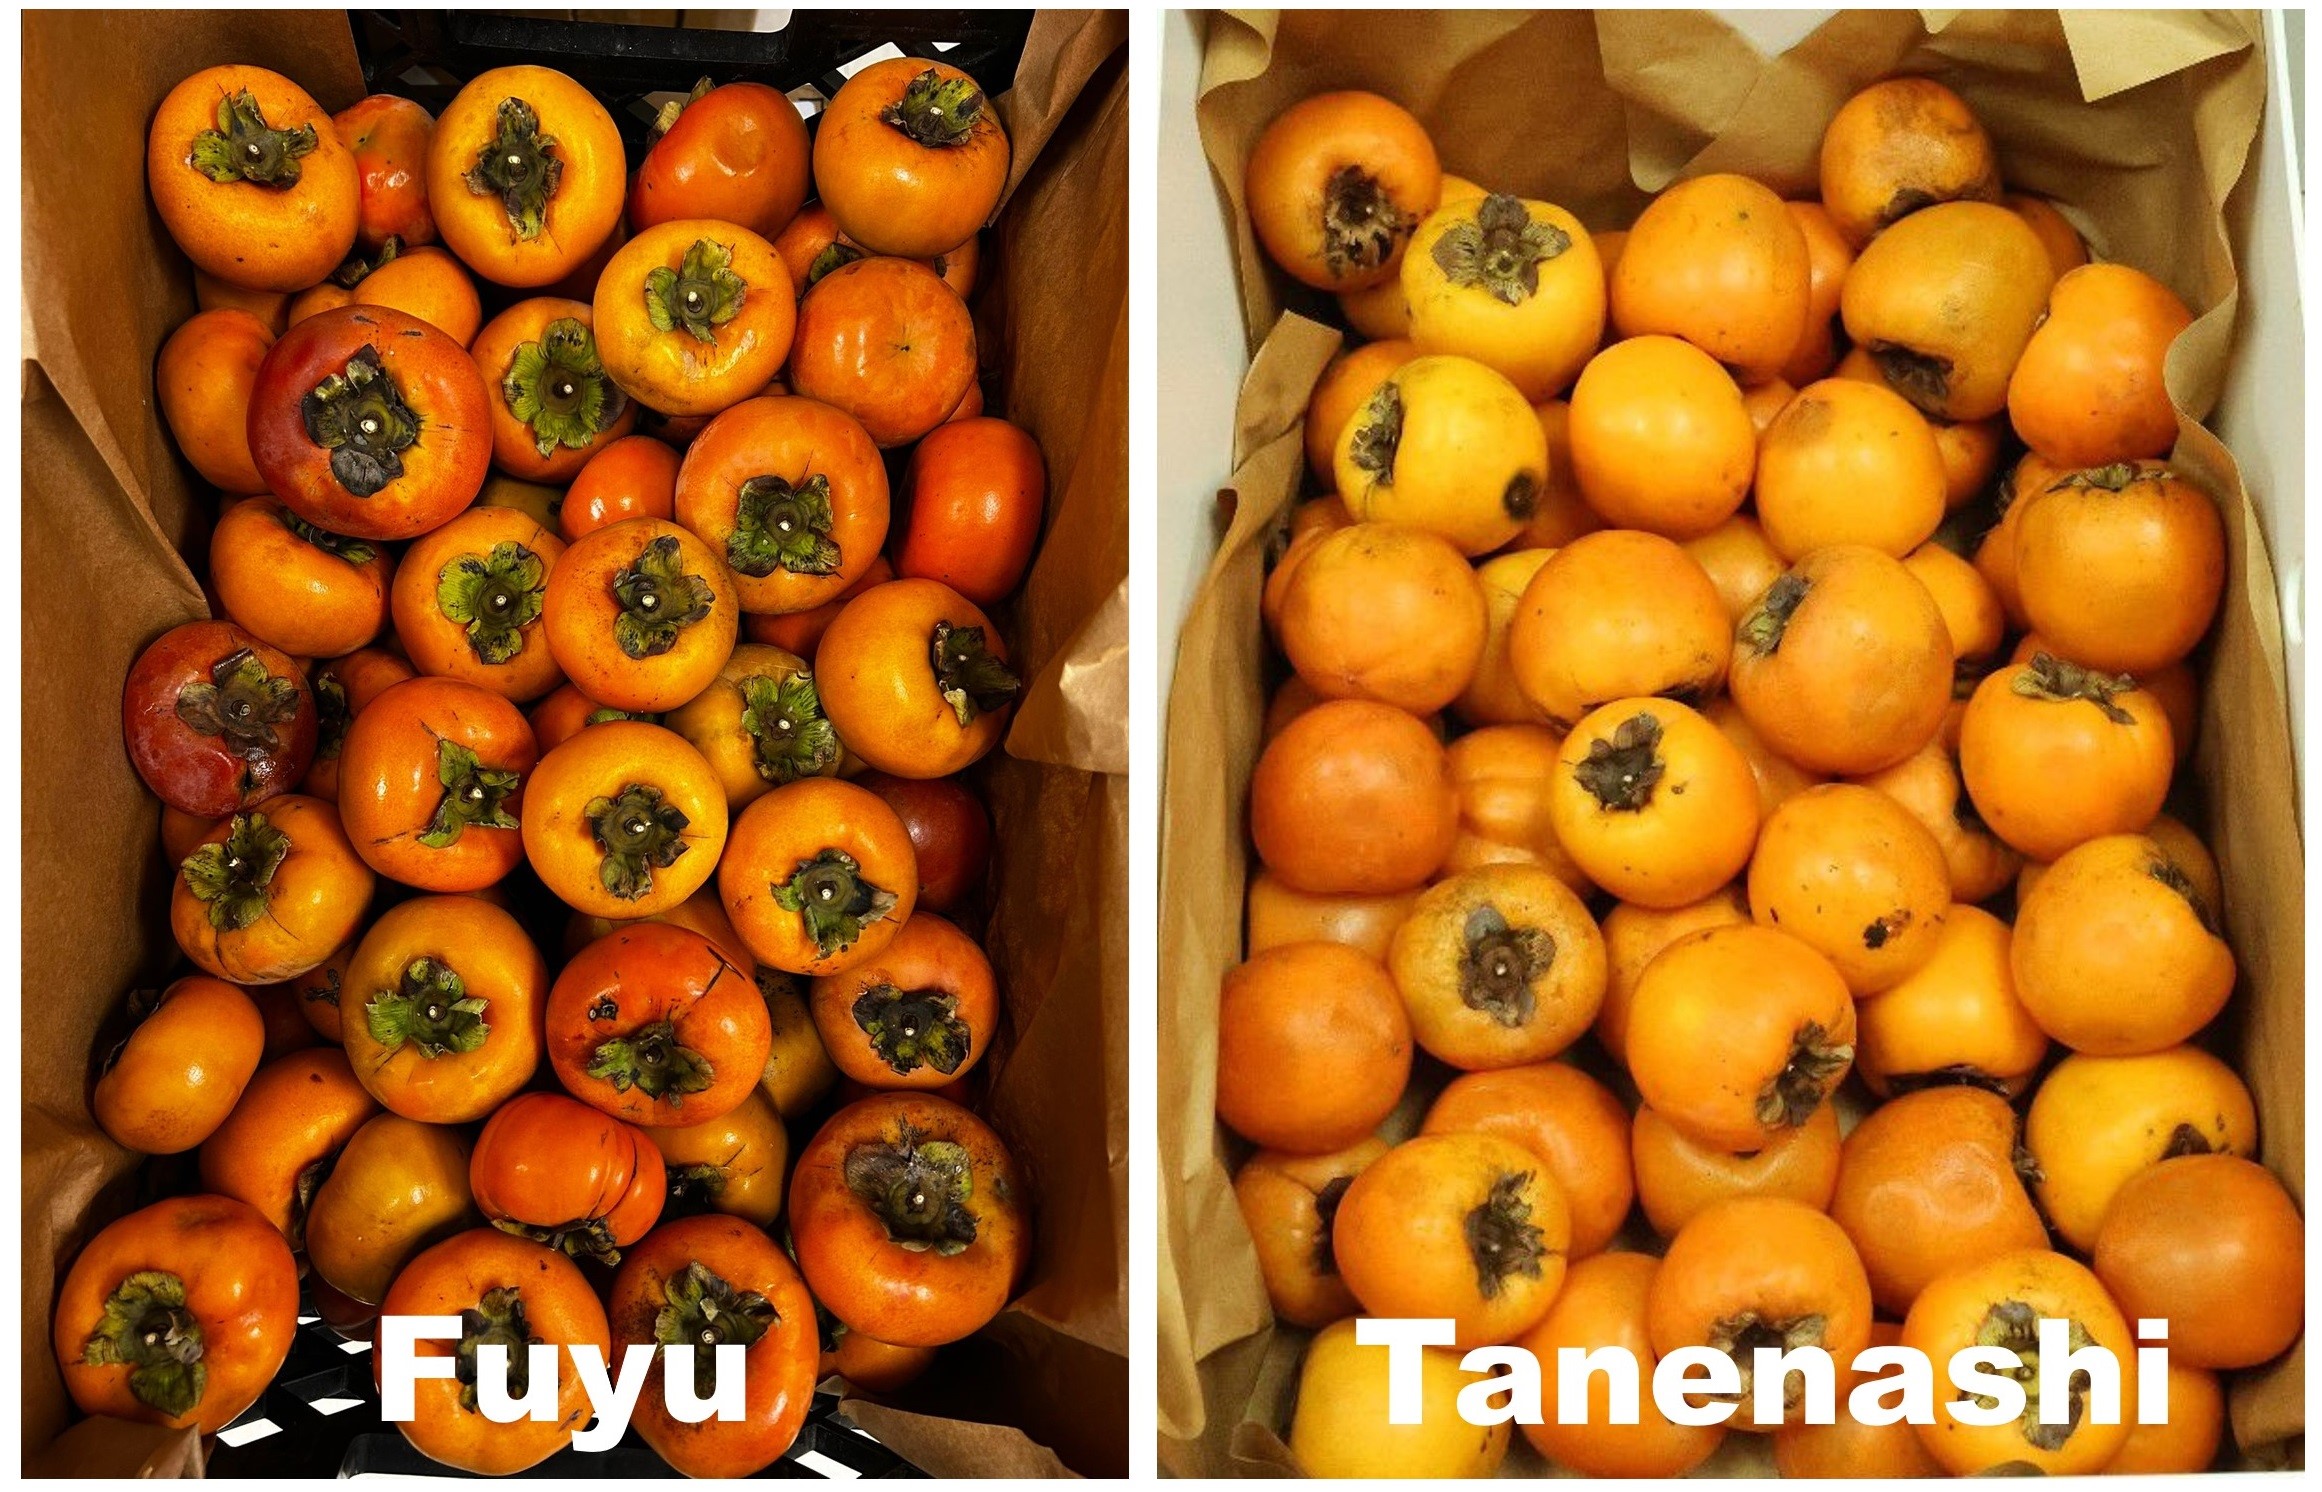
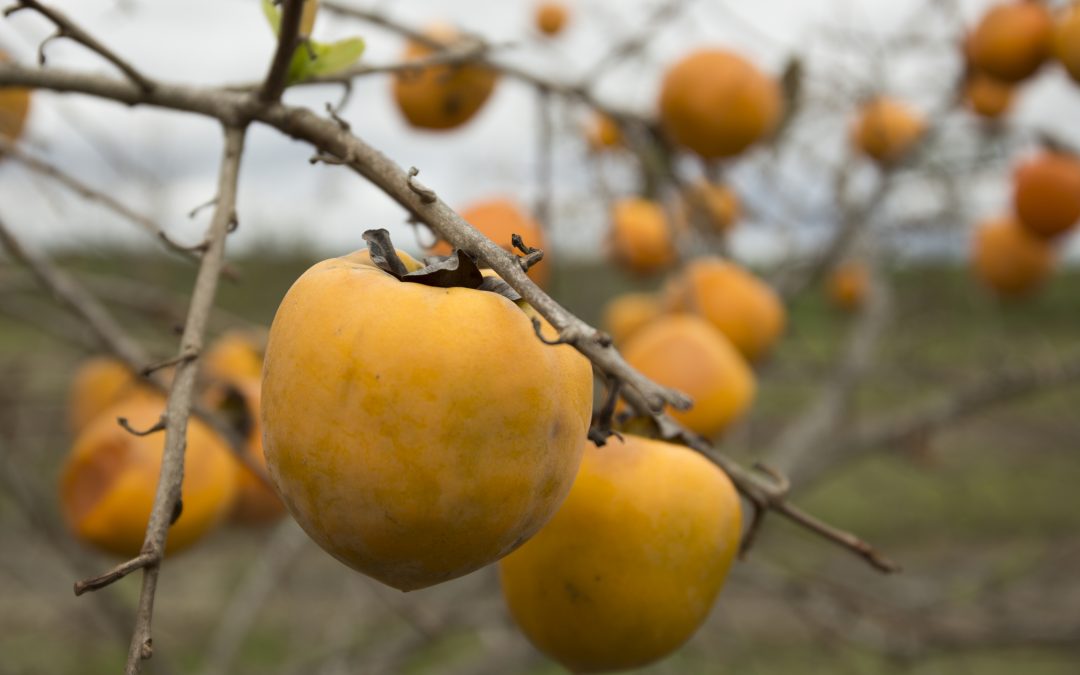
There are two main types of persimmons: the astringent and non-astringent varieties. Astringent persimmons, like Hachiya and Tanenashi, are high in tannins and must be fully ripened before consumption to avoid an unpleasant taste. The water-soluble tannins give the fruit astringency, making it inedible until it grows soft and ripe. Therefore, ripening for these varieties is essential to enable the tannins to disintegrate, allowing the fruit to taste as sweet and rich as it deserves. On the other hand, non-astringent persimmons, such as Fuyu and Jiro, are sweeter and can be consumed even when they are still firm. These varieties have low or no tannin content, and hence, they can be consumed raw and crispy without the dry mouth effect of other more stringent types (Figure 1).
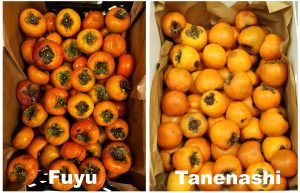
Japanese persimmon fruit: non-astringent variety ‘Fuyu’ (left) and astringent variety ‘Tanenashi’ (right).
Ripening and harvesting the persimmon
Determining the ripening of persimmons depends on the variety. Astringent varieties should be completely soft and jelly-like before they are harvested, while non-astringent varieties can be picked when they are still firm but have reached their full orange color. Persimmons are typically harvested by hand to avoid damaging the delicate fruit. Using pruning shears or scissors, cut the fruit off the tree, retaining a small part of the stem to prevent skin tearing. This method helps in prolonging the shelf life of the fruit.
Methods to speed up the ripening process
Cool temperatures: Keep persimmons cool and leave them in one layer on the countertop. They will ripen in several days to a week and become ready for consumption. The indicators include changes in skin color to deep orange, and the fruit feels almost like jelly when pressed on; it is prepared to eat. If parts of the fruit are slightly bruised or get spots, the fruit is still in the ripening process.
Keep persimmon fruit stored with high ethylene fruits: Ethylene is a natural plant hormone used to promote fruit ripening. You can quicken the ripening process, especially for astringent varieties, by harnessing the power of ethylene by placing the fruit in a brown bag with other fruits like apples or bananas that produce more ethylene. The enclosed space inside the bag retains the ethylene gas, enhancing the tannin deterioration in the persimmons. Use the following steps: Use a clean paper bag, place 3-4 persimmons with one apple or banana inside the bag, then close it and let it stay warm. The persimmons should be checked daily in order not to over ripen. They should soften in 2-3 days, depending on how hard they were.
Freezing: Freezing is another method to reduce astringency. Freeze the unripe astringent persimmons for about one day or until you feel they are already sufficiently chilled. When the fruit thaws, it will have softened greatly and will not be as astringent because the freezing helped eliminate tannins. This method does not allow the fruit to ripen in the usual sense of the word but can quickly turn the persimmons into a palatable state. When frozen, the fruit becomes soft, slightly brown, and tender, so this method would be better served if one wanted to use the persimmon for baking or making purees.
Preservation and storage
Preserving persimmons is key to enjoying their unique flavor and texture long after the harvest season. Persimmons, particularly astringent varieties, have a short shelf life once they ripen, so proper preservation strategies are essential for extending their usability and minimizing waste. Here are some practical methods for preserving persimmons:
- Persimmons should be stored at 50 degrees F (10 degrees C) for optimal preservation
- Use a transparent plastic bag with holes in it or a container with some holes on its surface. This will help prevent moisture accumulation, which, if left for some time, leads to mold growth on the container walls.
- Do not place persimmons in a tight, covered container, as they require ventilation to prevent mold growth.
- Use a mesh bag or a basket with a clean cloth that will allow air to circulate while at the same time keeping the fruit from developing bruises.
- The refrigerated persimmons can last up to 2 months. Examine them often for signs of spoilage, such as softness and mold formation.
- Frozen persimmons can be kept for up to 6 months.
Dr. Muhmmad A. Shahid, UF/IFAS NFREC, Assistant Professor of Horticulture
Dr. Shahid Iqbal, UF/IFAS NFREC, Postdoc Scholar, Horticulture Sciences
Dr. Muhammad Nadeem, UF/IFAS NFREC, Postdoc Scholar, Horticulture Sciences
by Molly Jameson | Sep 30, 2024

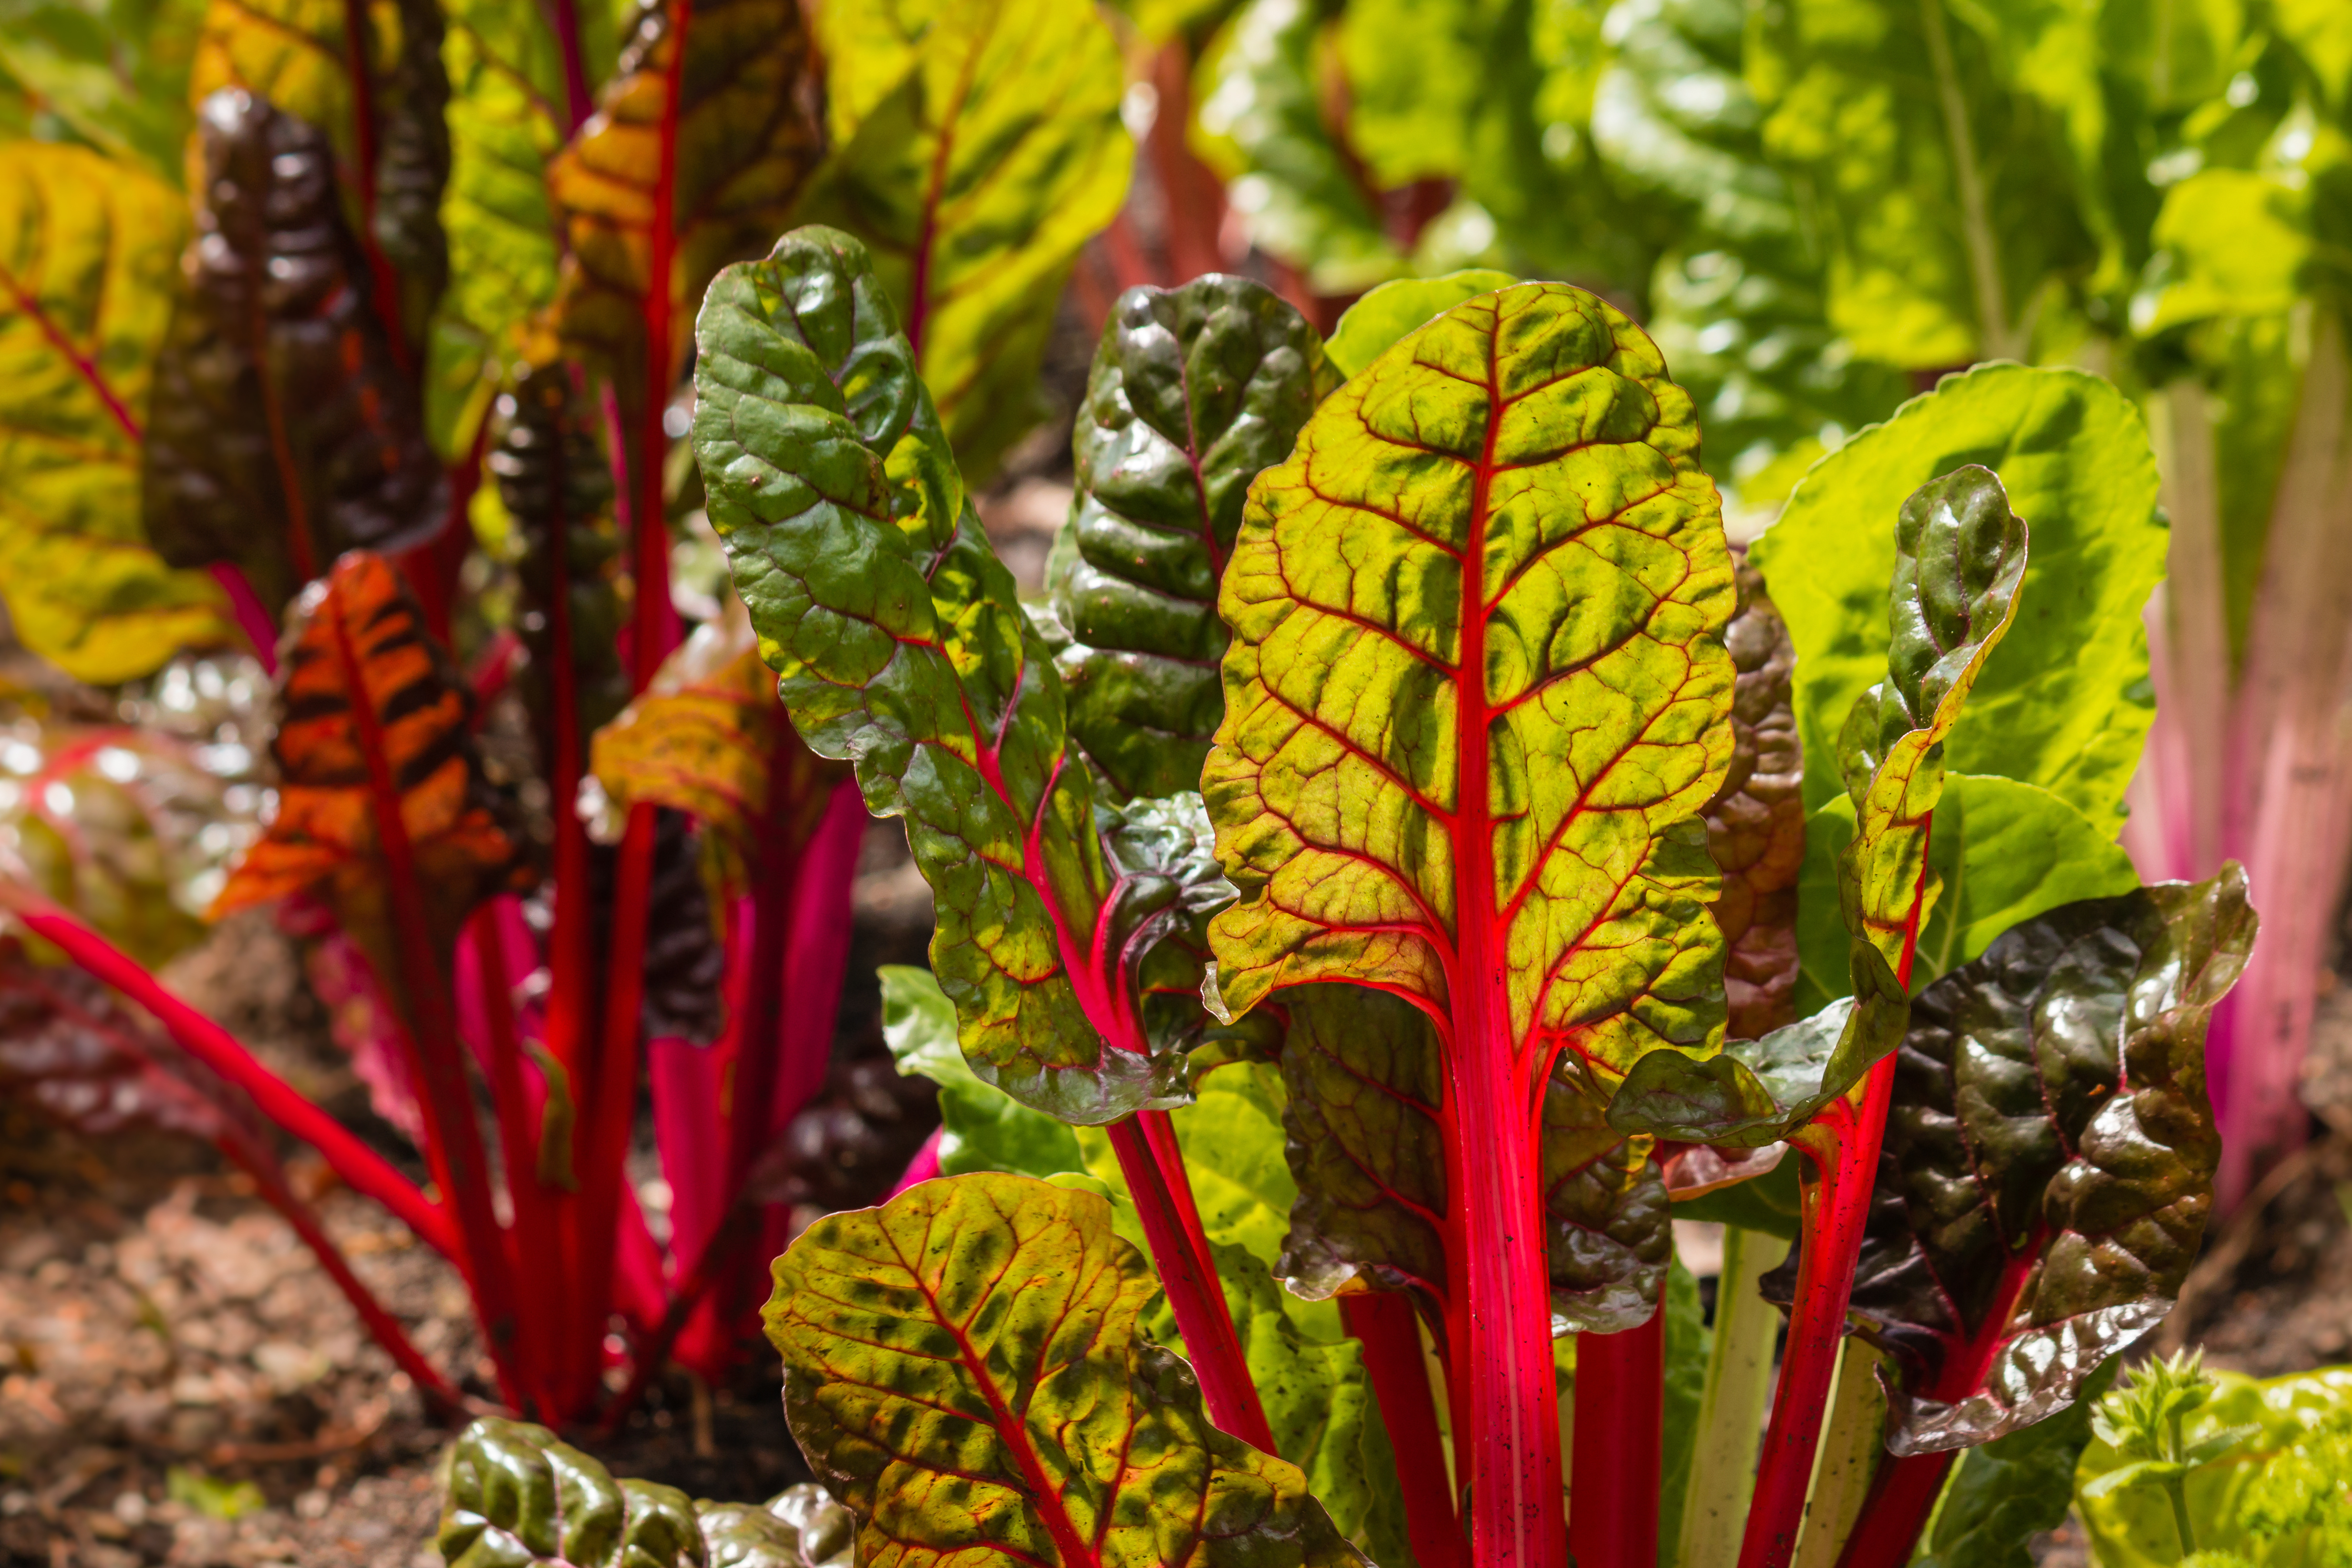
Swiss chard thrives in cooler weather, producing a continuous harvest of large, glossy, deep green leaves with colorful stems in shades of white, red, and yellow. Photo by Patrik Stedrak, Adobe Stock.
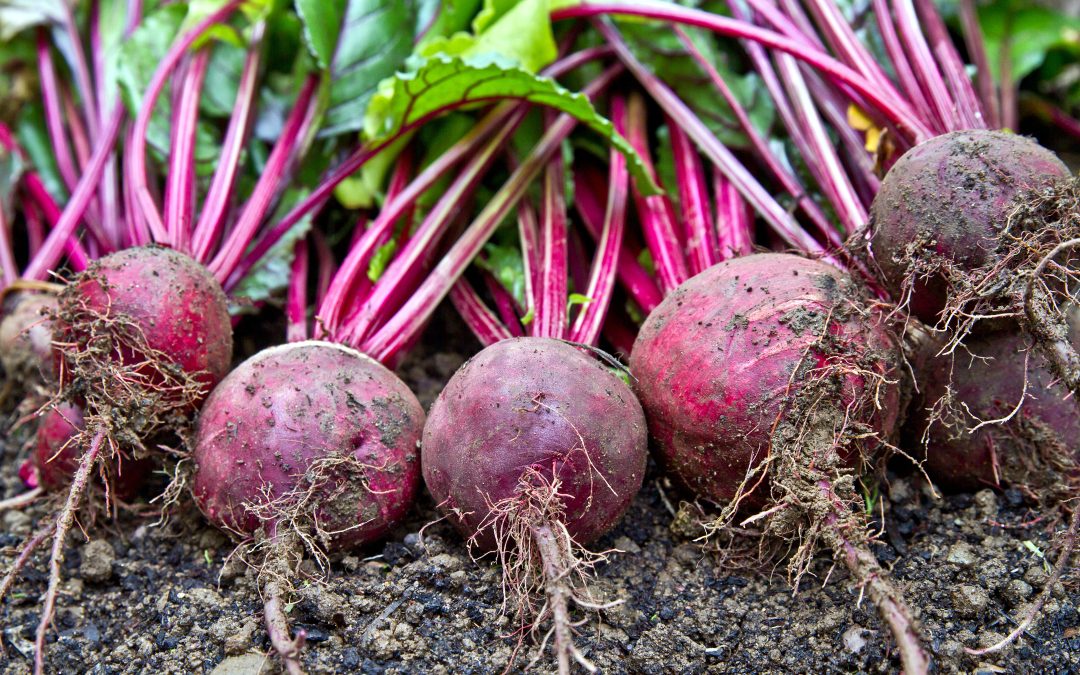
At first glance, beets and Swiss chard might seem like entirely different plants. Beets are known for their edible, bulbous root, while Swiss chard is grown for its large, leafy greens and colorful stems. However, both belong to the same species, Beta vulgaris, in the Amaranthaceae family, and their differences are the result of selective breeding over time.
Wild sea beet (Beta vulgaris subsp. maritima), native to Mediterranean and coastal European regions, is the ancestor of cultivated beets and Swiss chard. Photo by Thorsten Schier, Adobe Stock.
Both beets and Swiss chard originate from the wild sea beet (Beta vulgaris subsp. maritima), a plant native to Mediterranean and coastal European regions. Ancient civilizations, such as the Greeks and Romans, bred beets for their enlarged roots, which eventually became the garden beets we know today. Despite its name, Swiss chard isn’t from Switzerland – it was also cultivated in the Mediterranean, bred for its nutritious leaves and stems. The “Swiss” name was added in the 19th century by seed catalog publishers to distinguish it from French spinach varieties.
Both beets and Swiss chard are highly nutritious. Beets, which range in color from deep red to golden yellow, are rich in vitamin C, folate (B9), and essential minerals like manganese, potassium, magnesium, and iron. They contain betalains, antioxidants with strong anti-inflammatory properties, and are a great source of fiber and nitrates, supporting digestion and heart health. Beets can be cooked in a variety of ways, offering a sweet, earthy flavor that intensifies when roasted. They can also be boiled, steamed, or eaten raw in salads, pairing well with tangy ingredients like citrus and goat cheese.
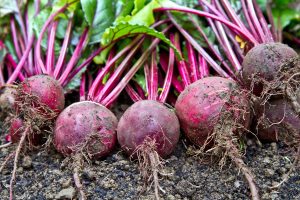
Beets can be grown in the fall and winter in the Panhandle, yielding round, bulbous roots with a sweet flavor and earthy aroma. Photo by Clickmanis, Adobe Stock.
Swiss chard, with its large, flavorful leaves and vibrant stalks in red, yellow, and white, is packed with vitamins A, C, and K, as well as minerals like magnesium, potassium, iron, and calcium. It also contains antioxidants like beta-carotene, lutein, and zeaxanthin, which support eye health and combat oxidative stress. Its high levels of potassium aid in electrolyte balance and heart health, while vitamin K and calcium contribute to strong bones. Swiss chard can be sautéed, added to soups, or eaten raw in salads, with both the leaves and stems being edible.
Essentially, beets and Swiss chard are different forms of the same plant, bred for either the root or the leaves. This explains why beet greens are similar in flavor and texture to Swiss chard, though beet greens are usually smaller and more delicate. Beets provide the advantage of both edible roots and greens, while Swiss chard offers vibrant, nutritious leaves that can be harvested throughout the season. Both crops thrive in cooler weather, making them ideal for fall and winter planting in the Florida Panhandle.
by Abbey Smith | Sep 4, 2024
Even though it’s still 98 degrees outside, it’s the time of the year to be looking ahead to plan a fall garden. With the optimal climate of Northwest Florida, the fall season offers gardeners a time to refresh their plots and prepare for another productive season. Here’s a guide to make the most of the fall gardening season!
Site Prep for Fall Gardens
When transitioning from summer to fall, it is important to prep the area where a new crop will be placed. It’s best to remove all dead material from your spring garden so it will not spread disease or bacteria to the new plants. You also may consider adding nutrients to the soil after it has been tilled for fall vegetables. The best method to know how much to add into the soil is by first taking a soil sample. The soil sample results will show what is readily available for vegetables going in the ground and will give you a baseline of how much fertilizer or organic amendments to add. The fall season is also one of the best times of the year to prioritize soil health. Another way to do this in the off season is to incorporate a cover crop into your gardening regimen. For more information on cover crops please visit: https://nwdistrict.ifas.ufl.edu/hort/2023/10/19/cover-crops-in-the-garden/
UF/IFAS Photo by Tyler Jones.
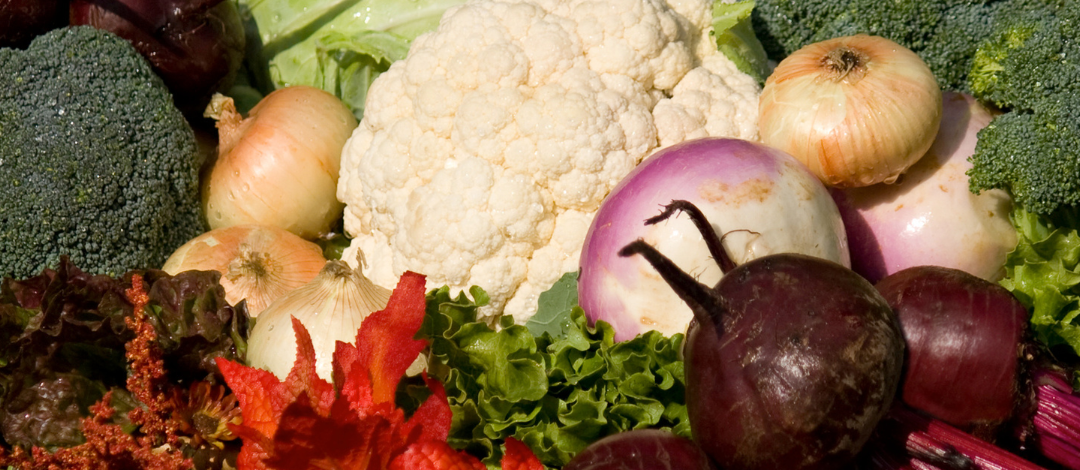
What Vegetables Do I Plant in the Fall?
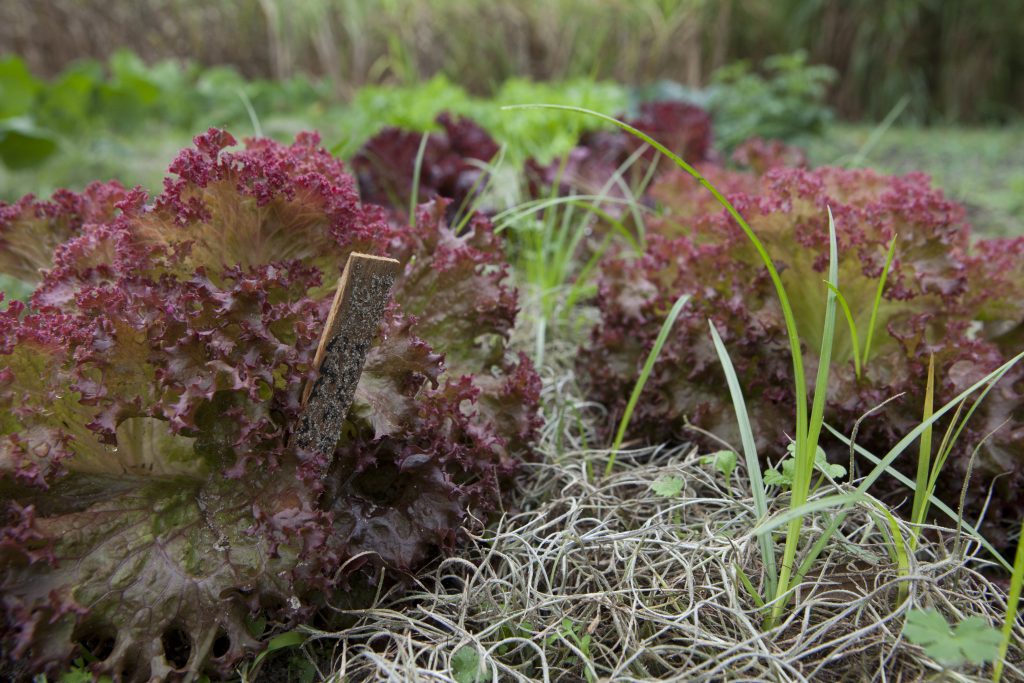
The “cool” temperatures of a Florida fall make it very ideal for a variety of cool-season vegetables. Vegetables can be classified a hardy, semi-hardy, and tender based on their abilities to withstand freeze conditions, cold temperatures, or high heat. That is how can put vegetables in warm-season and cool-season groups. Tender vegetables are considered short season and are typically seen in spring and summer months. Examples of tender vegetables are potatoes, tomatoes, and squash. Semi-hardy vegetables are mostly frost-tolerant but cannot withstand freezing temperatures. Examples are carrots, leafy greens like Swiss chard and Bok Choy, peas such as sugar snaps, and celery. Lastly, hardy vegetables are a true cool-season vegetable that is frost-tolerant and can withstand freezing temperatures up to a certain degree. Examples of hardy vegetables are broccoli, cauliflower, kale, onions, and garlic. To find more information on fall vegetables in northwest Florida, please visit: https://edis.ifas.ufl.edu/publication/EP451

UF IFAS Photo by Tyler Jones
Fall Garden Maintenance
With the temperatures being cooler in the fall months, your garden vegetables will require less water. It is best to water your garden early in the morning to allow the soil to dry out during the day. Doing this will prevent fungal growth and root rot. Utilizing mulch will also help conserve soil moisture, regulate the soil the temperature from the cool weather, and suppress weeds. Even through the winters are typically mild in Florida, it is still best to have a freeze protection plan for your garden. Using row covers or frost blankets will help shield your garden when the temperatures drop.
As you enjoy your fall garden, planning ahead for winter and spring will also set you up for success. Research what crops will follow best behind your fall harvest and consider starting your seeds indoors to get a head start. By embracing these fall gardening tips, you can enjoy a bountiful harvest and a thriving garden throughout the season. Happy Fall!
by Molly Jameson | Aug 7, 2024
If you are planting a purple muscadine cultivar, ‘Noble’ is an ideal choice due to its productivity, disease resistance, and high-quality juice. Photo by Leonard, Adobe Stock.
Discover the Charm of Muscadines
Imagine walking through endless rows of lush grapevines, each brimming with clusters of plump, juicy muscadines. Scientifically known as Vitis rotundifolia, muscadine grapes are a species native to the southeastern US, with a range extending northward from Florida to Delaware and westward to east Texas and Oklahoma.
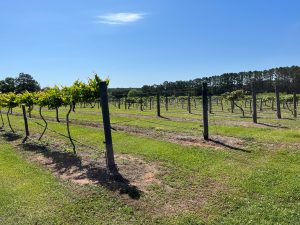
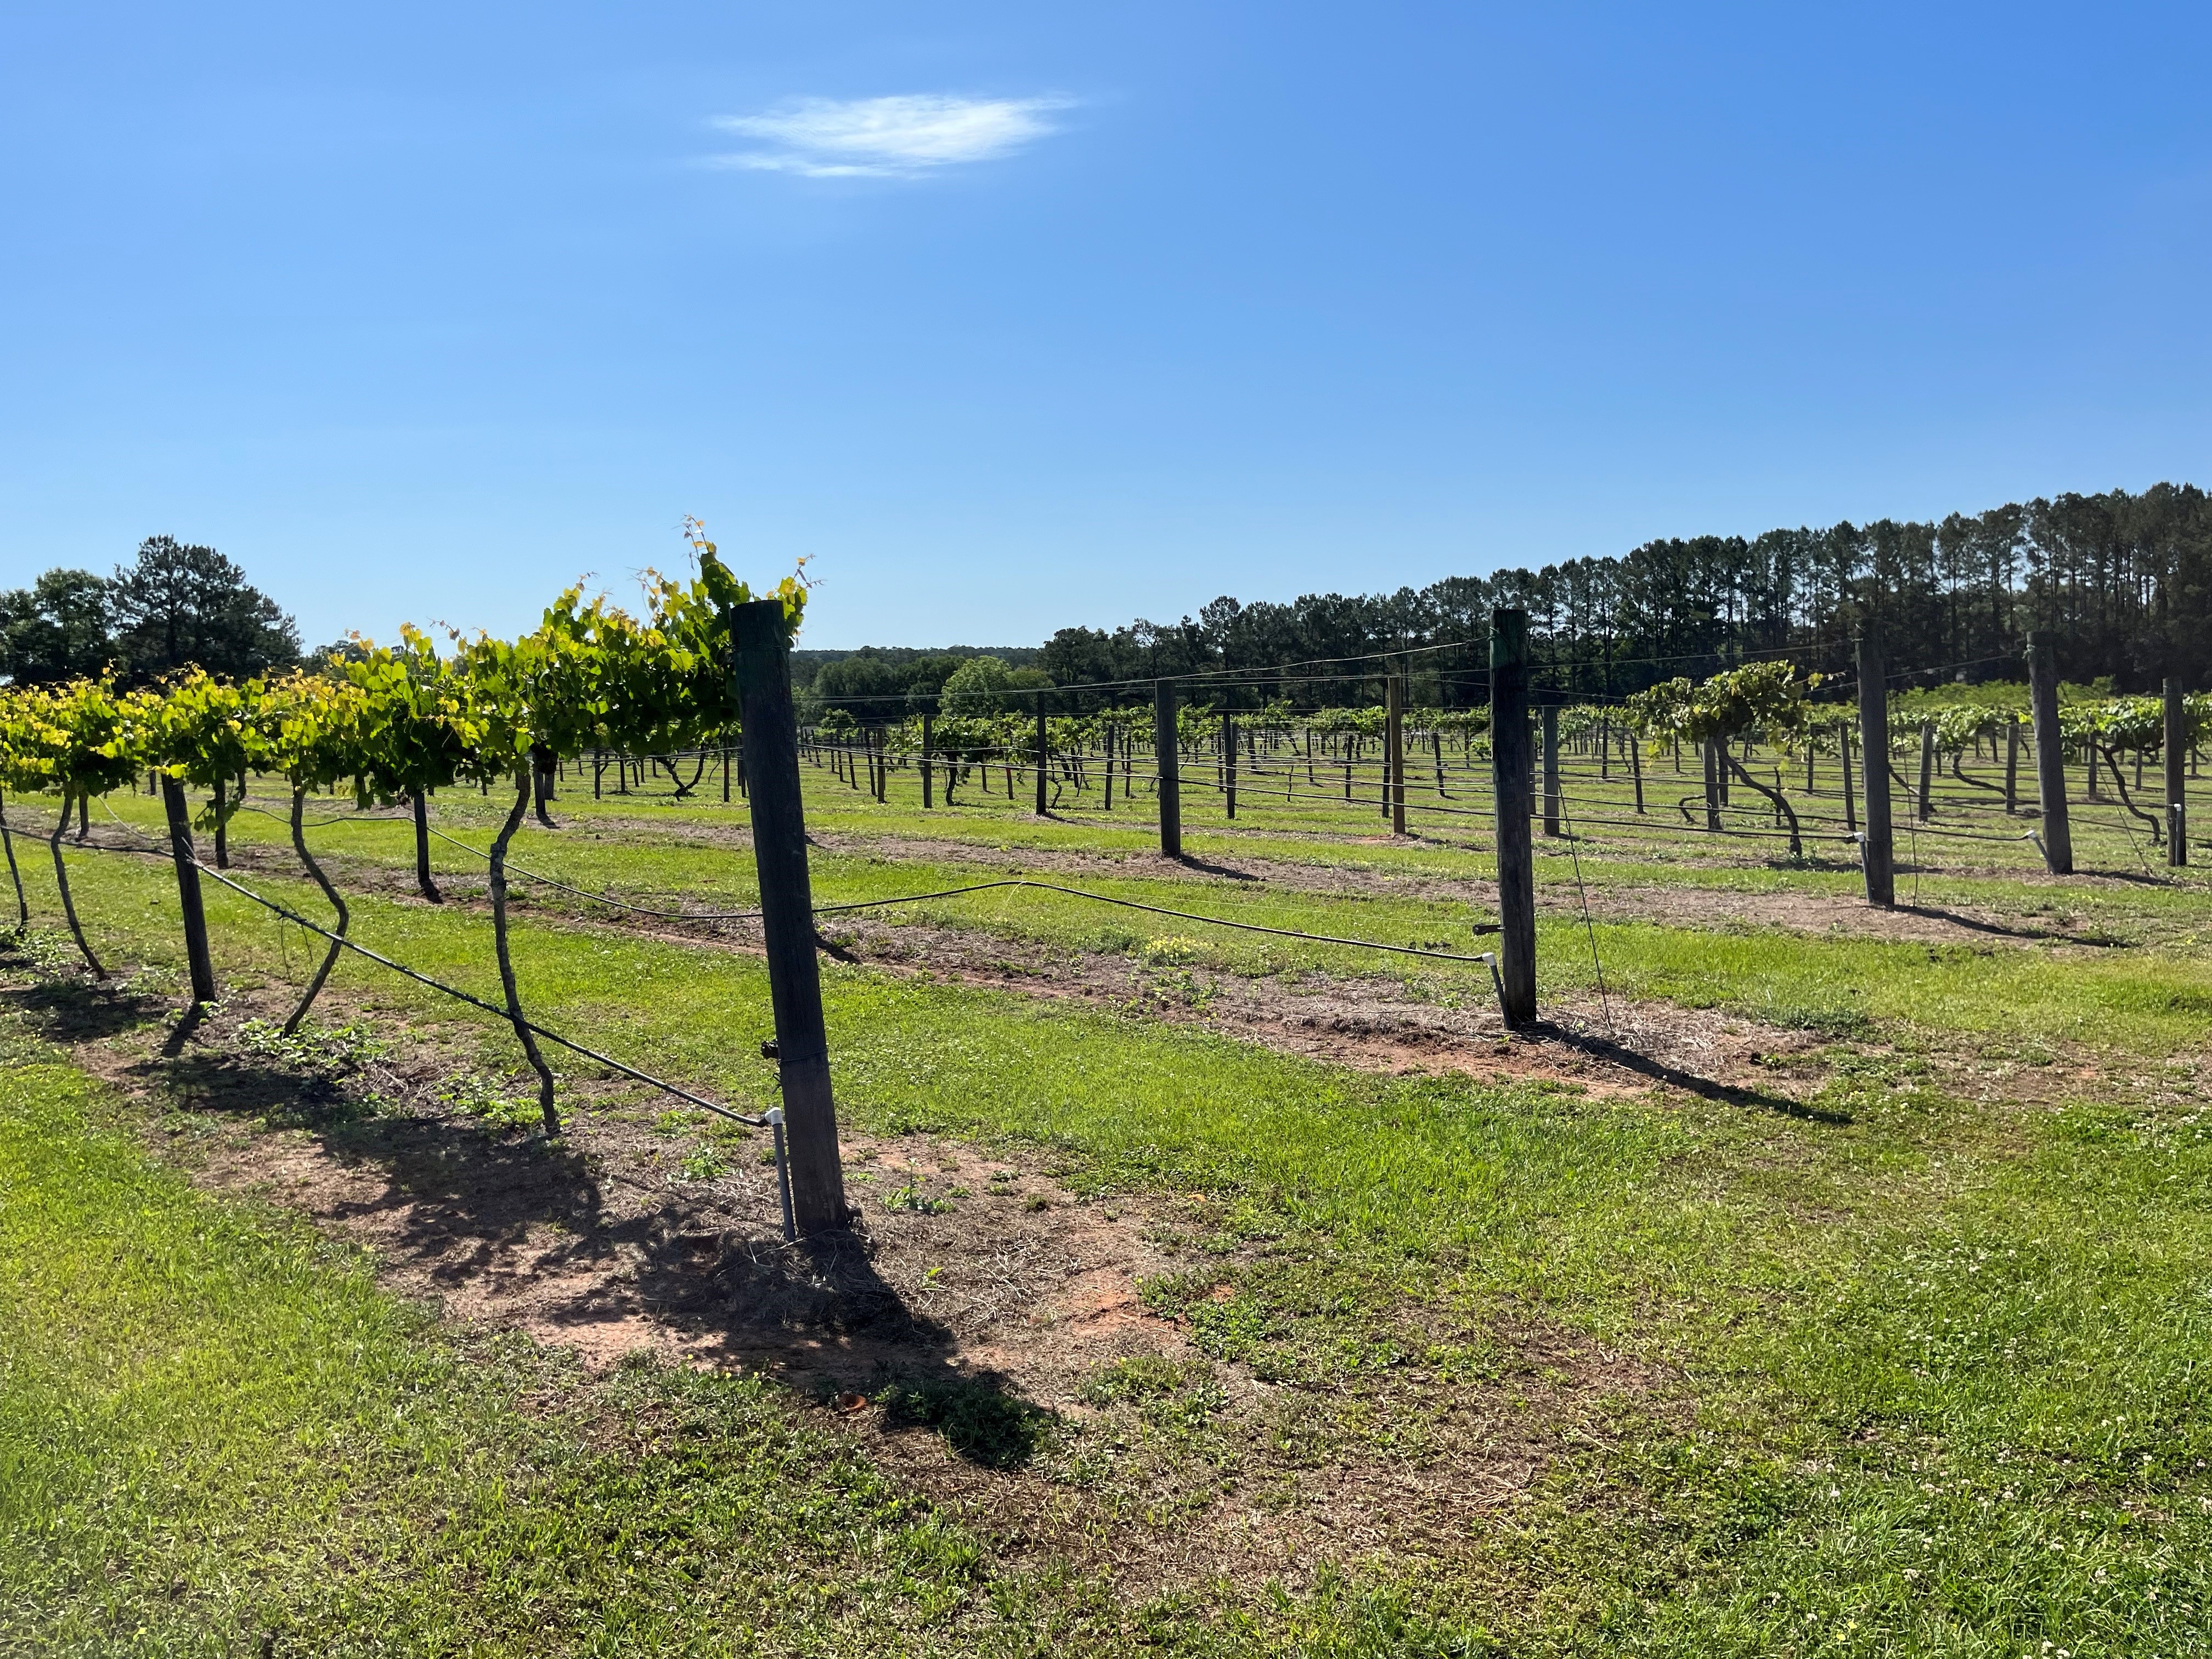
The FAMU Center for Viticulture and Small Fruit Research serves as a hub for studying and developing new cultivation techniques, aiming to enhance muscadine grape quality and resilience to various pests and diseases. Photo by Molly Jameson.
Unlike their traditional grape cousins, muscadines have a unique, robust flavor profile that is often described as rich, sweet, and pleasantly tart. For those who grew up enjoying muscadines, their taste often brings back fond memories of languid, late summer days. Here in the Panhandle, muscadines thrive in our long, hot summers and flourish in our sandy, well-drained soils.
Muscadine grapes are not only a delight for our taste buds, but they are also packed with antioxidants, vitamins, and minerals, making them a powerhouse of nutrition. The high levels of the polyphenol resveratrol, a potent antioxidant, have been linked to numerous health benefits.
In the culinary world, muscadine grapes, with their thick skins and rich colors, spark creativity and exploration. Their unique flavor makes them perfect for everything from fresh fruit to preserves, pies, tarts, and juice. And naturally, muscadine grapes are ideal for winemaking, bringing a distinct twist to the wine market.
While muscadine grapes may not possess the storied history of their European counterparts, they have a rich history of their own in the southeastern US, where they are native and have been a significant part of the region’s agricultural and cultural landscape for centuries. Native American tribes in the southeast, including the Cherokee and Seminole, were the first humans to utilize muscadine grapes. They used the grapes for food and medicinal purposes, appreciating their nutritional value and distinct flavor. In the 1500s, early European settlers, including the English explorer Sir Walter Raleigh, documented the abundance of muscadines growing wild. Seeing their potential, settlers began cultivating muscadine grapes for winemaking and other purposes.

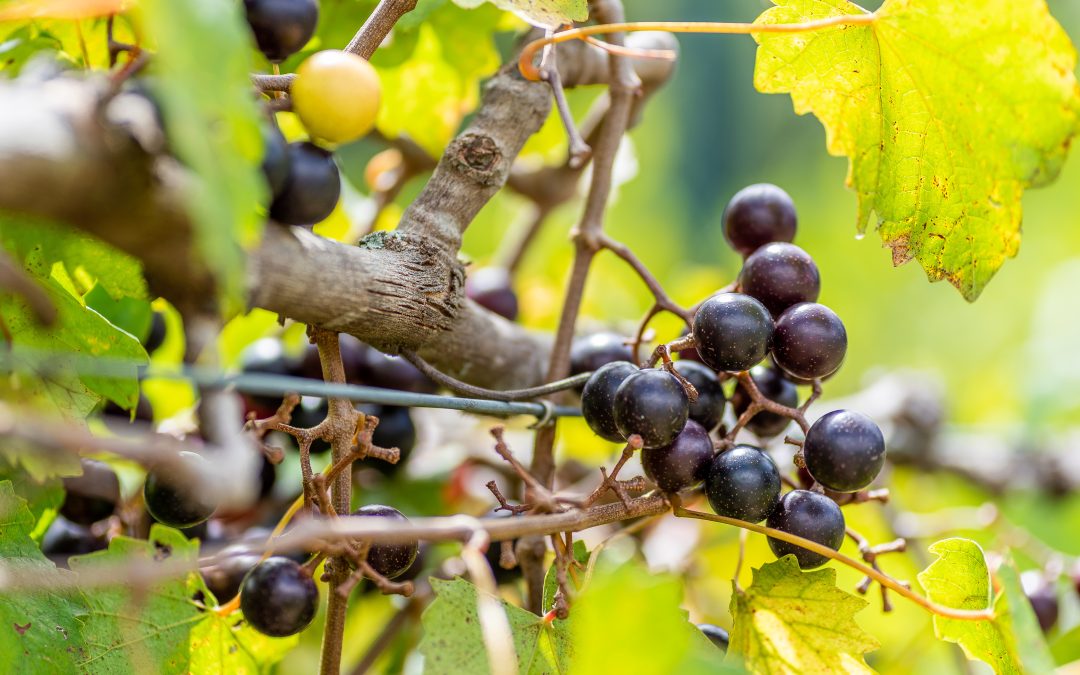
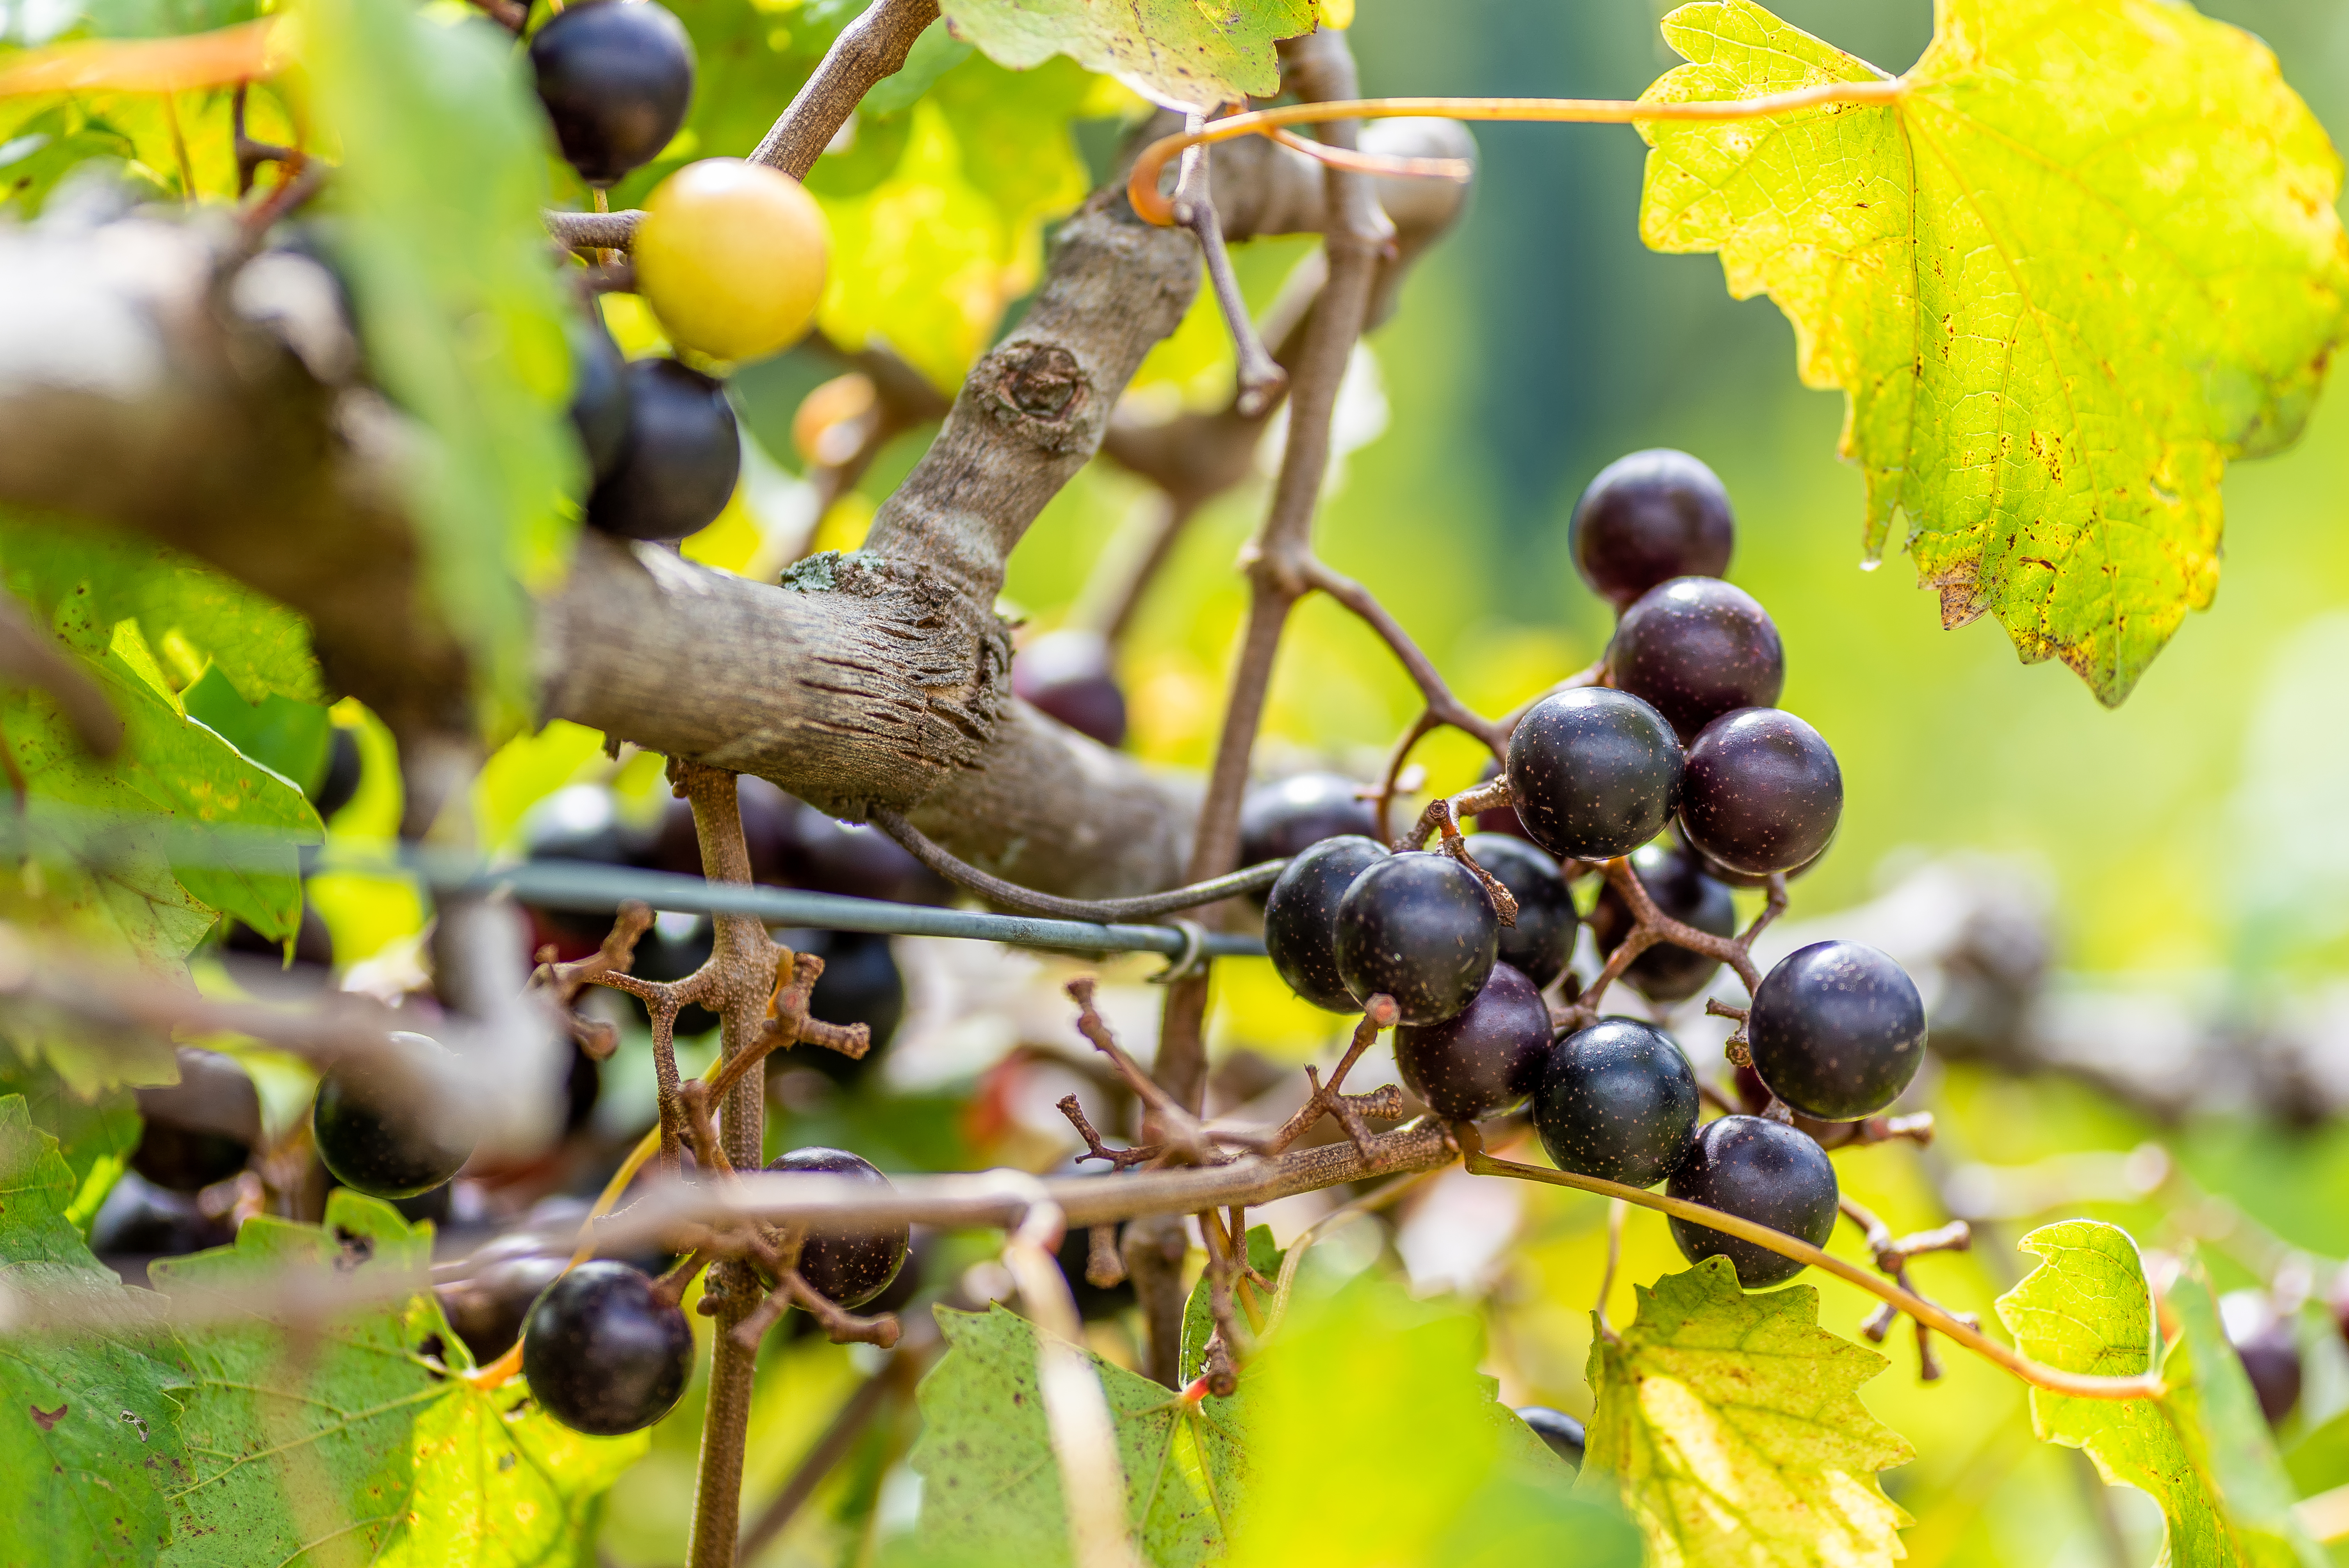
Muscadine grapes come in a variety of colors, including deep purple, black, bronze, and green, each offering its unique flavor profile and appeal. Photo by Tanya, Adobe Stock.
Unlike European grapes, muscadines are naturally more resistant to many common grape diseases, such as anthracnose and Pierce’s disease, and are less susceptible to pests due to their thick skins and natural antifungal compounds. However, they can still be affected by diseases such as angular leaf spot and other fungal rots, and pests such as grape vine borer, birds, raccoons, and deer. In contrast, European grapes are highly susceptible to a range of fungal and bacterial diseases, including powdery mildew and botrytis bunch rot, and are more vulnerable to pests, such as grape berry moths. European grapes also require specific chilling hours which cannot be achieved in the southeast US, and they are more sensitive to both drought and excessive moisture, requiring careful irrigation management and more intensive fertilization.
Today, muscadine grapes are cultivated extensively in the southeast, catering to niche markets. In Florida, there are many muscadine cultivars that thrive, each known for its unique characteristics and adaptability. Cultivars such as the purple ‘Alachua’ and ‘Noble’ and the bronze ‘Carlos’ are popular choices among growers for their high yields and suitability for winemaking, producing wines noted for their fruity flavors and distinct aroma. Muscadines like the purple ‘Supreme’ and the bronze ‘Fry’ and ‘Summit’ are renowned for their sweet taste and are often enjoyed fresh or used in jams and desserts. The muscadine harvest season typically starts in early August and goes through early October, depending on the cultivar, so it pays to grow a variety to extend the season. For more information about muscadine grape cultivars, check out the UF/IFAS Extension EDIS publication The Muscadine Grape.
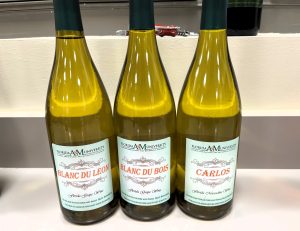
The wine produced at the FAMU Center for Viticulture and Small Fruit Research in Tallahassee showcases the region’s rich muscadine flavors with a focus on innovation and quality. Photo by Molly Jameson.
With ongoing research and cultivation efforts, Florida is broadening its range of muscadine cultivars, ensuring a diverse and thriving grape industry. This research is actively enhancing muscadine varieties, including at the Florida A&M University (FAMU) Center for Viticulture and Small Fruit Research located in Tallahassee.
Efforts at the Center focus on improving grape and small fruit cultivars, particularly those adapted to Florida’s unique climate. Their research includes enhancing disease resistance, boosting fruit quality, increasing yields, releasing new cultivars, and emphasizing sustainable agricultural practices.
Be sure to visit the FAMU Center for Viticulture and Small Fruit Research during the annual Grape Harvest Festival. This year, the festival will be held Saturday, September 14, 2024, from 8 a.m. to 3 p.m., featuring activities such as a vineyard run and walk-a-thon, insect demonstrations and computer simulations, grape varietals tasting, guided vineyard trailer rides, grape throwing and stomping competitions, a wine making workshop, grape picking, and more. Learn more and register to attend the festival at https://my.famu.edu/event/ghf24.
by Abbey Smith | Apr 5, 2024
Here in North Florida, it is not uncommon to see a few citrus trees in a residential landscape. With Florida being the second highest producing state of citrus, it is not out of the normal to see them when you are out and about. They are a great option to keep a lush green aesthetic in your yard. But, what other options are there for the homeowner that wants to add some edible diversity to their landscape? In this article we will be discussing a few of the many edible landscape choices that can add both diversity and a sweet treat to your yard.
A popular edible landscape option is the rabbiteye cultivar of blueberry. The rabbiteye blueberry plant is considered easier to grow for the first time blueberry grower in comparison to the southern high bush cultivar. This cultivar thrives in acidic soils and requires a soil pH of 4.0 to 5.5. When planting, the use of pine bark mulch is a great organic method to satisfy the soil pH requirement. Mixing composted pine bark mulch in the soil and adding additional mulch after the bush is planted will add to the soil’s organic matter over time. Mulching also aids the establishment of young plants and moderates soil temperatures and weed control. For variety selection, mid-to-late season rabbiteye cultivars are best for Northwest Florida, as they are more cold tolerant and less susceptible to lose their flowers and young set fruit in late winter/early spring frosts. Common mid-to-late season rabbiteye’s are ‘Vernon’, ‘Brightwell’, ‘Powderblue’, ‘Tifblue’, and ‘Georgia Giant’. Because blueberry plants are not “self-unfruitful”, they will require more than one variety to cross-pollinate with in order to produce fruit. Two is great, but three plants will also encourage larger fruit set for you and your family to enjoy!
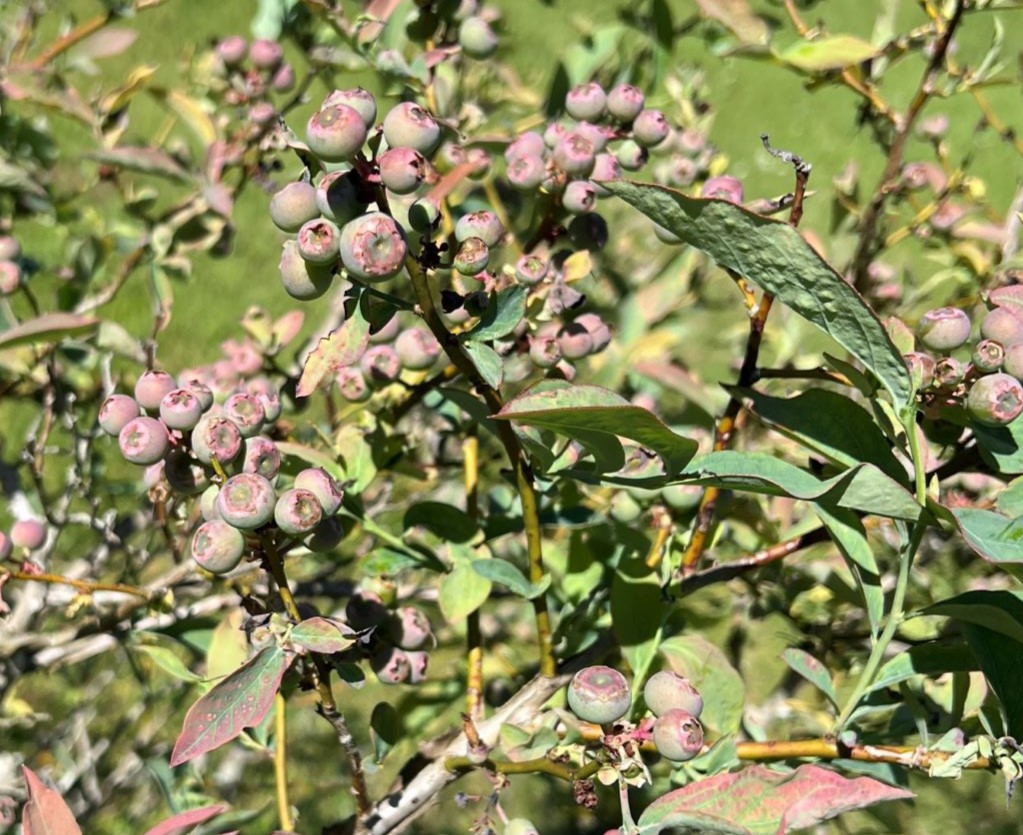
Blueberry Set Fruit, Jackson County Master Gardener Demo Garden
Another option that has steadily grown interest in the Florida Panhandle is the apple tree. There are two known cultivars of apple that are acclimated to the North Florida region due to their low chill hour requirement cold tolerance. This is the ‘Anna’ Apple and the ‘Dorsett Golden’ Apple. Apple trees will perform best in full sun locations of the yard and prefer a well-drained soil. The chilling hour requirement for these cultivars of apple are between 400-600 hours. You will begin to see the fruit ripen in the months of May to June. The ‘Anna” Apple has been compared to the well known ‘Red Delicious” that is best known in northern region of the United States. Planting should occur in early spring and planting holes should be big enough that the root system does not become over crowded from limited expansion space. There is no UF/IFAS fertilizer recommendation for the apple tree because it is not commercially produced in Florida, but generally a fertilizer such as 10-10-10 can be used.
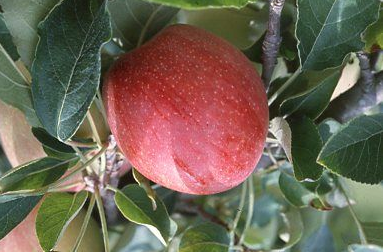
‘Anna’ Apple, Photo Credit: UF/IFAS NFREC
The blackberry is a great choice as well for an edible landscape. There are several blackberry species that are native to Florida. Most blackberries produce thorns on their shoots, but many new cultivars have been developed as thornless. When selecting your planting location, low-lying areas should be avoided to deter from over-flooding of your plants. Blackberries thrive best in well-drained soils and high air flow and should be planted between December to February. Pollination of the plant is very important to ensure the quality and quantity of the fruit produced; blackberries range from self-fruitful to self-unfruitful depending on the cultivar. ‘Apache’, ‘Flordagrand’, and ‘Choctaw’ are a few examples of many blackberry cultivars available. The first year after the blackberry has been established, it will only produce new shoots with no berries. These shoots are called primocanes. The second year, berries will produce on these shoots and then be called floricanes. It is important to cut the tip off the primocanes after they have reached about 3 ft in height to encourage the shoot to create lateral branches. Floricanes will die off after they have produced fruit. Trellises can be used as well to encourage the plant to grow upright and off the ground.
For more information, please use the following links:
https://edis.ifas.ufl.edu/publication/MG359
https://edis.ifas.ufl.edu/publication/MG368
https://edis.ifas.ufl.edu/publication/HS104