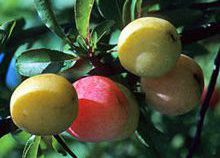
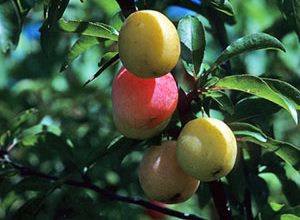
The Chickasaw plum is covered in beautiful small white flowers in the spring. Photo credit: UF IFAS
The native Chickasaw plum is a beautiful smaller tree (12-20 ft mature height) that is perfect for front yards, small areas, and streetscapes. True to its name, the Chickasaw plum was historically an important food source to Native American tribes in the southeast, who cultivated the trees in settlements well before the arrival of Europeans. They typically harvested and then dried the fruit to preserve it. Botanist-explorer William Bartram noted the species during his travels through the southeast in the 1700’s. He rarely saw it in the forests, and hypothesized that it was brought over from west of the Mississippi River.
One of the first trees to bloom each spring, the Chickasaw plum’s white, fragrant flowers and delicious red fruit make it charmingly aesthetic and appealing to humans and wildlife alike. The plums taste great eaten fresh from the tree but can be processed into jelly or wine. Chickasaw plums serve as host plants for the red spotted purple butterfly and their fruit make them popular with other wildlife. These trees are fast growers and typically multi-trunked.
Almost any landscape works for the Chickasaw plum, as it can grow in full sun, partial sun, or partial shade, and tolerates a wide variety of soil types. The species is very drought tolerant and performs well in sandy soils.
The plum is in the rose family and has thorns, so it is wise to be aware of these if young children might play near the tree.
Winter is ideal tree-planting time in Florida. While national Arbor Day is in spring, Florida’s Arbor Day is the 3rd Friday of January due to our milder winters.
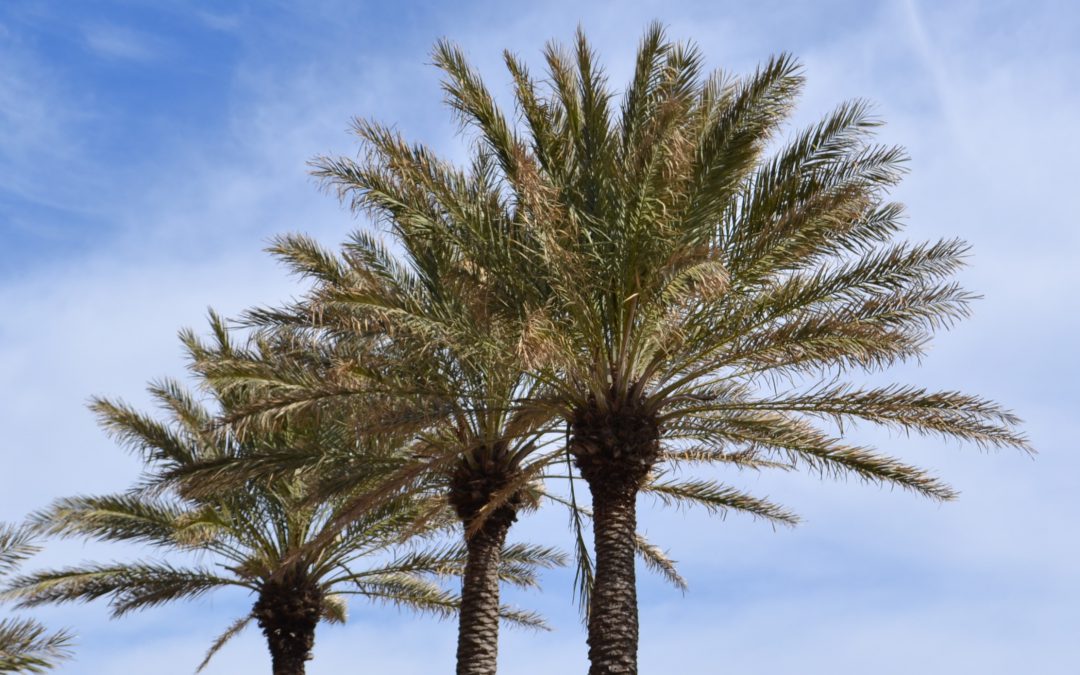
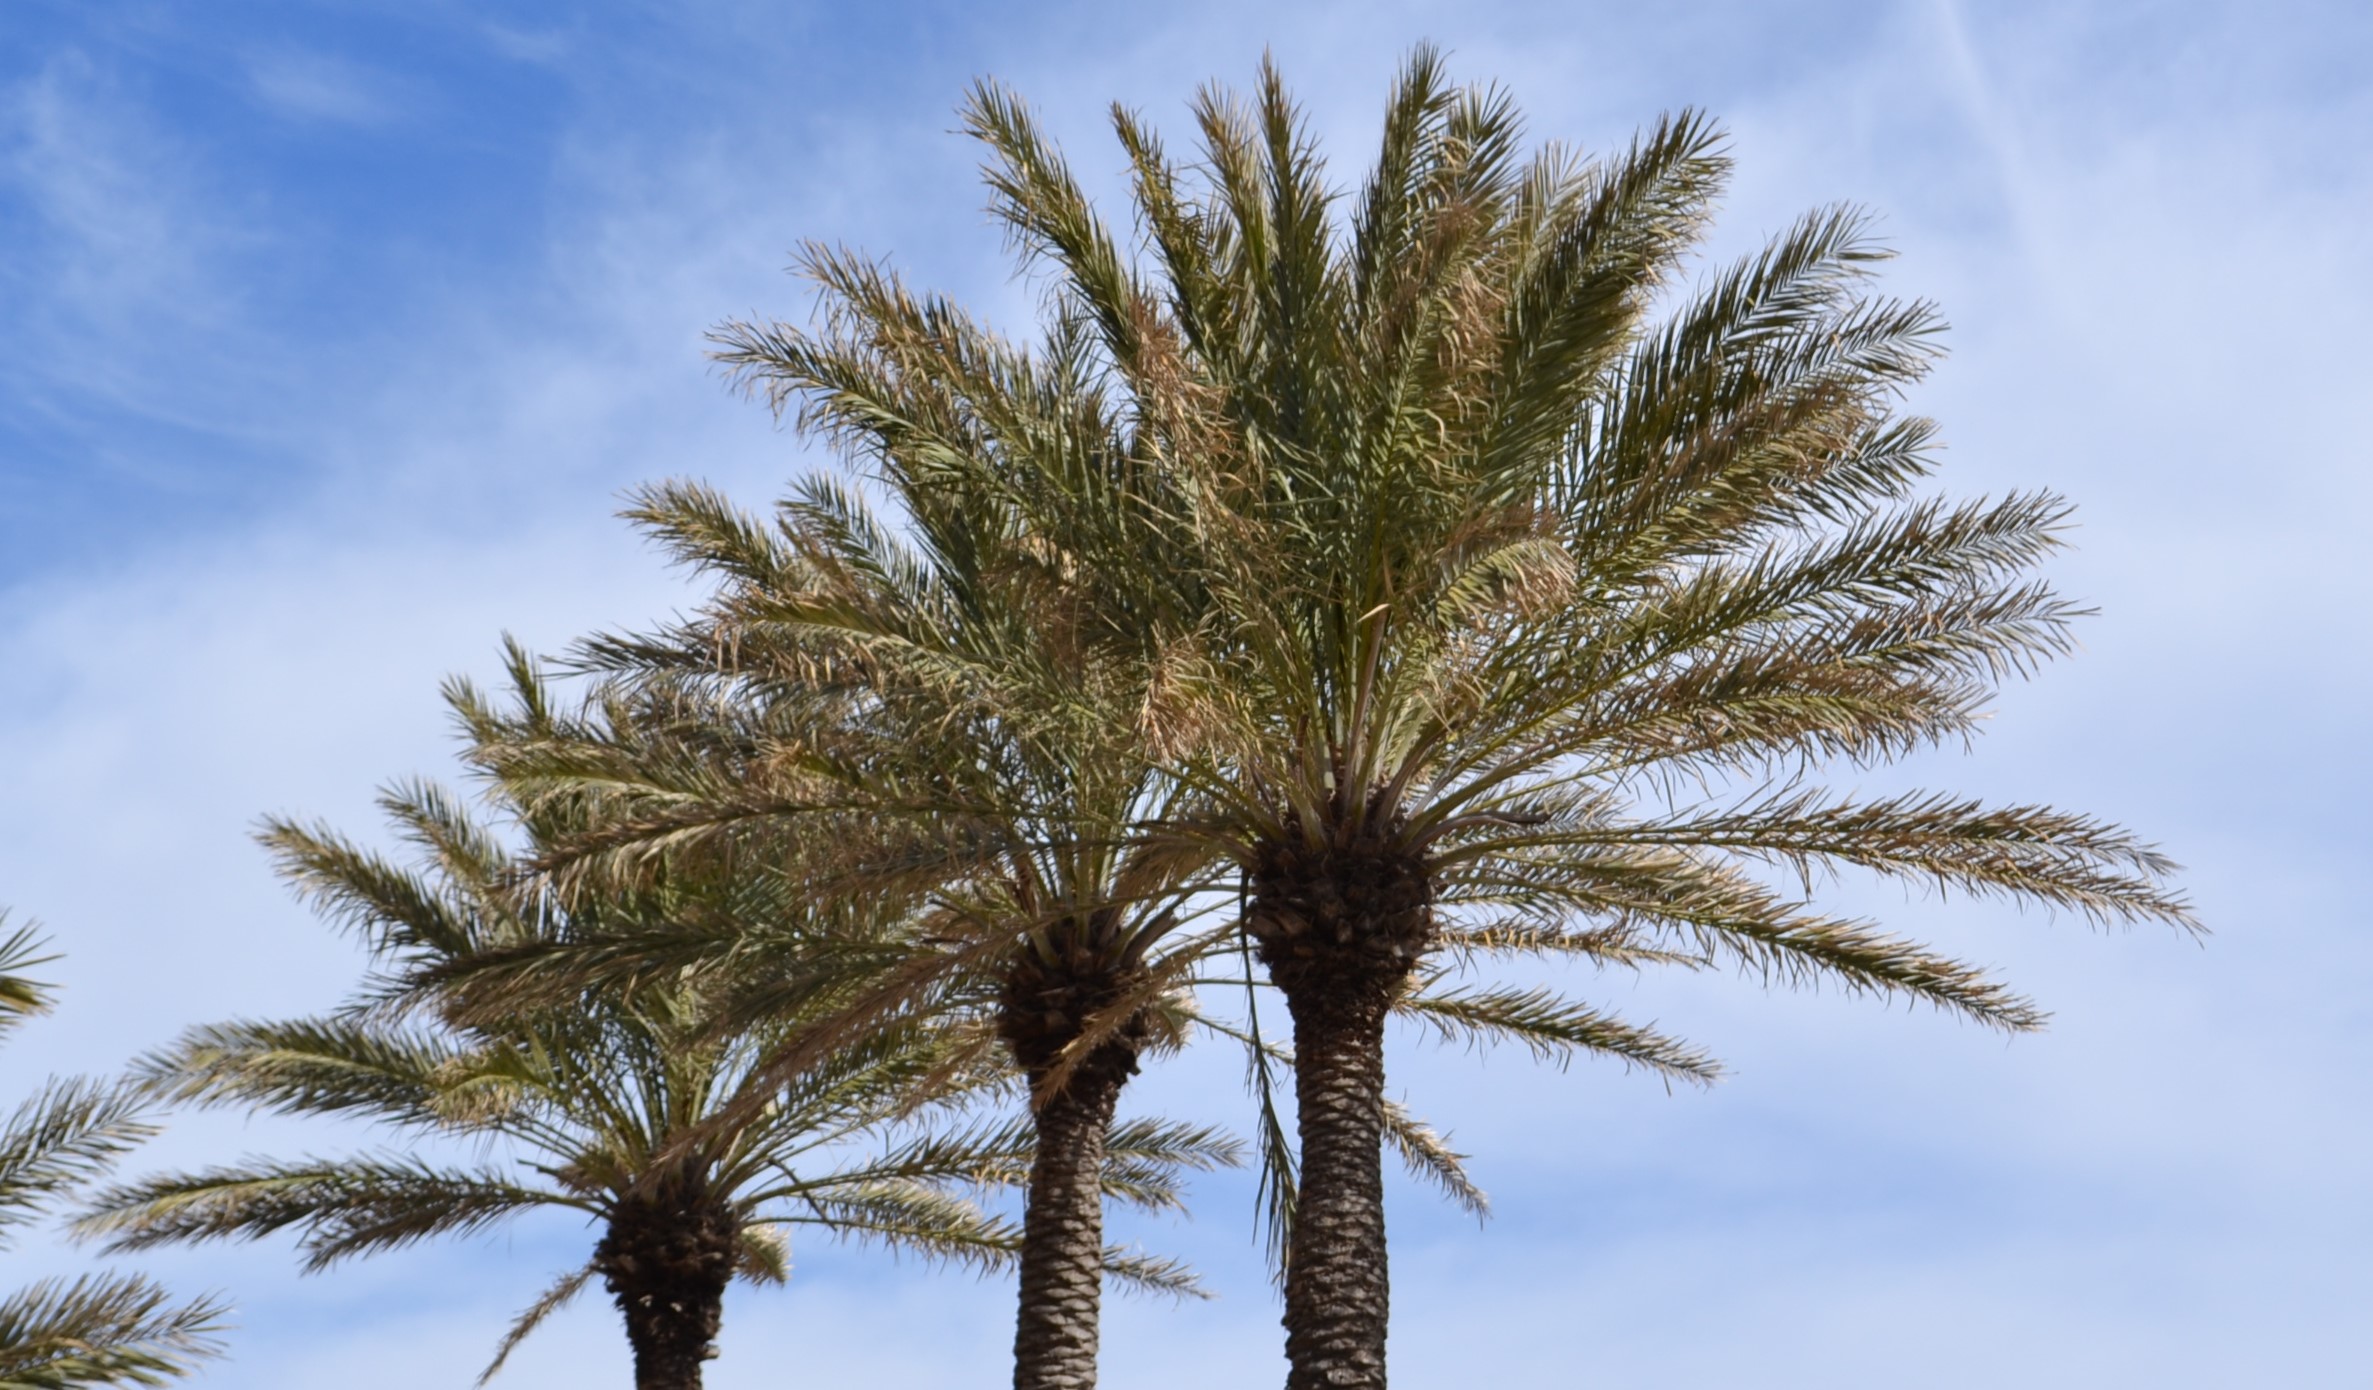
Interest in cultivating date palms in North Florida is on the rise. Highly regarded by gardening enthusiasts, the date palm is grown as an ornamental and for its delicious fruits with the added bonus of medicinal properties.
Growing date palm in North Florida poses challenges due to the region’s moist and cooler climate with temperatures occasionally dipping below freezing. Date palms, which typically thrive in hot, arid conditions, include two notable species: True date palm (Phoenix dactylifera) renowned for its tasty fruit and the Canary Island date palm (Phoenix canariensis), known for its substantial size and edible but less flavorful fruits. There is also (Phoenix sylvestris), known as the Sylvester date palm or wild date palm.
Date palm damaged by freezing temperatures. Photo by Beth Bolles, UF IFAS Extension Escambia County
Characterized by a slow growth rate, date palms can, in certain environments, grow to towering heights of up to 80 feet. Their pinnately compound leaves, ranging from blue-green to gray-green, can stretch up to 20 feet in length, featuring leaflets of 1 to 2 feet that form a distinctive “V” shape along the rachis. Date palms possess ornamental appeal, thanks to its textured trunk, striking blue-green foliage, and vibrant orange inflorescences. However, date palms do generate some concern because of the litter created by its fallen fruits. Its wide crown offers limited shade due to its relatively sparse canopy.
To flourish, date palms require well-drained, neutral to acidic soil and an abundance of direct sunlight. A plus is their ability to thrive in confined root spaces. North Florida’s sporadic frost and cold spells necessitate protective measures for date palms during the colder months, such as covering them with frost cloth or employing mulch around the base to insulate the roots. Some palm enthusiast grows them in sheltered location but occasional freeze damage to foliage can be expected.
Alternatives
Gardeners in North Florida seeking a cold-hardy alternative might try the pindo palm (Butia odorata), which is an excellent choice. Although it isn’t a true date palm, its feathery fronds provide a tropical ambiance to the landscape. Other palm species adaptable to North Florida’s wintry conditions include windmill palms, needle palms, and sabal palms. These options vary in their ultimate height and visual characteristics.
While it’s possible to grow date palms in North Florida, it’s important to understand that success may not be guaranteed, and you may need to provide extra care and protection to help your trees thrive in the region’s climate.
For more information contact your local extension office or visit:
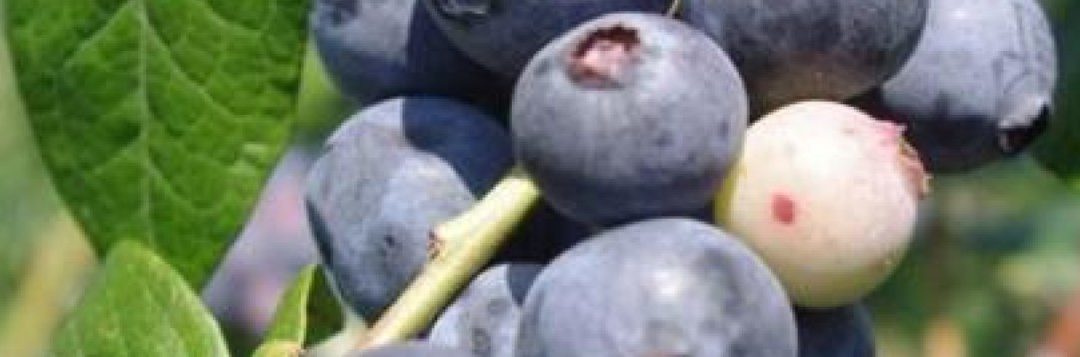
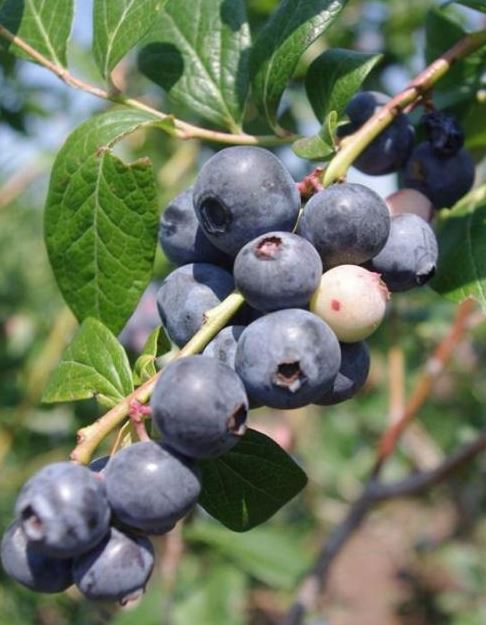
There are fruit types that grow well in North Florida and that do not require a lot of space. For high yields they do need a spot that gets direct sun for at least half the day. An area only 10 by 10 feet can support a gratifying amount of fruit production.
Some of the best fruit choices for small areas are rabbiteye blueberries, blackberries and muscadine grapes.
The rabbiteye blueberry is native to the Southeastern United States. Blueberries require a soil pH below 5.3. So, it’s advisable to have your soil tested to find out what the pH is before planting. Mixing peat moss into the soil can lower the pH, if needed. There are many rabbiteye blueberry cultivars. Be sure to plant at least two cultivars together for pollination. Here is a link with more information on blueberries for Florida. https://edis.ifas.ufl.edu/publication/MG359
All of the other fruits like a soil pH of 6.0 to 6.5. Garden lime can be used to raise the pH but only if you have the results of a reliable soil test indicating how much lime is needed. Your County Extension Office can help you determine how to have your soil tested.
Blackberries are productive if you select the correct cultivars. Cultivars adapted to Florida produce large, attractive fruit. Some are self-fruitful while others require a pollinator. Some have thorns while others are thornless. Some grow more erect while some have a trailing growth habit, requiring trellising. ‘Brazos’ is a late fruiting cultivar that does well in our area and does not require cross-pollination but it does have thorns. Here is a link with more information on blackberries for Florida. https://edis.ifas.ufl.edu/publication/hs104
The muscadine grape was one of the pleasant surprises found by the early colonists in the Southeastern United States. An extensive breeding program has resulted in many improved cultivars. Scuppernong is a variety of muscadine. Other popular varieties include ‘Cowart’, ‘Fry’, ‘Carlos’, ‘Summit’, ‘Higgins’, and ‘Nesbitt’. There are many others. Some are self-fruitful while others require a pollinator. There are cultivars that produce bronze, black, red or purple fruit. Some cultivars produce larger fruit, some have a higher sugar content and are sweeter. Muscadines are ready to harvest in late summer to early fall. Some mature early season, mid-season or late season, based on the cultivar. Here is a link with more information on muscadines for Florida. https://edis.ifas.ufl.edu/publication/HS100
Even though these fruit plants can be grown with limited space, they do require some care, including correct fertilization and pruning. Mid-December to mid-February is the best planting time for these fruit plants.
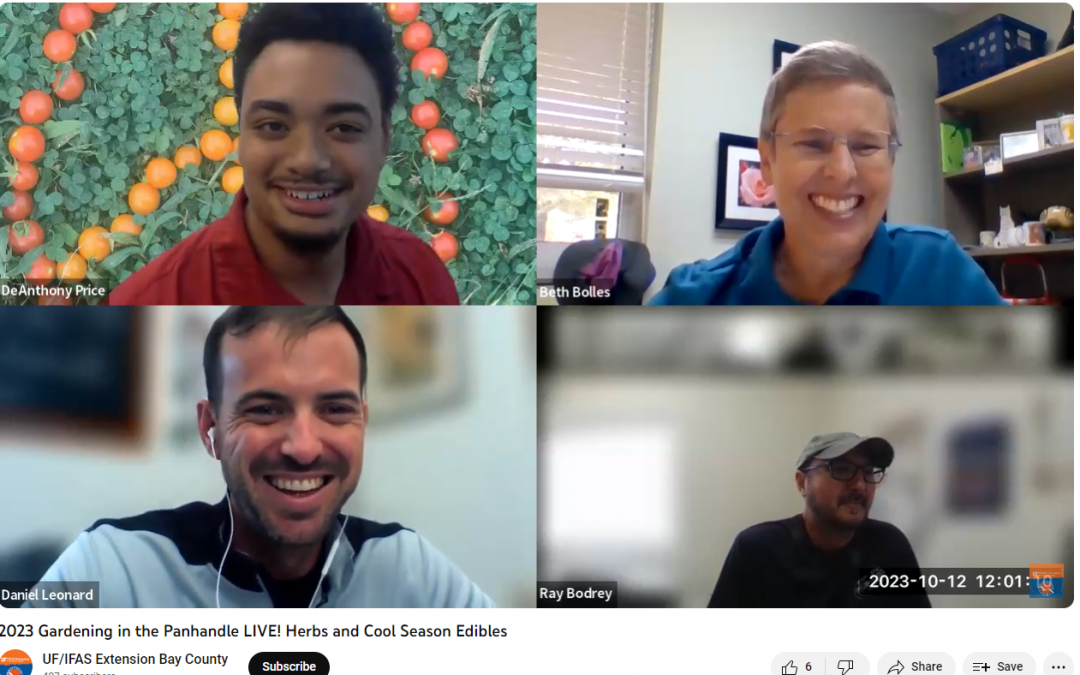
In case you missed it, you can watch our last session of Gardening in the Panhandle LIVE! that aired on October 12th by visiting our YouTube Playlist with all the past episodes of our gardening webinars.
We had a great conversation about herbs and cool season edible plants last month and this article compiles the links shared by the expert panel in the episode. Thanks for watching!
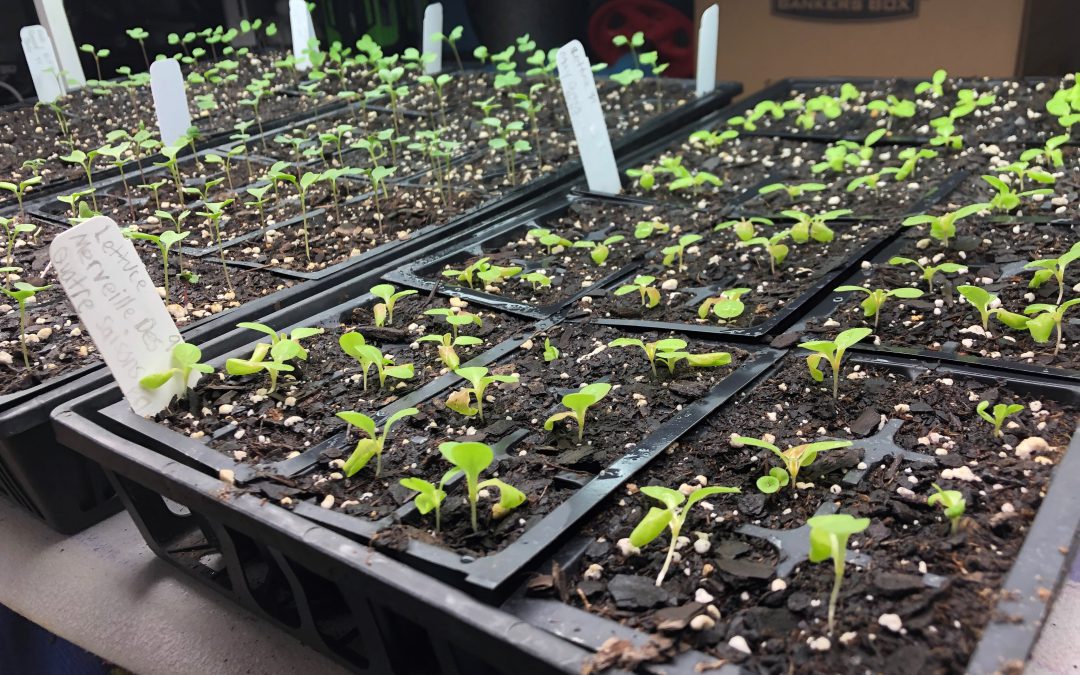
Start your fall garden seeds in containers to give them a healthy head start. Photo by Molly Jameson.Seed veggies into starter cell flats using a fine-textured growing medium designed to support seed germination and early seedling development. Photo by Molly Jameson.
Step-by-Step Instructions: Indirect Seeding Fall Veggies
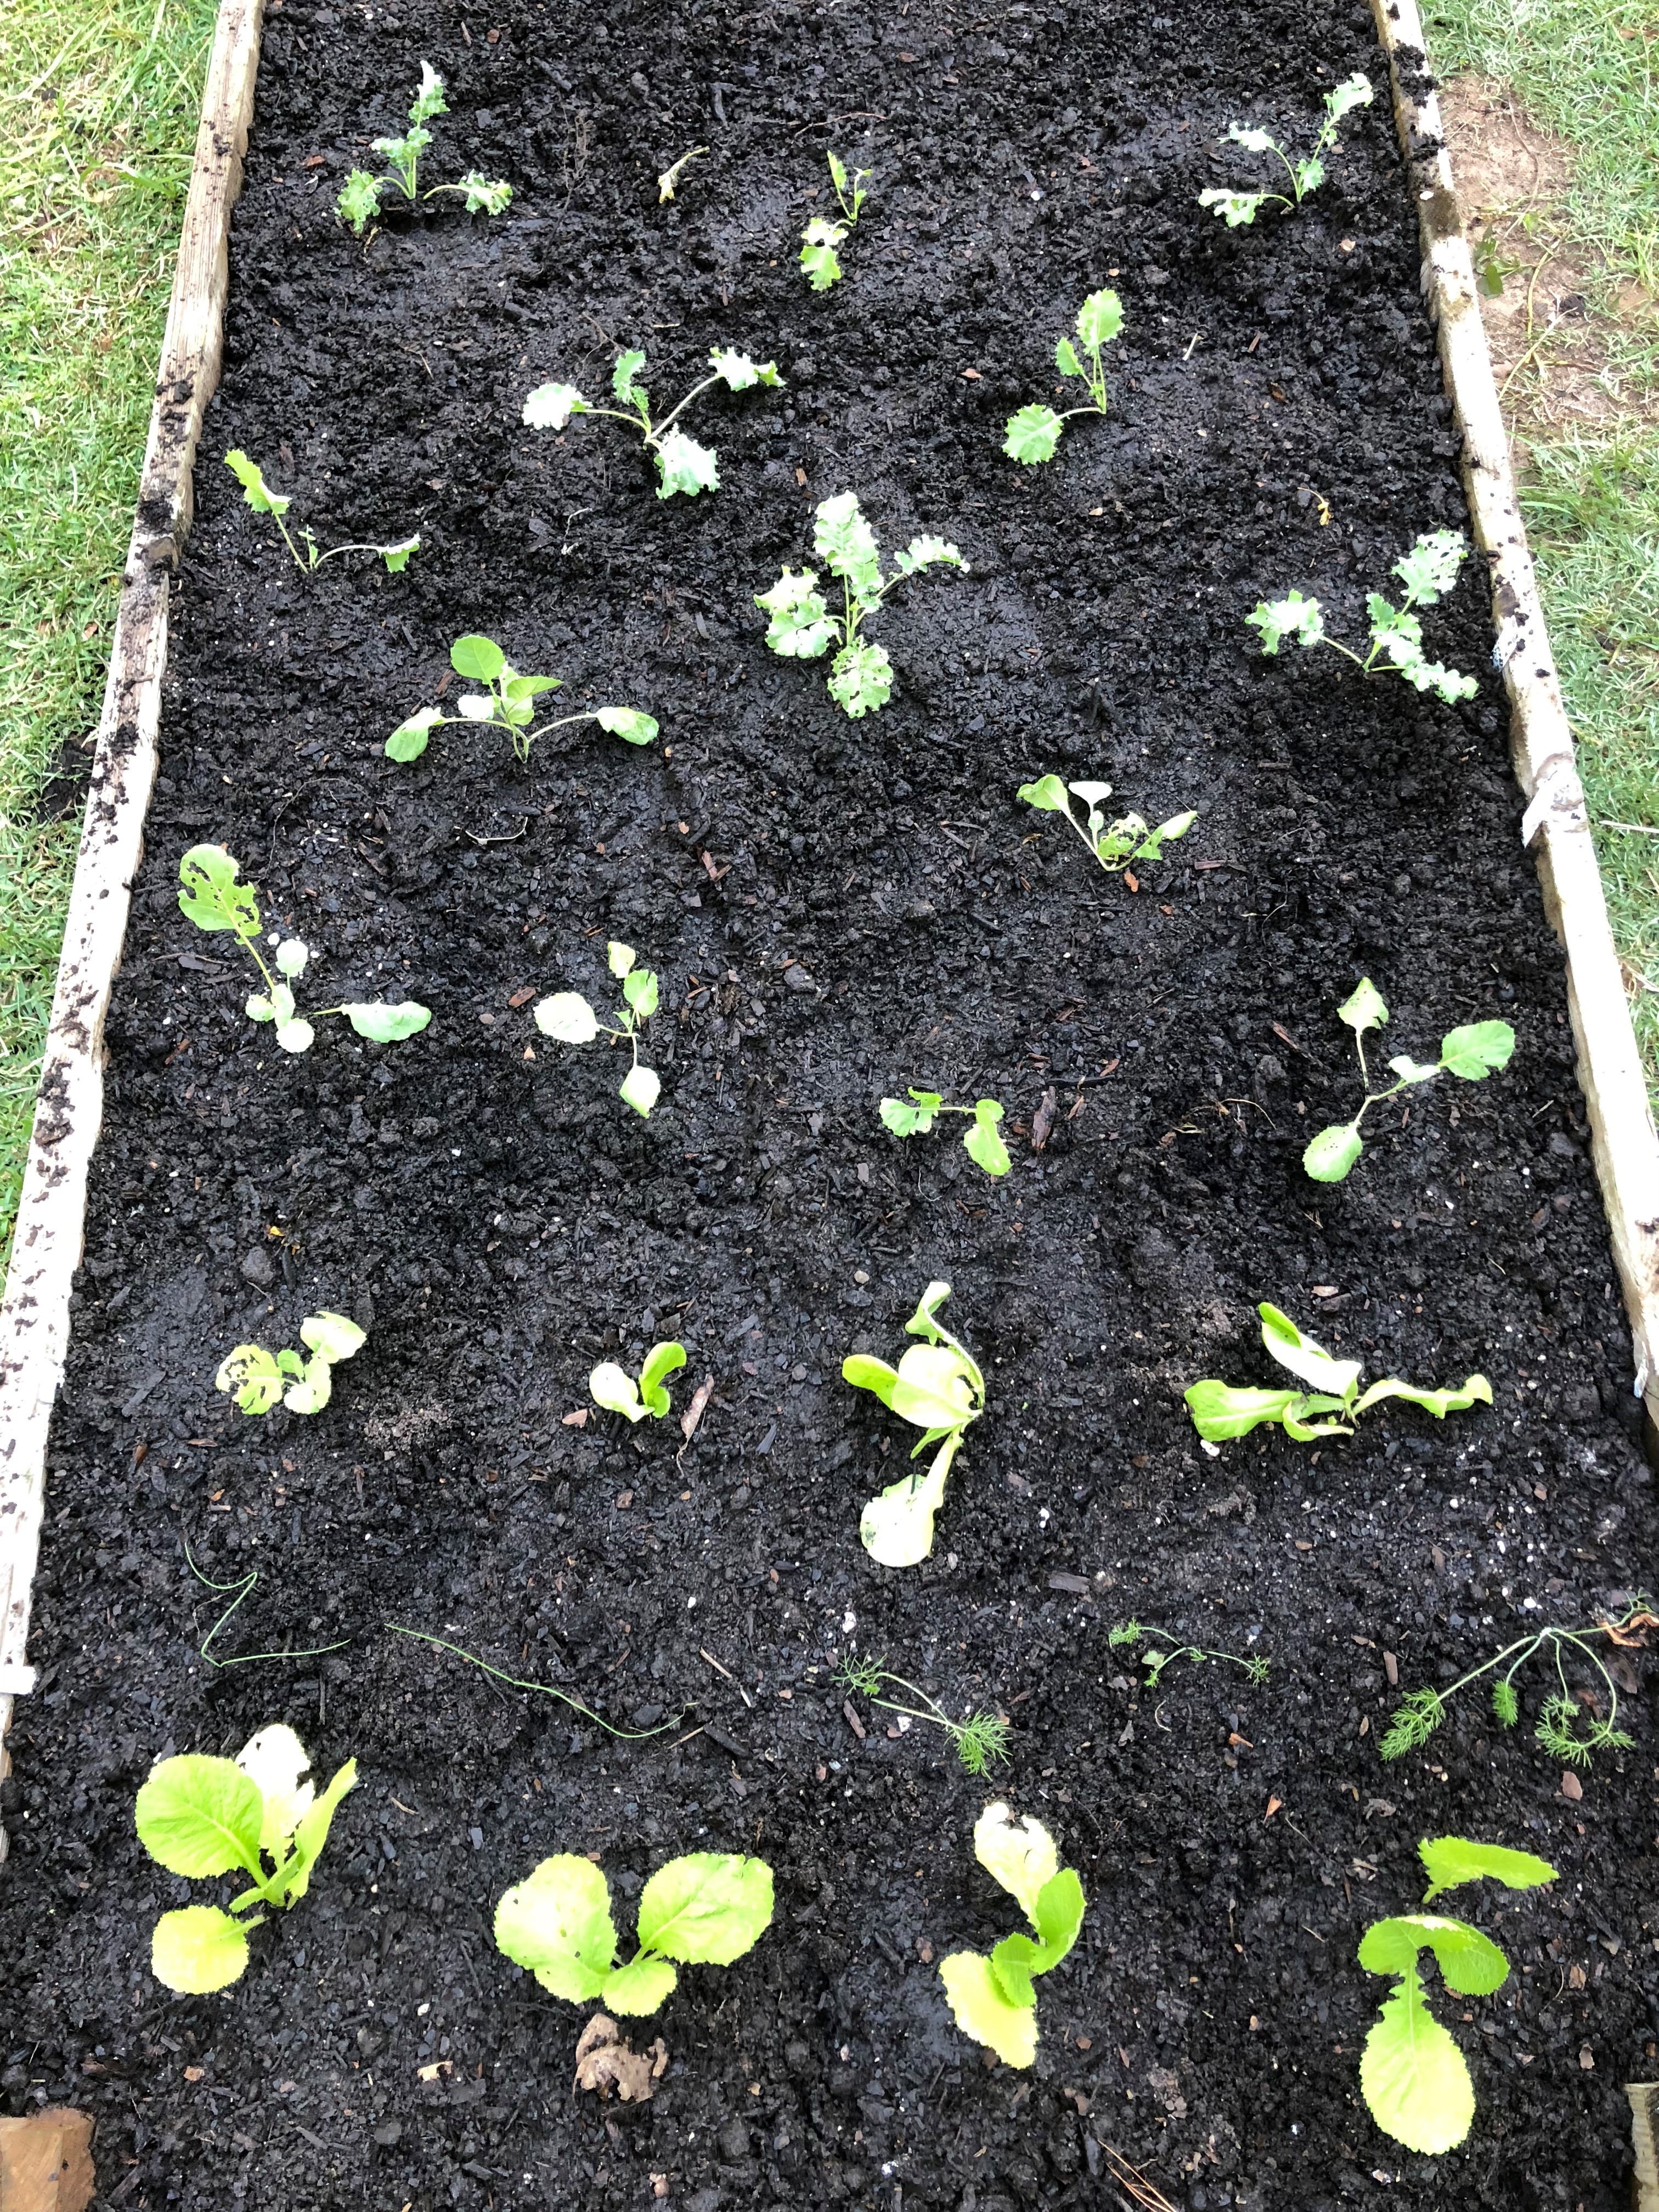
While summer gardens offer a variety of intriguing fruiting crops, I have a special fondness for gardening during the fall season. This preference stems from the reduced pest pressure, decreased need for watering, fewer weeds, and the more favorable cooler temperatures for completing gardening tasks. Although it generally offers a more straightforward gardening experience, achieving success with your fall garden still hinges on applying the right techniques, with one crucial aspect being the care for seeds and young seedlings.
Indirect seeding allows you to nurture your seedlings before they establish their permanent residence in your garden, ensuring their growth into robust, mature plants. Below, you’ll discover a step-by-step guide to indirect seeding and planting for fall vegetables. By following these instructions, you’ll get a head start in cultivating a thriving fall garden that will delight your taste buds.
Seeding into Starter Cells:
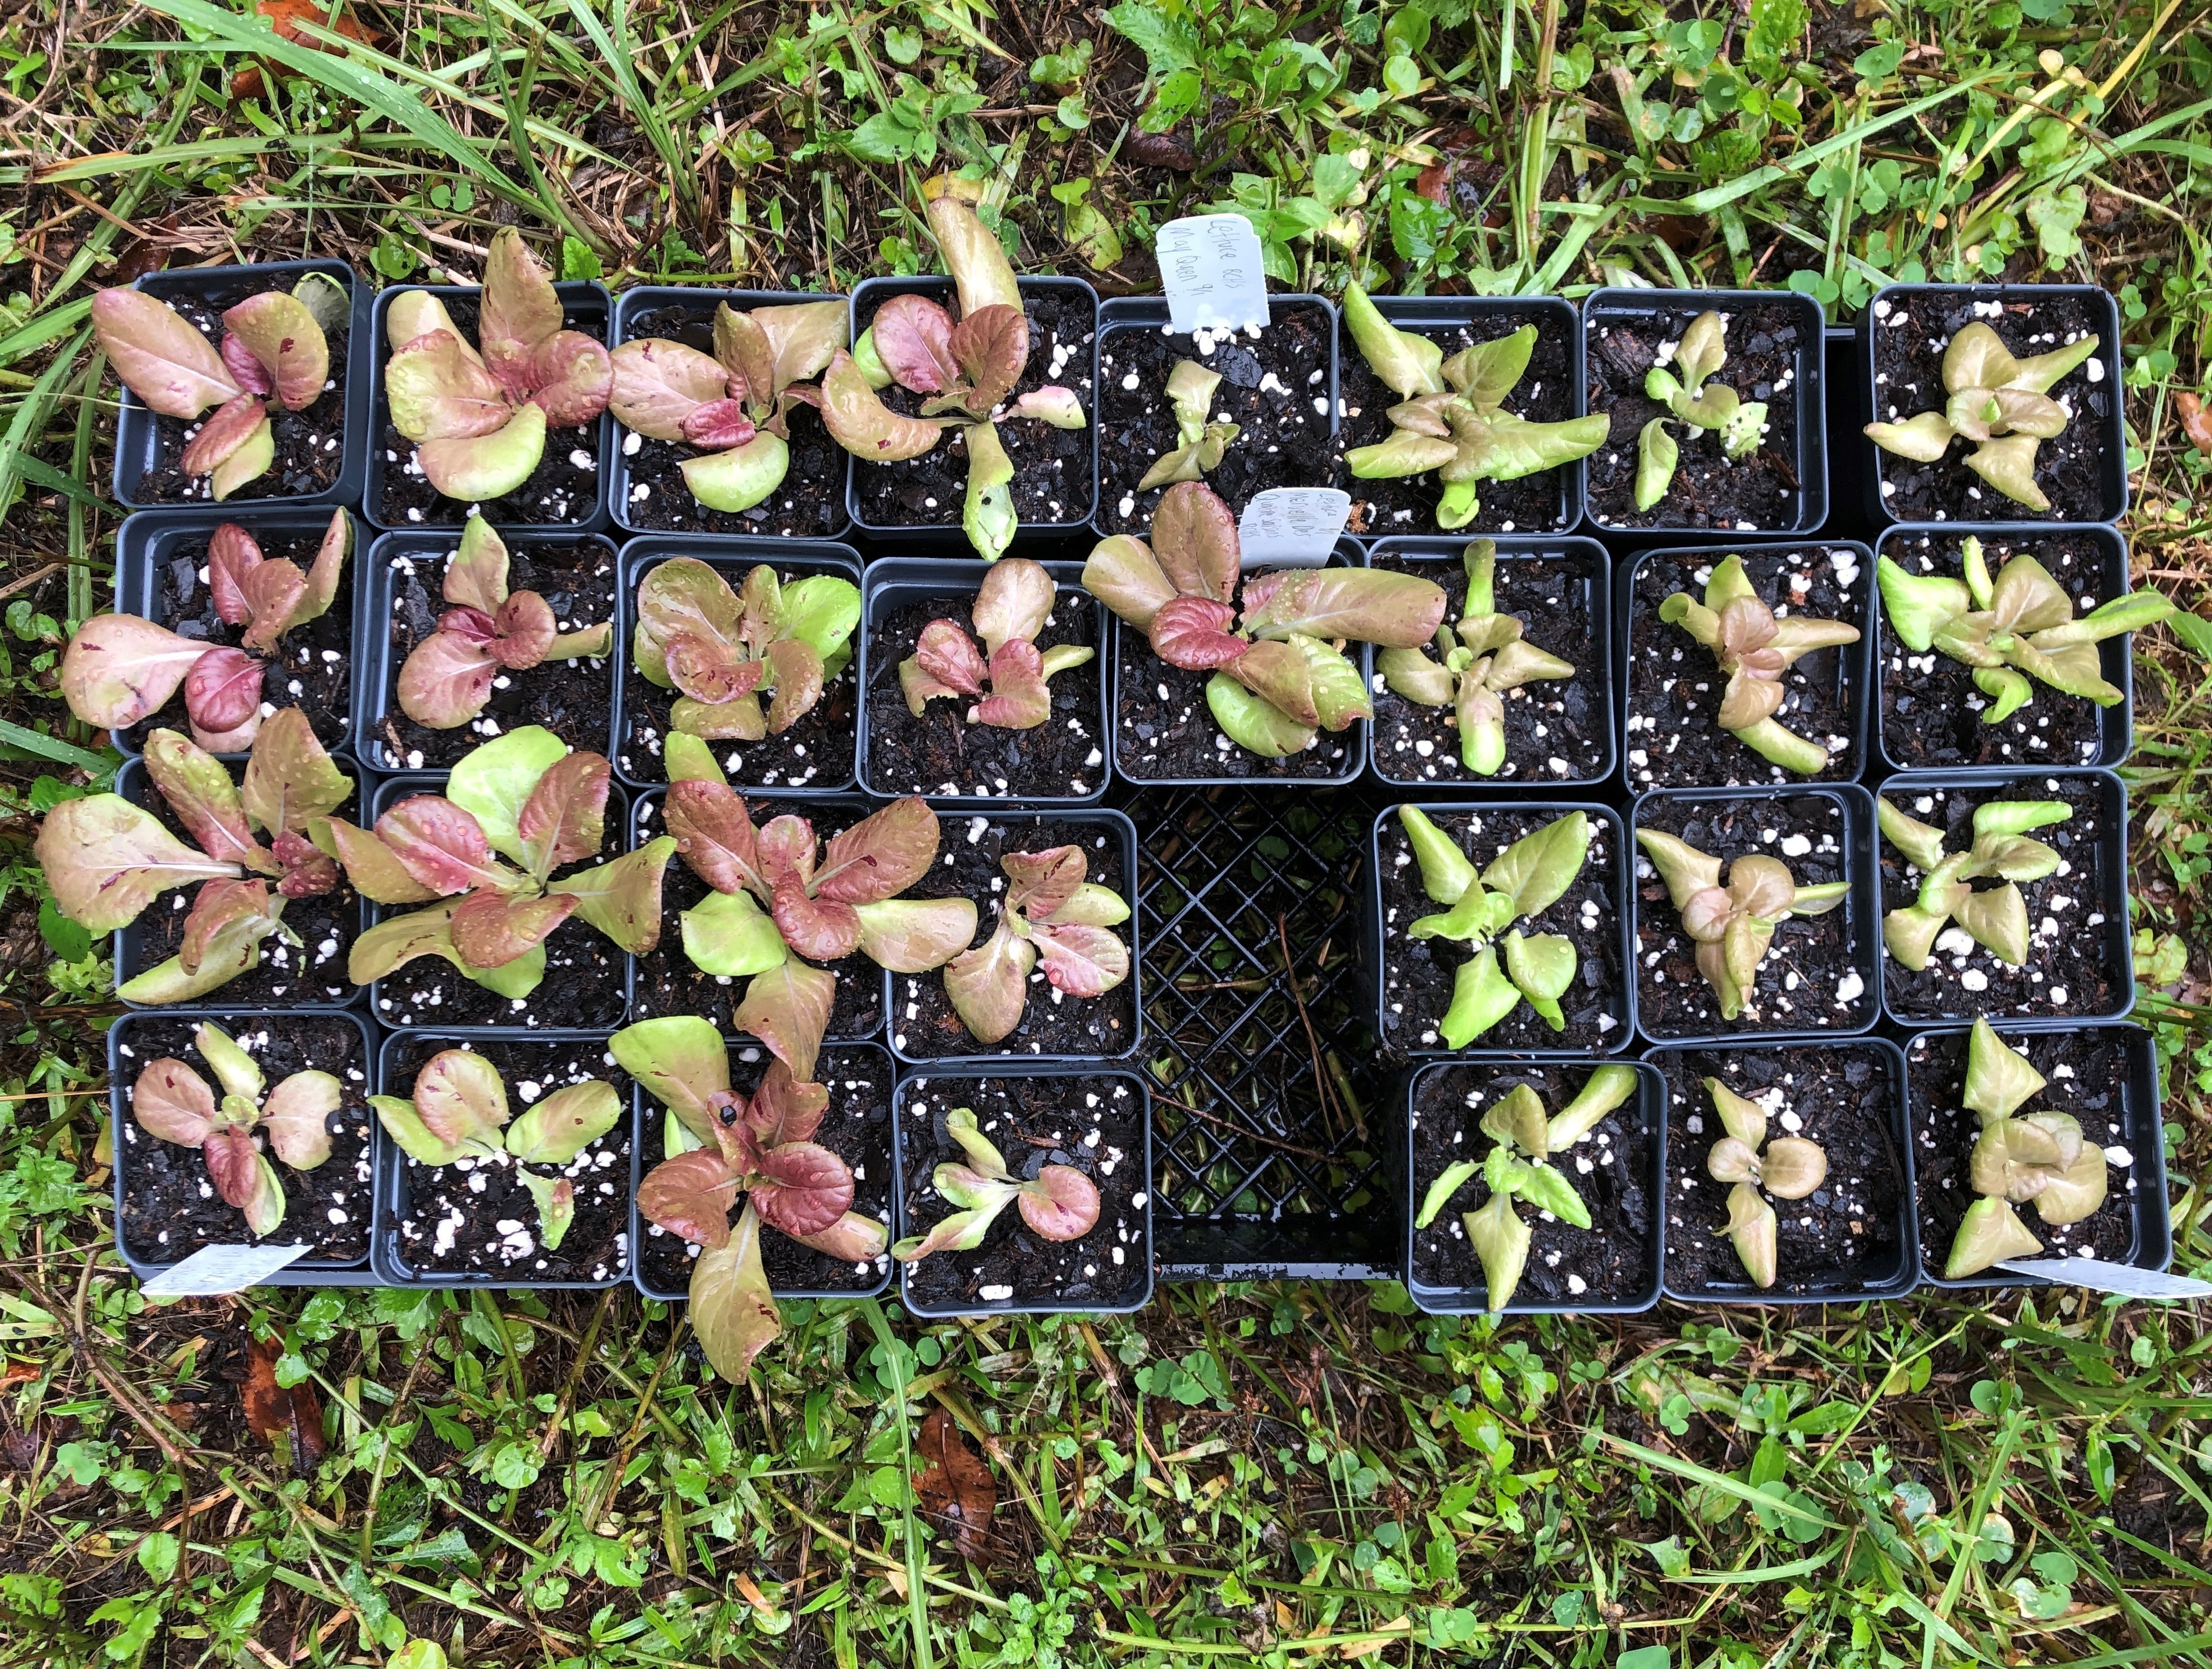
While many crops can be started indirectly in starter cells, it’s important to note that root vegetables (such as beets, carrots, radishes, turnips, etc.), peas, and beans are exceptions due to their delicate root systems, which do not transplant well. These particular crops thrive when directly seeded into the garden. Conversely, fall crops that typically benefit from indoor seeding include Brussels sprouts, broccoli, cabbage, cauliflower, cilantro, kale, lettuce, mustards, parsley, spinach, and Swiss chard. For Florida planting dates, transplant ability, and other detailed planting information, see Table 1 in the UF/IFAS publication Florida Vegetable Gardening Guide.
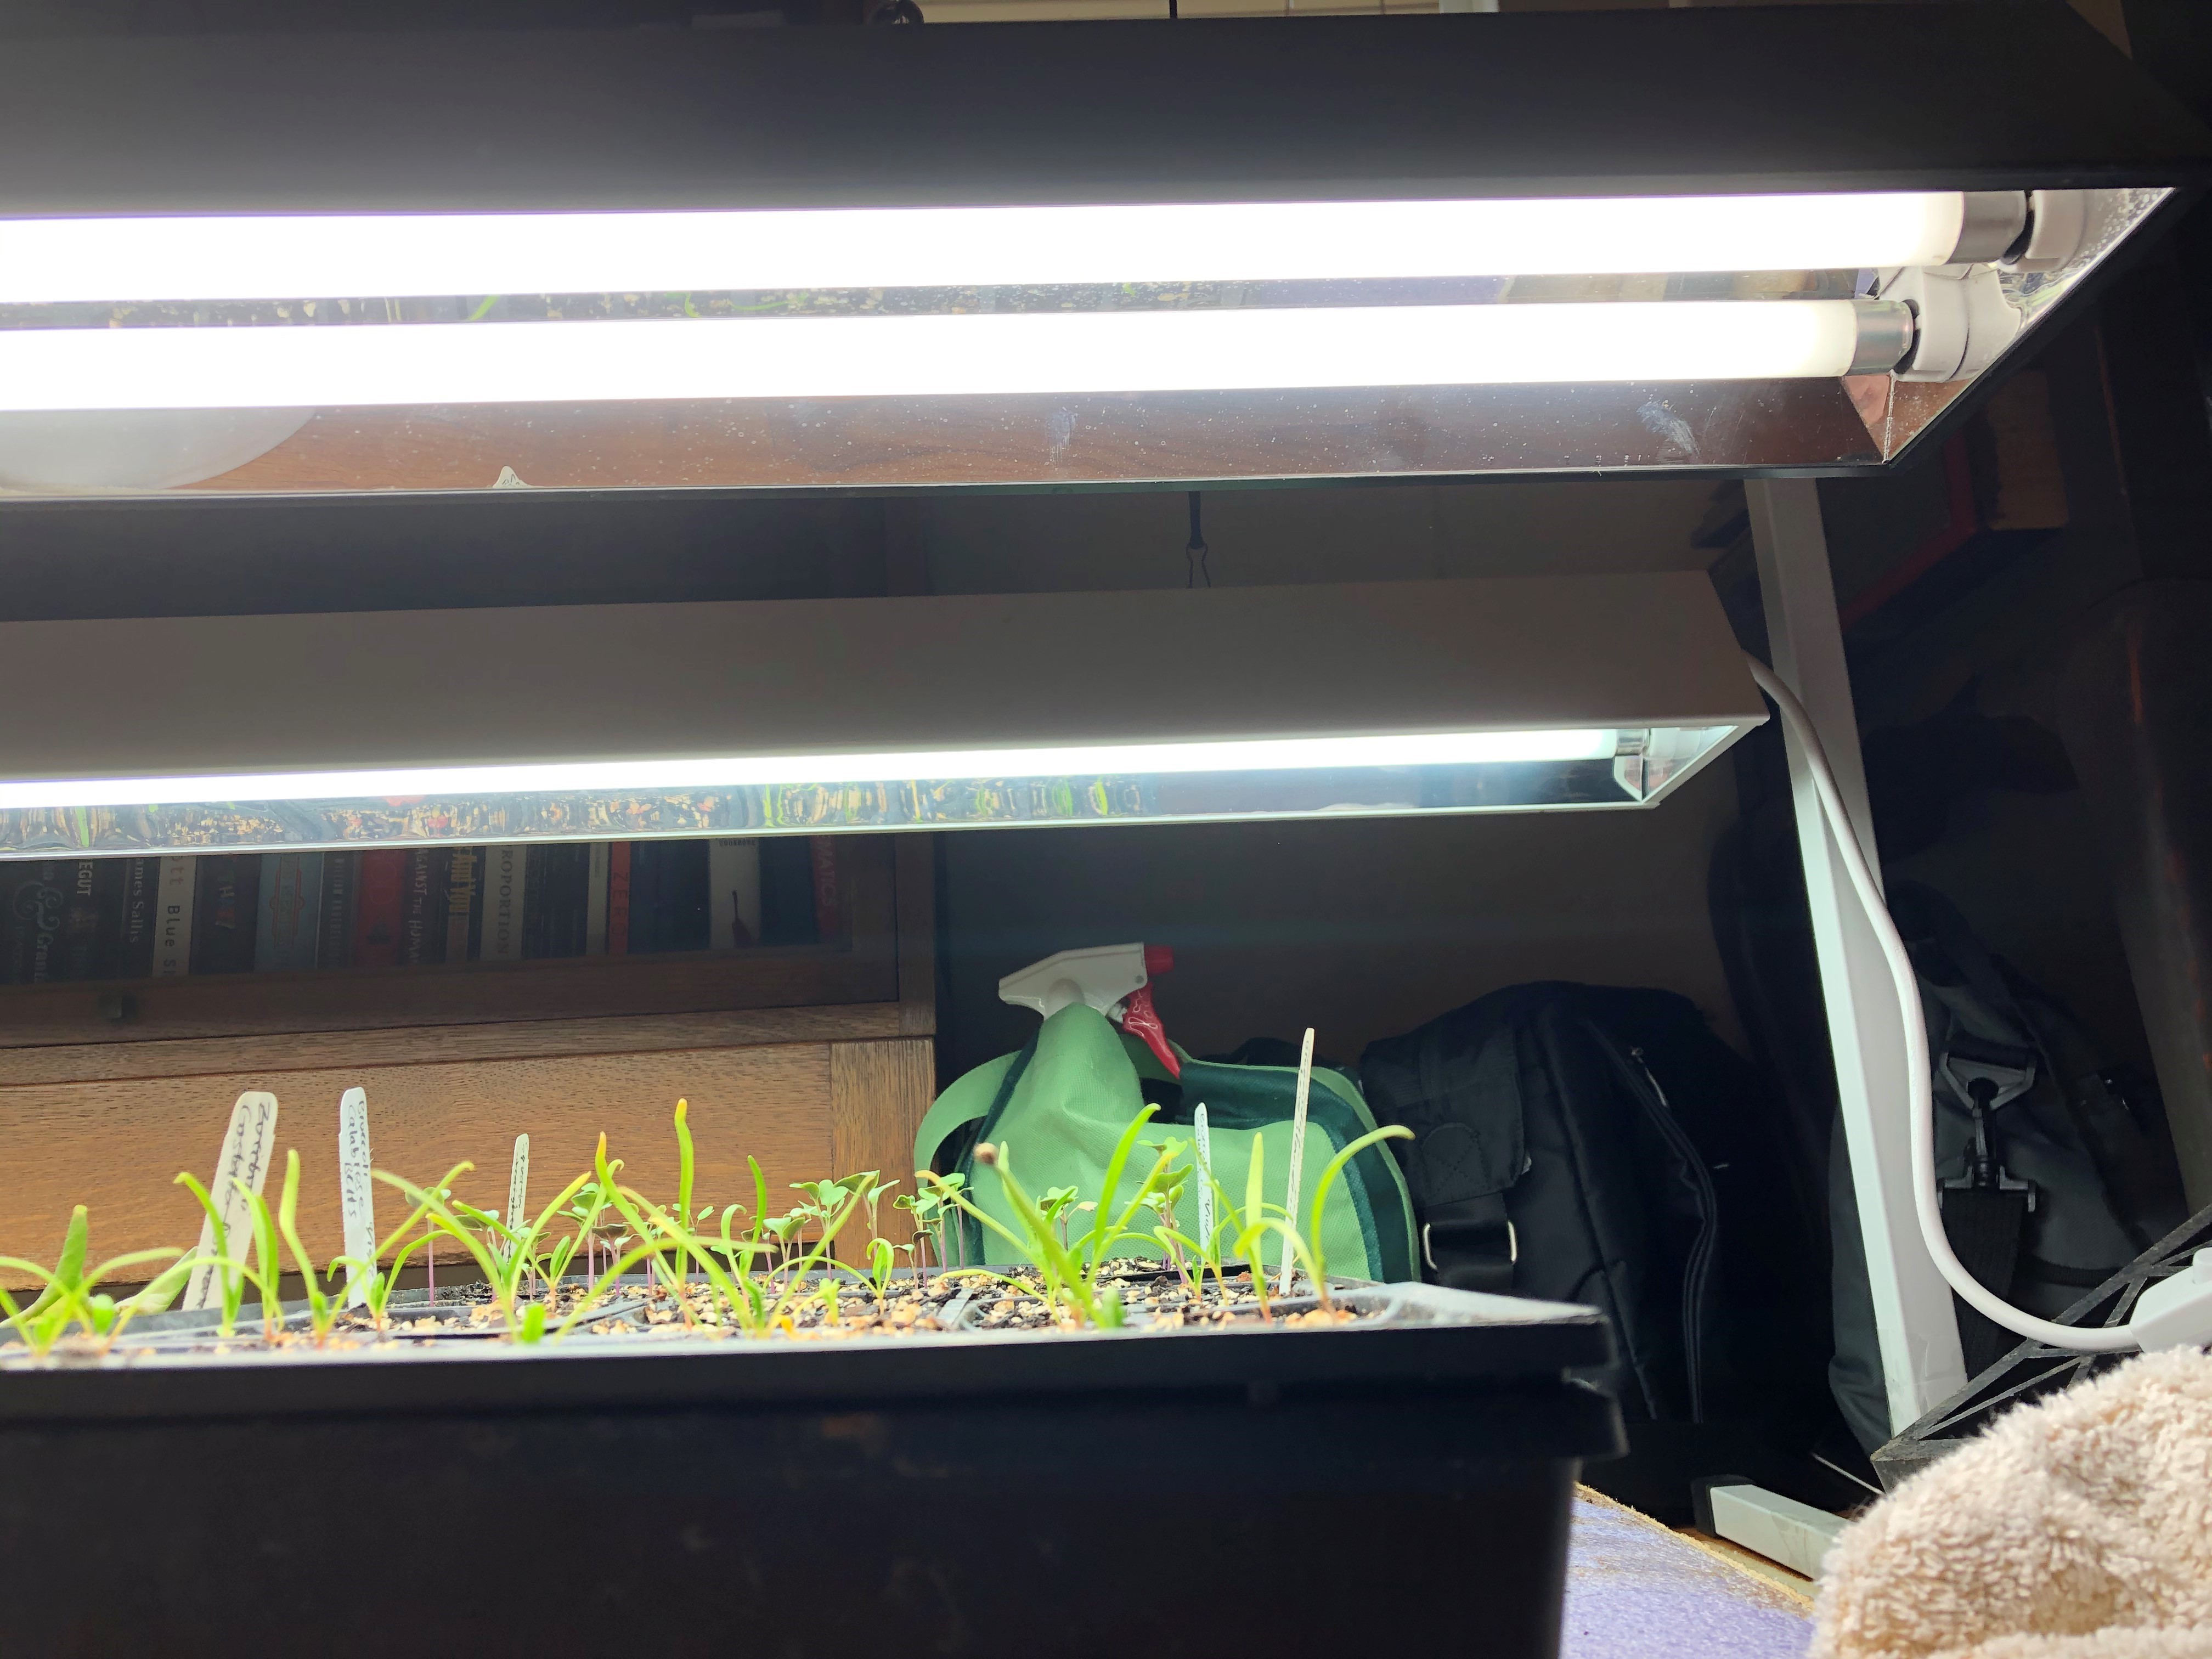
If you use fluorescent grow lights, maintain 2 to 4 inches between the top of the seedlings’ canopy and the fluorescent bulbs. Photo by Molly Jameson.
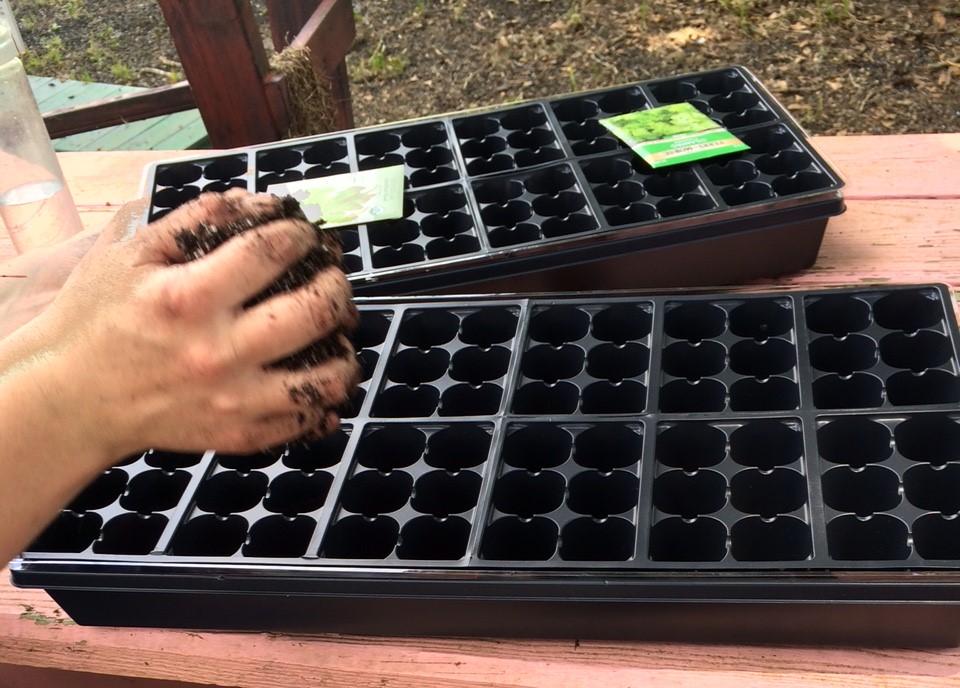
Begin by moistening a starting mix, which is any fine-textured growing medium designed to support seed germination and early seedling development. Fill seed starter cells with this prepared mix, ensuring a level, flat surface.
Create shallow indentations (2-3 times the diameter of the seed) in the starting mix in each starter cell using your finger and place 1-2 seeds in each cell. (Remove all but the strongest seedling if multiple seeds germinate in the same cell.)
To ensure even coverage and prevent clumping, lightly sprinkle dry starting mix over the seeds.
Label with the crop name, variety, and date.
Mist the surface with water from a spray bottle, pump sprayer, or a hose spray nozzle. Maintain moisture levels, avoiding waterlogging.
Before the seeds germinate, keep them in a temperature-controlled room or out of direct sunlight. Germination time varies, but typically takes 5 to 14 days, depending on the crop, environmental conditions, and seed quality. (For fall varieties, germination is best between 50-80°F.)
As soon as seedlings emerge, move them to a sunny location with more than 6 hours of direct sunlight. If temperatures exceed 85°F, provide afternoon shade to protect them from intense heat. If using full spectrum grow lights indoors (such as a T5 fluorescent light fixture), place seed starter cells at a distance of 2 to 4 inches between the top of the seedlings’ canopy and the fluorescent bulbs for 14 to 16 hours a day.
Continue to keep the starting mix moist but not waterlogged.
Up-potting into Larger Pots:
Up-potting refers to transplanting a young plant or seedling from a smaller container or pot into a larger one. While up-potting most seedling crop varieties into larger pots before transplanting into the garden is beneficial, you can skip this step and directly transplant seedlings from the starter cells into the garden if conditions are favorable (maximum air temperature is less than 86°F). However, keep in mind that young seedlings may be more vulnerable to rain, wind, insects, and animal disturbances. Up-potting into larger pots with nutrient-rich potting mix offers better protection and more time for root development.
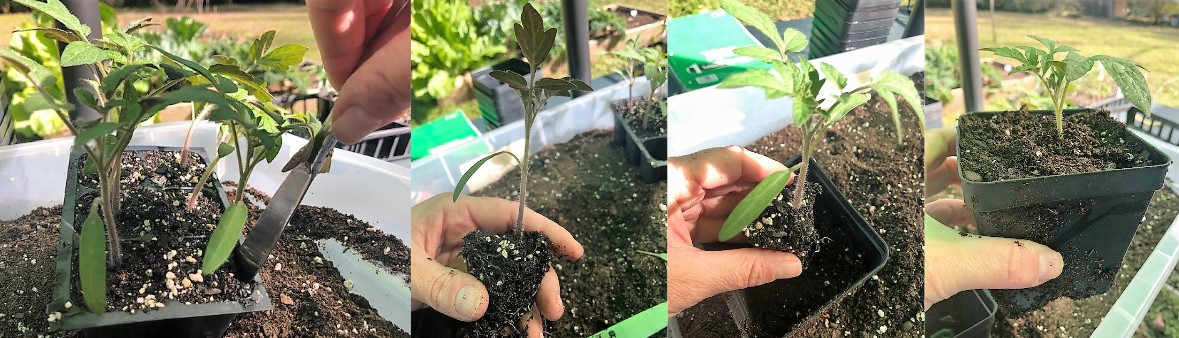
When up-potting, carefully extract each seedling using a butter knife to avoid disturbing the roots. Photos by Molly Jameson.
When seedlings develop “true leaves” (the second set of leaves after the initial seedling leaves), it is time to transfer them into larger pots (2″-4″ wide).
To start, fill the larger pots about halfway with pre-moistened, nutrient-rich potting mix designed for vegetables, ensuring good drainage.
After thoroughly watering the small seedlings, carefully extract each from the starter cells, using a butter knife for gentle and precise removal to avoid disturbing the roots.
Being careful not to disturb the roots, place each seedling gently into their halfway-filled pot and add more potting mix until the seedling is secure, standing upright, with all roots covered. There should only be one seedling per pot.
Keep seedlings in a sunny location with more than 6 hours of direct sunlight. If temperatures exceed 85°F, provide afternoon shade to protect them from intense heat. If using full spectrum grow lights indoors (such as a T5 fluorescent light fixture), place seedlings at a distance of 4 to 6 inches between the top of the seedlings’ canopy and the fluorescent bulbs for 12 to 14 hours a day.
Continue to keep the potting soil moist but not waterlogged.
Transplanting into the Garden:
When the time is right, dig a small hole in the garden bed and place the plant, along with the potting mix, in the hole, following the crop-specific spacing requirements. Photo by Molly Jameson.
Once the plants have developed strong roots and reach about the height of their pots, they are ready for transplantation into the garden.
If the plants have been indoors under grow lights, allow them to “harden-off” by gradually exposing them to outdoor conditions for a week. This helps them adjust to wind, direct sunlight, and varying temperatures.
Prepare the garden bed with compost and other soil amendments.
Water the plants thoroughly before carefully removing them from their pots, ensuring minimal disruption to the roots.
For each plant, dig a small hole in the garden bed and place the plant, along with the potting mix, in the hole, following the crop-specific spacing requirements (see Table 1 in the UF/IFAS publication Florida Vegetable Gardening Guide).
Cover the roots and maintain consistent soil moisture, avoiding waterlogging.
In summary, mastering the art of indirect seeding and planting fall vegetables can greatly improve your chance of a successful harvest. From carefully sowing your seeds in starter cells to up-potting and ultimately transplanting into your garden, each step is a vital component of the process. So, roll up your sleeves, get your hands dirty, and witness your fall garden flourish. Happy gardening!
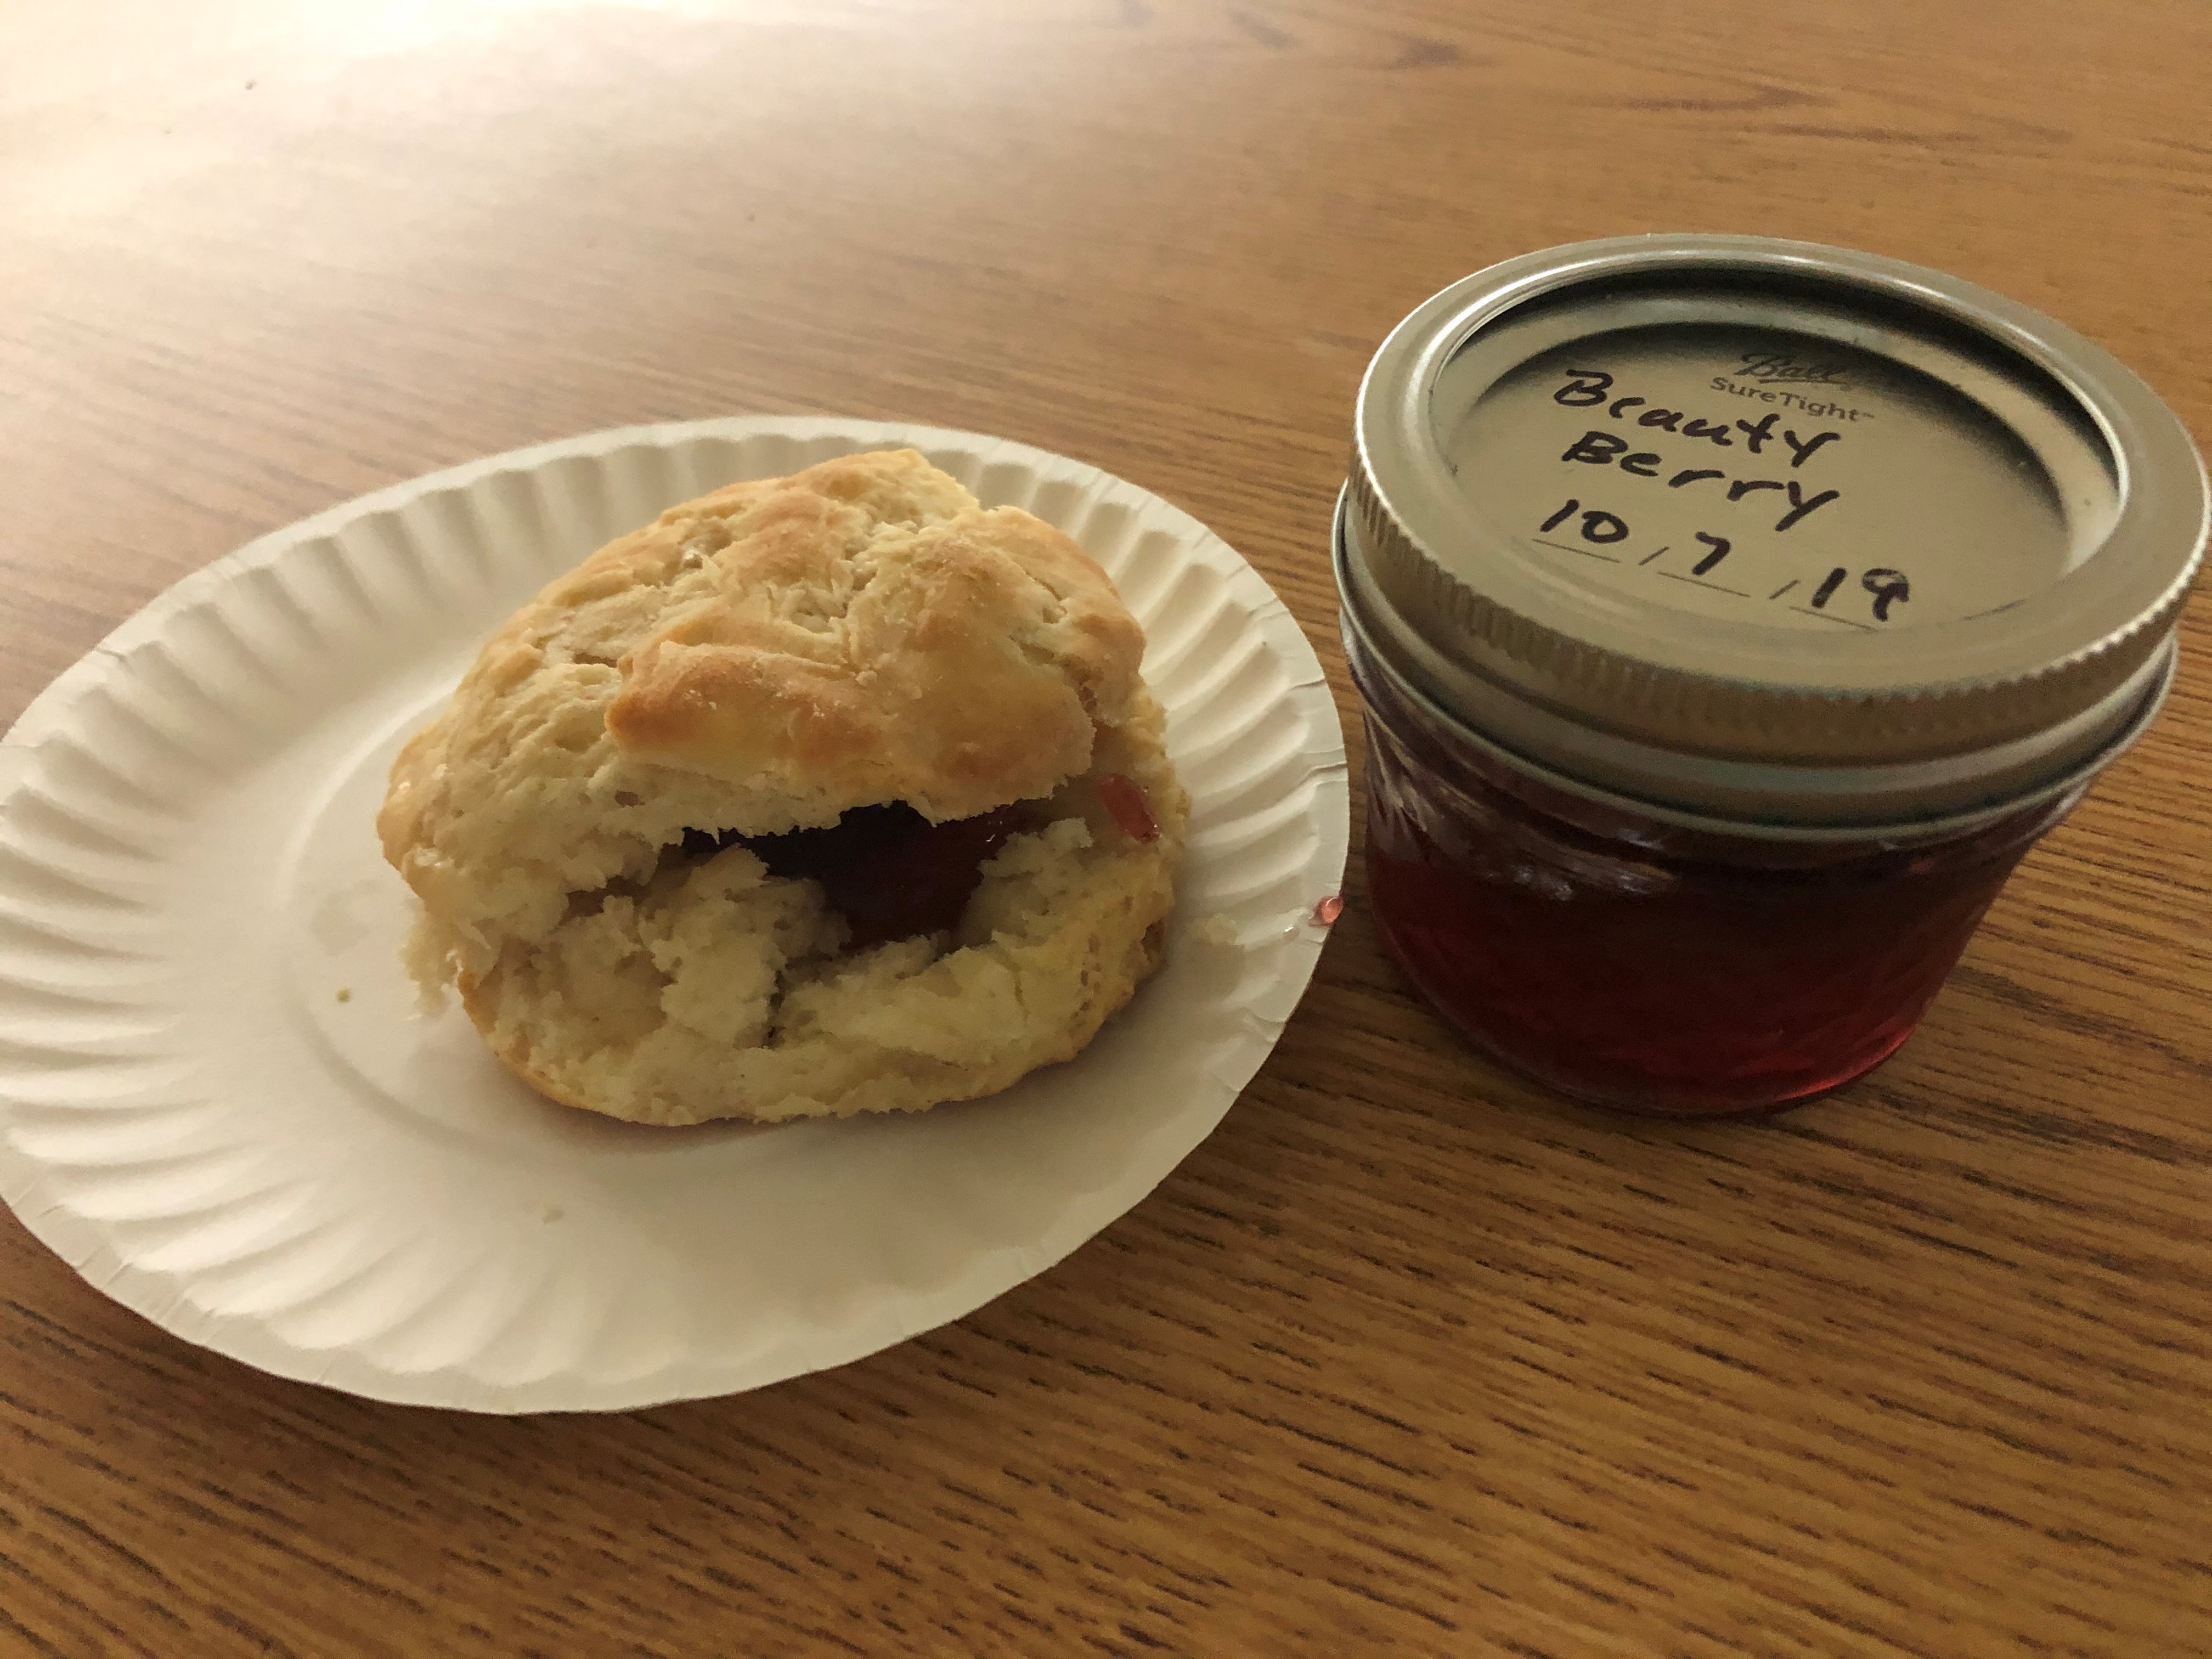
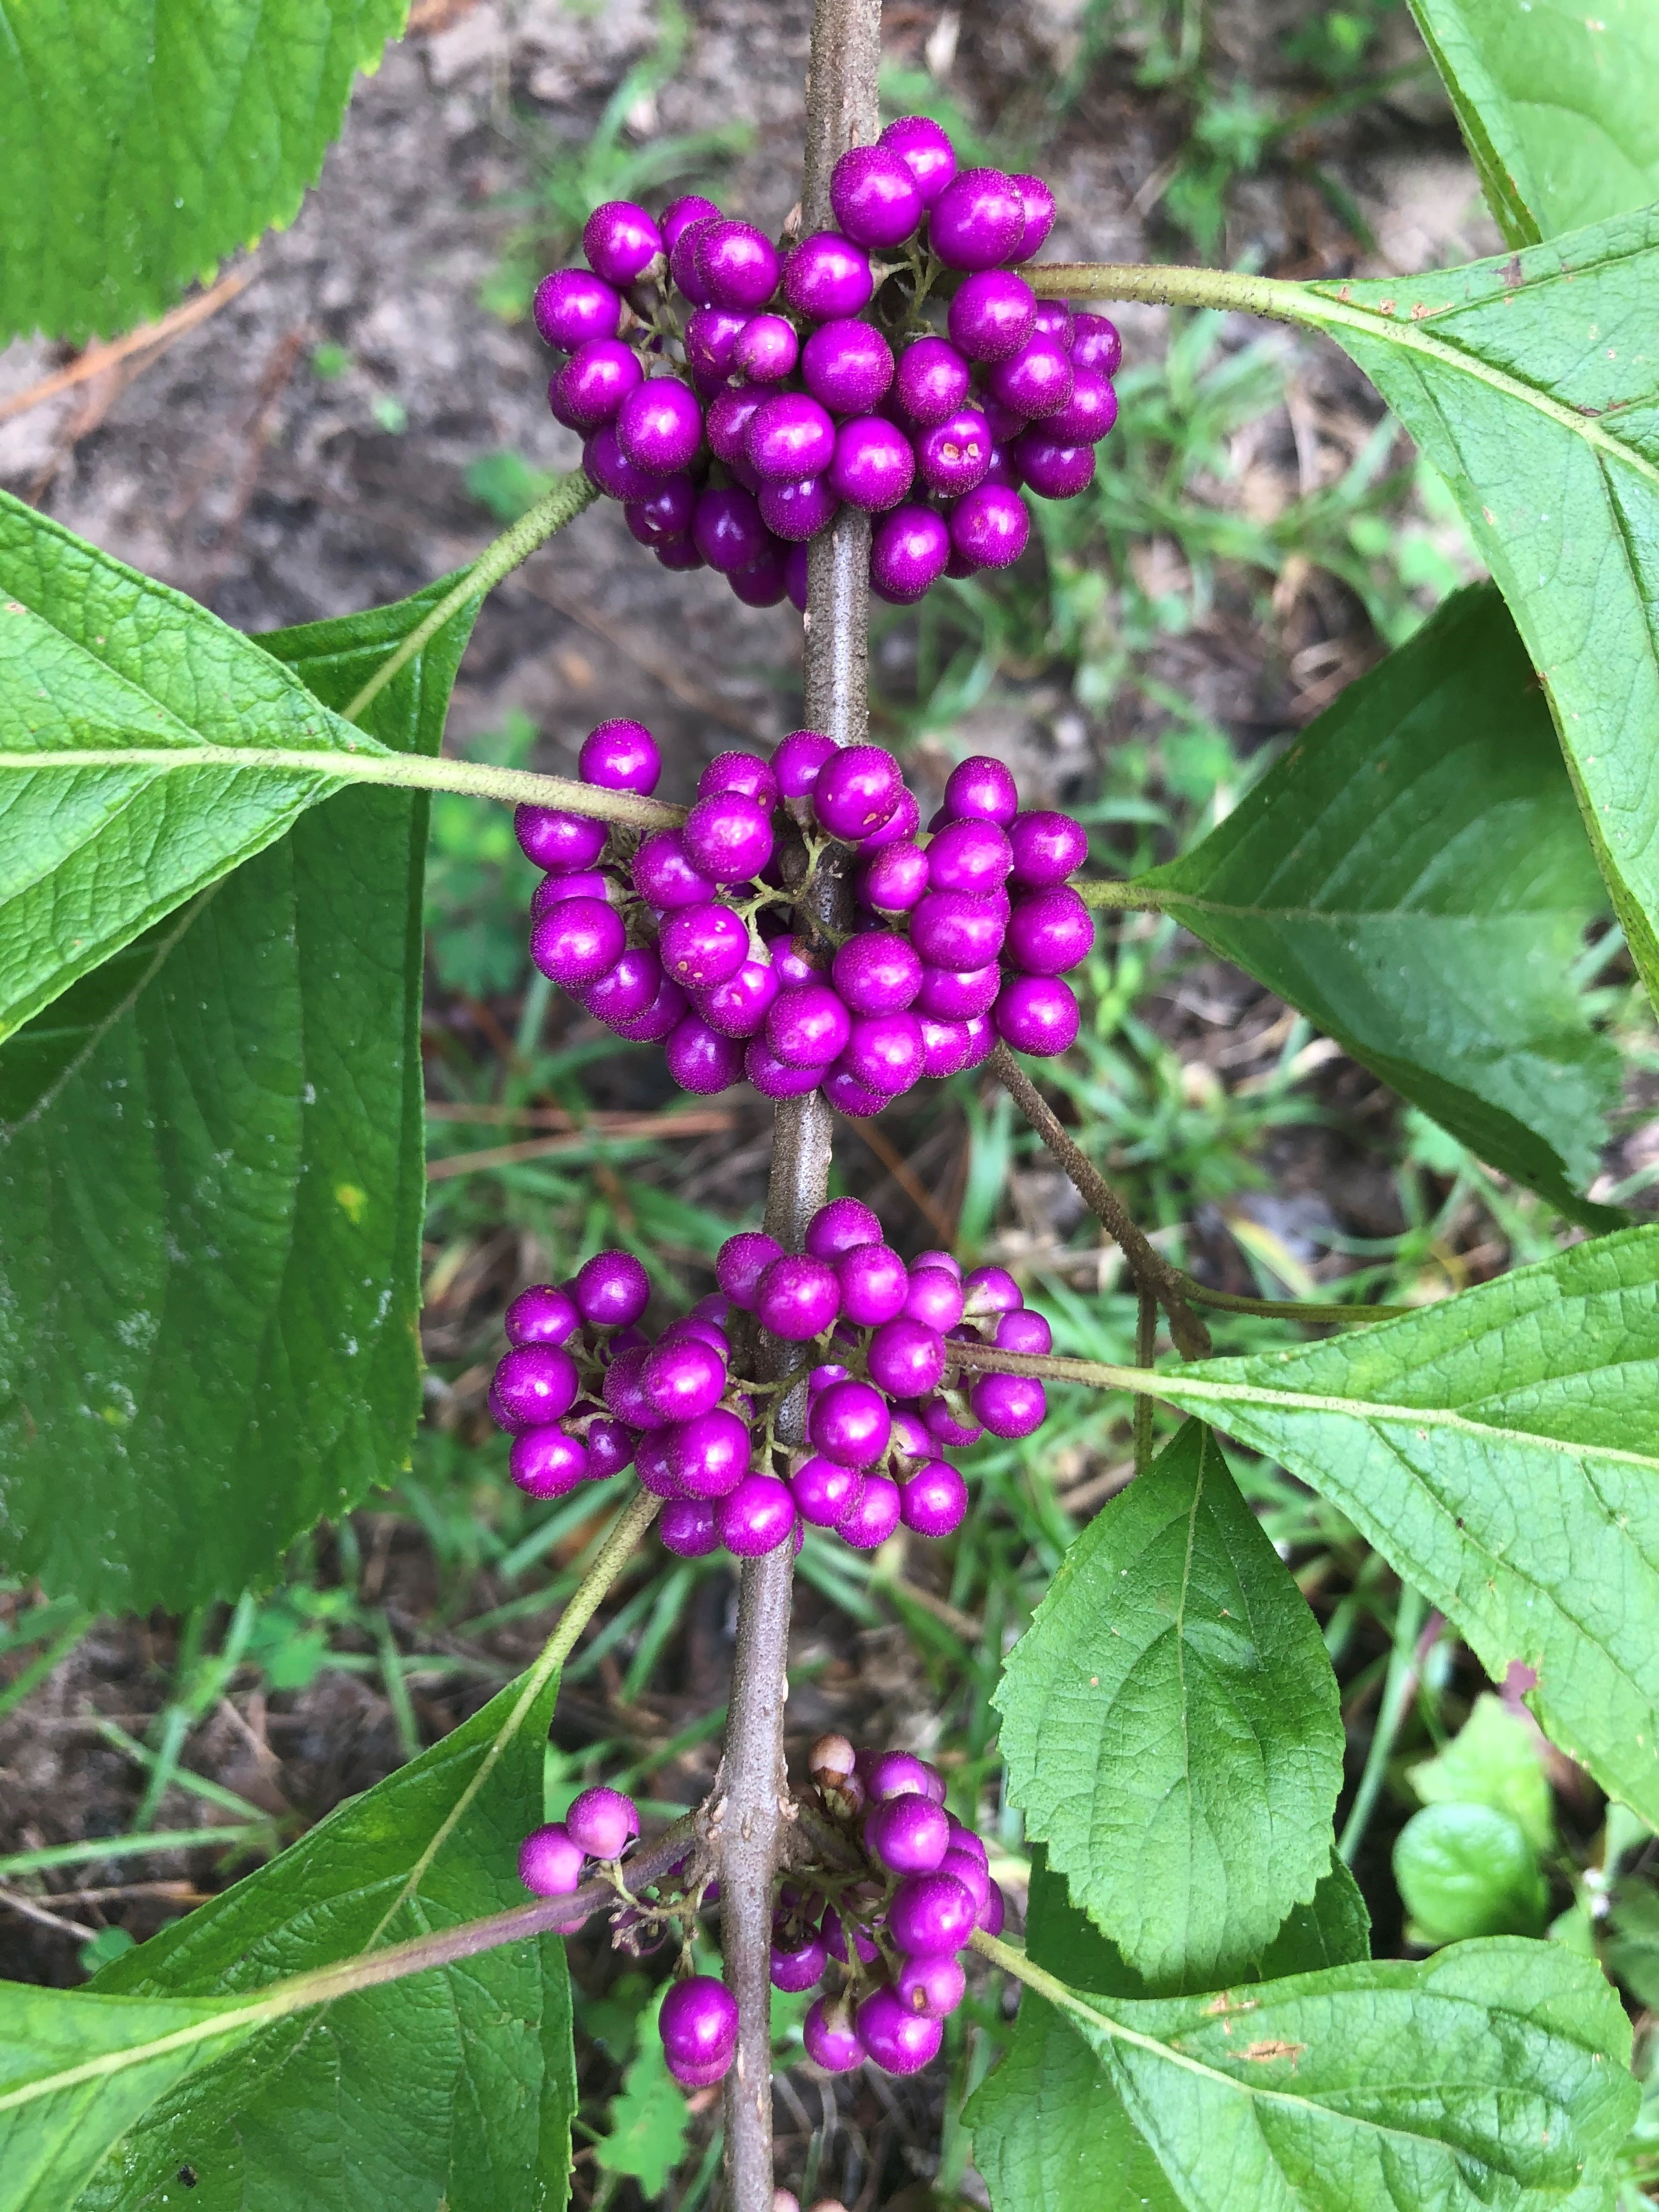
When beautyberries start producing their eye-catching, bright purple fruit in late summer, we start to get lots of questions. People want to know what it is, where can they find it, and can they eat it? While the berries look good enough to eat, it’s best to leave them to the birds and deer. They are not toxic and were used by Native Americans for a root tea to treat fevers, stomach aches, malaria, and more, but the taste has been described as bitter and mealy. Thanks to a generous volunteer, I am lucky enough to have tried beautyberry jelly. A little (or a lot) of sugar can make most anything taste good—and the finished product is a beautiful, translucent shade of fuchsia.
Homemade beautyberry jelly is a real treat for breakfast! Photo credit: Carrie Stevenson, UF IFAS Extension
Even more interesting to me was the revelation that researchers have been able to extract compounds from beautyberry that successfully repel pest insects such as ticks and mosquitoes. The study began about 15 years ago, after a Mississippi botanist with the USDA Agricultural Research Service mentioned to a colleague that his grandfather taught him to rub the crushed leaves of beautyberry on his skin. The technique had been used as a home remedy to prevent mosquito bites for people (and horses) for generations. As a follow up experiment, another group of researchers found these same compounds—callicarpenal and intermedeol—successfully repelled black-legged ticks (which transmit Lyme disease) as effectively as DEET. In the last few years, researchers out of Mississippi have worked towards creating natural insect repellents from the compound that are less harsh on human skin that many commercially available brands.
The striking purple berries of the beautyberry shrub attract the attention of people and wildlife, alike. Photo credit: Carrie Stevenson, UF IFAS Extension
Aside from its many practical uses, Callicarpa americana is a beautiful native shrub. It has wide green leaves and the brilliant purple berries grow in clusters along its stem. They stay on through late fall and winter in some places, making a beautiful contrast to fall foliage. Beautyberry shrubs can be found in a wide variety of habitats, including sandy and wet soils, full sun, and part shade. Their adaptability makes them a great plant for tight conditions like roadsides or yard edges, but also for nearly any home landscape. The plants can grow to a height of 4-8 feet and spread 3-6 feet wide. The long-lasting berries make them a great wildlife food source later in the cool season than many berry-producing species.