by Molly Jameson | Oct 28, 2021
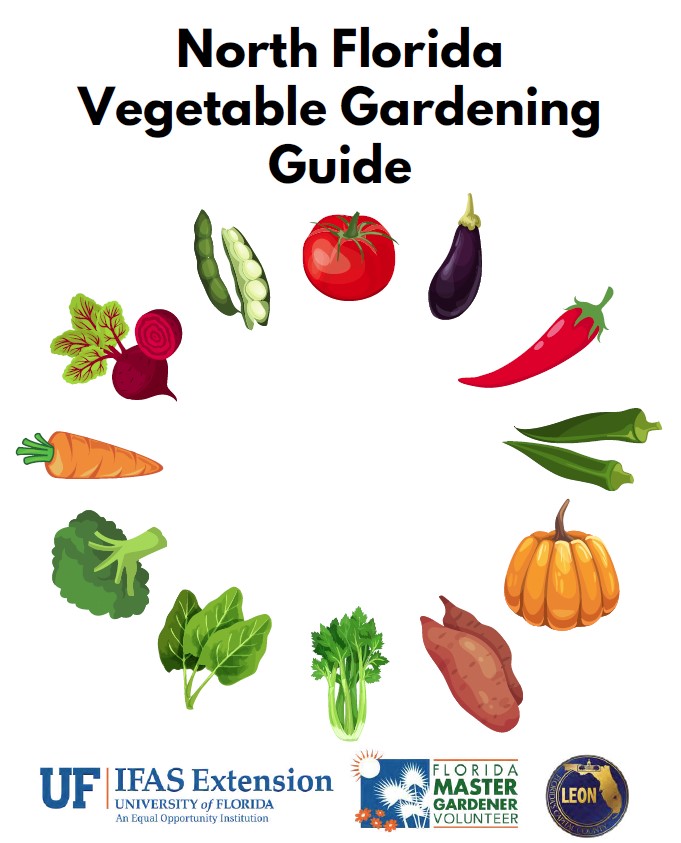
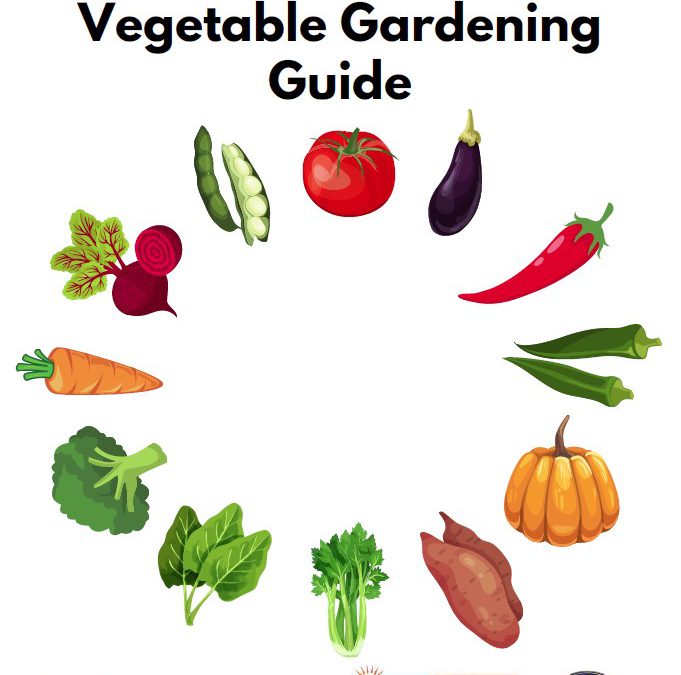
As you garden this fall, check out the North Florida Vegetable Gardening Guide, compiled by UF/IFAS Leon County Extension.
Getting into vegetable gardening, but don’t know where to start?
Even experienced gardeners know there’s always more to learn. To help both beginners and advanced gardeners find answers to their questions, the UF/IFAS Leon County Extension Office put together the North Florida Vegetable Gardening Guide. It incorporates multiple resources, including articles, planting calendars, photos, and UF/IFAS EDIS publications.
The North Florida Vegetable Gardening Guide covers the many aspects of vegetable gardening, including how to get started, site selection, insects and biodiversity in the garden, soil testing, composting, cover crops in the garden, irrigation, and more.
You can click here to view the digital version of the guidebook. We also have physical copies of the guide available at the UF/IFAS Leon County Extension Office (615 Paul Russell Rd., Tallahassee, FL 32301).
Happy fall gardening!
by Mary Salinas | Aug 20, 2021
On August 12, 2021, our panel answered questions on a wide variety of landscape topics. Maybe you are asking the same questions, so read on!
Ideas on choosing plants
What are some perennials that can be planted this late in the summer but will still bloom through the cooler months into fall?
Duranta erecta ‘Sapphire Showers’ or ‘Gold Mound’, firespike, Senna bicapsularis, shrimp plant, lion’s ear
Where can native plants be obtained?
Dune sunflower, Helianthus debilis. Photo credit: Mary Salinas UF/IFAS Extension.
Gardening Solutions: Florida Native Plants – see link to FANN: https://gardeningsolutions.ifas.ufl.edu/plants/ornamentals/native-plants.html
What are some evergreen groundcover options for our area?
Mondo grass, Japanese plum yew, shore juniper, ajuga, ferns such as autumn fern.
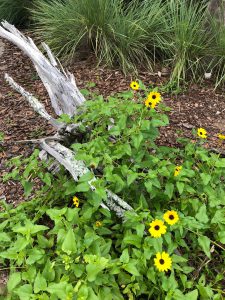
What are some ideas for partial morning sun butterfly attracting tall flowers to plant now?
Milkweed, salt and pepper plant, swamp sunflower, dune sunflower, ironweed, porterweed, and salt bush.
I’m interested in moving away from a monoculture lawn. What are some suggestions for alternatives?
Perennial peanut, powderpuff mimosa, and frogfruit.
We are new to Florida and have questions about everything in our landscape.
Florida-Friendly-Landscaping TM Program and FFL Web Apps: https://ffl.ifas.ufl.edu/
https://ffl.ifas.ufl.edu/resources/apps/
UF IFAS Gardening Solutions: https://gardeningsolutions.ifas.ufl.edu/
What are some of the top trends in landscaping today?
Houseplants, edible gardens, native plants, food forests, attracting wildlife, container gardening, and zoysiagrass lawns
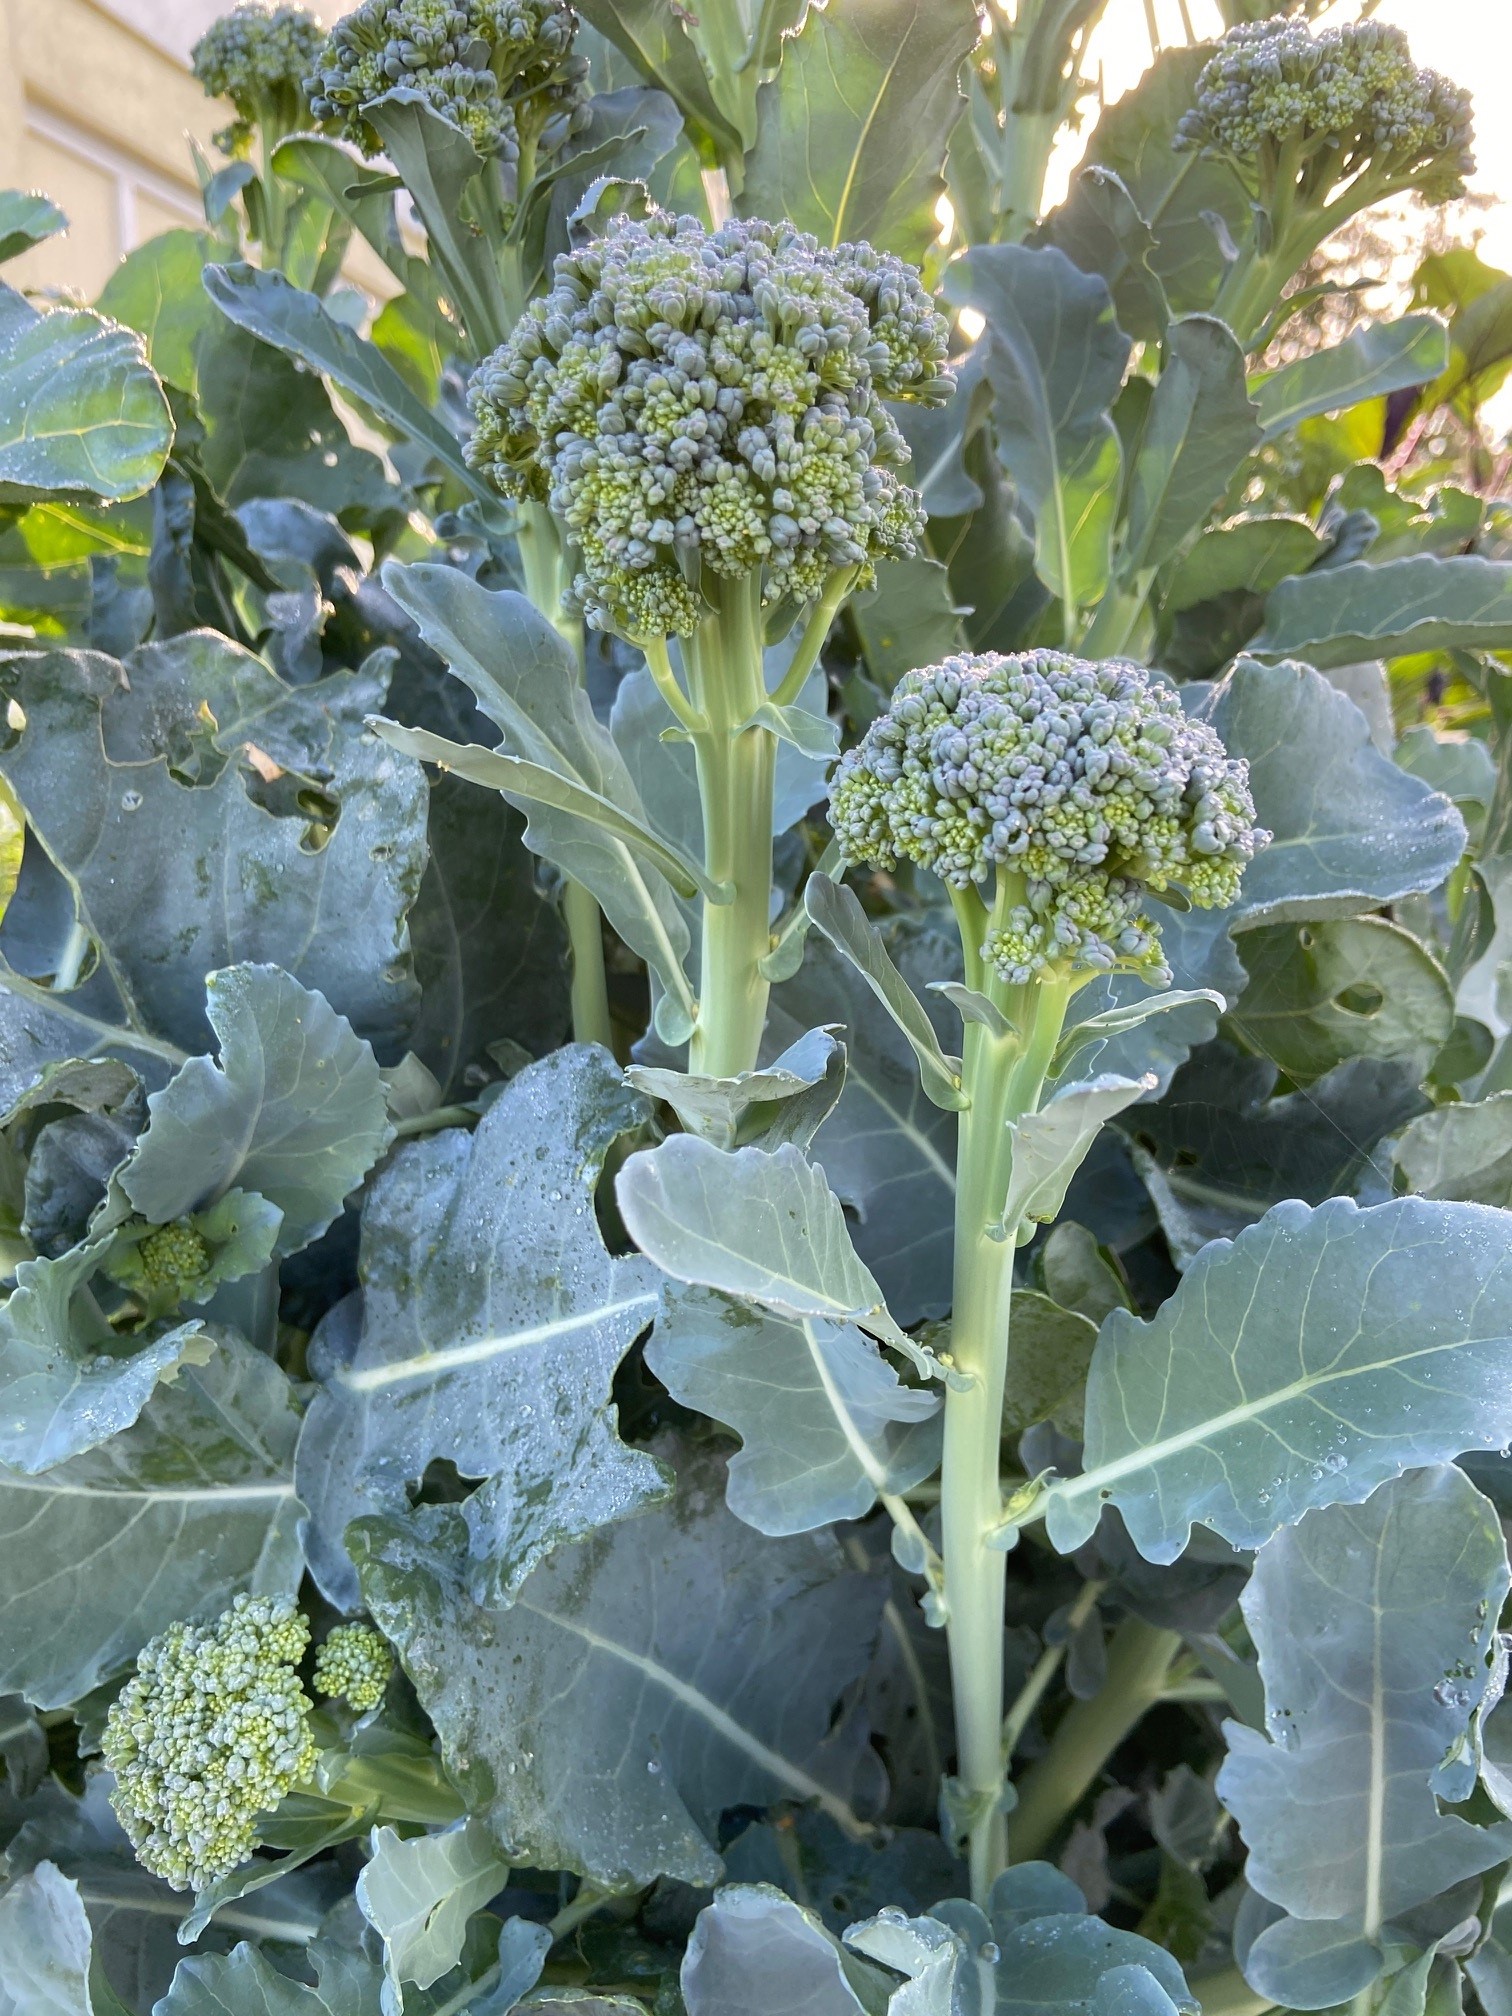
Edibles

Artwork broccoli is a variety that produces small heads. Photo credit: Mary Salinas UF/IFAS Extension.
What vegetables are suitable for fall/winter gardening?
Cool Season Vegetables: https://gardeningsolutions.ifas.ufl.edu/plants/edibles/vegetables/cool-season-vegetables.html
North Florida Gardening Calendar: https://edis.ifas.ufl.edu/publication/EP451%20%20%20
Florida Vegetable Gardening Guide: https://edis.ifas.ufl.edu/publication/vh021
How can I add herbs to my landscape?
Herbs in the Florida Garden: https://gardeningsolutions.ifas.ufl.edu/plants/edibles/vegetables/herbs.html
My figs are green and hard. When do they ripen?
Why Won’t My Figs Ripen: https://www.lsuagcenter.com/profiles/rbogren/articles/page1597952870939
What is best soil for raised bed vegetable gardens?
Gardening in Raised Beds: https://edis.ifas.ufl.edu/publication/EP472
And there are always questions about weeds
How can I eradicate cogongrass?
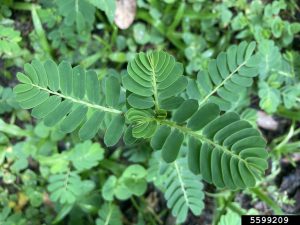
Chamber bitter is a troublesome warm season weed in our region. Photo credit: Brantlee Spakes Richter, University of Florida, Bugwood.org
Cogongrass: https://edis.ifas.ufl.edu/publication/WG202
Is it okay to use cardboard for weed control?
The Cardboard Controversy: https://gardenprofessors.com/the-cardboard-controversy/
What is the best way to control weeds in grass and landscape beds?
Weed Management Guide for Florida Lawns: https://edis.ifas.ufl.edu/publication/EP141
Improving Weed Control in Landscape Planting Beds: https://edis.ifas.ufl.edu/pdf/EP/EP52300.pdf
Landscape practices
Can ground water be brackish and stunt plants?
Reclaimed Water Use in the Landscape: https://edis.ifas.ufl.edu/publication/ss545
How can I prevent erosion from rainwater runoff?
Stormwater Runoff Control – NRCS: https://www.nrcs.usda.gov/wps/portal/nrcs/detail/national/water/?cid=nrcs144p2_027171
Rain Gardens: https://gardeningsolutions.ifas.ufl.edu/design/types-of-gardens/rain-gardens.html
And https://gardeningsolutions.ifas.ufl.edu/pdf/articles/rain-garden-manual-hillsborough.pdf
What is the best time of the year to propagate flowering trees in zone 8B?
Landscape Plant Propagation Information Page – UF/IFAS Env. Hort: https://hort.ifas.ufl.edu/database/lppi/
Which type of mulch works best on slopes greater than 3 percent?
Landscape Mulches: How Quickly do they Settle?: https://edis.ifas.ufl.edu/publication/FR052
When should bulbs be fertilized?
Bulbs and More – UI Extension: https://web.extension.illinois.edu/bulbs/planting.cfm
Should I cut the spent blooms of agapanthus?
Agapanthus, extending the bloom time: https://gardeningsolutions.ifas.ufl.edu/plants/ornamentals/agapanthus.html
http://blogs.ifas.ufl.edu/wakullaco/2020/10/07/extending-bloom-time/
Plant questions
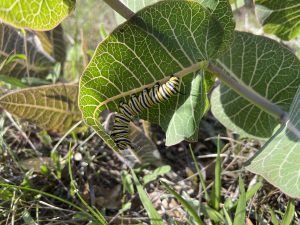
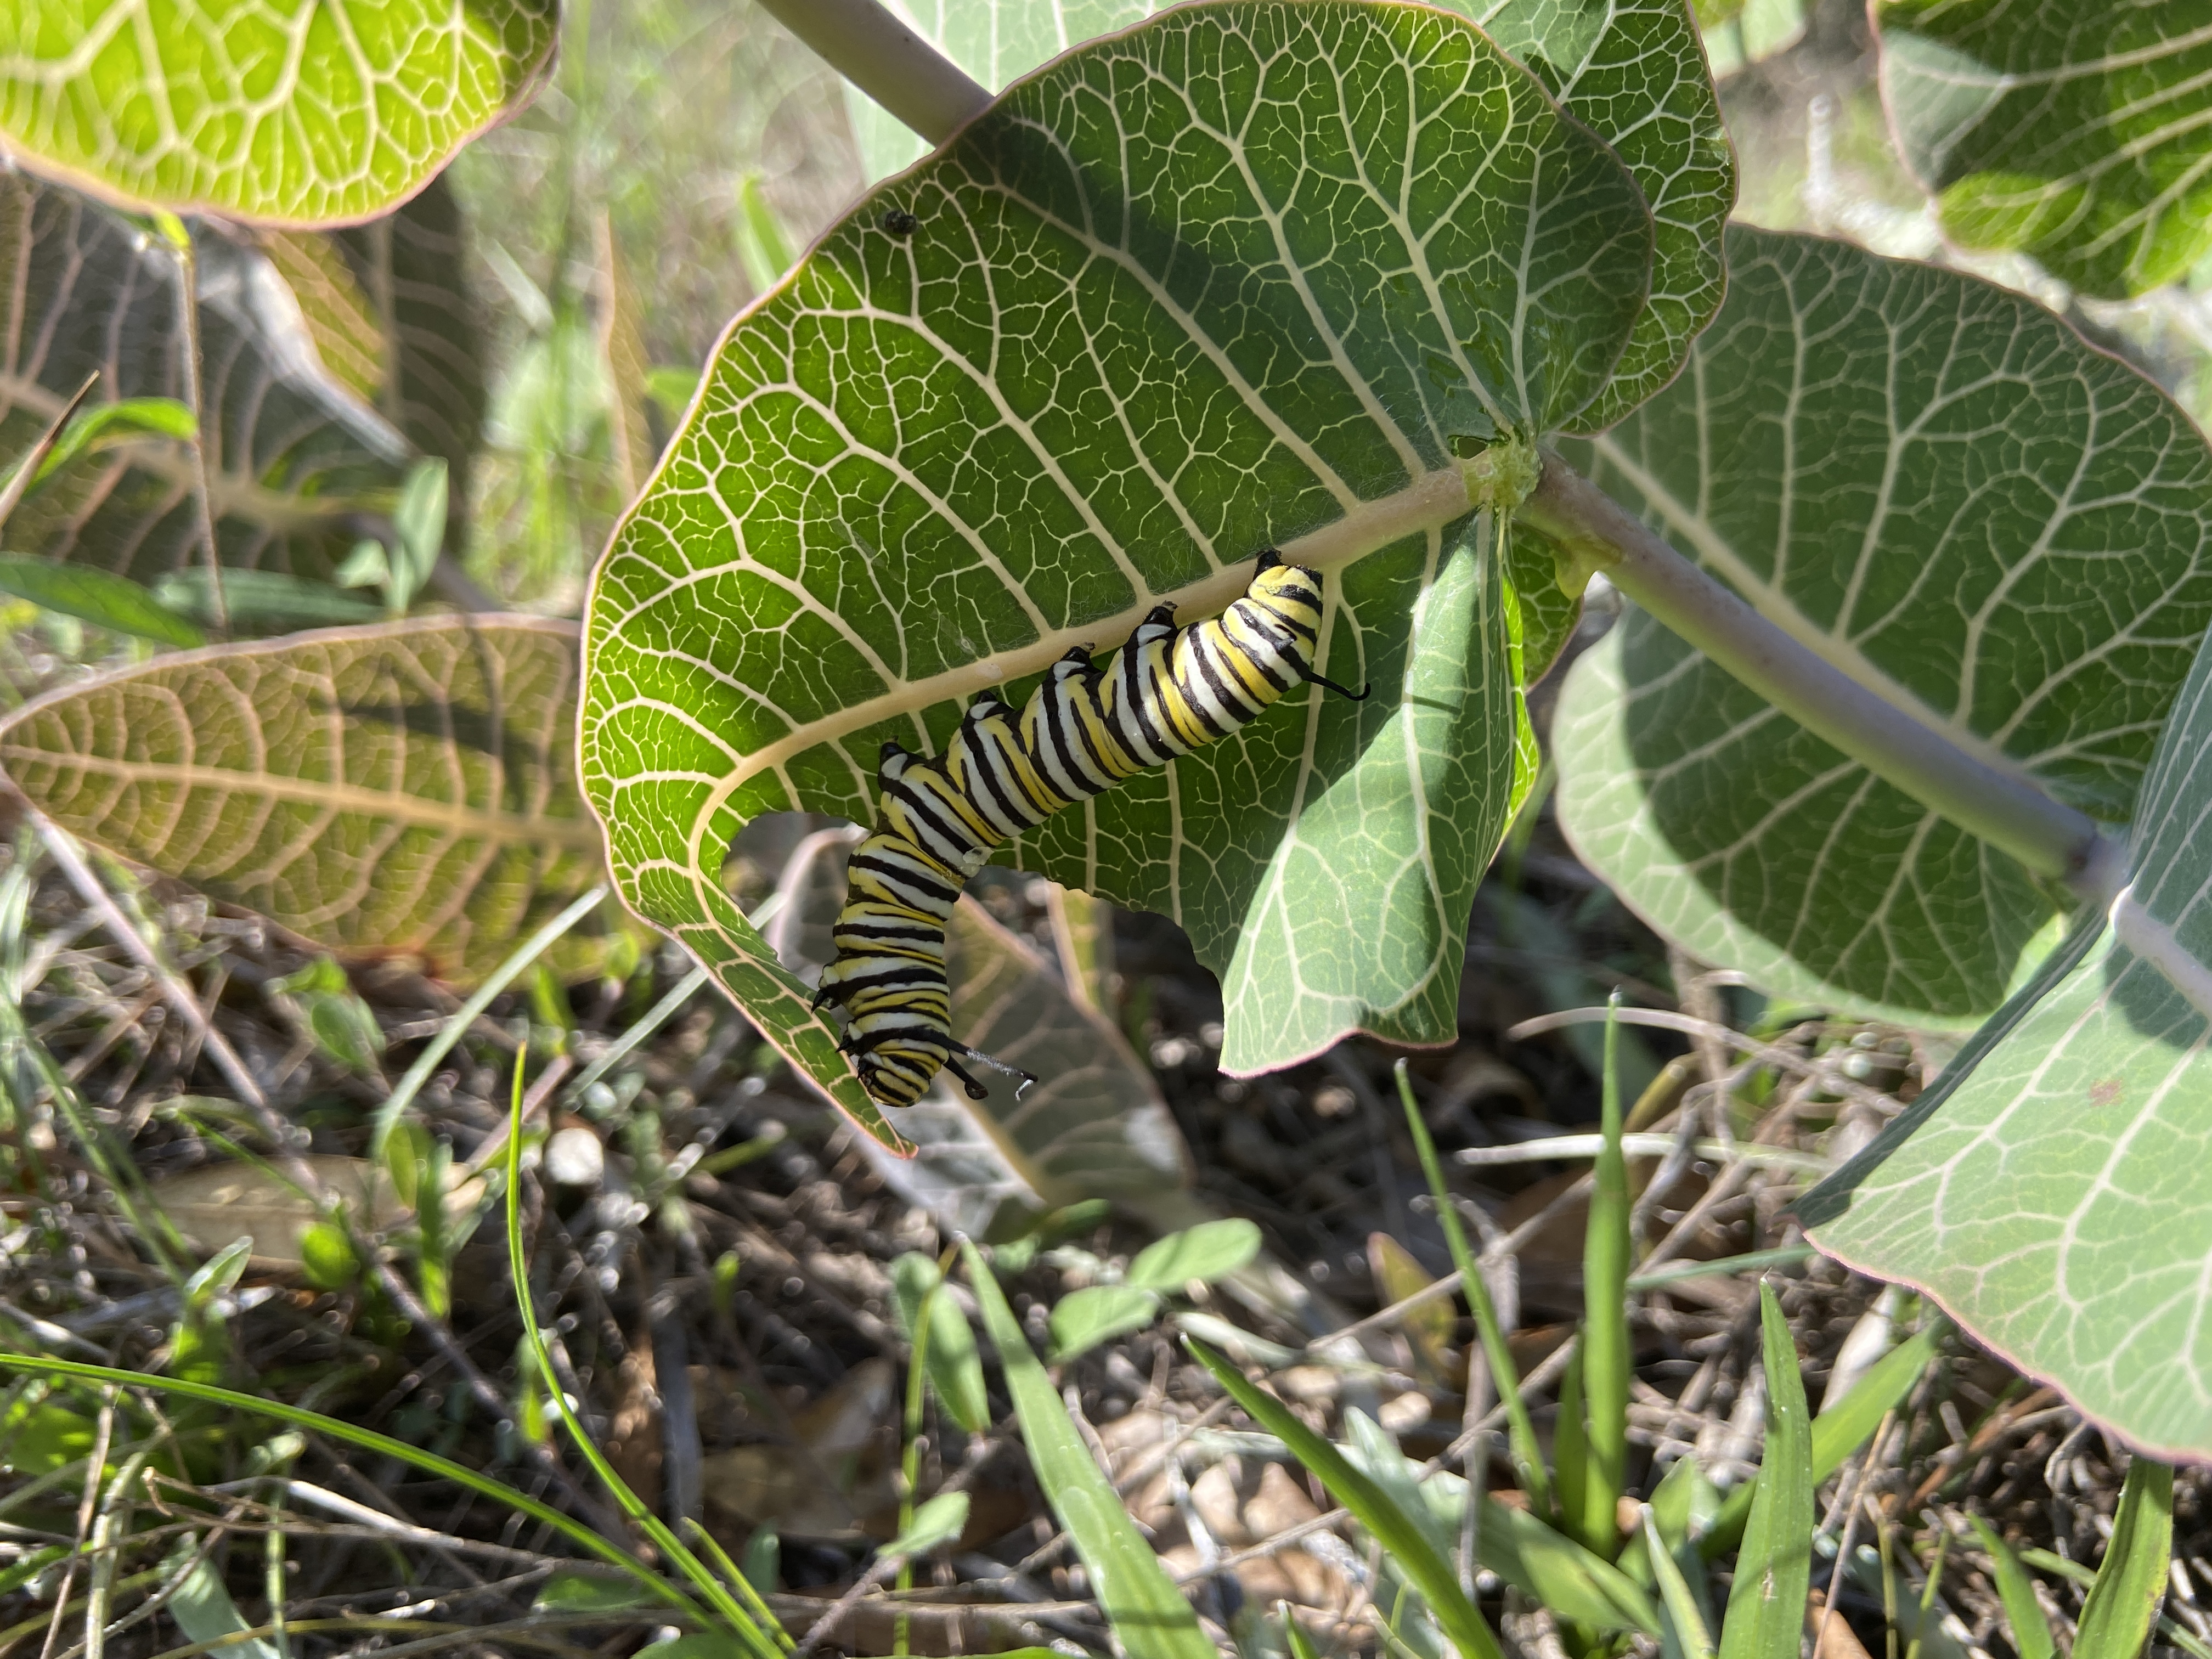
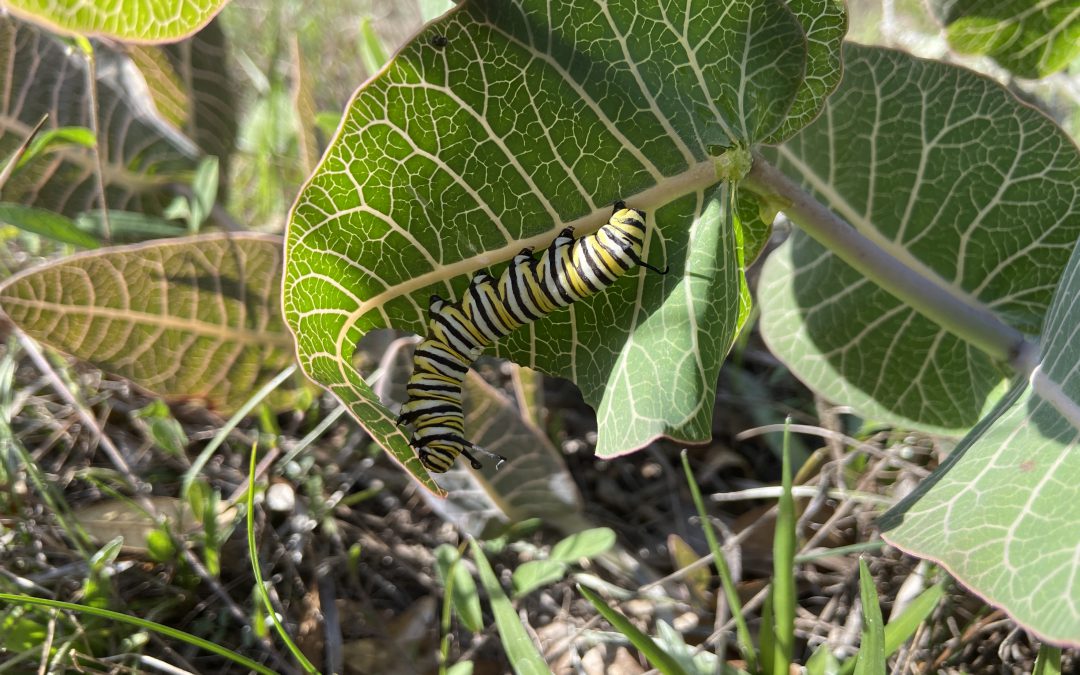
Monarch caterpillar munching on our native sandhill milkweed, Asclepias humistrata. Photo credit: Mary Salinas, UF IFAS Extension.
I planted native milkweed and have many monarch caterpillars. Should I protect them or leave them in nature?
It’s best to leave them in place. Featured Creatures: Monarch Butterfly: https://edis.ifas.ufl.edu/pdf/IN/IN780/IN780-Dxyup8sjiv.pdf
How does Vinca (periwinkle) do in direct sun? Will it make it through one of our panhandle summers? Can I plant in late August?
Periwinkles and No more fail with Cora series: https://gardeningsolutions.ifas.ufl.edu/plants/ornamentals/periwinkles.html#:~:text=Plant%20your%20periwinkles%20where%20they,rot%20if%20irrigated%20too%20frequently.
Insect and disease pests
What to do if you get termites in your raised bed?
The Facts About Termites and Mulch: https://edis.ifas.ufl.edu/publication/IN651
How to combat fungus?
Guidelines for ID and Management of Plant Disease Problems: https://edis.ifas.ufl.edu/publication/mg442
Are there preventative measures to prevent diseases when the humidity is very high and it is hot?
Fungi in Your Landscape by Maxine Hunter: http://blogs.ifas.ufl.edu/marionco/2020/01/16/fungi-in-your-landscape/
If you missed an episode, check out our playlist on YouTube https://www.youtube.com/watch?v=bp0HfdEkIQw&list=PLhgoAzWbtRXImdFE8Jdt0jsAOd-XldNCd
by Stephen Greer | Aug 11, 2021
One big goal of establishing a home lawn and landscape is to enjoy an attractive setting for family and friends, while also helping manage healthy soils and plants. Soil compaction at these sites can cause multiple problems for quality plants establishment and growth. Soil is an incredibly important resource creating the foundation for plants and water absorption.

Photo courtesy: Stephen Greer, UF IFAS
Soils are composed of many different things, including minerals. In Florida, these minerals often include sand of differing sizes and clay in the northern area of the counties in the panhandle of Florida. Soil is also composed of organic matter, nutrients, microorganisms and others. When soil compacts, the air spaces between the sand or clay are compressed, reducing the space between the mineral particles. This can occur anytime during the landscape and lawn construction phase or during long term maintenance of the area with equipment that could include tractors, mowers, and trucks.
What can be done to reduce soil compaction? There are steps that can be taken to help reduce this serious situation. Make a plan on how to best approach a given land area with the equipment needed to accomplish the landscape of your dreams. Where should heavy equipment travel and how much impact they will have to the soils, trees, and other plants already existing and others to be planted? At times heavy plywood may be needed to distribute the tire weight load over a larger area, reducing soil compaction by a tire directly on the soil. Once the big equipment use is complete, look at ways to reduce the areas that were compacted. Incorporating organic matter such as compost, pine bark, mulch, and others by tilling the soil and mixing it with the existing soil can help. Anytime the soil provides improved air space, root will better grow and penetrate larger areas of the soil and plants will be healthier.
Even light foot traffic over the same area over and over will slowly compact soils. Take a look at golf course at the end of cart paths or during a tournament with people walking over the same areas. The grass is damaged from the leaves at the surface to the roots below. Plugging these areas or possibly tilling and reestablishing these sites to reduce the compacted soils may be necessary.
Photo courtesy: Stephen Greer, UF IFAS
Water absorption is another area to plan for, as heavy rains do occur in Florida. Having landscapes and lawns that are properly managed allow increased water infiltration into the soil is critically important. Water runoff from the site is reduced or at least slowed to allow the nutrient from fertilizers used for the plant to have more time to be absorbed into the soil and taken up by the plants. This reduces the opportunity for nitrogen, phosphorus, and other nutrients to enter water areas such as ponds, creeks, lagoons, rivers and bays. Even if you are miles from an open water source, movement of water runoff can enter ditches and work their way to these open water areas, ultimately impacting drinking water, wildlife, and unwanted aquatic plant growth.
Plan ahead and talk with experts that can help with developing a plan. Contact your local Extension office for assistance!
by Ray Bodrey | Jul 29, 2021
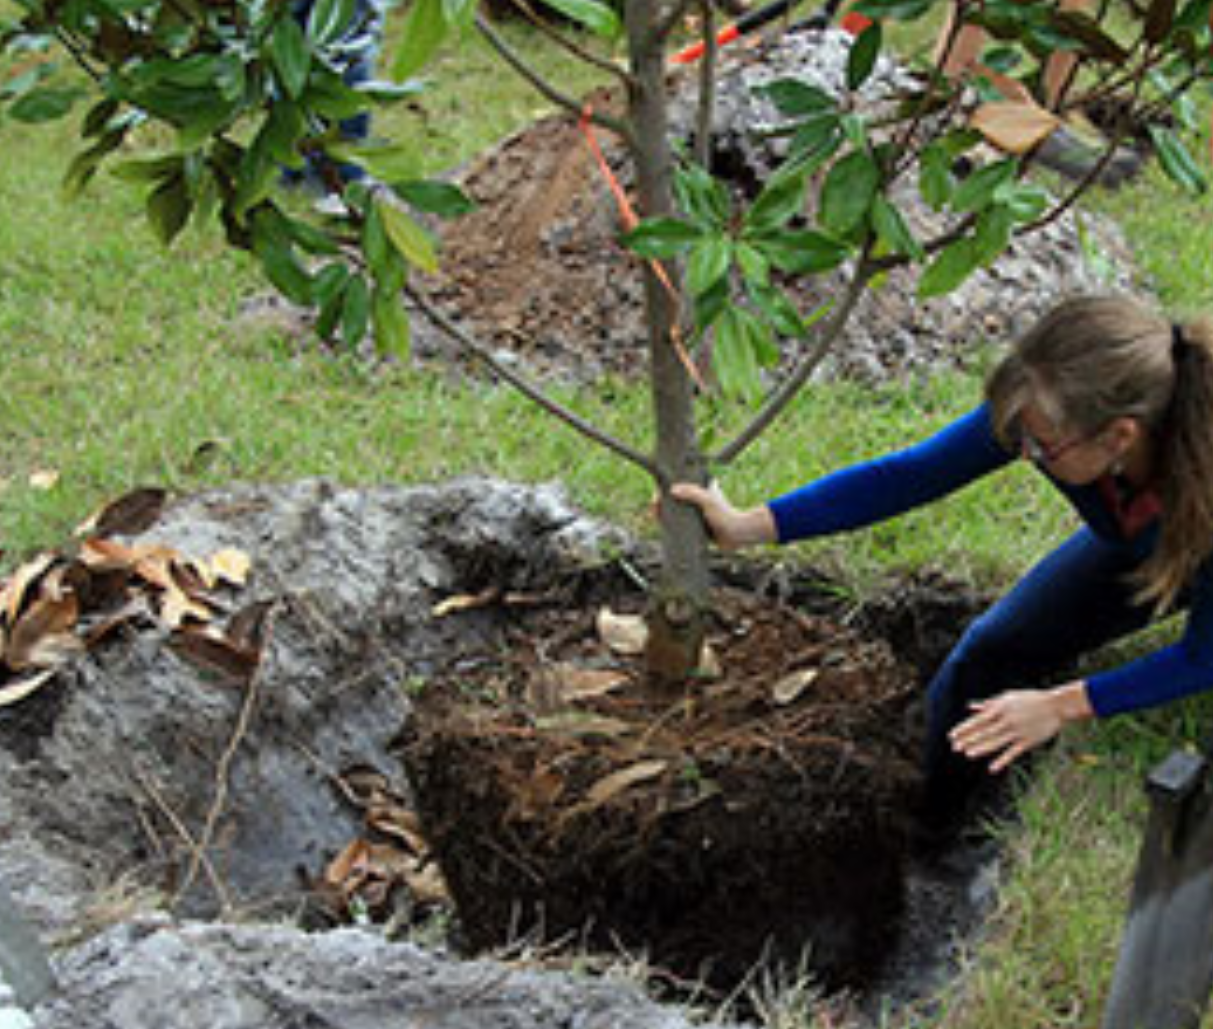
Need tips on planting and caring for trees? The primary focus in care of your newly planted tree is root development. It takes several months for roots to establish and newly planted trees and shrubs do not have a very strong root system. Start by digging the hole in a popcorn bowl shape. Once planted, backfill around the root system, but be careful not to compact the soil as this will hinder root growth. Be sure to keep the topmost area of the root ball exposed, about one to two inches. A layer of mulch will be applied here.
Frequent watering is much needed, especially if you are planting in the summer. Water thoroughly, so that water percolates below the root system. Shallow watering promotes surface root growth, which will make the plant more susceptible to stress during a drought. Concentrate some of the water in a diameter pattern a few feet from the trunk. This will cause the root system to grow towards the water, and thus better establish the root system and anchor the tree.
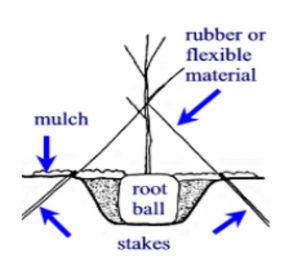
Figure: A Traditional Staking Option. Credit: Edward F. Gilman, UF/IFAS Extension.
Mulch is important in the conservation of soil moisture. Pine needles, bark, wood chips, and other organic materials make a great mulch. A three inch layer of mulch will usually suffice. It’s important to keep the mulch a few inches from the trunk as mulching too close to the tree trunk can cause rot.
You should always prune the bare roots of trees during planting. These exposed roots in containers can be damaged in shipping and removing some of the roots will help trigger growth. Pruning some of the top foliage can also reduce the amount of water needed for the plant to establish, as well. Trees and shrubs grown and shipped in burlap or containers usually need very little pruning.
Newly planted trees often have a difficult time establishing if the root system cannot be held in place. Strong winds and rain can cause the plant to tip over. Avoid this by staking the plant for temporary support. A good rule of thumb to determine staking need is if the trunk diameter measures three inches or less, it probably needs some support! Tie the stake to the plant every six inches from the top. However, only tie the trunk at one spot. Don’t tie too tightly so that the tree has no flexibility. This will stunt the growth of the tree.
Following these tips will help ensure your tree becomes well established in your landscape. For more information please contact your local county extension office.
Information for this article can be found in the UF/IFAS EDIS publication: “Planting and Establishing Trees” by Edward F. Gilman and Laura Sadowiski: https://edis.ifas.ufl.edu/pdf%5CEP%5CEP31400.pdf
Supporting information also provided by UF/IFAS Extension Forestry Specialist Dr. Patrick Minogue, of the North Florida Research Education Center in Quincy, Florida.
by Pat Williams | Jan 22, 2021
For all my years in the classroom, I never let students say the “d-word” when discussing soil science. In some instances, we had a “d-word” swear collection jar of a quarter when you used the term and even today, I hesitate from spelling the word out in text due to feedback from all those I have corrected. In case you still need a clue on the “d-word”, it ends in irt.
As a horticulturist for 46 years, I have read, heard, and been told many secrets to growing good plants. I still hold firm that without proper knowledge of how soil works, most of what we do is by chance. Soil is a living entity comprised of parent material (sand, silt, and clay), air, water, organic matter (OM), and microorganisms. It is this last item which makes our soils come to life. If you have pets, then you know they need shelter, warmth, air, water, and food. From this point forward think of soil microorganisms as the pets in your soil. If you take care of them, they will take care of your plants.
Sandy soil without any organic matter at the Wakulla County Extension office.
There is a huge difference in habitat from a sandy soil to a healthy soil with a good percentage of OM (5% – 10%). In one gram of healthy soil (the weight of one standard paper clip), you can have bacteria (100,000,000 to 1,000,000,000), actinomycetes (10,000,000 to 100,000,000), fungi (100,000 to 1,000,000), protozoa (10,000 to 100,000), algae (10,000 to 100,000), and nematodes (10 to 100) (1). A teaspoon of healthy soil can contain over four billion organisms (2). These microorganisms are part of the soil food web and they form a relationship between soil and your plants. They help convert nutrients to useable forms and assist with other plant functions.
The question becomes how to take care of your soil pets. For years we have performed practices that compromise these populations. Growing up we put all of our grass clippings in the weekly trash. We know now how valuable those clippings are and to leave them be. Two practices still common today though are tilling and raking leaves.
Master Gardener Volunteer vegetable bed with organic matter added.
Tilling has a limited purpose. If I place a layer of organic matter on top of the ground, then tilling incorporates the OM which feeds my pets. Excess tilling of soil introduces large amounts of oxygen which accelerates the breakdown of OM thus reducing our pet populations over time. Another adverse result from tilling is disturbing the soil structure (how the parent materials are arranged) which can reduce pore spaces thus limiting water percolation and root growth. There is a reason agriculture has adapted no-till practices.
Raking leaves (supposedly the sign of a well-kept yard) is removing large amounts of OM. Do you ever wonder why trees in a forest thrive? All of their leaves fall to the ground and are recycled by the microorganisms. Each of those leaves contains macronutrients (carbon, hydrogen, oxygen, nitrogen, phosphorus, potassium, calcium, sulfur, and magnesium) and micronutrients (boron, copper, chlorine, iron, manganese, molybdenum, nickel, and zinc) which are necessary for plant growth. You would be hard pressed to find all those nutrients in one fertilizer bag. So recycle (compost) your leaves versus having them removed from the property.
We are in our off season and tasks such as improving soil health should be considered now for soils to be ready in spring. Remember a little organic matter at a time and never work wet soils. As your OM levels build over the years, remember to change your watering and fertilizing schedules as the soil will be better adapted at holding water and nutrients. Soil tests are still recommended before fertilizing.
If you would like more tips on improving your soil, contact me or your local county horticulture extension agents. For a more in depth look at caring for your soils, read The Importance of Soil Health in Residential Landscapes by Sally Scalera MS, Dr. A.J. Reisinger and Dr. Mark Lusk (https://edis.ifas.ufl.edu/ss664).
- Chapter 2: Soils, Water, and Plant Nutrients. Texas Master Gardener Training Manual.
- The Importance of Soil Health in Residential Landscapes. 2019.
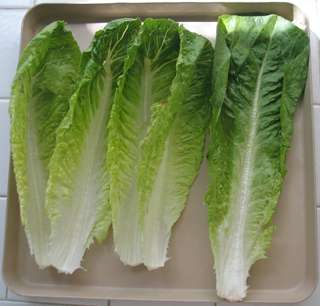
by Ray Bodrey | Oct 7, 2020
Who doesn’t enjoy a fresh, crisp bowl of salad? Lettuce happens to be a vegetable that is easily grown in Florida for fall & winter gardens. In Florida, four types of lettuce are commonly grown: crisphead, butterhead, leaf, & today’s topic, romaine.

Photo courtesy of Tyler Jones, UF/IFAS.
An interesting, little known fact about romaine lettuce is that it was cultivated extensively by the Roman Empire. By the fourteenth century, the Catholic Hierarchy had moved from Rome to Avignon, France bringing their prized lettuce along with them. During this period, the plant was known as “Avignon” lettuce. In England, romaine is called “cos” lettuce named after the Greek islands from which the lettuce was originally distributed. Of course, in the U.S., the name we give, Romaine, refers to the time when it was grown extensively in the Roman Empire.
Romaine is grown both commercially and in backyard gardens across the state. Like all lettuce, this is a cool season vegetable. September through March is a generally the extent of the growing season. Romaine can be grown from seeds or by transplants. If you are going the seeding route, just remember these seeds are very small and should be sown shallow and in a tight pattern, with 12”-18” row spacing and a light sprinkle of soil over the top. Newly planted seeds may require burlap or straw to help retain soil moisture for successful germination. Once plants reach a few inches in height, rows can be thinned to where plants are 8” apart.
Romaine needs adequate soil moisture throughout the season. Mulching around plants to retain moisture and adding a complete fertilizer such as 8-8-8 will help ensure a good yield. Lettuce is vulnerable to the usual suspects of garden pests. However, gardening in cooler months helps combat that threat.
Romaine lettuce is fun and rewarding to harvest, as well. You can pick a few leaves off a plant or harvest the entire head.
For more information, contact your local UF/IFAS County Extension office.
Supporting information for this article can be found in the UF/IFAS EDIS publication, “Romaine – Lactuca sativa L.” by James M. Stephens, Emeritus Extension Vegetable Crops Specialist, UF/IFAS: https://edis.ifas.ufl.edu/mv125
UF/IFAS Extension is an Equal Opportunity Institution.