GIP Live Foodscaping: Questions and Answers
The Northwest District Agents discussed foodscaping by answering questions submitted by program participants. Included are the panelist’s answers along with supporting publications for the questions. You may view the session on YouTube at https://www.youtube.com/watch?v=wEMXmaZqRTU
- What is foodscaping?
Combining edible plants with your traditional ornamental plants in an intentional combination.
Publication: Foodscaping https://gardeningsolutions.ifas.ufl.edu/design/types-of-gardens/foodscaping/
- When do I start spring vegetable garden?
Still follow the guidelines for warm season edibles. Many seeds are started earlier (inside in January/February) and outside (now through April). For established landscapes with large trees, direct sowing is not the best amongst all the roots. Publication: What to Plant Month by Month https://gardeningsolutions.ifas.ufl.edu/plants/edibles/text-version-of-what-to-plant-by-month/
- What are the easiest vegetables to grow in a foodscape?
Look for visually appealing plants and one of the easiest is Swiss chard.
Amaranth for the summer months, which is an ancient grains.
Publication: What to Plant Month by Month, https://gardeningsolutions.ifas.ufl.edu/plants/edibles/text-version-of-what-to-plant-by-month/
- Suggestions for only 4-6 hours of sunlight in an oak tree hammock.
Bell peppers can grow in some shade in containers or in the ground. Leafy lettuces for the cooler months.
Publication: Peppers in the Shade, https://edis.ifas.ufl.edu/publication/HS368
- What herbs work well mixed into the landscape?
Many will work but look for those with essential oils such as thyme and rosemary. Mint is good in a container. Add a bay laurel tree for a evergreen selection.
Publication: Herbs, https://gardeningsolutions.ifas.ufl.edu/plants/edibles/vegetables/herbs/
- What is the best citrus for North Florida?
Satsuma would be a cold hardy selection with delicious fruit. Owari and Brown Select grow well in Panhandle. Tangerine and Meyer lemon is intermediate in cold hardiness. Start fruit in about a year but remove those early to but energy into the tree. Look for harvesting fruit in about 3-5 years. Look at our citrus publication for citrus fertilization with a fertilizer that contains zinc and iron.
Soil test to match plants with the right locations.
Publication: The Satsuma Mandarin, https://edis.ifas.ufl.edu/publication/CH116
- What fruit trees can I grow?
Choose a variety adapted to our area. Peaches, pears, plums, some citrus, Pineapple guava, Loquat. Choose ones with chill hours for our area. Look at Auburn and Georgia selections rather than Florida selections which are more adapted to central and south Florida.
Publication: Dooryard Fruit Varieties, https://edis.ifas.ufl.edu/publication/MG248
- What about companion planting?
One plant will benefit another – attracts beneficials, provides chemicals for a purpose. Use a trap crop that attracts insects to catch them before they move to your desirable fruit.
Marigolds is an example of use around some edibles to reduce nematodes.
Publication: Companion Planting, What is It? https://nwdistrict.ifas.ufl.edu/hort/2023/02/21/companion-planting-what-is-it/
- What vegetables can I grow on a trellis?
Cucumbers, squash, passionflower, pole beans, indeterminate tomatoes benefit for a trellis. Provides shade for ground plants in heat of summer.
Publication: Trellises and Cages for Vegetable Gardens, https://extension.umn.edu/planting-and-growing-guides/trellises-and-cages
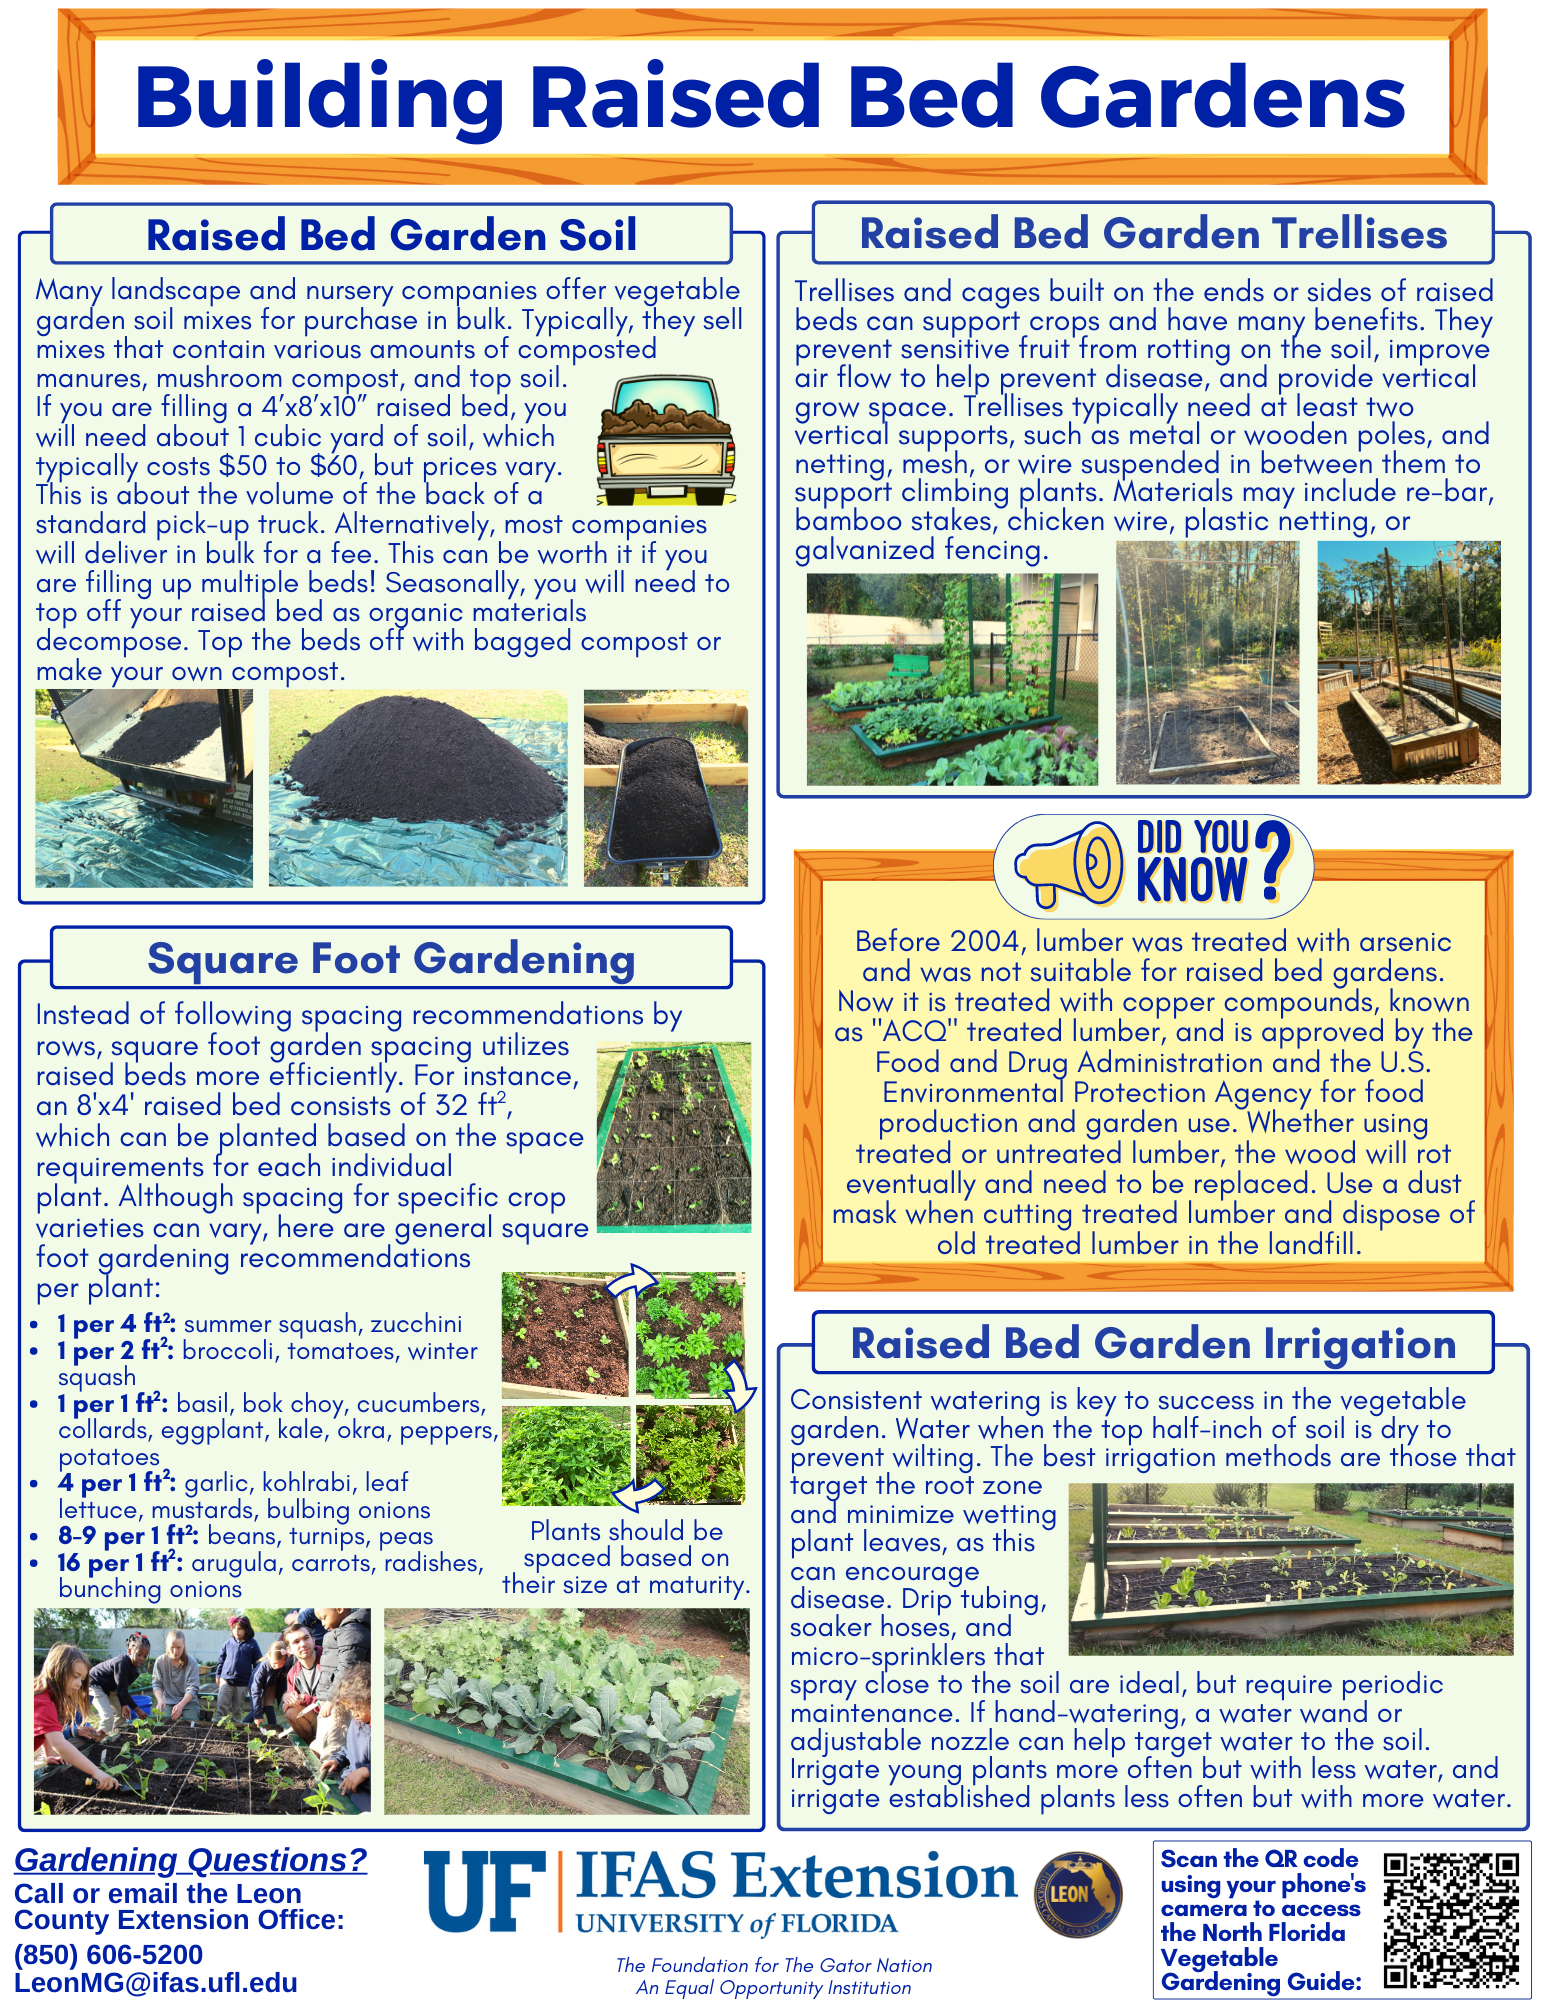
- I need to add soil to my native/food garden. What are considerations?
Sandy soils may need some amendments. Compost should be mixed in and not grow straight in compost. Maybe add ½ inch.
Soil test first so you don’t add too much nitrogen through amendments.
Publication: Soils and Fertilizers, https://sfyl.ifas.ufl.edu/lawn-and-garden/soil-and-fertilizer/
- What vegetables grows among pine trees and cherry laurel trees?
This environment may have a lower pH. Sweet potatoes may work well if you can bank up hills for planting the potatoes.
Make a pine straw bed too to plant sweet potatoes.
Publication: Sweet Potatoes, https://aggie-horticulture.tamu.edu/vegetable/wp-content/uploads/sites/10/2010/10/EHT-026-Easy-Gardening-Sweet-Potatoes.pdfGrowing Miss Figgy and how to fertilize a kumquat tree growing in a large pot?Fruit tree selections that are dwarf may work better and be prepared to up pot. Watering and fertilizer will have to be managed carefully in the container environment.
Video: Small Edibles for Small Spaces, https://www.youtube.com/watch?v=3oVTBqs3I44
- What are the best drought resistant food source plants?
Some tropical crops like Yucca can tolerate drought. Conserve water with mulches. Well established trees and shrubs will not need as much routine watering if rainfall is occurring. Fruiting plants and vegetables will need to managed carefully. Publication: Conserving Water in the Vegetable Garden, https://extension.uga.edu/publications/detail.html?number=C964&title=conserving-water-in-the-vegetable-garden#:~:text=Placing%20three%20sheets%20of%20newspaper,that%20keeps%20plant%20foliage%20dry.
- I have 3-4 blueberry bushes and they are 2-4 years old and haven’t fruited. What is wrong?
Know the cultivar so you are sure they have a cross pollinator. Need the right conditions too. Blueberries set in the fall so if fall pruning, you may have cut off flowering structures. Soil pH is critical. Blueberries like acidic soil and they will struggle in higher pH soils.
Publication: Blueberry Gardener’s Guide, https://edis.ifas.ufl.edu/publication/MG359 - How do I grow lavender in the landscape?
Lavender likes low humidity and drier conditions. Soil should be well drained and plants need good air circulation. Maybe try Phenomenal lavender. Grow in a pot that is very well drained and don’t amend soil when planting in the ground. Prune as needed to open up plant.
Publication: Lavender, https://edis.ifas.ufl.edu/publication/FP337 - Which apple trees grow best in North Florida?
You can grow a tree but it does not produce well due to lack of proper chill hours. Try the Shell apple which is more adapted to north parts of the counties.
Our area may get 500-600 hours of chill generally.
Publication: Dooryard Fruit, https://edis.ifas.ufl.edu/publication/MG248 - What about edibles near saltwater?
Many edibles won’t like saltwater intrusion. Cowpeas, black eyed peas are the most salt tolerant. Some of the cuburbits (squash, pumpkin, zucchini, gourds) can tolerate some salt.
Grow some plants in a protected area or in containers. Consider some of the shrubby edibles that match the pH at the coastal sites.
Publication: Soil Salinity and Vegetables, https://sfyl.ifas.ufl.edu/media/sfylifasufledu/miami-dade/documents/disaster-preparation/post-hurricane-and-disaster/Soilsalinityinfodraft.pdf - How to protect plant from insects without pesticides, including squirrels?
Reduce stressed by planting in the right spot and providing care. You will also have many diverse plantings in a foodscape to allow beneficial to help manage pest. Monitoring the garden is very important to catch problems early and physically remove. Consider safer options when pesticides are needed that are labeled for food crops.
Might use some screening for small mammals and fencing for large animals. Motion activated sprinklers and scare devices such as ribbon, foils. Chemical repellents that contain capsaicin.
Publication: Natural Products for Pest Control, https://edis.ifas.ufl.edu/publication/IN197 - Publication: Deterrents for Nuisance Wildlife, https://edis.ifas.ufl.edu/publication/UW371
- What are the most common vegetables for small spaces?
Some plants will need at least 12 inches of depth such as tomatoes. Lots for winter edibles do well in small spaces and containers. Consider a patio version of the plant. There are small selections of Pineapple guava and Pomegranate although they may produce smaller fruit. - How easy is it to grow in containers?
You can grow in the ground with good soil and if you can work with plants on the ground.
Containers allow you to create the right soil environment easy. You do have to manage water carefully as the heat builds up.
Publication: Growing Vegetables in Containers, https://gardeningsolutions.ifas.ufl.edu/plants/edibles/vegetables/growing-vegetables-in-containers/
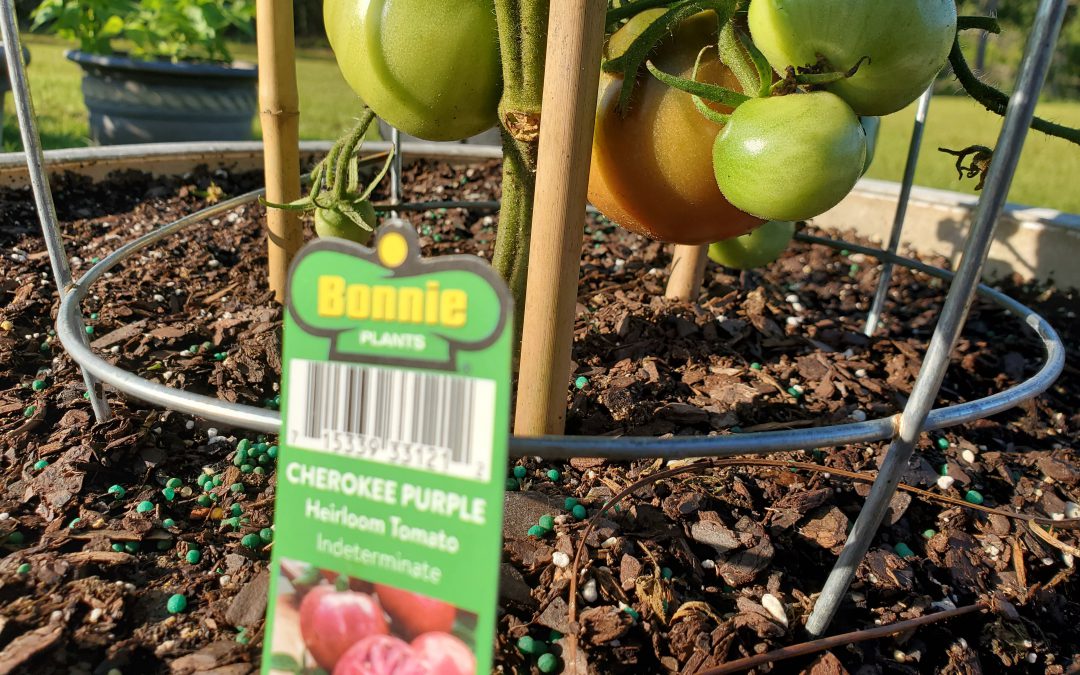
- What are the best tomatoes for the area?
Determinate and cherry will perform a little better. Choose early or mid producing plants to get fruit
Panelist’s favorites are:
Everglades and Sungold, Early Girl, Cherokee Purple is an heirloom - What edibles can handle full sun?
Most fruit plants like sun since they are needing lots of energy. Water must be available when rainfall is lacking. - Three fruit trees have not produced in 3 years. What do we need to do?
We really need to know what they are first. Do they need a plant for cross pollination? Are they flowering but not fruiting? How are they planted? Deep planting will cause a plant to struggle. Contact your Agent for more help. - Will glyphosate residues from a fall application carry over to spring?
Chemicals are regulated extensively so follow the label directions for safety. There should not be residue issues with this pesticide.
Try to manage weeds with other techniques like mulches, handpulling, directed watering, soil solarization, etc.
Publication: Use of Glyphosate and Herbicide Alternatives for Weed Control in Florida Landscape Planting Beds, https://edis.ifas.ufl.edu/publication/ep580 - What are some native plants for foodscaping?
Blueberries, blackberries, Chickasaw plum, pecans, persimmons, Maypop, Mulberry.
Use native plants to attract animals such as beautyberry. - Where can we find compost?
Cotton gin to get cotton gin trash will need to be composted first. Manure from equestrian centers or zoos. Make sure it is composted too.
Peanut processing facility.
Escambia County has bloom compost from ECUA.
- Note: Amended soil with compost can be flammable. Ash can benefit garden if needed. Test soil pH first so you don’t add too much.