by Mary Salinas | Sep 9, 2015
You’ve grown some wonderful vegetables, annuals or perennials and you would like to save some of the seed from those plants to have for planting in the future. This is a great way to get more of the plants you know and love while saving on the expense of new plants. One exception are plants that are F1 hybrids; seeds from these plants will produce crops quite dissimilar to the parent.
First, you need to collect ripe seed from the desired plants. How do you know when the seeds are ripe and ready to harvest? The strategies for annuals/perennials and vegetable plants differ.

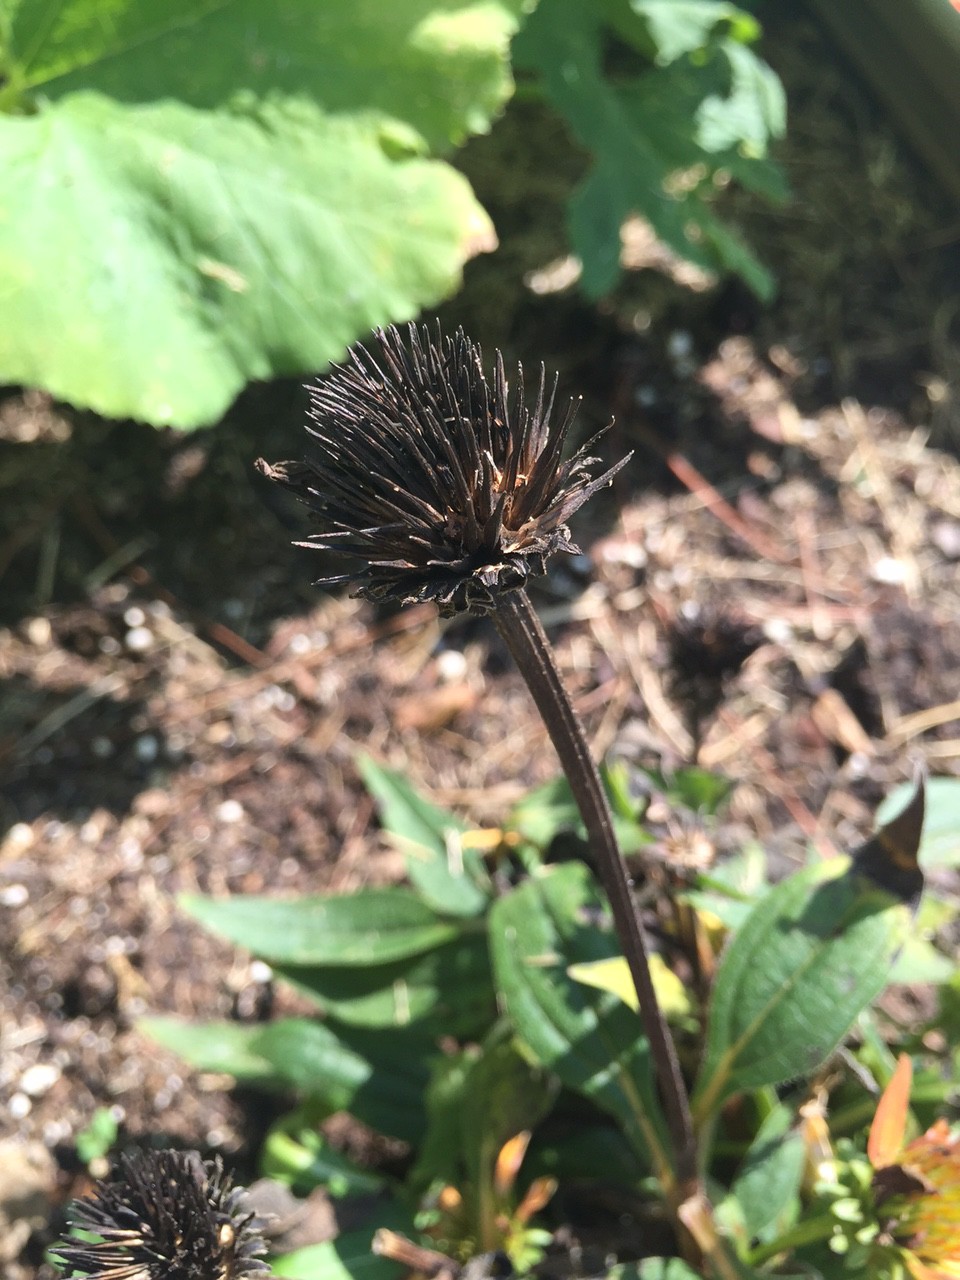
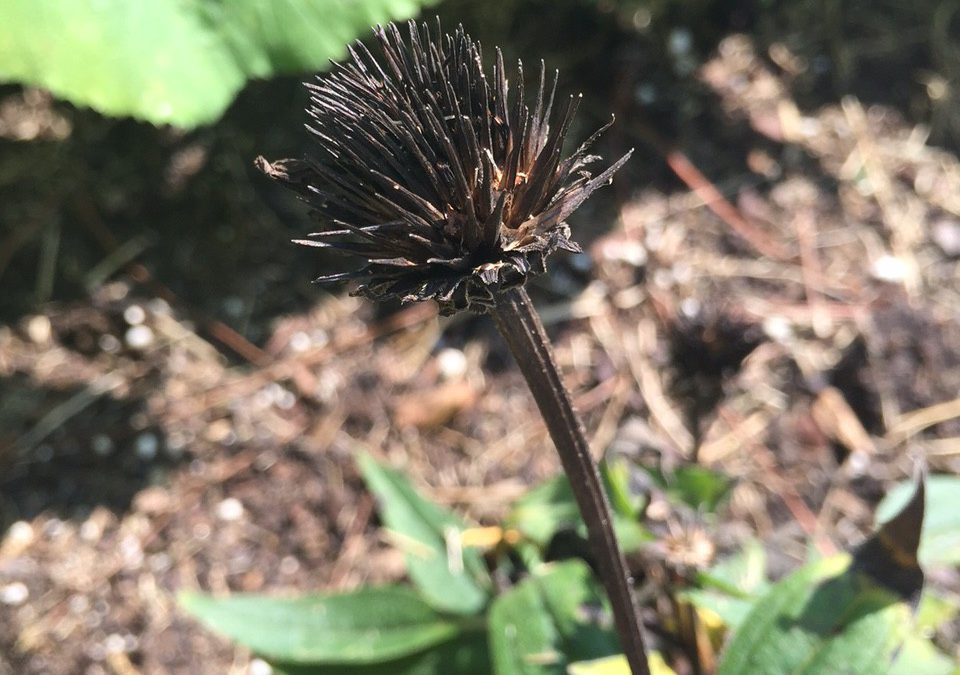
The ripe seedhead of a coneflower. Photo credit: Mary Derrick, UF/IFAS Extension.
For annuals and perennials that flower without making a fruit, wait until the flower has dried up and the seed head is brown and dead-looking. The seeds are then mature and ready to harvest. Take a look at the photo of the coneflower seedhead for reference. These seeds are already dry and can be put into an envelope and then into a sealed jar or plastic stage bag that contains a desiccant to absorb any excess moisture. There are a few options for desiccants: the little packets that come in vitamin bottles and purses to keep them dry, cornmeal or dried milk in bottom of the bag. Be sure to label your envelope with the date and name of your plant seeds. Store in the refrigerator.
When you are saving seed from a vegetable that has seeds inside it such as a tomato, pepper or squash, harvest the vegetable when it is ripe and ready to eat and scoop out the seeds and wash away all other plant parts from the seed. These seeds are very moist and if stored in this state, they will rot into a mess. You want to get the moisture content below about 8% for long term storage. There are several methods:
- If the humidity is low and the temperature high, (I know, those can be rare conditions for Florida) you can put the seeds in a single layer on a baking sheet in the shade to let them dry all day.
- Another option is to take that baking sheet with a single layer of seeds and put it in a 100° oven for 6 hours with the door open. It’s crucial to monitor your oven temperatures as those above 100° will kill the seeds.
Once the seeds are dried sufficiently, store them as described above for flower seeds. Your seeds can then last for several years.
For more information:
Seed Saving from Colorado State Extension
Saving Vegetable Seeds from University of Minnesota Extension
by Matthew Orwat | Sep 9, 2015
Azaleas pruned late in the fall will have little or no bloom in the spring. Image Credit: Matthew Orwat
As fall approaches, our spring blooming shrubs such as gardenia, spirea and azalea begin to look unkempt and overgrown. That means it is time to give them a severe pruning to get them ready for winter, right? Not so fast, take a minute to understand the growth habit of each species before diving in with the pruning shears.
Azalea:
Many do not understand that annual spring azalea bloom could be sacrificed completely by pruning spring blooming azaleas at the wrong time.
Pruning traditional azaleas in the fall will result in a loss of spring bloom the following year because most bloom on previous years’ wood. This means that they flower on growth put on throughout the previous growing season. If a gardener removes the previous season’s new growth, they are removing the blooms as well.
So, when is the proper time to prune azaleas? The ideal time to prune is directly after the spring bloom. This will give the plant enough time to generate abundant new growth, thus maximizing bloom next spring.
Even the developers of the Encore Azalea, a new repeat blooming type, recommend pruning as soon after the spring bloom as possible to maximize bloom set for the following year.
For more information on pruning azaleas or on general azalea culture, please read the UF / IFAS publication Azaleas at a Glance or check out the Pruning Azalea page on Gardening in a Minute.
Gardenia:
Gardenia, Image Credit Dan Culbert.
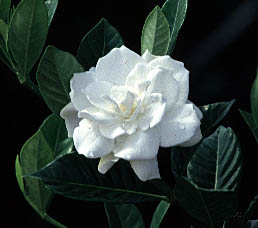
Gardenias don’t need much pruning except to remove any dead or non-productive wood, to help them remain bushy, and to remain the same size as other plants in the landscape. Choose a cultivar that will mimic the size of other shrubs, not one too large for the area. Pruning should be done as soon after the summer bloom as possible. Pruning after the beginning of fall will reduce the next year’s bloom production. Know your cultivar. Some cultivars of gardenia flower on new wood as well as old, while some flower on old wood only.
Spiraea:
Regarding spiraea, prune after the bloom as needed. The closer to the late summer or autumn, the greater negative effect pruning will have on bloom quality since spirea set their bloom in early autumn.
I hope this article prevented a few pruning disasters as well as started a thinking process for the act of pruning your landscape plants.
by Mary Salinas | Sep 9, 2015
After a few years, many perennial plants have grown so large that they need to be divided in order to be revived. Overcrowding causes them to bear fewer flowers and, sometimes, to die in the center. Fall is a good time to divide perennials that bloom in spring and summer and are now done blooming for the year. This is a great way also to expand your perennial beds or share some of your perennial favorites with friends and neighbors.

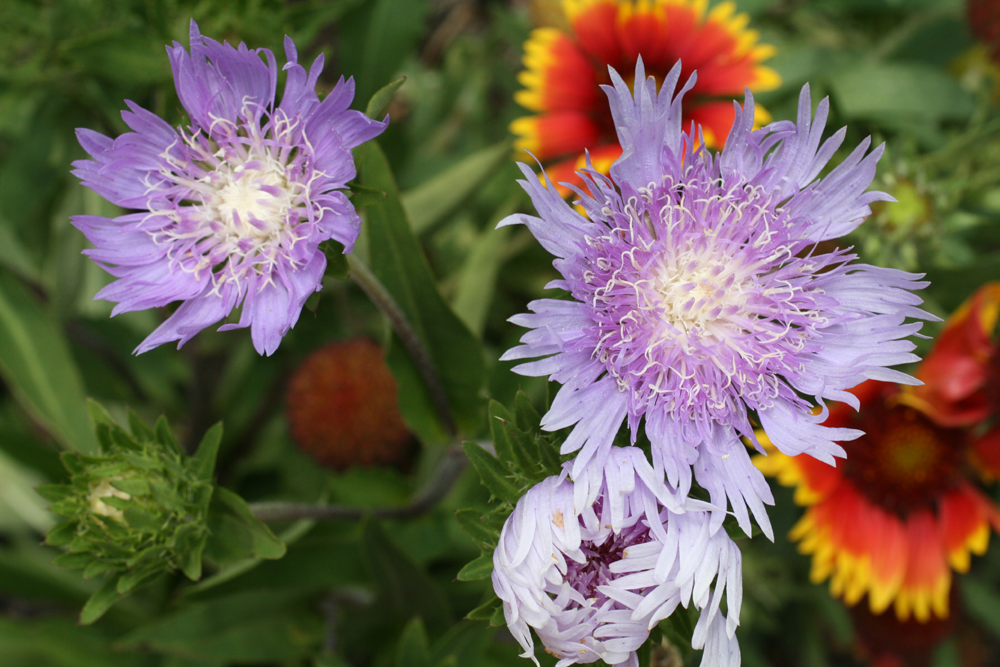
Vibrant blue Stokes’ aster. Photo credit: UF/IFAS.
Some examples of perennials to divide in the fall are:
- Stokes’ aster, Stokesia laevis
- Daylily, Hemerocallis spp.
- Black-eyed Susan, Rudbeckia hirta
- Yarrow, Achillea millefolium
- Crocosmia, Crocosmia spp.
- Flax lily, Dianella tasmanica ‘Variegata’
- Liriope, Liriope muscari
- Cast iron plant, Aspidistra elatior
The first step is to dig out the entire clump. If there is enough clearance in the garden bed, start digging about six inches out from the plant and dig straight down beyond the root zone. It’s best to get as much of the roots as possible to lessen the shock of transplanting. If the clump is too heavy to remove, make your divisions right there with a sharp blade, trowel or shovel. Often, you can just pull them apart with your hands.
Before replanting the divisions, consider adding some nutritious compost to those areas of your garden bed to ensure healthy plants. Be sure to replant as soon as feasible to protect the roots from drying out. After replanting, water the transplanted divisions well and mulch appropriately.
To explore further please see:
Gardening with Perennials in Florida
Propagation of Landscape Plants
by Molly Jameson | Sep 3, 2015
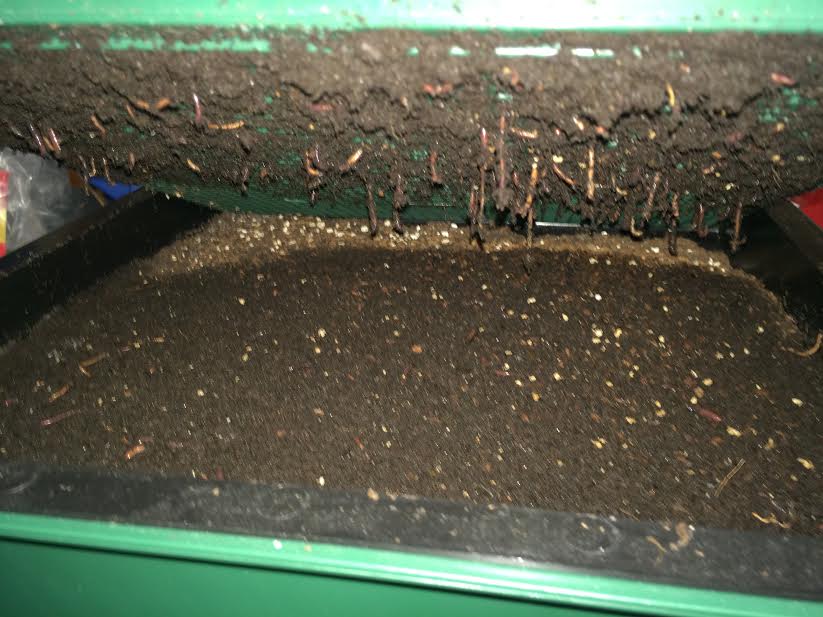
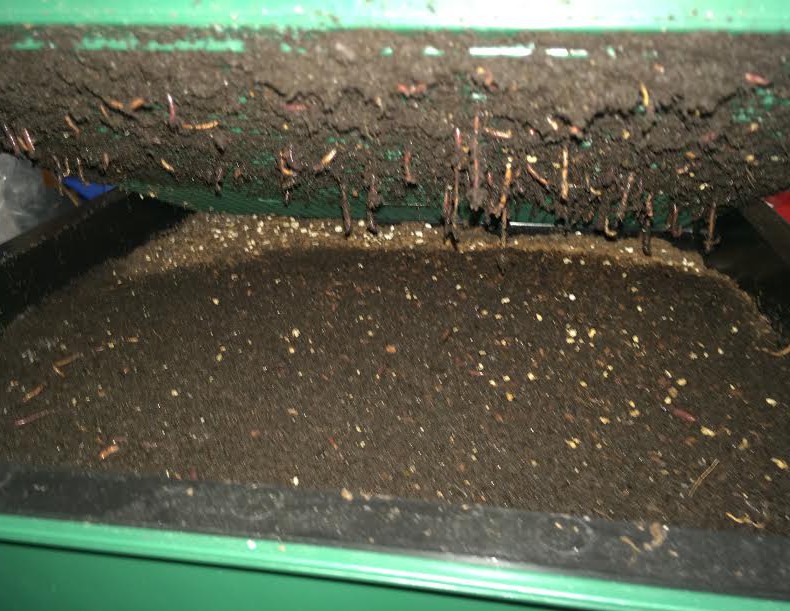
Red wigglers hanging through the bottom bin of a “Worm Factory” vermicompost system. Photo by Molly Jameson.
What if I told you there was a way to create compost indoors? No pitchfork required, no hot steamy temperatures, a simple mix of ingredients, and it would fit right under your kitchen sink? As long as you can convince your family to have worms in the house… you can start vermicomposting.
Vermicomposting uses a type of worm called red wigglers. These worms specialize in digesting organic matter, can digest their own body weight in food each day, and can double their population within months. It is, therefore, a wonderful way to responsibly dispose of food waste and can reduce your garbage by more than a third. Microorganisms inside the worms are actually doing most of the work, and the “castings” excreted are teaming with beneficial microbes and nutrients that will condition your soil and make the plants in your garden shine.
You can easily construct a vermicompost bin at home, but you can also purchase one online. Bins should hold about five gallons for one to two people or ten gallons for three to four (Rubbermaid containers work nicely). Your container should not exceed 12 inches in depth, as red wigglers do not like to burrow deeply. You will also want good aeration, so drill holes in the bottom of the bin and either place the bin in another container or put the bin on bricks and use a tray underneath to capture escaped materials. Either way, you will want a lid – as worms do not like light and need moisture – but they also need to breathe, so make sure it is not airtight. Be sure your bin is never in direct sunlight or in a location that regularly exceeds 80°F.
To get started, you will need about 1,000 worms, which weighs about one pound. Red wigglers can also be purchased online, at local nurseries, and some bait shops. Better yet – if you know vermicompost enthusiasts, they may be happy to share.
Before you purchase your worms, you want to prepare your worm bedding. Shredded newspaper and coconut fiber (coir) – which you can find at your local nursery – work great. You will also need to add a small scoop of garden soil to inoculate your bin with microbes. To get started, lightly moisten your bedding material and fill your bin about two-thirds full.
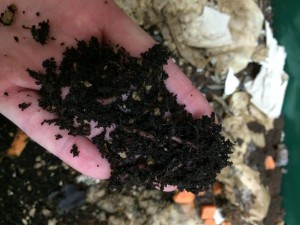
Finished worm castings will be dark, slightly moist, and will have an earthy smell. Photo by Molly Jameson.
Now it is time to add the food. Worms love vegetable scraps, most fruits, moldy bread, coffee filters and grounds, tea bags, and crushed eggshells. Chop their food into small pieces for fastest consumption. Foods to avoid include meat, dairy, large amount of citrus, and onion peels. Start out slow, and put the chopped food in the corner of your worm bin. Once your worms are settled, maintain the bin as half bedding, half food scraps. If your bin looks too dry, add more food. If your bin looks too wet, add more bedding or hold back on food a few days. Bad odors will develop only if the worms are overfed.
Give your worm bin about three to four months, and then you can begin to harvest. Add a handful of castings to potting mix or a thin layer directly to your garden. Give vermicomposting a try – your plants will thank you, your trash will not stink, and you will reduce your global impact.

by Julie McConnell | Sep 3, 2015
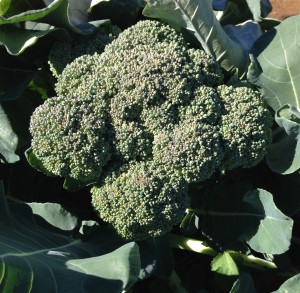
Broccoli, a popular winter vegetable. Photo by Mary Derrick, UF IFAS
As the days get shorter and temperatures decrease, it is time install your cool season vegetable garden. Many vegetables can be grown in Florida, but it is important to understand what the climatic requirements are for each crop to have the most success.
To get the most of your garden space know the recommended months for planting and the turnaround time for harvest so that you can stagger plantings or change out crops as needed.
September is the ideal time to plant cabbage, beets, kale, lettuce, mustard greens, onions, and radishes. After the New Year some options include eggplant, potatoes, English peas, and turnips.
Many gardeners start their tomatoes and peppers as early as February, but they are frost sensitive and early planting carries some risk of cold damage.
If you are interested in learning more about fall vegetable gardening, join the UF/IFAS Bay County Master Gardeners on Friday, September 18th for a free vegetable gardening workshop. This class will be held at the Bay County Extension Office at 2728 E. 14th Street in Panama City. To register please call 850-784-6105 or email bay@ifas.ufl.edu. Fall-VegMG2015
For more information and a full chart of what to plant when see Florida Vegetable Gardening Guide.