
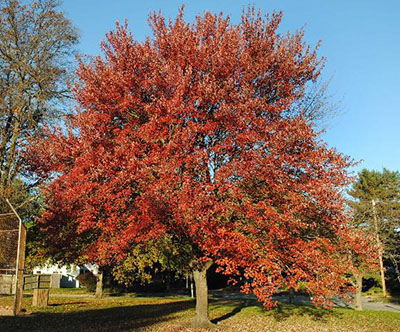
January to February is the ideal time to plant trees. During dormancy, all the energy in a tree is in the root system. They will establish very quickly. In the spring, they will be ready to grow leaves. Planting and establishing trees is all about managing air and moisture in the soil. The exception is palms. They are not technically trees and should only be planted in the late spring and summer. Three of the most common causes of poor plant establishment or tree death are planting too deep, under watering, and over watering. If appropriate trees are planted at the right depth and they are irrigated properly, the trees will thrive for years to come. As simple as this sounds, problems often arise that lead to poor establishment or plant failure.
Following ten critical steps can ensure proper tree planting:
1. Look up for wires and lights. Make sure that the tree species’ mature size will not interfere with any utility lines.
2. Find the topmost root and treat root defects. After removing the pot from the tree, remove all excess soil on the top of the root ball, until a root that is similar in diameter to the lower branches is located. That is the topmost root. Look for any roots that encircle the rootball, particularly close to the trunk. Remove any roots that will strangle the trunk. Cut all encircling roots at the point they turn to encourage root branching. Then, rough up or shave off all the roots on the perimeter of the rootball. If the tree is balled and burlapped, use a metal skewer to locate the depth of the topmost root.
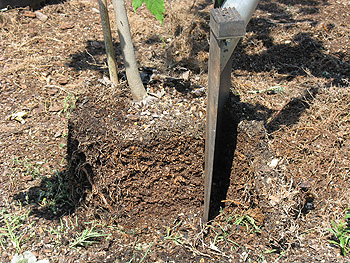
3. Dig shallow and wide hole. Using the corrected rootball as a gauge, dig the hole slightly less shallow that the rootball. Loosen the top six inches of soil around the entire rootball.
4. Carefully place tree in hole. Lower the tree into the hole slowly.
5. Position top root 1-2 inches above landscape soil. Make sure that the rootball is above the surrounding soil grade. If balled and burlapped, the nylon straps, metal pins, burlap on top of the rootball, and wire basket above the grade will need to be removed.
6. Straighten tree. Check the tree from two directions at 90% angles from each other.
7. Add and firm backfill soil. Tamp soil with fingers, not feet. Do not stomp on the soil. It will compact the soil and reduce the oxygen to the roots.
8. Add mulch. Apply a 2–3-inch layer of natural mulch out to the perimeter of the trees branches, or beyond if possible. However, there should be 1 inch or less mulch on top of the rootball. Do not allow mulch to touch the trunk.
9. Stake and prune if needed. If there is a strong steady wind, staking is necessary. Otherwise, don’t stake. Make sure to do all structural pruning is done at planting time. Establish a central leader and remove crossing branches. But do not remove the lower branches. Just reduce the length. The tree needs to bring food to the lower portion of the trunk to increase the diameter.
10. Water the tree. Don’t walk away until the tree has been watered. Apply at least ½ gallon. The tree will need to be watered twice a week for 20-30 weeks. The larger the tree, the more water needed at each event. However, if the water doesn’t perk in within a few minutes, reduce the amount being applied. Overwatering can be as harmful as underwatering.

- Watch for “Melting Grass” - February 19, 2025
- Palms Can Suffer in the Cold - January 30, 2025
- Camellia Care - January 9, 2025