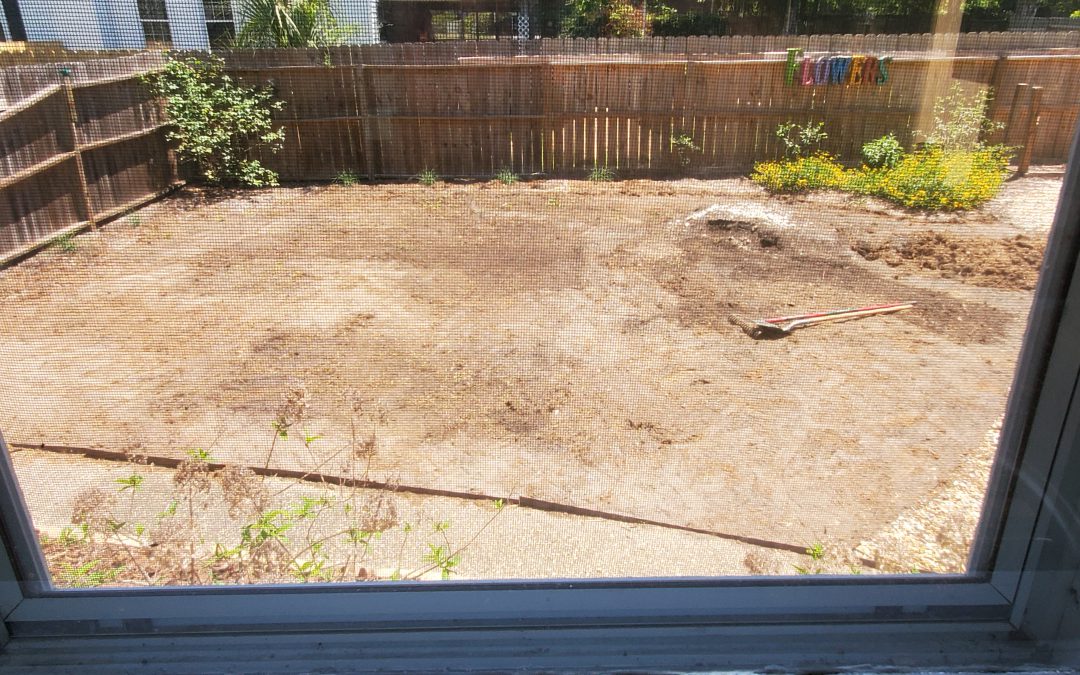
It is mid-summer with temperatures outside in the 90’s plus, so you may wonder why article on landscape installation considerations during this time of year. It simply is an excellent time for planning and preparing for fall and winter site prep and planting well before it arrives, reducing a time crunch when it is time to plant.
Think healthy plants for our Northwest Florida settings, proper preparation of the site before planting, and many other points to be successful with establishing a landscape that will be enjoyed by all. This article will address the use of woody ornamental plants, but many things discussed can be applied to perennials and annuals as well.
Before starting, make sure to do your homework not only on the plants and placement in the landscape, but any county, city, or homeowner association requirements to work within. Many neighborhoods have review committees for these approvals. This commitment by you when purchasing property and a home can be a part of the closing papers during the purchase. If you are required to submit for an approval before work can begin you might want to consider consulting with a professional landscape company to assist in this process. Always ask for references and sites you can visit before securing services.
Site preparation can be a afterthought, with limited funding focused on this critical area, but properly addressing it leads to healthy, vigorous plant establishment and future growth. Understanding the site from soil type and drainage, size of area, sunlight, water availability, plus needs of prospective plants goes a long way to being successful. If there are plants already established on site that may be worth keeping, be sure to include them in the consideration. Determining soil drainage, moisture retention that would be available to plants, soil pH and structure will also go a long way to determining the type of plants that work best for the site. If, for example, your site does not drain well and holds higher levels of water in the root zone area (top 12″ of soil), consider plants that grow well in wet settings. The next steps are determining soil pH and nutrient needs for general landscape plant growth performance. Many plants thrive in slightly acidic soil (pH 6.0 to 7.0 range) while others grow best in moderately acidic settings (pH 5.0 to 6.0 range). Contact your local UF IFAS Extension office in your county for additional information.
The landscape site brings other considerations for plants to flourish, involving space and light. Space should be considered both above and below ground. With the above ground area, is there room for the limbs to expand in width and height? If pruning is required to manage the size, considering another plant may be a viable option. Next is the root growth and expansion opportunity for the plant. If the root area is limited in space, other options may need to be considered to mitigate compacted soils or pavement areas. Adding raised beds for better soil drainage and increased root growth room may be an option. Be sure to know your soil type and use a similar soil with characteristic that match the existing soil. If you do not, there can be incompatibility that leads to a hard pan layer between the soils reducing potential root zone establishment.
The desire to develop and establish an enjoyable landscape for all to appreciate can be a challenge, but a positive one. As a reminder, call and go visit with your local UF IFAS Extension office, there is great research information available for the asking. Enjoy your gardening experience.
January to February is the ideal time to plant trees. During dormancy, all the energy in a tree is in the root system. They will establish very quickly. In the spring, they will be ready to grow leaves. Planting and establishing trees is all about managing air and moisture in the soil. The exception is palms. They are not technically trees and should only be planted in the late spring and summer. Three of the most common causes of poor plant establishment or tree death are planting too deep, under watering, and over watering. If appropriate trees are planted at the right depth and they are irrigated properly, the trees will thrive for years to come. As simple as this sounds, problems often arise that lead to poor establishment or plant failure.
Following ten critical steps can ensure proper tree planting:
1. Look up for wires and lights. Make sure that the tree species’ mature size will not interfere with any utility lines.
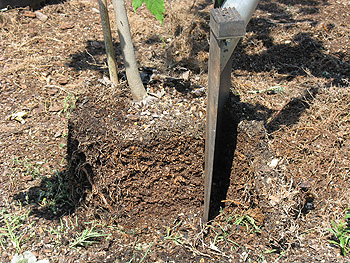
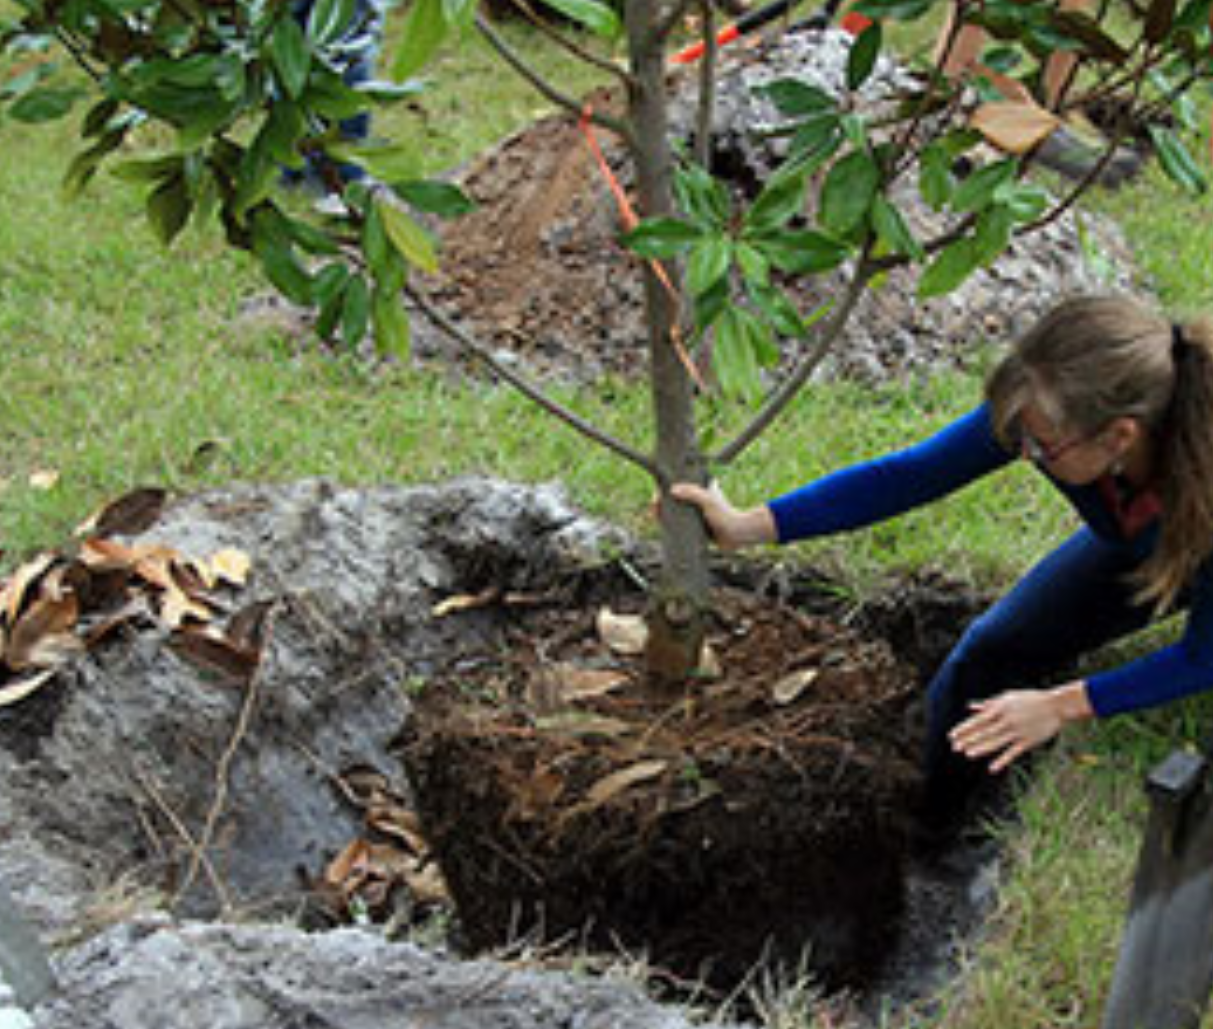
2. Find the topmost root and treat root defects. After removing the pot from the tree, remove all excess soil on the top of the root ball, until a root that is similar in diameter to the lower branches is located. That is the topmost root. Look for any roots that encircle the rootball, particularly close to the trunk. Remove any roots that will strangle the trunk. Cut all encircling roots at the point they turn to encourage root branching. Then, rough up or shave off all the roots on the perimeter of the rootball. If the tree is balled and burlapped, use a metal skewer to locate the depth of the topmost root.
Remove an inch or more for extremely rootbound trees.
3. Dig shallow and wide hole. Using the corrected rootball as a gauge, dig the hole slightly less shallow that the rootball. Loosen the top six inches of soil around the entire rootball.
4. Carefully place tree in hole. Lower the tree into the hole slowly.
5. Position top root 1-2 inches above landscape soil. Make sure that the rootball is above the surrounding soil grade. If balled and burlapped, the nylon straps, metal pins, burlap on top of the rootball, and wire basket above the grade will need to be removed.
6. Straighten tree. Check the tree from two directions at 90% angles from each other.
7. Add and firm backfill soil. Tamp soil with fingers, not feet. Do not stomp on the soil. It will compact the soil and reduce the oxygen to the roots.
8. Add mulch. Apply a 2–3-inch layer of natural mulch out to the perimeter of the trees branches, or beyond if possible. However, there should be 1 inch or less mulch on top of the rootball. Do not allow mulch to touch the trunk.
9. Stake and prune if needed. If there is a strong steady wind, staking is necessary. Otherwise, don’t stake. Make sure to do all structural pruning is done at planting time. Establish a central leader and remove crossing branches. But do not remove the lower branches. Just reduce the length. The tree needs to bring food to the lower portion of the trunk to increase the diameter.
10. Water the tree. Don’t walk away until the tree has been watered. Apply at least ½ gallon. The tree will need to be watered twice a week for 20-30 weeks. The larger the tree, the more water needed at each event. However, if the water doesn’t perk in within a few minutes, reduce the amount being applied. Overwatering can be as harmful as underwatering.
There are some key practices that are necessary to make sure your trees and shrubs establish and thrive in your landscape. Learn a few pointers from UF IFAS Extension Escambia County to promote healthy establishment after correct plant installation. Learn about installing shrubs with the UF IFAS publication Establishing Shrubs in the Florida Landscape.
One big goal of establishing a home lawn and landscape is to enjoy an attractive setting for family and friends, while also helping manage healthy soils and plants. Soil compaction at these sites can cause multiple problems for quality plants establishment and growth. Soil is an incredibly important resource creating the foundation for plants and water absorption.
Photo courtesy: Stephen Greer, UF IFAS
Soils are composed of many different things, including minerals. In Florida, these minerals often include sand of differing sizes and clay in the northern area of the counties in the panhandle of Florida. Soil is also composed of organic matter, nutrients, microorganisms and others. When soil compacts, the air spaces between the sand or clay are compressed, reducing the space between the mineral particles. This can occur anytime during the landscape and lawn construction phase or during long term maintenance of the area with equipment that could include tractors, mowers, and trucks.
What can be done to reduce soil compaction? There are steps that can be taken to help reduce this serious situation. Make a plan on how to best approach a given land area with the equipment needed to accomplish the landscape of your dreams. Where should heavy equipment travel and how much impact they will have to the soils, trees, and other plants already existing and others to be planted? At times heavy plywood may be needed to distribute the tire weight load over a larger area, reducing soil compaction by a tire directly on the soil. Once the big equipment use is complete, look at ways to reduce the areas that were compacted. Incorporating organic matter such as compost, pine bark, mulch, and others by tilling the soil and mixing it with the existing soil can help. Anytime the soil provides improved air space, root will better grow and penetrate larger areas of the soil and plants will be healthier.
Even light foot traffic over the same area over and over will slowly compact soils. Take a look at golf course at the end of cart paths or during a tournament with people walking over the same areas. The grass is damaged from the leaves at the surface to the roots below. Plugging these areas or possibly tilling and reestablishing these sites to reduce the compacted soils may be necessary.
Photo courtesy: Stephen Greer, UF IFAS
Water absorption is another area to plan for, as heavy rains do occur in Florida. Having landscapes and lawns that are properly managed allow increased water infiltration into the soil is critically important. Water runoff from the site is reduced or at least slowed to allow the nutrient from fertilizers used for the plant to have more time to be absorbed into the soil and taken up by the plants. This reduces the opportunity for nitrogen, phosphorus, and other nutrients to enter water areas such as ponds, creeks, lagoons, rivers and bays. Even if you are miles from an open water source, movement of water runoff can enter ditches and work their way to these open water areas, ultimately impacting drinking water, wildlife, and unwanted aquatic plant growth.
Plan ahead and talk with experts that can help with developing a plan. Contact your local Extension office for assistance!
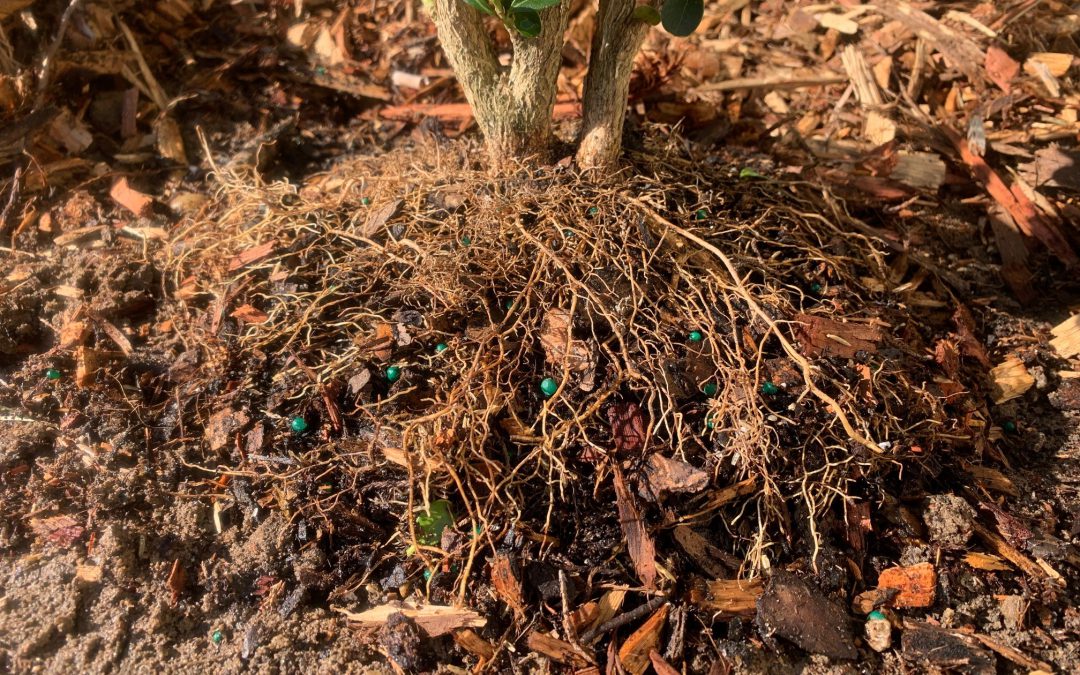
Need tips on planting and caring for trees? The primary focus in care of your newly planted tree is root development. It takes several months for roots to establish and newly planted trees and shrubs do not have a very strong root system. Start by digging the hole in a popcorn bowl shape. Once planted, backfill around the root system, but be careful not to compact the soil as this will hinder root growth. Be sure to keep the topmost area of the root ball exposed, about one to two inches. A layer of mulch will be applied here.
Frequent watering is much needed, especially if you are planting in the summer. Water thoroughly, so that water percolates below the root system. Shallow watering promotes surface root growth, which will make the plant more susceptible to stress during a drought. Concentrate some of the water in a diameter pattern a few feet from the trunk. This will cause the root system to grow towards the water, and thus better establish the root system and anchor the tree.
Figure: A Traditional Staking Option. Credit: Edward F. Gilman, UF/IFAS Extension.
Mulch is important in the conservation of soil moisture. Pine needles, bark, wood chips, and other organic materials make a great mulch. A three inch layer of mulch will usually suffice. It’s important to keep the mulch a few inches from the trunk as mulching too close to the tree trunk can cause rot.
You should always prune the bare roots of trees during planting. These exposed roots in containers can be damaged in shipping and removing some of the roots will help trigger growth. Pruning some of the top foliage can also reduce the amount of water needed for the plant to establish, as well. Trees and shrubs grown and shipped in burlap or containers usually need very little pruning.
Newly planted trees often have a difficult time establishing if the root system cannot be held in place. Strong winds and rain can cause the plant to tip over. Avoid this by staking the plant for temporary support. A good rule of thumb to determine staking need is if the trunk diameter measures three inches or less, it probably needs some support! Tie the stake to the plant every six inches from the top. However, only tie the trunk at one spot. Don’t tie too tightly so that the tree has no flexibility. This will stunt the growth of the tree.
Following these tips will help ensure your tree becomes well established in your landscape. For more information please contact your local county extension office.
Information for this article can be found in the UF/IFAS EDIS publication: “Planting and Establishing Trees” by Edward F. Gilman and Laura Sadowiski: https://edis.ifas.ufl.edu/pdf%5CEP%5CEP31400.pdf
Supporting information also provided by UF/IFAS Extension Forestry Specialist Dr. Patrick Minogue, of the North Florida Research Education Center in Quincy, Florida.
National Arbor Day is April 30 and although we celebrate Florida Arbor Day in January you may find yourself planting trees right now as Spring Fever sets in. It is a little easier on the tree and the gardener caring for it to plant in the winter, but you can plant year-round if you implement proper care to ensure good establishment.
The most common problems with trees we see at our help desk are related to incorrect installation and establishment. Number one is incorrect planting depth and number two is incorrect watering during establishment. This article will cover a few pitfalls to avoid so that whenever you plant your tree you will increase your likelihood of success!
Planting Depth
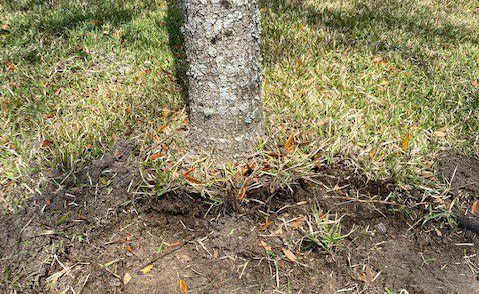
It is important that tree roots are not too deep so that they can adequately access both water and oxygen needed for survival and root generation. A good rule of thumb is to plant new trees with 10% of the root ball above the natural grade. Also check to be sure the root flare is exposed in trees that have this feature. This may require removing some soil from the top of the root ball as it came from the nursery.
A few common mistakes that lead to incorrect planting depth are listed below:
Leaving burlap and straps on the top of root balls of balled-and-burlap (B&B) trees
Piling soil on top of the root ball
Adding mulch to the root ball
Laying sod on top of root ball
Planting on a slope where soil can erode onto the root ball
Planting level with grade – trees settle and bark mixtures decompose which cause the tree to become deeper than originally planting
Creating a bed with added soil around trees (this is more common on mature trees and should be avoided)
When planting a tree, measure height and width of the corrected root ball. Dig the hole 90% as deep as the height and 125-150% as wide as the root ball. There is no need to add fertilizer or amendments to the hole, simply plant into the native soil and water appropriately.
Watering Until Tree is Established
The establishment period is the time it takes for a plant to create enough functional roots to adequately uptake water and nutrients needed to survive with little to no supplemental irrigation. In general, smaller/younger plants establish more quickly than larger ones so there are benefits to starting small when choosing trees.
Soil texture, rainfall, time of year, and tree species will factor into how long it takes for a tree to become established but there are a few guidelines to help you plan. Irrigate 2-5 gallons of water per inch trunk caliper during establishment period. Hint- your turfgrass irrigation output is not sufficient for optimum tree root growth. The chart below offers a range of irrigation frequency based on size of tree at installation and whether your goal is for fast growth or just enough to survive.
Size of Nursery Stock
Irrigation Schedule for Vigor
Irrigation Schedule for Survival
Less than 2” trunk caliper
Daily: 2 weeks
Every other day: 2 months
Weekly: Until established
Twice weekly for 2-3 months
2-4-inch trunk caliper
Daily: 1 month
Every other day: 3 months
Weekly: Until established
Twice weekly for 3-4 months
Gilman and Sadowski. “Planting and Establishing Trees.” This document is ENG 1061, one of the Urban Forest Hurricane Recovery Program series of the School of Forest Resources and Conservation and the Environmental Horticulture Department, UF/IFAS Extension. Original publication date September 2007. Reviewed February https://edis.ifas.ufl.edu/pdffiles/EP/EP31400.pdf