by Daniel J. Leonard | Nov 21, 2018
After a devastating windstorm, as we just experienced in the Panhandle with Hurricane Michael, people have a tendency to become unenamored with landscape trees. It is easy to see why when homes are halved by massive, broken pine trees; pecan trunks have split and splayed, covering entire lawns; wide-spreading elms were entirely uprooted, leaving a crater in the yard. However, in these times, I would caution you not to rush to judgement, cut and remove all trees from your landscape. On the contrary, I’d encourage you, once the cleanup is over and damaged trees rehabilitated or disposed of, to get out and replant your landscape with quality, wind-resistant trees.
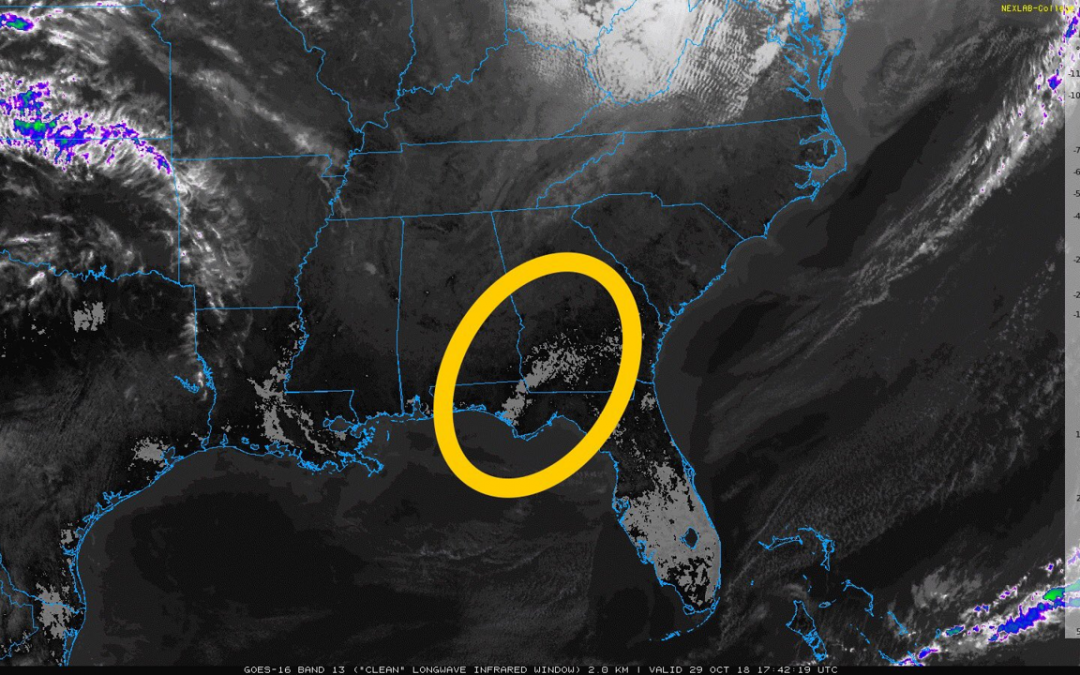
First, it’s helpful to take a step back and remember why we plant and enjoy trees and the important role they play in our lives. Beyond the commercial aspect of farmed timber, there are many reasons to be judicious with the chainsaw in the landscape and to plant anew where seemingly sturdy trees once stood. For example, trees provide enormous service to homes and landscapes, from massive cooling effects to aesthetic appeal. Take this thermal satellite image of Hurricane Michael’s path that simultaneously shows the devastation of a major hurricane and the role trees play in the environment.
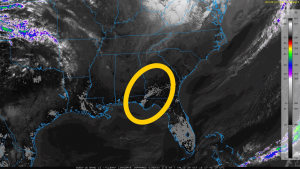
Lightly shaded area showing higher ground temperatures from loss of vegetation.
In the lighter colored areas where the wind was strongest and catastrophic tree damage occurred, the ground temperatures are much higher than the unaffected areas. Lack of plant life is entirely to blame. Plants, especially trees, provide enormous shading effects on the ground that moderate ground temperatures and the process of transpiration releases water vapor, cooling the ambient air. Trees also lend natural beauty to neighborhood settings. There is a reason people termed the hardest hit areas by Michael “hellscapes”, “warzones”, etc. Those descriptions imply a lack of vegetation due to harsh conditions. In this respect, trees soften the landscape with their foliage colors and textures, create architecture with their height and shape, and screen people from noise, unpleasant sights and harsh heat.
Though all trees give us the benefits outlined above, research conducted by the University of Florida over a span of ten major hurricanes, from Andrew to Katrina, shows that some trees are far more resistant to wind than others and fare much better in hurricanes. In North Florida, the trees that most consistently survived hurricanes with the least amount of structural damage were Live Oaks, Cypresses, Crape Myrtle, American Holly, Southern Magnolia, Red Maple, Black Gum, Sycamore, Cabbage Palm and a smattering of small landscape trees like Dogwood, Fringe Tree, Persimmons, and Vitex. If one thinks about these trees’ growth habits, broad resistance to disease/decay, and native range, that they are storm survivors comes as no surprise. Consider Live Oak. This species originated along the coastal plain of the Southeastern United States and have endured hurricanes here for several millennia. Possessing unusually strong wood, they have also developed the ability to shed the majority of their leaves at the onset of storms. This defense mechanism leaves a bare appearance in the aftermath but allows the tree to mostly avoid the “umbrella” effect other wide crowned trees experience during storms and retain the ability to bounce back quickly. Consider another resistant species, Bald Cypress. In addition to having a strong, straight trunk and dense root system, the leaves of Bald Cypress are fine and featherlike. This leaf structure prevents wind from catching in the crown. Each of the other listed species possess similar unique features that allow them to survive hurricanes and recover much more quickly than other, less adapted species.
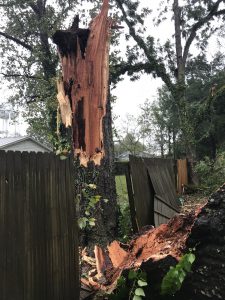
Laurel Oak split from weak branching structure.
However, many widely grown native trees and exotic species simply do not hold up well in tropical cyclones and other wind events. Pine species, despite being native to the Coastal South, are very susceptible to storm damage. The combination of high winds and beating rains loosens the soil around roots, adds tremendous water weight to the crown high off the ground, and puts the long, slender trunks under immense pressure. That combination proves deadly during a major hurricane as trees either uproot or break at weak points along the trunk. In addition to pines, other widely grown native species (such as Pecan, Laurel Oak and Water Oak) and exotic species (such as Chinese Elm) perform poorly in storms. Just as the trees that survive storms well possess similar features, so do these poor performers. We’ve already mentioned why pines and hurricanes don’t mix well. Pecan, Laurel Oak, and Water Oak tend to have weak branch angles and break up structurally in wind events. The broad spreading, heavy canopy of trees like Chinese Elm cause them to uproot and topple over. It would be advisable when replanting the landscape, to steer clear of these species or at least site them a good distance from important structures.
This piece is not a warning to condemn planting trees in the landscape; rather it is a template to guide you when selecting trees to replant. Many of our deepest memories involve trees, whether you first climbed one in your grandparent’s yard, fished under one around a farm pond, or carved your initials into one in the forest. Don’t become frustrated after a once in a lifetime storm and refuse to replant your landscape or your forest and deprive your children of those experiences. As sage investor Warren Buffett once wisely said, “Someone is sitting in the shade today because someone planted a tree a long time ago.”
For these and other recommendations about how to “hurricane-proof” your landscape, contact your local UF/IFAS Extension Office. Plant a tree today.
by Daniel J. Leonard | Sep 25, 2018
Florida is known for many things, however sweeping vistas of hillsides covered in the orange, red, and yellow foliage of fall is not one of them. Our long, hot summers and short, cool (not cold) winters, and lack of anything of substance resembling a season in between, precludes the fall color show our neighbors to the north enjoy. Don’t settle for synthetic Halloween decorations or faux painted leaves to add festivity to the autumn landscape design. When football season kicks off and summer blooming annuals begin to fade, it’s time to reach into the horticultural toolbox and pull out a couple fall-y Florida Friendly annual foliage species, perfect for the balmy Panhandle “autumn”: ‘Alabama Sunset’ coleus and ‘Petra’ croton.
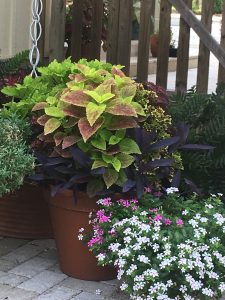
‘Alabama Sunset’ Coleus in mixed container – Photo Courtesy Andrea Schnapp
The first plant to consider when looking for outstanding heat tolerant foliage is the common coleus (Solenostemon scuttellarioides), particularly the cultivar ‘Alabama Sunset’. As the name indicates, ‘Alabama Sunset’ offers leaves in shades of red and yellow, perfect for designing fall containers or mixing into planting beds. This popular summer annual is known for its ability to add interesting color and texture to shady areas.
Recently with the arrival of the ‘sun coleus’ series (to which ‘Alabama Sunset’ belongs), coleus is permissible in situations with greater sunlight. Coleus is incredibly easy to grow and easy to find since nearly every nursery stocks at least a few cultivars. What’s more, these plants are generally free of pests and disease problems! Even sun coleus does appreciate a little protection from the hot afternoon sun and occasional deadheading of flowers.

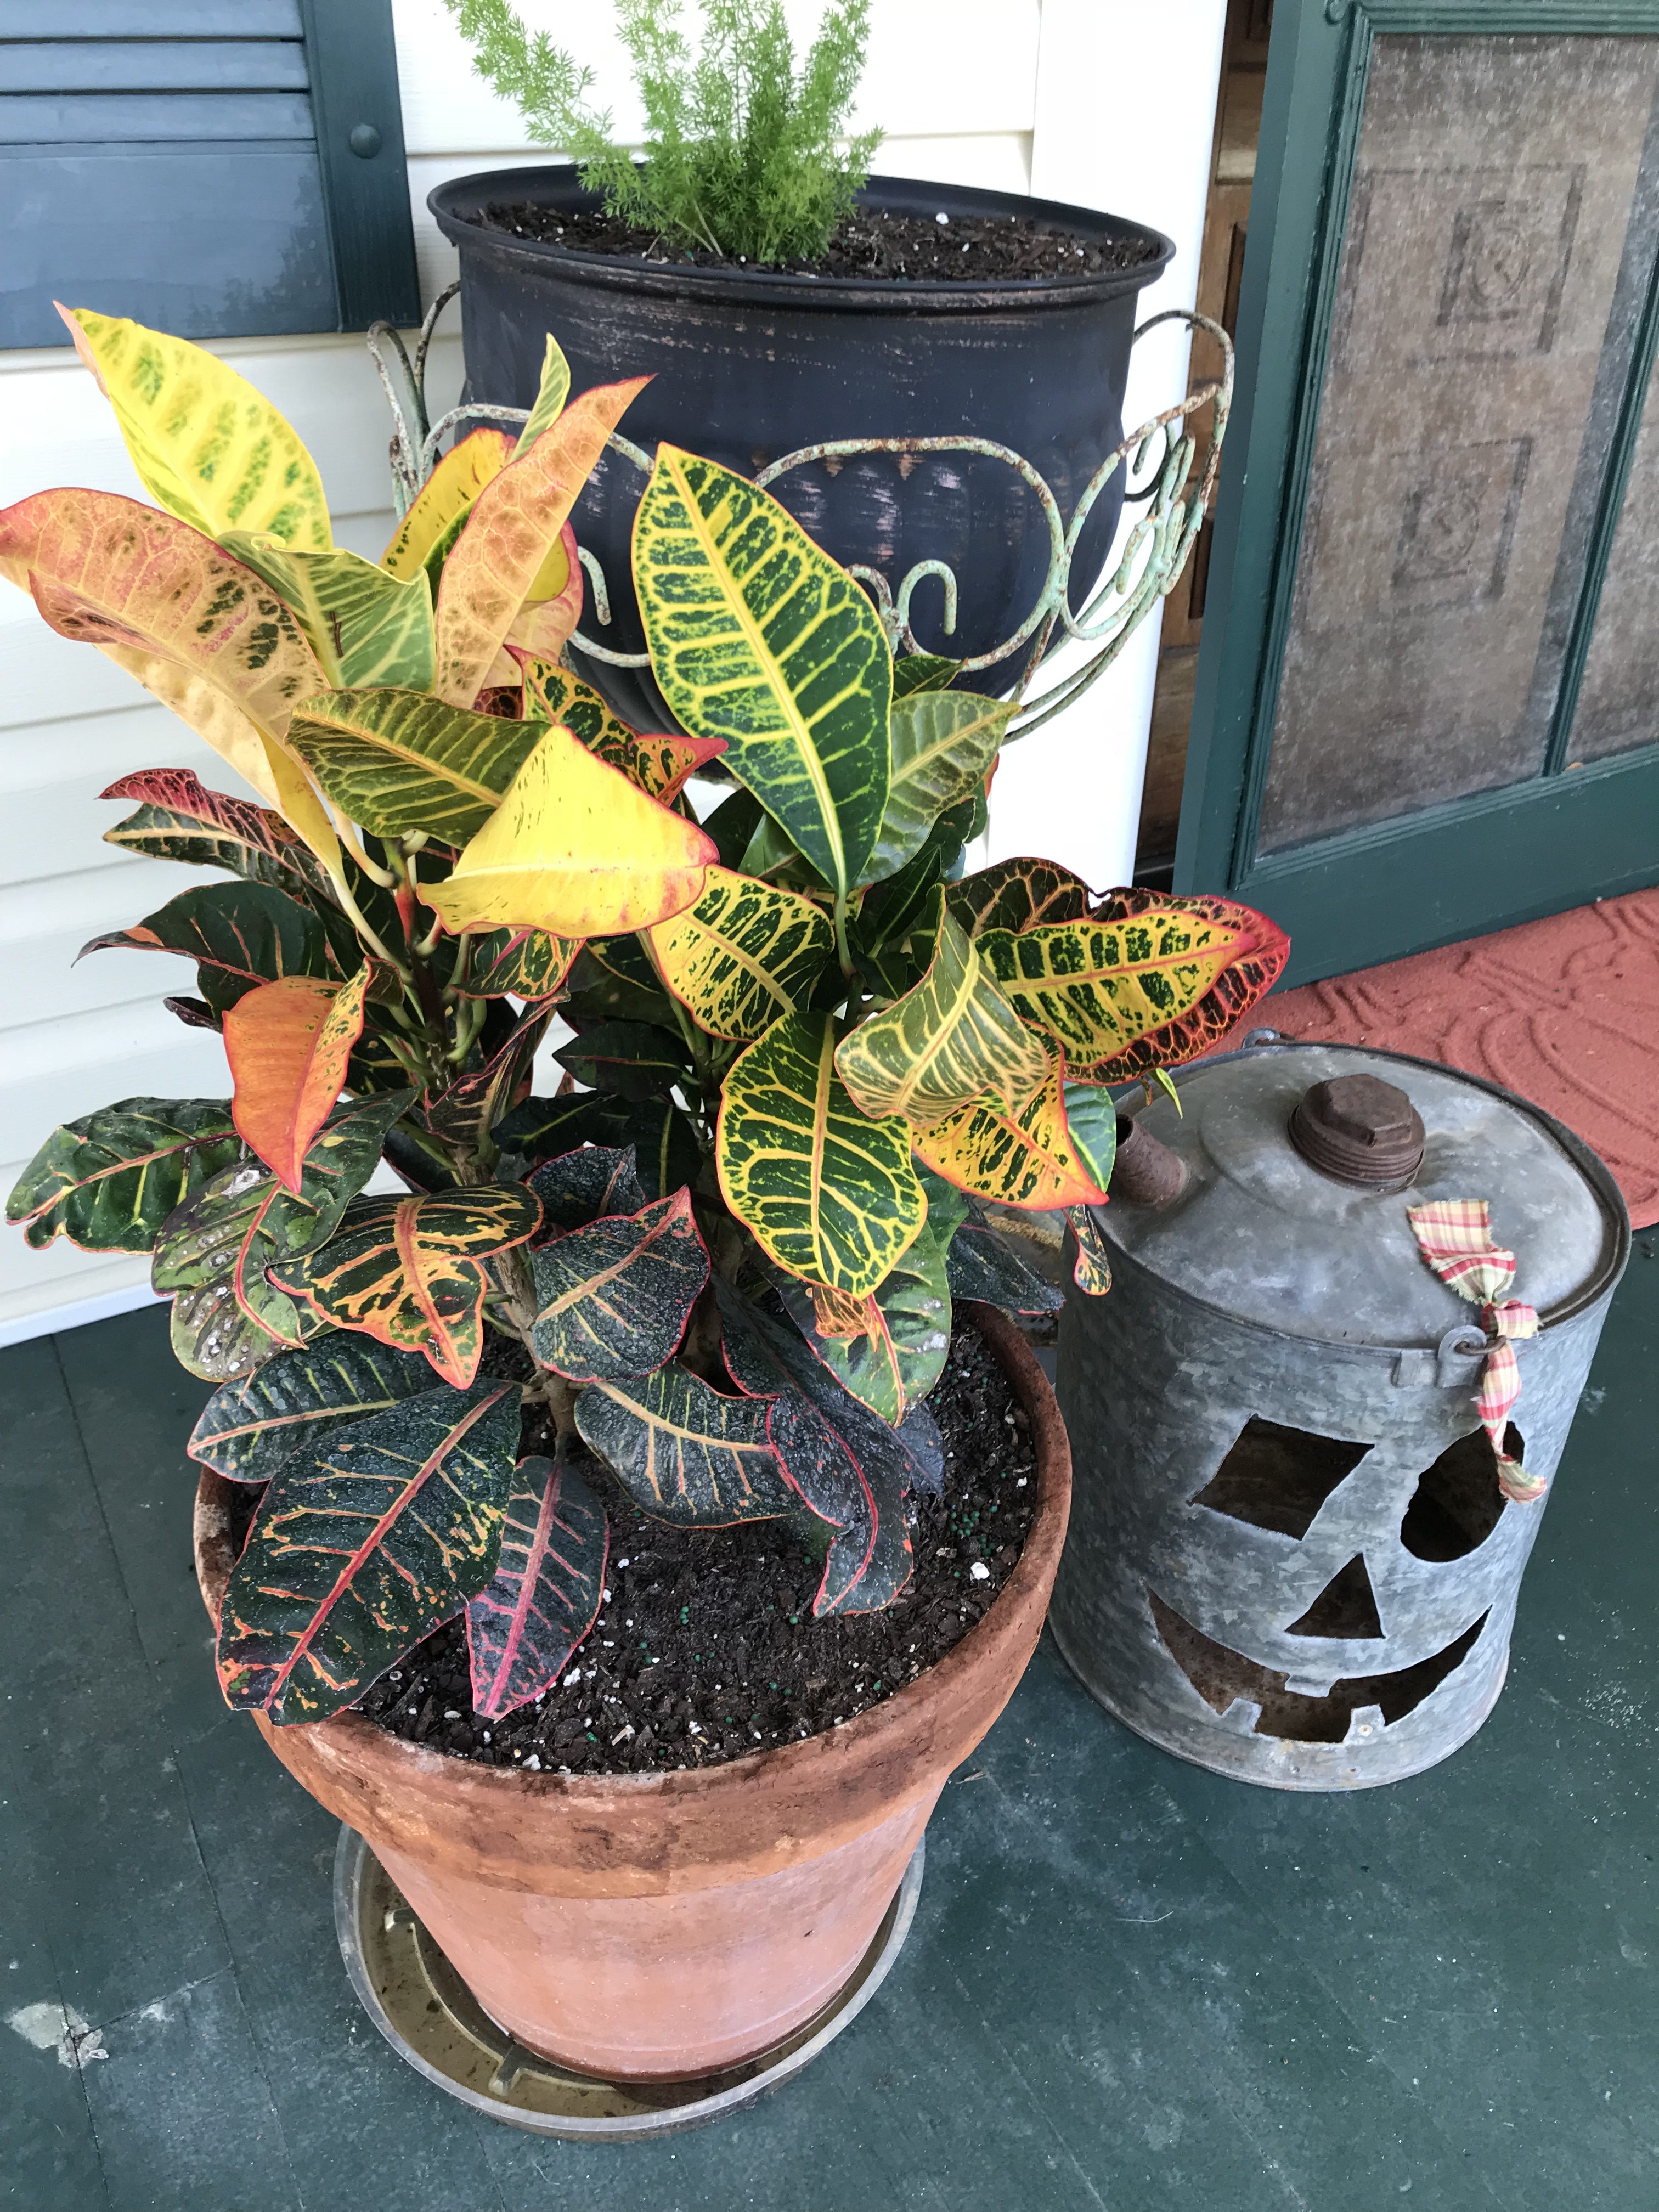
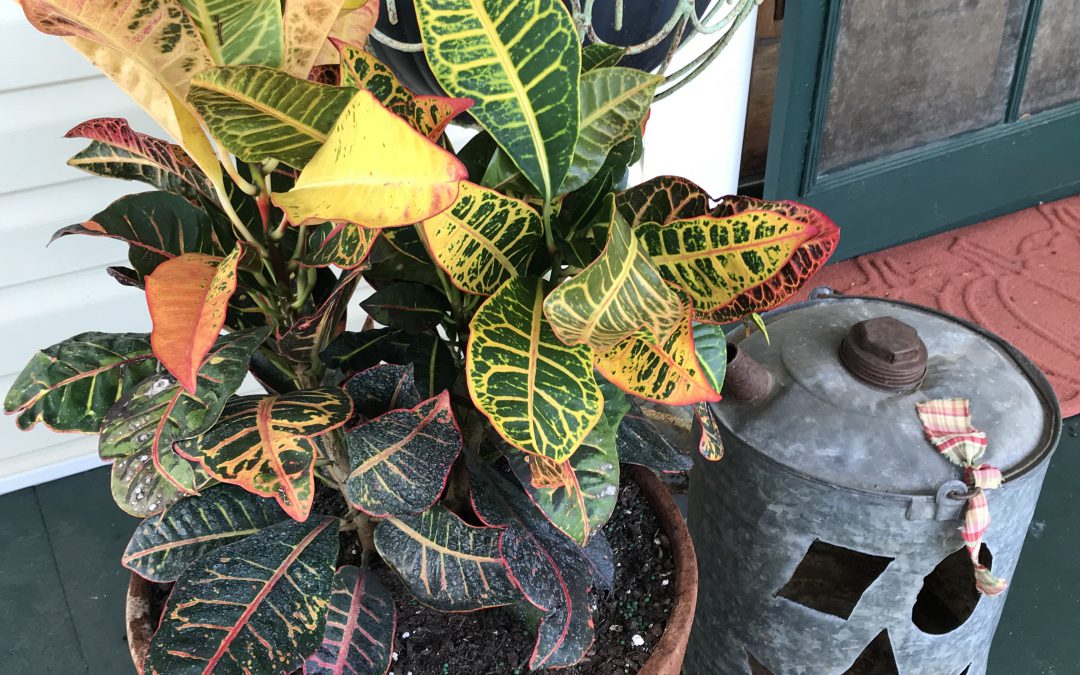
‘Petra’ Croton. Photo courtesy Daniel Leonard.
The second plant in the fall foliage arsenal is ‘Petra croton’ (Codiaeum variegatum ‘Petra’). Primarily known as a tropical foliage or indoor houseplant, Petra croton is criminally underused in fall landscape and container design. Petra croton sports bold magnolia-sized leaves striped with colors of yellow, red, orange, and black. A great Halloween plant to complement those front-porch Jack-O-Lanterns!
Like coleus, Petra croton is extremely easy to grow either in a container or in the ground. It should be located in either in full sun or partial shade and watered through establishment. Otherwise, this species is quite drought tolerant and can be killed with kindness if watered too frequently!
Although croton is a perennial shrub in the tropics, in Northwest Florida it may be killed by frost and best treated as an annual. Croton can be expected to reach 30-36” in height in a single season, its size and the boldly colored foliage make it a true focal point in the autumn landscape!
Appalachian-grade fall color may be unattainable in the Panhandle in the literal sense, but with these novel plant selections the autumn mood may be present even as the emerald waves hit the sugar white sand. By using annual foliage plants that possess traditional fall colors throughout their life cycle, anyone can add a splash of Autumn to their mixed containers or landscape beds. ‘Alabama Sunset’ coleus and ‘Petra’ croton are the perfect match for this time of year, pairing ease of culture with bold, seasonal color. Plant a couple today!
by Daniel J. Leonard | Jul 20, 2018
Too often, would be gardeners travel to exotic locales, become intoxicated with the beautiful floral display of Plumeria, Jatropha, Bird of Paradise and Bougainvillea, and come home with visions of homemade leis picked from the garden dancing in their heads. As anyone who has attempted to grow any of the aforementioned plants in the Panhandle will tell you though, fulfilling those visions in the landscape are easier said than done! However, not all is lost for the gardener wanting to bring the tropics home. A tropical feel in the landscape can be achieved, you just have to look beyond the aforementioned flowering plants that will have long since succumbed to winter frost by the time they mature and begin flowering and instead to tropical foliage plants that can be enjoyed for a season and easily (cheaply too!) replaced the following spring. Of all the tropical foliage options available for Panhandle landscapes, my favorite is the Ti Plant, sometimes called Hawaiian Ti.
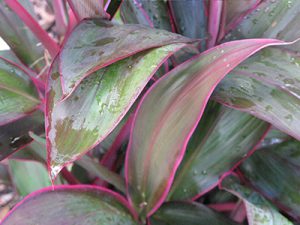
Ti Plant foliage
Even if you have never heard of Ti, you have probably seen it. The strap like, 12-18” long, purple and pink striped leaves are hard to miss and add an unmistakable tropical flair in the landscape! Ti Plants grow generally in single, unbranched stalks, though most commercial growers combine several plants into a single pot to give a bushy, multi trunked appearance that looks more appealing on a retail nursery bench. These plants will easily reach 4-6’ in height in a single warm season, providing a powerful punch of pink/purple all summer long. In addition to its considerable attractiveness, Ti boasts a cosmopolitan constitution, as it will grow in sun or shade, outside or inside. Of course, some cultural do’s apply to Ti broadly, regardless of where it is grown, as well as a few don’ts.
In general, Ti will be more colorful in brighter light. Though it grows well in shade, its leaves tend to lose their luster and fade to a dull purple in full shade. Similarly, though it will survive in full, all day sun, Ti’s foliage tends to bleach a bit in these conditions and can turn a whitish gray. It is best to shoot for somewhere in the middle for the most vivid foliage color. If growing indoors, give Ti as much light as you can. If growing outdoors, full sun through midafternoon is appropriate, as is bright shade throughout the day. Be sure to give Ti plants consistent moisture, as they will readily wilt down under prolonged drought conditions. As with watering, Ti prefers a consistently fertile soil and will appreciate a topdressing of a complete, slow release fertilizer (made by Osmocote, Harrell’s and others) at planting, with a follow up application 60-90 days later (possibly more frequently depending on temperature and frequency of watering).

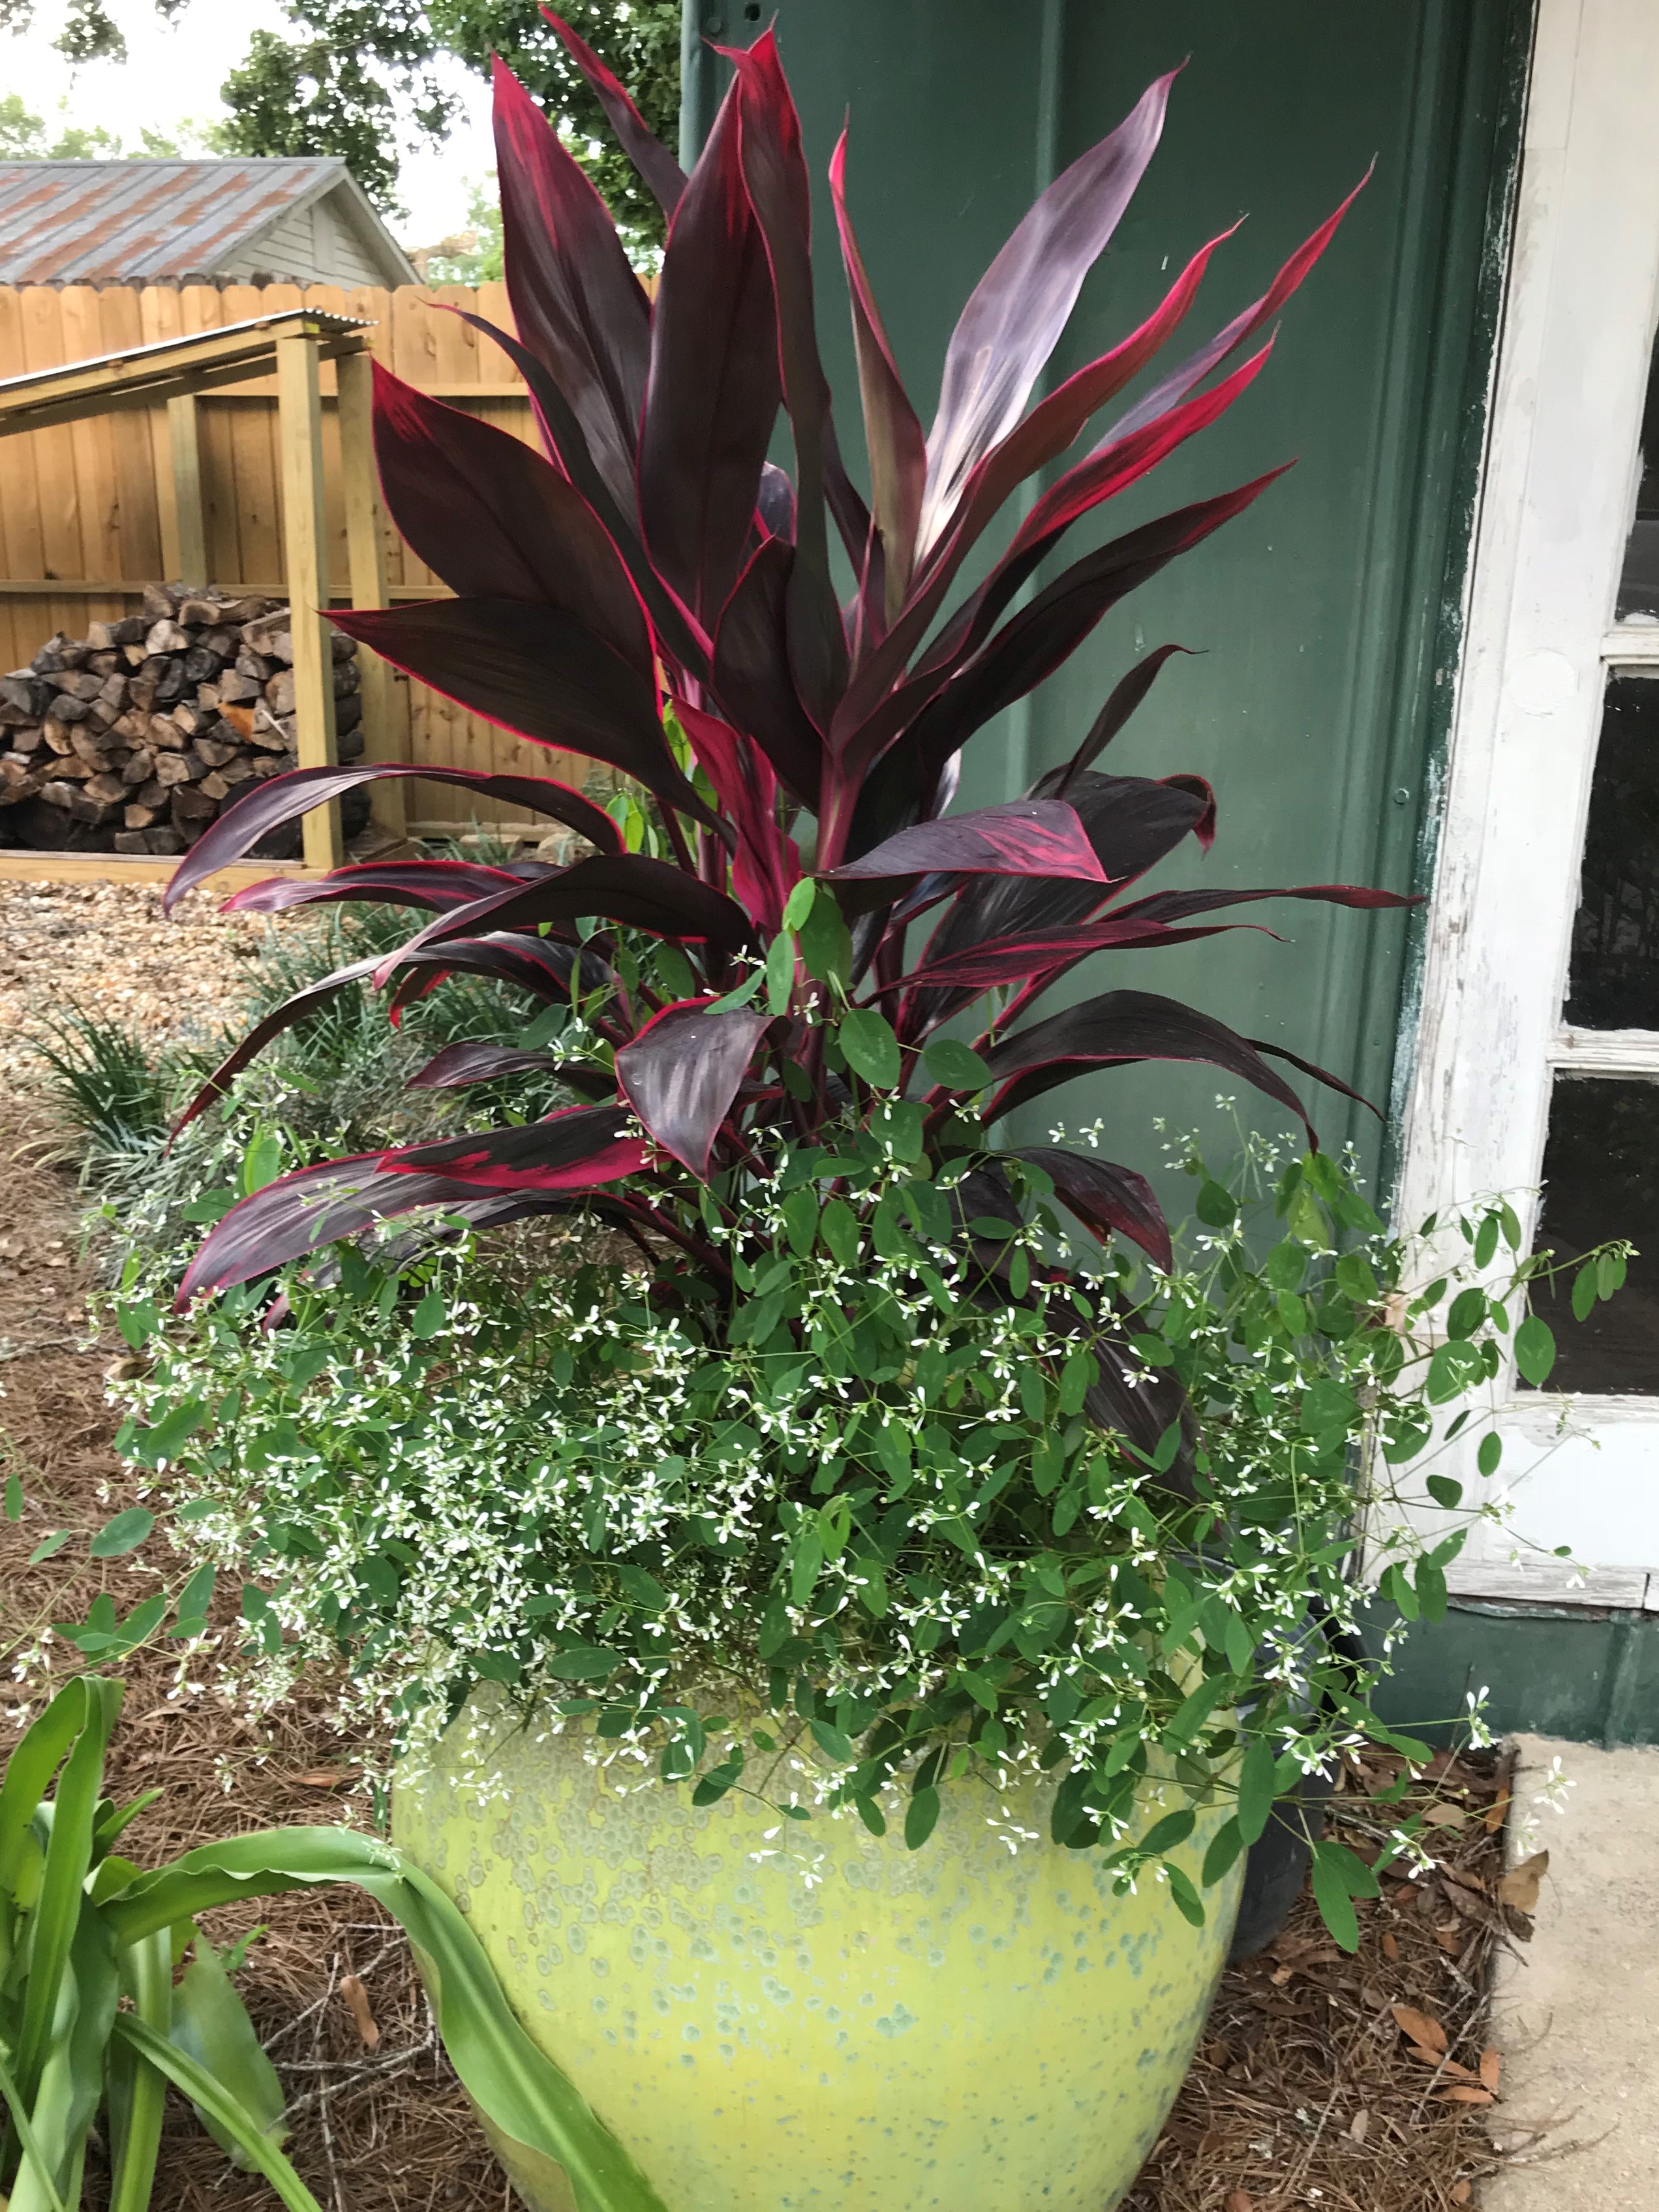
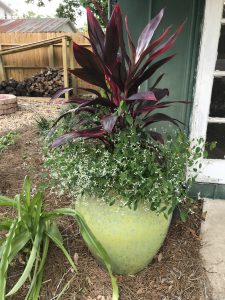
Ti plant in a mixed container – Photo Courtesy Daniel Leonard
Though Ti performs well planted in the ground in Northwest Florida as an annual specimen to brighten a border (think of it like a supersized Coleus), it really gets to shine in large, mixed containers. Ti’s upright growth habit and traffic stopping color make it the perfect thriller in the widely used “thriller, filler, spiller” container design. Because Ti can grow quite large relative to other common container plants, a large 20-45 gallon container is necessary to facilitate optimum root growth and plant development. If a smaller container is chosen, water management will become an issue as the Ti plant’s root mass will quickly crowd the container. I prefer glazed ceramic or concrete containers as these are often painted in bright colors that complement Ti’s foliage, do not allow as much air exchange as terra cotta planters (soil in terra cotta containers dry very quickly in hot, dry weather), and are heavy enough that tall Ti plants won’t cause them to blow over in windy conditions. Mix smaller, mounding filler plants and trailing spiller plants under and around Ti in containers. For a striking contrast in color, choose companion plants in white, yellow, orange or chartreuse (remember, plants don’t have to flower to be colorful, vivid foliage plants like coleus or caladium work too!).
Regardless of how you use Ti Plant, you’ll find it to be one of the most high value color plants in the landscape. Plant one today and happy gardening!
by Daniel J. Leonard | Jul 3, 2018
Each time I travel to central and south Florida and observe the wonderfully flamboyant tropical flora, I am reminded of the unique and frustrating climatic characteristics of Northwest Florida. Our weather is tropical enough through the summer to sustain virtually everything our friends to the south grow, but winters north of the Big Bend are just cold enough to prevent long-term success with most tropical species. However, the genus that is maybe most synonymous with tropical color, the Hibiscus (it even has its own texting emoji!), contains several species that are hardy through our winters. The best landscape plant of these hardy Hibiscus species is creatively (sarcasm) called Hardy Hibiscus or Giant Rose Mallow (Hibiscus moscheutos) and is an absolute star in the Panhandle, bringing the beauty of the tropics to your yard!

Hibiscus ‘Starry Starry Night’ – Photo courtesy Daniel Leonard
Rose Mallow is a native perennial species that occurs in sunny wetlands across the eastern U.S. This species can grow 7-8’ in height in its natural, unimproved state and possesses the largest flowers of any hardy perennial, some varieties easily eclipse 12” in diameter. Rose Mallows bloom through the heat of our long summers and return reliably each winter unfazed by frost. The flowers also happen to be a favorite of butterflies and hummingbirds and bring beneficial wildlife to the landscape. These characteristics and the trend towards the use of pollinator friendly, low-maintenance native perennials in landscapes quickly made Rose Mallow a jewel for plant breeders and now virtually all major horticultural brands have a line of Hardy Hibiscus available at garden centers, in varying sizes, flower color and leaf color/form. Recent breeding efforts have focused on introducing plants with enormous, richly colored flowers held on compact plants with attractive foliage. The results have yielded two series and three individual cultivars that I consider superior selections and are more than worthy of inclusion in your garden:
- Summerific® Series by Proven Winners. This series is comprised of four robust (up to 5’ in height) cultivars, ‘Cherry Cheesecake’ (bicolor magenta and white flowers), ‘Berry Awesome’ (purplish lavender flowers), ‘Cranberry Crush’ (a red you really have to see to believe), and ‘Perfect Storm’ (notable for its deep purple foliage).
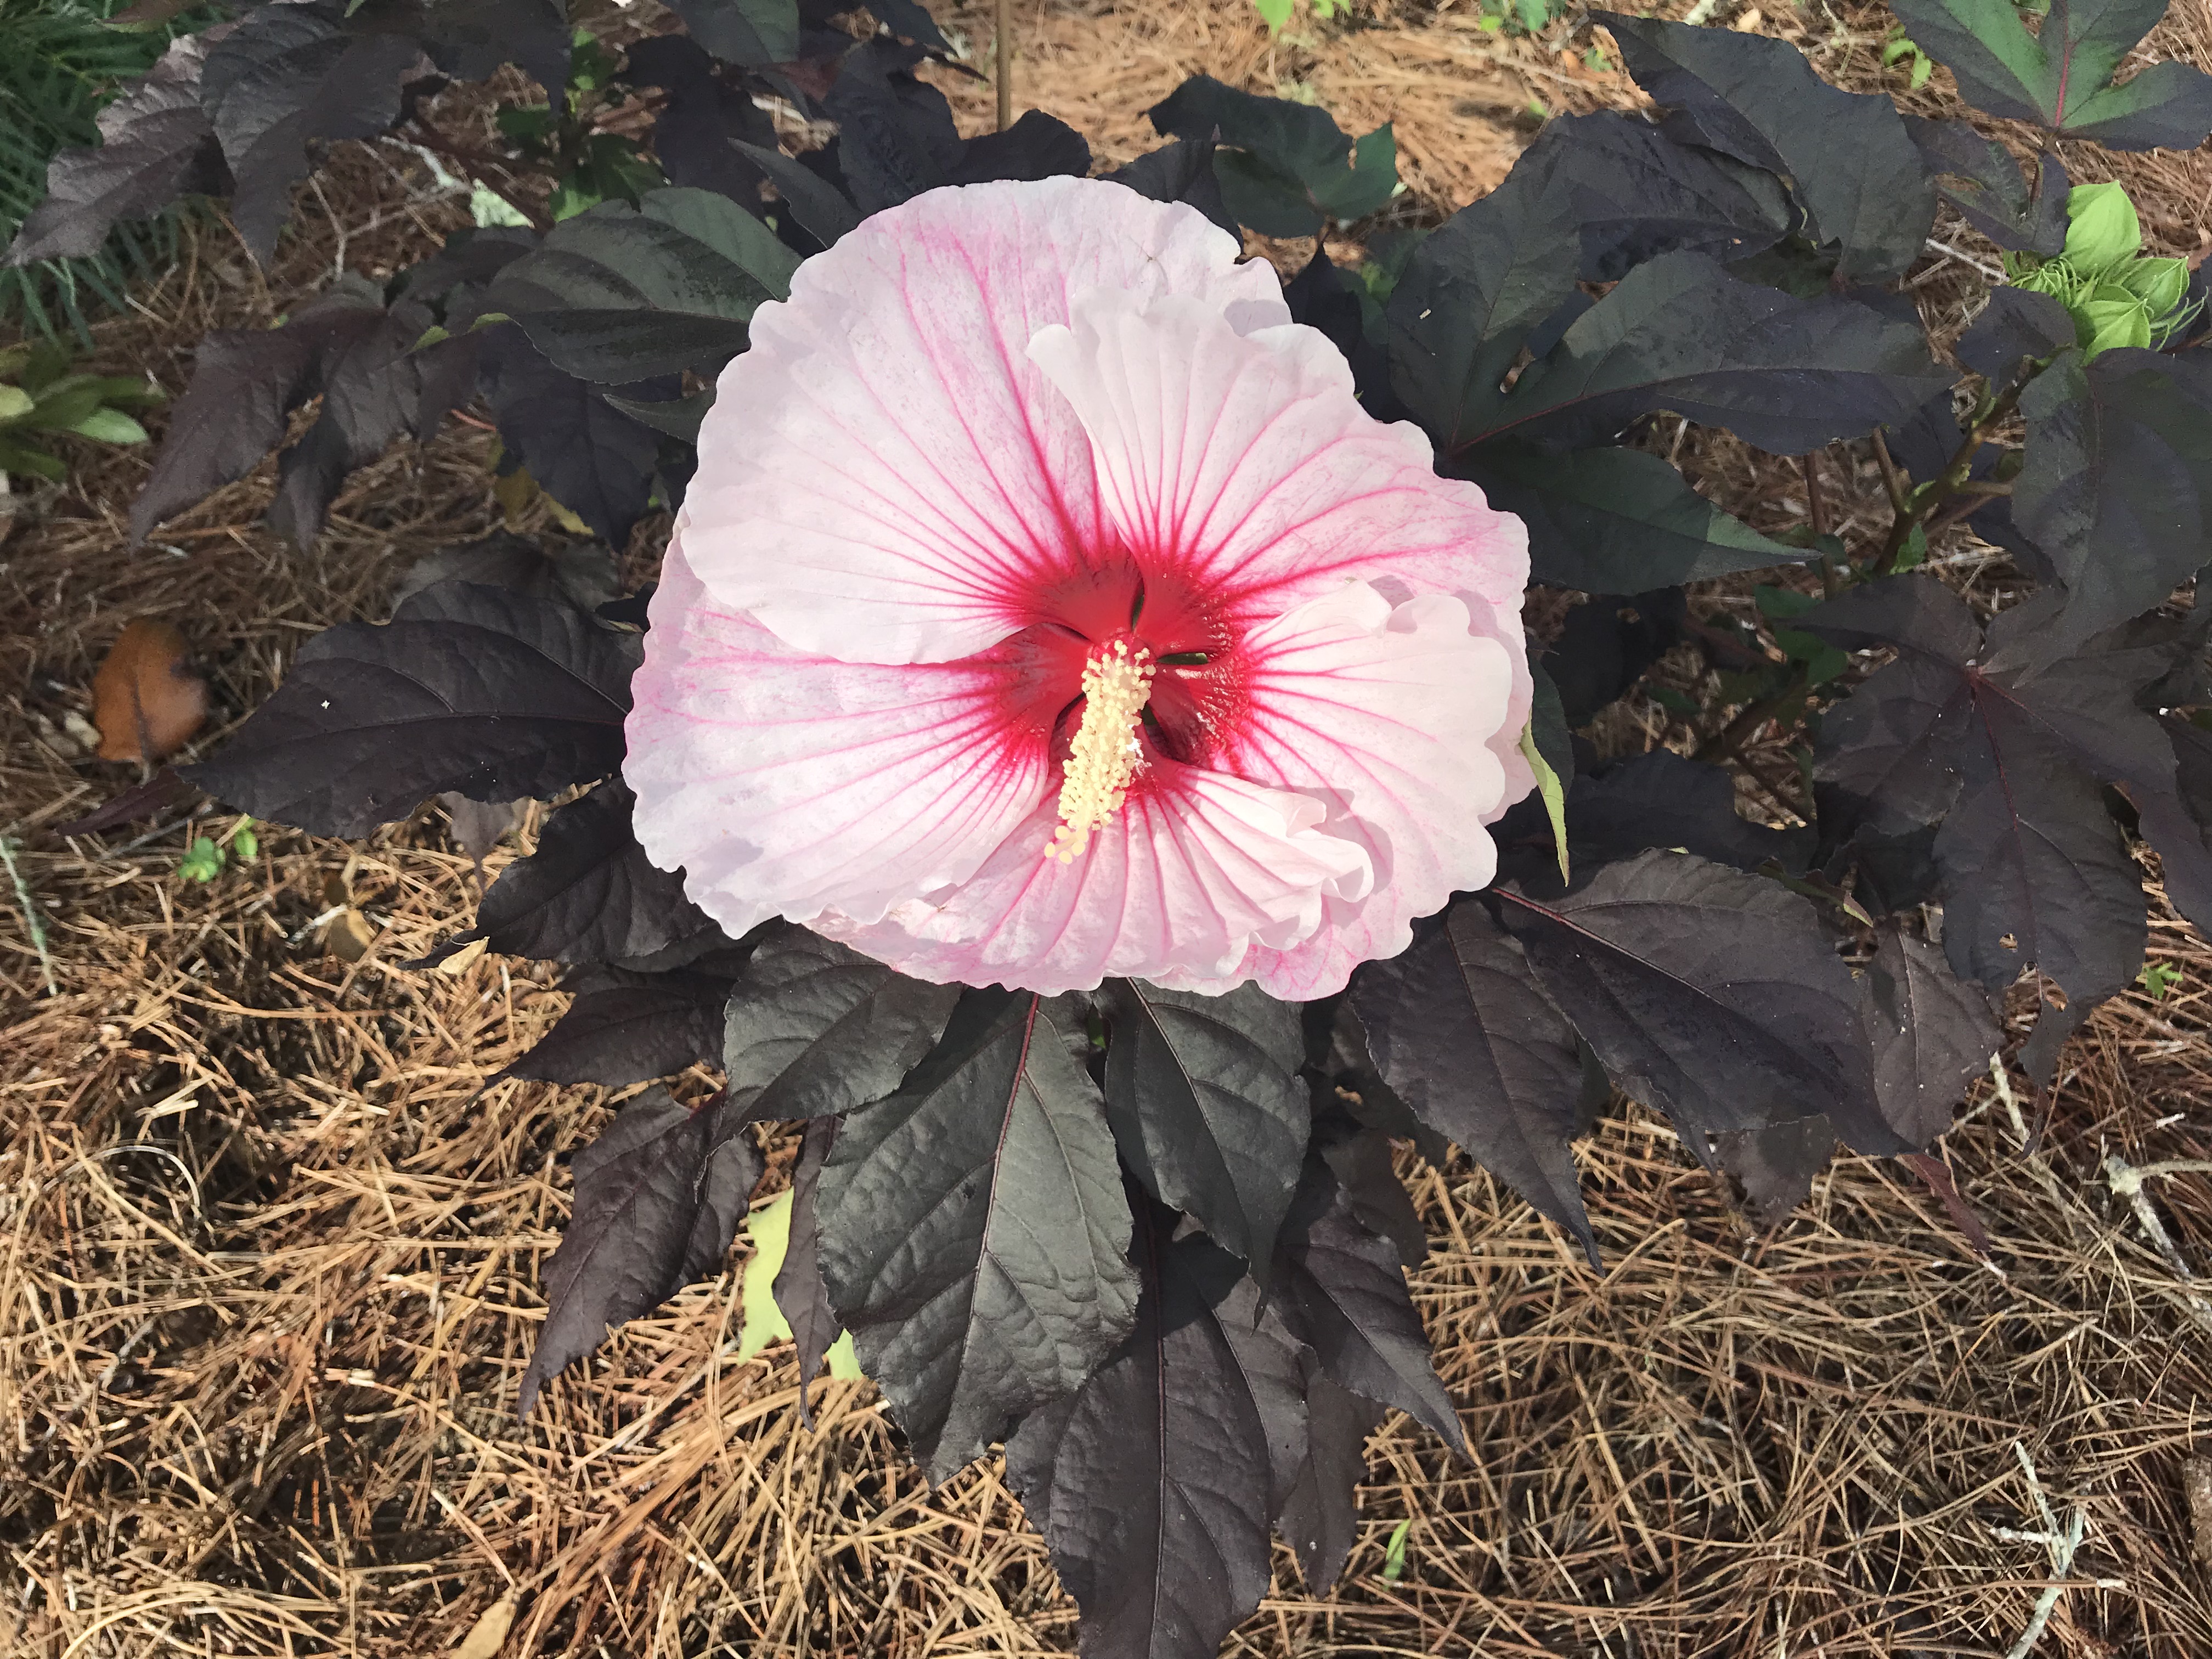
- Luna Series by Monrovia. This series is notable for its ultra-compact (3’ in height or less) size and characteristically large flowers. It is also composed of four cultivars, ‘Luna Red’ (deep red), ‘Luna Blush’ (white, fading to pink near flower margins), ‘Luna Pink Swirl’ (pictured and my favorite, bicolor swirly flowers), and ‘Luna White’ (white with a red center).

Hibiscus ‘Luna Pink Swirl’ – Photo courtesy Daniel Leonard
- ‘Starry Starry Night’ by Walter’s Gardens. (Pictured) This cultivar combines dark purple to black leaves with swirled pale and dark pink flowers. It has performed very well in my landscape and if I could only grow one, this might be it.
- ‘Lord Baltimore.’ The classic, large growing cultivar with bright red flowers that is widely available and easily found. An oldie (introduced in 1955) but a goodie.
- ‘Midnight Marvel’ by Walter’s Gardens. A “hot off the press” new cultivar that is currently difficult to find due to popularity, though some online outlets have them available in small sizes. This one is worth your patience. Sporting deep red blooms on near black foliage, there’s nothing else like it in the landscape.
In addition to being gorgeous plants, Rose Mallows are extremely versatile in the landscape and could not be easier to grow. Because the size varies so greatly (from the diminutive 30” tall ‘Luna’ series to the 8’ tall unimproved species), there really is a place for one in every garden. I like to use the smaller cultivars in large containers to facilitate moving them around where their floral display has the greatest impact or to create a tropical effect where in ground plantings are not an option (pool decks, patios, etc). The larger cultivars make spectacular specimen plantings in perennial and shrub beds and even make a really dense, striking hedge (just know they disappear in the winter). Be sure to give them as much sun as possible, as this will enhance the number of flowers on each plant and darken the foliage on the cultivars with purplish/black leaves. Too little sun will result in fewer flowers and lighter green foliage. As wetland plants, Rose Mallows enjoy regular water, either from rainfall or irrigation; they will let you know when they need it – their large leaves readily wilt under drought stress, somewhat like Hydrangea.
For low-maintenance, native, pollinator friendly, cold-hardy tropical color, you need look no further than Rose Mallow. These perennial shrubs come in all sizes and colors and fit any landscape! Look for the above listed series and cultivars at better garden centers and online retailers and enjoy the oohs and ahhs elicited when people first get a glimpse of Hardy Hibiscus in your landscape! Happy Gardening!
by Daniel J. Leonard | Jun 21, 2018
It’s that time of year. School is out, hurricane season is in, and the mercury is up! Gardens wilt by midday and gardeners retreat into the air conditioning long before then. Unless you have your toes in the water on one of Northwest Florida’s beautiful beaches, it can be a miserable time to be a Floridian, for plants and people! However, despite the relentless heat and blistering sunshine, low-maintenance, eye-catching color can still be had in the landscape. When the calendar flips to June, I turn to my two favorite Florida-Friendly annuals to do the heavy lifting in my landscape: ‘Diamond Frost’ Euphorbia, and the ‘Cora’ Vinca series.
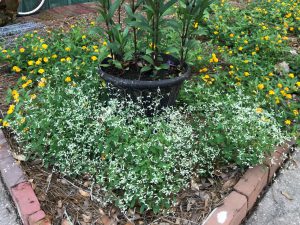
‘Diamond Frost’ Euphorbia – Photo Courtesy Daniel Leonard
A relative newcomer to landscapes, the award winning ‘Diamond Frost’ Euphorbia is an amazing introduction from Proven Winners. The ultimate in tough, ‘Diamond Frost’ does great both as a mounding accent in a container or as a standalone bedding plant in the landscape. Though its individual, teardrop-shaped, white flowers are tiny, the hundreds of them that open each day really pack a floral punch in the landscape! One caveat: if planting in the landscape, I find ‘Diamond Frost’ to be most effective massed in groups of three or more. Due to the daintiness of the flowers, a single plant can get lost among other garden inhabitants. However, when done right, ‘Diamond Frost’ is a proven winner in any landscape!
Mixed container featuring ‘Diamond Frost’ Euphorbia – Photo Courtesy Daniel Leonard
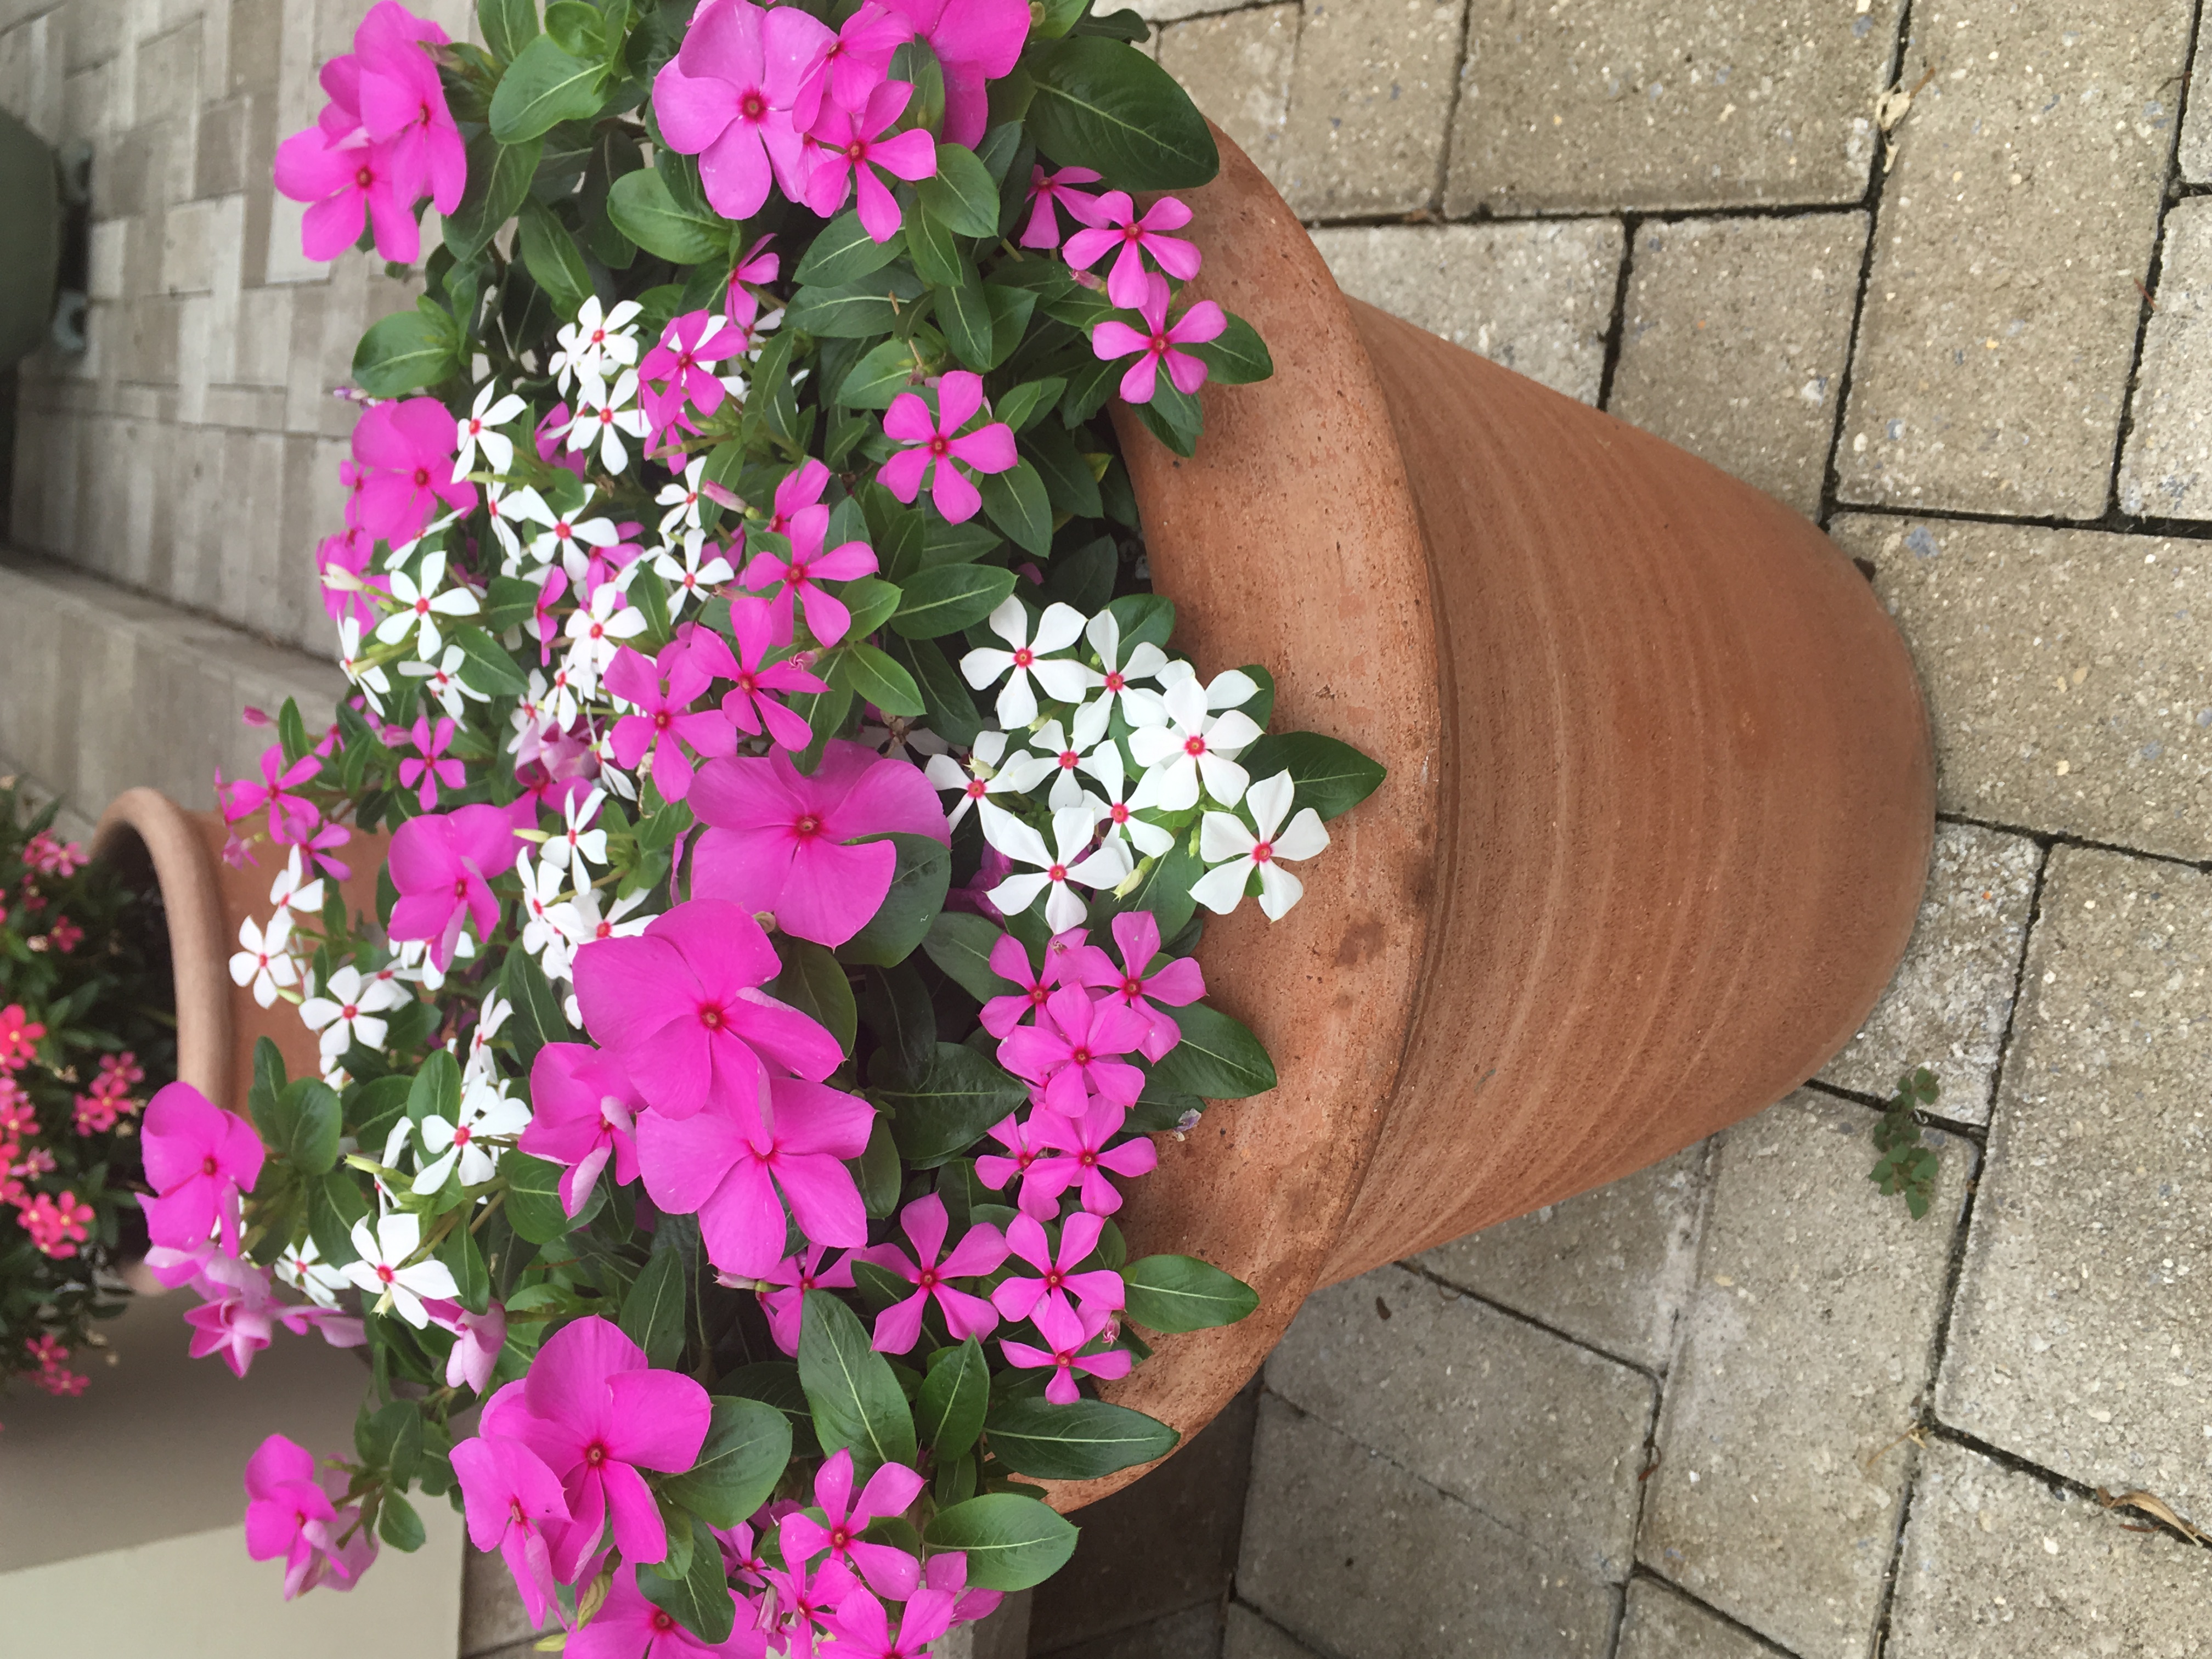
Next, the ‘Cora’ series of Vinca (Catharanthus roseus), also introduced by Proven Winners, is an improvement on an old favorite. Note: This species is also, on occasion, called Periwinkle. However, do not confuse it with the spreading, purple-flowered, perennial groundcover of the same common name! Gardeners in the South have been growing Vincas for years. This species is unbelievably tolerant of harsh conditions, sometimes even seen growing in sidewalk cracks! However, the unimproved species had an Achilles heel: susceptibility to Phytophthora, a devastating fungal rot disease. ‘Cora’ overcomes this issue and is as close to a perfect bedding annual as you’re likely to find. The ‘Cora’ series is composed of cultivars with pinwheel-shaped white, pink and lavender flowers, a color for everyone! The kind (and clever) marketing folks at Proven Winners have even made ‘Cora’ easy to spot on retail nursery benches; just look for the plants in the hot pink containers!
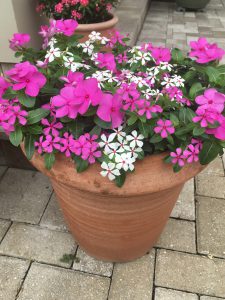
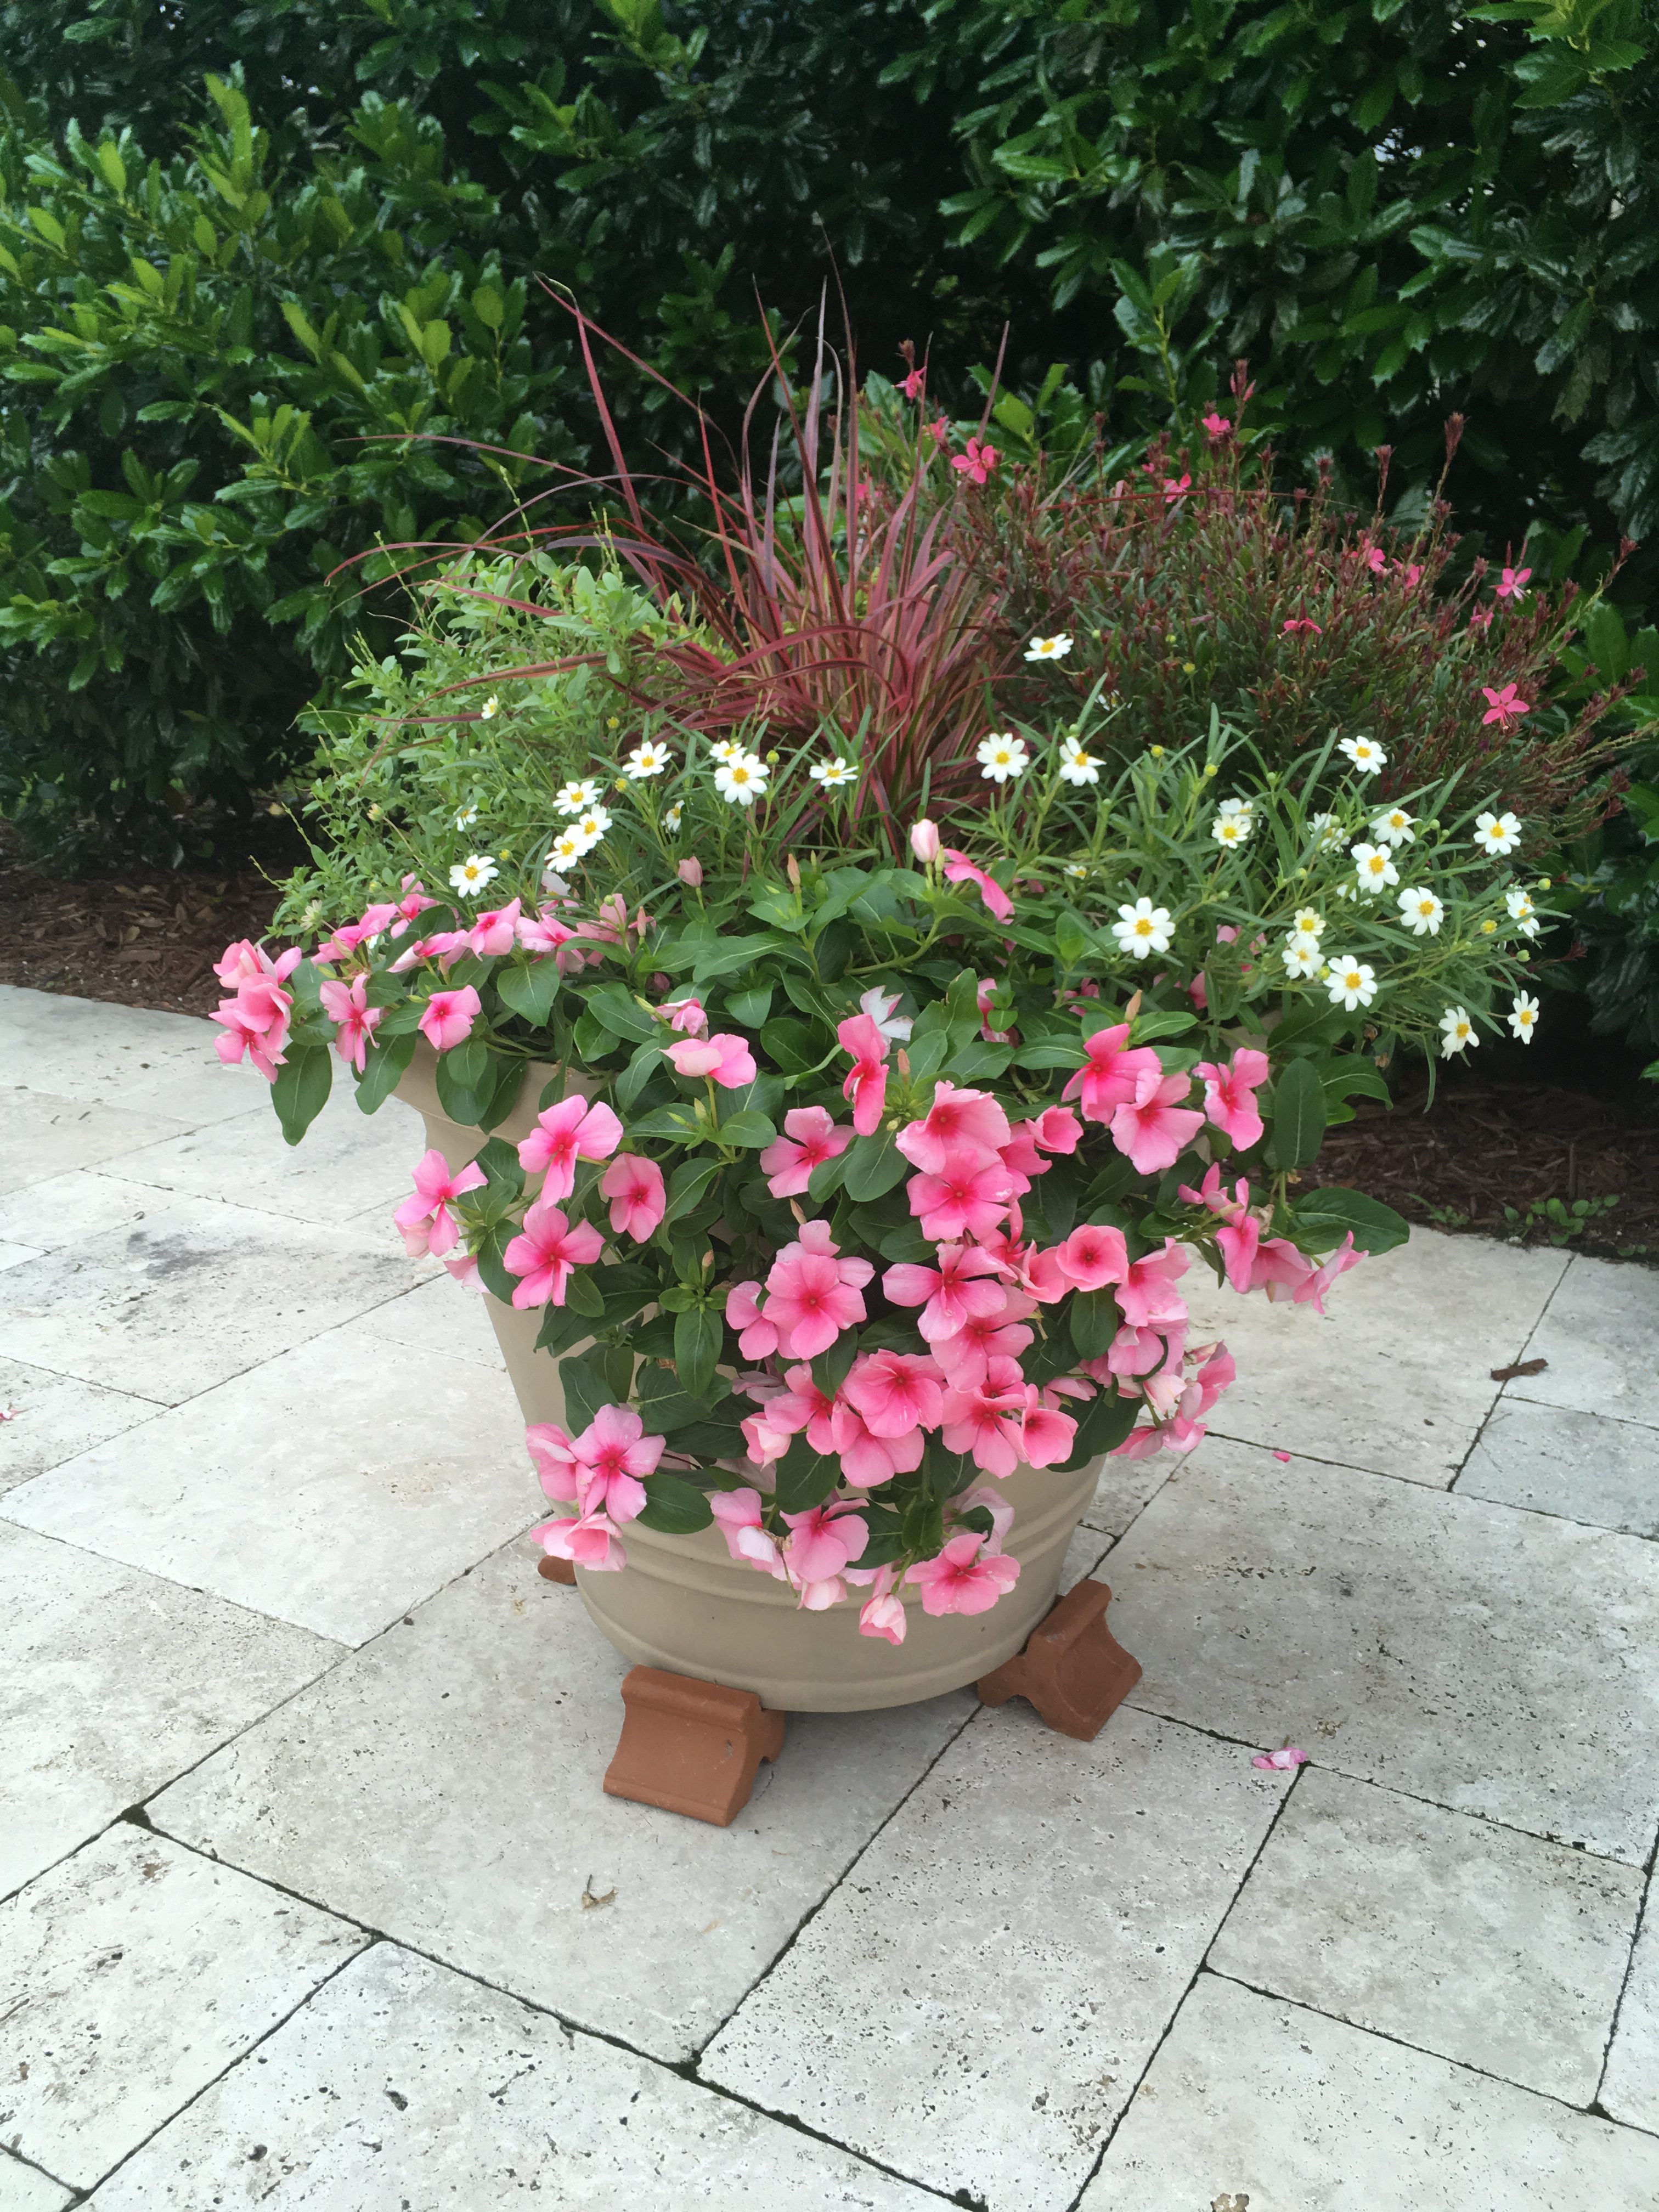
‘Cora’ Vinca
Photo: Andrea Schnapp
Both of the above-described plants are extremely undemanding of gardeners. Once established, little is required in the way of irrigation and fertilization. To ensure success, water daily for the first week after planting, back off to a couple of times per week for the next two weeks or so and then watch ‘Diamond Frost’ and ‘Cora’ thrive with only rainfall for the rest of the summer! Keep in mind, during periods of excessive drought, supplemental watering may be required to keep any plant, even drought tolerant ones, looking their best! To meet the minimal nutrition demands of these plants, I incorporate a quality, slow-release fertilizer (for example, Osmocote, Harrell’s Polyon, or any other similar product) at planting. These products last two or three months in our rainy, hot, humid climate and generally need a second application accordingly for full-season performance. ‘Diamond Frost’ Euphorbia and ‘Cora’ Vinca also require full, blazing sun for maximum floral performance. Don’t be shy about siting them in harsh, sunny places, even a few hours of shade tend to make leggier plants that flower less!
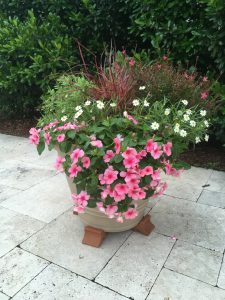
Mixed container with ‘Cora’ Vinca accent
Photo: Andrea Schnapp
When you need low-maintenance, season long color that can beat the heat, look for ‘Diamond Frost’ Euphorbia and the ‘Cora’ series of Vinca at your local nursery! Stay cool out there folks and happy gardening!