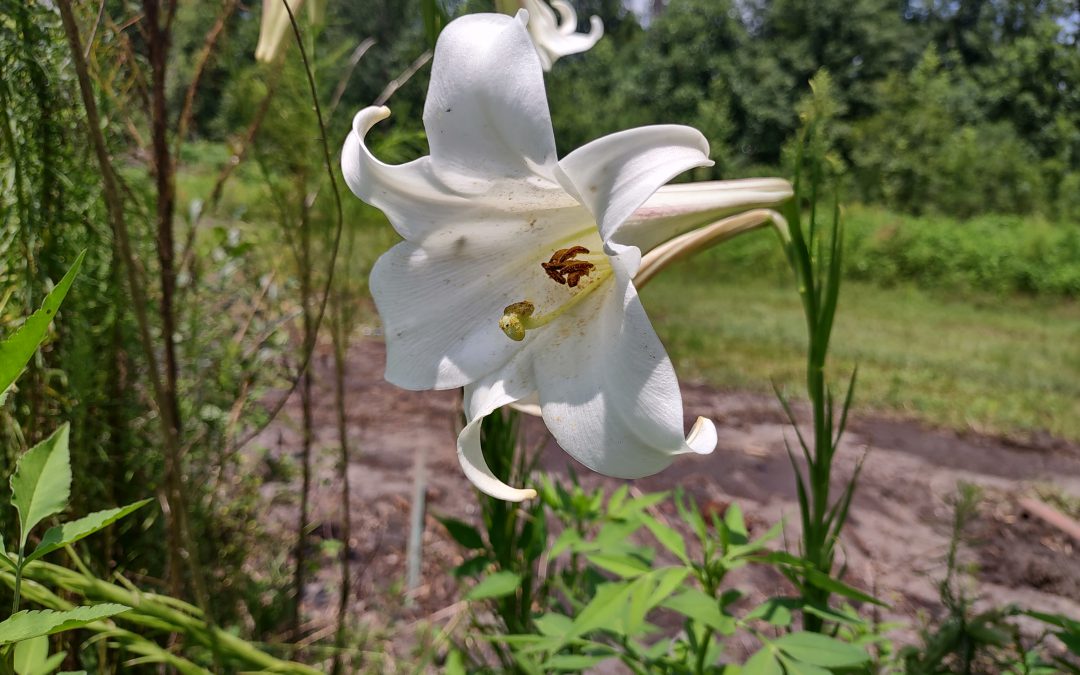
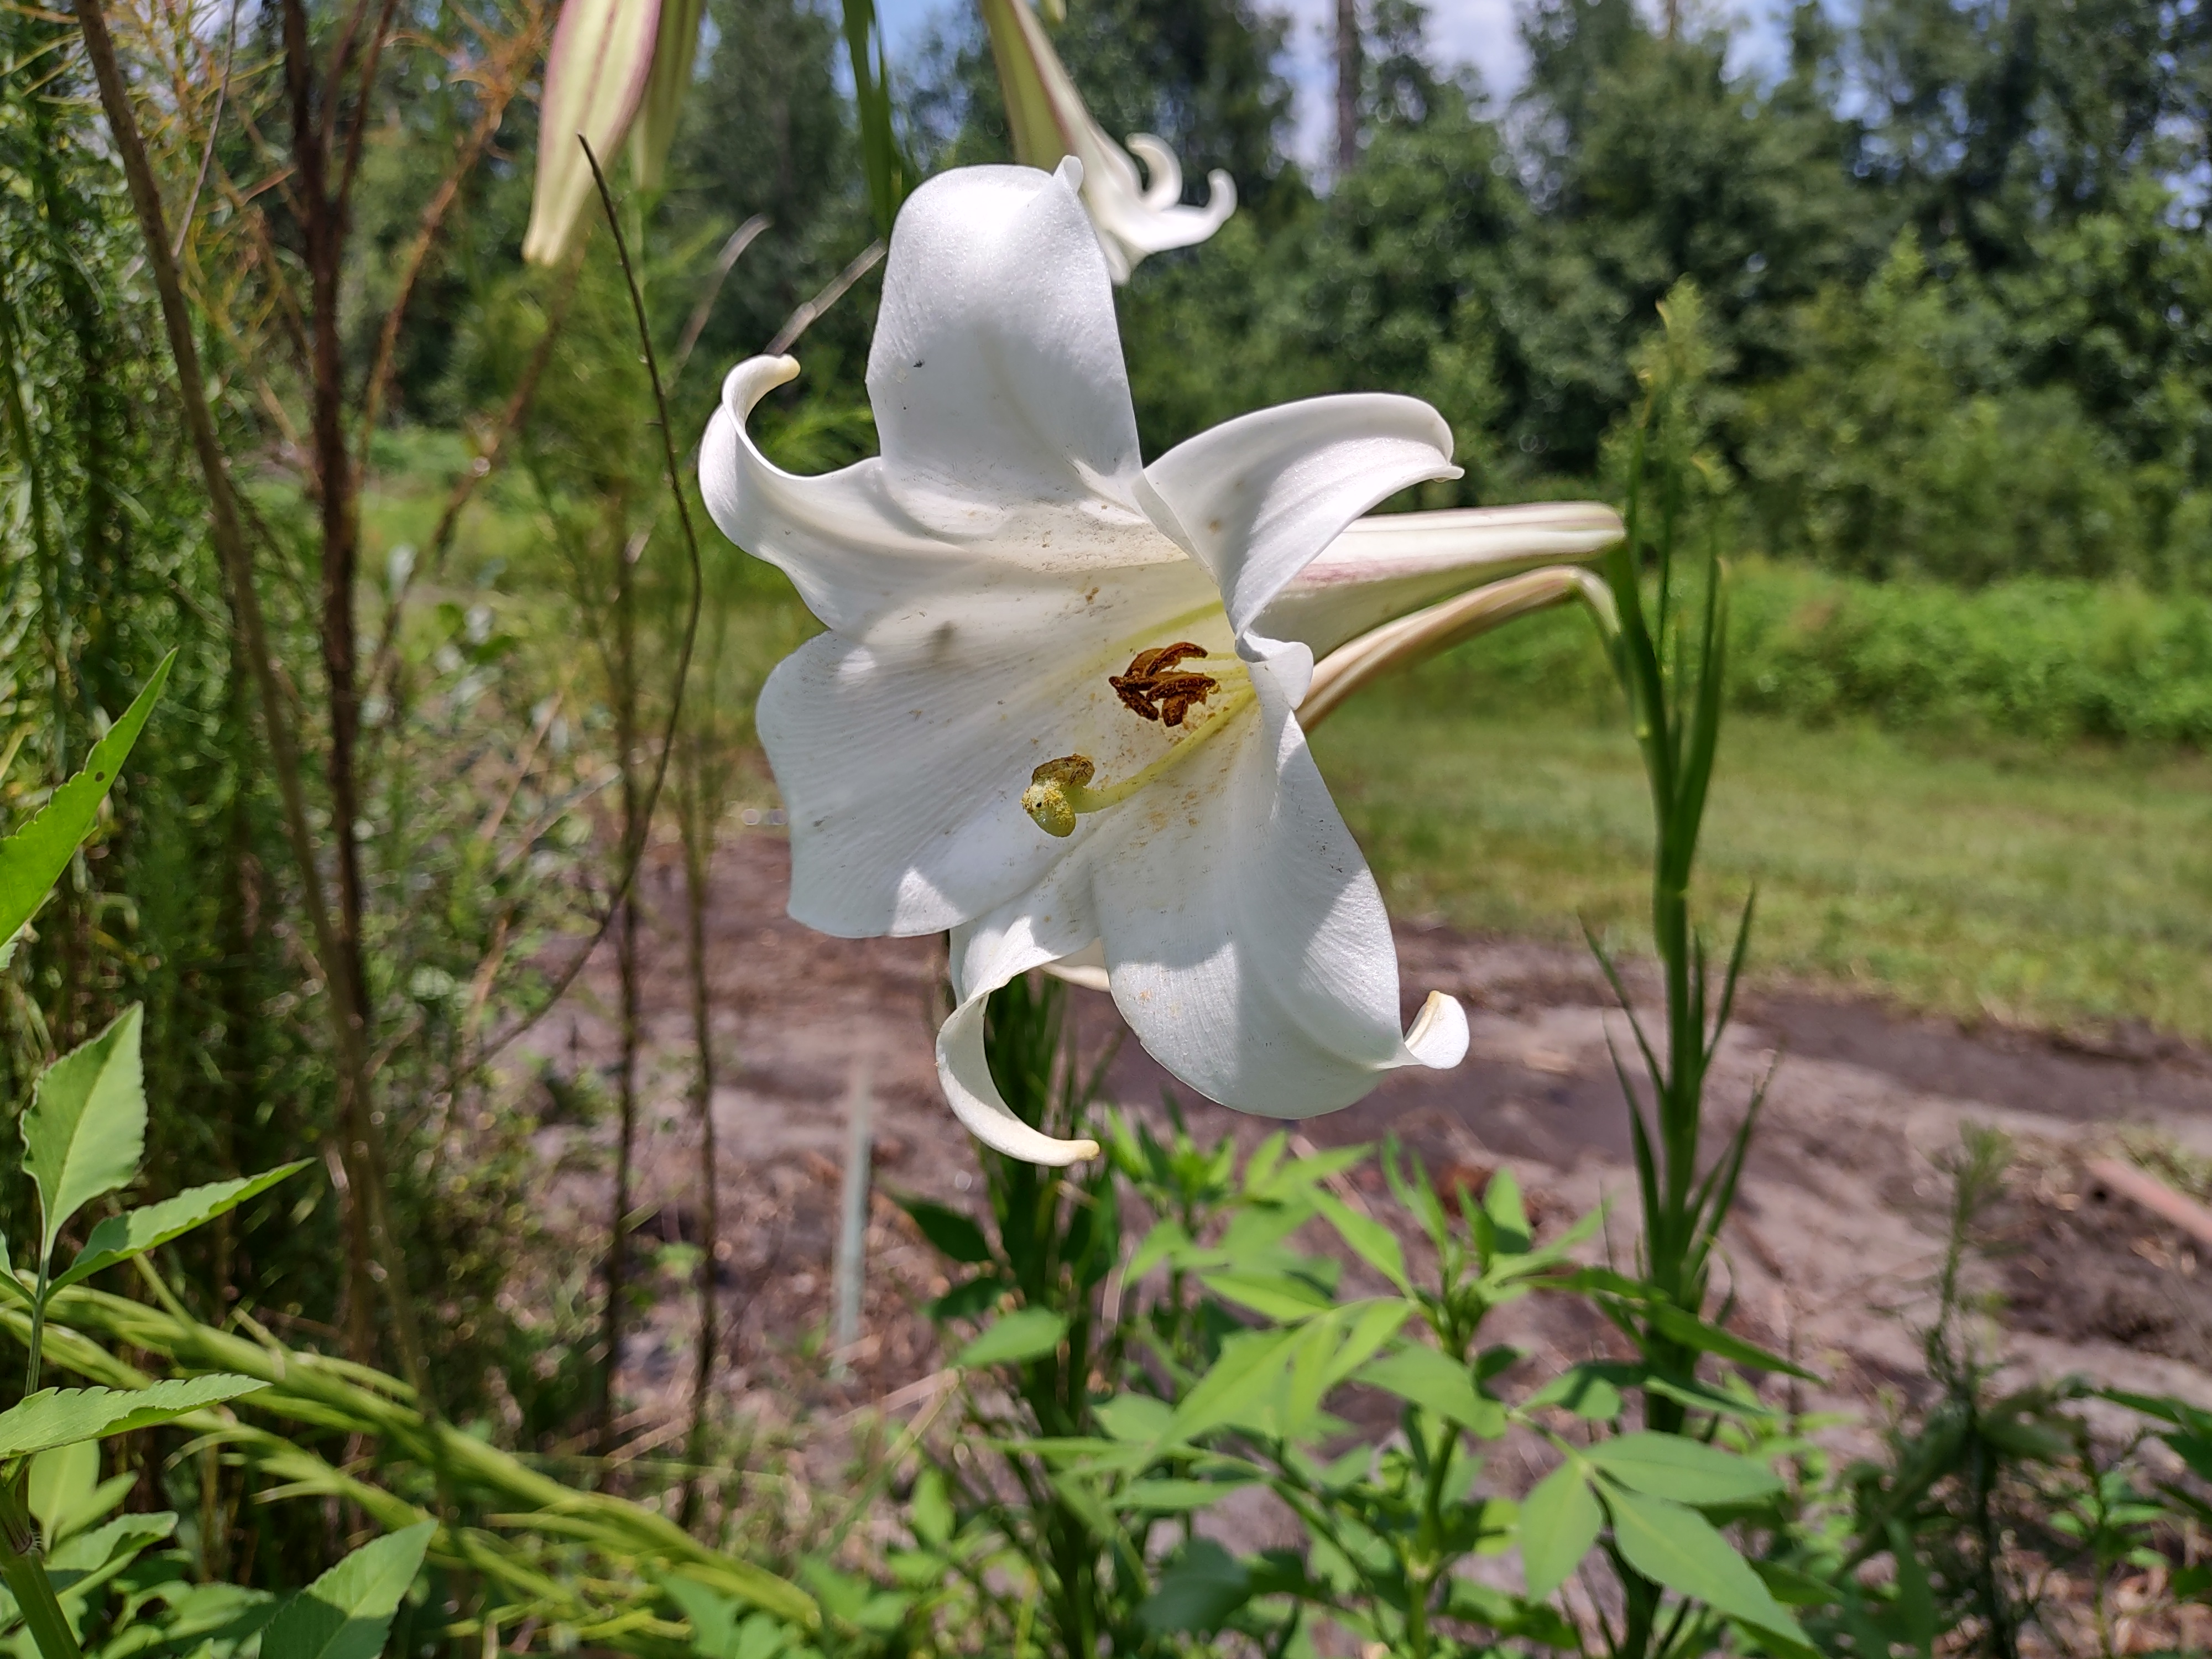
Since Ponce de Leon first set foot in Florida around Easter in 1513 and gave the state its name – he called it La Florida, which loosely translates to flowery in English – Florida has been known for its amazing native wildflower displays. Florida’s primary native flower shows do indeed occur in the spring (the one observed by Ponce de Leon) and fall, but my favorite Florida “wild” flower is neither a native nor does it bloom in April or October. Rather, the Philippine Lily (Lilium formosanum) does its thing each year in the heat of the summer, when not much else wildflower-wise is blooming.
Hailing from Taiwan and the Philippines but naturalized throughout the Panhandle, the Philippine Lily is easy to spot. Often confused with Easter Lily (Lilium longiflorum), which blooms much earlier in the year, Philippine Lily blooms mid-July to August and sports classic lily-type flowers held high on study stems that may reach 7’ or higher. Emerging from the drab green of the surrounding summer landscape, Philippine Lily’s very large (10” or more), very fragrant, trumpet-shaped, creamy-white flowers are showstoppers. The propensity of the flowers to appear in elegant, “nodding” clusters of a dozen or more also adds to the effect. Admired by gardeners and other passersby during the day, at night these wonderfully scented flowers become a whirring site for evening pollinators, particularly the enormous Hummingbird, or Sphinx Moth.
Philippine Lily in bloom in late July. Photo courtesy of Daniel Leonard.
In addition to being a beautiful surprise in natural areas, Philippine Lily is among the easiest and most versatile of landscape plants to grow. The species prefers partial shade, but the thousands growing along roadsides in full sun speak to its adaptability. It is also right at home in our often dry, sandy Panhandle soils, and no special soil amendments are needed for the species to thrive. To get plants started, one may use either seeds or transplants from existing stands. If using seeds, simply sow them in your desired garden location into loosened garden soil, cover lightly, and water – the same seed sowing method can be used in pots for transplanting or sharing with friends later. Alternatively, you can dig or pull bulbs from natural areas where Philippine Lily already exists – assuming you have permission from the property owner. These newly dug and planted Lilies will need babying with regular water for several weeks to reduce transplant shock and improve survival.
Philippine Lily is probably best sited in the back of landscape beds to take advantage of the plant’s height and display its flowers over lower growing perennials. Siting in the back also allows pre and post bloom Philippine Lily stalks to hide amongst other plants as they don’t add much aesthetically when not in flower. Philippine Lily pairs very well with other low-maintenance summer-blooming perennials like Black-Eyed Susan (Rudbeckia hirta), Garden Phlox (Phlox paniculata), Milkweed (Asclepias spp.), and others.
While not a native wildflower, Philippine Lily certainly adds to North Florida’s reputation as La Florida! They are among the easiest to grow, highest impact “wild” flowers Panhandle gardeners have at their disposal. Enjoy them this summer in natural areas and consider adding a few to your landscape! For more information on Philippine Lily or any other horticultural topic, contact us at the UF/IFAS Calhoun County Extension Office. Happy gardening.
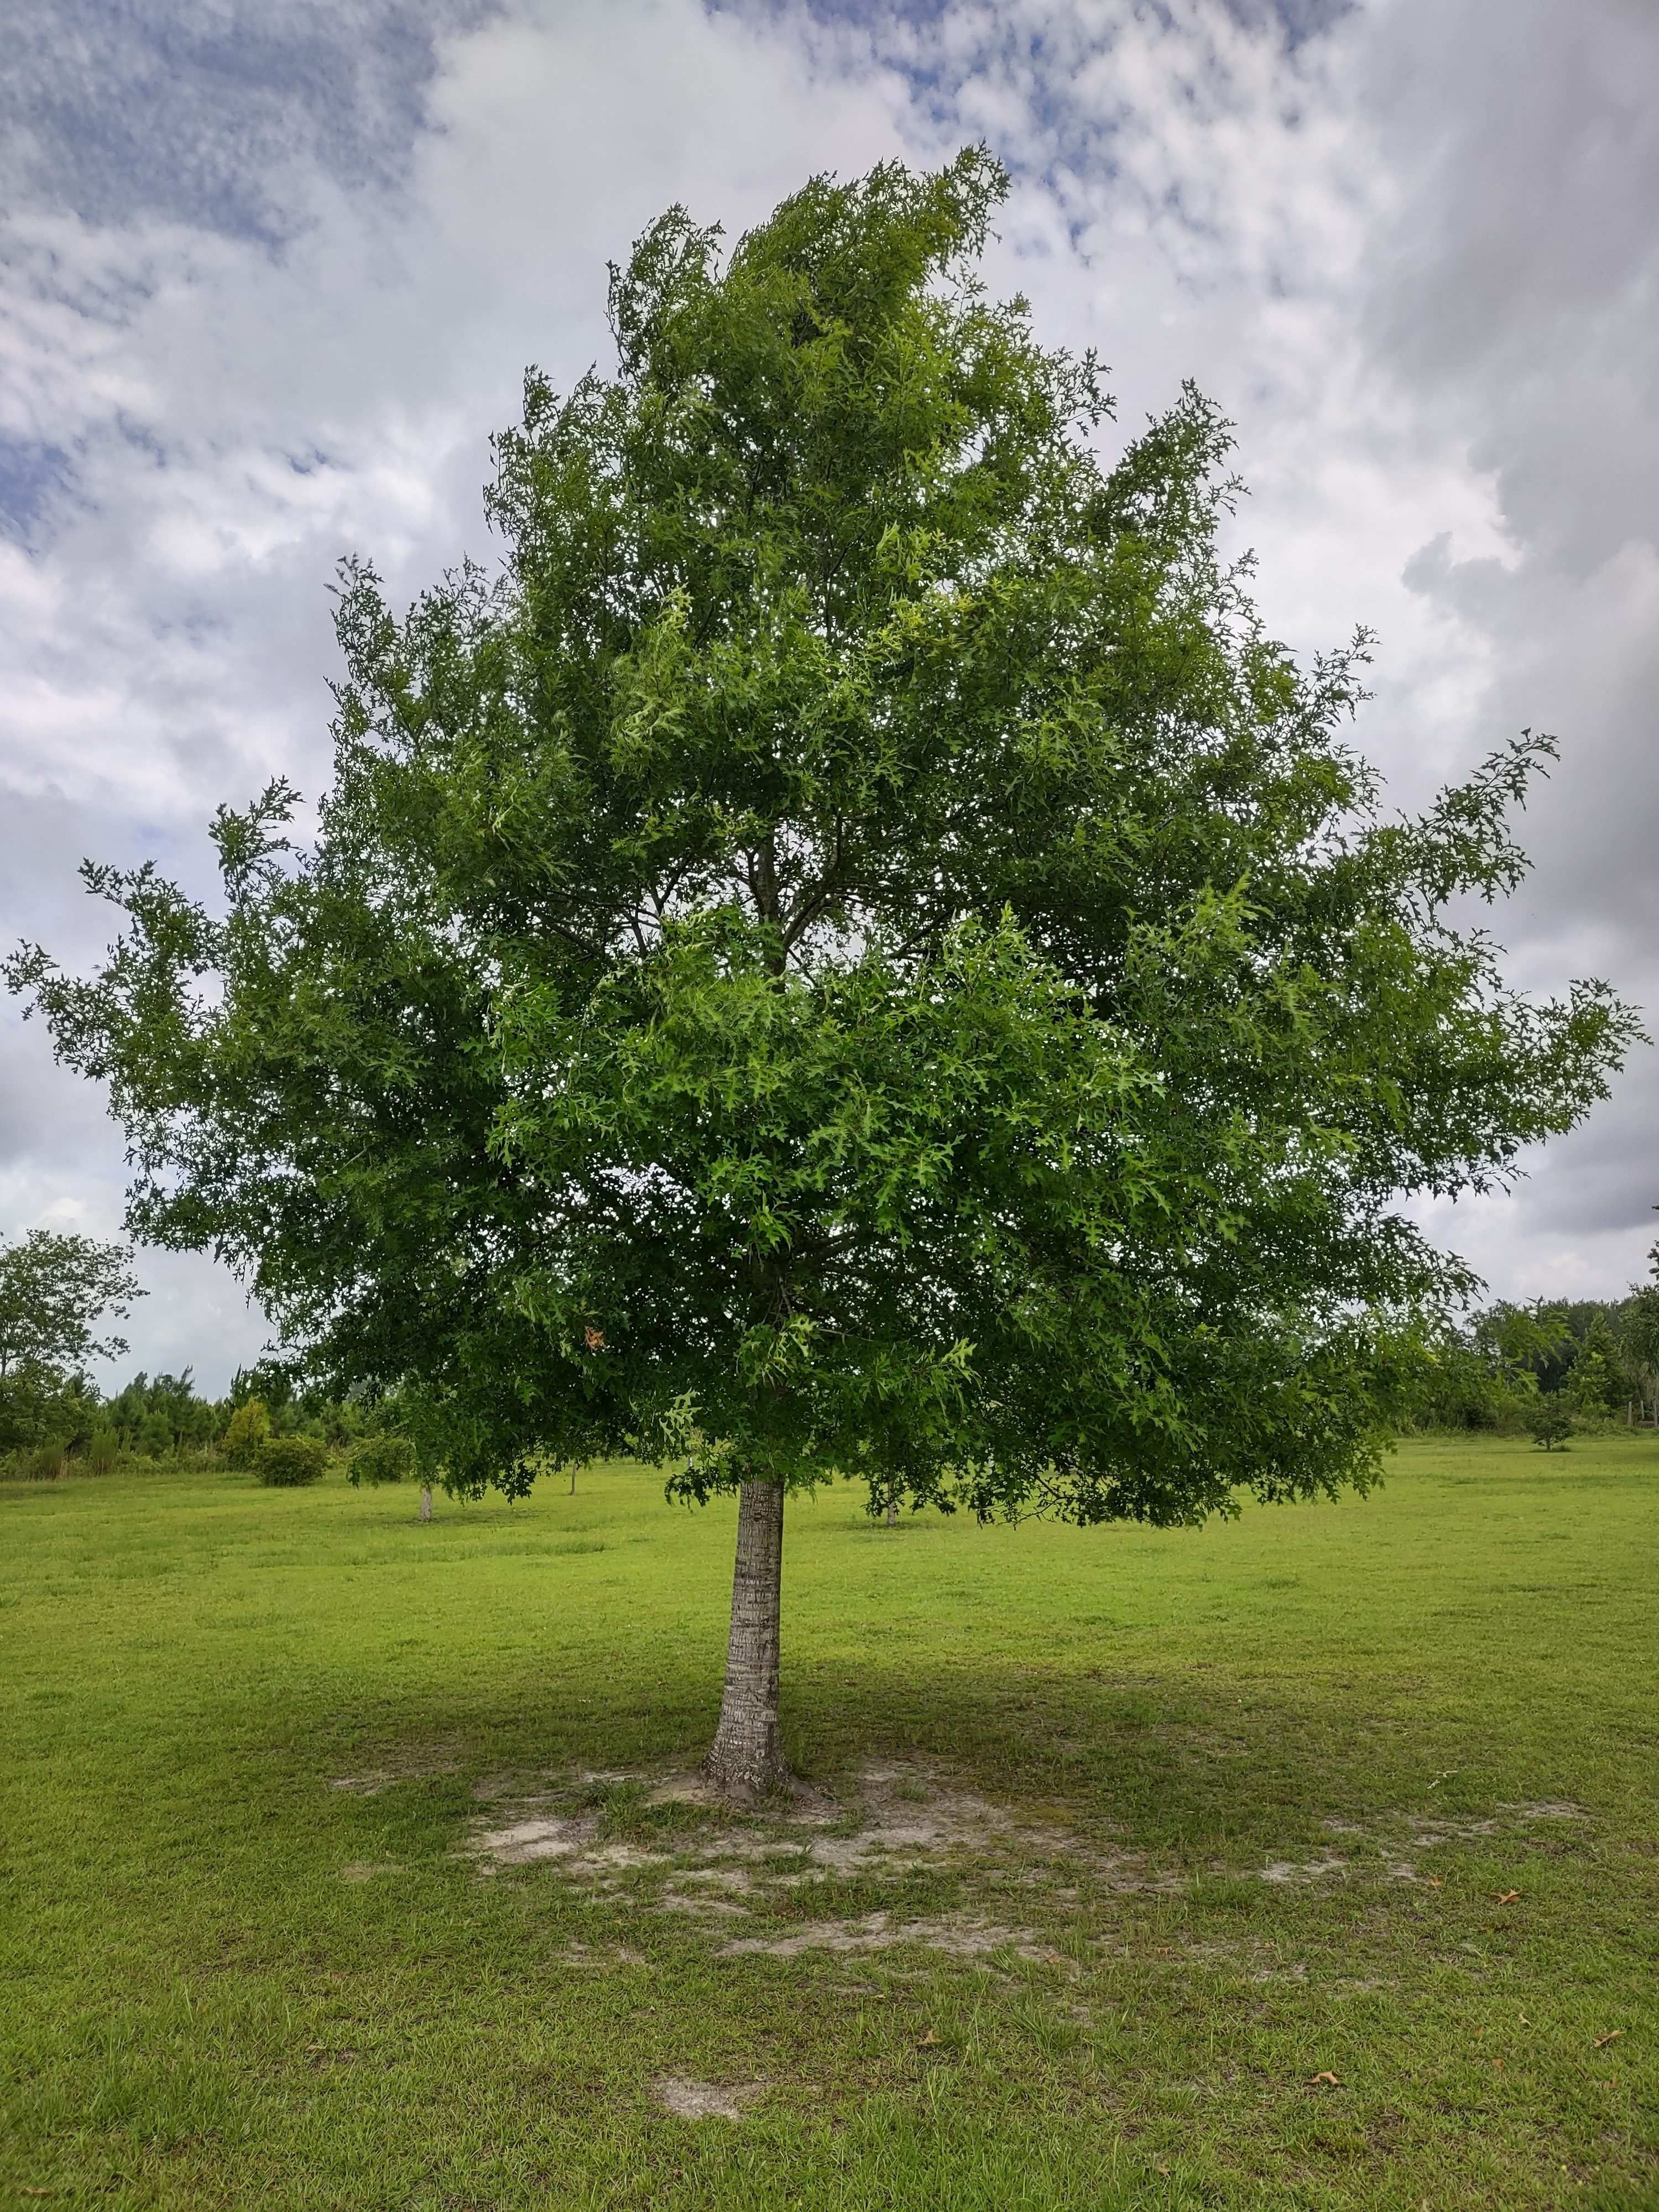
After Hurricane Michael indiscriminately felled millions of trees in the Florida Panhandle five years ago, I’ve gotten much more selective with which trees I recommend to shade-seeking homeowners. Category 5 hurricanes don’t strike every year, or even every decade, but Michael reminded us that 150 mph+ wind events are possible, and we should choose the trees we plant accordingly. Keeping Michael’s lesson in mind, the shade tree I’ve recommended most to area homeowners lately is the ultra-wind resistant Nuttall Oak (Quercus texana) *.
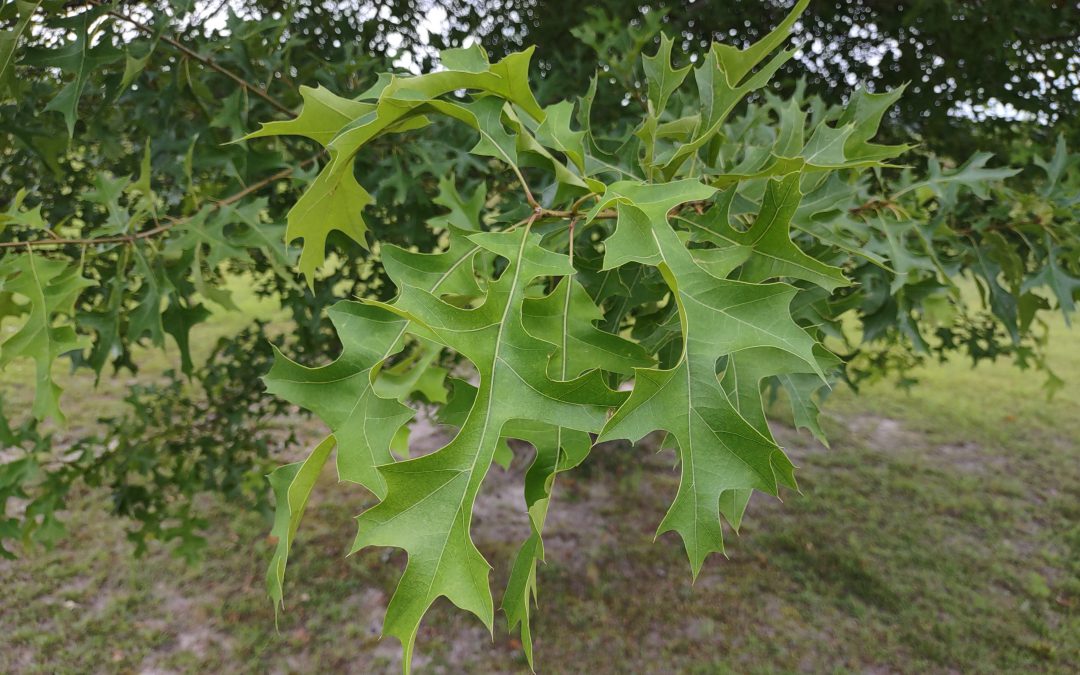
While probably not native to our area (Nuttall is native to Mississippi River Valley bottomlands and nearby Gulf Coast regions), Nuttall Oak is a well-adapted deciduous oak species perfect for the Panhandle. The species is a strong, long-lived tree, yet also a quick grower (3-4’ per year in its youth, reaching 60-80’ at maturity). Unlike many rapidly growing trees, Nuttall is extremely resistant to wind breakage, disease, and other disfiguring issues. There are several Nuttall Oaks in Panhandle landscapes that survived Michael’s fury completely intact, with little more than wind-whipped leaves as evidence a storm had passed.
10 year old Nuttall Oak in a Calhoun County landscape. Photo courtesy of Daniel Leonard.
Nuttall is also an awesome landscape ornamental and a wildlife magnet in maturity. The species possesses a strong central leader and a stately, upright-rounded appearance. In summer, Nuttall leaves are large, dark green, deeply lobed, and pointed, somewhat reminiscent of our native Southern Red Oak. In fall, trees are capable of Blue Ridge quality color with fiery orange-red foliage, though the foliage show is not as consistent year to year here as farther north. The bark of Nuttall even has aesthetic appeal – dark and smooth in youth becoming ridged/furrowed with age. And it’s not just people that find Nuttall attractive, several beneficial insects use Nuttall as a host plant and various wildlife (deer, squirrel, and ducks especially) are fond of the prolific, highly nutritious acorns that mature trees produce in earnest each winter.
Finally, Nuttall is among the easiest of trees to grow and thrives in a variety of landscape conditions. Because it’s adapted to grow in poorly drained bottomlands that are either seasonally flooded or very dry, Nuttall is very tolerant of both compacted, poorly aerated soils common in urban areas and unirrigated, often droughty soils present in many Panhandle landscapes. However, like any tree, Nuttall Oak performs best with regular water and fertilizer for the first couple of years until established.
If you’ve been searching for a native-ish, hurricane-resistant, quick-growing, low-maintenance, wildlife-attracting shade tree for your property, Nuttall Oak is an excellent option and one I can fully recommend! For more information on Nuttall Oak or any other horticultural topic, please contact your local UF/IFAS County Extension Office. Happy gardening!
*Nuttall Oak was recently reclassified botanically from Quercus nuttallii to Quercus texana.
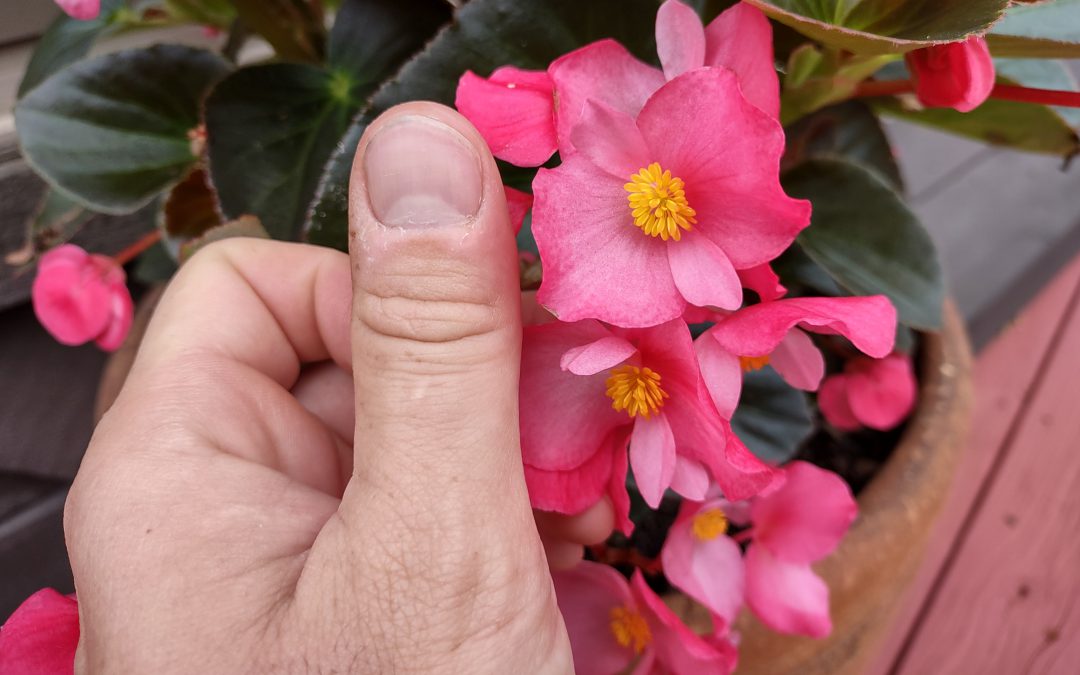
Begonias have long had a reputation of being either boring workhorses in annual planting beds and container gardens, like Wax Begonias, or finicky, greenhouse specialty types unsuitable for most people and landscapes, like Rhizomatous Begonias. However, in 2008, Benary Seeds introduced a new early flowering landscape/container Begonia series, all with huge, showy flowers and robust growth habits. They named the series ‘Big’ and changed Begonia’s negative narrative forever.
The first attribute that’s obviously different about ‘Big’ Begonias is that they are, in fact, much bigger than “normal” bedding begonias in every conceivable way. ‘Big’ grows to 18” high with a similar spread, roughly twice as large as conventional wax begonias. ‘Big’ also sports massive (for a Begonia) 1.5-2” flowers that don’t stop until the first fall frost ends the show. And since Begonia flowers appear in clusters, the combined effect of these much larger flowers grouped together is nothing short of spectacular. Even individual leaves are larger on ‘Big’, often hand-sized and coming in various shades of green and bronze, depending on the cultivar.
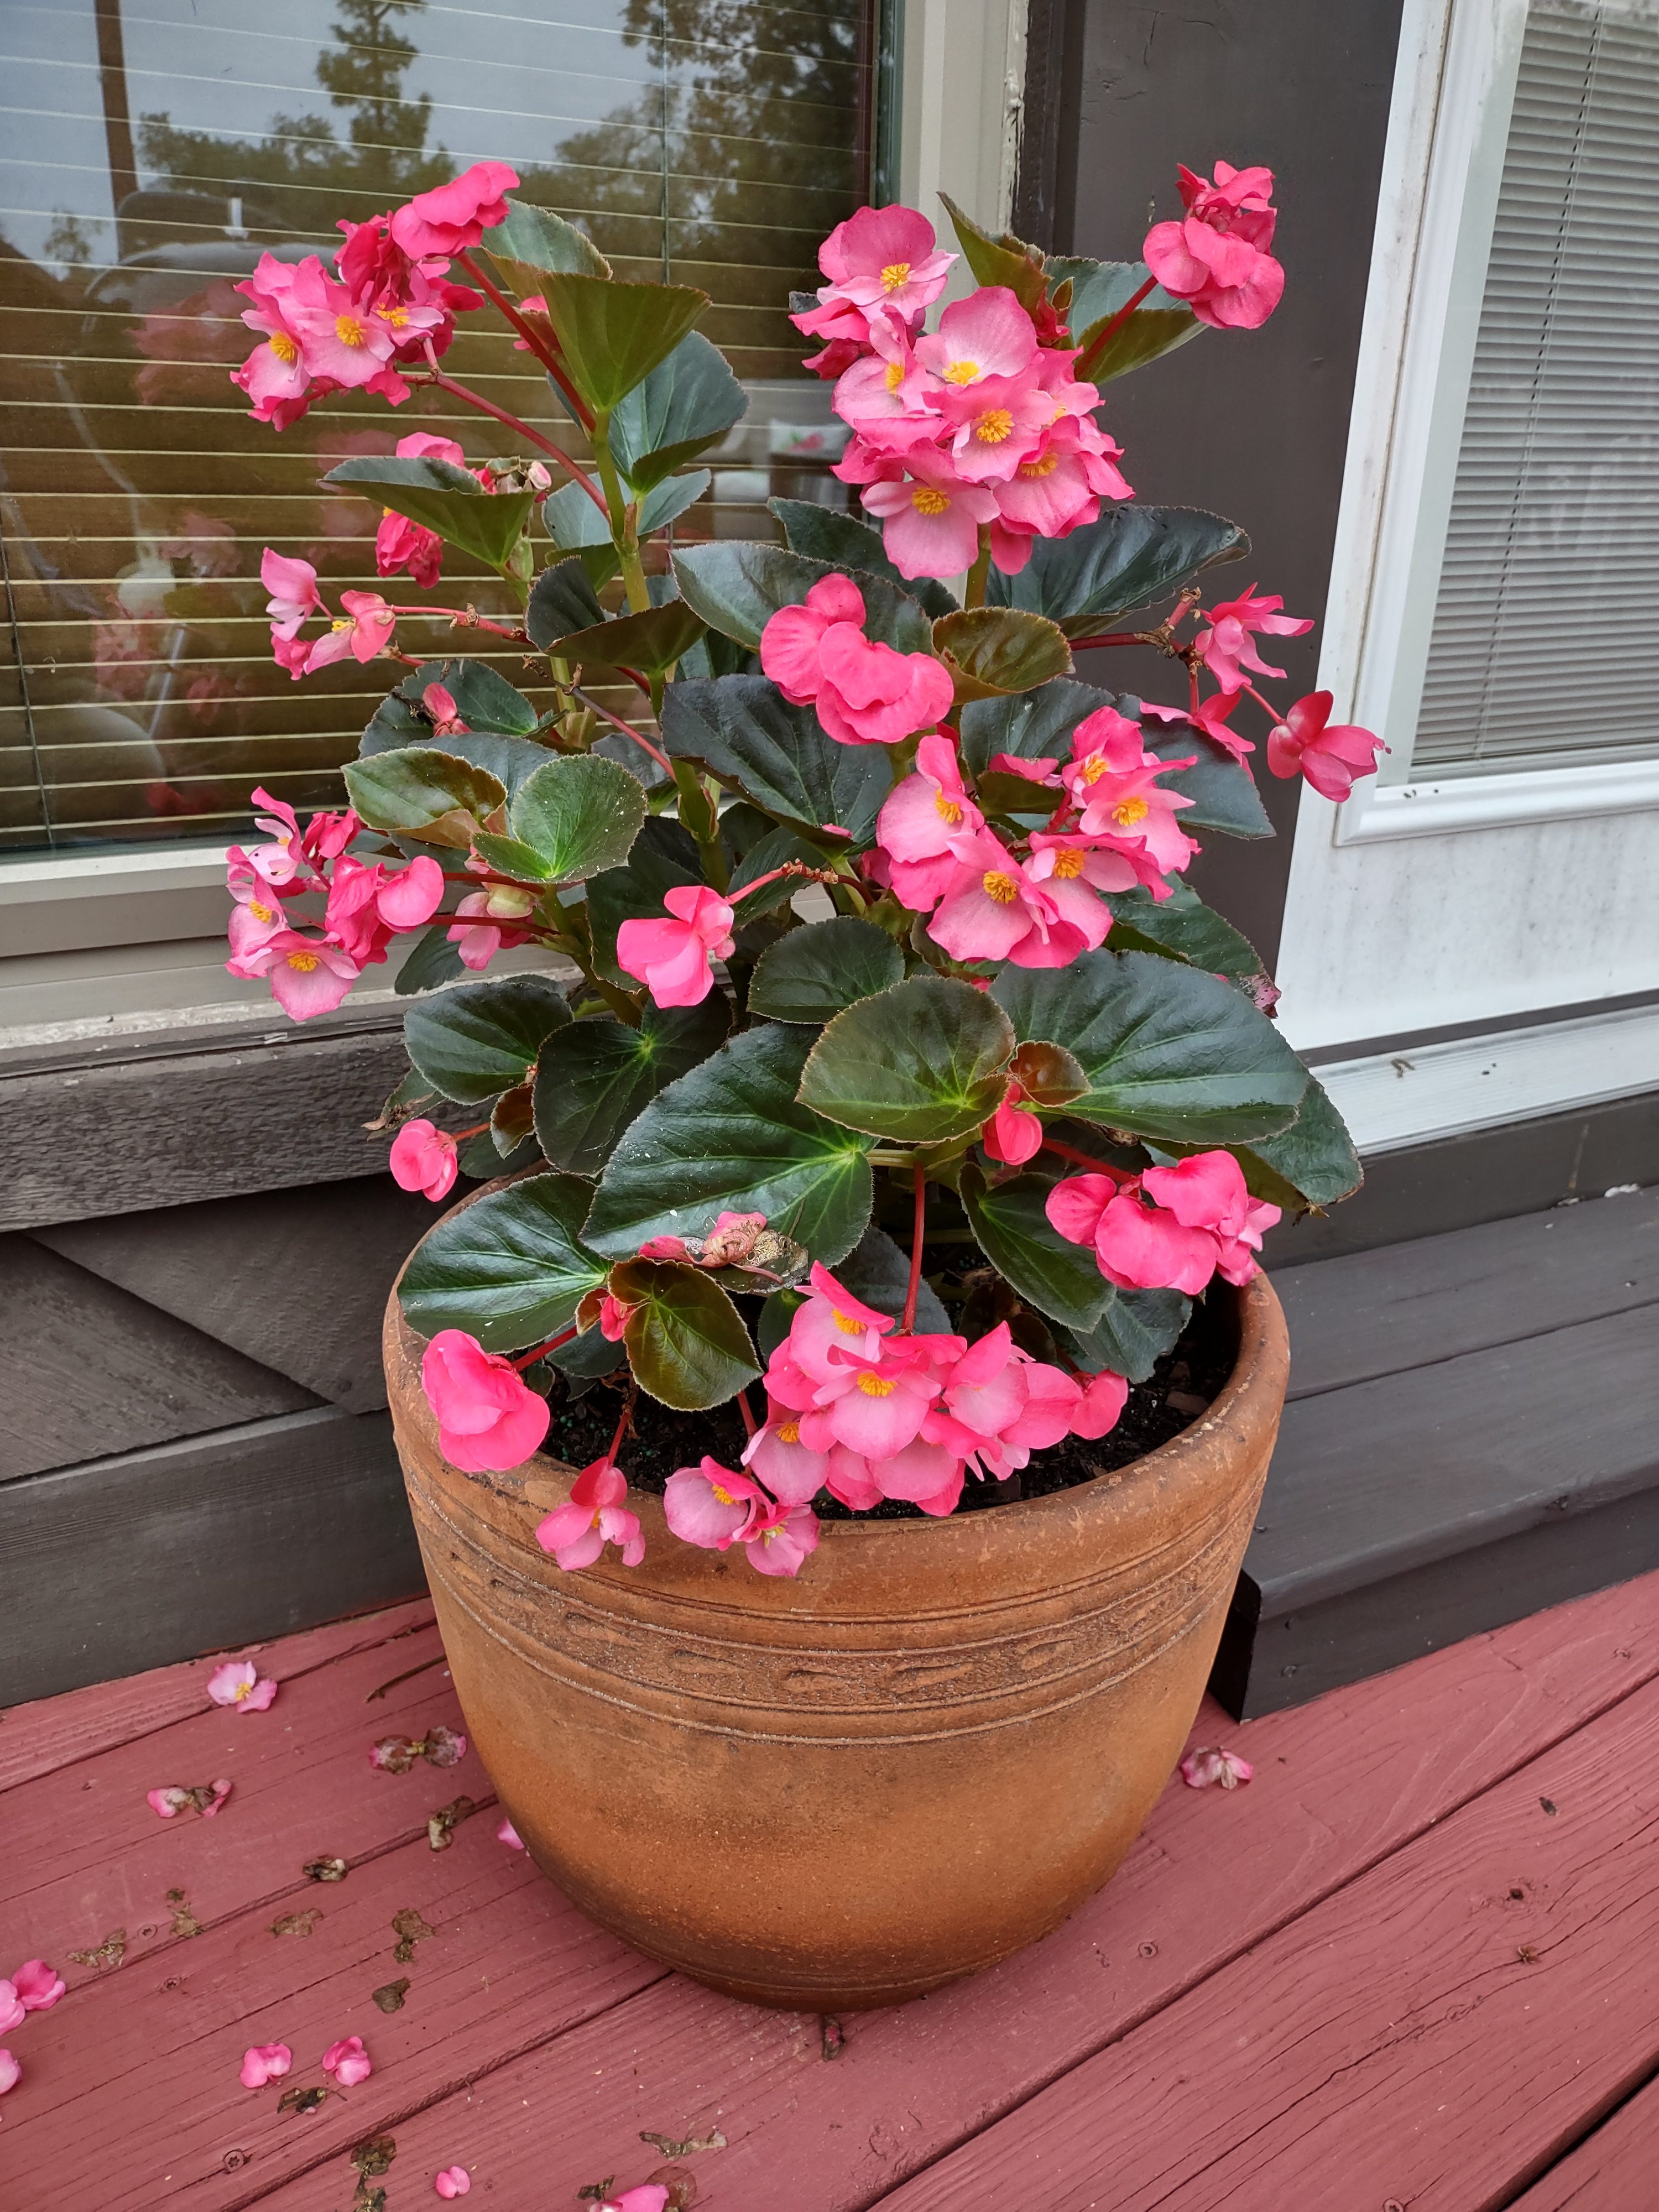
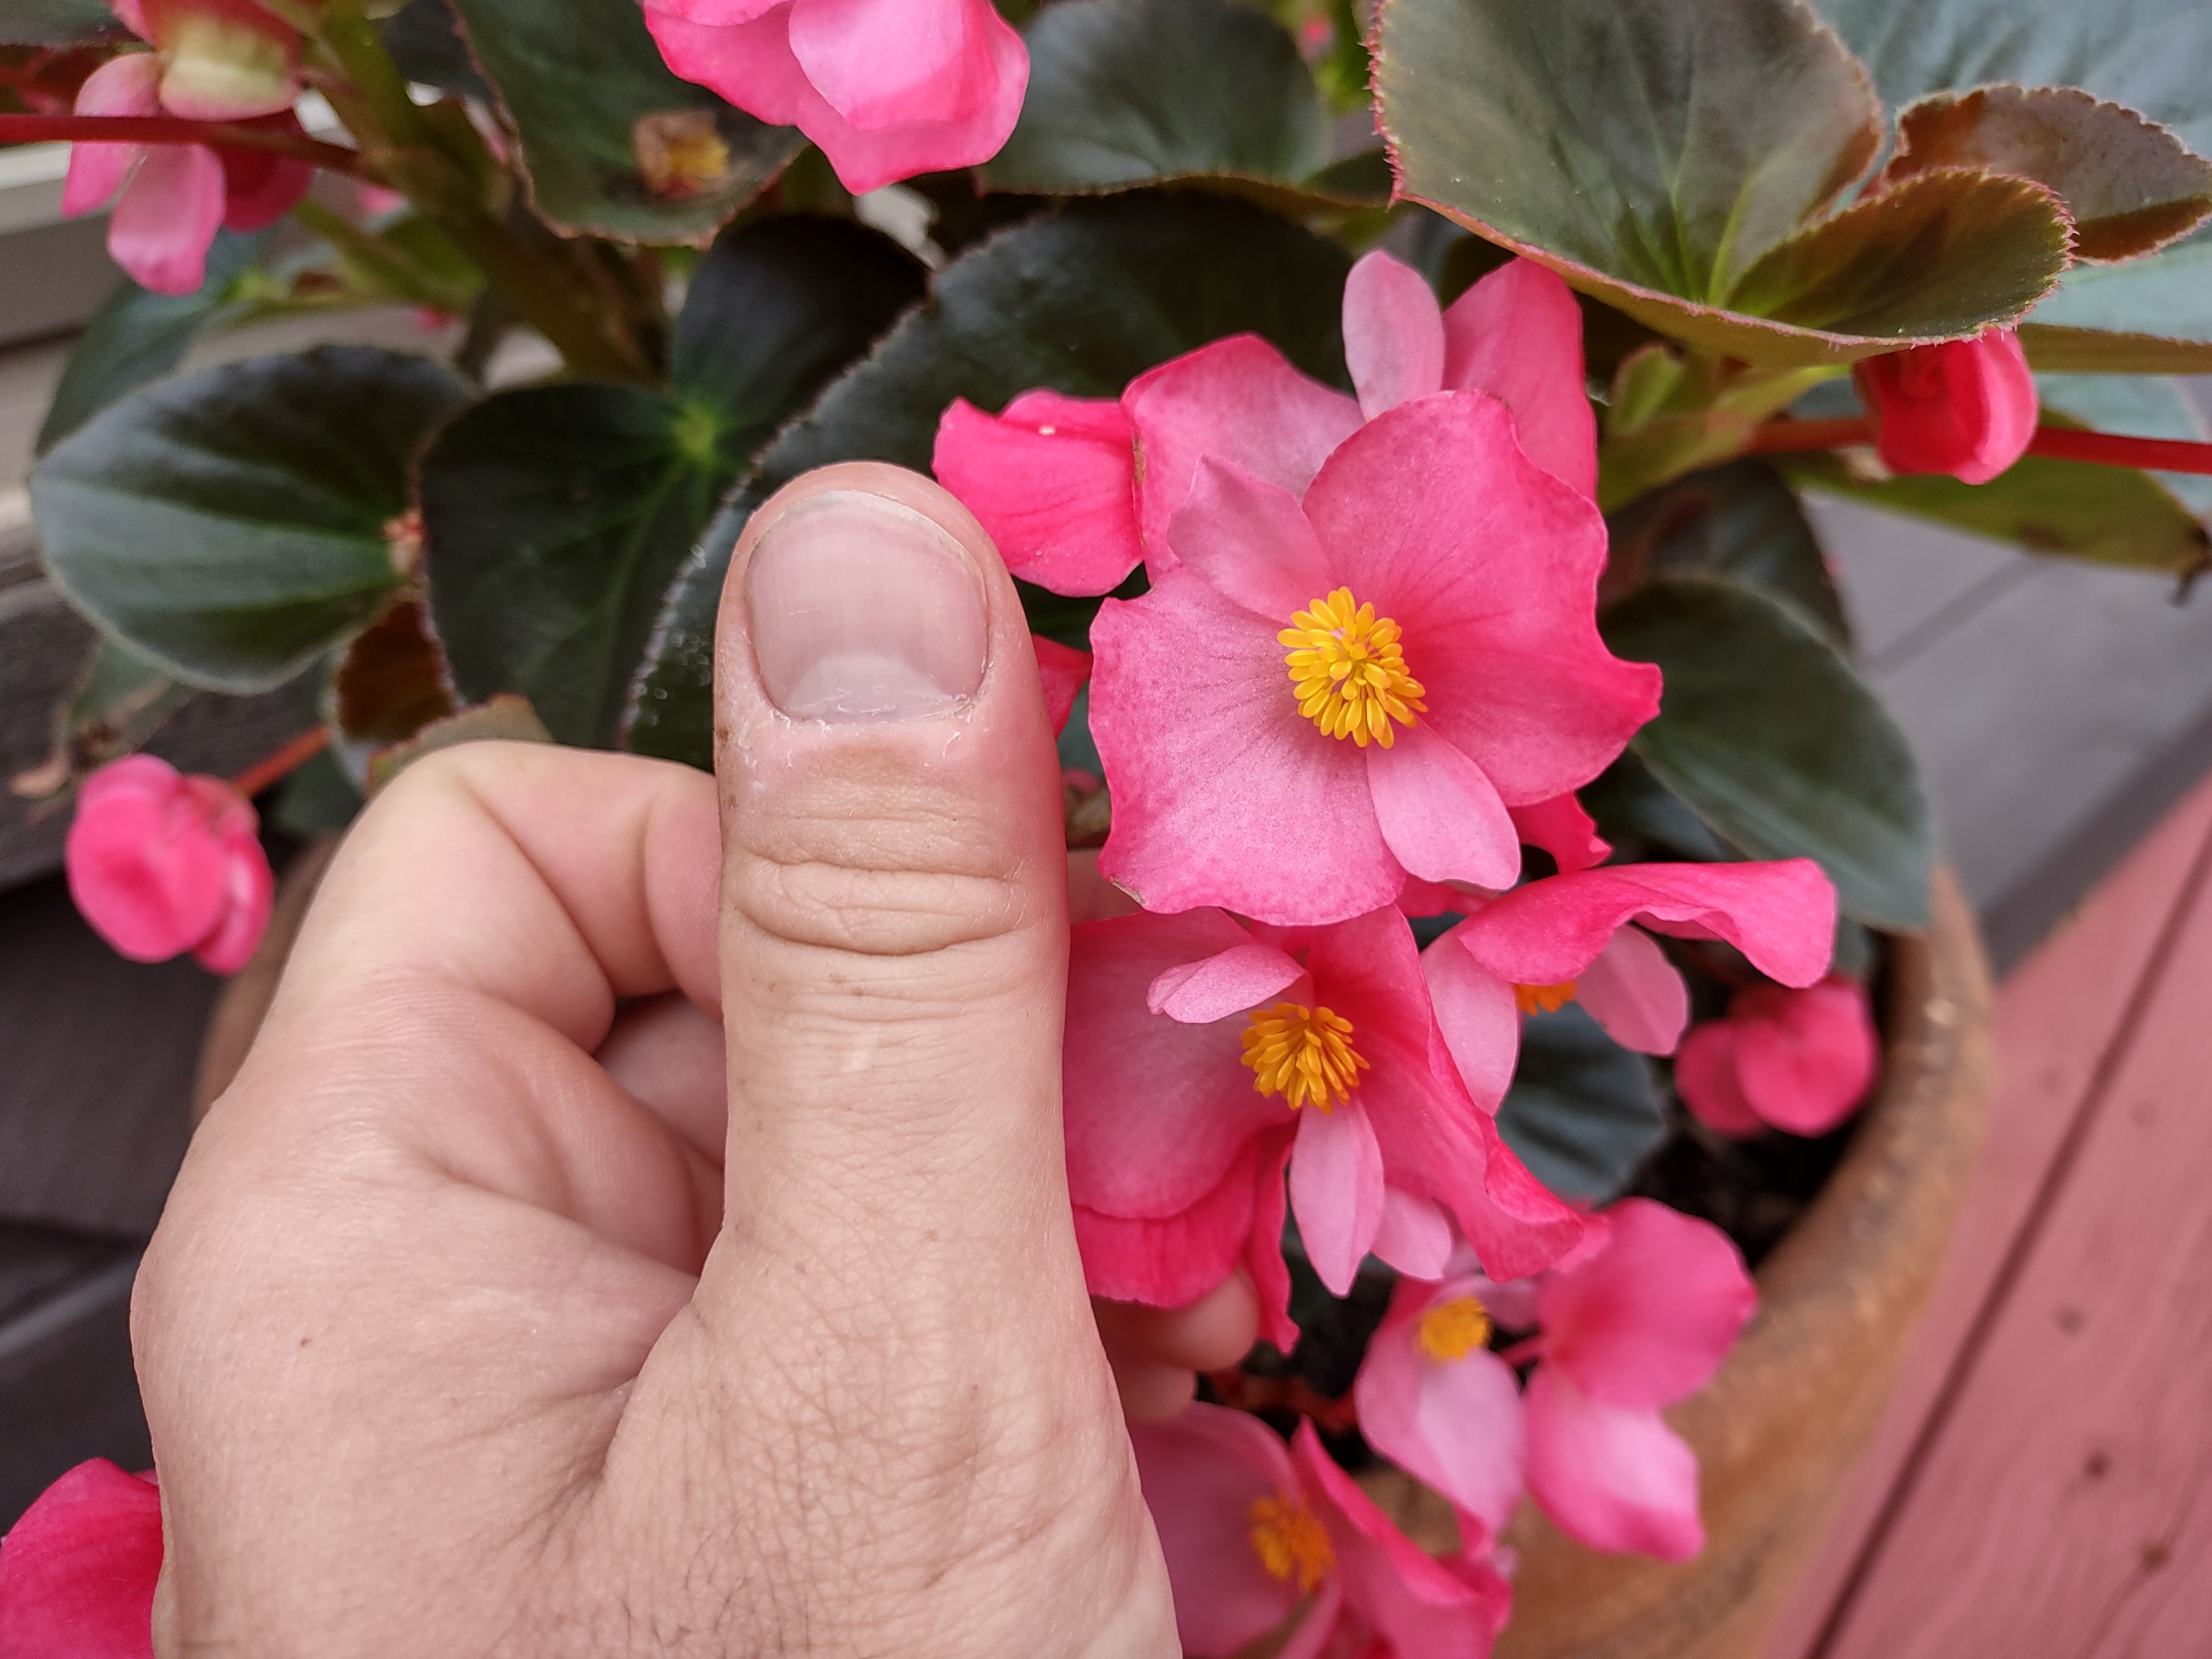
‘BIG Rose Bronze Leaf’ Begonia 45 days after purchase. Photo courtesy of Daniel Leonard.
Speaking of cultivars, the ‘Big’ series has now expanded to include eight different selections, each with slightly different leaf/flower attribute combinations. For example, the ‘Big’ that I am growing this year is named ‘BIG Rose Bronze Leaf’. As you might expect, the plant has dark, bronzish-colored leaves and vivid, rose-pink flowers that together make for a striking combination. Others in the series include such creative names as ‘BIG Red Green Leaf’ and ‘BIG White Bronze Leaf’. Though the names of these cultivars leave much to be desired (come on Benary, step up your name game!), they are all outstanding plants.
Fortunately, growing difficulty doesn’t also increase with plant/flower size and all the plants in the ‘Big’ series are extremely easy to cultivate. ‘Big’ selections, like most other Begonias, prefer partial shade and consistently moist soil, though they can tolerate the occasional dry period due to their waxy leaves. The ‘Big’ cultivars with bronze-colored leaves can even tolerate full sun, which the ‘BIG Rose Bronze Leaf’ sited in a sunny area on my deck can confirm. As with most other long-season flowering annuals, I apply a slow-release, complete fertilizer at planting and then supplement throughout the season with liquid fertilizer to keep them looking their best!
If you’ve avoided Begonias in the past like I did because they just didn’t offer the “wow” factor of other annuals, it’s time to think again. Bigger and truly better in every way than most other begonias, the selections in the ‘Big’ series are definitely worthy of a spot on your patio or in your landscape – plant one today and enjoy eye-catching Begonia blooms all summer long. For more information on Begonias, flowering annual plants, or any other horticultural topic, contact your local UF/IFAS County Extension Office. Happy Gardening!
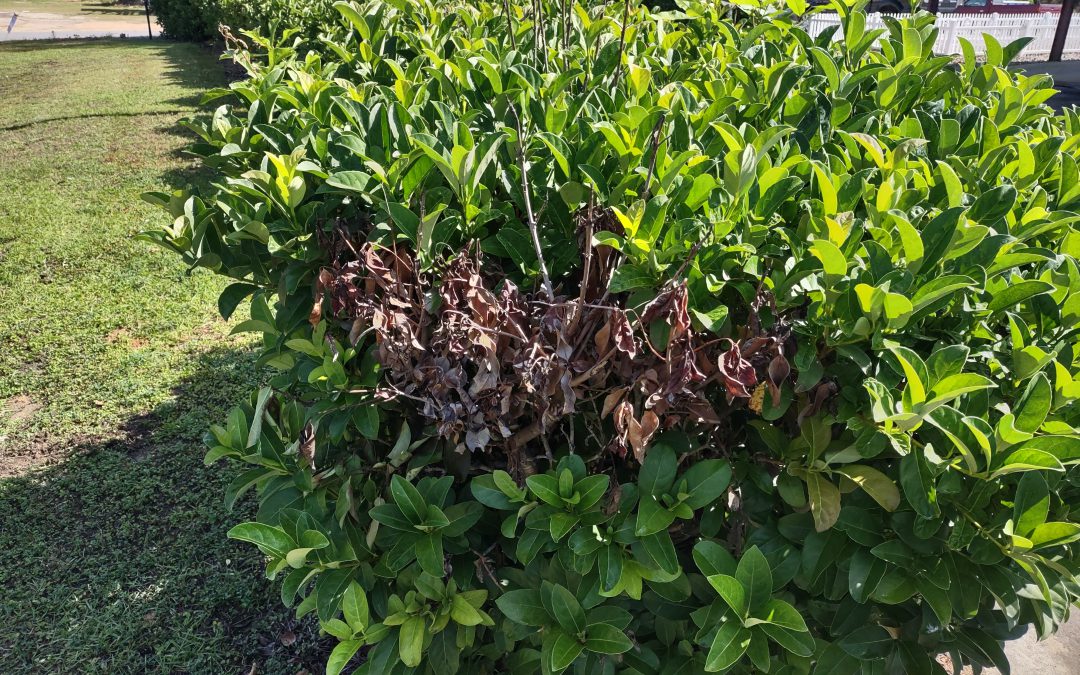
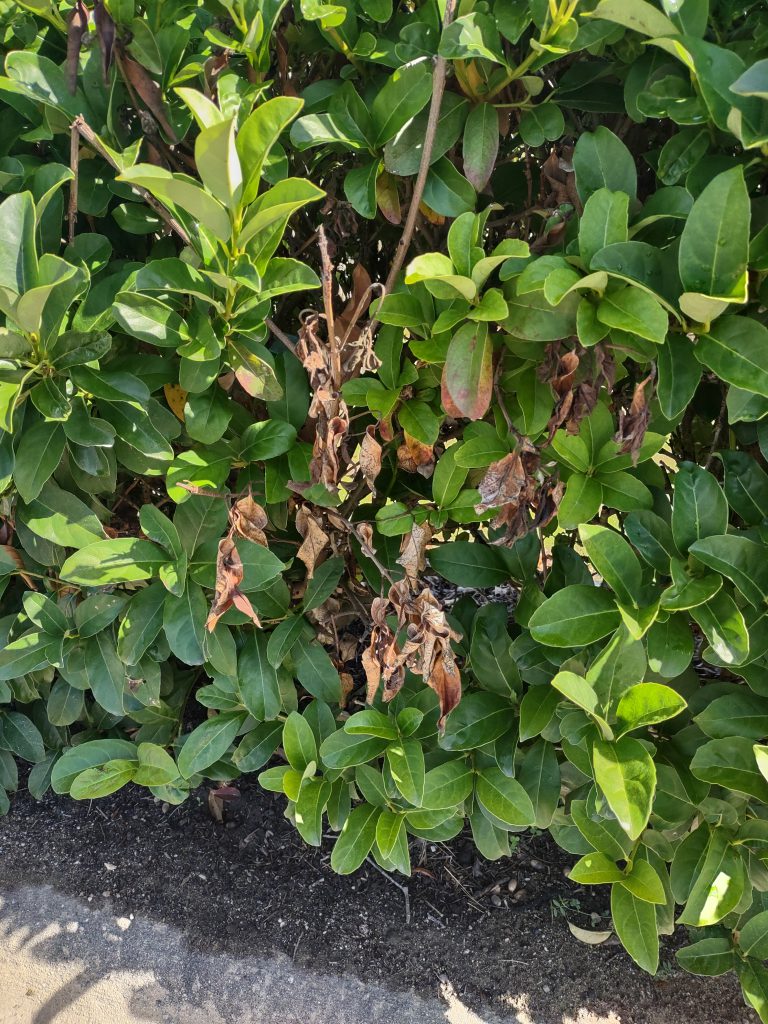
Sweet Viburnum (Viburnum odoratissimum) is thought of as being an ironclad landscape shrub, generally a rapid, healthy grower free of insects and disease. However, this spring, many Sweet Viburnum specimens across the Panhandle have experienced varying degrees of dieback, from individual shoots to entire sections of shrubs, caused by the fungal pathogen Botryosphaeria – commonly known as Bot Rot.
Typical symptom of Bot Rot on Sweet Viburnum. Photo courtesy of Daniel Leonard.
Bot Rot almost always appears after some kind of major stress event that impacts susceptible plants – drought, pruning wounds, nutritional deficiencies, or another environmental stress. We haven’t been afflicted lately with any serious drought conditions and the disease occurrences are too widespread to have been a result of isolated pruning or poor plant nutrition. However, the Panhandle did experience a major environmental event around Christmas 2022 that was plenty stressful for landscape plants, a weeklong Arctic blast of extreme cold. This abrupt hard freeze event in an otherwise mild winter is my best guess for what brought about the increased incidence of Botryosphaeria we have experienced this spring.
The Botryosphaeria fungus enters plants via wounds – in this case one probably caused by cold – and begins destroying the plant’s vascular system in the area. As the pathogen progresses, it eventually causes sunken cankers to appear, girdles the affected branch, and cuts off “circulation” in that stem. The first symptom of Bot Rot that gardeners notice is shoots rapidly wilting and exhibiting a blighted appearance, with brown, dead leaves holding onto affected limbs. Unfortunately, dieback isn’t always limited to individual shoots and can spread back into plants to eventually encompass whole branches. Entire plants dying from Bot Rot infection is not uncommon.
While there aren’t any fungicides that are effective in controlling or preventing Bot Rot, gardeners can arrest its spread by pruning out infected branches. To completely rid the plant of the fungus, make sure to prune 4” or so below the last infected plant tissue (symptomatic tissue will appear dark and discolored; healthy tissue will appear light and greenish). After pruning each affected plant, it is important to sanitize pruning equipment with either a 10% bleach solution or 70%+ isopropyl alcohol to prevent spreading pathogens to other healthy plants! Plants that have been irreparably disfigured by Bot Rot or outright killed may be pulled and discarded offsite.
While this year’s Bot Rot infestation has been extremely frustrating and similar future freeze events can’t be ruled out, gardeners should not give up on Sweet Viburnum, an excellent specimen or screening shrub. Keeping plants healthy with proper pruning, good fertility, and adequate irrigation is the best defense to ward off future infection when we experience harsh environmental conditions! For more information on Bot Rot, Sweet Viburnum, or any other horticultural topic, contact your local UF/IFAS County Extension Office! Happy Gardening.
No Mow March was an awesome success this year! Together, by leaving some unmown areas of our lawns and landscapes, we helped create acres of additional valuable pollinator habitat in a critical time of the year. However, we can’t forget that there are still nine months remaining in which we can provide low-maintenance food and shelter for pollinators and other wildlife in our landscapes this year! The following are three of my favorite ultra-low maintenance pollinator friendly shrubs for Panhandle landscapes for summer and fall.
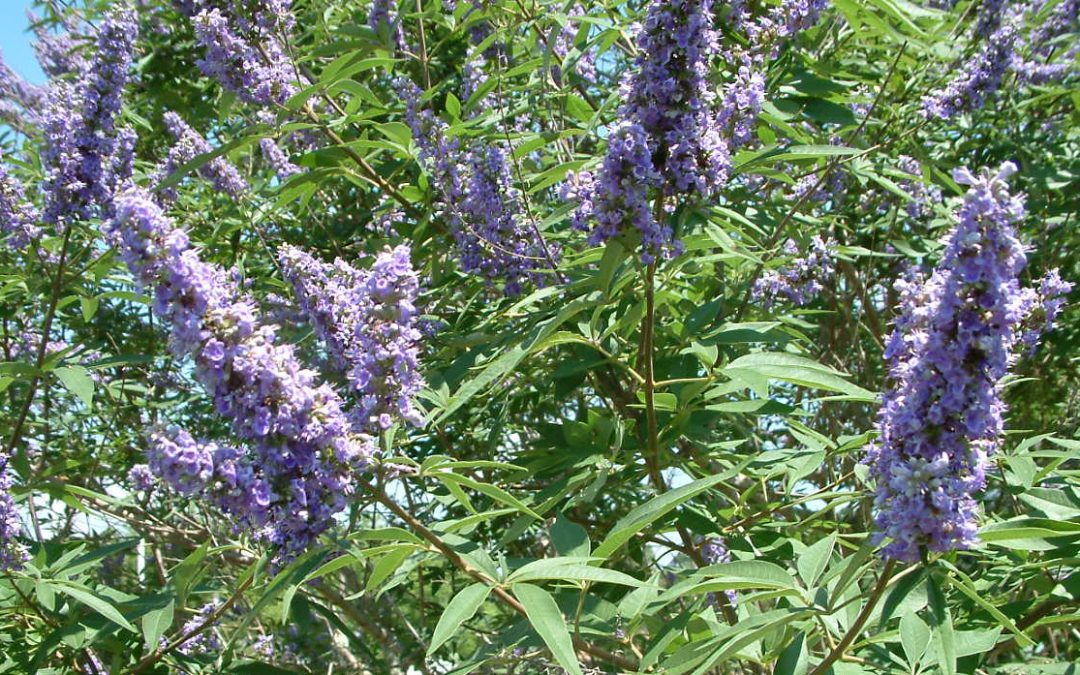
Chaste Tree (Vitex agnus-castus)
Chaste tree or vitex, an outstanding Florida-Friendly Landscape shrub/small tree, provides many aesthetic and wildlife landscape benefits throughout the growing season. Vitex features attractive grayish-green foliage and grows into a nice, rounded shape (10-15’ tall). However, the primary draw is its summer/fall flower show. Sporting striking masses of purplish-blue flowers for months on end until frost, Vitex is a pollinator magnet. Bees, butterflies, hummingbirds, and all manner of other pollinators visit vitex when in bloom and birds frequent the shrub in the fall to feed on its seeds. Simply select a site with full sun and well-drained soil and Vitex will reward gardeners and pollinators for years to come.
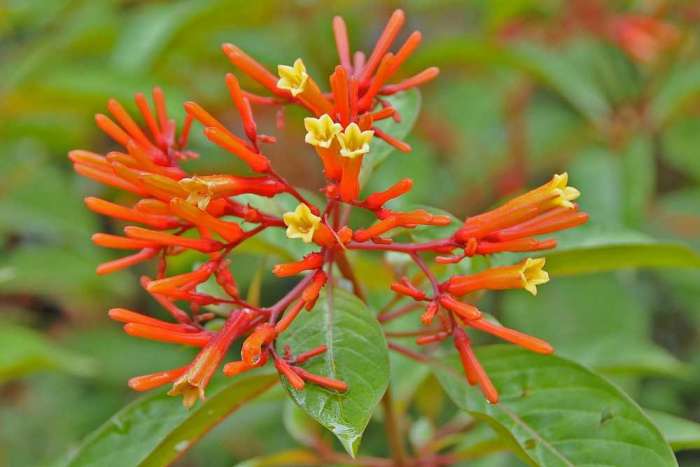
Firebush (Hamelia patens)
Firebush is a showstopper for both passers-by and pollinators. This sorta native shrub (Florida native but does not occur naturally in the Panhandle), is a prolific producer of tubular, bright-red flowers from late spring-through frost. These flowers are a preferred nectar source for many species of butterflies, Zebra longwing and Gulf Fritillary included, and a favorite of hummingbirds. Like vitex, birds also enjoy feeding on the berries that follow firebush flowers. In the Panhandle, firebush tops out at around 6’ tall and about as wide and is often killed back to the ground by frost, regrowing rapidly each spring. Firebush has no real insect or disease issues in landscapes and prefers the same sites as Vitex and will appreciate as much sun as you can give it and well-drained soil.
Bright orange-red blooms on a firebush. Photo courtesy UF/IFAS.
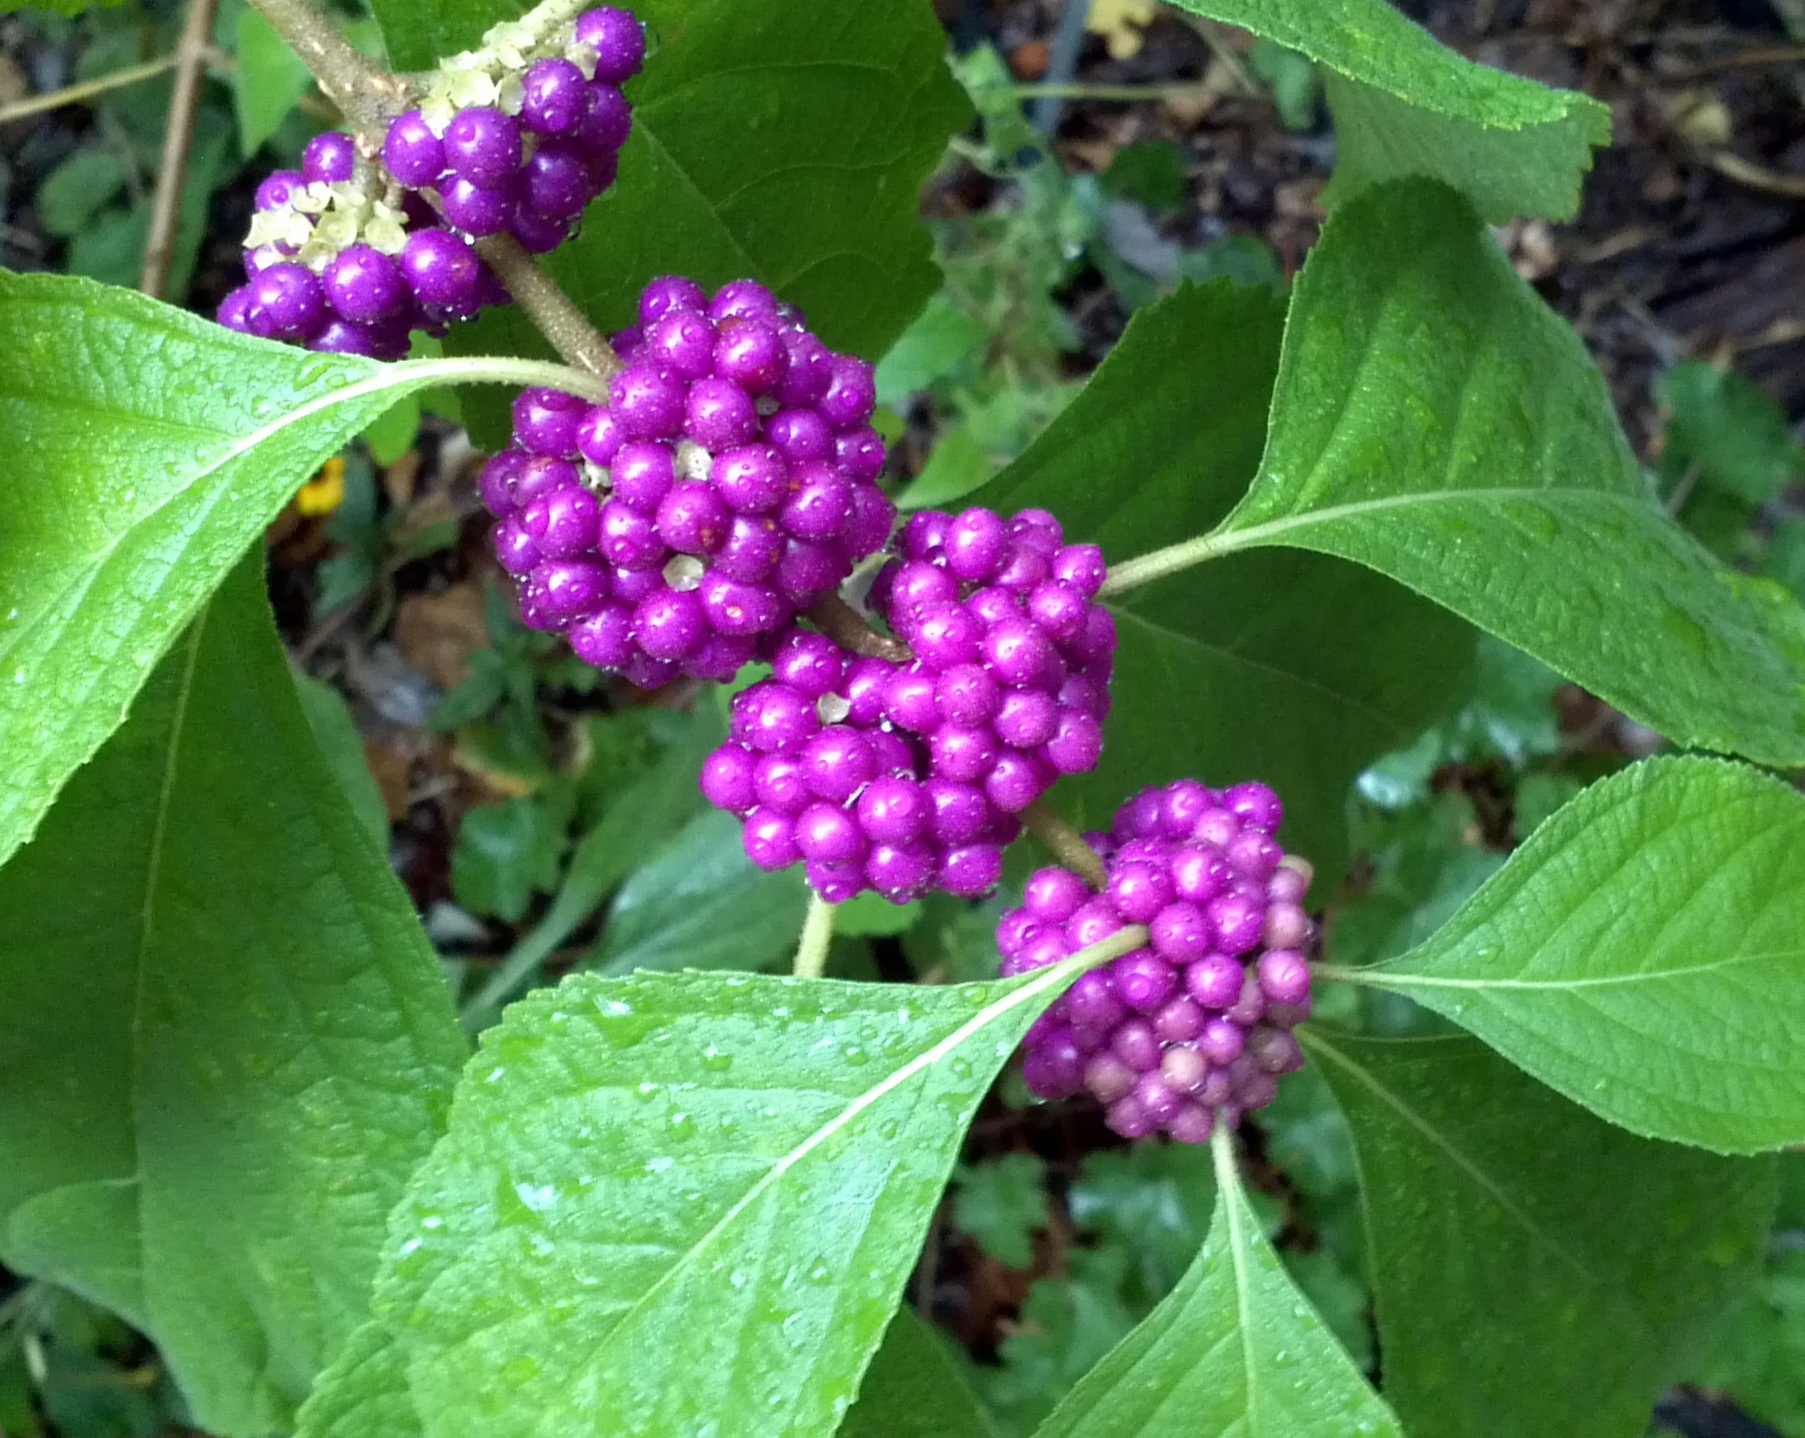
American Beautyberry (Callicarpa americana)
American beautyberry, or just Beautyberry as it is commonly referred to, is a lovely little deciduous shrub native to all parts of Florida and provides benefits to all manner of landscape wildlife. Though primarily known for its bird-attracting, vibrant purple berry clusters that appear late summer through fall, Beautyberry is a host plant for several butterfly/moth species and its dainty, pink flowers are an early summer favorite of many bees! Beautyberry grows 5-7’ in height and is extremely adaptable in landscapes as well, thriving in sun or light shade and many different soil conditions.
American Beautyberry
Photo by: UF/IFAS
It’s important to remember that providing pollinator/bird food and habitat in lawns and landscapes is not a one month event, but a year round commitment. Reducing mowing frequency, reducing pesticide use, planting native trees, including host and nectar annuals/perennials in landscape beds, and yes, planting native fauna friendly shrubs like vitex, firebush, and American beautyberry are all part of maintaining a pollinator-friendly yard! Plant one (or several) today! For more information on creating pollinator habitat in landscapes or any other horticultural topic, contact your local UF/IFAS County Extension Office.