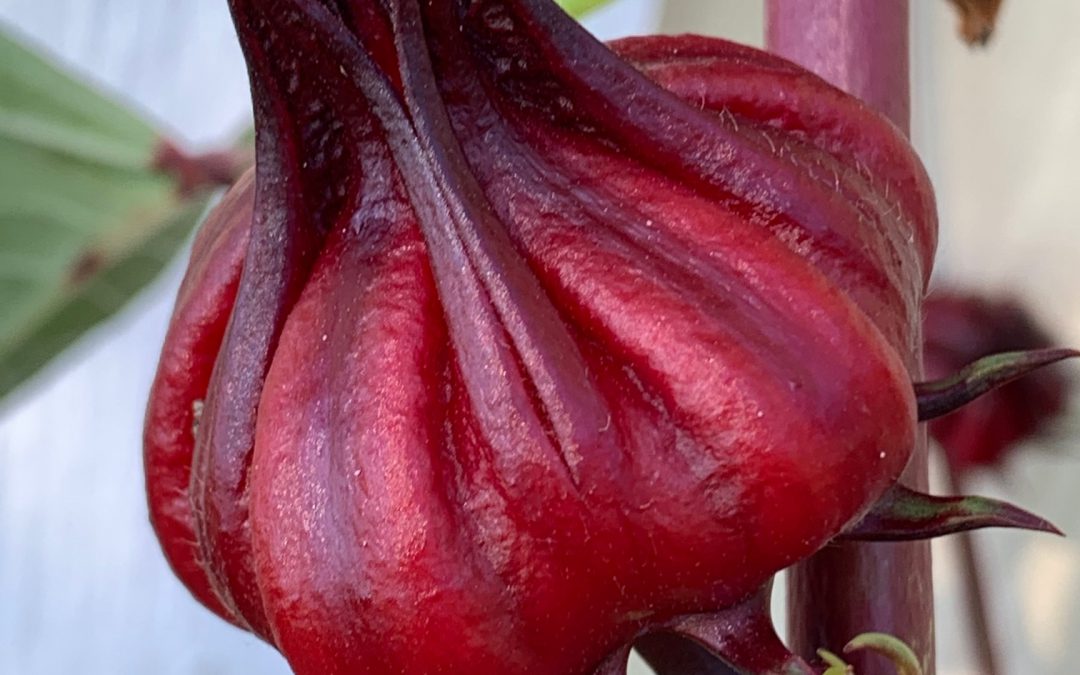
Attractive roselle fruit. Photo credit: Mary Salinas, UF/IFAS Extension.
Just before the recent cold weather I harvested seed pods from my roselle, Hibiscus sabdariffa, and made the most delicious and nutritious iced herbal tea.
You may have heard other names for this plant of Asian or African origin: bissap, red sorrel, Indian sorrel, Jamaica sorrel, Florida cranberry or jelly okra. Whatever name you call it, it has been grown in Florida since the late 1890’s.
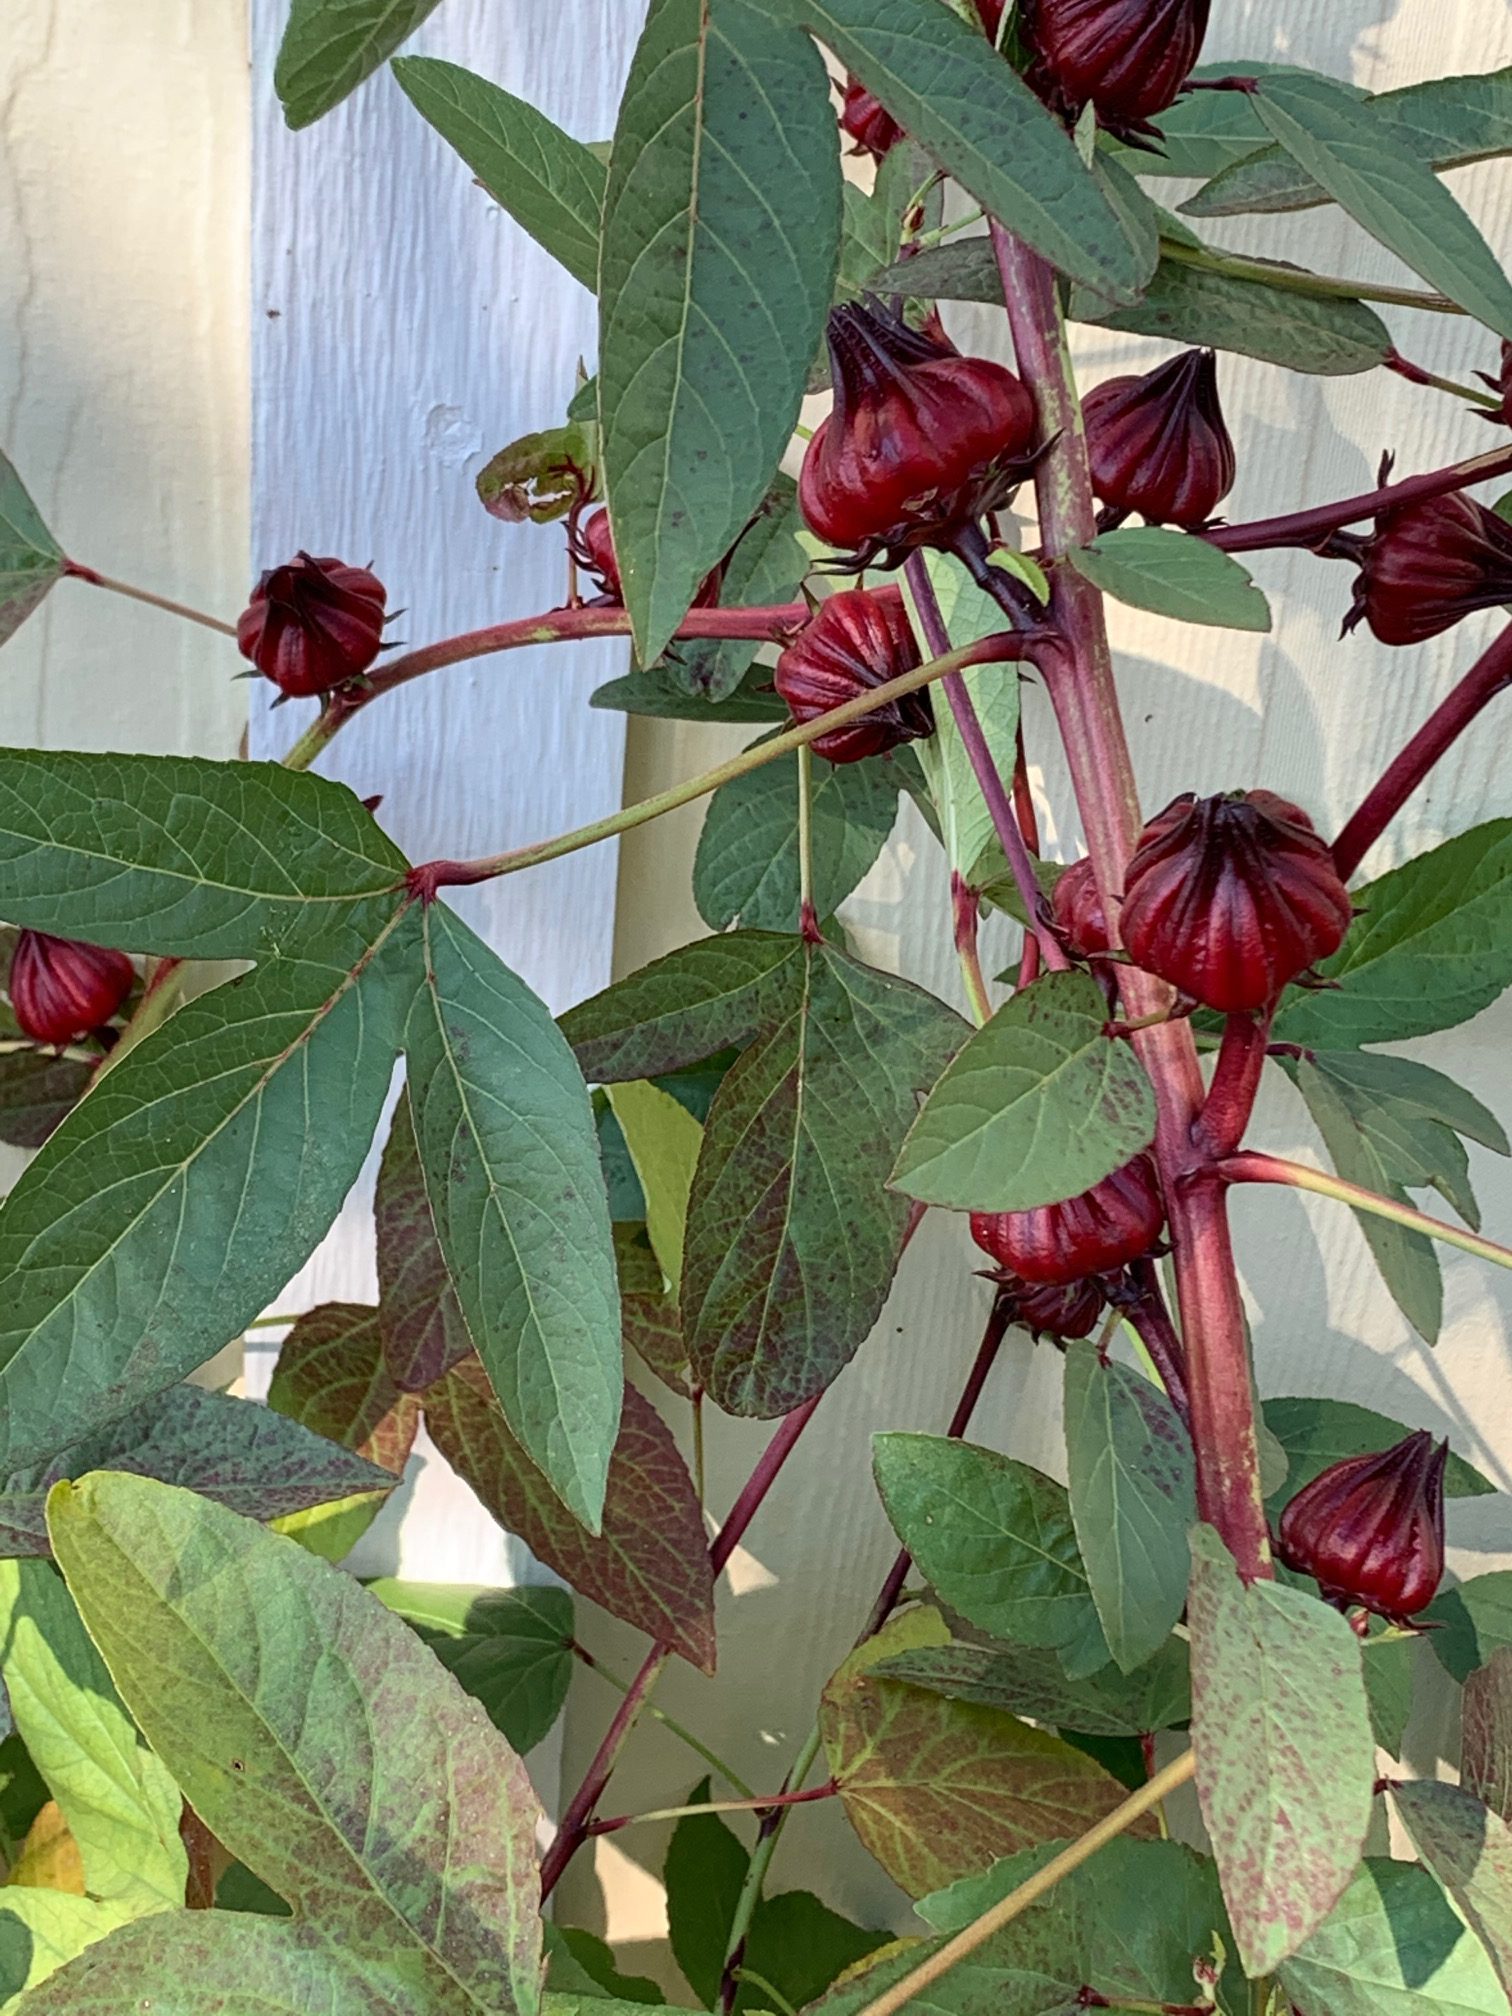
Roselle leaves and fruit. Photo credit: Mary Salinas, UF/IFAS Extension.
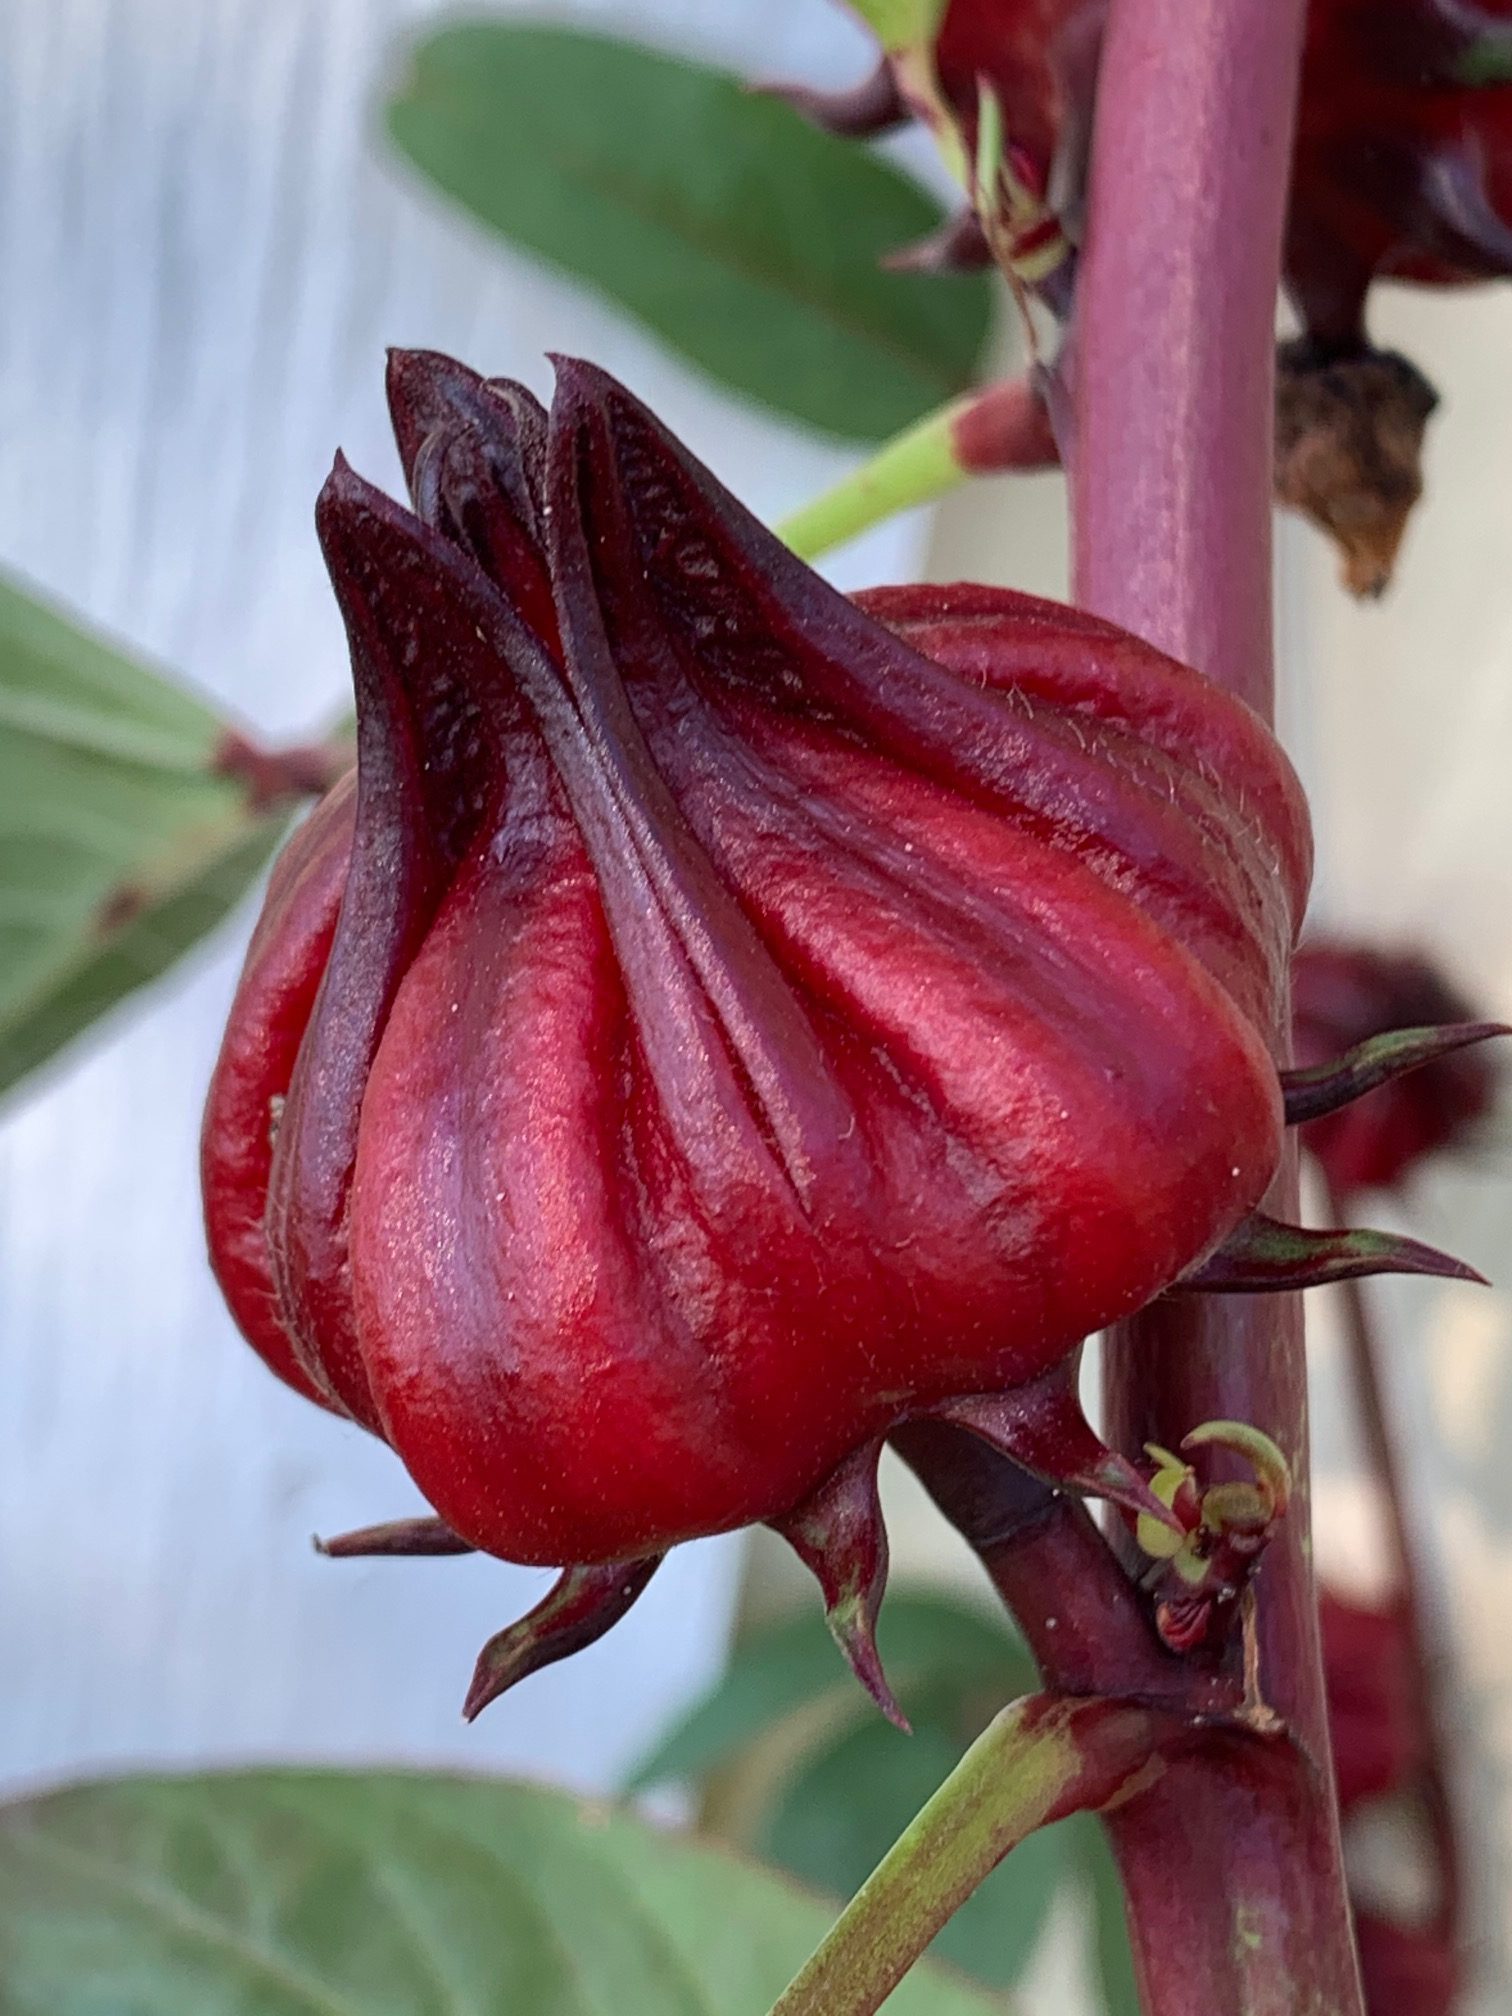
People around the world enjoy consuming roselle in many ways. In addition to making a beverage from the fleshy fruit, it is used to make jams, jellies, relishes, syrup and added to salads. Harvest the fruit when it is large (as in the photo) but before it gets tough. Leaves can be eaten raw in salads or cooked into dishes. Even the seeds can be made into a high protein meal or ground into a coffee substitute.
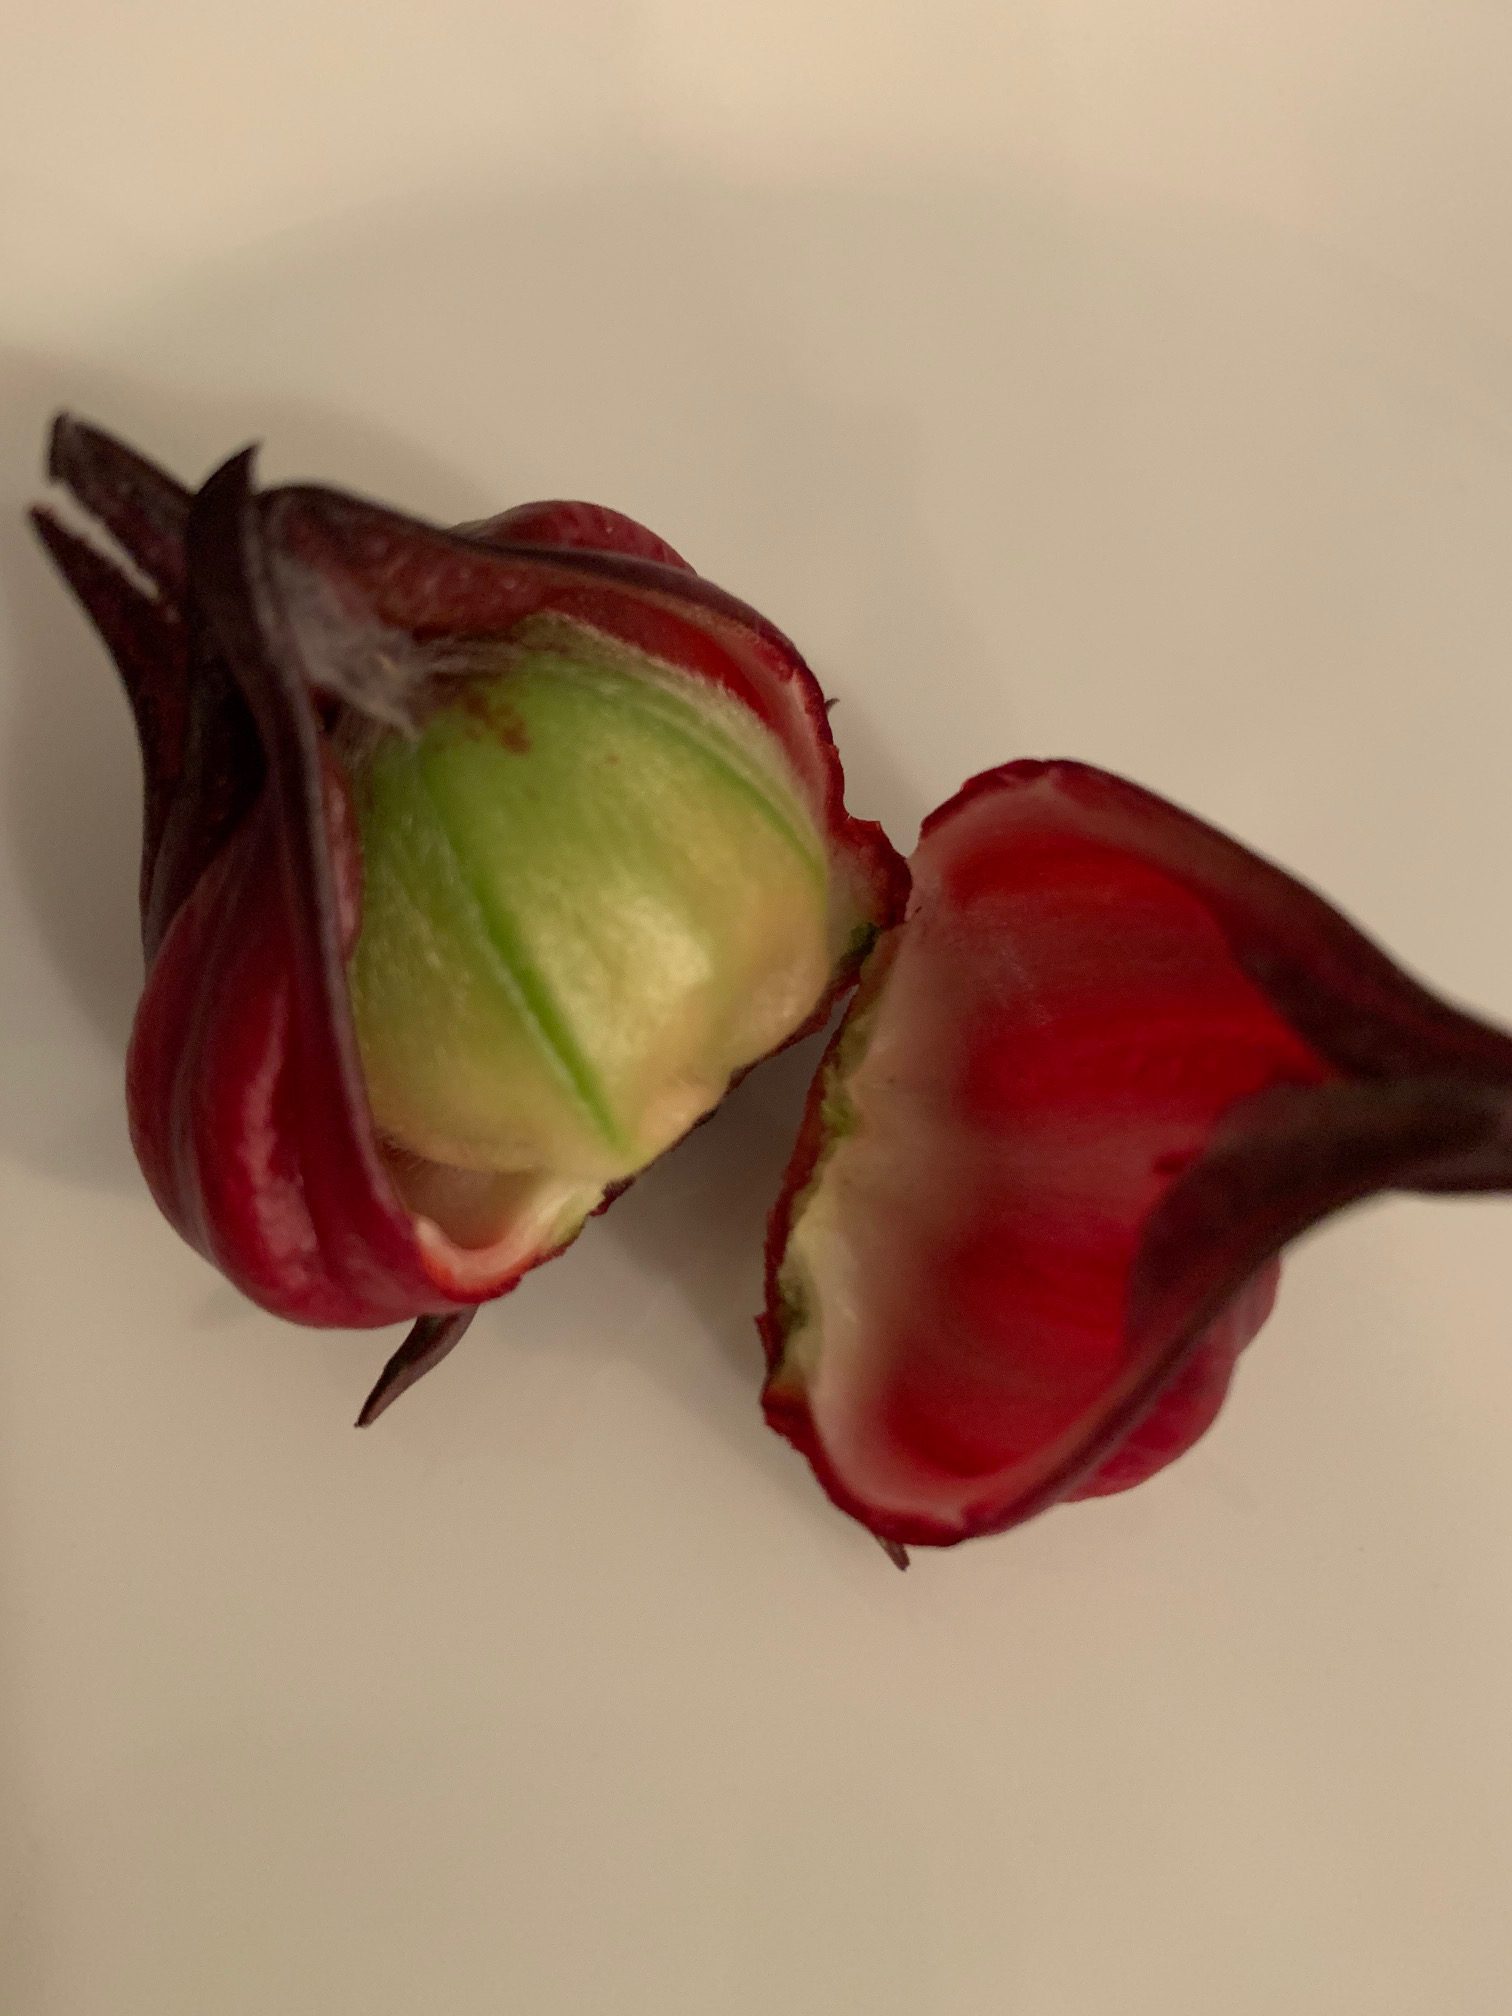
Roselle fruit showing the unripe green seedpod surrounded by the fleshy calyx. Photo credit: Mary Salinas, UF/IFAS Extension.
My lone roselle plant provided hundreds of fruits and was so easy to grow. In the spring it started as a small 3-inch seedling and by November it grew to over 4 feet tall and wide. Roselle can grow 6 to 7 feet tall. It’s not too picky on soil type if it gets plenty of sun and consistent moisture. Few pests are attracted to roselle. However, deer will eat this down to the ground, as they will any hibiscus. Since my garden is plagued by hungry deer, I placed the roselle in the back of a landscape bed with a border of plants unappetizing to the deer. Expect roselle to start blooming in mid-summer and continue through frost. Blooms only last one day before forming the equally attractive fruit.
Roselle is a tropical plant and susceptible to frost in northwest Florida. To have seeds for next year, let some of the fruit stay on the branches to let the seed pods turn yellow/brown and ripen. There are also many online seed companies that carry seed.
As an unabashed plant enthusiast who’s been experimenting with new plant introductions (some not really “new”, just new to me) in his own landscape, and his parent’s yard before that (sorry guys for the ‘Charmed Wine’ Oxalis that now pops up unwanted every spring) for nearly two decades now, at this point I’m pretty hard to impress. However, last year Andrea Schnapp, a UF/IFAS Walton County Master Gardener, introduced me to a newish plant that has since changed the way I choose plants to color shady pots and planting beds, a little native of tropical South America called Bush Violet (Browallia spp.), specifically the hybrid ‘Endless Illumination’.
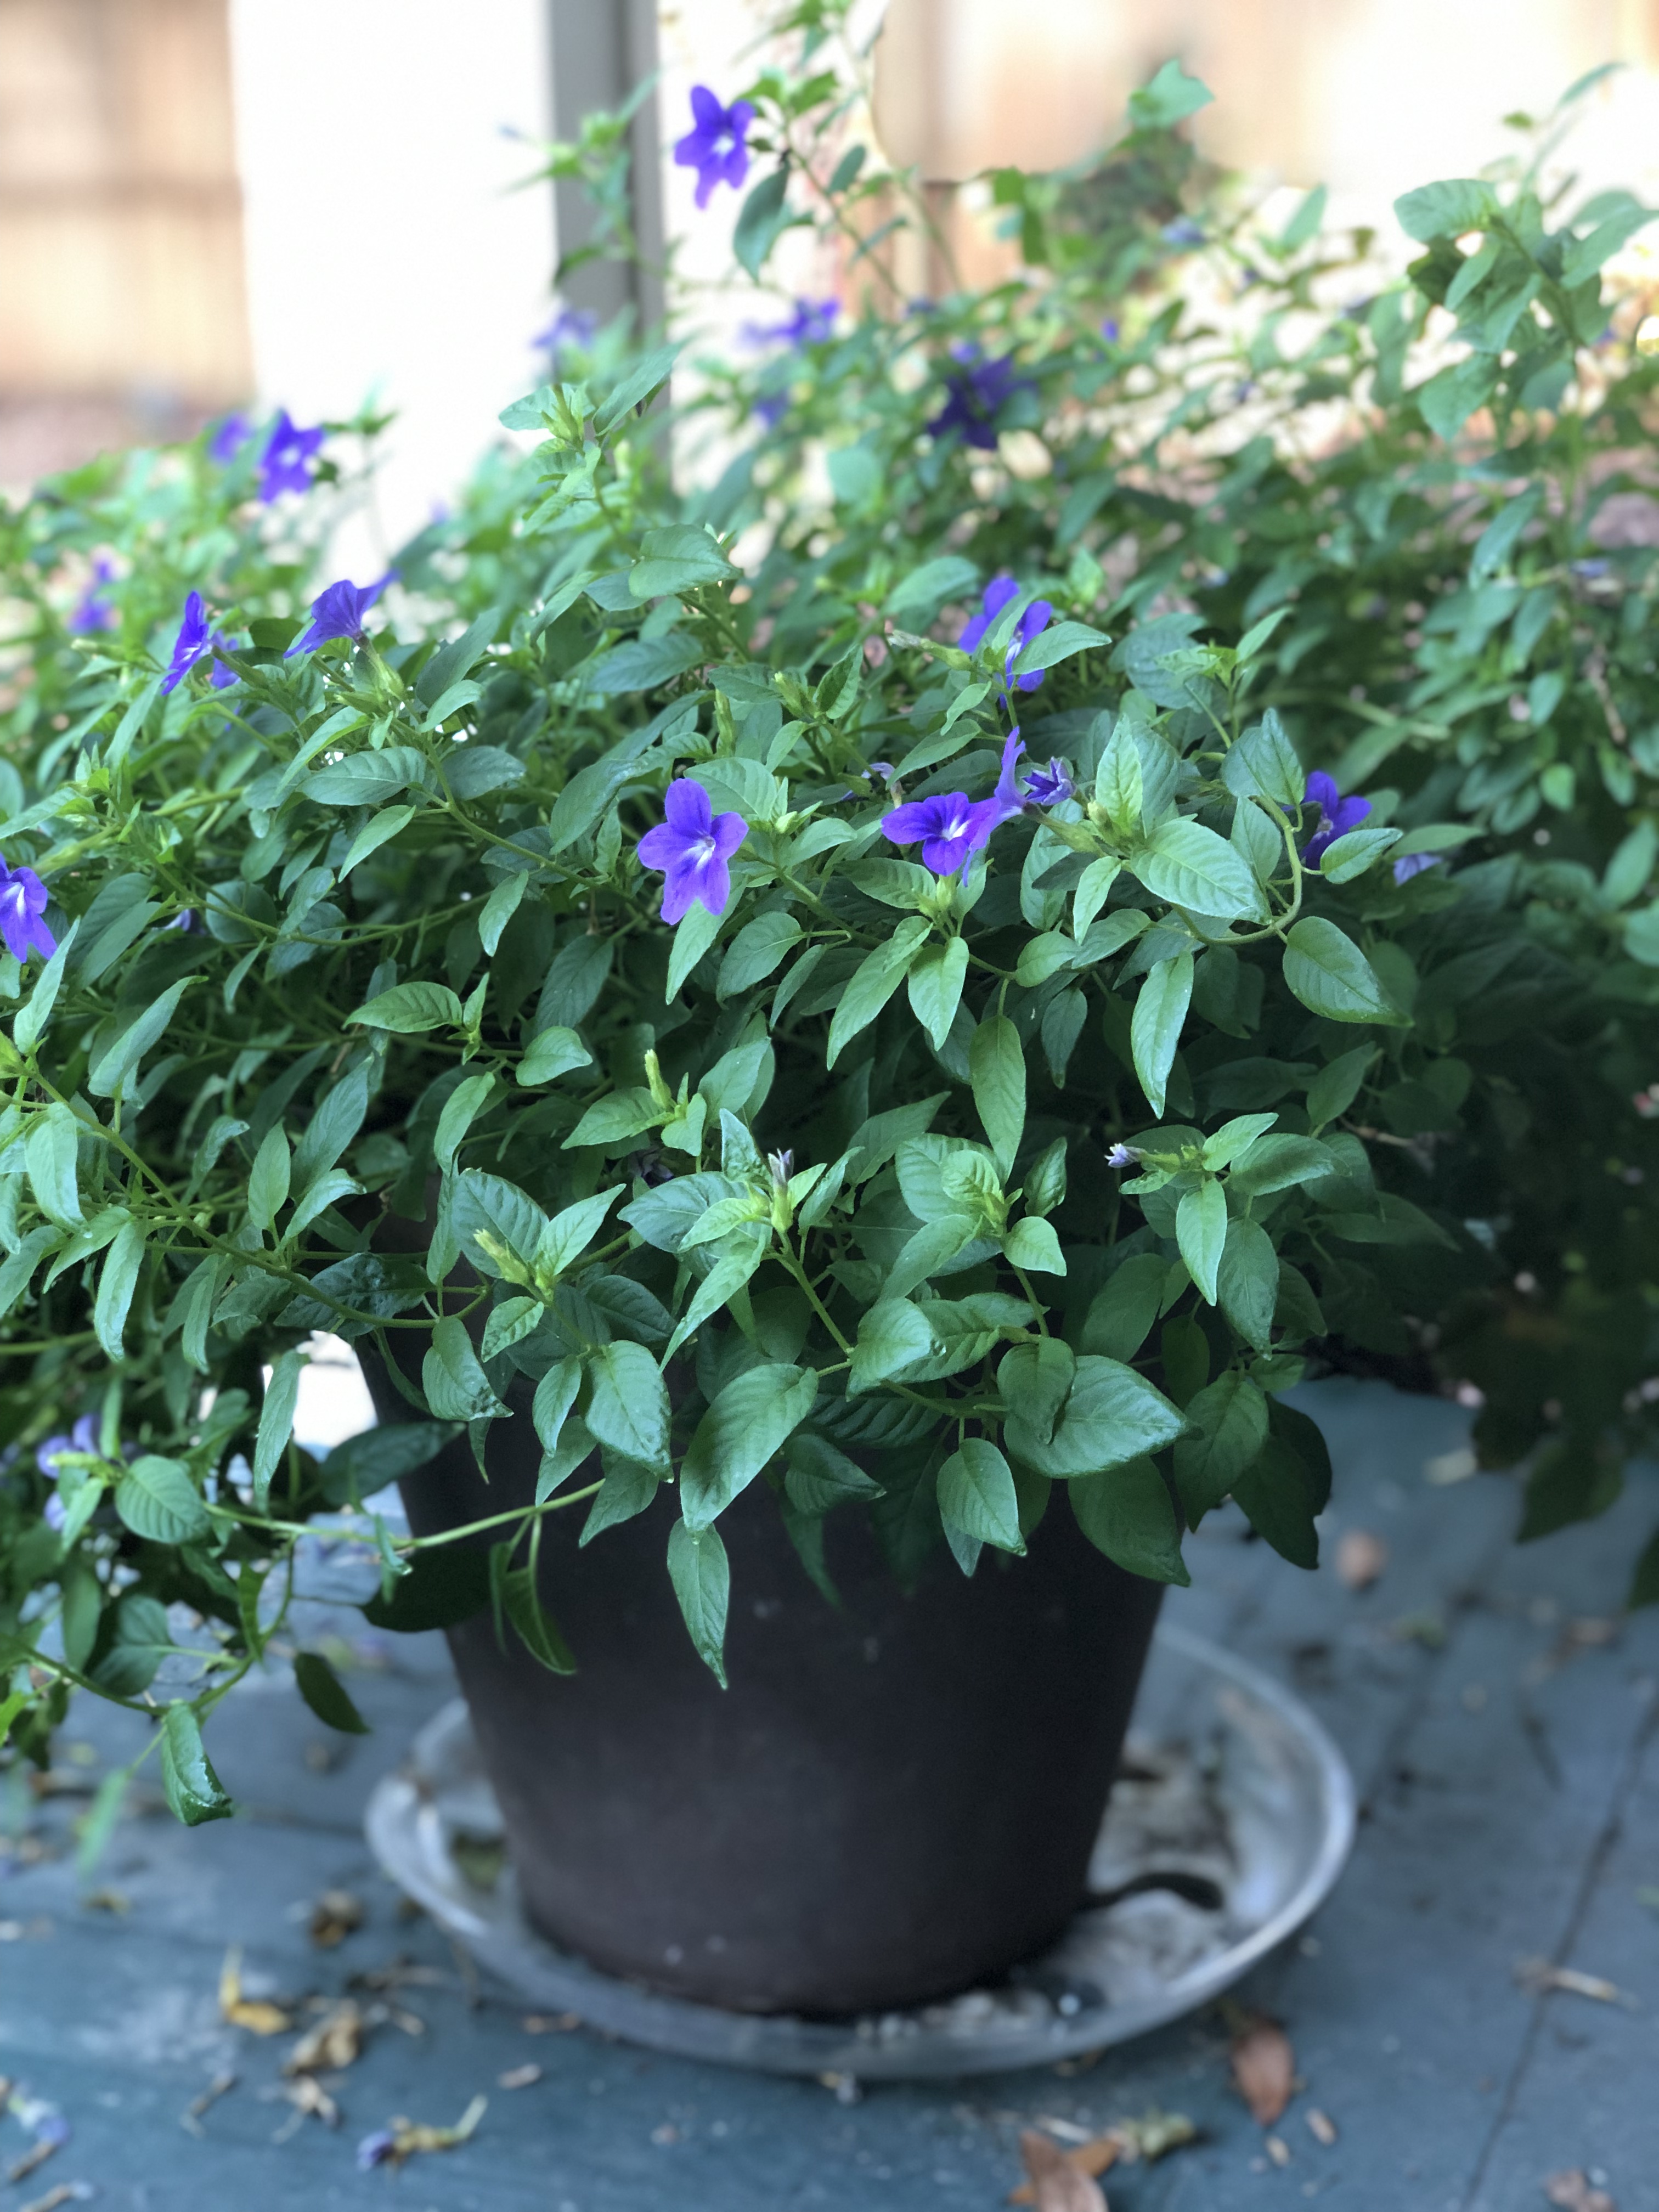
Browallia ‘Endless Illumination’ on the author’s back porch.
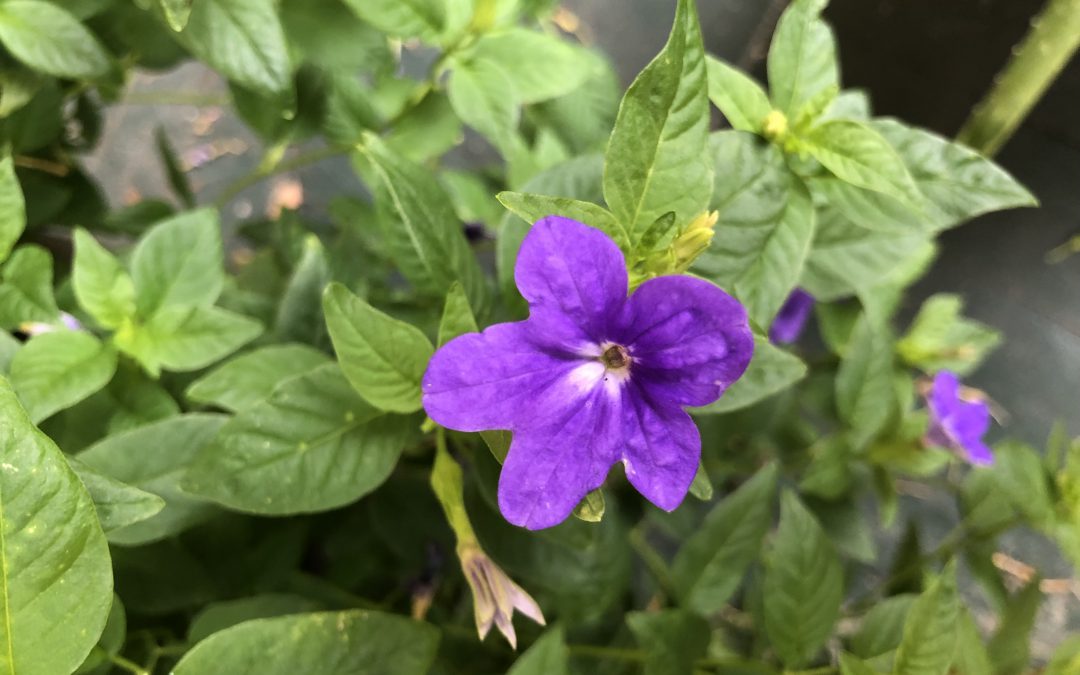
For decades, the standard bedding plant for color in the shade in the Deep South has been Impatiens walleriana. However, in the last few years, a new disease called Impatiens Downy Mildew has wreaked habit on the bedding plant species, virtually eliminating it as a serious player in the horticulture industry. Fortunately, the fine folks at Proven Winners introduced ‘Endless Illumination’ a couple of years ago to fill the niche formerly occupied by old-fashioned Impatiens. And boy, is ‘Endless Illumination’ aptly named. The unending masses of star shaped flowers are an absolutely brilliant purple hue that does indeed light up shady areas in the landscape. I’ve encountered few plants put forth such a proliferous display of flowers for as long of a time as this Browallia selection has, and it doesn’t even require deadheading!
Browallia ‘Endless Illumination’ flowers.
In addition to having one of the more striking color displays of any bedding plant, Browallia happens to be a vigorous grower with an extremely hardy constitution. I’ve found ‘Endless Illumination’s mature size as listed on the sales tag as being a little conservative, instead of the 16” tall x 14” wide stated, my samples have consistently grown more than the 16” listed in height and doubled the width, no complaints here as this just means more flowers! And though my experience with Browallia has strictly been in containers so far, it has weathered heat and bounced back from drought like a champ. It’s not super important to know that the container it occupies is sited under my back porch roof and therefore is subjected to human induced drought by my forgetting to water it, good performance in droughty conditions is good performance in droughty conditions! Finally, Browallia requires the bare minimum of fertilizer to thrive. A good topdressing of a slow-release fertilizer (rates according to the product’s label, of course) at planting and an identical refresher dose mid-summer have induced great performance and no noticeable nutrient deficiencies.
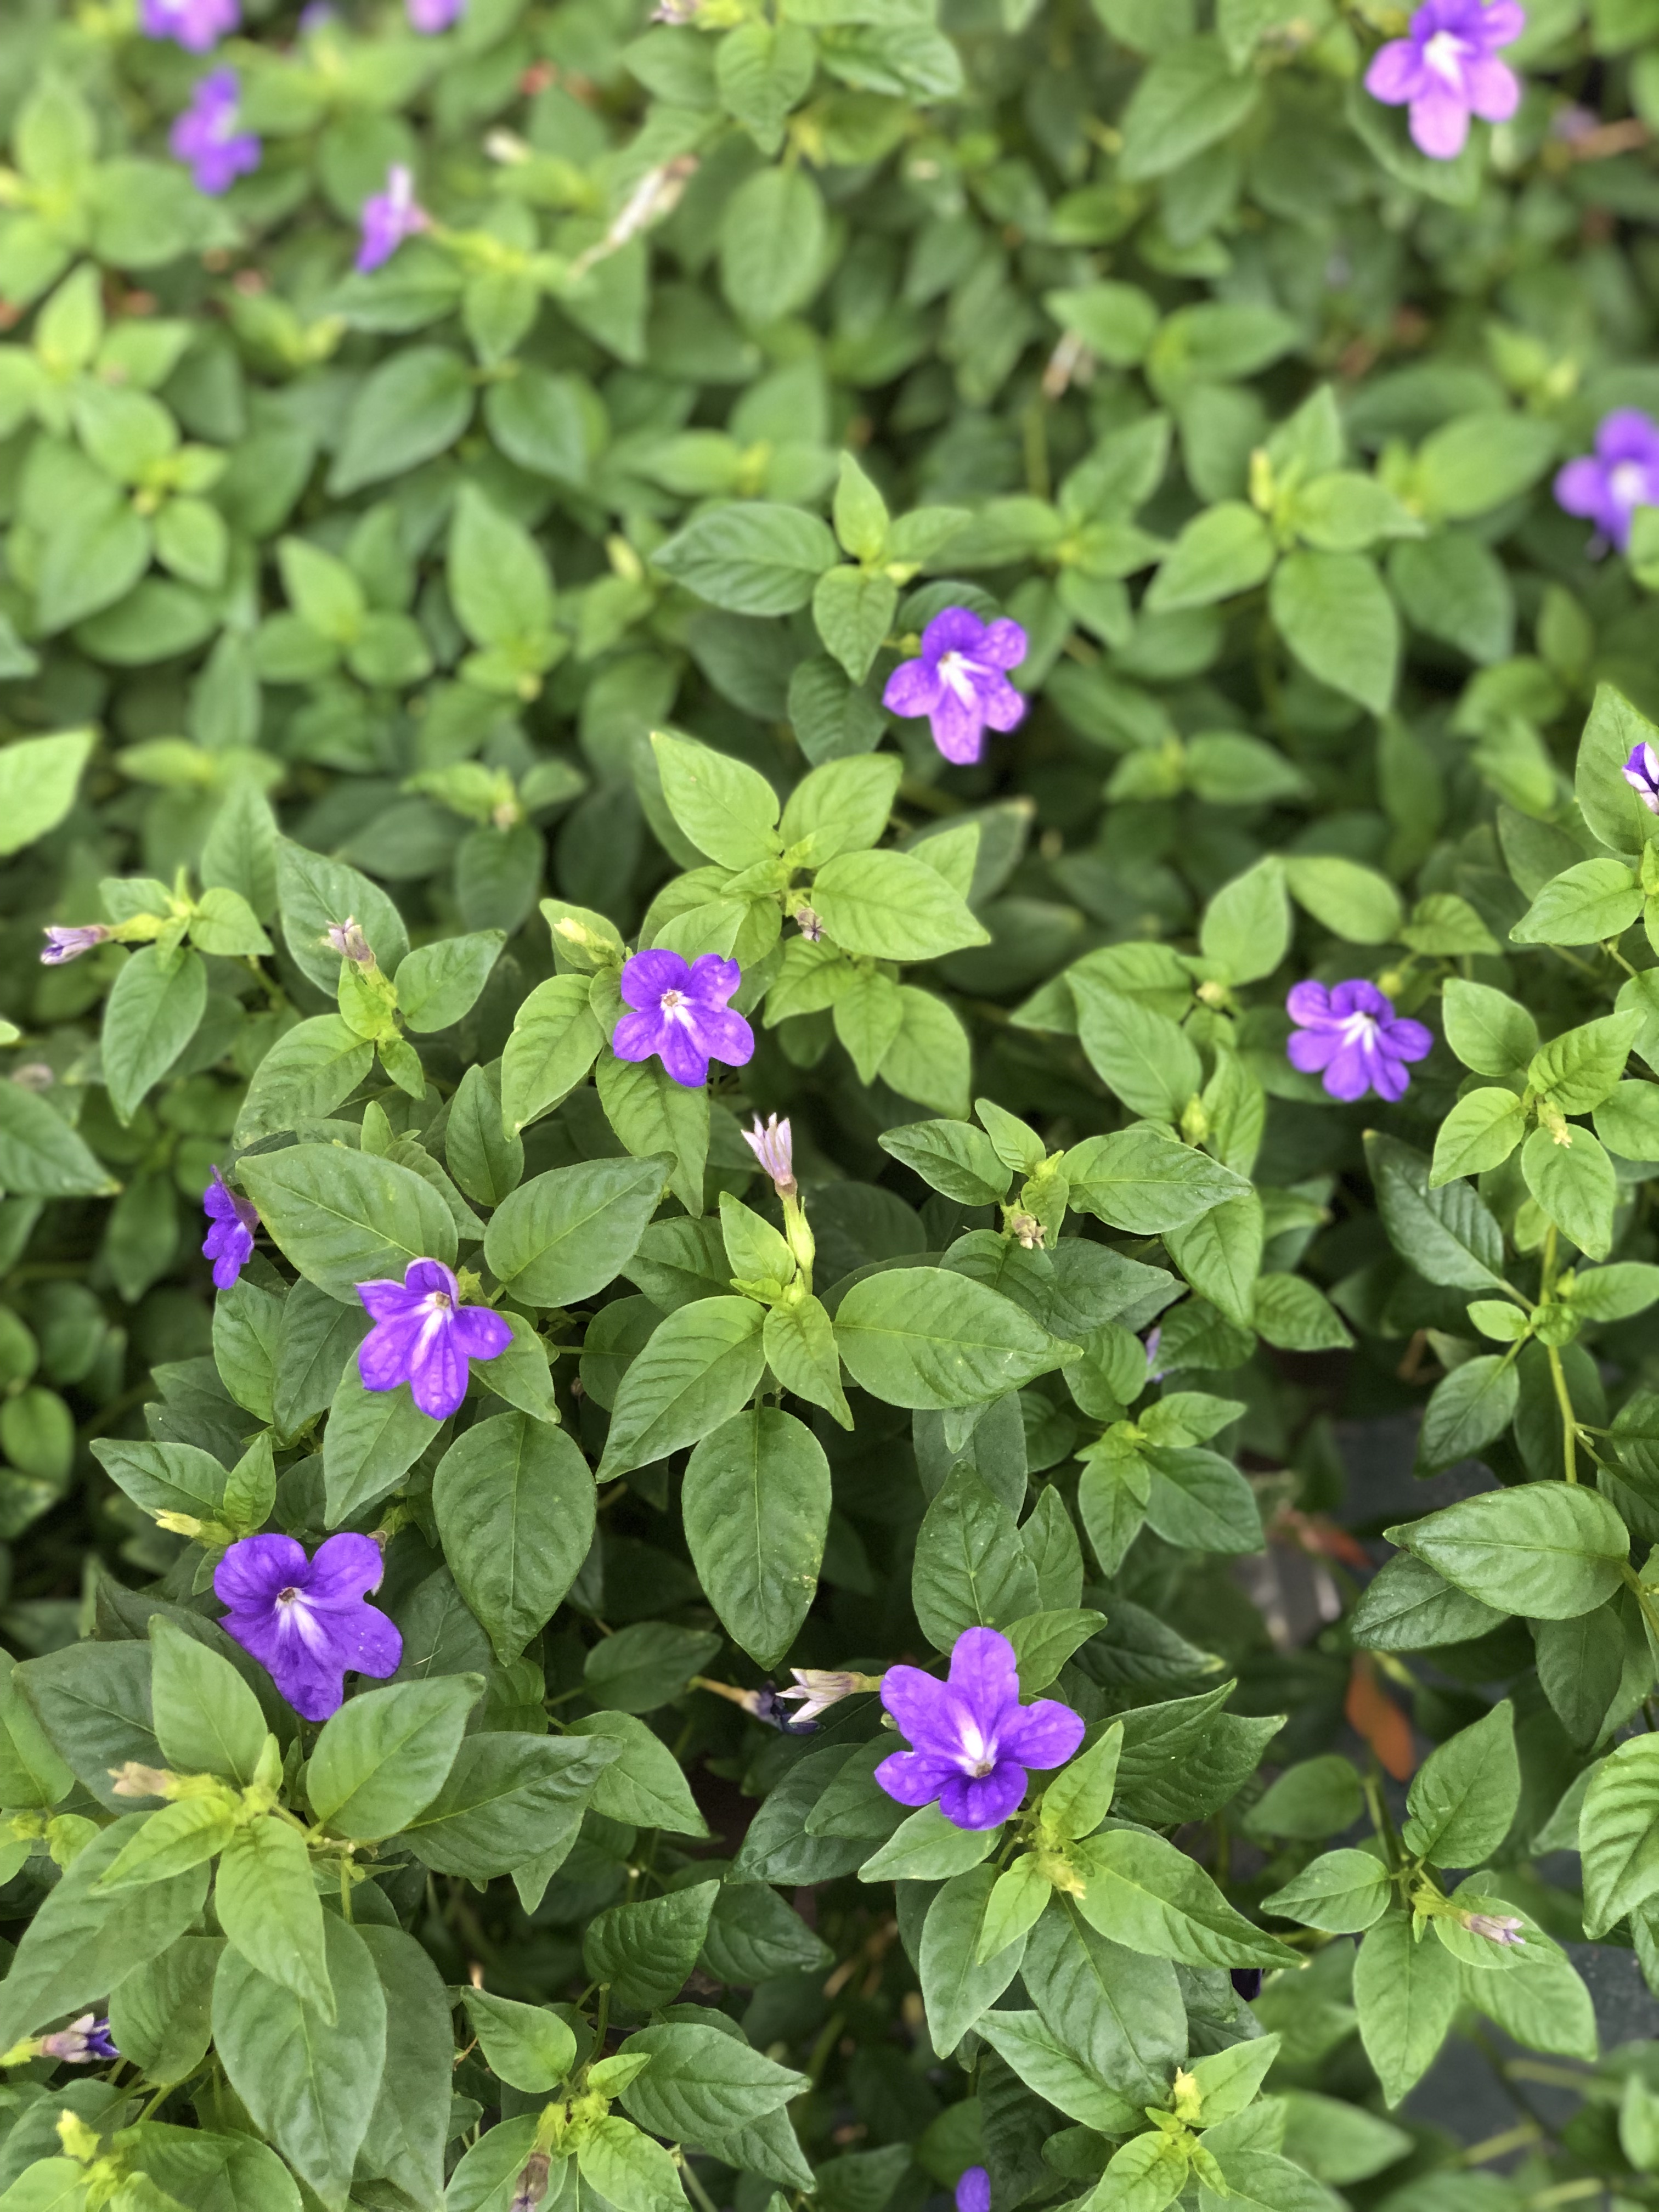
Browallia ‘Endless Illumination’ flowers
A quick note before we adjourn, when perusing nurseries next spring for Browallia, you’ll likely encounter the sister cultivar of ‘Endless Illumination’ with white flowers, named ‘Endless Flirtation’. I’d encourage you to stick with the purple flowers of ‘Endless Illumination’ as I’ve found, through personal growing experience and anecdotes from other growers, ‘Endless Flirtation’ to be noticeably fussier than and not nearly as attractive as its sister plant.
Sometimes, the misfortunes of one plant are a merely an opportunity for another plant to claim its place in the flower bed. Browallia ‘Endless Illumination’ has taken the spot occupied by Impatiens walleriana and quickly become a garden favorite. Look for this awesome little annual in garden centers next spring! And remember, if you have any questions about this newly introduced plant or any other horticultural topic, please contact your local UF/IFAS Extension office! Happy gardening!
My obsession with plants started with the purchase of my first house in Waverly, Alabama in the late 90s. I bought a house with seven acres and of that about 1.5 acres was a fenced yard. The landscape was not very appealing, so I was on a mission to make it beautiful yet functional for my dogs. The only problem was, as a new homeowner, I had very little expendable income for my burgeoning plant habit. This dilemma forced me to be a resourceful gardener.
Shop the discount rack at garden centers
Many retail garden centers (especially mixed use stores with limited plant space) will discount plants simply because they are no longer flowering. Plants look perfectly healthy but are just not considered “retail ready” anymore, so rather than hold them over until they bloom again and appeal to most shoppers the stores tend to mark them down.
Plants are either growing or they are dead, so it is common to find some outgrowing their container and are getting “potbound” which means the root system is outgrowing the pot. Potbound plants are hard to keep watered without wilting and the solutions are to transition to a larger pot or plant in the ground. Most garden centers are not equipped to pot up overgrown plants to larger containers, so the easier solution is to sell them quickly. If you purchase a plant with circling roots be sure to trim the bottom and score (slice) the root ball to encourage roots to spread laterally.
Avoid plants that appear diseased (leaf spots, brown stems, mushy parts, rotting odor) or have active feeding insect activity.
Compliment other gardeners’ plants
When you get gardeners together, they inevitably start swapping plants. I really don’t have an explanation for this other that good old southern hospitality, but I’ve noticed over the years that when you express appreciation of plants to other people they tend to end up in your own yard. Ask if you can take a pinch (for cuttings) or offer to divide a clump of crowded perennials and you are on your way to a trunk full of plant babies.
I can’t recommend this for multiple safety reasons, but I have been known to photographs plants in my travels then strike up a conversation with a homeowner who insisted I take one home.
Experiment with basic propagation techniques
Grow flowers from seed. Either purchase seeds (usually under $2/pack) or collect seed heads from spent flowers in your own garden. After flowers fade, allow them to set seed then either crush and distribute in other parts of your garden or store in a cool, dry place until you can swap with friends.
Division – clumping perennials such as daylilies, cast iron plant, iris or liriope can be dug up and cut into smaller pieces with a shovel or machete. You only need to be sure to have buds on top and roots on the bottom to make a new plant. Other plants create offshoots that can be removed from the parent plant. Examples of these are agave, cycads, and yucca.
Cuttings – the list of plants that can be propagated from stem cuttings is endless but a few that are very easy are crape myrtle, hydrangea, and coleus.
Walking around my yard I’m always on the lookout for changes – both good and bad. I look to see which plants are leafing out or flowering. I scout for plant disease symptoms, insect damage, and weeds. I’ve learned over the years that when I spot a plant out-of-place before condemning it as a weed, I need to make sure it isn’t really a bonus plant!
This spring my yard has really changed. After losing numerous mature trees the sun is shining in new spots. Last fall I also had a bit of unexpected seed and vegetation dispersal to say the least, so I’m getting lots of surprises in the landscape. A few bonus plants I’m seeing and leaving alone are oak seedlings, black-eyed Susan, sunflowers, Angelina sedum, dotted horsemint, and verbena.
These plants might not be exactly where I would have placed them, but if they are not located somewhere that will be a maintenance problem, they can stay where they landed. Many of these plants are taking advantage of dry, non-irrigated sites and providing welcome vegetative groundcover that will help prevent erosion. The bonus is that they all provide food or shelter for birds and/or bugs!
How do you tell the difference between a weed and a plant you would like to keep? The key is to pay attention to plant features other than flowers. Start looking at foliage shape, texture, color, growth habit, and how leaves are arranged on the plant. Other characteristics are stem color and shape – some plants have square stems, others have ridges we refer to as “wings” in horticulture terms, tendrils on vines, all of these can be distinctive and recognizable before the obvious flowers form. Keep notes with pictures of plants at different life stages until you commit them to memory. Eventually you’ll be able to walk through your landscape and quickly note the differences which will help conserve those bonus plants and get weeds under control before they get too prolific.
Below are links to sites that might be outside your regular bookmarks. These resources show more than just the pretty flowers and have detailed information on life cycle and growing conditions.
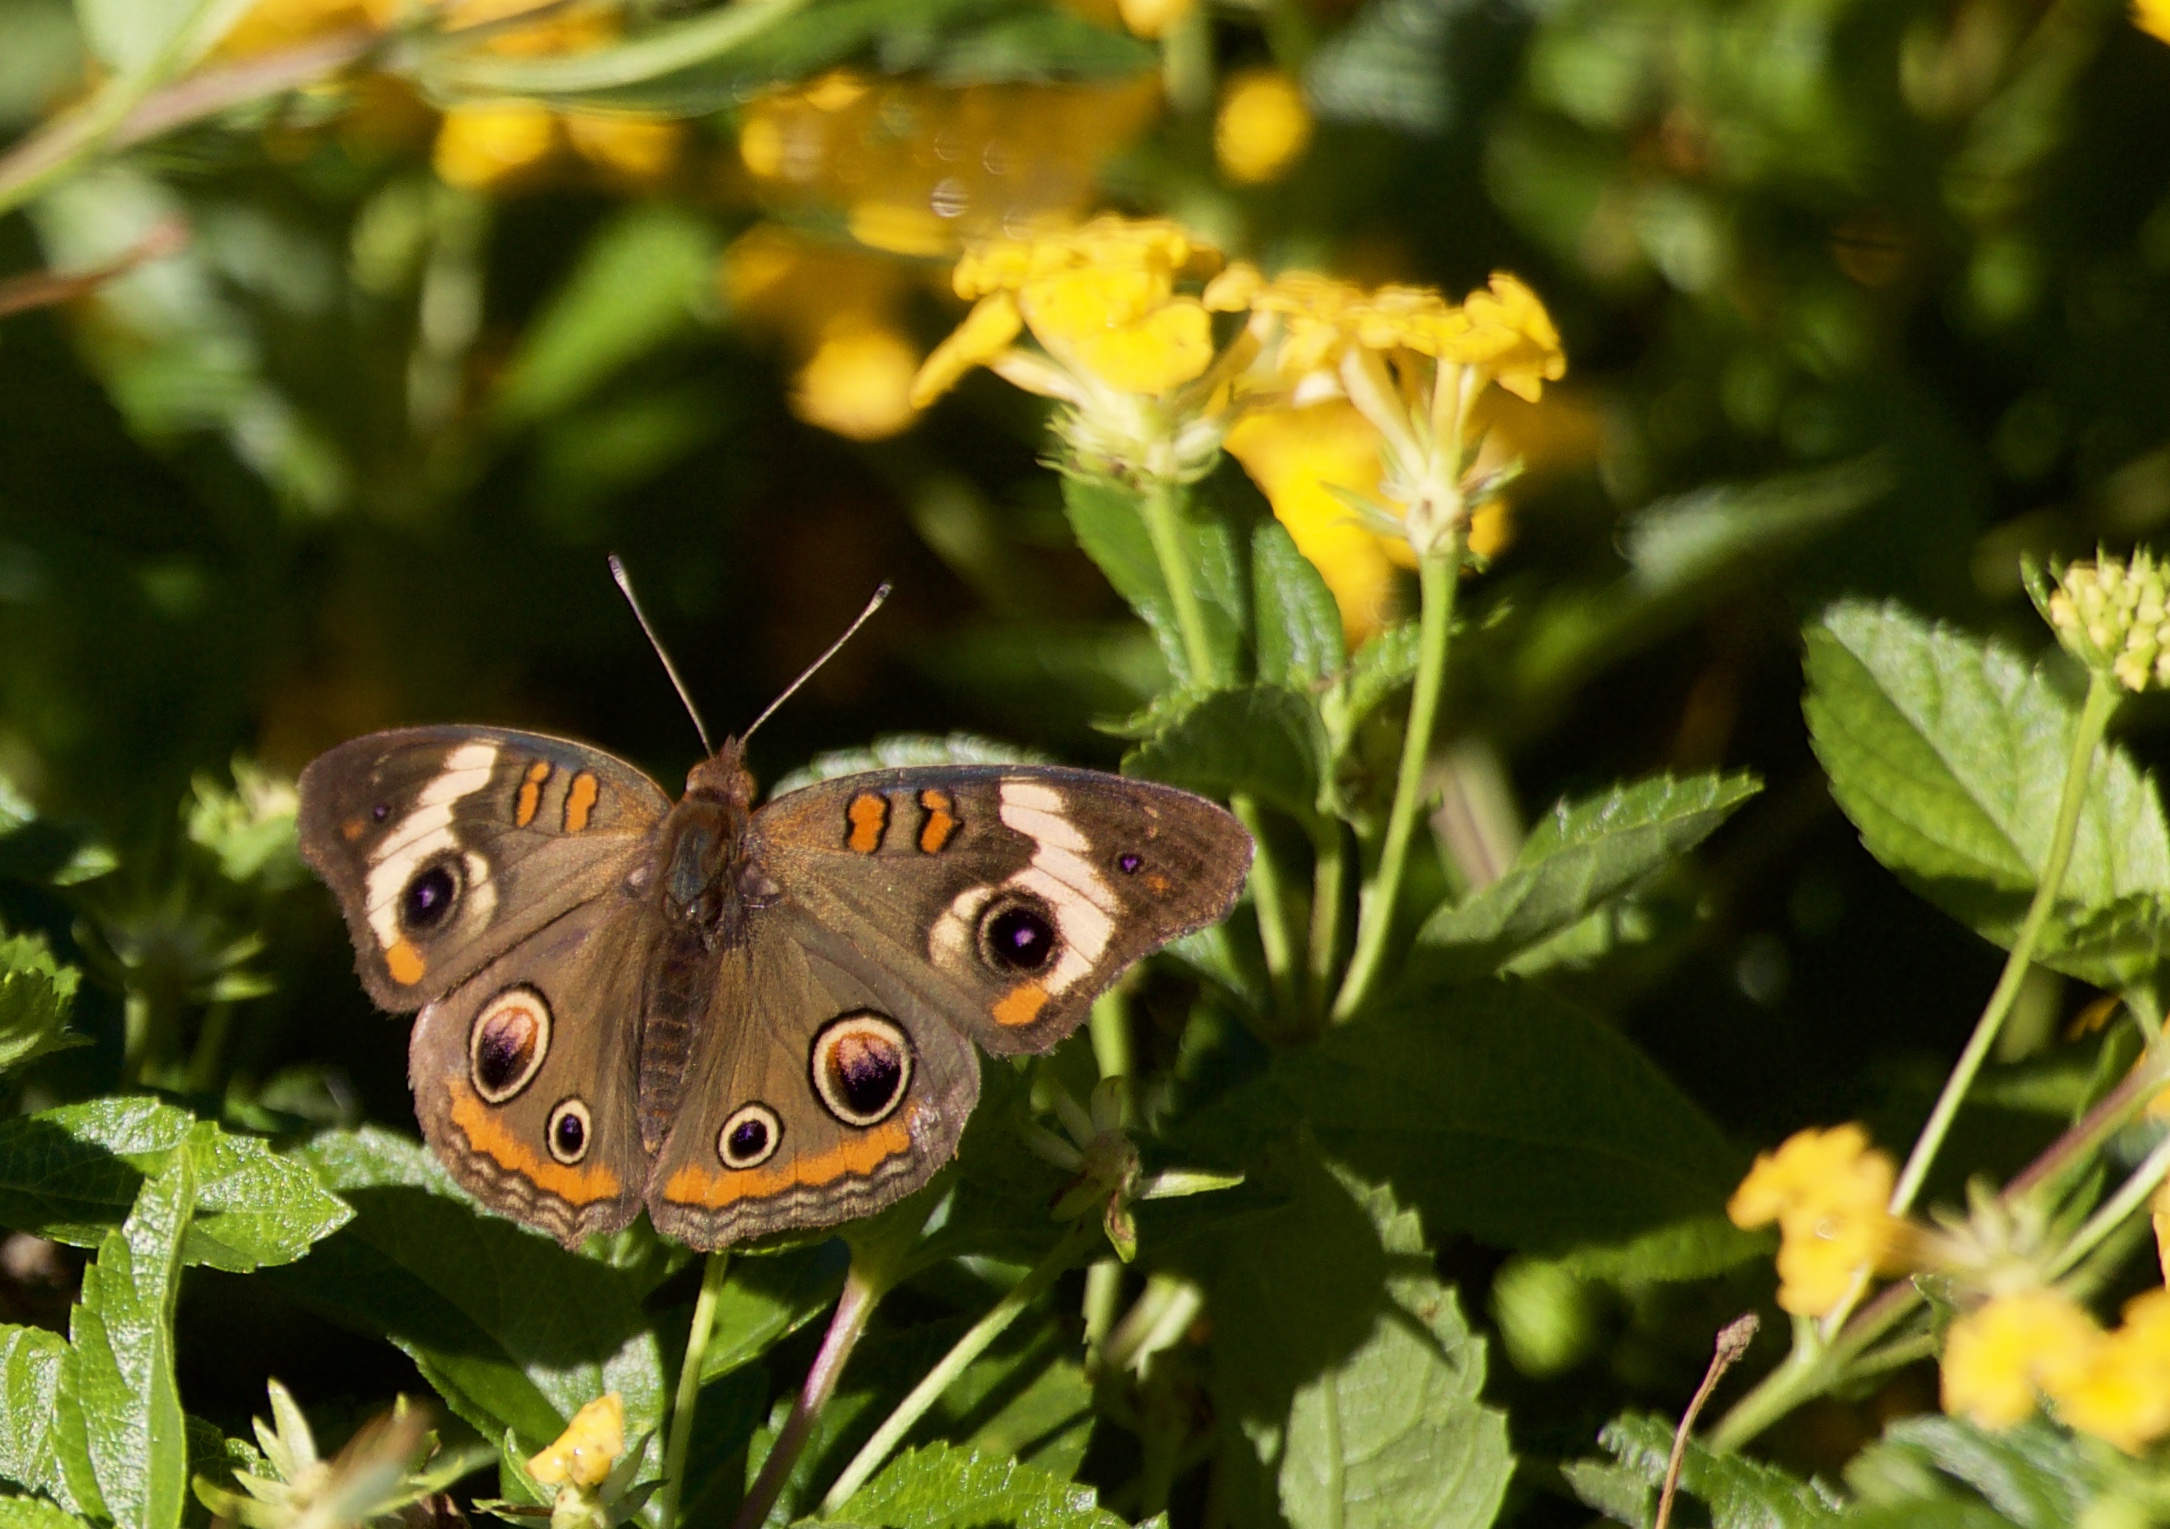
Each week, the editors scour the world wide web to find unique and informative content. This week’s selection is a video by Tennessee State University Extension Agent Joellen Dimond, in which she explains how to create a backyard butterfly garden!
Florida is known for many things, however sweeping vistas of hillsides covered in the orange, red, and yellow foliage of fall is not one of them. Our long, hot summers and short, cool (not cold) winters, and lack of anything of substance resembling a season in between, precludes the fall color show our neighbors to the north enjoy. Don’t settle for synthetic Halloween decorations or faux painted leaves to add festivity to the autumn landscape design. When football season kicks off and summer blooming annuals begin to fade, it’s time to reach into the horticultural toolbox and pull out a couple fall-y Florida Friendly annual foliage species, perfect for the balmy Panhandle “autumn”: ‘Alabama Sunset’ coleus and ‘Petra’ croton.
‘Alabama Sunset’ Coleus in mixed container – Photo Courtesy Andrea Schnapp
The first plant to consider when looking for outstanding heat tolerant foliage is the common coleus (Solenostemon scuttellarioides), particularly the cultivar ‘Alabama Sunset’. As the name indicates, ‘Alabama Sunset’ offers leaves in shades of red and yellow, perfect for designing fall containers or mixing into planting beds. This popular summer annual is known for its ability to add interesting color and texture to shady areas.
Recently with the arrival of the ‘sun coleus’ series (to which ‘Alabama Sunset’ belongs), coleus is permissible in situations with greater sunlight. Coleus is incredibly easy to grow and easy to find since nearly every nursery stocks at least a few cultivars. What’s more, these plants are generally free of pests and disease problems! Even sun coleus does appreciate a little protection from the hot afternoon sun and occasional deadheading of flowers.
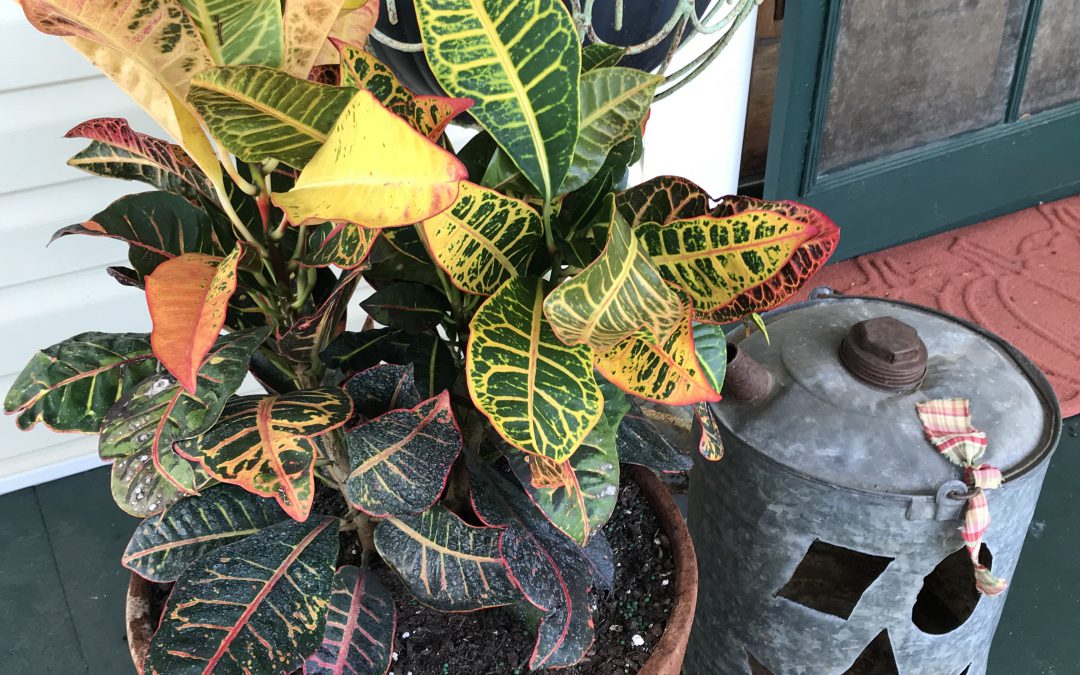
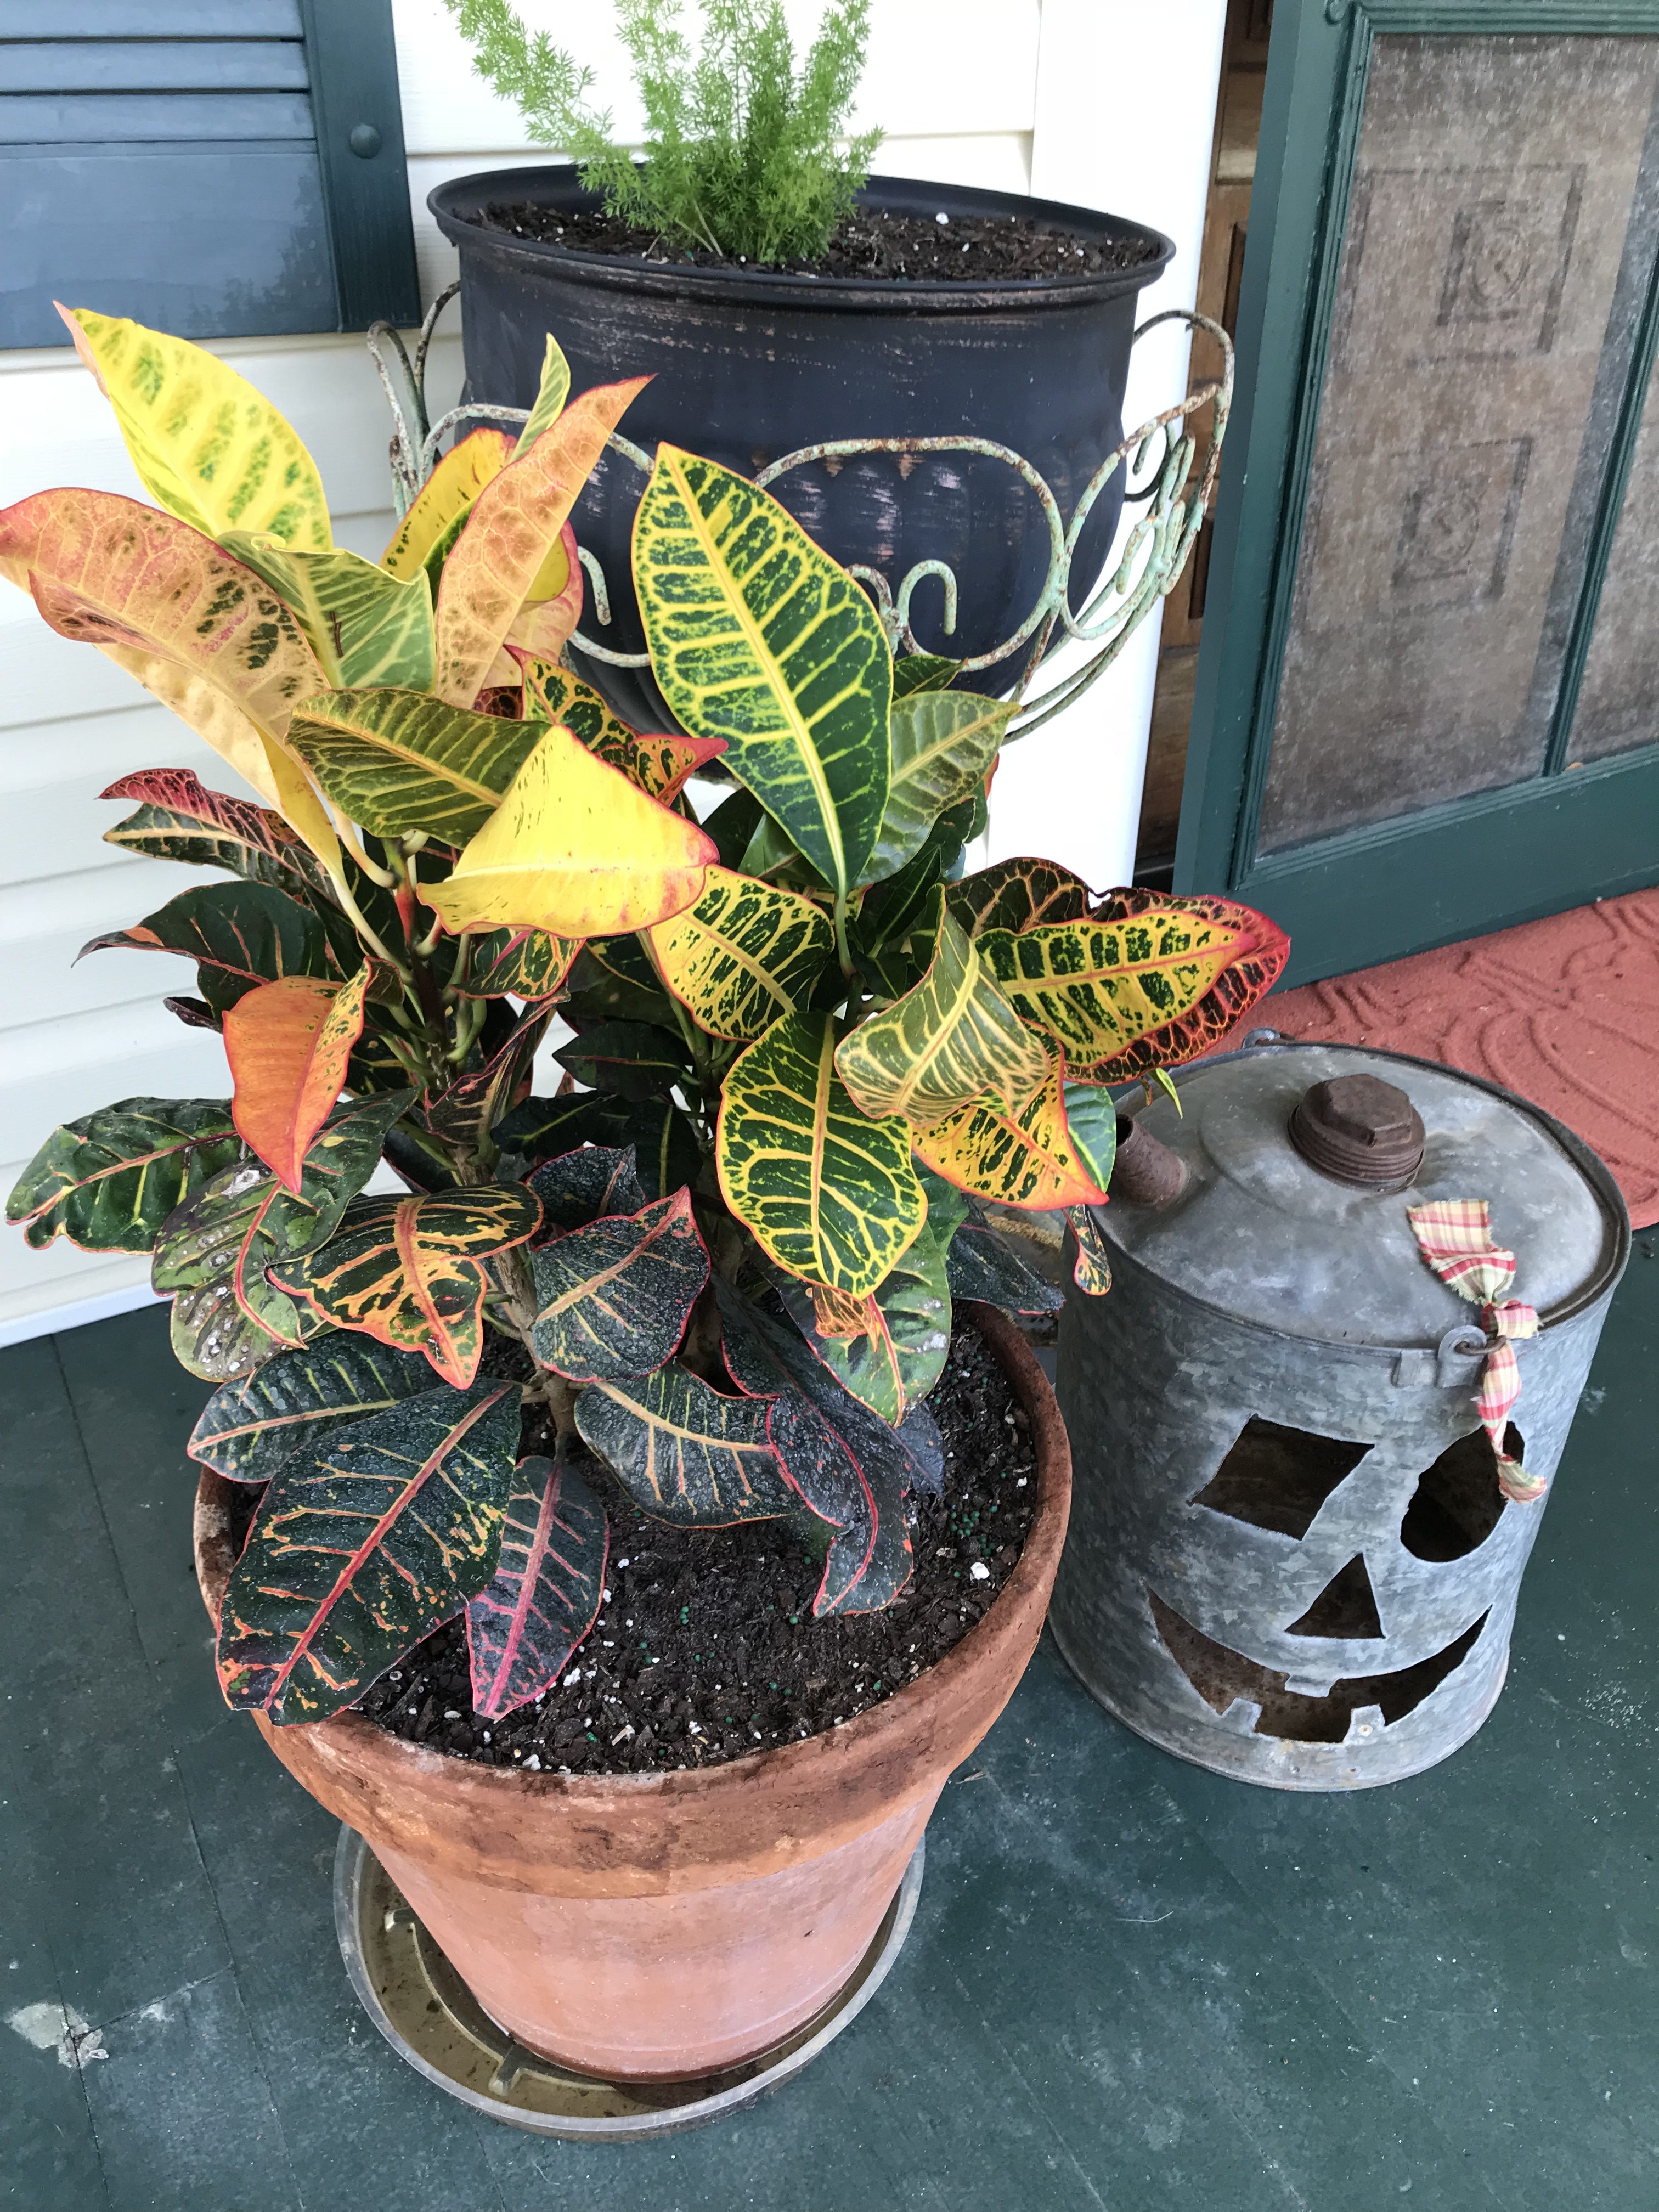
‘Petra’ Croton. Photo courtesy Daniel Leonard.
The second plant in the fall foliage arsenal is ‘Petra croton’ (Codiaeum variegatum ‘Petra’). Primarily known as a tropical foliage or indoor houseplant, Petra croton is criminally underused in fall landscape and container design. Petra croton sports bold magnolia-sized leaves striped with colors of yellow, red, orange, and black. A great Halloween plant to complement those front-porch Jack-O-Lanterns!
Like coleus, Petra croton is extremely easy to grow either in a container or in the ground. It should be located in either in full sun or partial shade and watered through establishment. Otherwise, this species is quite drought tolerant and can be killed with kindness if watered too frequently!
Although croton is a perennial shrub in the tropics, in Northwest Florida it may be killed by frost and best treated as an annual. Croton can be expected to reach 30-36” in height in a single season, its size and the boldly colored foliage make it a true focal point in the autumn landscape!
Appalachian-grade fall color may be unattainable in the Panhandle in the literal sense, but with these novel plant selections the autumn mood may be present even as the emerald waves hit the sugar white sand. By using annual foliage plants that possess traditional fall colors throughout their life cycle, anyone can add a splash of Autumn to their mixed containers or landscape beds. ‘Alabama Sunset’ coleus and ‘Petra’ croton are the perfect match for this time of year, pairing ease of culture with bold, seasonal color. Plant a couple today!