by Sheila Dunning | Jul 21, 2017
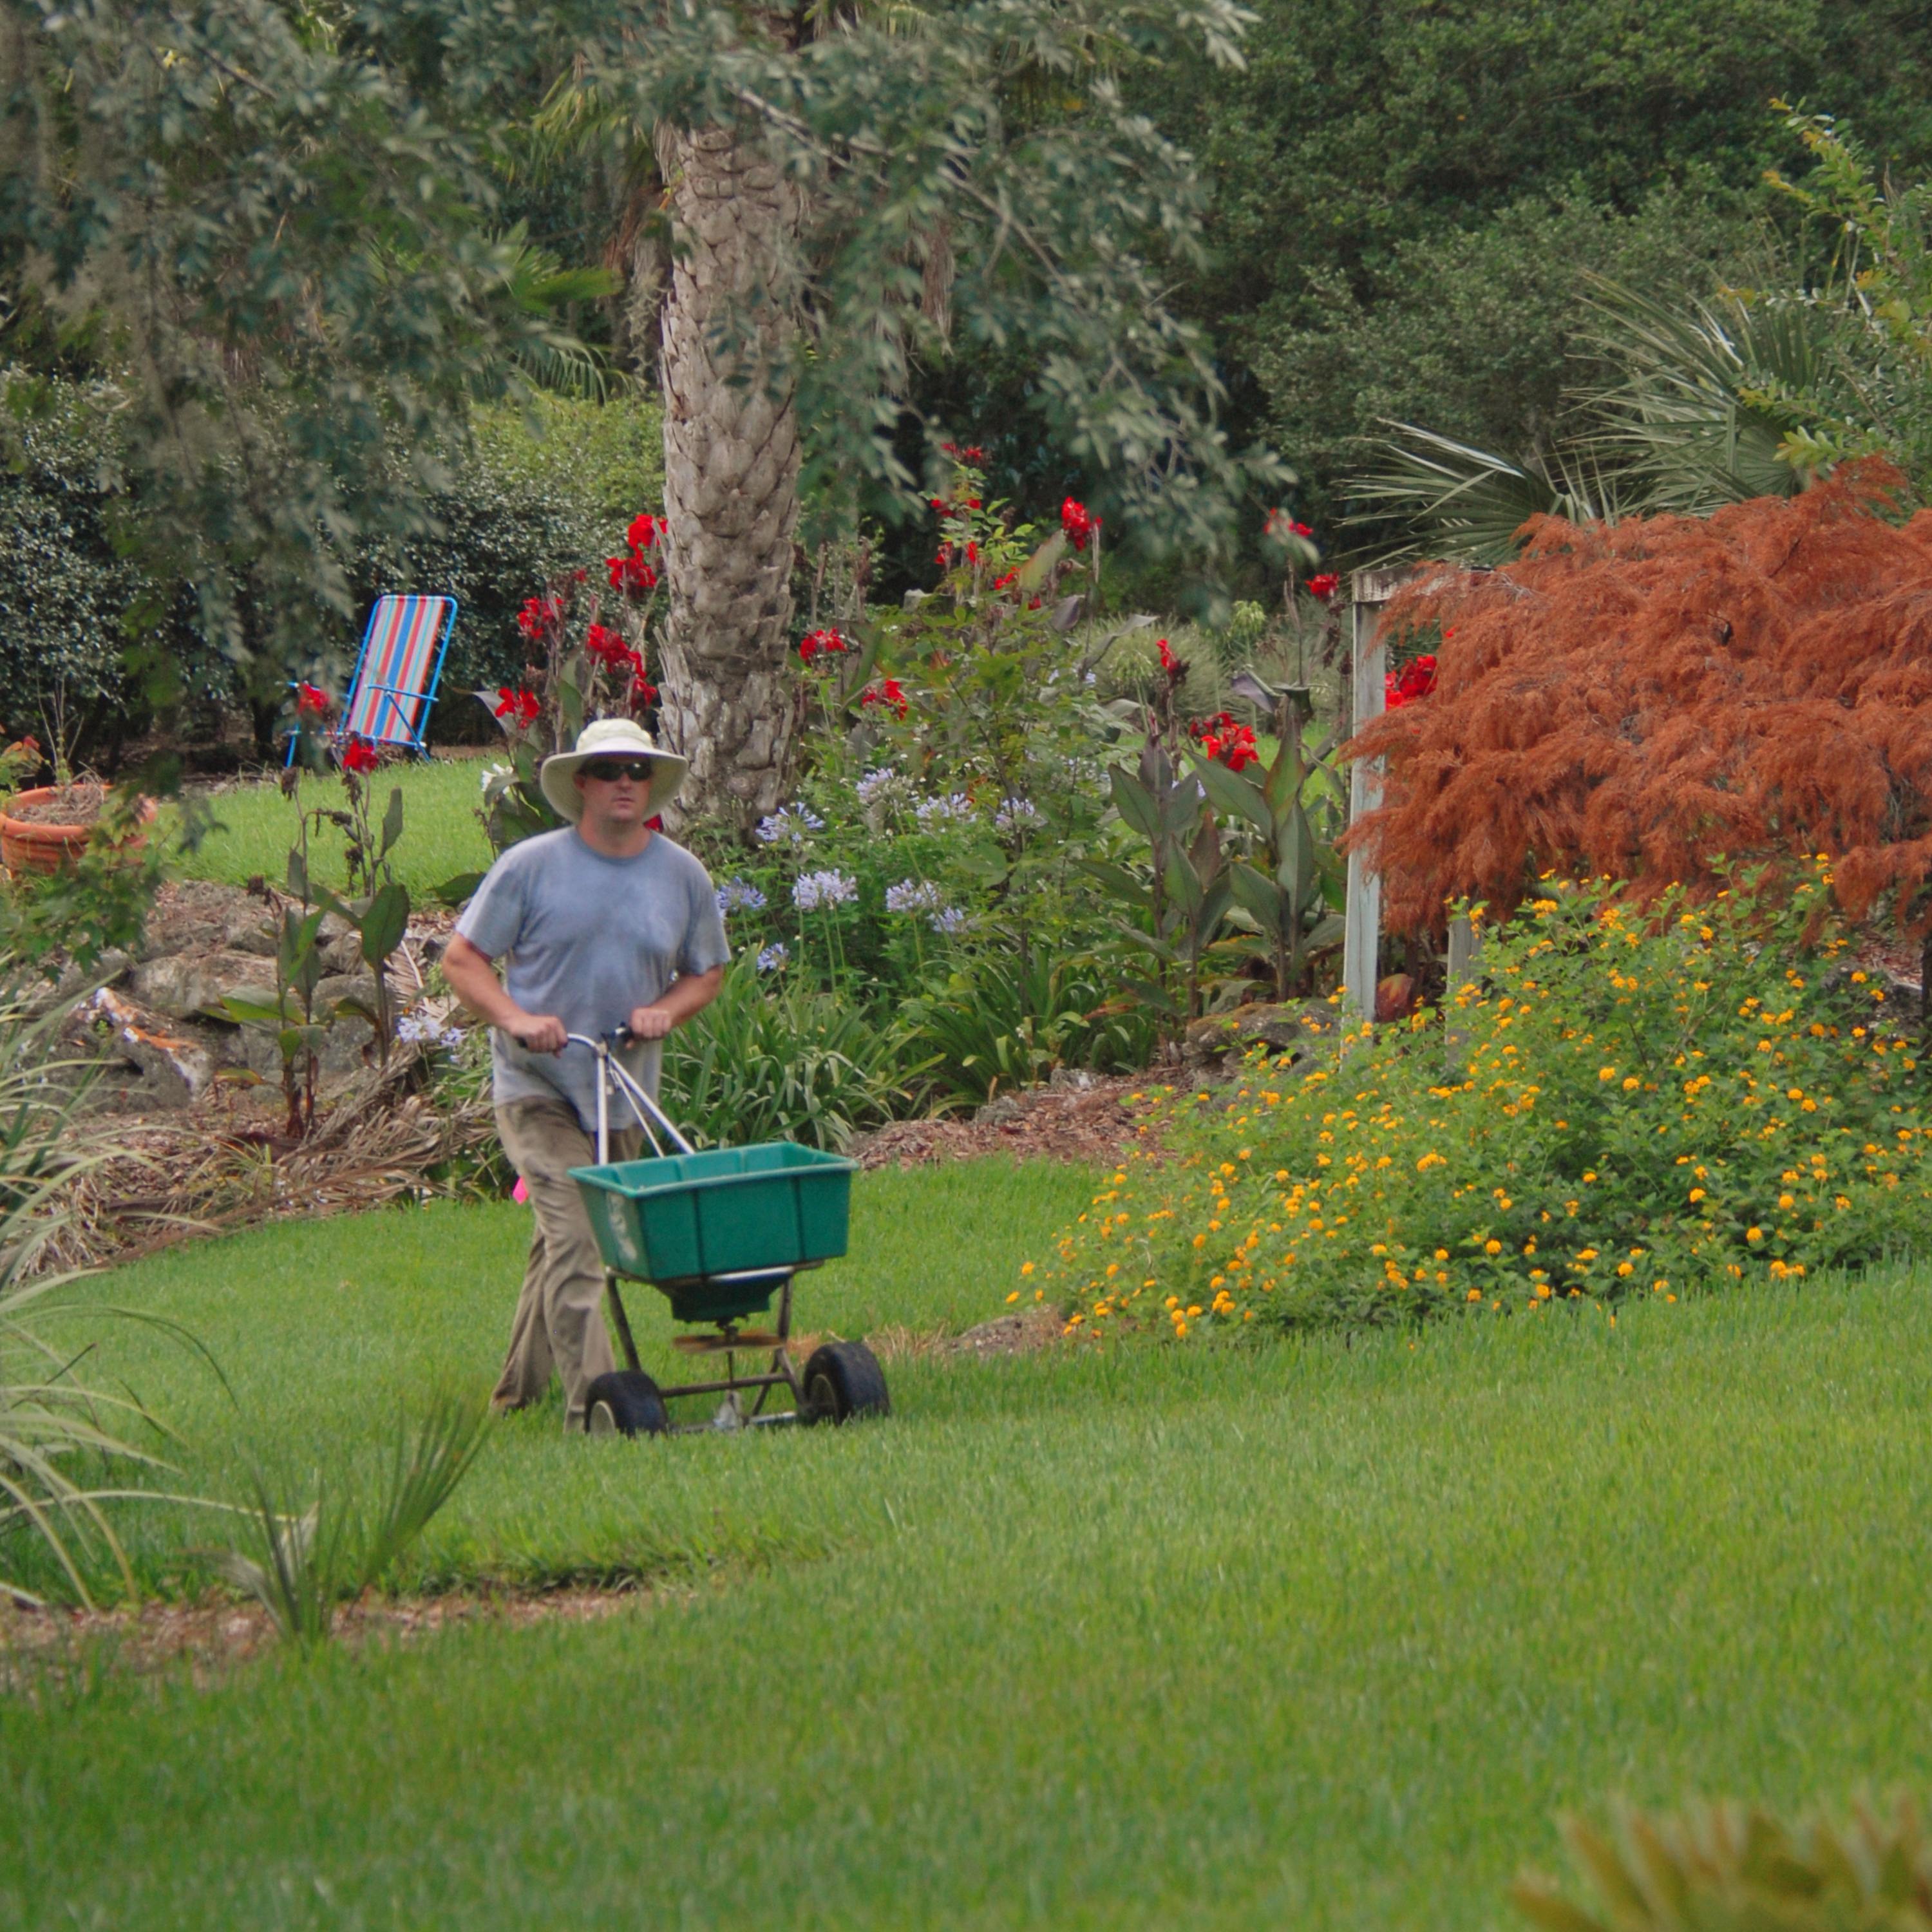
(UF/IFAS photo Thomas Wright)
Northwest Florida’s weather patterns can present challenges to maintaining a health lawn. Heavy rains promote fast growth and relentless sunshine causes lawns to fade. In the last 200 days we have received at least 68 days of rain. While the rest of Florida was experiencing record drought, the Panhandle was experiencing torrential downpours. With every drop of rain your spring fertilizer is being metabolized by the lawn, reducing how many nutrients remain in the soil. Even the best slow-release fertilizer will only last 3-4 months. The message is: “It’s time for more fertilizer.”
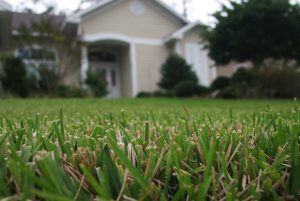
A healthy lawn is an important component of the urban landscape. Not only do lawns increase the value of a property, they also reduce soil erosion, filter stormwater runoff, cool the air, and reduce glare and noise. A healthy lawn effectively filters and traps sediment and pollutants that could otherwise contaminate surface waters and groundwater. Lawns require nutrients throughout the growing season to stay healthy. In Northwest Florida the growing season is typically April to October.
Proper fertilization consists of selecting the right type of fertilizer and applying it at the right time and in the right amount for maximum plant uptake. The type of fertilizer should be based on a soil test, available through UF/IFAS Extension. The timing of application and amount of fertilizer is dependent on the research-based recommendations for the grass species and the fertilizer analysis of the product being used.
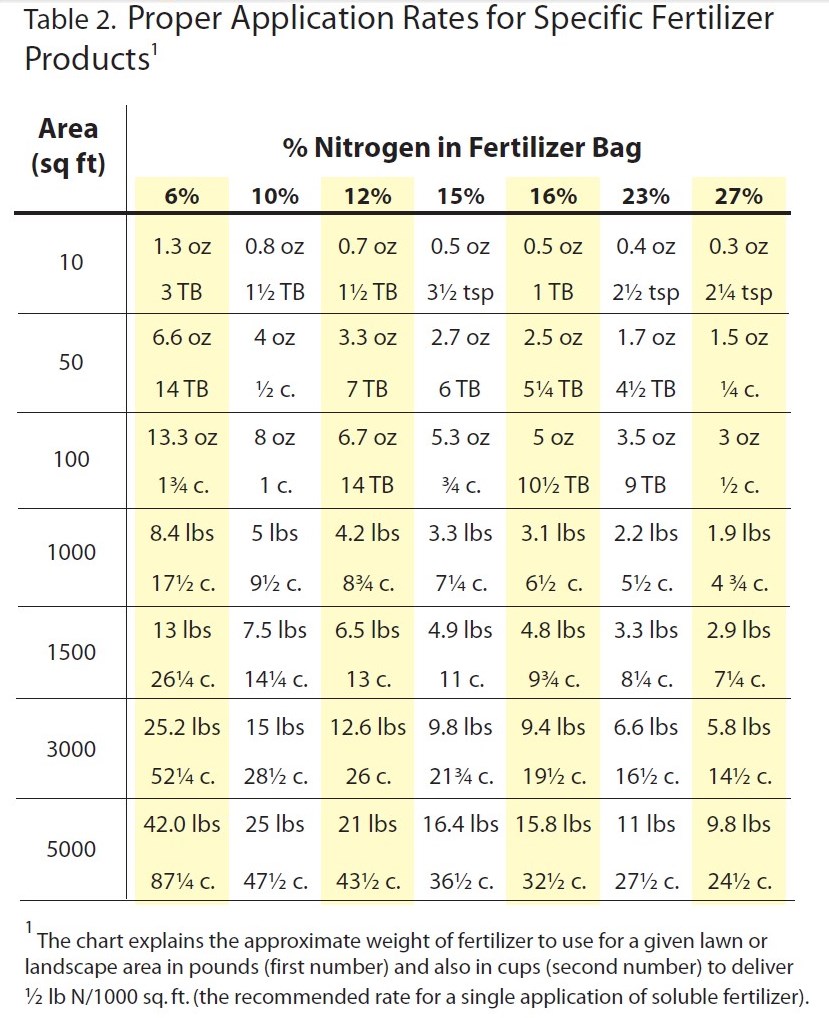
Chart excerpted from Florida Friendly Landscaping publication
Select only a fertilizer that states that the product is for use on residential turf. Do not use a fertilizer meant for flower or vegetable gardens on lawns. By Florida Administrative Code, Rule 5E-1.003, the Urban Turf Rule requires that the fertilizers being applied to residential lawns are labeled for the site and the application rates be followed. Typically, these products will contain both slow-release nitrogen and low or no phosphorus. Slow-release nitrogen will provide a longer-lasting response from the grass and reduces the potential for burning. For more information on the Urban Turf Rule go to: http://www.edis.ifas.ufl.edu/pdffiles/EP/EP35300.pdf.
With frequent rain the soil is also losing iron. Keep in mind that the green fading to yellow appearance in your lawn may be an iron deficiency. Before applying your summer fertilizer put out a liquid chelated iron. It will improve the health of the lawn while you are trying to find a dry day to fertilize. While it is necessary to water in fertilizer with ¼” of water to reduce burn potential and volatilization, never apply fertilizer when heavy rain is expected. The rainfall over ¼” can encourage runoff and/or leaching of that fertilizer, which can be costly and environmentally harmful.

by Les Harrison | Jul 14, 2017
Praying Mantis, Image Credit Les Harrison
Summertime is bug time in the Florid Panhandle. The weather has provided enough rain for the bugs which depend on a supply of foliage and the temperatures have been ideal for a population explosion.
Stink bugs, leaf-footed bugs, grasshoppers, all sizes and colors of caterpillars and many more have been enjoying the lush and plentiful dining options. More than one Panhandle homeowner or gardener has been plagued by the sudden appearance of a hoard of hungry nuisances which are eyeing the menu choices at residences.
Fortunately, nature has a way of eventually balancing all situations when left to its own devices. With the increase of the plant eaters comes a surge in those insects which restrain the excess population.
One of the most easily recognized predator insects is the praying mantis. This beneficial insect is actually a family with multiple members, some of which have been introduced to Florida.
While there are over 2400 mantis members worldwide, Florida is home to eleven. Two of those exotics have been introduced from other regions, but considered non- invasive.
Mantises are thought to have evolved during the Cretaceous period about 100 million years ago, possibly from a predatory cockroach with similar front legs. Their closest surviving insect relatives are cockroaches and termites, both of which they will consume if given the opportunity.
Like many insects, the mantis is equipped with a tough, durable exoskeleton which provides a basis for successful close quarter combat and meal procurement. These hunters have three other advantages which create a severe vulnerability in their prey’s defense and potential for surviving a mantis encounter.
The mantis is an ambush predator which will lay in wait for the victim/meal to deliver itself. The mantis has the instinctive ability to identify and hide in areas with high amounts of prey species traffic.
This insect is a master at stealth and camouflage. The creature’s coloration and linear shape allow it to blend into the earth tones of many settings.
To complement its ability to conceal itself in plain sight, the mantis can hold perfectly still and patiently wait for the oblivious bug to bumble into sticking range. At that precise moment, the mantis is a blur of lethal motion.
The mantis’ forelimbs are a set of deadly spiked vices used to immobilize and secure its target. It extends these spiny levers forward in a raised position which appears as though it is in a mealtime prayer, hence its name.
The kill technique is to impale and restrain the victim with a single stroke of the forelimbs while holding the victim securely to the mantis’ body. On occasion the attempt fails and the mantis has to apply a more direct approach.
This insect’s beak is designed for slicing and tearing its victim’s body. Its jaw muscles provide the power to effectively employ this tool.
Depending on its stage of live, the mantis will eat a wide variety of creatures. Early stage mantises will eat little flies and other tiny insect (including its siblings), but at maturity they will take on small reptiles and amphibians along with a variety of destructive insects.
Female mantises will even consume their prospective mates. Despite its vicious and cannibalistic nature, the praying mantis is the answer to many gardeners’ prayers.
To learn more about praying mantises and other beneficial insects, check out this EDIS site with many articles on various species of beneficial insects.

by Ray Bodrey | Jun 29, 2017
 Although we’ve received much-needed rainfall of late, it’s still a struggle to manage moisture levels in our Panhandle landscapes this summer. During wet summer seasons, one recurring issue is that watering plants too much can have as much of an ill effect as not watering enough.
Shallow rooted plants, as well as newly set plants can easily become water stressed. Some people lightly water their plants each day. With this practice, one is only watering an inch or less of the topsoil. Most roots are deeper than this. Instead of a light watering every day, soaking the plant a few times a week works better. A soil that has been soaked will retain moisture for several days. This is a very good practice for young plants. In contrast, some people soak their plants to often. This essential drowns the roots by eliminating vital oxygen in the root zone. This can also cause root rot. Leaves that turn brown at the tips or edges, as well as leaf drop, are displaying signs of overwatering.
The following are tips from the UF/IFAS Florida-Friendly Landscape Program. These tips will help conserve water by providing best management practices for your landscape:
- Choose the right plant for the right place: Be sure to place plants in your landscape that match existing environmental conditions.
- Water Thoughtfully: Water early in the morning and water when plants and turfgrass start to wilt. Refrain from watering in the late afternoon or evening. This is when insects and diseases are most active.
- Perform regular irrigation maintenance: Remember, an irrigation system is only effective if it is maintained regularly. Check for and repair leaks. If using a pop-up heads for turfgrass, point heads away from driveways and sidewalks.
- Calibrate turfgrass irrigation system: Ideal amount of water to apply to turfgrass is ½”- ¾”. A simple test can be done to calibrate. Place a coffee or tuna cans throughout the landscape. Run the irrigation system for 30 minutes. Average the depth of the water containers. Adjust running time to apply the ½”- ¾” rate.
- Use micro-irrigation in gardens and individual plants: Drip, or microspray irrigation systems apply water directly to the root system with limited surface evaporation.
- Make a rain barrel: Rain barrels are an inexpensive way to capture rainwater from your roof. This can translate into a big impact on your water bill as well.
- Mulch plants: Mulch helps keep moisture in the root zone. Two to three inches in-depth, for a few feet in diameter will work well for trees, shrubs, flowers and vegetables.
- Mow correctly: Mowing your grass at the highest recommended length is key. Be sure to cut no more than 1/3 of the leaf blade each time you mow. Keep mowing blades sharp as dull cuts often cause grass to be prone to disease.
- Be a weather watcher: Wait at least 24 hours after a rainfall event to water. If rain is in the forecast, wait 48 hours until irrigating. Use a rain gauge or install a rain shut-off device to monitor irrigation scheduling.
For more information on water conservation principles contact your local county extension office.
Supporting information can be found at the UF/IFAS Center for Landscape Conservation & Ecology’s Drought Toolkit: http://clce.ifas.ufl.edu/drought_toolkit/
by Beth Bolles | Jun 10, 2017
It is common in Northwest Florida for palms to show signs of nutrient deficiencies. In general our sandy soil is often nutrient poor and available nutrients can easily move out of soils with frequent rainfall. In landscapes where fertilization is occurring, often the wrong types of fertilizer are applied. Fertilizer miss-application actually increases nutrient problems for the palm.
Palms can be deficient in many nutrients but the most common deficiencies we see in landscapes are from inadequate amounts potassium and magnesium. The simple solution would be to purchase a fertilizer labeled for palms to correct the problem. The difficulty is that most easily available fertilizers for palms do not have the correct form of nutrients that are required for the problems. With the exception of nitrogen, all other nutrients are in a quick release form so while the slow release nitrogen lasts for 2-3 months, all other nutrients have been used up. In response, the palm is encouraged to grow by the nitrogen but does not have enough of the other critical nutrients to carry out vital plant functions. What we see is often older leaves that are yellowing, browning, and die off before they should because the plant is pulling any available potassium and magnesium from old fronds to support new growth. Without the application of proper nutrients to the soil, the deficiency can continue until even new fronds are affected or the palm dies.
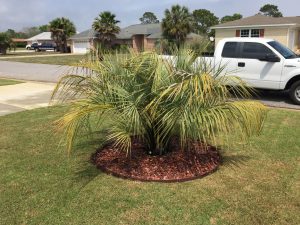
The fertilizer used for lawns does not have all the slow release and correct forms of nutrients for the palms. Older leaves turn yellow and brown indicating potassium deficiency. Photo by Beth Bolles, UF IFAS Extension Escambia County.
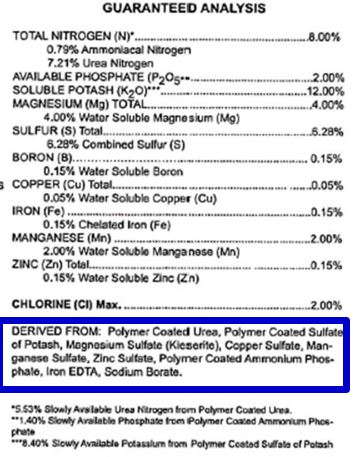
There is a solution that will help keep your palms healthy and attractive. Make sure you choose a specially designed fertilizer that has all nutrients in slow release form. Look for an analysis such as 8-2-12-4 (Nitrogen-Phosphorus-Potassium-Magnesium). Also read further on the label for Polymer Coated Sulfate of Potash, Magnesium Sulfate (Kieserite), and Chelate (Iron EDTA). These are the forms of nutrients that will be beneficial to your palms.

Look in the area ‘Derived From’ (outlined in blue) on your fertilizer label to find the forms of nutrients. Photo by Dr. Monica Elliott, US/IFAS Extension.
If you have a mixed landscape where the palms are planted in the lawn, be sure to keep all lawn fertilizers out of the root zone of the palms. Lawn fertilizers do not have the correct forms of nutrients for palms. Remember also that palms roots extend many feet beyond the palm canopy so your ‘no lawn fertilizer zone’ may be past the mulch ring.
The recommendation from the University of Florida is 1.5 pounds of fertilizer over a 100 square foot area. Broadcast this on top of the ground and lightly water after application. In North Florida, you will likely apply the correct palm fertilizer about at least two times in May and end of August or 1st of September. If you are not able to use a palm fertilizer with the correct form of slow release nutrients, it is best not to fertilize palms at all.
by Mark Tancig | May 25, 2017
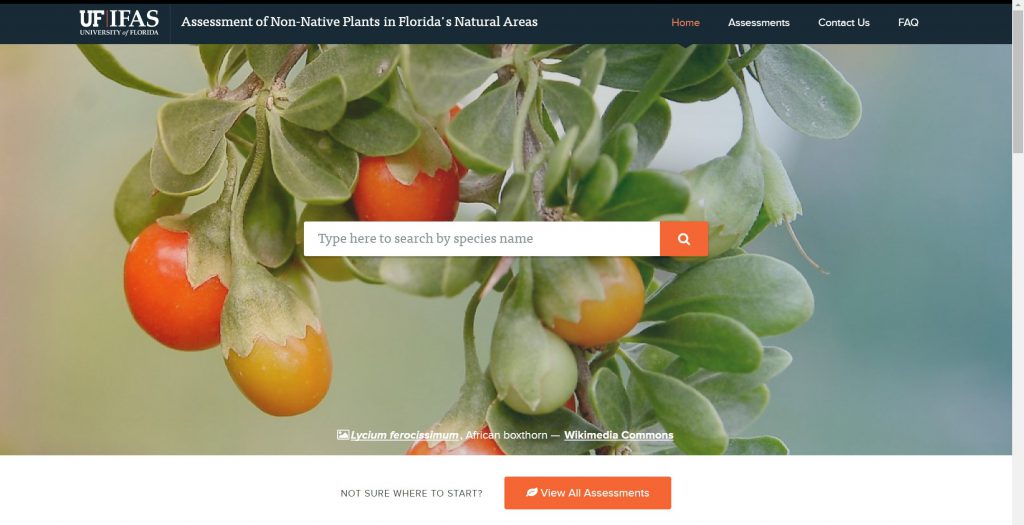
One of the main Florida-Friendly Landscaping principles is to plant the right plant in the right place. In Florida, not only does this apply to the zone you’re in, soils you have, and light conditions in your garden, but also ensuring that invasive, exotic plant species are not used. While most of us have heard about invasive, exotic plants – those that invade and disrupt our unique natural habitats – some may not know where or how to find out which plants are, in fact, invasive and exotic. Some of the more famous invasive, exotic plant species, such as kudzu and hydrilla, are familiar to us and we may have an idea of a plant in our garden that is “aggressive”, but how do we know for sure? Since only a handful of the worst invasive, exotic plants are legally prohibited from being sold, how do we know if a plant we are considering purchasing at our local nursery or another plant already in our gardens is an invasive, exotic? A quick internet search for Florida invasive plants gets you various sources of information. How do you choose which to use?

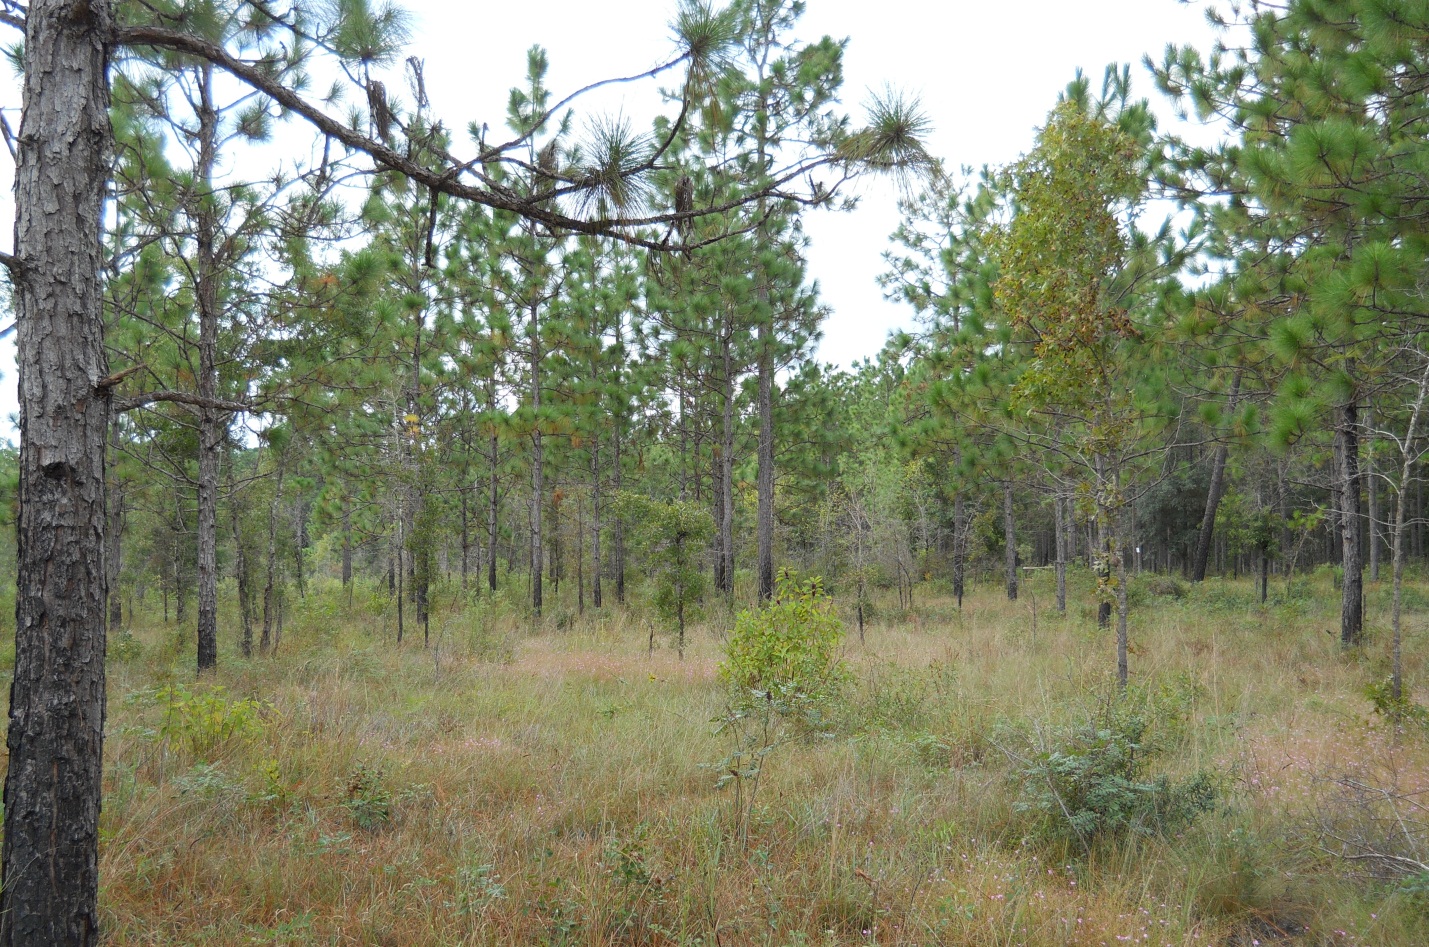
The unique habitats of Florida need our help. Prevent the spread of invasive, exotic species by planting Florida-Friendly plants. Source: Mark Tancig/UF/IFAS.
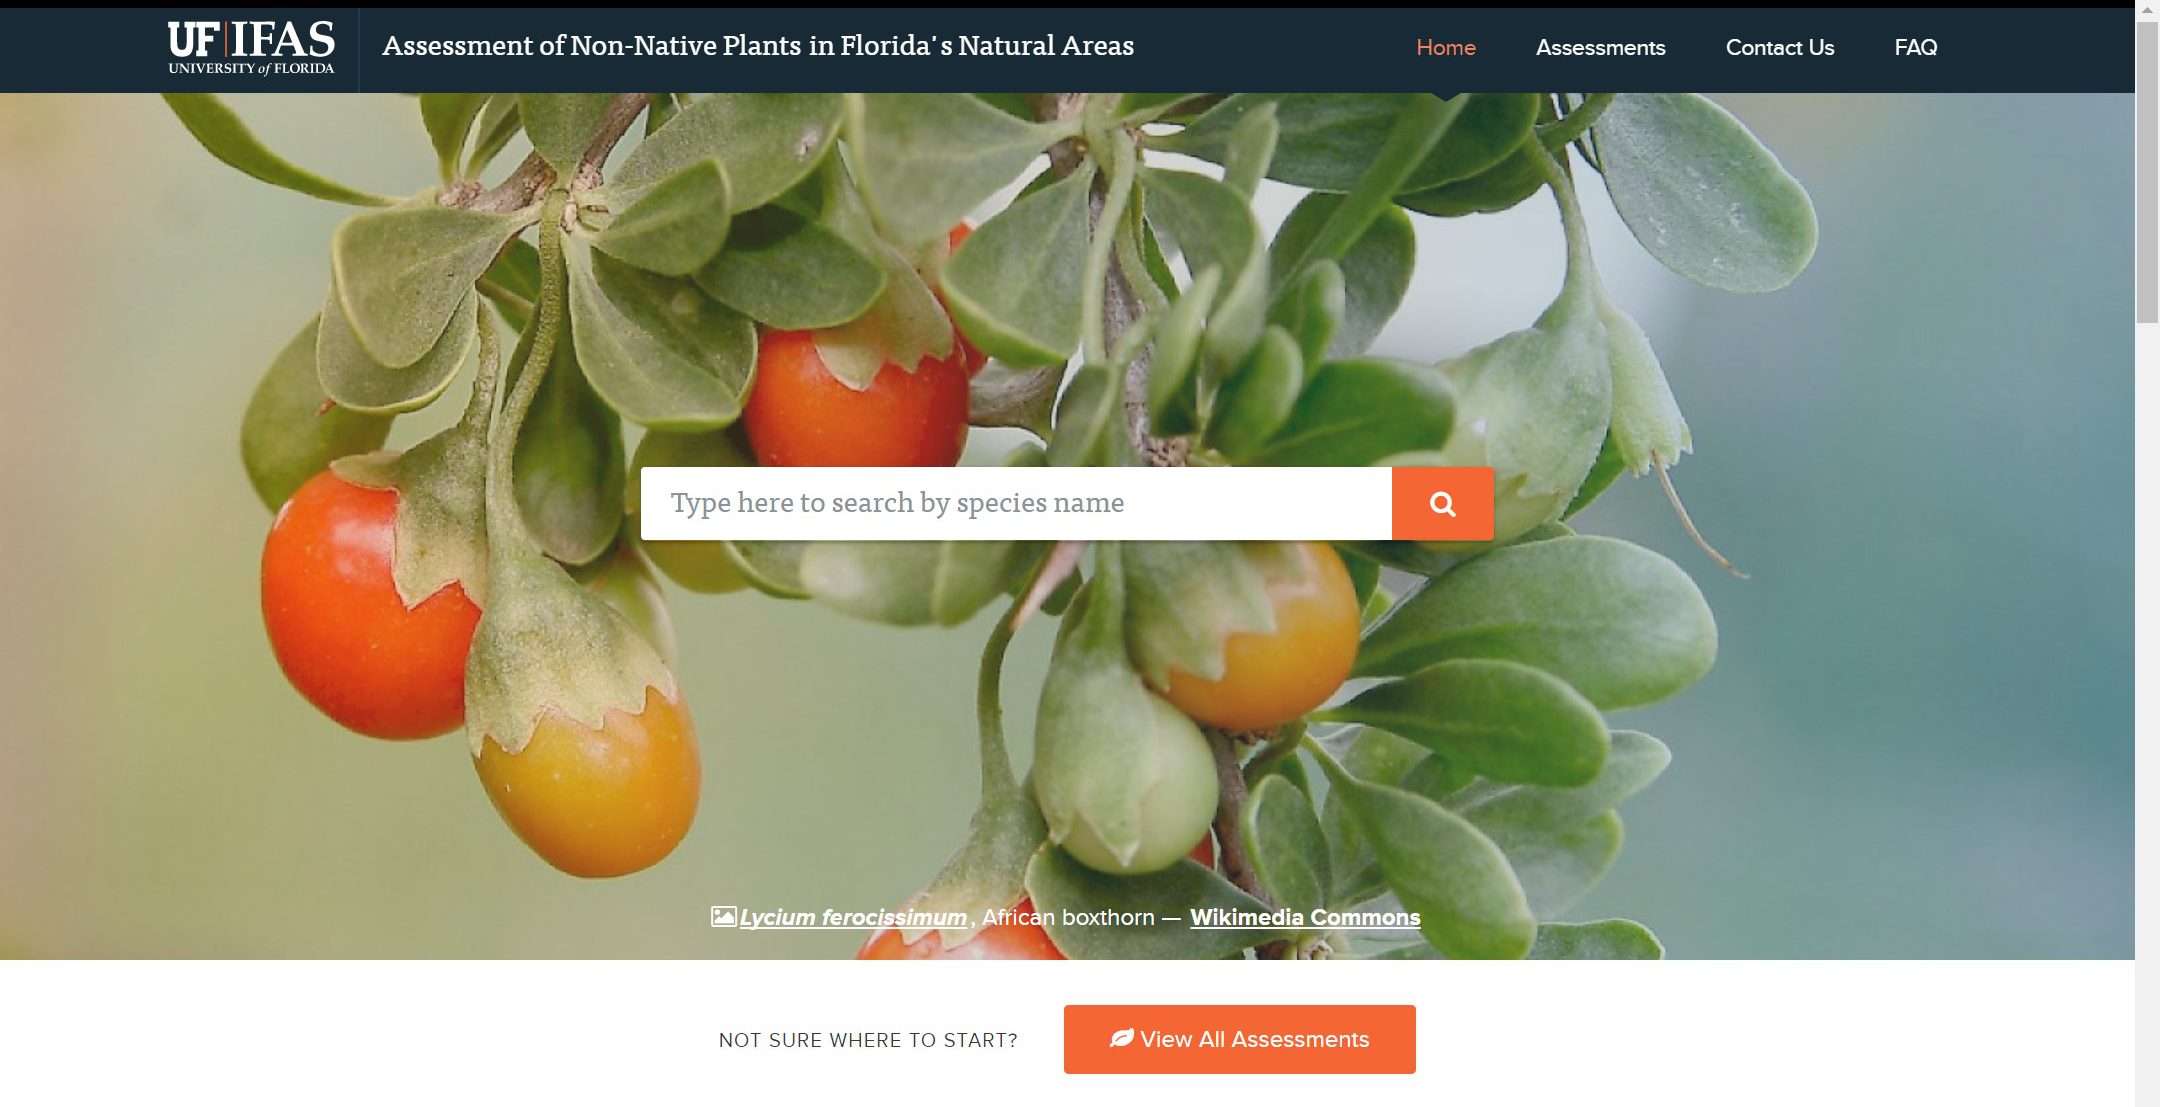
Fortunately, the researchers at UF/IFAS want you to be able to find the best information in one spot – the UF/IFAS Assessment of Non-Native Plants in Florida’s Natural Areas. This site systematically reviews individual plant species and provides a recommendation as to whether it should be used in North, Central, or South Florida landscapes. Many landscape plants have been reviewed – over 800 – and more are added to the site as reviews are completed. The UF/IFAS Assessment also reviews cultivars of known invasive, exotic plants to ensure that they are sterile and will not revert back to their wild type or hybridize with known invasives, or even closely related native species.
The UF/IFAS Assessment is a simple, convenient source for deciding if a plant should be used in your Florida landscape.
To use the site, simply visit the main web address – assessment.ifas.ufl.edu – and begin typing in your plant name in the search bar. You can begin spelling the scientific or common name and it will start showing possible results as you type. Once you select the plant you’re interested in, it will take you to a new page with photos of the plant, some general information, additional links, and, most importantly, the assessment conclusion for each zone. The conclusion will be one of the following:
- Not considered a problem species at this time,
- Caution, or
- Invasive
Of course, if it’s not a problem, then feel free to use and share that particular plant. If it is a caution plant, then it may be used, but you will want to be extra careful in where you plant it. Those may be better suited as potted plants or planted in areas that are confined, to limit its potential spread. If it’s invasive, don’t plant it.
Caution plants are reassessed every two years while those that are not considered a problem species or are considered invasive are reassessed every ten years.
Another way to use the UF/IFAS Assessment is to filter all reviewed plants by various criteria you’re interested in. If you select assessments on the main page, it will lead you to a list of all reviewed plants. A filter button allows you to choose geographic zone, conclusion type, and growth habit, among some other criteria. This will create a list that can then be exported to a Microsoft Excel table.
As you can see, UF/IFAS is trying to make it easy for you to determine which plants can be used in the landscape without potentially spreading and causing disruption to our unique natural areas.
If you have any questions about individual species that have or have not been assessed, contact your local County Extension Office.
by Sheila Dunning | May 25, 2017
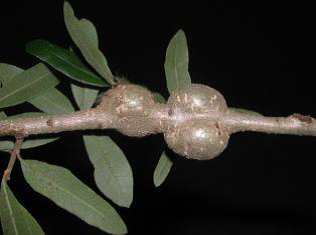
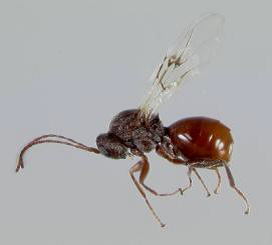
 As oak trees are now fully leafing out and people start hanging out in the shade of the canopy, many of you are noticing strange growths on the branches. They look like potatoes, spiky cones and fuzz balls on the leaves and stems. Don’t worry. It’s just a harmless wasp that chose that tree to create a nursery for her young.
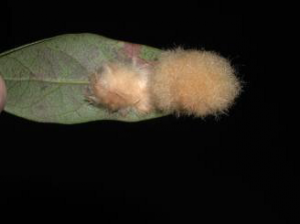
Galls are abnormal plant growth or swellings comprised of plant tissue. Galls are usually found on foliage or twigs. These unusual deformities are caused by plant growth-regulating chemicals produced by tiny wasps. The chemicals produced by these insects interfere with normal plant cell growth.
The life cycles of the various gall-forming wasps are highly variable. Two or more years are required for gall wasps that develop in woody twig galls to reach maturity. Gall-forming wasps usually overwinter as adults in protected places away from the host tree. As the buds break in the spring and the leaves begin to expand, these small wasps start to lay their eggs in expanding plant tissue. During the egg-laying process or early larval-feeding period, specialized body glands secrete growth-regulating chemicals that interact with certain plant chemicals to produce these abnormal growths.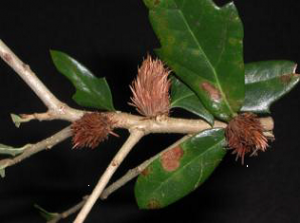
After a brief period of cell growth, gall development stops completely. Once these galls are formed, they do not continue to use nutrients from the host plant. The insect is confined within “its house” and feeds only on gall tissue during the remainder of its development. The galls provide shelter, protection, and food for the immature wasps. Inside a gall, the larvae are surrounded by tissues rich in nutrients
 There are a variety of gall-forming species of small wasps that commonly infest oak, Quercus spp ., trees. Galls generally are aesthetically objectionable to homeowners who find them unattractive and fear that galls will cause damage to the health of their oak trees. Most leaf galls on oak cause little or no harm to the health of a tree. However, twig or branch galls may cause injury by distorting branch development in a heavily infested tree.
Chemical control is seldom suggested for management of leaf galls on oak. Cultural methods of control may be effective in reducing the impact of these insects. Some fallen leaves may harbor various life stages of gall-producing pests. Therefore, it may be useful to collect and destroy all infested leaves. Some of these pests overwinter in twigs and branches of oak. Where such woody galls are detected, prune and destroy the infested plant material when the galls are small and have just started to develop. But, remember every bug needs a home!
All photos by Eileen Buss, UF Entomologist