by Daniel J. Leonard | Jun 22, 2016
Gardeners in Northwest Florida were blessed this spring with conditions conducive to great gardening, mild weather and plenty of rain. However, with those pleasant conditions has come an unusually high occurrence of Fireblight. Cases of Fireblight have been brought into our office almost daily this spring/early summer!
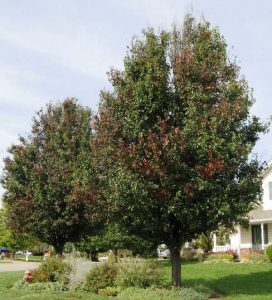
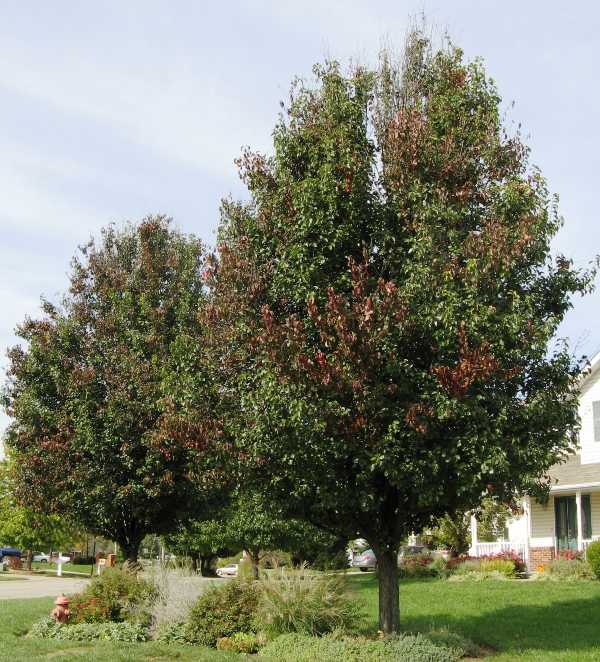
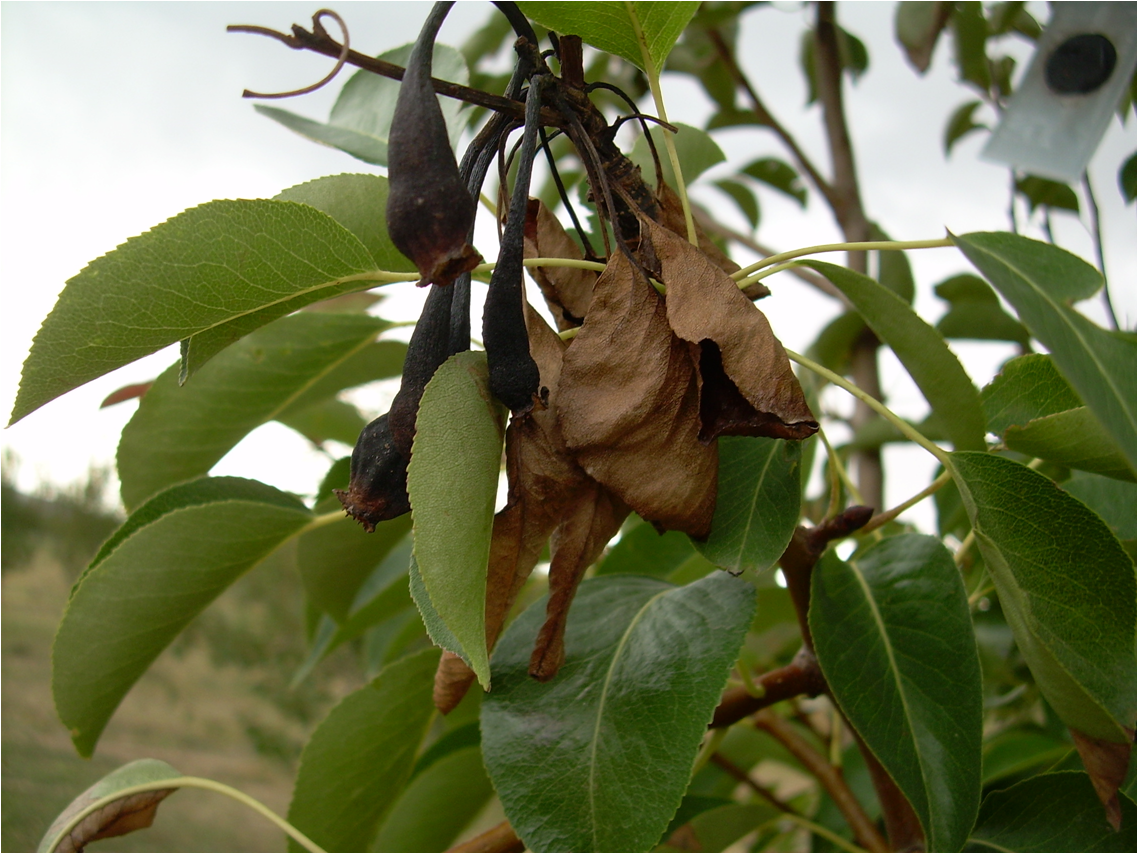
Mature ‘Bradford’ Pear infected with Fireblight
Fireblight is a difficult to control, rapidly-spreading disease caused by a bacterium (Erwinia amylovora) that affects many fruit trees, especially apple and pear but is also seen on quince, crabapple, hawthorn, loquat and photinia. Fireblight is generally noticed in late winter and early spring during periods of frequent rainfall as the plant begins to bloom and leaf out. The bacterium enters the plant through the opening flowers causing them to blacken and die. The disease then makes its way down the infected stem, destroying newly developing twigs along the way. Most homeowners notice the problem at this point in the progression; the new shoots have died, turned black and hold on the plant, giving it the tell-tale “burned” look. Homeowners also generally notice sunken lesions, or cankers, that form on the infected stems.
So, with a problem as unpredictable and destructive as Fireblight, what can one do to prevent it or combat its spread? There is no one method that can prevent or cure a Fireblight infection but there are several precautions homeowners can make to mitigate its effects.
- Plant resistant species and/or resistant cultivars of susceptible species, such as pear and apple. Under conditions like we’ve had this year, no pear or apple is immune but these cultivars have some proven resistance:
- Edible Pear: ‘Keiffer’, ‘Moonglow’, ‘Orient’
- Apple: ‘Anna’, ‘Dorsett Golden’
- Ornamental Pear: ‘Bradford’, ‘Cleveland Select’
- Remove infected and dead wood when the tree is dormant. Make a clean cut at least 12” below the last sign of infected wood and dispose of it. It is always a good practice to sanitize your pruners between cuts on a diseased tree. Also, there is little evidence to suggest that pruning out diseased wood on actively growing plants has much effect on further disease spread as long as conditions are still suitable for Fireblight formation.
- If you have noticed Fireblight on your trees in the previous year, it is good practice to make a preventative spray of a copper fungicide prior to the plant breaking dormancy.
- During bloom, streptomycin may be applied every three or four days for the duration of the bloom cycle to prevent infection. Consult the label for required days between spraying and consumption.
Fireblight is bad news in a fruit orchard but homeowners can take heart in the fact that the condition is not always fatal, especially if the preventative measures outlined above (proper cultural practices, proper pesticide use, and planting of resistant cultivars) are taken!
by Larry Williams | May 12, 2016
Do you have azaleas or camellias with leaves that are thickened, curled and waxy in appearance? This is fairly common this year and is caused by a fungus.

Camellia leaf gall on Sasanqua Camellia. Note swollen, malformed leaves. Photo credit: Larry Williams
Exobasidium vaccinii is a fungus that causes leaves, and in some cases flower petals, to enlarge abnormally and is commonly referred to as azalea leaf and flower gall.
Infected azalea and camellia leaves become large and distorted. Eventually a white powder covers the galls. The white growth consists of spores, which is how the fungus reproduces. Galls ultimately turn brown and harden. Not every leaf will be infected.
The disease relies on airborne spores produced in the whitish mold on the surface of galls in late spring to early summer to reproduce. Some plant pathologists believe that once the spores are released, they are blown and washed to leaf and flower buds where they cause new infections. Galls then form the following spring. Other plant pathologists think that the spores are produced the following year from the old dried, brown galls that fell to the ground around infected plants the previous year. In spring, the spores blow and splash onto new leaves and petals as they emerge causing infection. One or both lines of thought may be true. But in either case, it’s important to remove and dispose of infected leaves before they turn white with spores.
Once you see evidence of infected leaves, it’s too late for chemical control. Besides, there currently is no effective or practical fungicide to control this disease in home landscapes. But you can reduce the amount of infection the following year by pruning infected leaves and throwing them away before spores develop. After removing infected leaves with galls, never leave them on the ground around the plants.
It’s best to bury, burn or place infected leaves in a plastic bag and throw them away. This disease is more severe during a cool, wet spring, which we experienced this year. It’s advisable to not add to the problem by artificially providing the “wet weather” the spores need by frequently using an overhead sprinkler and keeping the foliage wet in the spring during disease development. This is exactly what this and many other plant diseases need – wet conditions. It’s best to water established landscape plants on an as needed basis.
In the home landscape, the fungus does not cause any long-term problems for the plant. It just makes the plant’s leaves look ugly. Infected leaves will usually fall prematurely.
by Mary Salinas | May 5, 2016
The panhandle of Florida is a great place to grow citrus with our plentiful sunshine and sandy soil. But some varieties do better than others. Here are some that thrive in the more northerly climes of Florida:
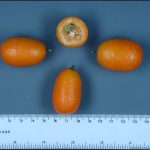
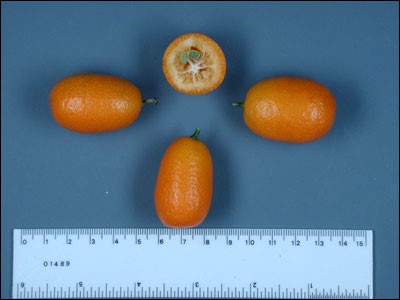
Nagami kumquat. Photo credit: UF/IFAS.
- Satsuma mandarin is cold hardy to 15°F once established. There are a few different available cultivars with fruit ripening October through December. Fruit needs to be picked promptly when ripe.
- Kumquat is cold hardy to 10°F once established. ‘Nagami’ and ‘Meiwa’ are the two common cultivars of the small tart fruits. Fruit matures in fall and winter and holds fairly well on the trees.
- Calamondin is a lesser known variety that bears small fruit that resemble tangerines. The tart fruit is great for jams and chutneys. Fruit is borne all year.
- Some of the sweet oranges that do well in the panhandle are Navel, Hamlin and Parson Brown. They are cold hardy to 14°F once established and are harvested November through January.
- Minneola or Honeybell tangelo is also hardy to 14°F and harvested in January. This is a cross between a Duncan grapefruit and a Darcy tangerine. This bell-shaped fruit is very juicy and sweet. Unlike the other citrus varieties, it needs another citrus nearby for cross-pollination in order to produce an abundant crop.
- Meyer Lemon is the choice to make if you would like to grow lemons in the panhandle. Other lemons may be damaged by our occasional freezes.
Grapefruit and lime can be grown – although unreliably – on the coast with protection from northwestern winter winds. They are much more susceptible to freezes in more northerly panhandle locations.
In order to have the healthiest and most productive trees, learn about how to properly care for citrus and how to recognize and combat the pests and diseases that occur.
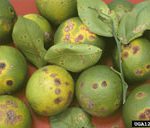
Citrus canker symptoms on leaves, fruit and stem. Photo by Timothy Schubert, FDACS
There are threats to our dooryard and commercial citrus from pests and disease. Only vigilance will help to combat the challenges so that we may continue to grow and enjoy our citrus. What can we do to protect our citrus?
- Report any serious diseases like suspected citrus canker or citrus greening to the Division of Plant Industry by calling toll-free 1-888-397-1517. Inspections and diagnosis are free. Citrus canker has been confirmed in south Santa Rosa County in the past 3 years.
- Purchase citrus trees only from registered nurseries – they may cost a little more but they have gone through an extensive process to remain disease and pest free. That will save you $$ in the long run!
- Don’t bring plants or fruit back into Florida – they may be harboring a pest!
- Citrus trees or fruit cannot move in or out of the State of Florida without a permit. This applies to homeowners as well as to the industry. This rule protects our vital dooryard trees and citrus industry.
For more information please see:
Save Our Citrus Website
UF IFAS Gardening Solutions: Citrus
Citrus Culture in the Home Landscape
UF IFAS Extension Online Guide to Citrus Diseases
Your Florida Dooryard Citrus Guide – Common Pests, Disease and Disorders of Dooryard Citrus
by Mary Salinas | Apr 21, 2016
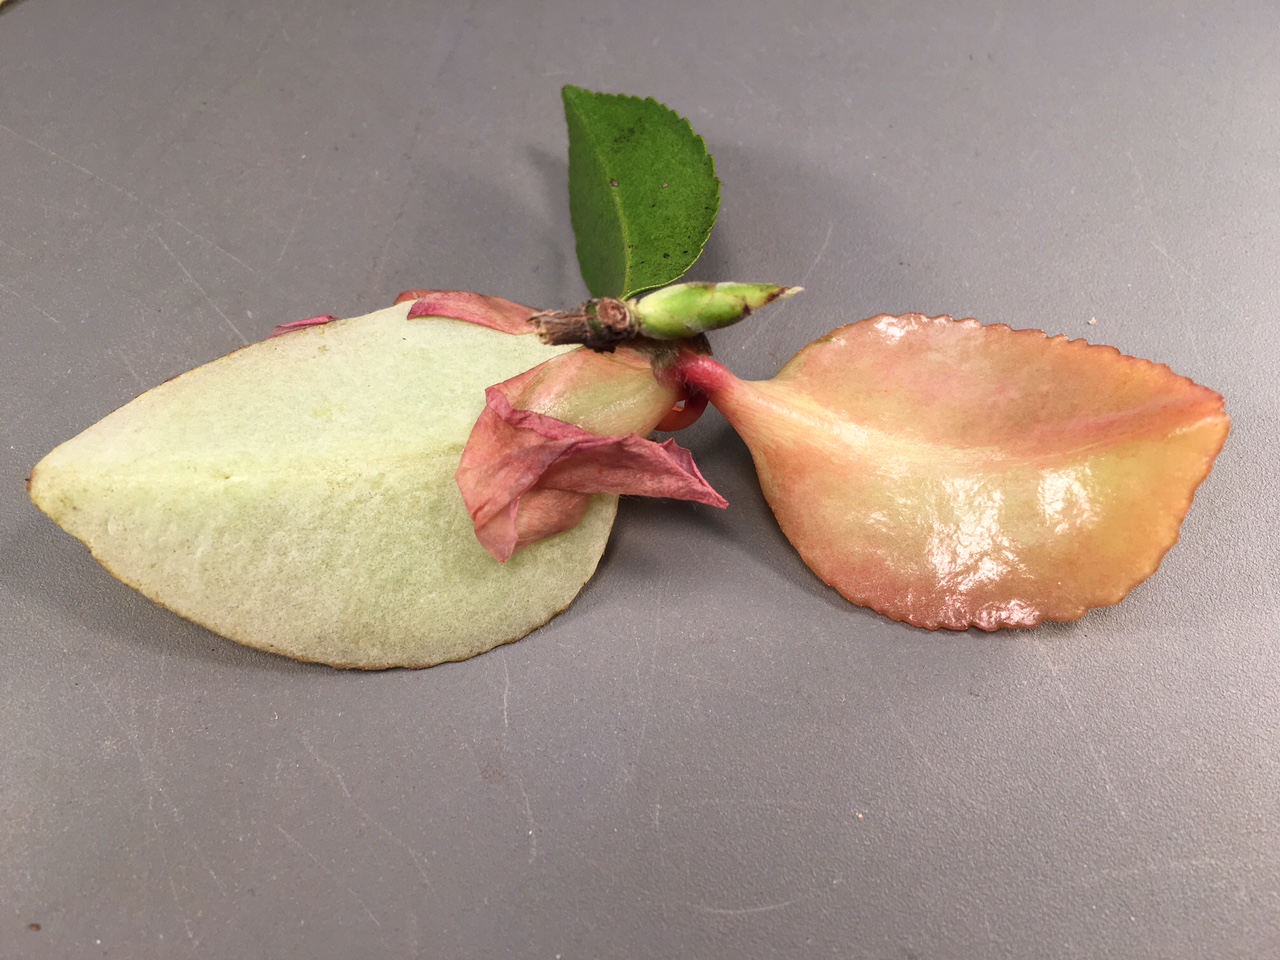
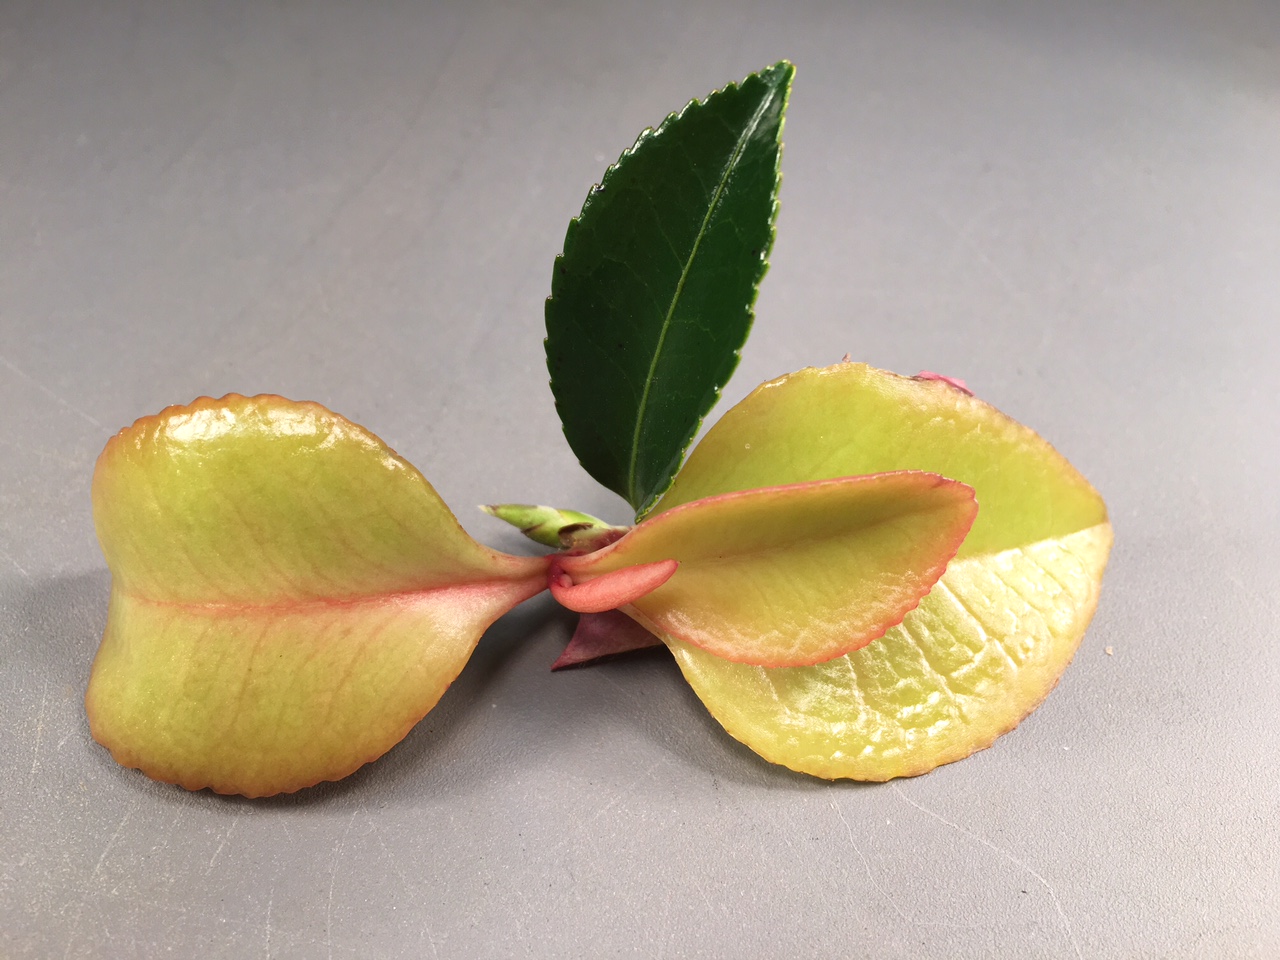
Recently, a home gardener brought in some strange looking new leaves on his camellia. The youngest leaves were thick and fleshy and looked more characteristic of a succulent type plant than a camellia. What’s wrong with these leaves?

Camellia leaf gall infection resulting in fleshy light green and pink leaves. Note the contrast with a healthy uninfected leaf. Photo credit: Mary Derrick, UF/IFAS.
The culprit is a fungus Exobasidium camelliae whose spores are carried by the wind in search of camellias. This fungus infects camellias, especially sasanquas; it will not infect any other plant species. The disease it causes is known as camellia leaf gall and is most commonly seen here in the Florida panhandle in April. The frequent wet weather this winter and spring created favorable conditions for disease development.
The symptoms of the disease are easy to distinguish and really stand out against the typical dark green leaves of the camellia. Leaves become thick and fleshy and the color ranges from light green to cream to pink. As the disease progresses and the galls mature, the lower leaf surfaces of the leaves will peel away to reveal a white underside laden with fungal spores. Wind and rain will take these new spores to other parts of the camellia or other camellias in the vicinity where they will lay dormant and cause infection the following spring. Eventually the galls will turn brown and dry up.

The underside has pealed away revealing white fungal spores. Photo credit: Mary Derrick, UF/IFAS Extension.
Camellia leaf gall is not a serious disease that requires chemical intervention for the homeowner. Simply remove the galls and put them in the trash. The earlier you remove the galls the better; the risk of further infection can be reduced if the galls are removed before the undersides peel and expose their spores. Any that have fallen to the ground can spread the disease and need to be removed.
For more information:
Camellias at a Glance
Camellia Leaf Gall
by Molly Jameson | Oct 6, 2015
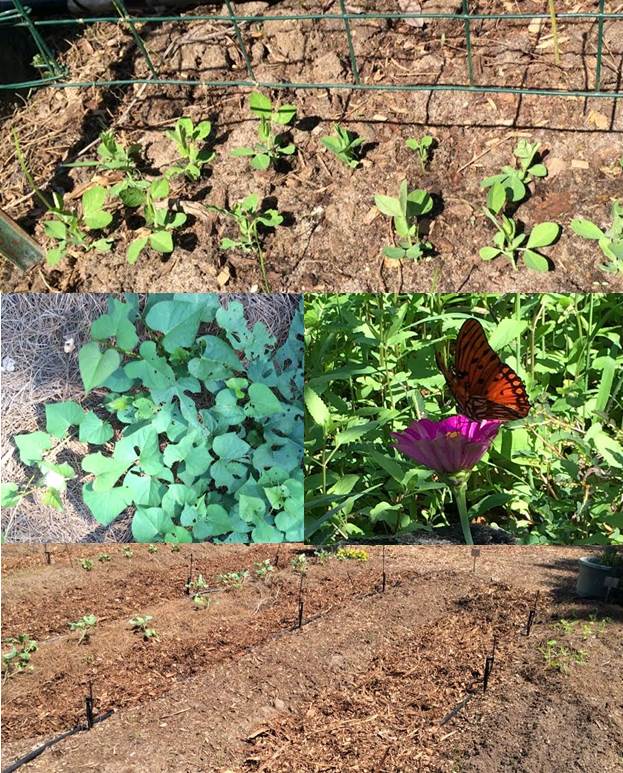
A diverse garden attracts pollinators and helps balance soil fertility. Photo by Molly Jameson.
The kids are back to school and you know what that means – everyone in the house will soon come down with the sniffles and a sore throat. But what if when the kids came home, Jack went straight to his room, Susie to her room, Dad went to work in the garage, and Mom read in the office? This separation – along with good hand washing techniques – may be what prevents the entire house from turning into a sick ward. Since humans are very closely related genetically, we are susceptible to many of the same diseases. Well, believe it or not, plant families operate very similarly. If you keep planting crops together that are in the same plant family, they will be susceptible to the same diseases.
Although it can be challenging to keep your family from getting sick, there are certain practices in the garden that can go a long way in keeping your vegetable plants disease free and healthy. One easy step you can take is implementing a crop rotation. By separating crops that are in the same family during the season and not planting the same plant families in the same locations year after year, you not only help prevent diseases, but it will also help control insects, balance nutrients, and improve the condition of your soil.
Probably the most important reason to use a crop rotation system is to prevent plant diseases. For example, if you grow tomatoes in the same section of your garden year after year, certain pathogens that attack tomatoes, such as some bacterial spots and blights, can overwinter in your garden, and will have an easily accessible host (next year’s tomatoes) the following spring. Tomatoes are in the nightshade family, along with crops such as potatoes, peppers, and eggplants. If these crops are planted in the same location, they then become susceptible to the same pathogens, and the cycle continues.
Turn your garden into a revolving collage. Photo by Molly Jameson.
Many pests in the garden are also attracted to many of the same crops. For instance, the mustard or brassica family, which includes vegetables such as broccoli, kale, collards, and turnips, easily attract aphids. By regularly rotating your brassicas, you can help break the life cycles of these garden pests.
Another important aspect of crop rotation is considering the fertility and health of your soil. Different crops require different types and amounts of nutrients to grow. Legumes, such as peas and beans, actually “fix” nitrogen from the atmosphere, which can increase the nitrogen in your soil, reducing your need to add fertilizers. You would then want to follow legumes with plants that require a lot of nitrogen, such as lettuce or broccoli. Subsequently, follow heavy feeders with light feeding root vegetables, such as onions or carrots, which are good nitrogen “scavengers.”
Root crops also help break up the soil, which is then advantageous to legumes, which thrive in loose soil. Growing leguminous “cover crops,” such as clovers and alfalfa, is an excellent way to improve the fertility and organic matter content of your soil. Incorporate the biomass of the cover crops into your soil prior to seed production for optimum benefits.
Remember that the key to both a healthy garden and a healthy diet is diversity! Incorporating many different botanical families into your garden will help break disease life cycles, attract beneficial insects, effectively utilize soil nutrients, and improve soil composition. In turn, eating many different types of vegetables will ensure that you are getting the full spectrum of vitamins and minerals. Which, by the way, will help keep your family healthy and strong and able to combat those pesky colds!
by Sheila Dunning | Sep 16, 2015
“We have replaced this grass several times over the past few years; and it’s dying again.” I have heard this complaint too many times this summer. Last summer’s heavy rain, the stress of January’s icy weather, and this year’s extended summer have contributed to widespread outbreaks of Take-All Root Rot, a soil-inhabiting fungus Gaeumannomyces graminis var. graminis.
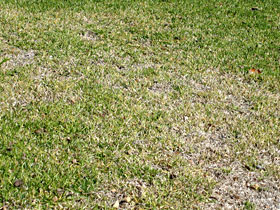
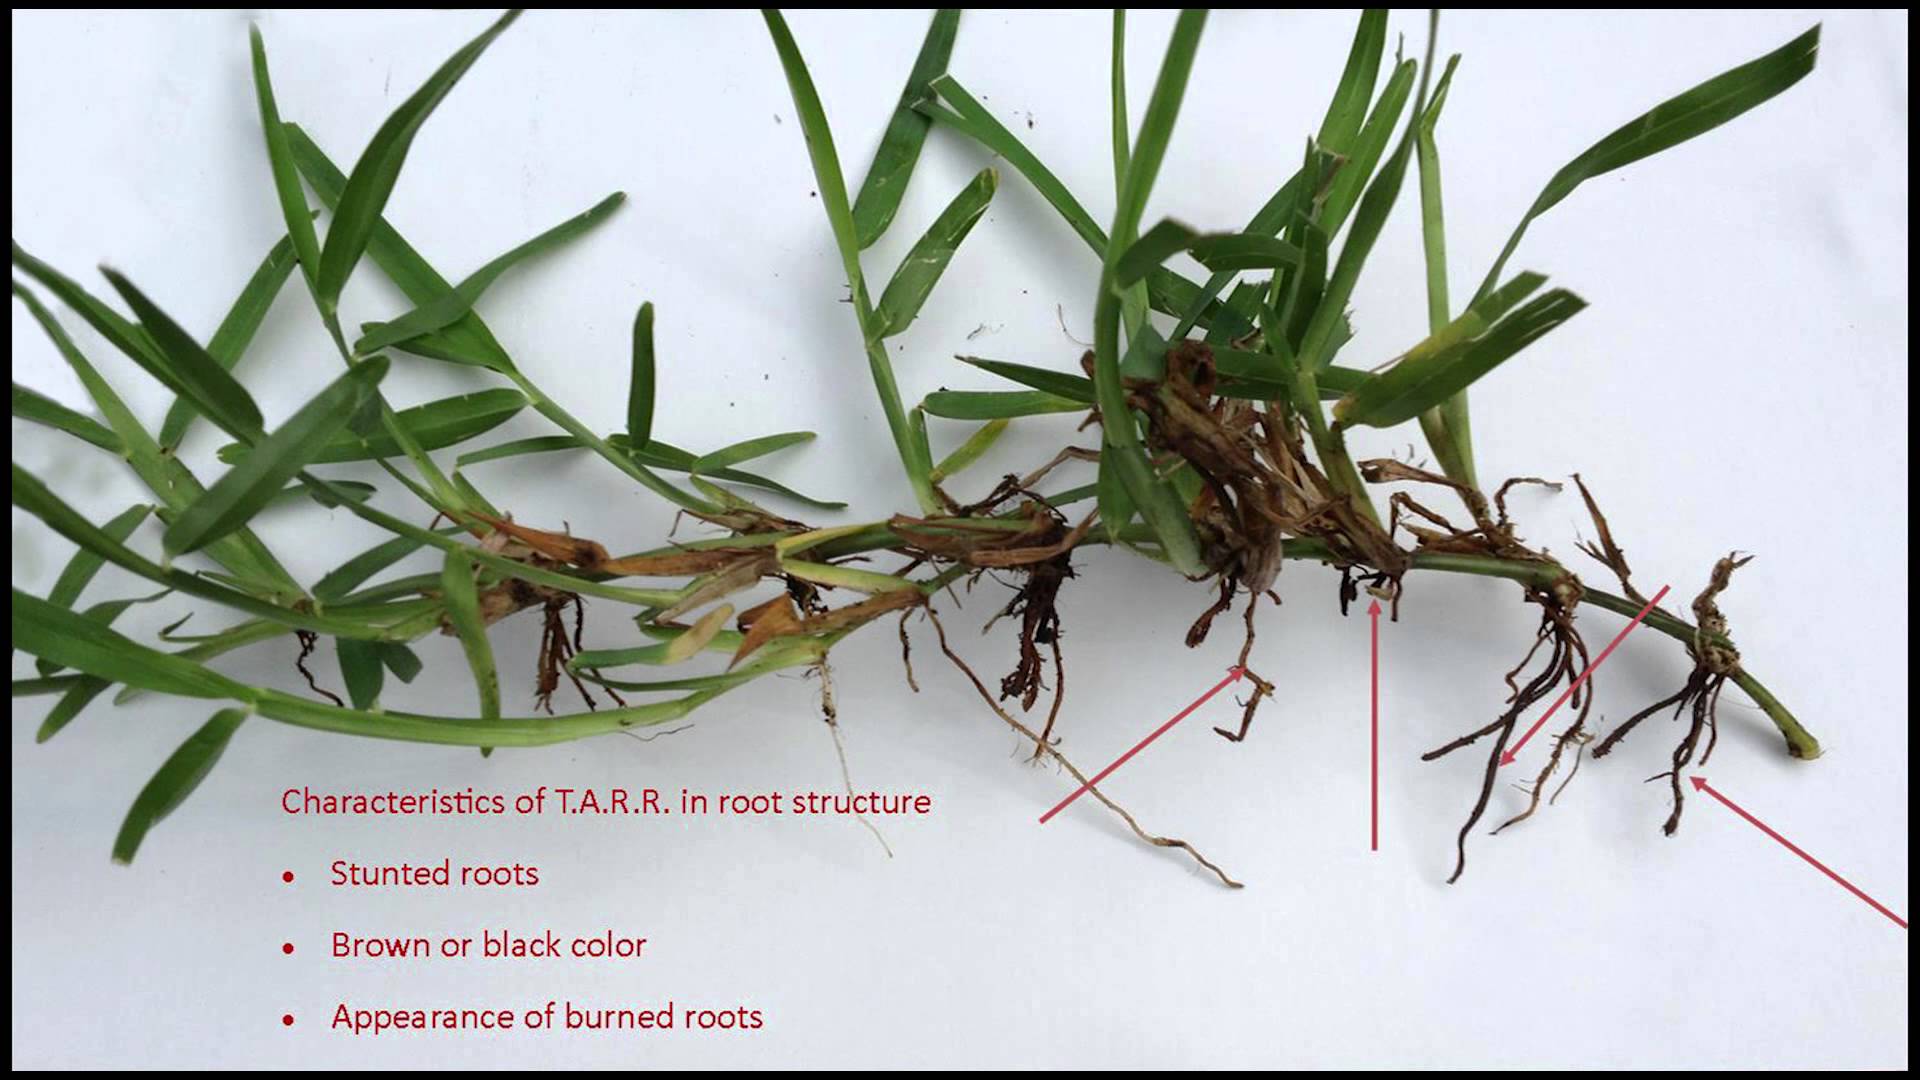
Symptoms of Take-All-Root-Rot. Photo credit: Sheila Dunning, UF/IFAS.
This disease causes yellow grass patches ranging in diameter from a few inches to more than 15 feet. The symptoms first appear in the spring, but the disease can persist all summer and survive the winter. Over time, the entire area dies as the root system rots away. The pathogen is naturally present on warm-season turfgrass roots. High rainfall and stressed turfgrass trigger the disease.
Since the roots are affected, they are not able to efficiently obtain water or nutrients from the soil, nor are they able to store the products of photosynthesis, which result in the loss of color in the leaves. By the time the leaf symptoms appear, the pathogen has been active on the roots for several weeks, probably longer; the disease has been there potentially for years. If the turfgrass is not stressed, leaf symptoms may never be observed.
This disease is very difficult to control once the aboveground symptoms are observed. Measures that prevent or alleviate stress are the best methods for controlling the disease. Any stress (environmental or manmade) placed on the turf weakens it, making it more susceptible to disease. Remember, that every maintenance practice, fertilizer application, and chemical (especially herbicide), application has an impact on turfgrass health. Cultural practices that impact the level of stress experienced by a lawn include:
- proper turfgrass species selection
- mowing at the correct height
- irrigation timing, frequency and volume
- fertilizer: nitrogen and potassium sources and application quantities
- thatch accumulation, and
- soil compaction
The selection of turfgrass species should be based on existing soil pH, sunlight exposure, use of the area and planned maintenance level.
Mower blades must be sharp to avoid tearing of the leaves. Additionally, turfgrasses that are cut below their optimum height become stressed and more susceptible to diseases, especially root rots. When any disease occurs, raise the cutting height. Scalping the grass damages the growing point. Raising the cutting height increases the green plant tissue available for photosynthesis, resulting in more energy for turfgrass growth and subsequent recovery from disease.
If an area of the lawn has an active fungus, washing or blowing off the mower following use will reduce the spread of the disease to unaffected areas.
The amount of water and the timing of its application can prevent or contribute to disease development. Most fungal pathogens that cause leaf diseases require free water (rainfall, irrigation, dew) on the leaf to initiate the infection process. Irrigating every day for a few minutes is not beneficial for the turfgrass because it does not provide enough water to the root zone, but it is beneficial for turfgrass pathogens. It is always best to irrigate when dew is already present, usually between 2 and 8 a.m., and then only apply enough water to wet the root zone of the turfgrass.
Excessively high nitrogen fertility contributes to turfgrass diseases. The minimum amount required for the grass species should be applied. Potassium (K) is an important component in the prevention of diseases, because it prevents plant stress. Application of equal amounts of nitrogen and potassium is recommended for turfgrass health. When turfgrass roots are damaged from disease, it is beneficial to apply nutrients in a liquid solution. However, nitrate-nitrogen increases the severity of diseases, so their use should be avoided when possible. Ammonium-containing fertilizers are the preferred nitrogen sources.
Heavy liming has also been linked to increases in Take-All Root Rot. Since most turfgrasses can tolerate a range of pH, maintaining soil at 5.5 to 6.0 can suppress the development of the pathogen. When the disease is active, frequent foliar applications of small amounts of nutrients is necessary to keep the turfgrass from declining.
Additional maintenance practices that need to be addressed are thatch removal and reduction of soil compaction. Excessive thatch often causes the mower to sink which can result in scalping and reducing the amount of leaf tissue capable of photosynthesizing. Thatch and compacted soil prevent proper drainage, resulting in areas remaining excessively wet, depriving root systems of oxygen. Since recovery of Take-All-Root-Rot damaged turfgrass is often poor, complete renovation of the lawn may be necessary. Removal of all diseased tissue is advised.
As a native soil-inhabiting pathogen, Take-All-Root-Rot cannot be eliminated. However, suppression of the organism through physical removal followed by proper cultivation of the new sod is critical to the establishment of a new lawn. Turfgrass management practices, not chemicals, offer the best control of the disease.
It is acceptable to use fungicides on a preventative basis while rooting in the sod. Azoxystrobin, fenarimol, myclobutanil, propiconazole, pyraclostrobin, thiophate methyl, and triadimefon are all fungicides that can be utilized to prevent disease development while having to excessively irrigate newly laid sod. Ideally, the turf area should be mowed and irrigated prior to a fungicide application. Unless the product needs to be watered in, do not irrigate for at least 24 hours after a chemical treatment. Do not mow for at least 24 hours, to avoid removal of the product attached to the leaf blades.
With all the stresses that our lawns have experienced, it is very important to continue monitoring the turf and be cautious about the cultural practices being used. Take-All Root Rot is likely to flourish. Do not encourage its development. A pathology test with the University of Florida Laboratory can confirm the presence of the disease causing organism. Before resodding again, have the dying sod tested.
For information and the submission form go to:
Sample Submission Guide
For more information on the disease go to:
Take-All-Root-Rot