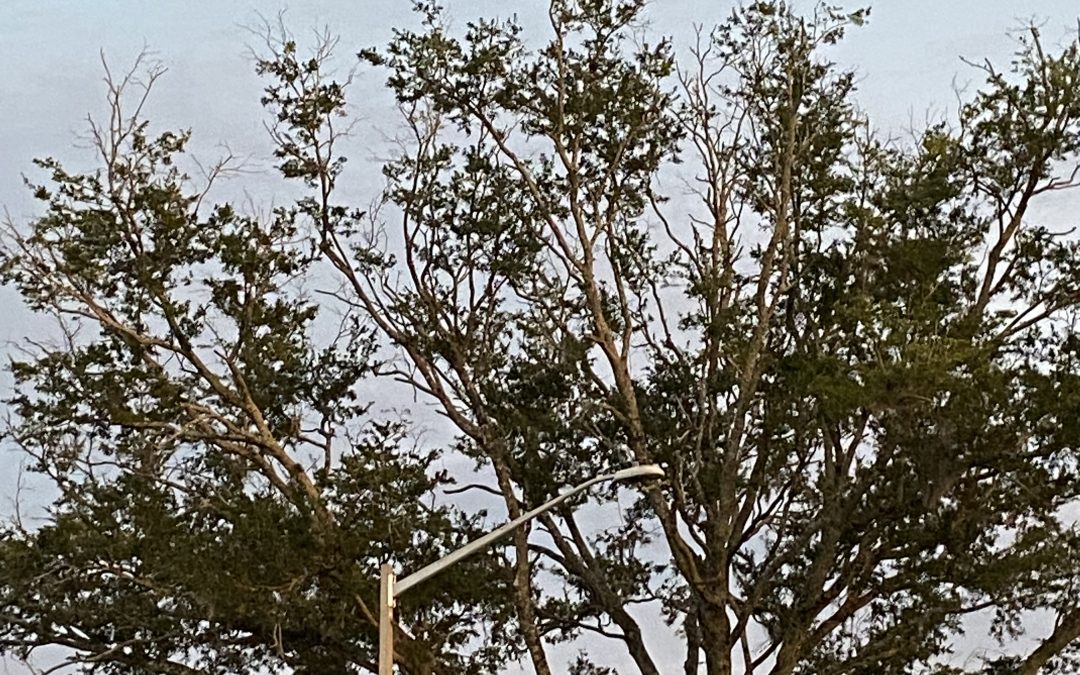
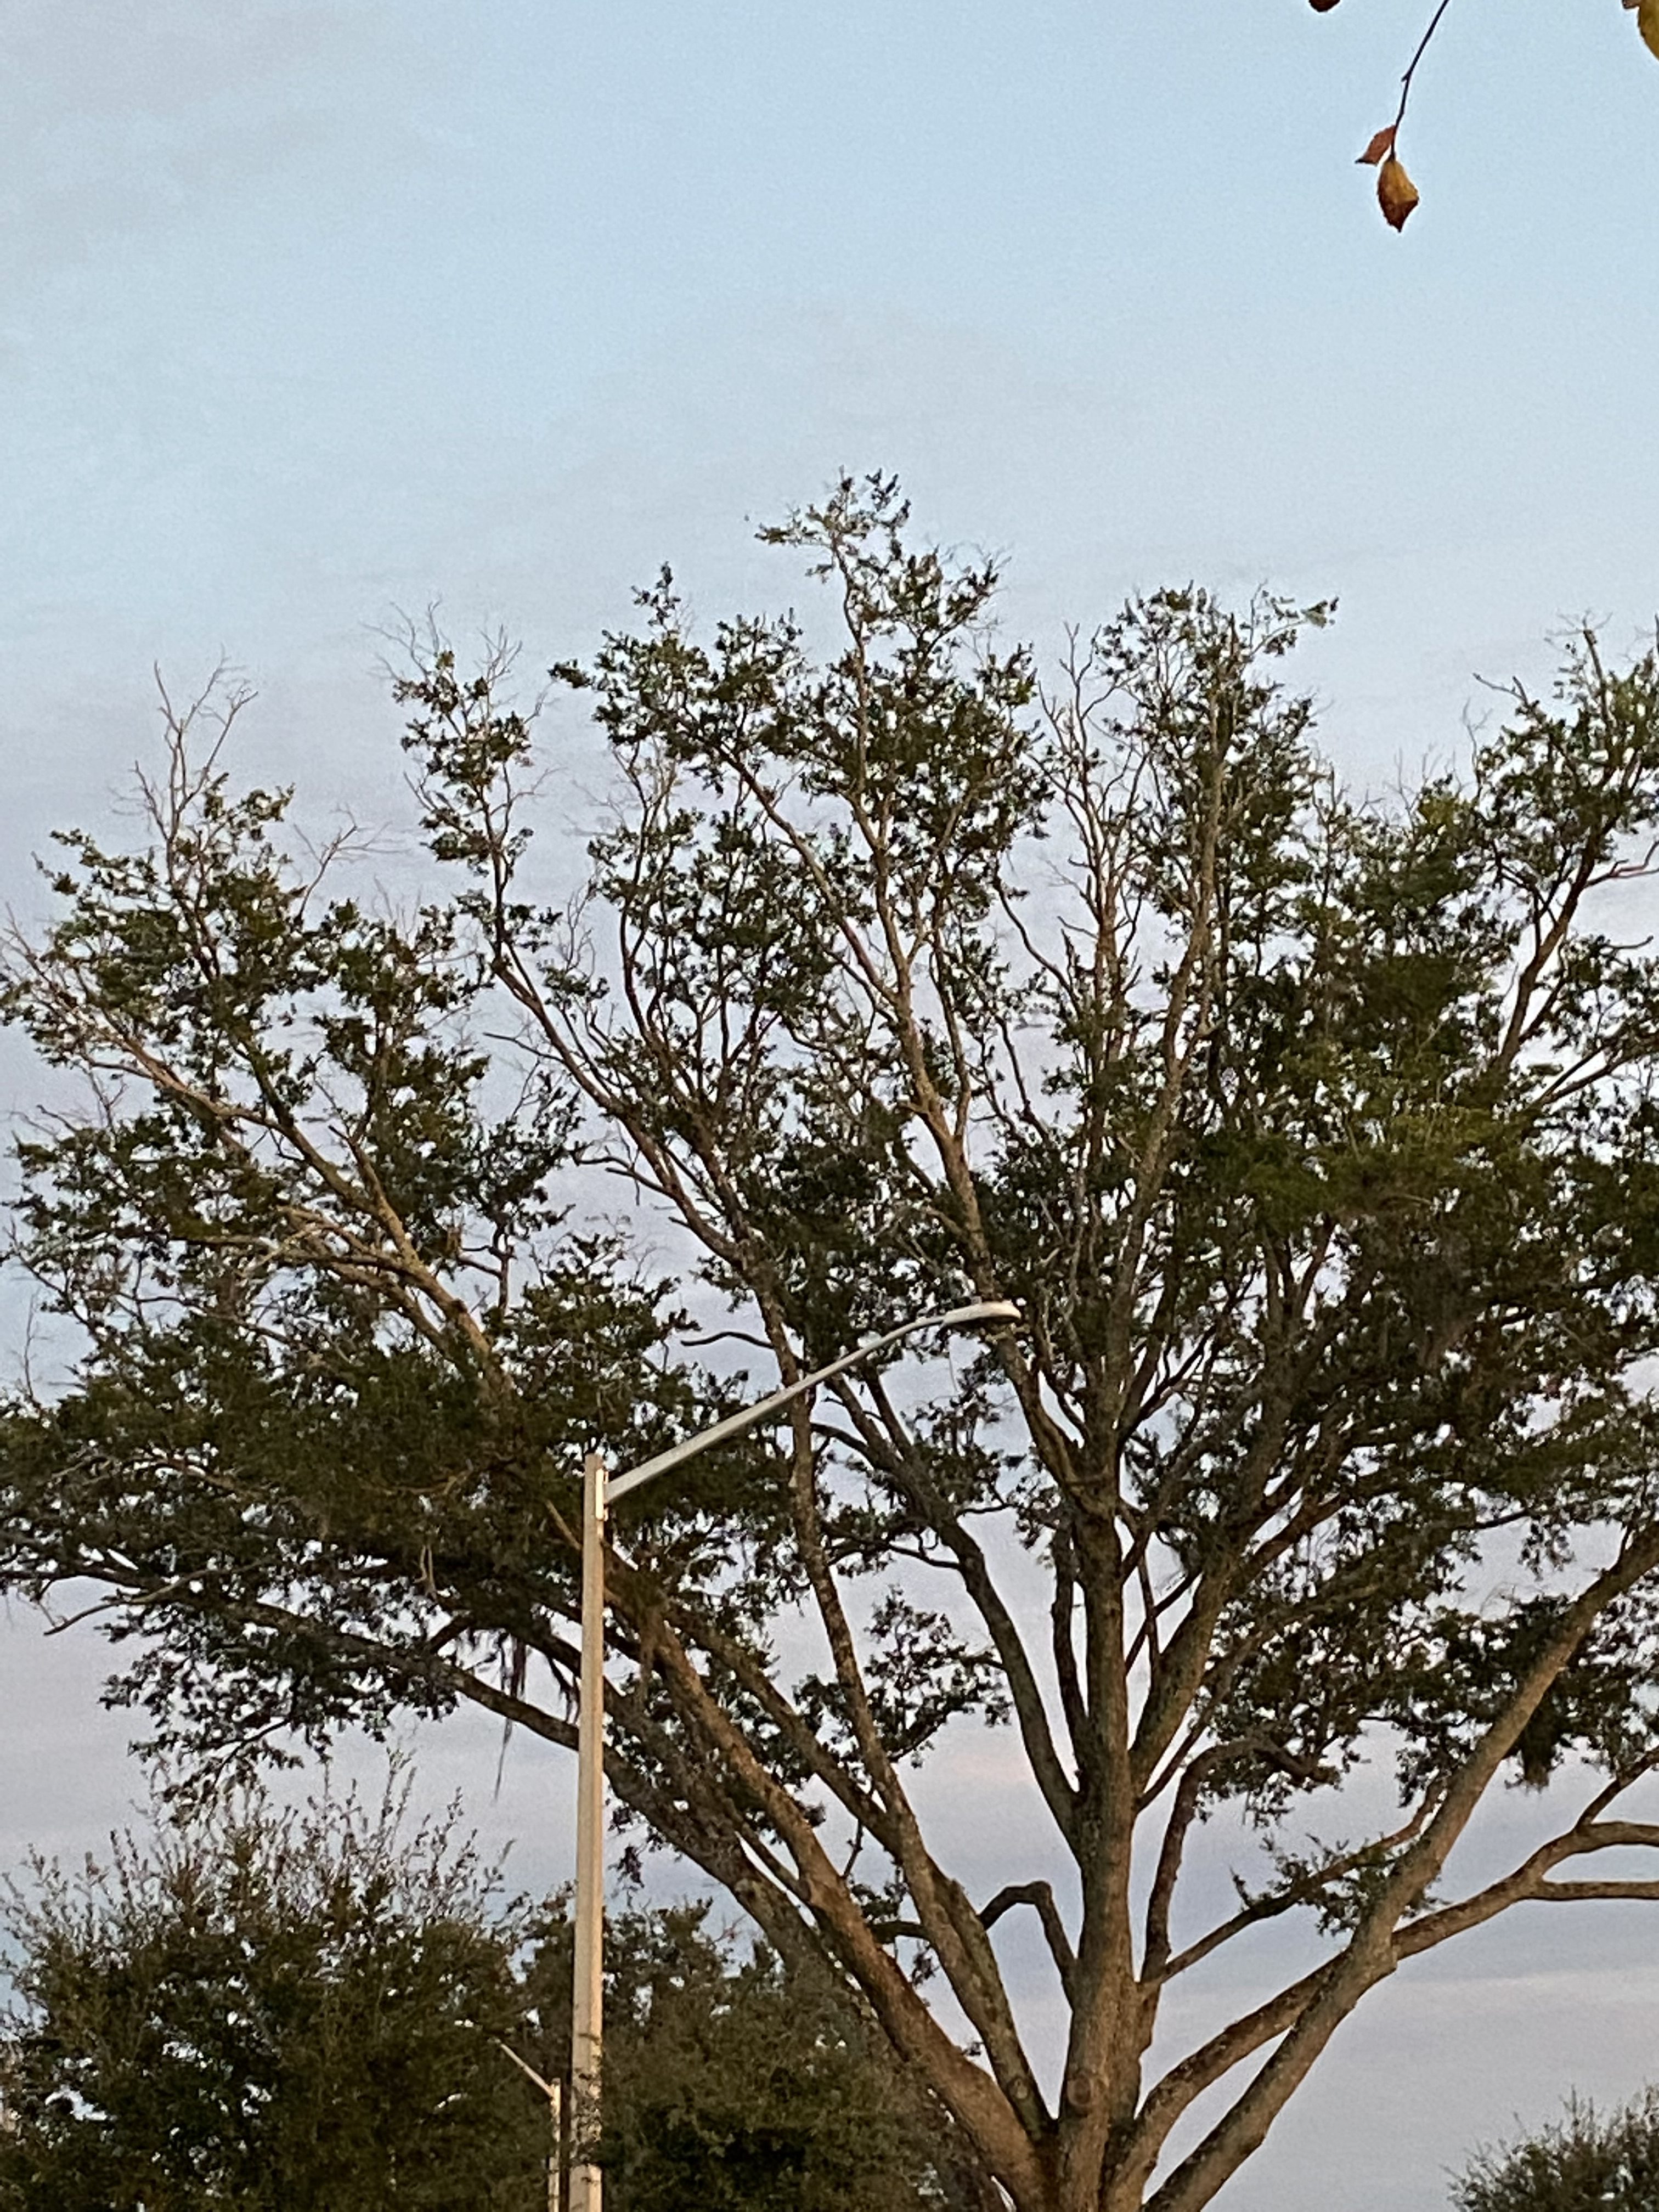
The crown of a tree is the leaf bearing twigs and branches and the spreading green foliage that we see. A heathy, full crown is a good indication of a healthy and vibrant tree. The crown and the foliage it supports is the energy collector and the center for photosynthesis, which is how the tree produces the energy it needs to live. For a tree to live and thrive, a full crown of leaves is essential, and an unhealthy and thin crown is an indicator the tree has issues. Crown dieback is often not noticed until it is relatively severe and at that point it can be too late. If a tree drops below a certain percentage of live crown it can no longer support itself and continues to decline. The good news is that if you notice your tree is starting to show signs of crown thinning and dieback you can likely intervene to improve its health or diagnose a problem early.
Tree Showing crown dieback, note the dead branches and lack of foliage on the outer branch tips. Photo Credit-Ian Stone
Crown dieback, which is also referred to as crown decline, is a progressive issue that starts small and can progress to the point that only small sparse areas of foliage are left. It is a tree’s response to various stressors, including environmental conditions and severe rot/decay. As a response to severe stress, the tree begins to abort part of the leaves and some of the small branch tips. If the stress continues to worsen, the tree will continue to abort more of the crown, producing progressively more dead wood. The tree is essentially trying to prune itself back to a manageable level of foliage based on the stress it is encountering. This can occur in both small, young trees and mature, established trees. A variety of conditions cause the stress that begins this process. For instance, you may notice crown dieback in young trees planted in compacted urban conditions such as parking lots and paved areas. Trees in these conditions experience stress from the compacted soil and encounter subsequent issues with water and nutrient stress. Large mature trees in an area that experienced recent construction may also exhibit dieback, especially if buffers and setbacks are not maintained or significant fill dirt is brought in. Issues from root disturbance and compaction cause stress and root dieback, which in turn causes visible crown dieback. Additionally, trees that are experiencing rot, decay, and other vascular disease issues will often begin to exhibit dieback. As the rot or vascular disease progresses, the tree is less able to transport water to the crown, which results in the crown dieback that can be seen as the crown thins. Often, in cases of rot, crown dieback will be the primary visible symptom that rot is occurring, as the rot can be concealed deep in the tree. While multiple stressors can be the cause of crown dieback, it is a clear indicator a tree is stressed and in trouble. If this condition goes unnoticed, it can progress past the point that the tree can be saved. However, if noticed and caught early, good tree care techniques can be applied that may restore the tree to heath. In cases of severe rot and decay, having the tree examined may prevent structural failure of a tree exhibiting crown dieback.
If you have a tree on your property that is exhibiting crown dieback, it is a good idea to have the tree examined by a professional to determine the extent and nature of the issue. Key signs of dieback are bare branch tips and dying foliage during spring and summer. It is natural to have some dead wood in a tree, but extensive dead wood around the entire perimeter of the crown is a cause of concern. With good diagnosis, the proper tree care techniques can be applied to help a tree recover. Waiting and hoping a tree with crown dieback will recover on its own is not a good course of action. Recognizing crown dieback and taking early action is the key to success. Contacting a Certified Arborist (www.treesaregood.org ) is a good step in getting an opinion on the extent of dieback, if the tree is recoverable, and how to best address the issue. You can also contact your local County Extension Office or Florida Forest Service County Forester for assistance.
What is a titi? Google it. Wiktionary says it is “a New World monkey of the genus Callicebus, native to South America, distinguished by their long soft fur”. But deeper into the definitions you will find “a shrub or small tree of the southern Unites States, having glossy leaves and elongated clusters of flowers, occurring in wet soil conditions”.
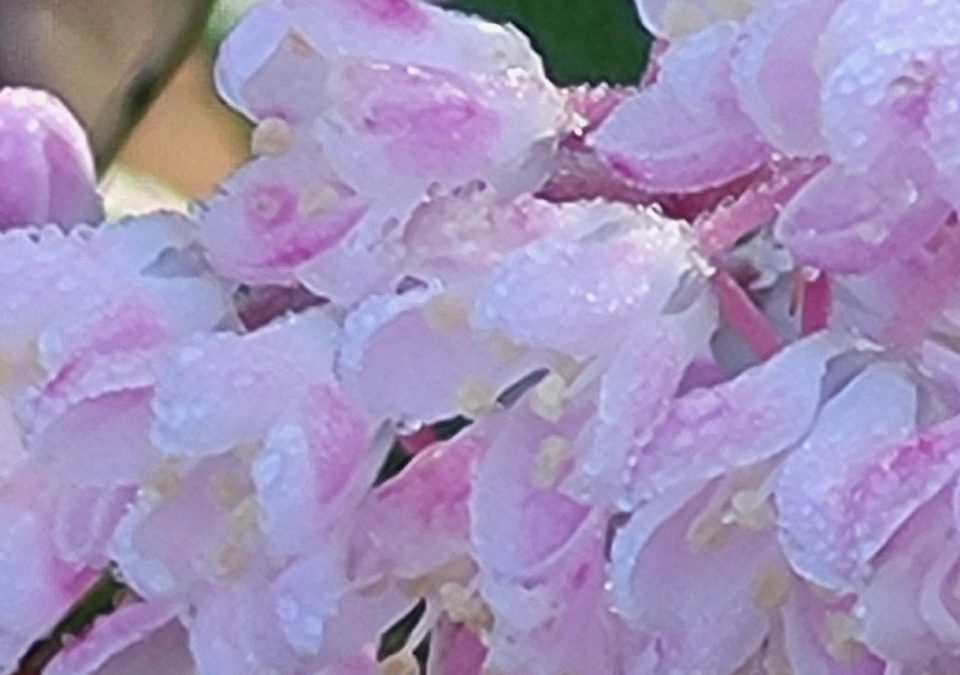
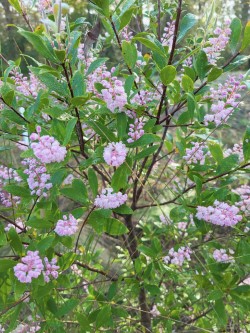
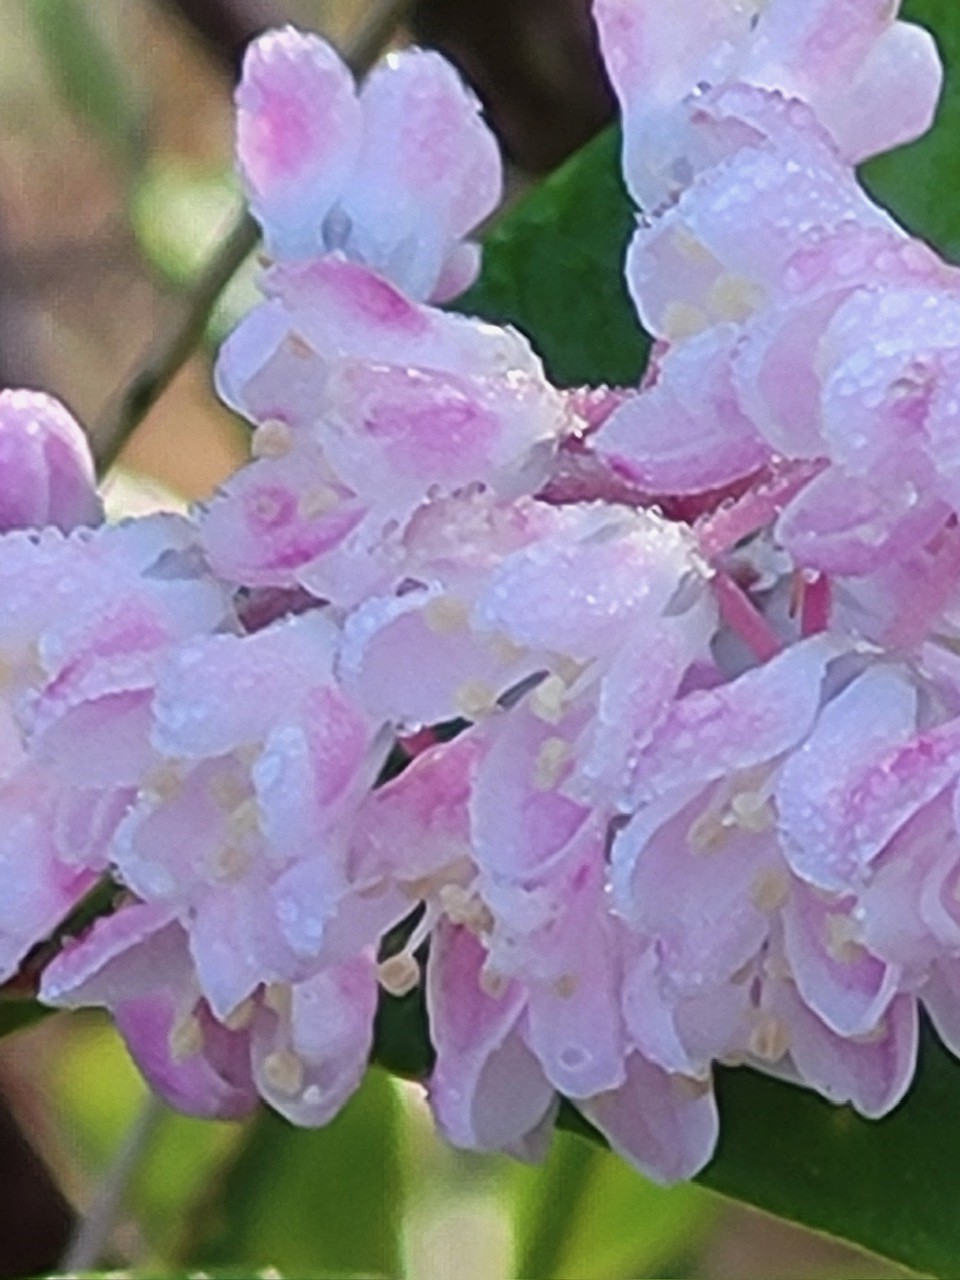
Titi is just a common name for two species that grow in the wetlands. Black titi (Cliftonia monophyla), also referred to as buckwheat tree, is the first to bloom in the spring. Native seedlings produce clusters of small white flowers at the tip of the branches. The sweet-smelling blooms provide a nectar source for bees in February and March. Following pollination, golden-brown seed pods will form, resembling buckwheat grains; hence, the other common name. The seed persists through the fall, providing added aesthetics and a food source for native and migratory birds. Pink-flowering sports of the Black titi have been propagated for the native plant nursery trade. ‘Chipolo Pink’ is one of the most popular (pictured).
The other species is Red titi (Cyrilla racemiflora), also called Swamp titi. It will send out multiple drooping white flowers in a finger-like cluster from the previous year’s wood. Blooming begins in the late spring and continues into the summer. Unfortunately, the nectar has shown to be a source for purple brood disease in bees, a terminal condition for the baby bees.
So, when deciding on native plants for your wetlands edge or rain garden, look for the Black titi and the new cultivars on the market. Then research other summer-flowering nectar sources like Clethra alnifolia, Sweet pepperbush, and their many new cultivars.
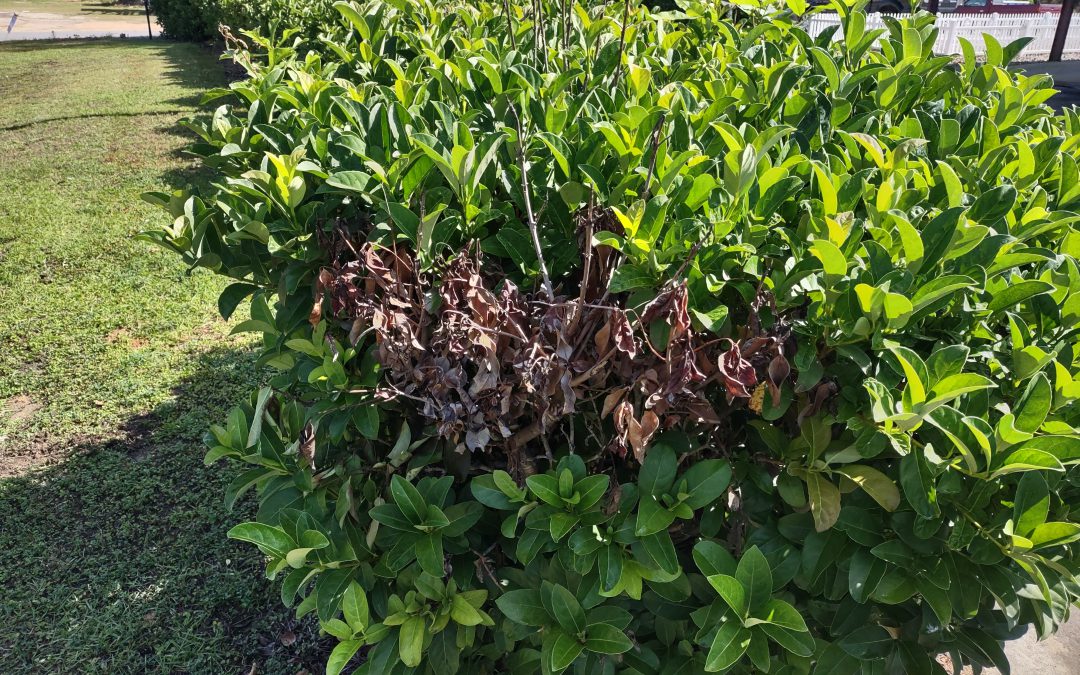
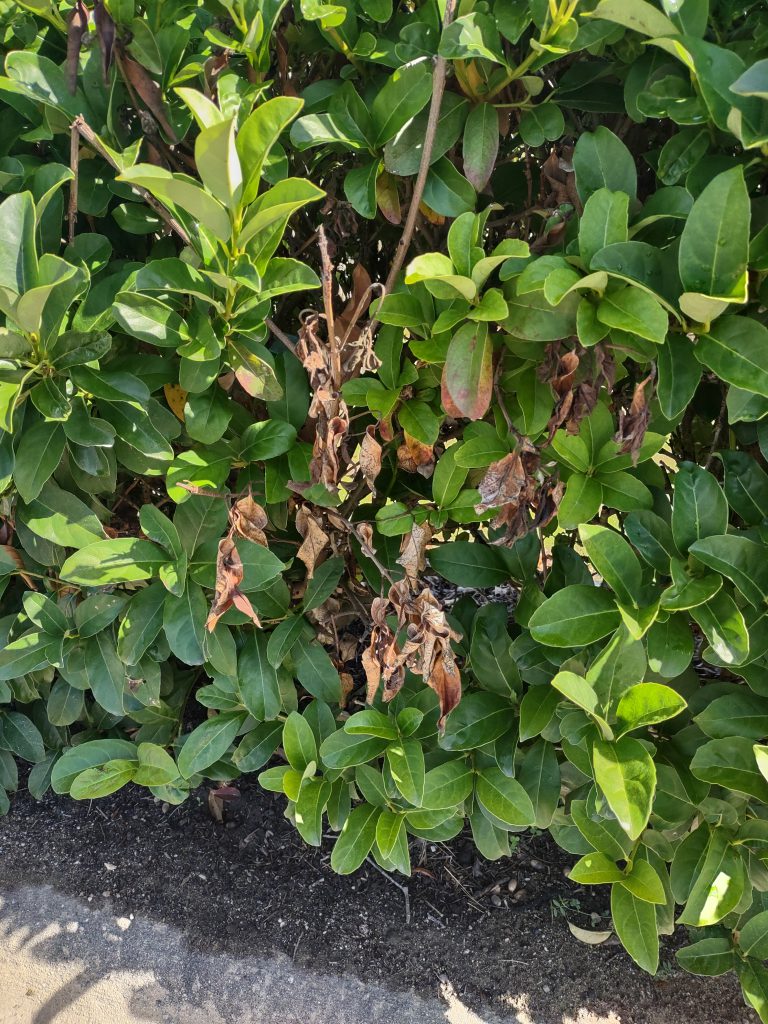
Sweet Viburnum (Viburnum odoratissimum) is thought of as being an ironclad landscape shrub, generally a rapid, healthy grower free of insects and disease. However, this spring, many Sweet Viburnum specimens across the Panhandle have experienced varying degrees of dieback, from individual shoots to entire sections of shrubs, caused by the fungal pathogen Botryosphaeria – commonly known as Bot Rot.
Typical symptom of Bot Rot on Sweet Viburnum. Photo courtesy of Daniel Leonard.
Bot Rot almost always appears after some kind of major stress event that impacts susceptible plants – drought, pruning wounds, nutritional deficiencies, or another environmental stress. We haven’t been afflicted lately with any serious drought conditions and the disease occurrences are too widespread to have been a result of isolated pruning or poor plant nutrition. However, the Panhandle did experience a major environmental event around Christmas 2022 that was plenty stressful for landscape plants, a weeklong Arctic blast of extreme cold. This abrupt hard freeze event in an otherwise mild winter is my best guess for what brought about the increased incidence of Botryosphaeria we have experienced this spring.
The Botryosphaeria fungus enters plants via wounds – in this case one probably caused by cold – and begins destroying the plant’s vascular system in the area. As the pathogen progresses, it eventually causes sunken cankers to appear, girdles the affected branch, and cuts off “circulation” in that stem. The first symptom of Bot Rot that gardeners notice is shoots rapidly wilting and exhibiting a blighted appearance, with brown, dead leaves holding onto affected limbs. Unfortunately, dieback isn’t always limited to individual shoots and can spread back into plants to eventually encompass whole branches. Entire plants dying from Bot Rot infection is not uncommon.
While there aren’t any fungicides that are effective in controlling or preventing Bot Rot, gardeners can arrest its spread by pruning out infected branches. To completely rid the plant of the fungus, make sure to prune 4” or so below the last infected plant tissue (symptomatic tissue will appear dark and discolored; healthy tissue will appear light and greenish). After pruning each affected plant, it is important to sanitize pruning equipment with either a 10% bleach solution or 70%+ isopropyl alcohol to prevent spreading pathogens to other healthy plants! Plants that have been irreparably disfigured by Bot Rot or outright killed may be pulled and discarded offsite.
While this year’s Bot Rot infestation has been extremely frustrating and similar future freeze events can’t be ruled out, gardeners should not give up on Sweet Viburnum, an excellent specimen or screening shrub. Keeping plants healthy with proper pruning, good fertility, and adequate irrigation is the best defense to ward off future infection when we experience harsh environmental conditions! For more information on Bot Rot, Sweet Viburnum, or any other horticultural topic, contact your local UF/IFAS County Extension Office! Happy Gardening.
Would you like to make money off your land? Are you looking to diversify your current plans on your property? Jackson County is hosting a fruit and vegetable meeting on January 26, 2023, and this just may be the perfect way to start off your new year!
Photo by Molly Jameson.
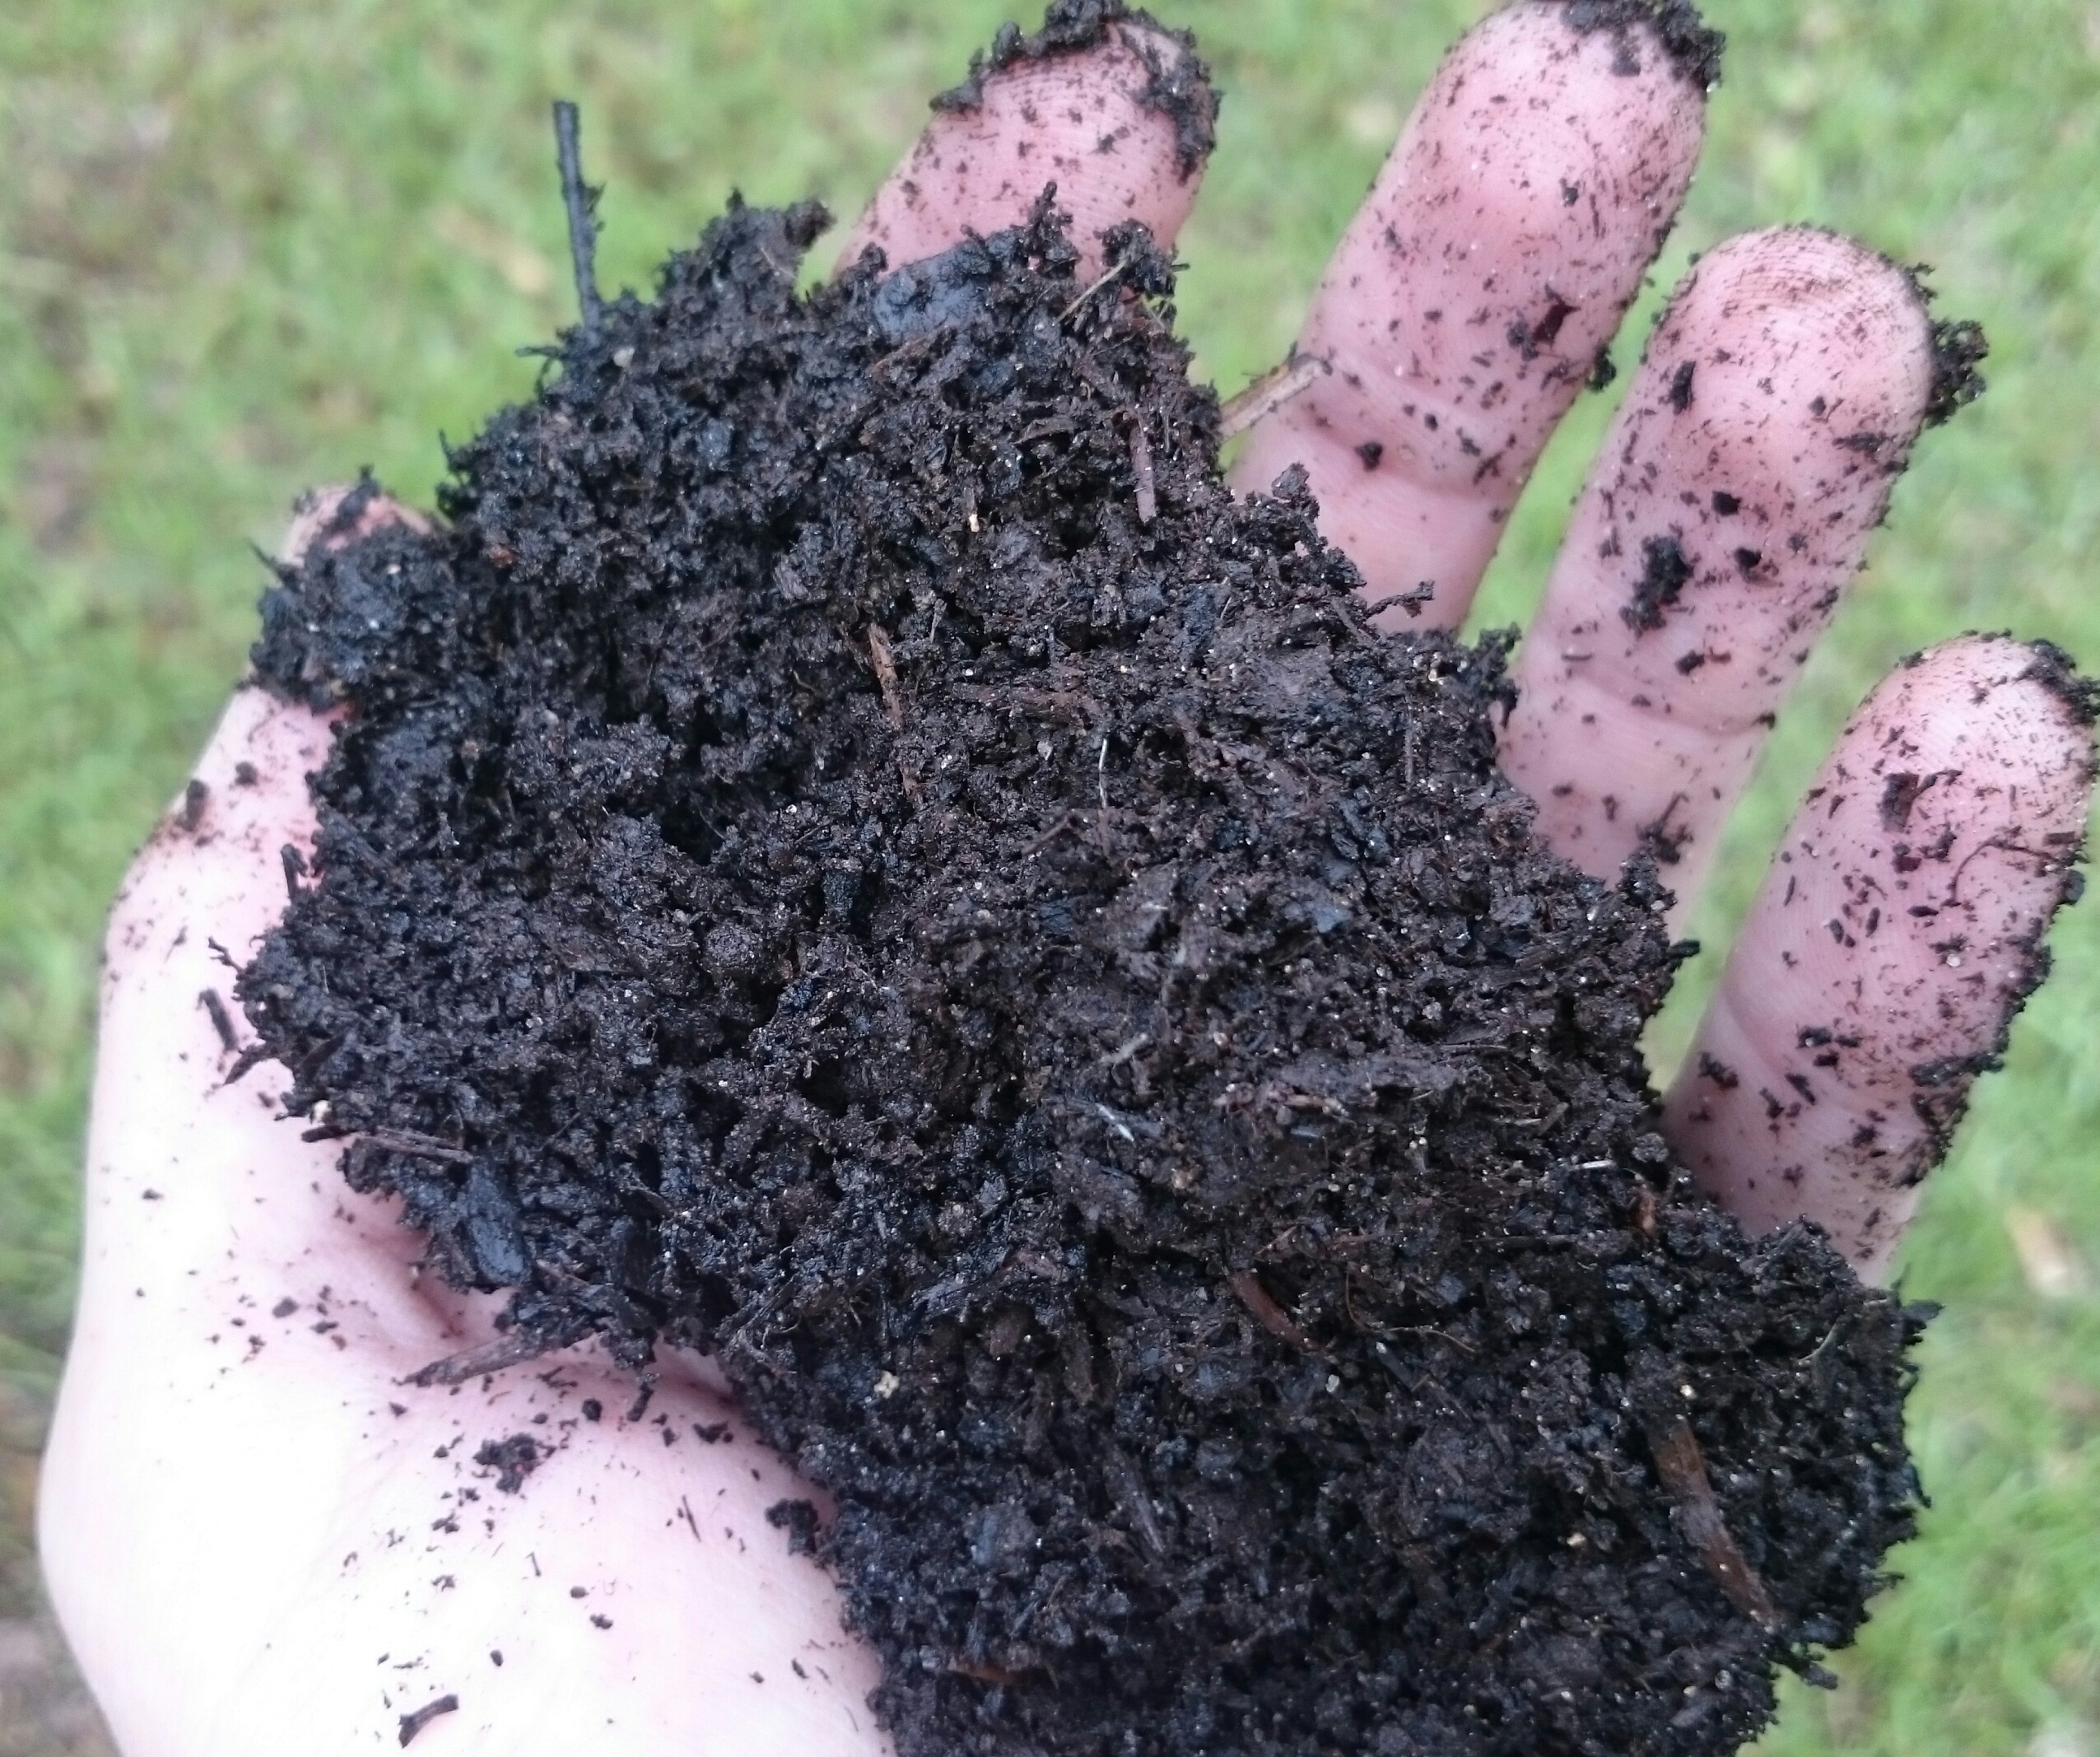
When thinking about what it means to be successful in planting your garden or having fruit trees, often the first thing that comes to mind is a healthy quality crop. This starts with the health of your soil. We will have two specialists that cover soil health and the benefit of adding cover crops to your rotation during the off season. The second thing that might come to mind when wanting to be successful is how to start? how much time do I have to devote to gardening? and how much do I want to do? This meeting will also have a specialist coming to Marianna to cover how to get started on a property with a specialty crop. Even though this information may be geared towards new farmers, it could also be very useful to new land owners and community residents just wanting to do more on their property. You may find that you have so much extra produce that you want to have a little fruit stand!
There will also be a session on the importance of drip irrigation, fertigation and how to implement these practices. Drip irrigation will not only save you money in the long run with the use of less water, but it is also much better for overall plant health by reducing pest and disease problems. Fertigation is the process of adding soil amendments, water amendments and other water-soluble products into an irrigation system. This process can be both beneficial to the plants and cut back on the time it would take to fertilize by hand.
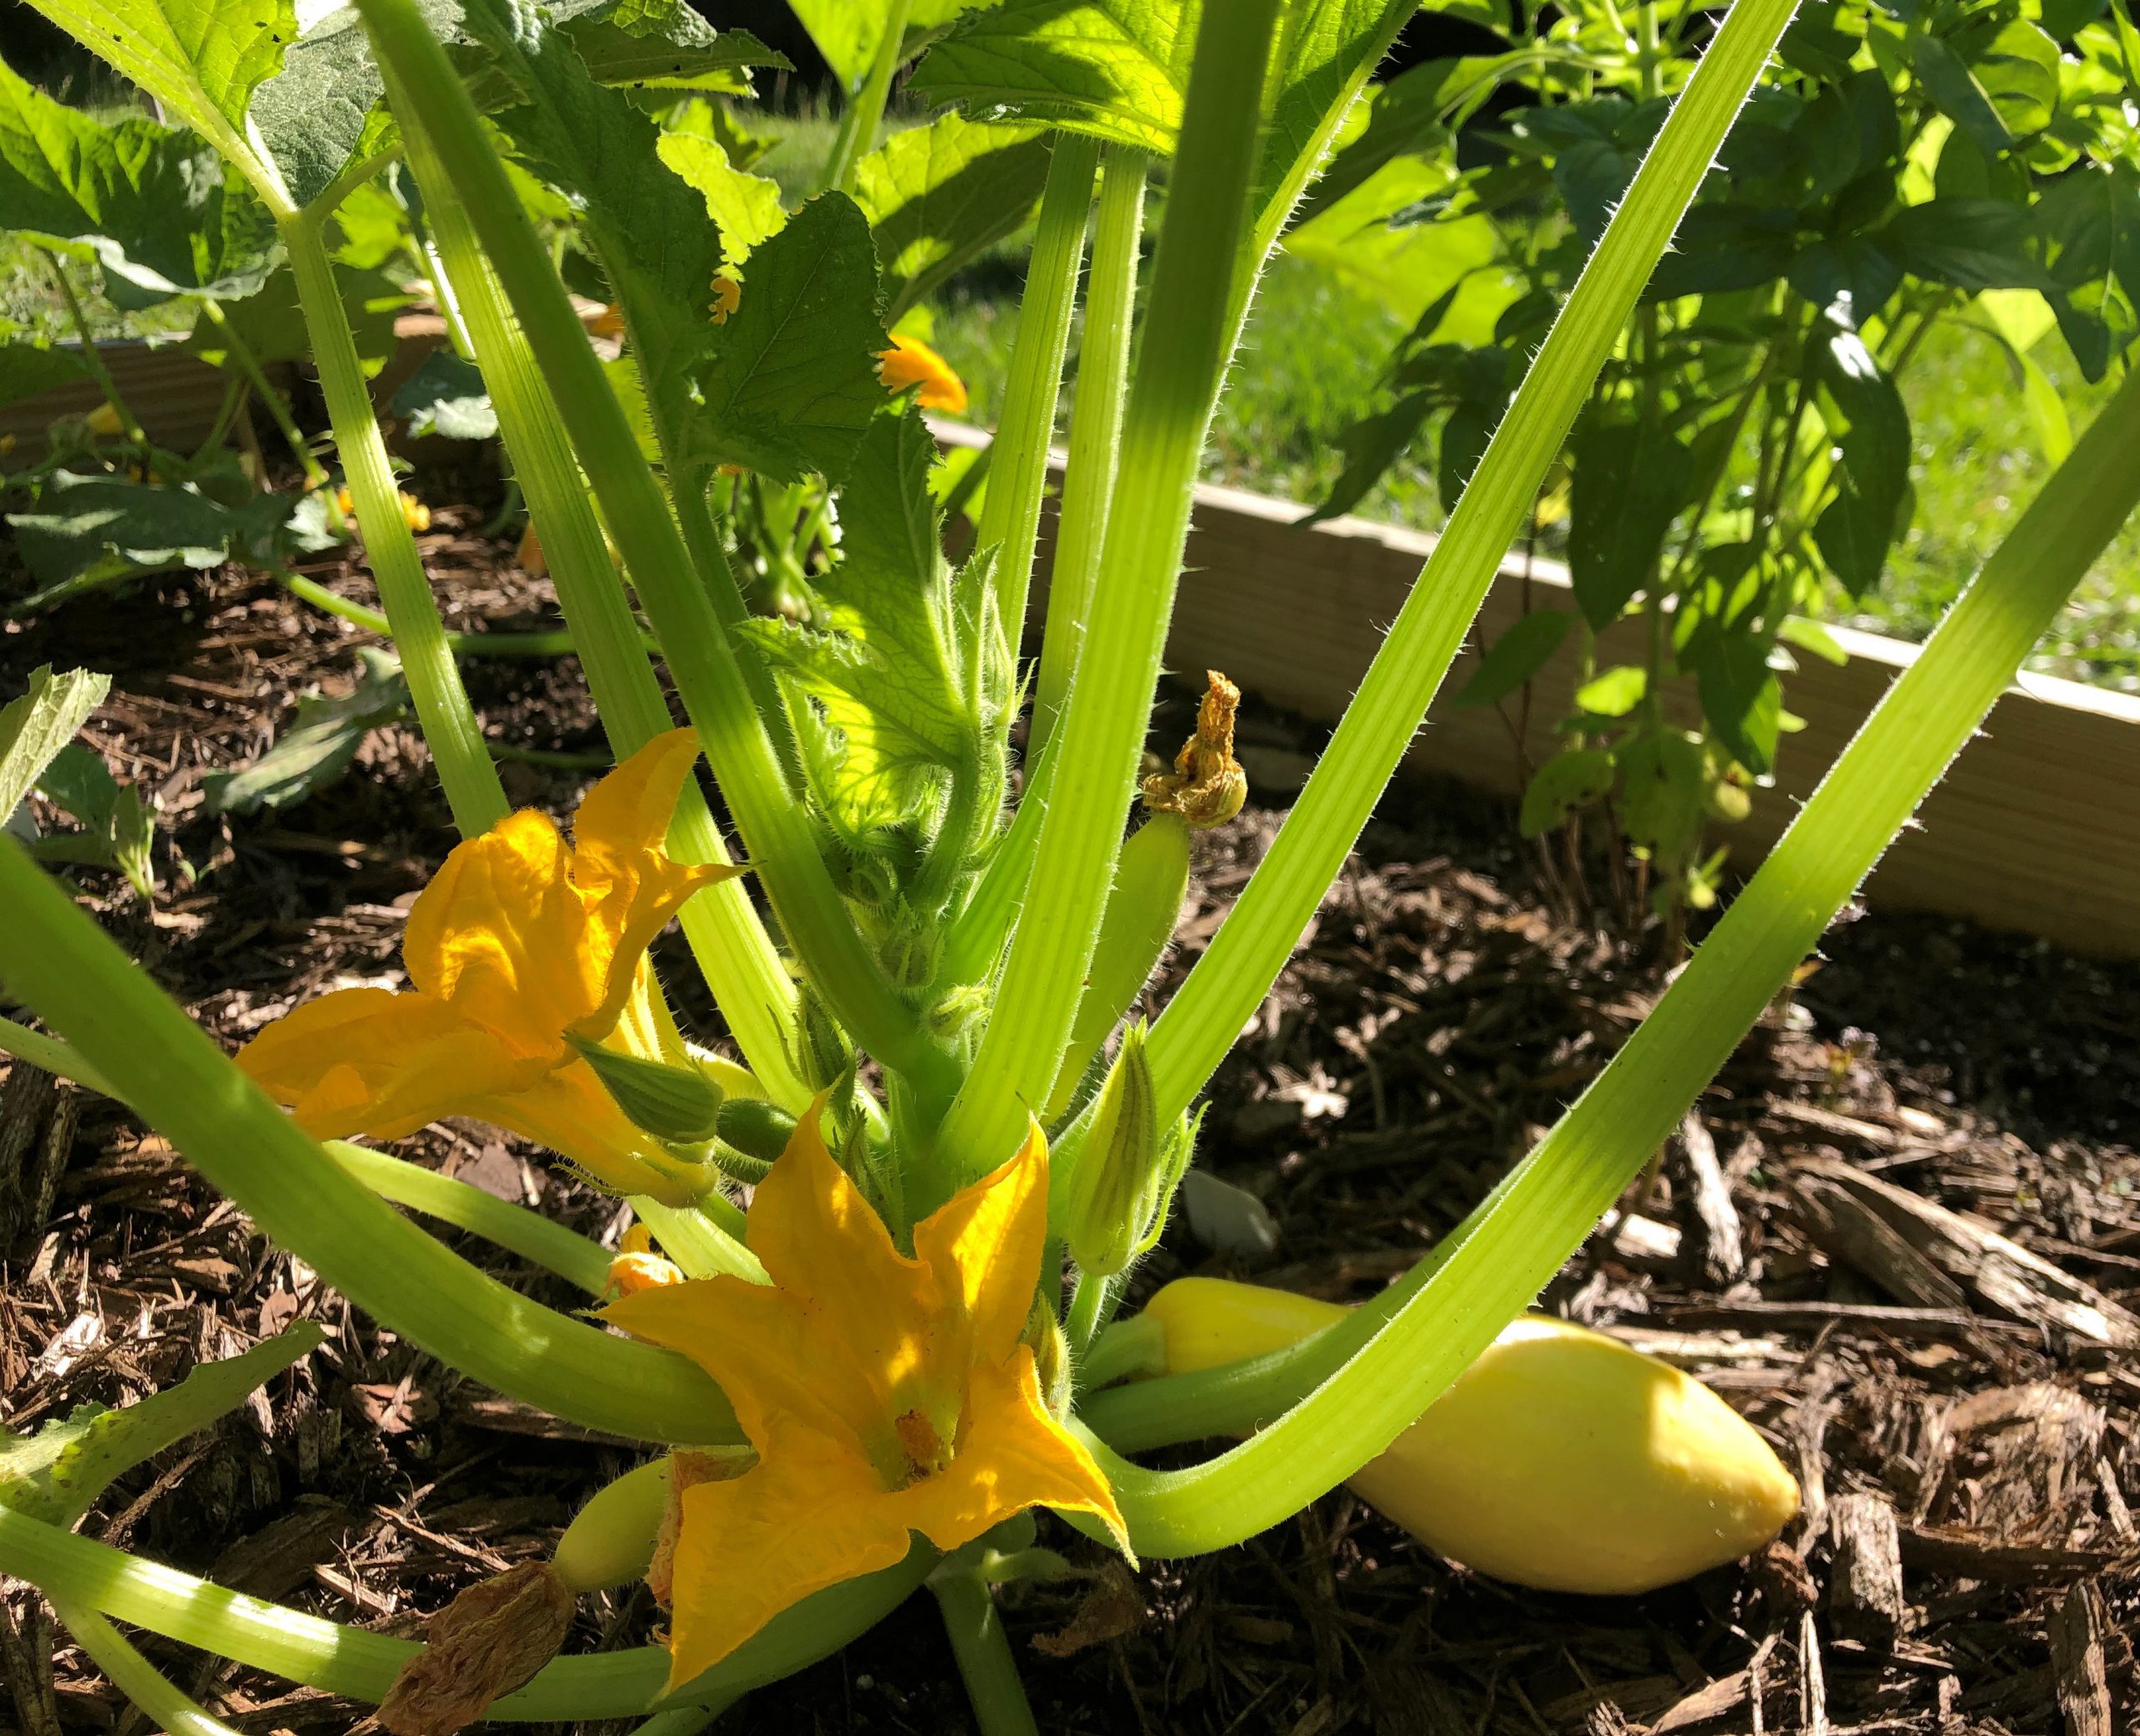
The next session on specialty vegetable and fruit crops will teach about the various exciting specialty crop opportunities in the Tri-State area such as artichokes, blackberries, Seminole pumpkins, and more. Finally, the meeting will also cover cucurbit disease updates and will be extremely useful if you already have a field or garden of watermelons, cucumbers, or squash! Come with questions! CEUs will be offered as well if you are a homeowner that holds a pesticide license.
Organic matter is the “glue” that will hold your soil together. Photo by John Edwards.
While, the audience for this conference is primarily small to medium sized, diversified cucurbit and vegetable producers in the tri-state region including the counties in the Panhandle, Alabama, and Georgia, the residential community is welcome to attend and will truly benefit with learning about soil health, cover crops, fertigation, drip irrigation, and specialty crops. The conference will be held at the Jackson County Extension Office in the Peanut Hall. We are planning a full morning with educational sessions and lunch to follow.
This meeting will be $5 at the door and pre-registration is highly encouraged. Please call our office at 850-482-9620 to reserve your seat and if you have any questions.
Tri-State Fruit and Vegetable Meeting
Thursday, January 26, 2023, 8:00 am- 1:00 pm at the Jackson County Agriculture Offices Auditorium, 2741 Penn Ave., Marianna.
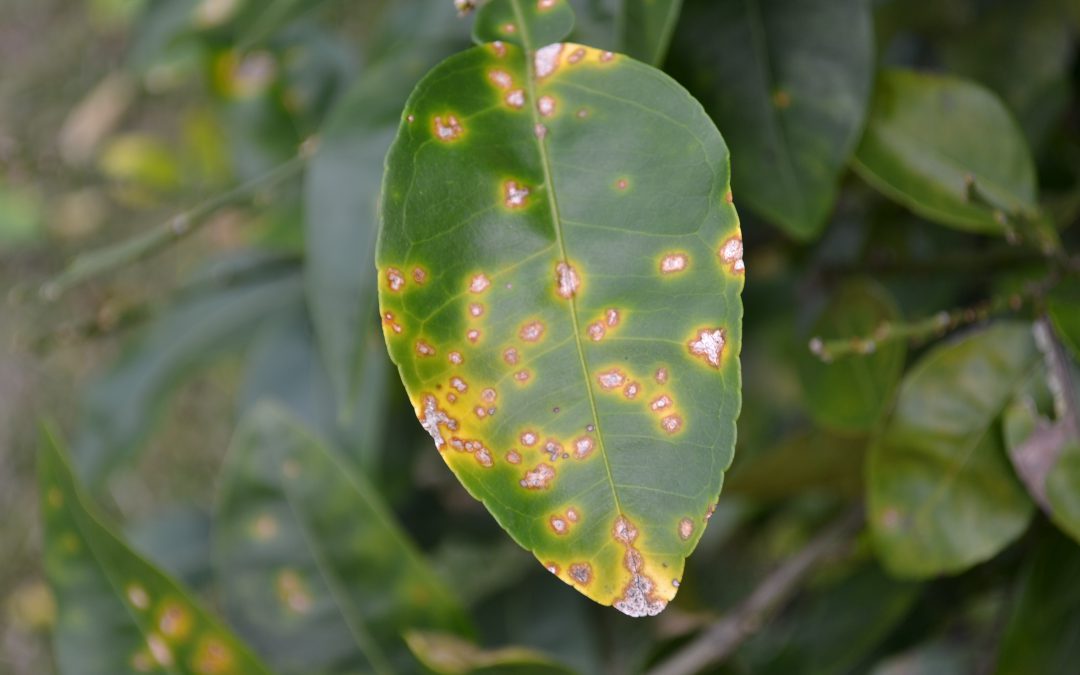
Citrus canker has made its way to Escambia County and may be more widespread that we realize. This bacterial disease was first seen in Northwest Florida almost 10 years ago in Gulf Breeze. Given time and the ease of transmission of this disease, we are now seeing affected citrus trees in both the east and west portions of Escambia County.
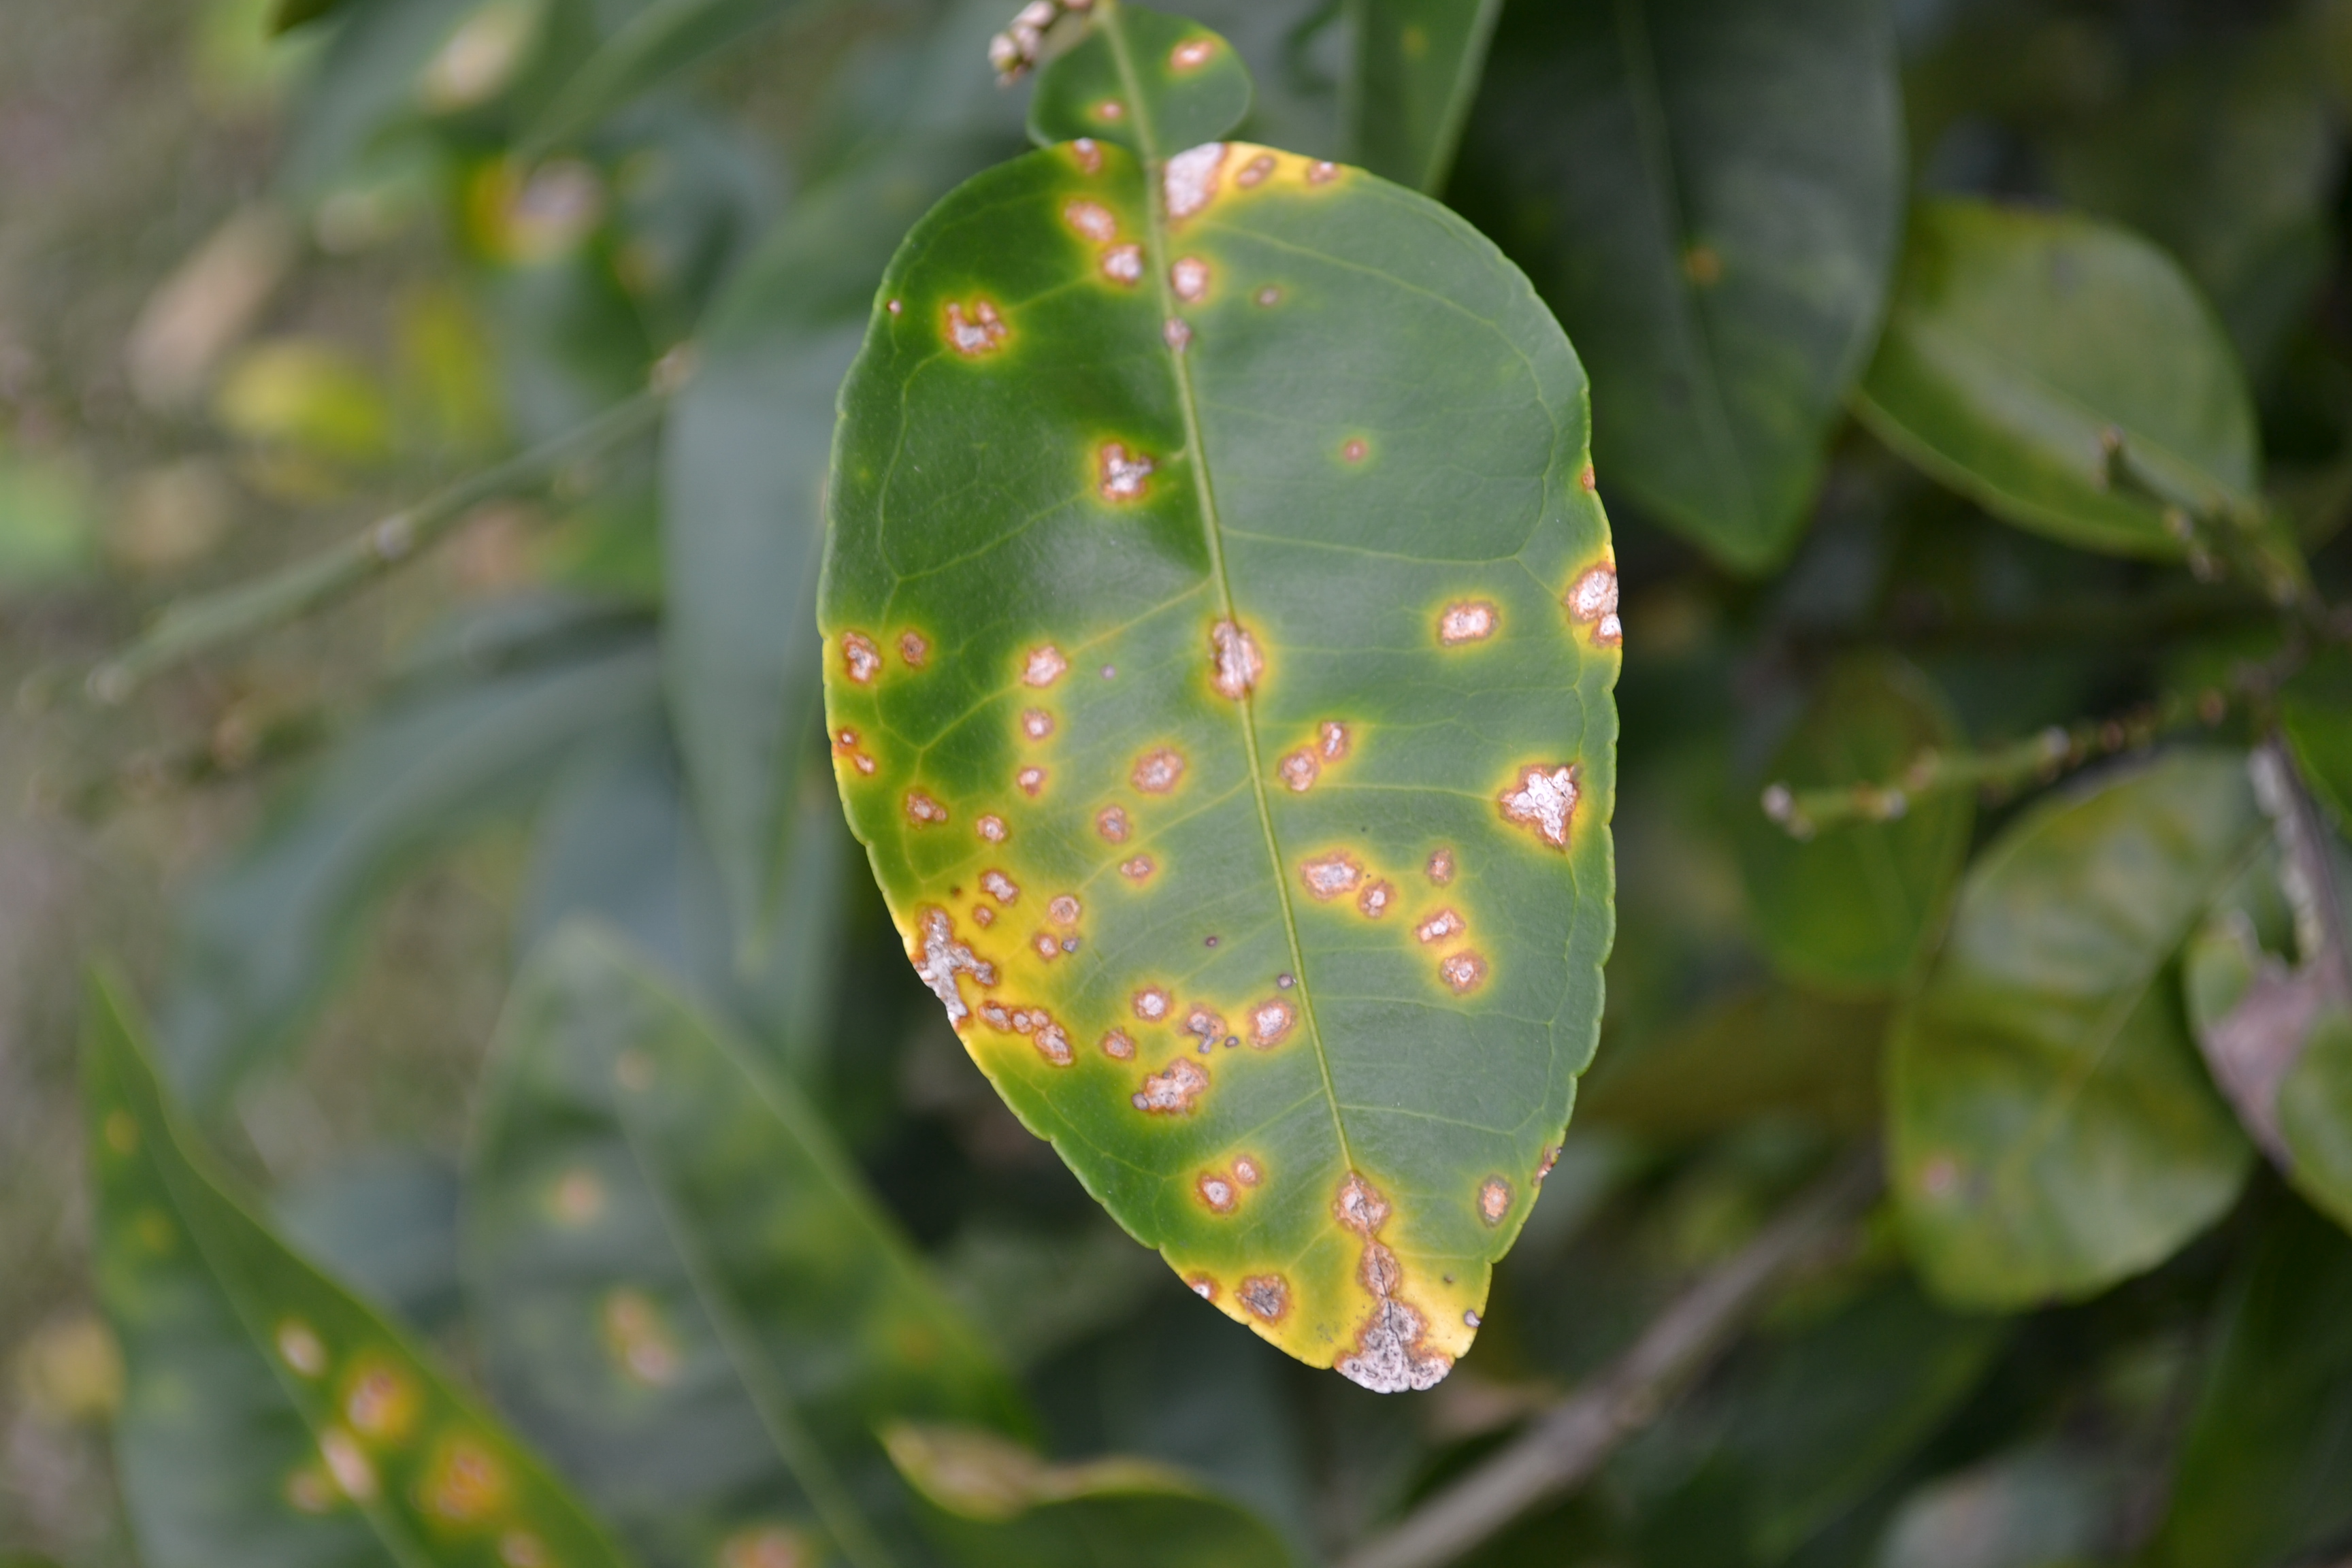
This disease is specific to citrus with grapefruit, lemon, and lime being the most susceptible to infection. The disease can infect all above ground tissues and often enters through natural openings and wounds of leaves, stems, and fruit. If you find an infection early in an isolated area of the tree, you can prune out and double bag the affected tissue for disposal. Often times, the disease is noticed only after a considerable amount of tissue and fruit are affected making it difficult to keep the disease in check.
Since the bacteria is so easily transmitted through rain and wind, it is difficult to prevent movement during our frequent storm events. People can also spread the disease by movement of unregulated citrus trees, on equipment, and even on clothing.
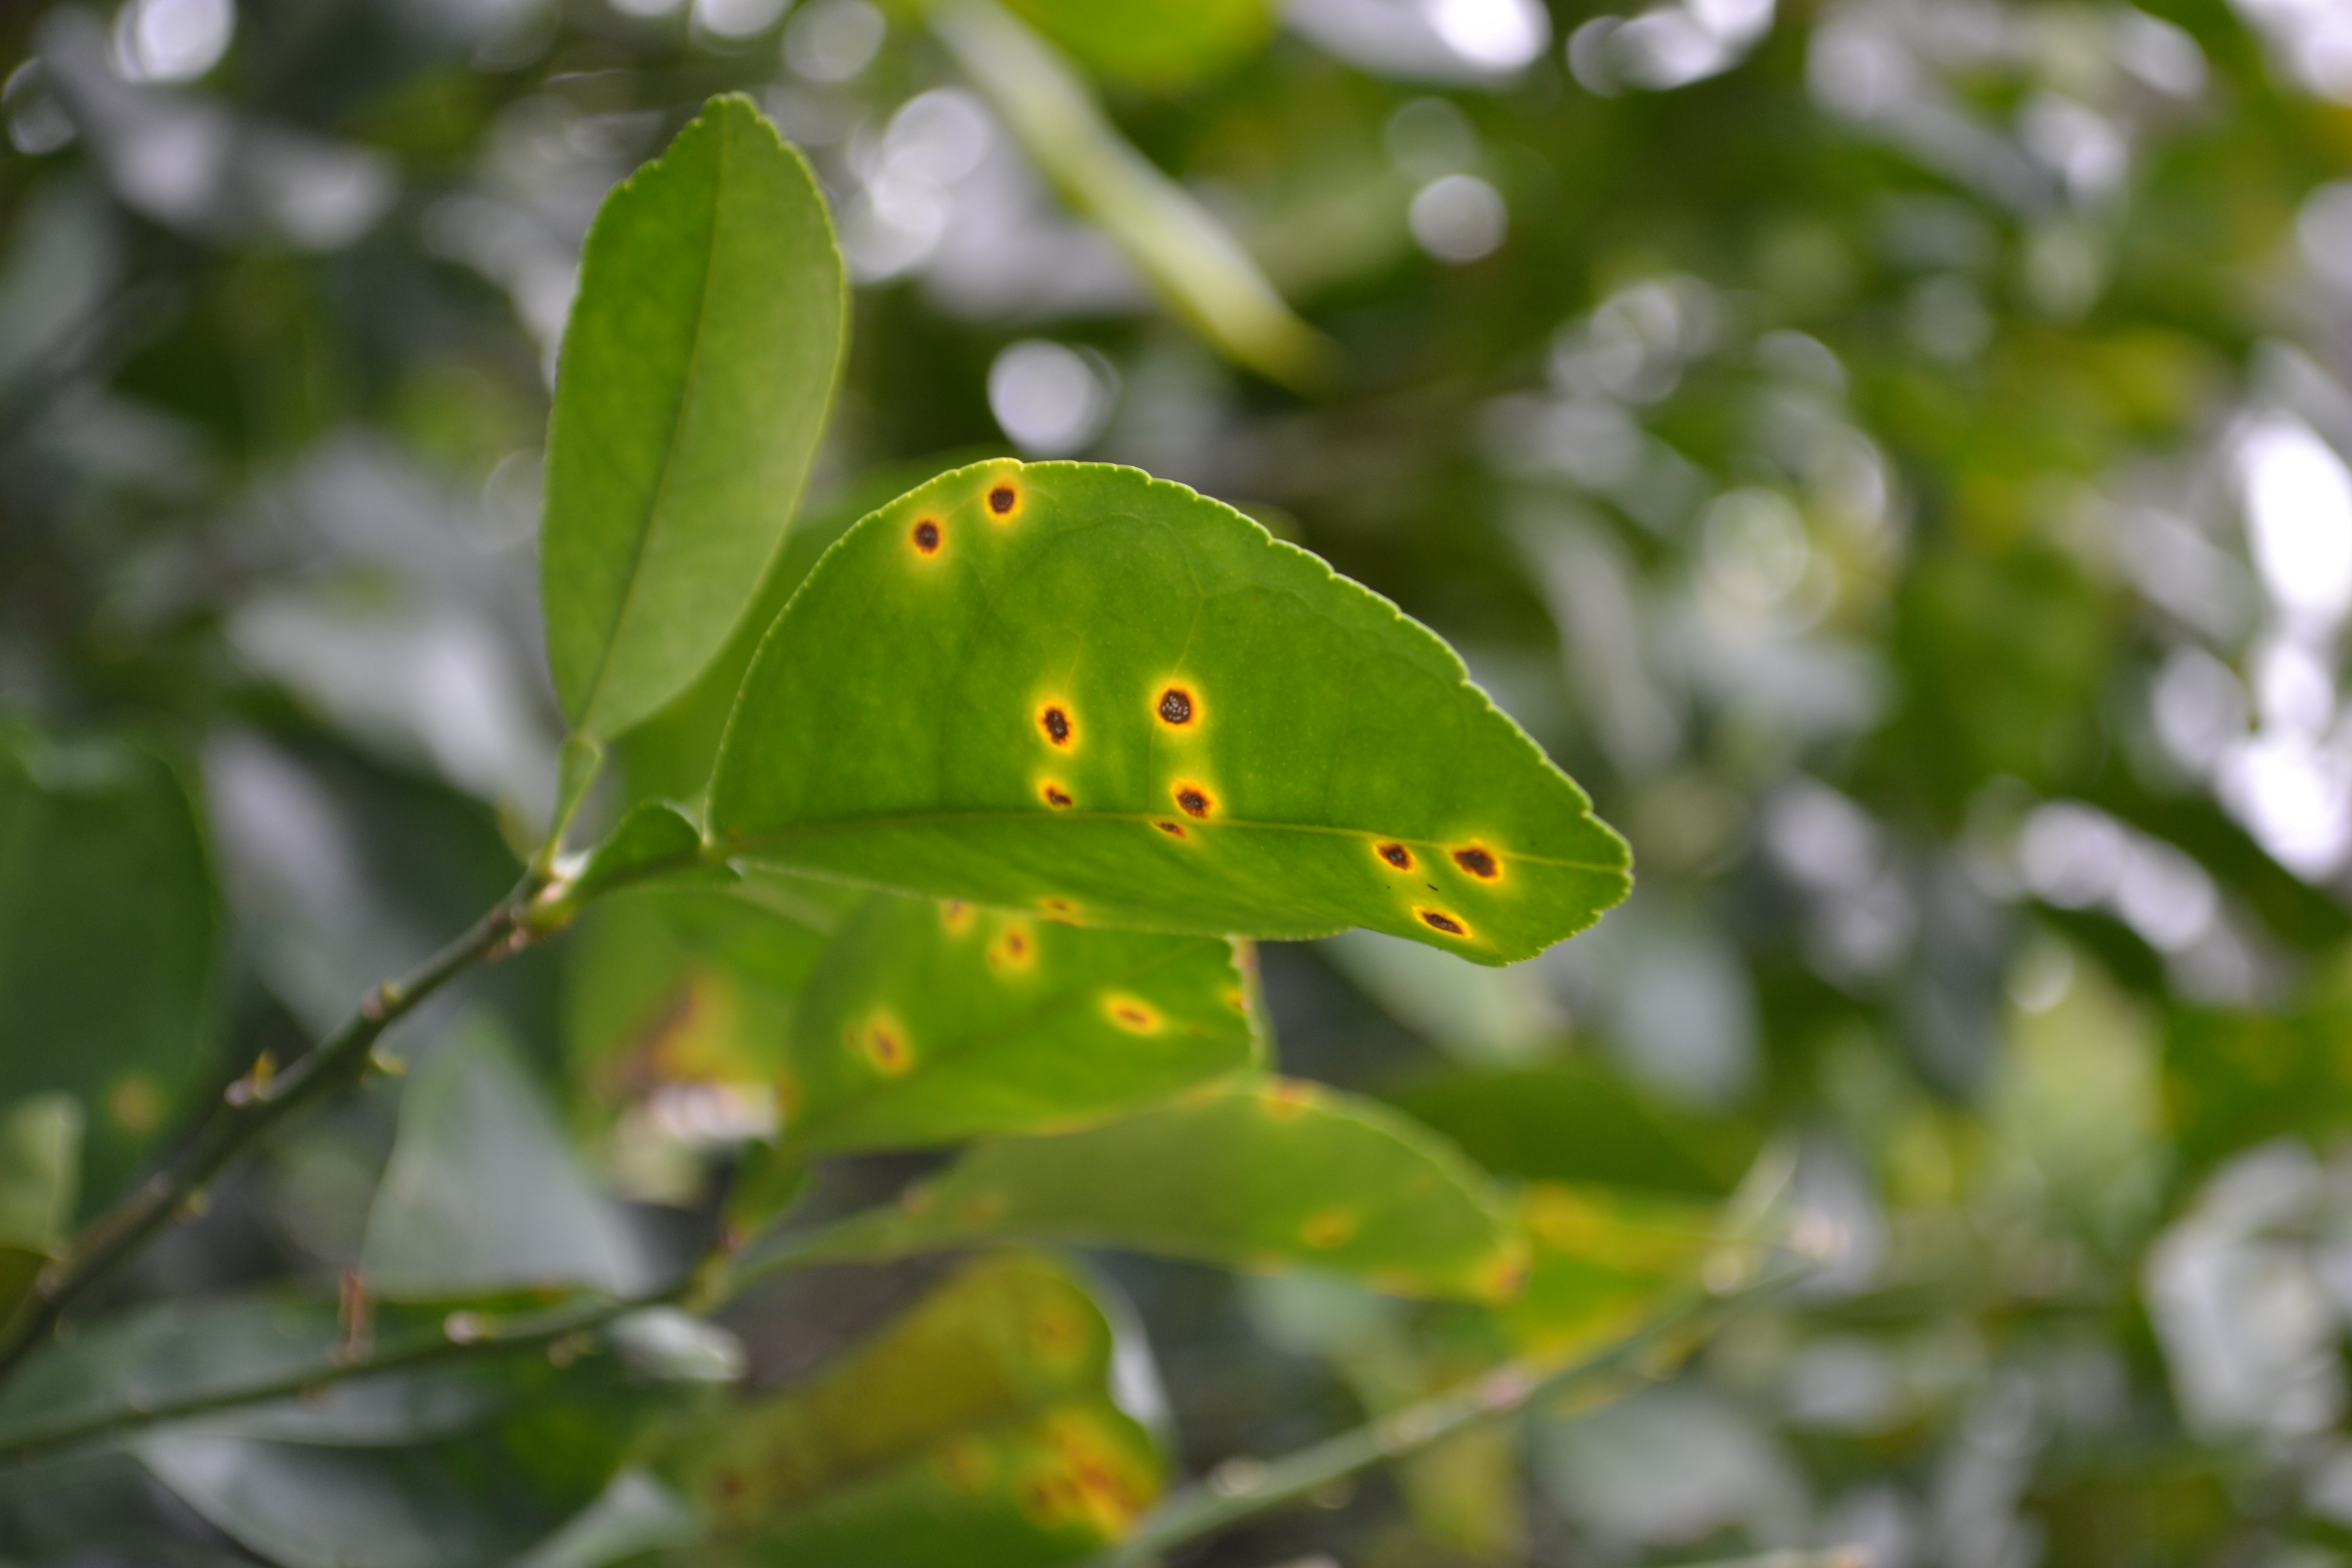
Citrus canker lesions appear on both the upper and lower surfaces of the leaves. Photo by Beth Bolles, UF IFAS Extension Escambia County
Lower surface with citrus canker. Photo by Beth Bolles, UF IFAS Extension Escambia County
If you suspect a citrus in your landscape has canker, do not bring a sample to your Extension office for identification. Take a photo of plant symptoms of upper and lower leaves, fruits, and stems so that your local Extension educators can assist with identification. The University of Florida publication https://edis.ifas.ufl.edu/publication/PP323 has quality photos and descriptions of the different stages of citrus canker, along with photos of other citrus issues.
Stem lesions on grapefruit. Photo by Beth Bolles, UF IFAS Extension Escambia County.
The bad new for homeowners is that there is not a treatment to cure citrus canker. If the infection is small (a few leaves or a branch), it may be possible to remove and dispose of the material, following proper sanitation guidelines. Homeowners may also suppress a small infection on fruit by using copper-based fungicides, applied at appropriate intervals. These fungicides only protect plant tissue for a short time by acting as a barrier to infection. See this UF publication for timing of copper sprays for fruit.
Once susceptible citrus are heavily infected, trees will have fruit and leaf drop, along with general decline and dieback. At this stage of the disease, homeowners should strongly consider removing the tree. If it can be burned on site in accordance with local burn laws, that keeps the material contained and may reduce disease transmission. Otherwise, all material should be double bagged and sent to a landfill. Do not compost any material onsite or at local composting facilities. Be sure to follow disinfecting techniques outlined in the University of Florida publication https://edis.ifas.ufl.edu/publication/PP323 for tools, hands, and clothing.
Since management of citrus canker is so difficult, prevention is the best method to protect your tree. If you are considering a citrus, choose a more resistant selection outlined in the UF publication, Table 2. Always purchase a citrus from a certified nursery and follow state guidelines which prohibits all propagation of citrus, unless registered to do so.
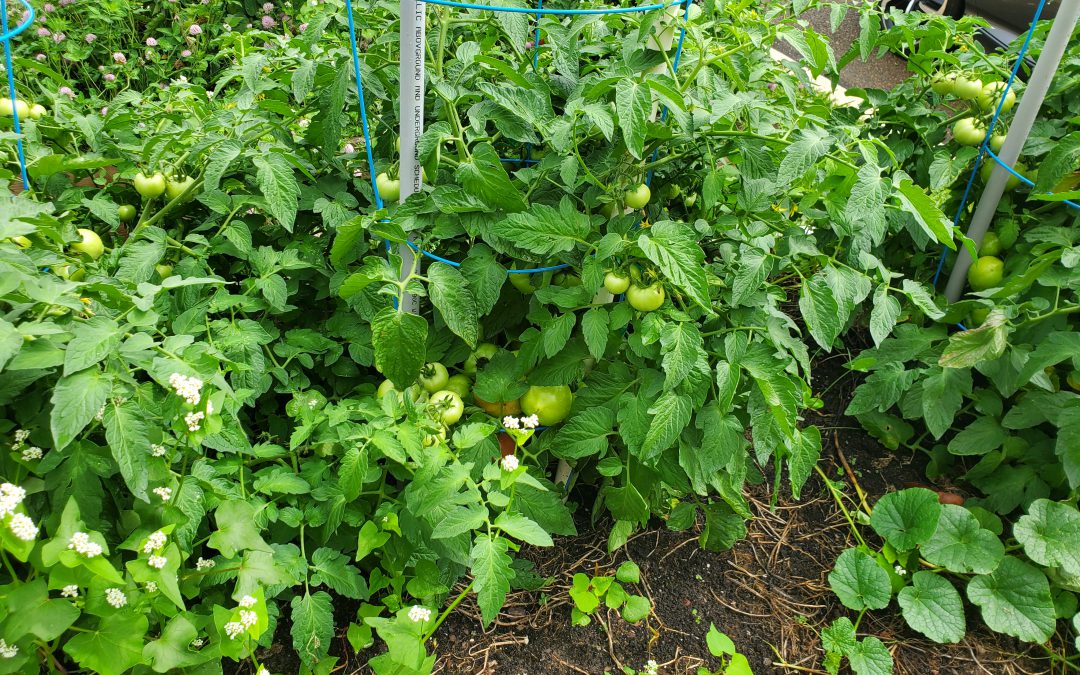
2022 has been a good tomato growing year for many Panhandle gardeners, myself included. It would have been difficult to have better climatic conditions to aid a terrific tomato harvest. After enduring a late frost just before Easter, the Panhandle then experienced two mild months in April and May that combined with nearly a month of dry weather during fruit development to deliver an excellent fruit set season with minimal disease and insect pressure. However, despite the favorable growing conditions, I have talked with several gardeners that once again struggled to yield a good crop of fresh garden tomatoes. Why is that? With the Panhandle tomato home gardening season nearing its conclusion, now is a perfect time to revisit 3 of the most common mistakes that prevent an excellent harvest!
Not Starting Early – Since Memorial Day, the rain and heat have really ramped up. These hot, wet conditions are perfect for developing tomato plant problems like fungal and bacterial diseases, not to mention the fact that tomato plants will stop setting fruit once nighttime temperatures rise above 75 F. While spraying fungicides preventatively can certainly help decrease disease incidence, the absolute best thing a gardener can do is try to get ahead of the disease-bringing heat and humidity by starting plants early when more favorable growing conditions prevail. So, what is early? I try to have tomato transplants in the ground by March 15 or soon after*. If you plan to grow plants from seed, they should be started indoors mid-January for planting outdoors in mid-March. Most tomato varieties take between 60 and 80 days to mature after planting, so a mid-March planting date normally yields harvestable tomatoes by the middle of May, comfortably beating the June disease deadline. *Planting early means protecting plants from occasional late frosts. Be prepared!
Not Scouting Your Plants – Pest and disease problems are a lot easier to manage if caught early and the best way to do that is to spend time with your plants. If you scout (just walking by and giving plants a short inspection) daily, you’ll learn what tomato plants and the beneficial insects that hang around all the time are supposed to look like an and be able to spot abnormalities and bad bugs when they occur. While tomato diseases and pest outbreaks can certainly cause a lot of damage in a short amount of time, they don’t reach disastrous levels immediately – be vigilant and catch them early!
Not Fertilizing and Watering Correctly – It takes a lot of energy for a tomato plant to grow a nice, bushy plant AND yield an abundance of America’s favorite vegetable (or fruit, depending on who you ask). To produce that necessary energy, gardeners must ensure plants receive adequate nutrition and water. Here’s my general prescription. At planting, apply a general purpose, slow-release fertilizer according to the label rate (for example, Osmocote, Harrell’s, or similar) and gypsum (a calcium supplement that helps prevent blossom end rot) at one pound per hundred square feet of garden. Then, supplement later in the season with a quick-release general purpose fertilizer sufficient to drive growth and fruit development. Watering is more of an ongoing concern. For the first couple of weeks of the tomato plant’s life, you can get by with watering once a day or every other day. As the plants get larger and the days get hotter however, watering twice daily is often needed to prevent wilting down in the heat of the day. Allowing tomato plants to wilt, even for a little while, is an excellent way to encourage blossom end rot and a subpar harvest!
When tomato season rolls around in 2023, remember to start early, scout often, and water and fertilize correctly. Follow those few tips and you’ll be well on your way to a great harvest in 2023! For more information about growing tomatoes or any other horticultural or agricultural topic, contact us at the UF/IFAS Calhoun County Extension Office at 850-674-8323 or email d.leonard@ufl.edu. Happy Gardening!