by Daniel J. Leonard | May 27, 2019
Talk to nearly any Panhandle gardener and one of the first things brought up in conversation is the difficulty growing large, beefsteak/slicing tomatoes (Solanum lycopersicum) in their home garden. Large tomatoes are indeed among the more challenging garden vegetables in North Florida, affected by myriad pests, pathogens and abiotic issues. However, giving up growing this garden favorite is unwarranted as success can be had by following a couple of often overlooked, simple steps to ward off potential problems.
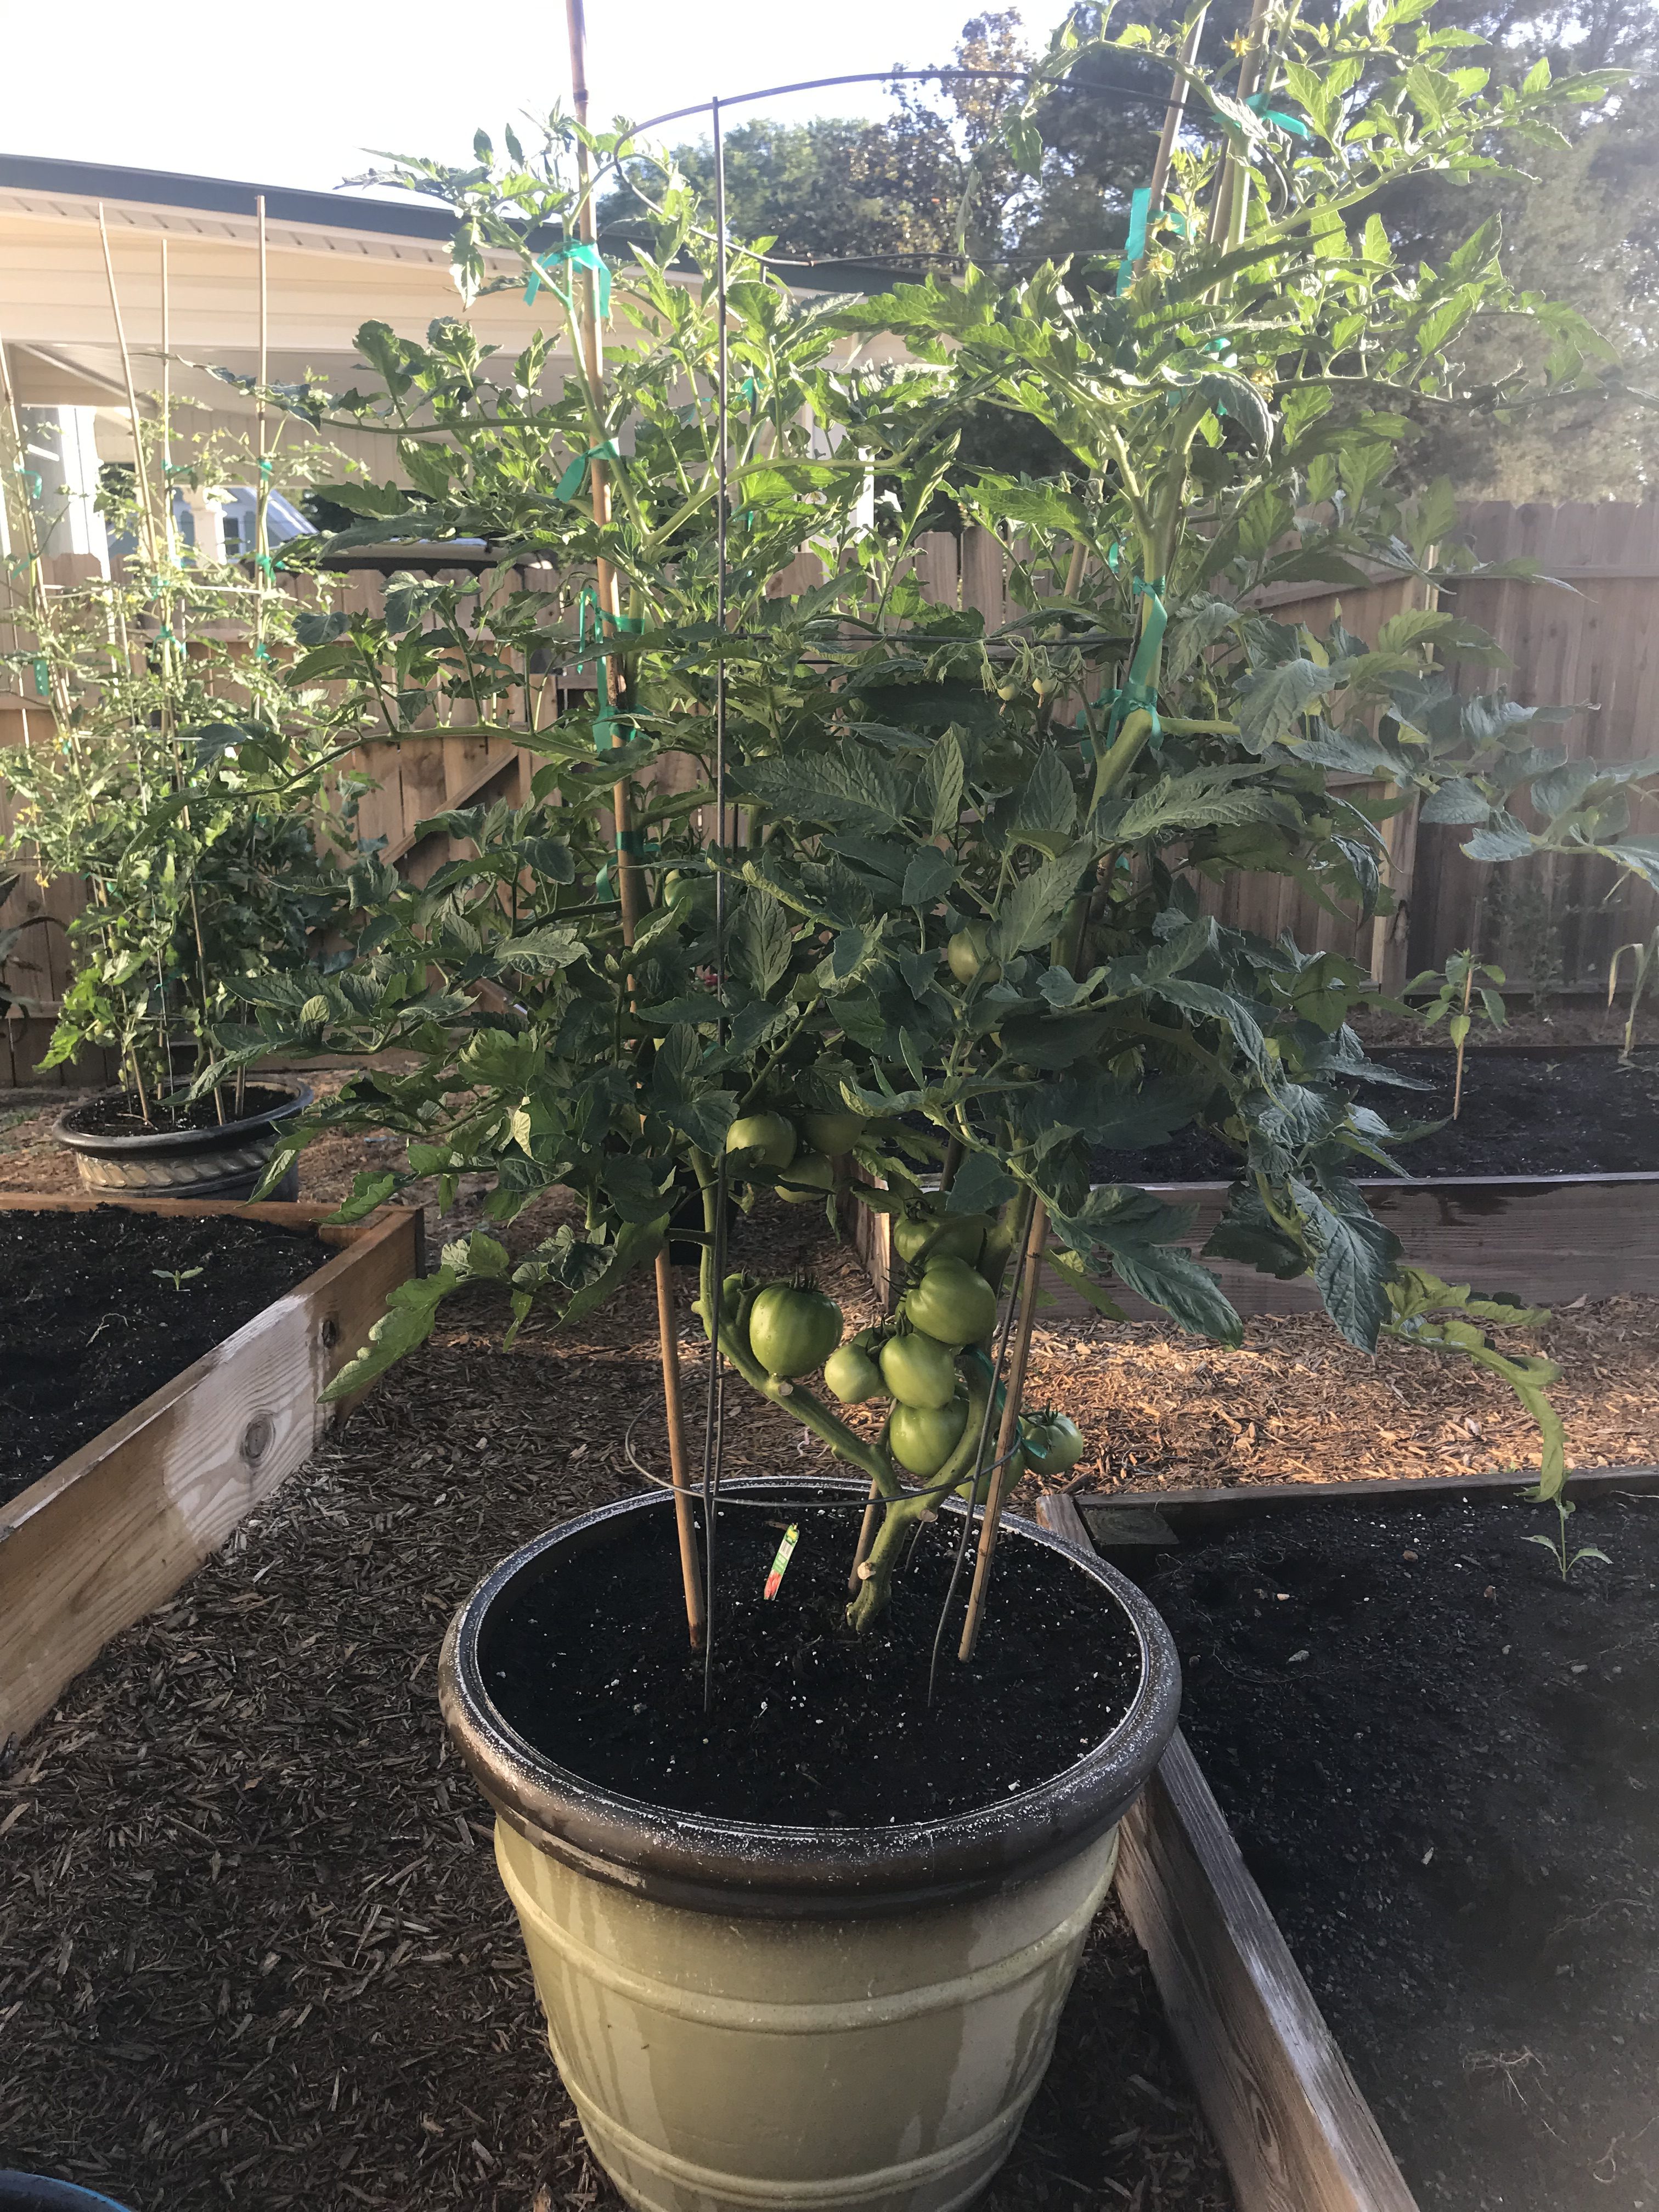
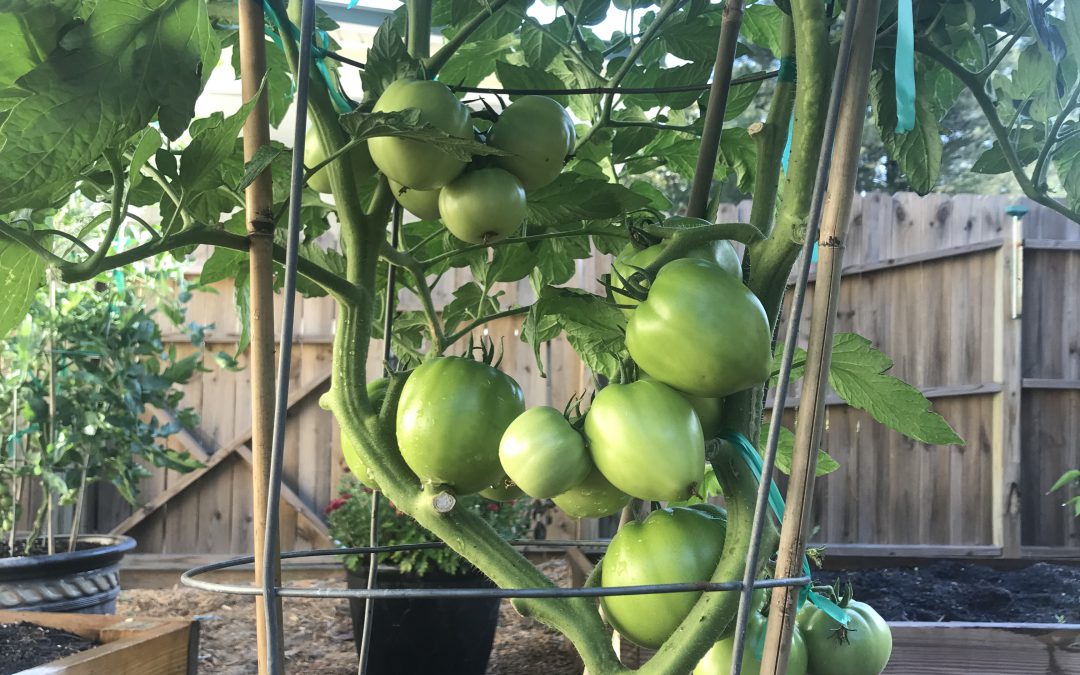
Choose Resistant Cultivars – One of the major recent gardening trends is the rise of heirloom veggies, particularly heirloom tomatoes. While many of these varieties certainly are interesting and often possess superior flavor/texture, heirlooms are, as a group, extraordinarily susceptible to disease in our climate. Fortunately for gardeners, there are a number of excellent varieties available with large resistance profiles to many common diseases and a similar taste profile to heirloom favorites! ‘Big Beef’ (pictured), ‘Better Boy’, ‘Celebrity’, and ‘Skyway’ are just a few of the many great cultivars with extensive disease resistance available as transplants at garden centers or as seed from quality online seed vendors.

Tomato ‘Big Beef’ in 15 gallon decorative container
Start Early – Once, you’ve selected the proper cultivar, the next key is to get them in the ground early! I’m convinced one of the primary reasons folks fail with tomatoes is waiting for “traditional” garden planting dates. For instance, an old tradition in the South is to plant your garden on Good Friday before Easter. However, according to Johnny’s Selected Seeds Southeast Sales Representative Blake Thaxton, tomatoes should be germinated and growing in the garden no later than March 15. Mr. Thaxton notes two primary reasons for this, the most important being pest/disease avoidance. Beefsteak tomato varieties take around 70 days from planting to harvest, so a March 15th planting date yields ripe tomatoes around the third or fourth week of May, when pest/disease pressure is still manageable. Pests and disease occurrence becomes exponentially worse in the Panhandle as May trickles into June and July, therefore it is critical that your fruit begin ripening prior to this onslaught. An important second motivation to plant early is that tomatoes stop setting fruit when nighttime temperatures rise above 75°F. At these temperatures, tomato pollen is rendered sterile and though the plant will continue flowering, no fruit will be set.
Mulch – Another overlooked best management practice in backyard veggie gardening is mulching! Those of us who tend flower beds already know many benefits of mulch like soil temperature moderation, weed prevention, and moisture conservation. But for tomato growers, mulch has another benefit – disease prevention! Several serious diseases that affect tomato are soil-borne pathogens (i.e. Early Blight, Late Blight, Bacterial Spot, etc.). These pathogens find their way onto plants either indirectly via water splashing from soil onto leaves or direct contact from leaves and fruit resting on the soil. To prevent these pathogens from infecting plant tissue, apply an organic mulch (preferably wheat straw or tree leaves) under and around plants. This simple step goes a long way toward season-long, yield-saving disease prevention.
Consistent Watering – Everyone knows plants need water but what you might not know is that irrigation consistency makes a huge difference in plant health, particularly tomatoes. Consistent watering is key in helping ward off one of the most frustrating tomato maladies, blossom end rot (BER) – you know, the one where the bottom end of your perfectly good tomato fruit turns to a brownish mush! Though BER is caused by calcium deficiency, the condition is commonly induced by creation of distinct wet and dry periods from non-regular watering, interfering with calcium uptake and availability to the plant. So, while you may have adequate soil calcium, if you don’t water correctly, the condition will happen anyway! It’s also good to keep in mind that mature tomato plants use large quantities of water daily, so during the heat of summer, plants in containers may need to be watered multiple times daily to maintain consistently moist soil. Think about it, you don’t drink 8 glasses of water when you wake up and then never drink again throughout a hot day. A tomato is no different. Allowing your plants to wilt down before providing additional water ruins productivity and can induce BER.
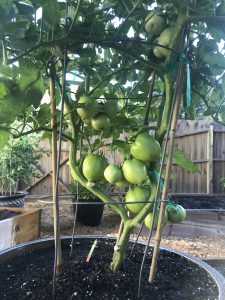
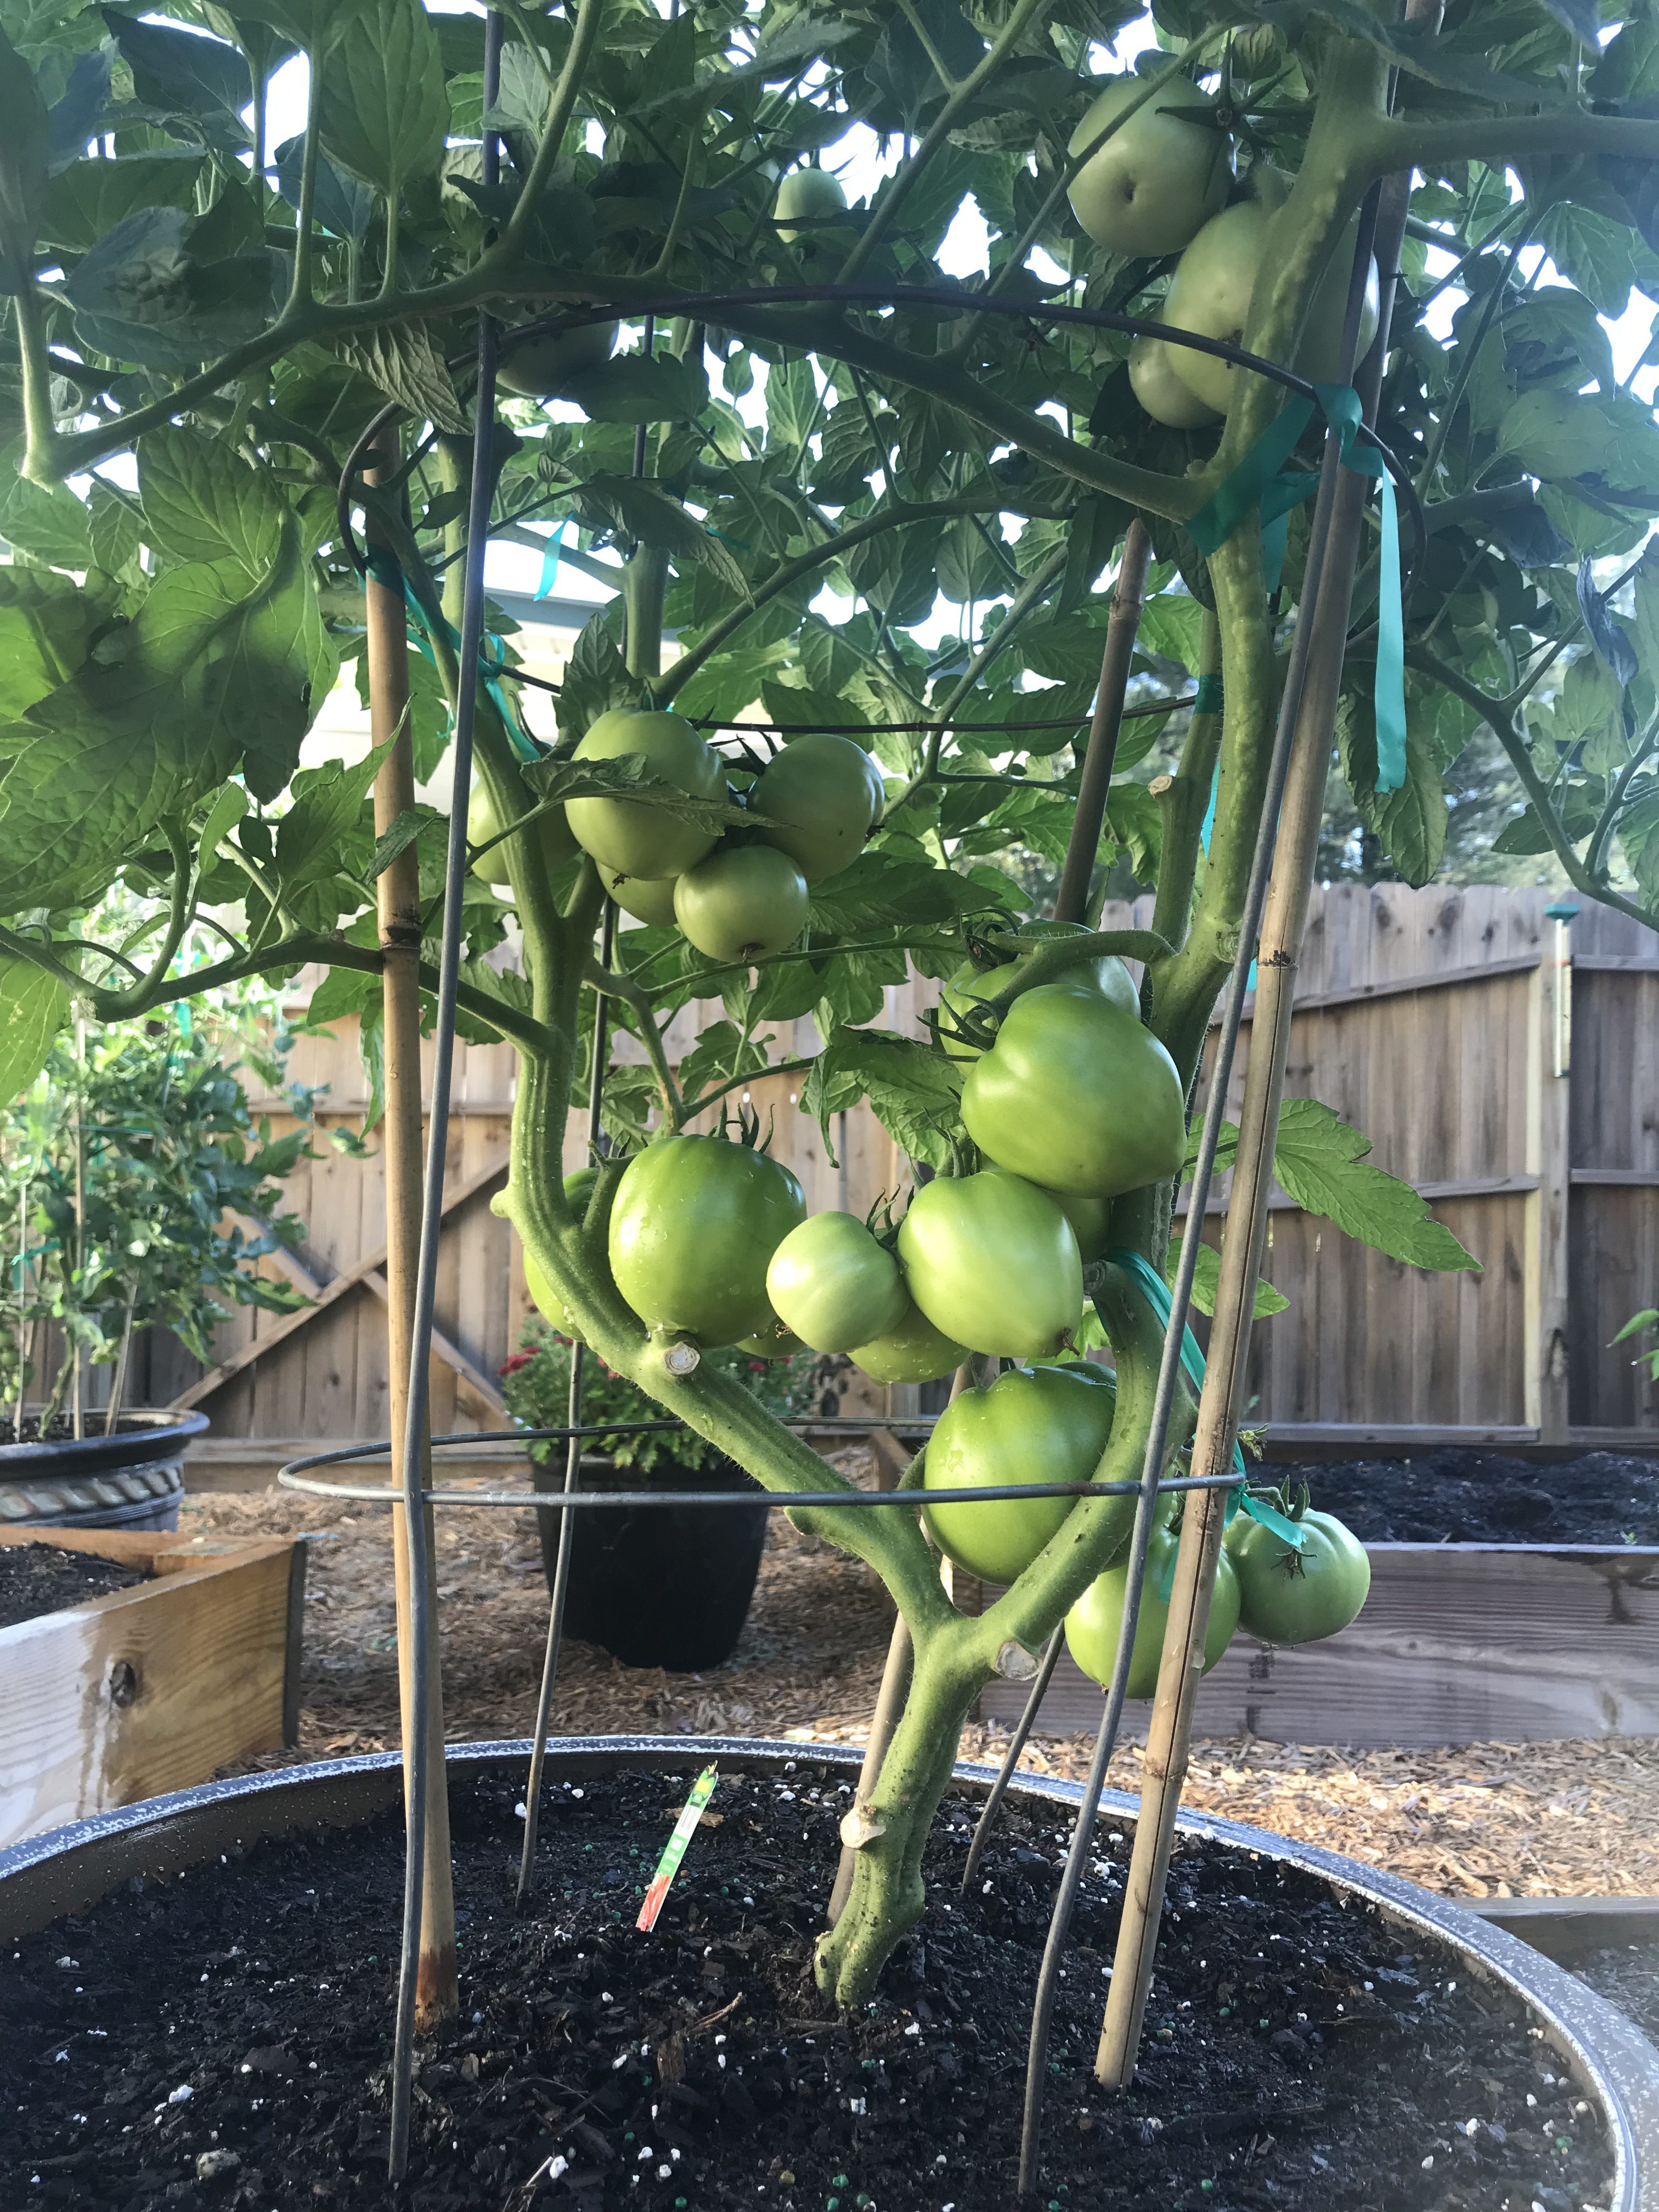
Tomato ‘Big Beef’ demonstrating pruning for soil clearance and airflow.
Pruning – I get it. Once you’ve nursed your baby tomato from a wee transplant or seed into a rapidly growing and flowering plant, it seems counter-intuitive to break out the pruners, but to keep your tomato plant as healthy as possible for as long as possible, that is what you must do! Pruning tomatoes should accomplish two things. First, remove the bottom layer of foliage from the plant base, so that water will not readily splash onto the lowest remaining leaves. (I tend to remove all leaves up to the second set of flowers 8-12” from the soil’s surface.) As with mulching, this prevents bacterial and fungal pathogens from spreading easily from the soil surface onto your plant. Second, tomato plants, especially the vigorous indeterminate varieties, often grow more foliage than is necessary for fruit production. This excess foliage can prevent airflow and trap moisture in the canopy of the plant, promoting disease. To open up the canopy and allow for more airflow, I prune off leaves that grow from the primary stems inward to the center of the plant. The idea is to keep the inside of the plant open while allowing enough leaves to power photosynthesis and shade the developing fruit below.
Tomatoes are notoriously hard to grow, but by following a few easy preventative practices, gardeners can greatly increase their chances of realizing harvestable fruit come summer. Please keep in mind that this is not an exhaustive list that will ensure disease-free plants over the entire growing season (you should also get a soil test to make sure your pH and soil fertility are correct and ideally you’d never work in your tomatoes when they are wet, etc., but this is a good place to start!). However, a little bit of planning and prevention early in the season can make growing tomatoes a lot less frustrating! As always, if you have questions regarding tomatoes or any other horticultural topic, please contact your local UF/IFAS Extension Office. Happy gardening!
by Daniel J. Leonard | May 20, 2019
Spring is a wonderful time of year. After months of dreariness and bare branches, bright, succulent green leaves and flowers of every kind and color have emerged. So too, have emerged gardeners and outdoor enthusiasts ready to tackle all their home and landscape improvement projects planned over the winter. However, this is also the time, when folks first start paying attention to their plants again, that strange, seemingly inexpiable plant problems crop up!
All plant problems can be divided into two categories: biotic problems, or issues caused by a living organism (think insects, fungus, and bacteria), and abiotic problems, issues that arise from things other than biotic pests. It’s the first category that people generally turn to when something goes wrong in their landscape or garden. It’s convenient to blame problems on pests and it’s very satisfying to go to the local home improvement store, buy a bottle of something and spray the problem into submission. But, in many of my consultations with clientele each spring, I find myself having to step back, consider holistically the circumstances causing the issue to arise, scout for pests and diseases, and if I find no evidence of either, encouraging the person to consider the possibility the problem is abiotic and to adopt patience and allow the problem to correct itself. Of course, this is never what anyone wants to hear. We always want a solvable problem with a simple cause and solution. But life isn’t always that easy and sometimes we must accept that we (nor a pest/disease) did anything wrong to cause the issue and, in some cases, that we ourselves actually caused the problem to happen in the first place! To illustrate, let’s consider two case studies from site visits I’ve had this spring.
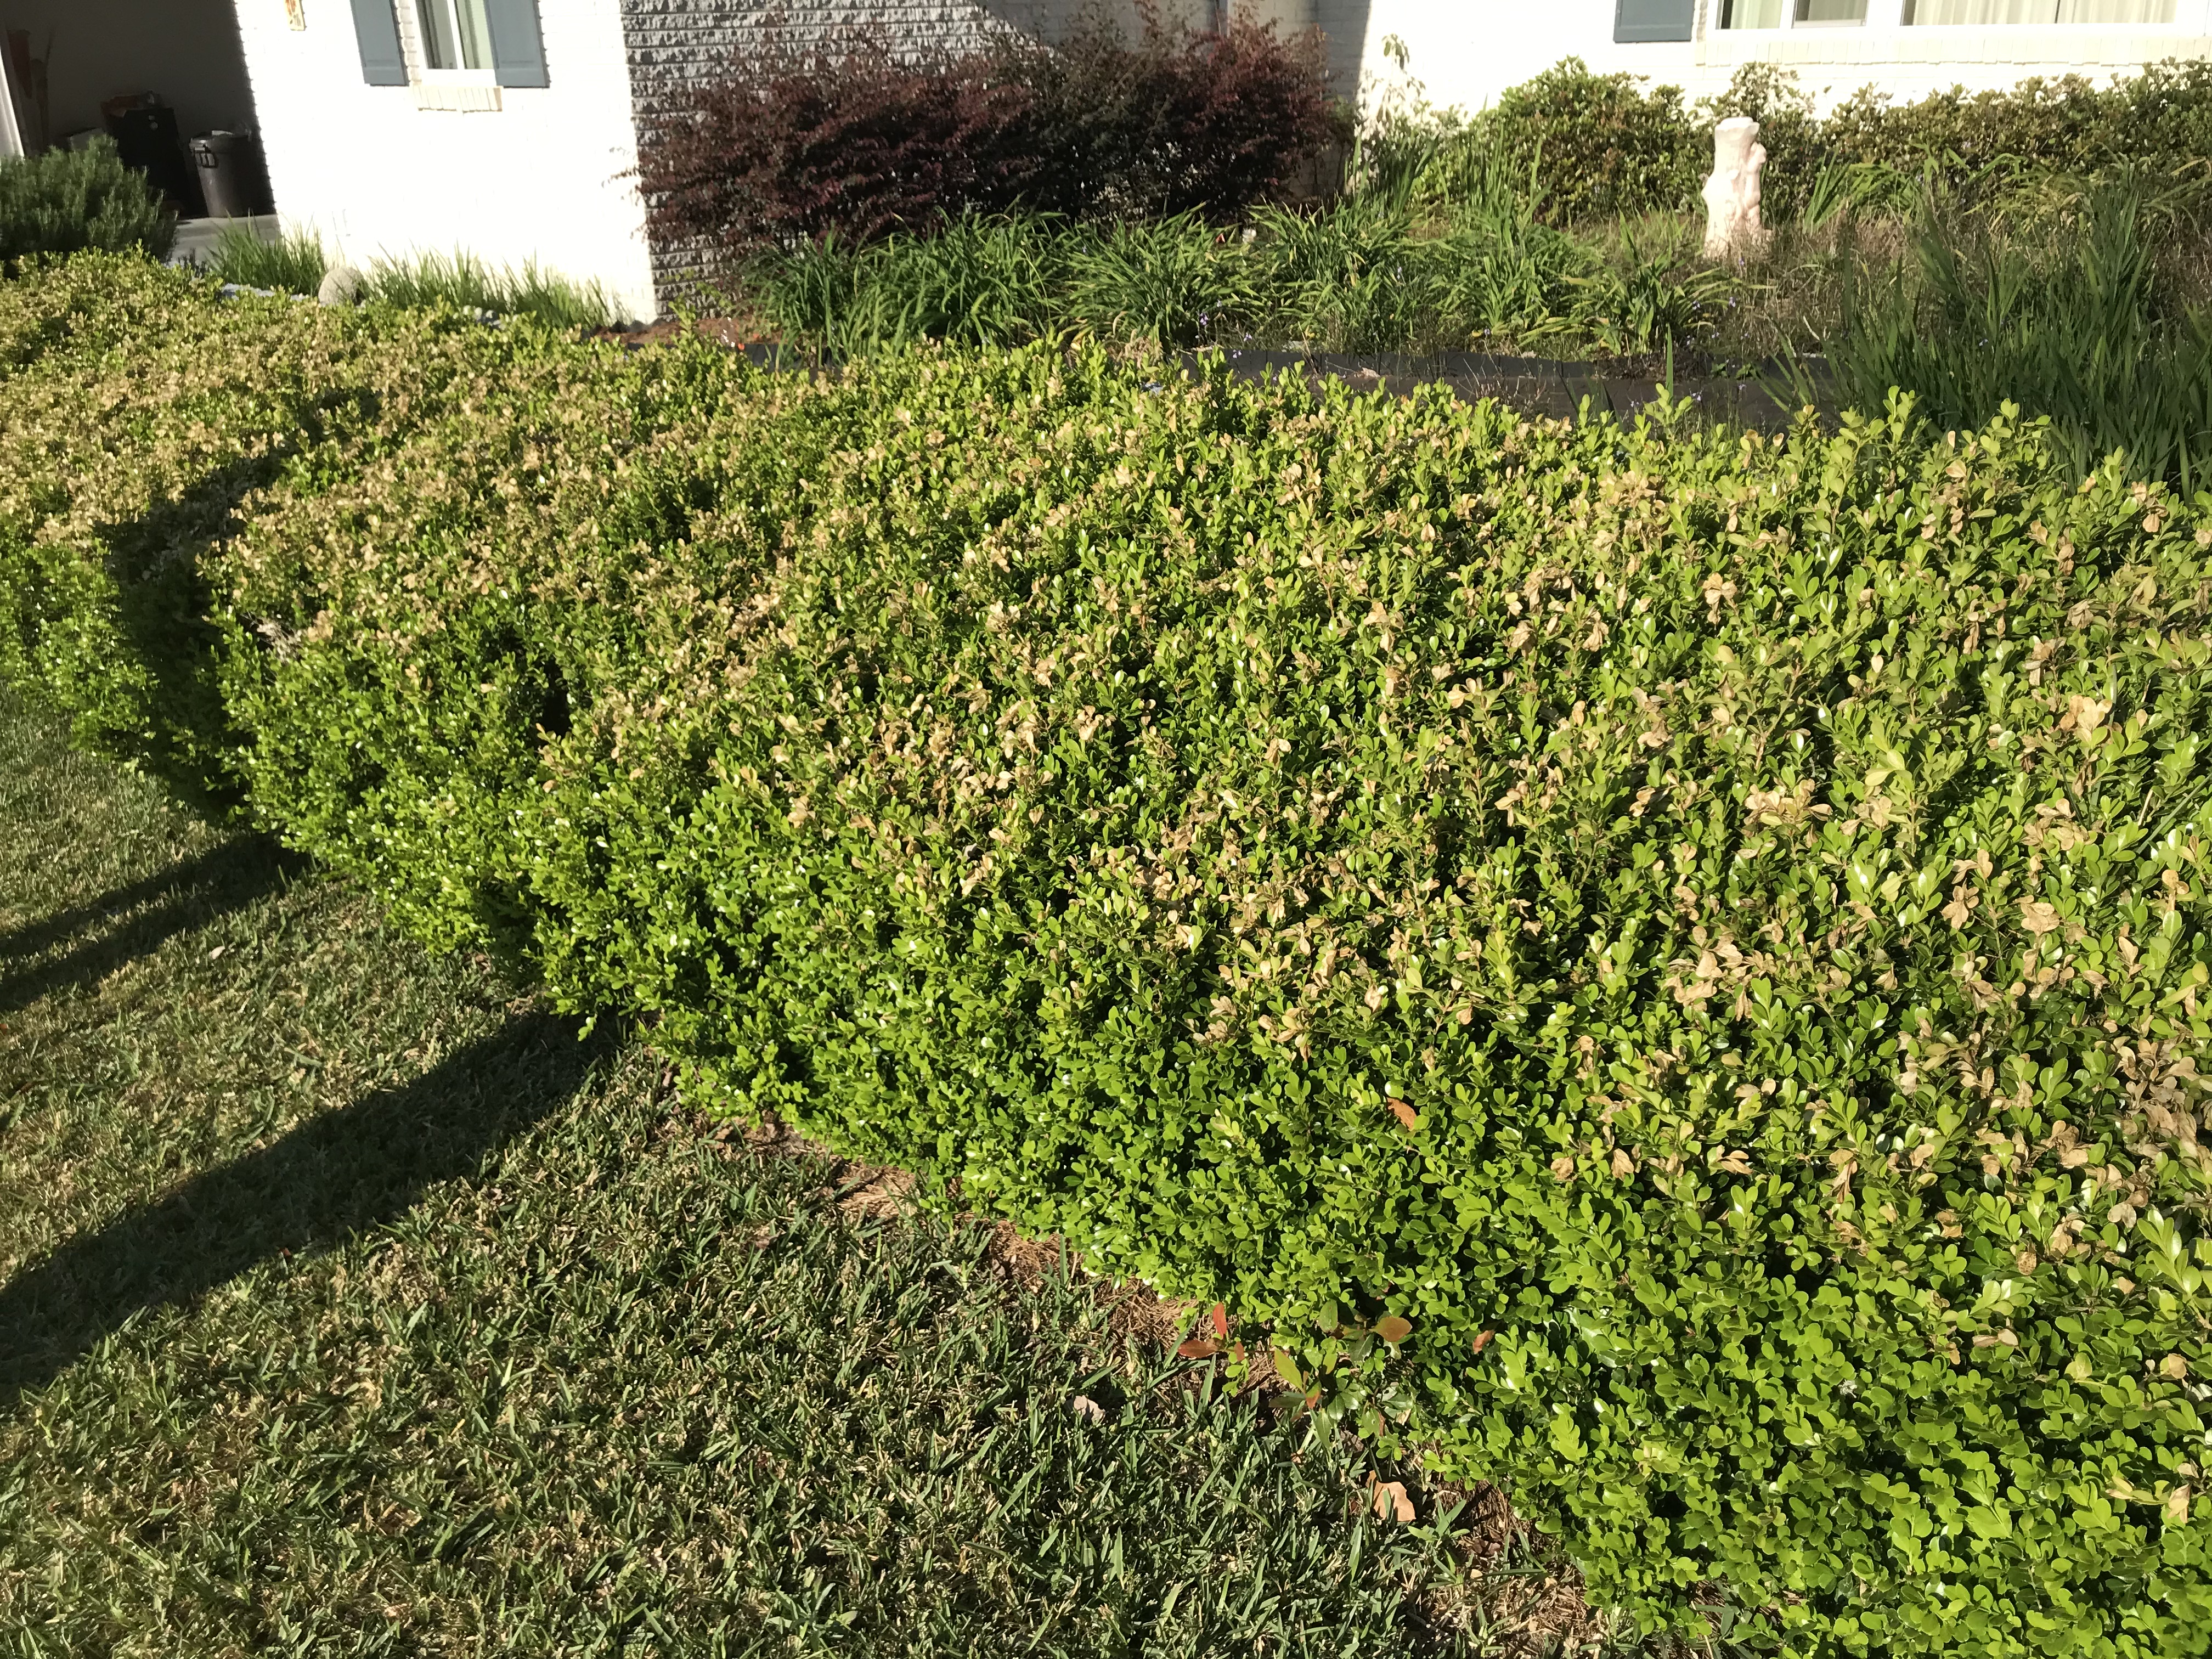
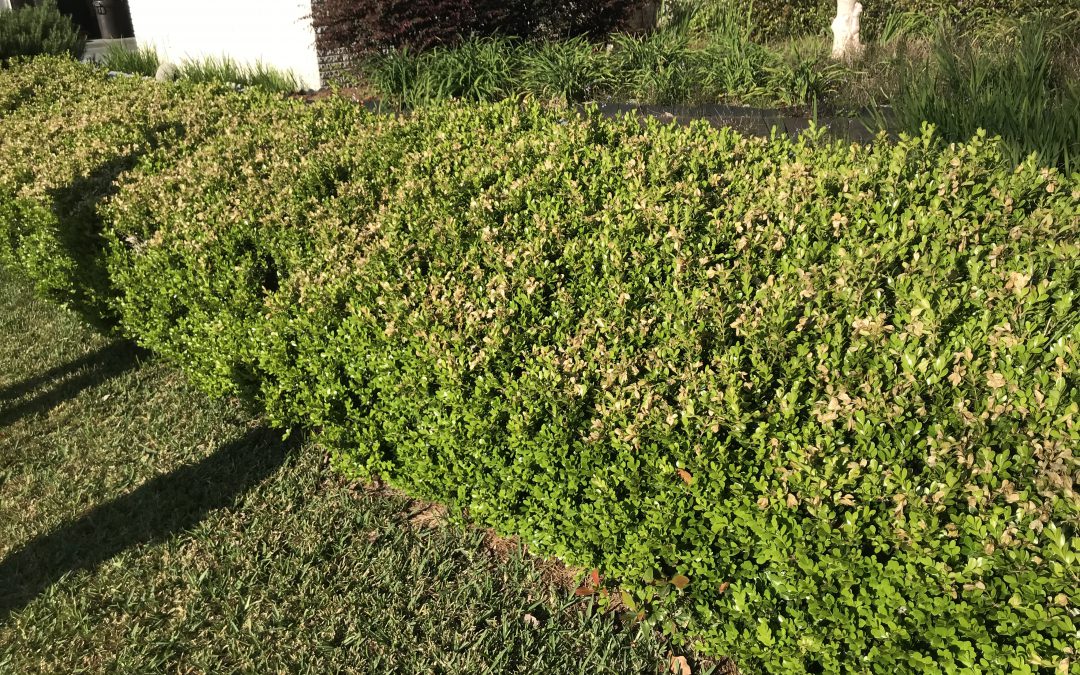
Cold damage on Boxwood hedge
Three weeks ago, I got a call from a very concerned client. She had gotten her March issue of a popular outdoor magazine in the mail, in which was a feature on an emerging pathogen, Boxwood Blight, a nasty fungus decimating Boxwood populations in states north of us. She had also noticed the Boxwoods in front of her house had recently developed browning of their new spring shoots across most the hedgerow. Having read the article and matching the symptoms she’d noticed to the ones described in the magazine article, she was convinced her shrub was infected with blight and wanted to know if there was a cure. Agreeing that the symptoms sounded similar and wanting to rule out an infection of an extremely serious pathogen, I decided to go take a look. Upon inspection, it was obvious that Boxwood Blight wasn’t to blame. Damage from disease generally isn’t quite as uniform as what I saw. The new growth on top of the hedge was indeed brown but only where the eaves of the house and a nearby tree didn’t provide overhead cover and, to boot, the sides of the hedge were a very normal bright green. Having gone through a recent cold snap that brought several mornings of heavy frost and knowing that the weeks before that the weather had been unseasonably warm, causing many plants to begin growing prematurely, all signs pointed toward an abiotic problem, cold/frost damage that would clear up as soon as the plant put on another flush of growth. The client was delighted to hear she didn’t have a hedge killing problem that would require either adopting a monthly fungicide regime or replacing the hedge with a different species.
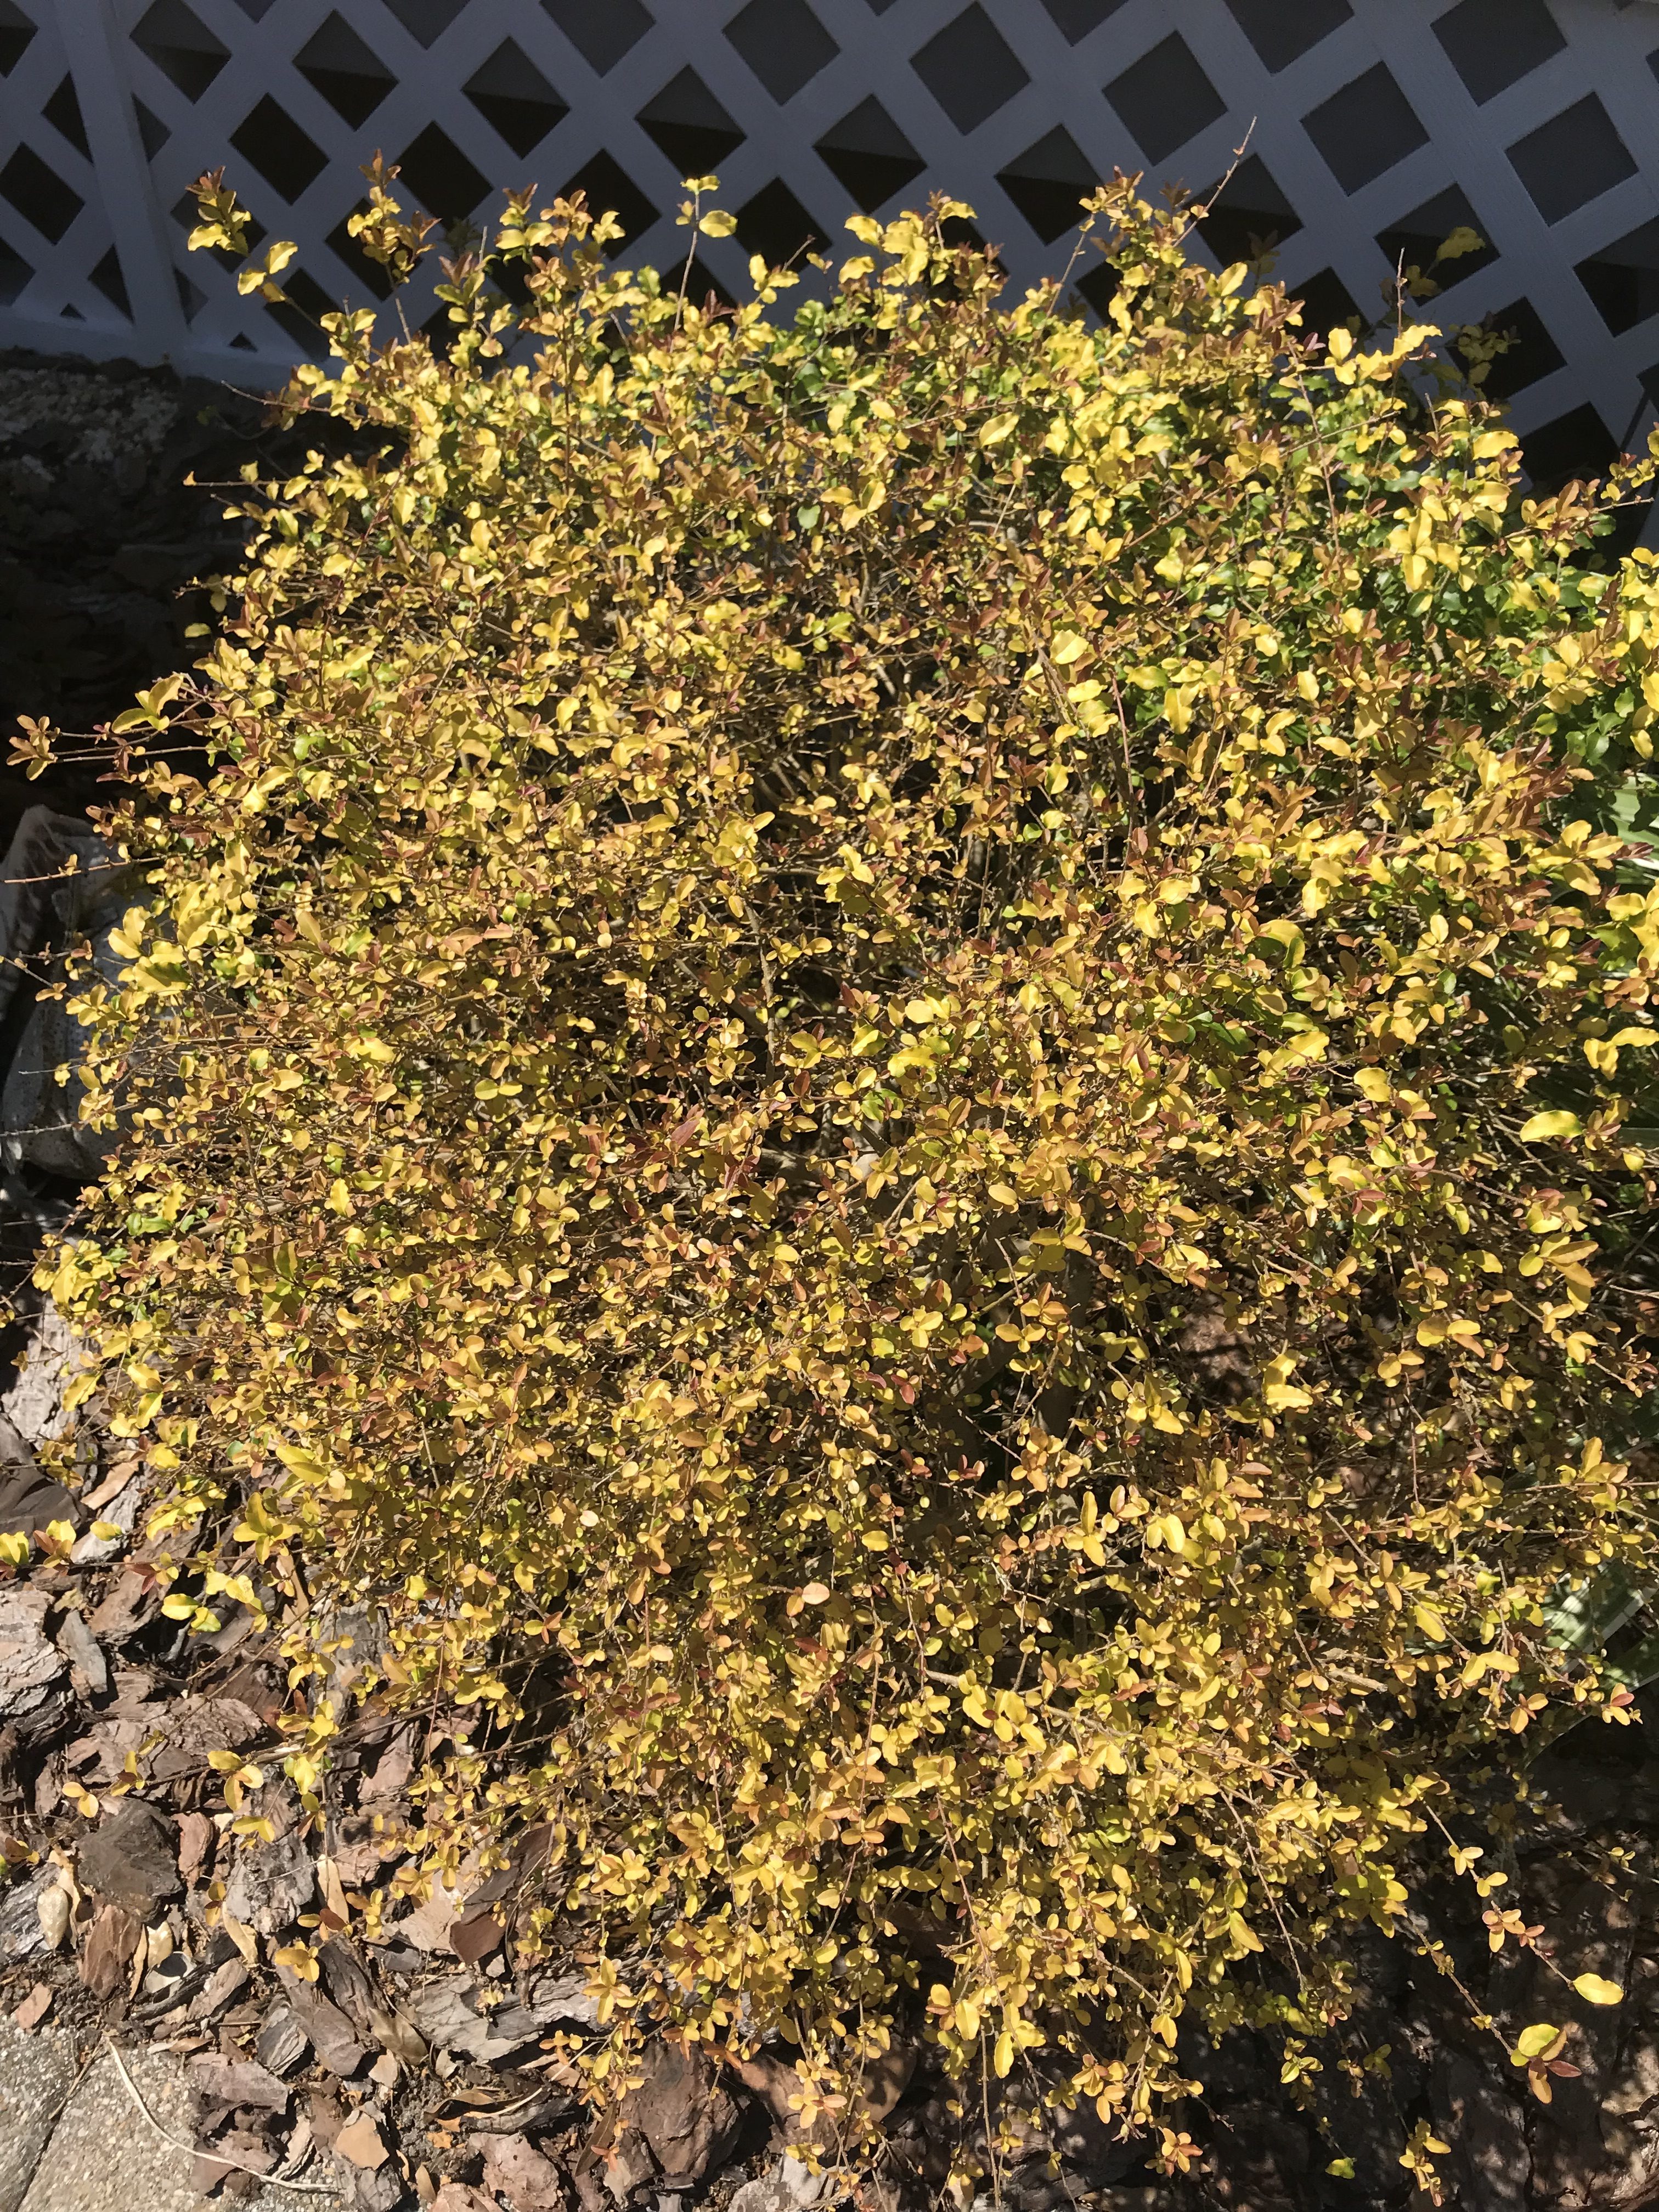
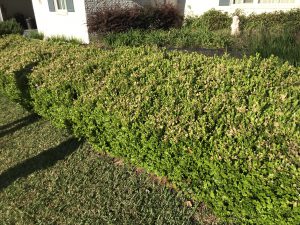
Damage to ‘Sunshine’ Ligustrum from pressure washing siding with bleach.
The very next week, another client asked if I would come by her house and take a look at a hedge of ‘Sunshine’ Ligustrum that lines her driveway, whose leaves had “bleached” out, turning from their normal chartreuse to a bronzy white color. This time, having seen similar issues with this particular plant that almost always involved an infestation of Spider or Broad Mites, I figured this was a cut and dry case that would end with a call to her pest control company to come spray the offending bugs. However, though the leaf damage looked similar, I was not able to locate any existing pests or find evidence any had been around recently, rather it appeared the leaves had been exposed to something that “bleached” and burned them. Puzzled, I began asking questions. What kind of maintenance occurs on the plants? Have you fertilized or applied any chemicals recently? Nothing. Then, near the end of our conversation, the client mentioned that her neighbor had pressure washed their house on a windy day and that she was irritated because some of the soap solution had gotten on her car. Bingo. Leaf burn from pressure washing solution chemicals. This time I was guilty of assuming the worst from a pest when the problem quite literally blew in on the wind from next door. Again, the client was relieved to know the plant would recover as soon as a new flush of growth emerged and hid the burned older leaves!
This spring, I’d encourage you to learn from the above situations and the next time you notice an issue on plants in your yard, before you reach for the pesticides, take a step back and think about what the damage looks like, thoroughly inspect the plants for possible insects or disease, and if you don’t find any, consider the possibility that the problem was abiotic in nature! And remember, if you need any assistance with identification of a landscape problem and want research-based recommendations on how to manage the problem, contact your local UF/IFAS Extension office.
by Matt Lollar | Apr 9, 2019
The UF/IFAS Extension and FAMU will be bringing the Florida Pest Management Conference to Milton on April 17th. Attend to earn CEUs for your PCO License. Attendance is free and we are currently seeking sponsors at $80 per sponsoring business/organization. For more details and to register, please visit the conference webpage at Northwest Pest Management Conference.
by Matt Lollar | Apr 9, 2019
The Evidenced-Based Zoysiagrass Management Workshop is returning to Milton on April 23 at the University of Florida – Milton Campus. Attend to get updates on managing zoysiagrass and to earn CEUs. Register at: UF/IFAS Evidence-Based Zoysiagrass Workshop
by Ray Bodrey | Feb 5, 2019
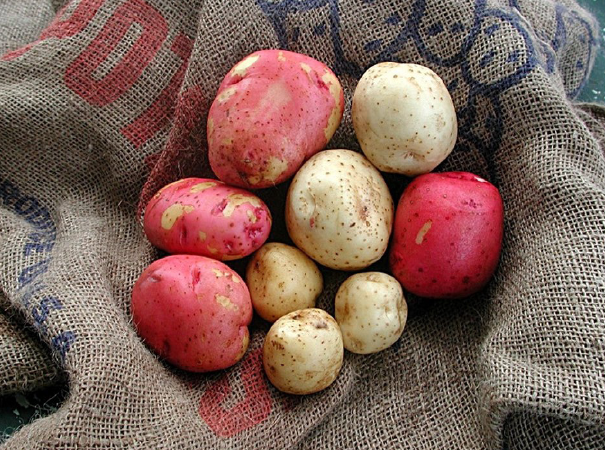
The “new” or “Irish” potato is one of America’s most popular vegetables and a fine cool season crop choice for gardeners in the Panhandle.
The history of the potato is quite interesting. The potato was first domesticated in Peru between 3000 BC-2000 BC. Potatoes were first planted, where in states? Idaho, of course, as early as the 1830’s. By 1900, Idaho’s production exceeded one million bushels. Potatoes are diverse in appearance and uses. Potatoes are high in nutrition and have fewer calories than other starches such as rice, pasta and bread.
In Florida, potatoes can be planted in the winter or early spring. February 1st to March 10th is the prime planting range. As a general production rule, 100 lbs. of seed potatoes will typically yield around ten bushels. Be sure to use only certified seed potatoes for best planting stock. These can be found at most garden centers. For best results, select varieties recommended for North Florida like ‘Atlantic’, ‘Sebago’, and ‘Superior’ (all round, white potatoes). Also, ‘Red Lasorda’ and ‘Red Pontiac’ are viable round, red potatoes. Resist using potato stock bought from produce sections at grocery stores. Odds are, symptoms of a number of diseases will occur. For planting, each seed potato should be cut into smaller pieces, displaying two or more eyes. To prevent fungal pathogens, the most common culprit in potato production, use a light dusting of a fungicide to combating decay.

Figure 1. Red and white potatoes grown in Florida.
Credit: C. Hutchinson. UF/IFAS Extension
It’s best to plant seed potatoes in raised rows, where the height of the mound is 6 inches and the width is 1 to 2 feet. Row spacing should be at least 3 feet apart. The seed furrow should be 3-4 inches in depth, through the center of the row. Seed potatoes should be planted in 1 foot intervals. Cover, and water freshly planted rows. Fertilizing is key. One quart of 10-10-10 fertilizer for every 50 feet of row space is needed for the initial application. Through the season, for every 3 weeks, side dress the rows with a pound of 10-10-10 per 50 feet of row space.
Following these steps will ensure a productive potato crop. For more information please contact your local county extension office.
Supporting information for this article and further information can be found in the following the UF/IFAS EDIS publication: “Growing Potatoes in the Florida Home Garden” by Christian T. Christensen, Joel Reyes-Cabrera, Libby R. Rens, Jeffrey E. Pack, Lincoln Zotarelli, Chad Hutchinson, Wendy J. Dahl, Doug Gergela, and James M. White: https://edis.ifas.ufl.edu/pdffiles/HS/HS18300.pdf
UF/IFAS Extension is an Equal Opportunity Institution.
by Larry Williams | Aug 20, 2018

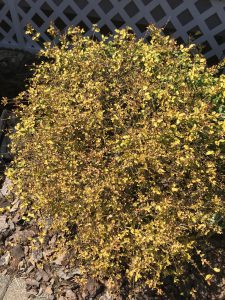
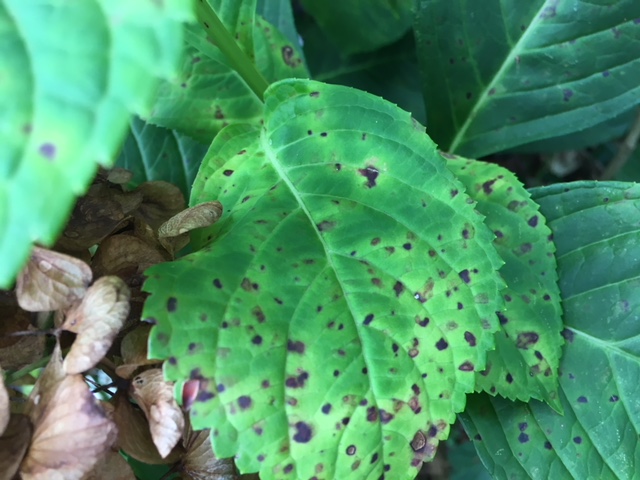
Hydrangea leaf spot disease
Photo credit: Larry Williams
It is not uncommon to see leaf spots on your hydrangeas during late summer and fall.
These spots are caused by a number of fungal diseases. Plant fungi and wet weather go hand-in-hand. Florida’s high humidity, heavy dews and frequent rains during spring and summer provide perfect conditions to allow fungal diseases to flourish. Bacterial leaf spots can be part of this foliage disease mix, too.
Common foliage diseases seen on hydrangeas this time of year include Phyllosticta leaf spot, Target leaf spot, Bacterial leaf spot, Botrytis and Cercospora leaf spot.
These foliage diseases are the norm rather than the exception as we move into the wet summer months and on into fall. As a matter of fact, you would be hard-pressed to find any hydrangea in our area without some evidence of infection now.
This late in the year it is more of a “grin and bear it” problem. In other words, it’s too late to do much about the fact that your hydrangea plant has leaves covered in ugly spots. By now many of the infected leaves are turning brown, withering and dropping prematurely from the plant.
Cercospora leaf spot is one of the most common foliage diseases of hydrangeas. Along with most of the leaf spot diseases, it begins as small dark-colored specks on the leaves. The small specks generally go unnoticed. But as the spots continue to slowly enlarge, mostly maintaining a circular shape, they become more obvious. With heavy infection, individual spots can coalesce forming larger irregular shaped brown areas on individual leaves. The individual spots may have a purplish halo with gray center.
There are some fungicides that can help prevent these leaf spots. But you’d have to begin treatment early in spring before any leaf spots exist and spray the plant every 10 to 14 days during favorable disease development (humid, rainy weather), which is pretty much our spring and summer months. These types of diseases are prevented, not cured. That’s the “grin and bear it” part of waiting until now.
The fungus survives on infected leaves. So, the best thing to do now is to remove and dispose of infected leaves. Also, be careful to not wet the leaves when irrigating the plants during the growing season.
New leaves of spring should be spot/disease free as they emerge. But the cycle of life for these leaf spot diseases will again result in spotted/diseased leaves on your hydrangeas next summer and fall without persistent treatment.
The good news is that these leaf spot diseases normally do not cause permanent/long-term damage for hydrangeas. They just make the plant look ugly.