by Matt Lollar | Aug 25, 2017
If you’ve attended any of our landscaping classes, then you’ve probably heard the phrase “Right Plant, Right Place”. This phrase is a simple reminder to research plant growth habits and growing conditions before making selections for your landscape. This not only holds true for ornamental plants, but for edible crops as well. A term used to describe the use of edibles as ornamentals is “Permaculture”. Now this is an extremely simplified definition of the term, but permaculture comes from a combination of the words “permanent” and “agriculture”. The thought behind permaculture is to fashion an edible landscape after a natural ecosystem.
There are a number of strategies to becoming a successful permaculturist. Below you will find a few examples.
- Site Observation and Analysis – The slope, orientation to the sun, and sectors of your yard should all be documented.
- Slope – Identifying the slope of your yard can help you determine the natural flow of water and nutrients. For example, if you have a hill in your back yard you may want to install some plant beds between the peak of the slope and your house. These beds will help absorb water and nutrients before they have a chance to reach the house.
- Orientation – Think about the location, relevant to your house, of each of your edible landscape areas. The eastern side of your house receives morning sunlight, which is much cooler than the western side of your house that receives sunlight in the afternoon. A tomato plant will be much happier if it can avoid the afternoon heat.
- Sectors – While walking your property, you will notice differences in soil texture, soil moisture, and the plants and weeds growing in these different areas. You can divide your yard based on these characteristics along with slope, orientation, and shade percentage to develop sectors of your property.
 Cover Crops and Living Mulch – Cover crops are planted in areas that you would normally allow to go fallow. Living mulches are plants that are planted alongside edible plants to help fill voids. The benefits of both are listed below.
- Weed Supression
- Erosion Control
- Produce and/or Scavenge Nutrients
- Nematode Supression
- Harbor Beneficial Insects
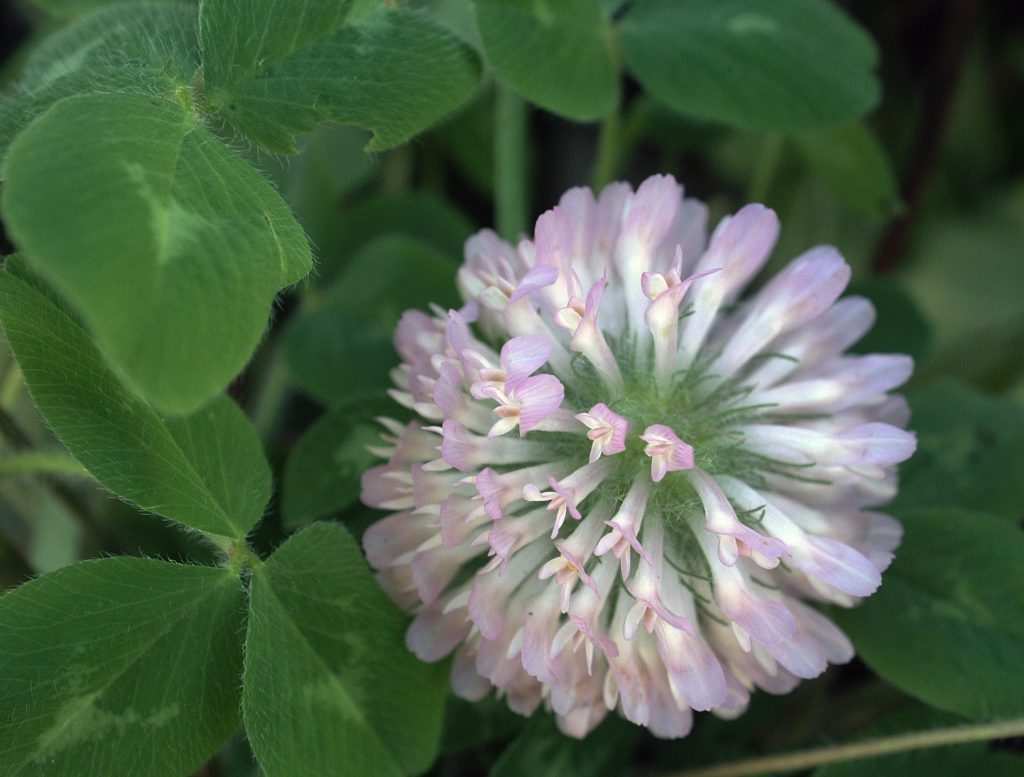
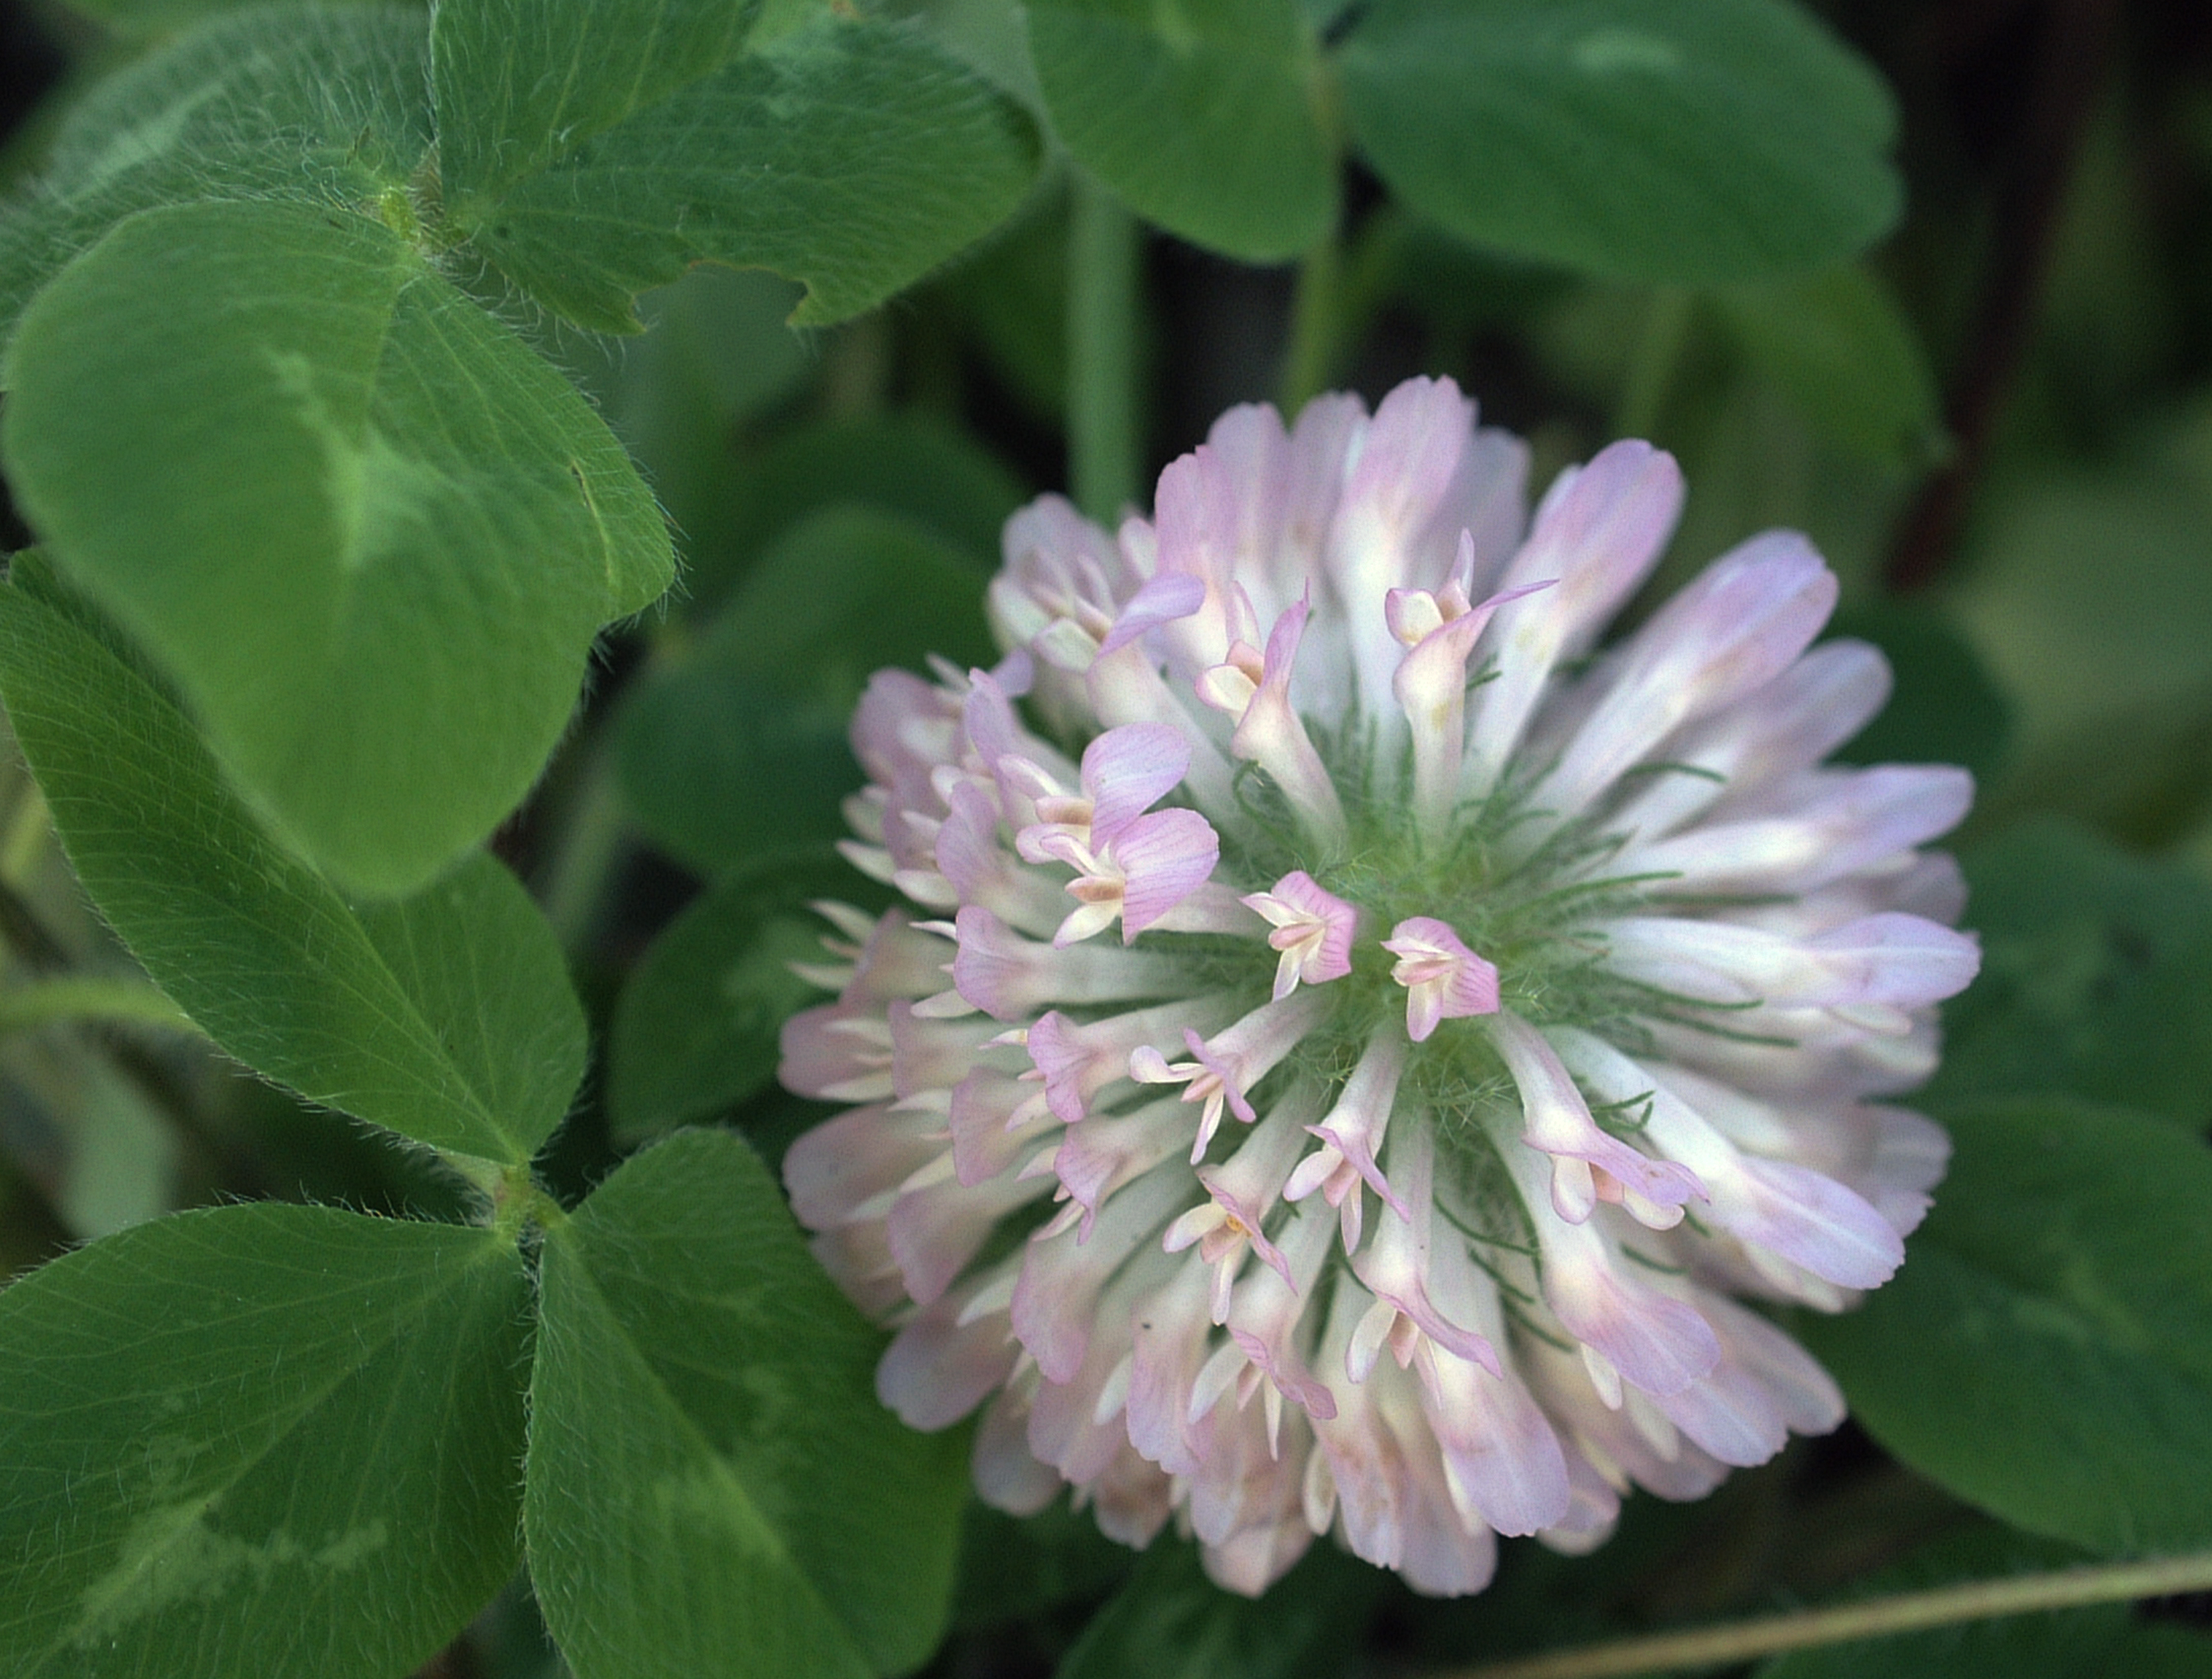
Clover is an excellent cover crop choice and has a beautiful flower. Photo Credit: University of Florida/IFAS.
- Space Utilization – The third criteria is to mimic a forest. Just like any good forest, your “forest garden” will consist of different layers of vegetation.
- You can start by planting large deciduous trees such as pecans or pears farthest from the house. These trees will allow filtered light to penetrate the layer below.
- Next, you can plant smaller fruit trees such as citrus or peaches along the understory of the larger trees.
- Then, you can plant your vegetable and herb garden around your fruit tree plantings.
- Finish by planting root and vining vegetables such as carrots or sweet potatoes at the edge of the forest.
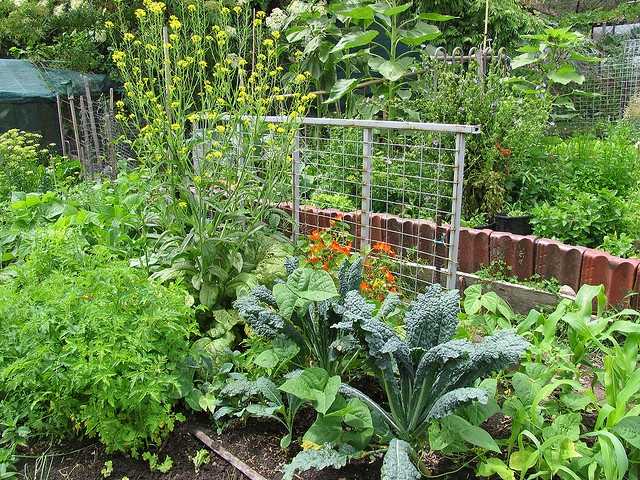
A mixed vegetable garden. Photo Credit: eXtension.org.
We’ve just scratched the surface of the concept of permaculture, but I encourage you to dig a little deeper. What could be the harm with being able to eat your landscape? Just don’t eat too much or you may lose your landscape entirely!
An “Intermediate Permaculture” class is scheduled for Saturday, September 23 at the Jackson County Extension Office. For more information, please call (850)-482-9620 and ask for Matt.
For more information on permaculture please visit the NC State Permaculture Page.
For more information on “Right Plant, Right Place” please visit the UF/IFAS Florida Friendly Living Site.
by Beth Bolles | Jul 5, 2017

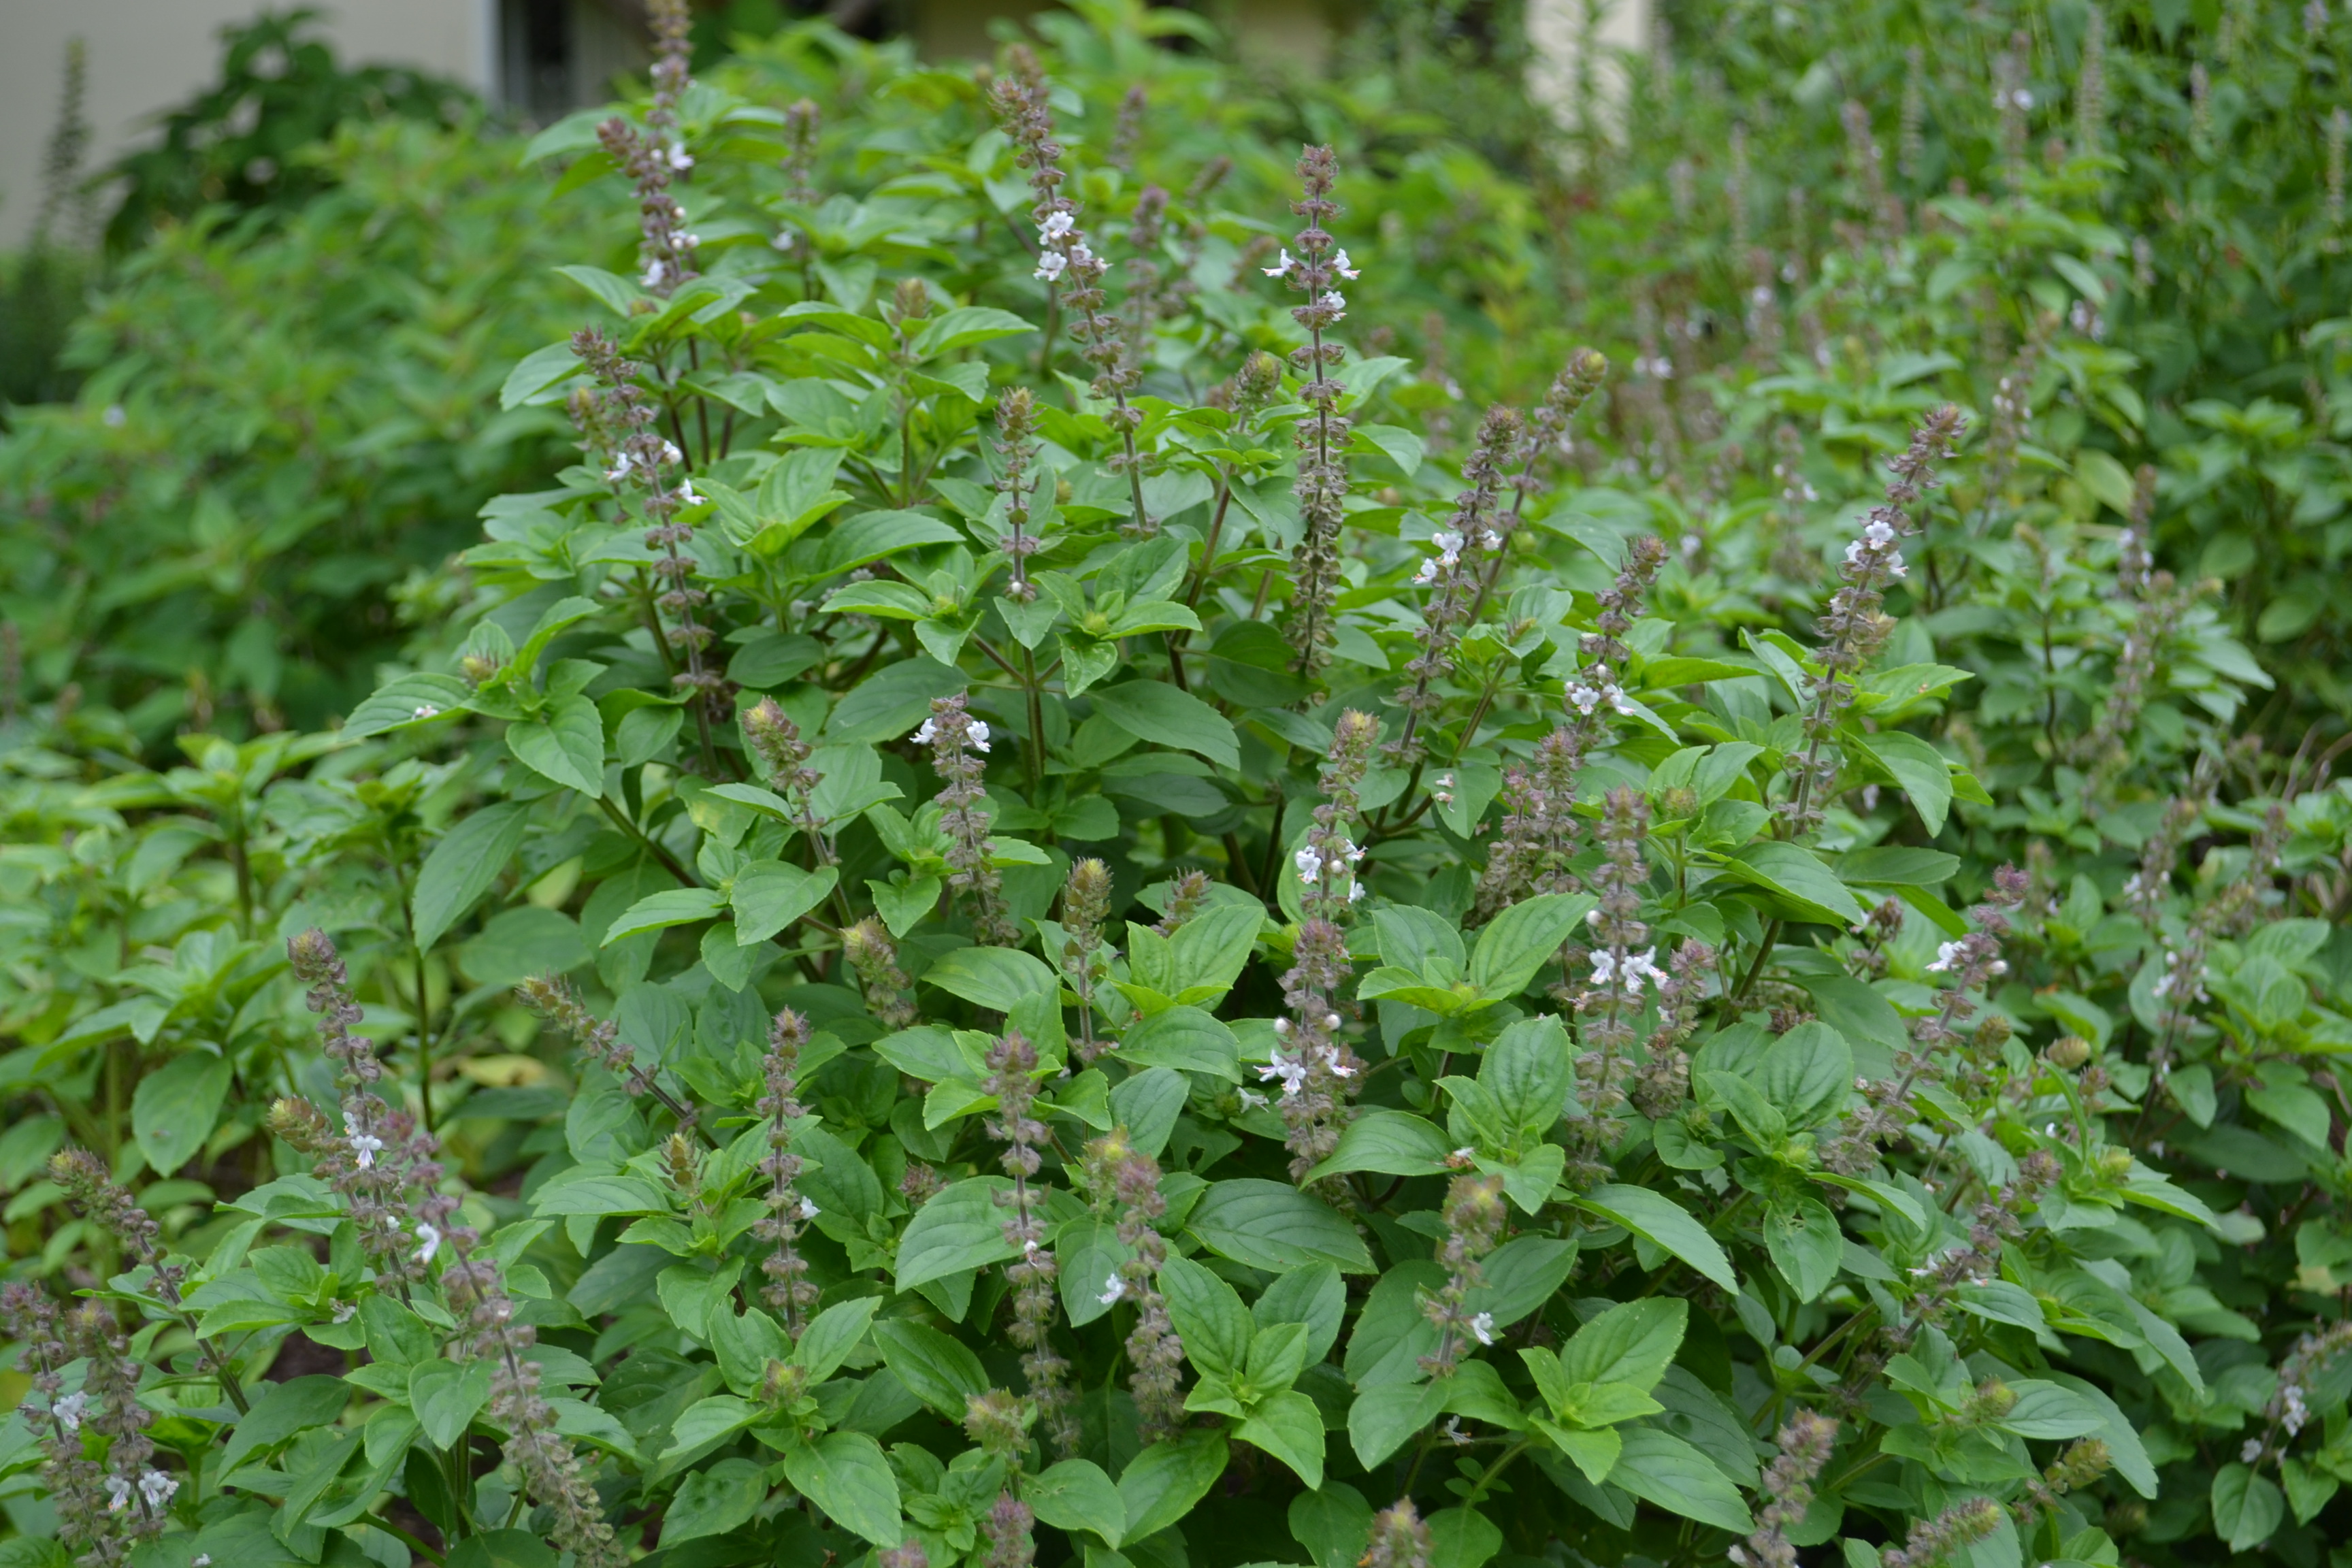
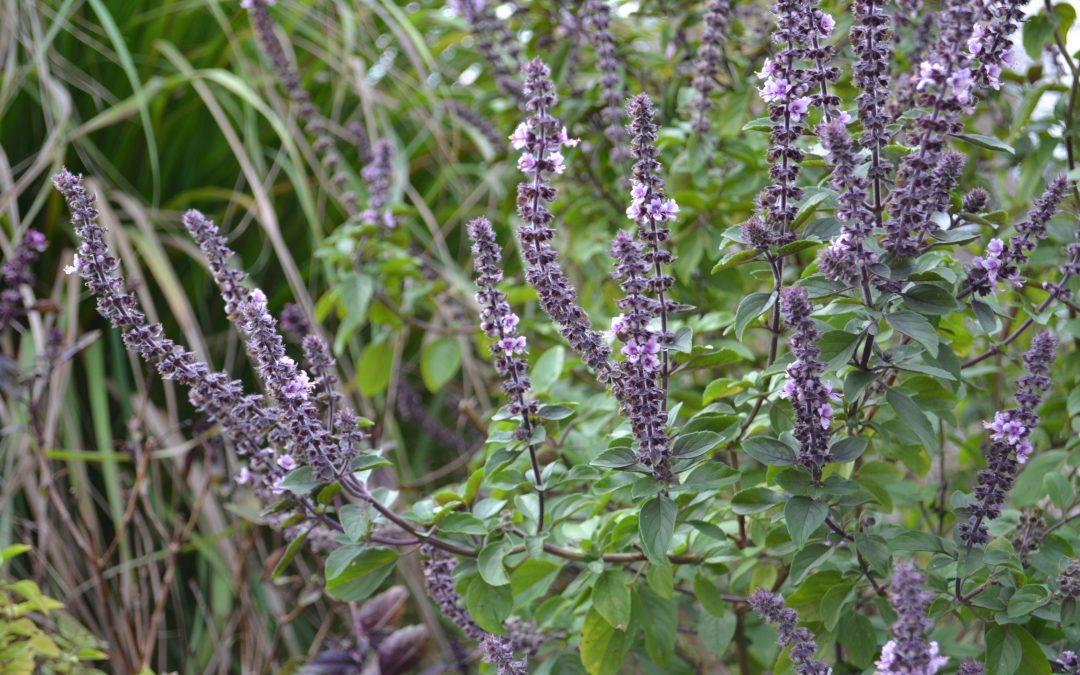
Many bees and beneficial wasps will be attracted to African blue basil. Photo by Beth Bolles, UF IFAS Extension Escambia County
Basil is a favorite plant in the summer herb garden and an absolute must for those who enjoy fresh leaves for a sandwich or delicious homemade pesto. While we grow basils as a food enhancer, an added benefit is that those basil selections that form flowers are very attractive to pollinators. If you would rather not let your favorite basil form flowers, consider adding a specific species that is grown more for its attractiveness to pollinators than its culinary uses.
African blue basil is a hybrid of two basils that has inherited a camphor flavor from one of its parents. Although edible, the flavor may not be appealing to those who are familiar with more traditional basil flavors. Plants produce abundant flowers that are pink with a dark purple base, although flowers are sterile so no seeds will be formed. If you want more African blue basil, you must purchase transplants or start your own from cuttings off the main plants.

African blue basil enhances gardens and landscapes. Photo by Beth Bolles, UF IFAS Extension Escambia County
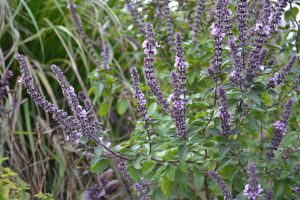
Flowers of African blue basil are also showy in the garden. Photo by Beth Bolles, UF IFAS Extension Escambia County
Like other basils, African blue basil does like soils amended with composts that are well-drained. Plants thrive in full sun and will form rounded mounds that will be much larger than more culinary basils, up to five feet in some gardens. Plants do form woody stems and although frost tender, some plants may return in the spring in more protected areas.
Although some edible gardeners may not want to allow space for a basil that they will not use in the kitchen, the amount of pollinator activity on this selection makes it a benefit to any edible garden for all the frost-free months.
by Mary Salinas | May 11, 2017
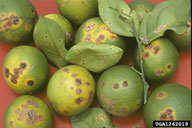
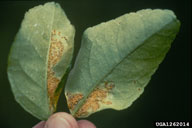
Citrus canker symptoms on twigs, leaves and fruit. Photo by Timothy Schubert, FDACS
In November 2013, citrus canker was found for the first time in the Florida panhandle in Gulf Breeze in southern Santa Rosa County. The Florida Department of Agriculture and Consumer Services (FDACS) tested and confirmed the disease on grapefruit trees in a residential landscape. Since that time, citrus canker has been confirmed on citrus trees at 27 more locations in Gulf Breeze. To my knowledge it has not been found in any other location in the panhandle. Not yet.
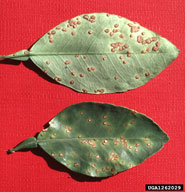
Citrus canker lesions on leaves are raised, rough and visible on both sides of the leaf. Photo by Timothy Shubert, FDACS.
Citrus canker is a serious bacterial disease that only infects citrus trees. It will not infect any other plant species nor is it a threat to human health. This highly contagious disease has no cure as yet. Severely affected trees experience substantial leaf and premature fruit drop and serve as a source for infecting other citrus in the area. The disease spreads through wind, rain and transportation of infected plant material from other locations.
We do not know how the disease came to infect trees in our region. The disease could have been spread through infected fruit or trees brought here from areas where the disease is established, such as central or south Florida.
What should you do if you suspect your citrus is infected with this disease?
Citrus canker lesions can appear in the mines left by the citrus leafminer pest. Photo by Timothy Schubert, FDACS
- Look at Homeowner Fact Sheet: Citrus Canker for more information.
- Leave the tree in place in your yard and call the Division of Plant Industry at FDACS at 1-888-397-1517 for a free inspection and testing of your citrus trees.
- Consult your local Horticulture Extension Agent for more information and control/removal strategies.
- Proper removal of infected trees is recommended to prevent the spread of citrus canker but is not mandatory.
For more information please see:
Save Our Citrus Website
UF IFAS Gardening Solutions: Citrus
Citrus Culture in the Home Landscape
UF IFAS Extension Online Guide to Citrus Diseases

by Carrie Stevenson | May 1, 2017
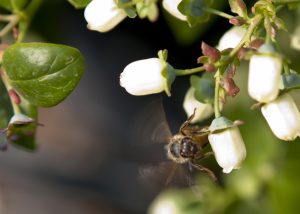
The Southeastern blueberry bee uses buzz pollination on a blueberry plant. Photo credit: Tyler Jones, UF IFAS.
This time of year, blueberry bushes are flowering and small fruit are coming onto the wild and cultivated bushes in north Florida. Many of us, myself included, look forward to the late-spring harvest of blueberries, taking our children out to u-pick operations and digging out family recipes for blueberry-filled desserts.
What many do not know, however, is that there’s a specialized bee that literally lives for this season. During the last few weeks, this little insect has been furiously pollinating blueberry bushes during its short, single-purpose lifetime.
The Southeastern blueberry bee, Habropoda labriosa is active only in mid-March to April when blueberry plants are in flower. They are smaller than bumblebees, and the yellow patches on their heads can differentiate males. Blueberry pollen is heavy and sticky, so it is not blown by the wind, and the flower anatomy is such that pollen from the male anther will not just fall onto the female stigma. Blueberry bees must instead attach themselves to the flower and rapidly vibrate their flight muscles, shaking the pollen out. Moving to the next flower, the bee’s vibrations will drop pollen from the first flower onto the next one. This phenomenon is called “sonicating” or ‘buzz pollination” and is the most effective method of creating a prolific blueberry crop.
Blueberry bees do not form hives, but create solitary nests in open, sunny, high ground. Females will dig a tunnel with a brood chamber large enough for one larva, filling it with nectar and pollen. After laying an egg, the female seals the chamber and the next generation is ready. The species produces only one generation of adults per year.
By the time we are picking fresh blueberries next month, you probably won’t see any blueberry bees around. However, we should all consider these insects’ short-lived but vitally important role in Florida’s $82 million/year blueberry industry!
For more information, check out the beautifully illustrated USDA Forest Service publication, “Bee Basics—An Introduction to our Native Bees,” or North Carolina State University’s entomology website.
by Carrie Stevenson | Apr 7, 2017
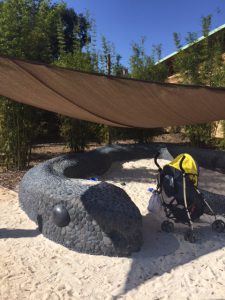
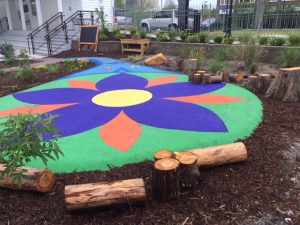
This sandbox area at Bok Tower Gardens is bordered by a stone “snake” and covered for shade, making it a real draw for small children and their parents. Photo credit: Carrie Stevenson, UF IFAS Extension
I recently had the pleasure of visiting Bok Tower Gardens in Lake Wales, Florida and experienced one of their newest additions, a children’s garden. As much a playground as a place for growing plants, it was full of whimsical energy and invitations to explore. The entire area encouraged children to reach beyond their comfort zones and engage with nature, including an outdoor art space, a climbing area made of lean-to logs, and a covered sand “box” shaped like a snake.
In recent years, sociologists, educators, and health experts have bemoaned the loss of free outdoor play in the lives of children. Multiple factors, including the rise in electronic entertainment, more organized, practice-heavy youth sports, fears of crime/abduction or just lack of safe access to ride bikes or walk, have contributed to a drop in the frequency and length of time that kids spend outdoors playing on their own. Many readers can probably relate to my childhood. We would take off on bikes in the mornings during summer and not come back until we got hungry. We didn’t have cell phones or GPS, and we knew all of our neighbors so we had a place to go if we had a rare emergency. The results of fewer child-led outdoor explorations include increases in childhood obesity, fear of the outdoors, difficulty with balance, agility, and managing excess energy.
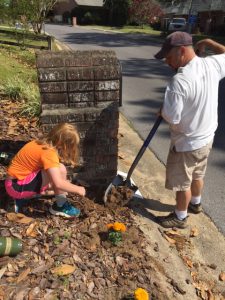
When children help plant a garden, they will be more interested in taking care of it–and tasting the fruits (or vegetables) of their labor! Photo credit: Carrie Stevenson, UF IFAS Extension
One way to encourage kids to get outside and explore is to plant something in your yard, school, or nearby park that can serve double-duty as a window to explore. Landscaping with young people in mind should include a variety of plants with interesting heights and textures, fruit-bearing shrubs or trees to engage the sense of taste, and lots of color. Logs to sit and climb on are perfect for developing balance and learning to take calculated risks. In addition, it is important to engage kids in the design and planting of the garden or landscape–if they have a hand in developing the area, they’ll be more invested in its success. In fact, research has consistently shown that children who help care for school gardens are more willing to try the food they’ve helped to grow. Beyond expanding a healthy palate, participation in school gardens can increase “soft” skills, such as the ability to work effectively in a team, better communication, and an increased appreciation for nature. Many kids also do better in science and gain a deeper understanding of proper nutrition after working with gardens.
If you are not a gardener or landscaper but interested in taking children outdoors where they can learn and become more comfortable, the US Forest Service has taken the research related to “nature-deficit disorder” so seriously that multiple “Children’s Forests” have been developed. While there are still very few in the southeastern US, there are dozens around the country. The stated goals for a Children’s Forest are: 1) Connect kids, families, and adults to healthy outdoor activities across all landscapes. 2) Create new education and career opportunities. 3) Foster an understanding of how our changing environment affects the world and how people can work together to embrace these changes. 4) Provide professional development opportunities for educators, with emphasis on conservation and the natural world. Local state and national parks often provide excellent programs for families as well, such as the National Park System’s Junior Ranger Program.
The landscaping at this coffee shop uses color, log seating/climbing, and a variety of interesting plants to attract children to engage with the outdoors.
A program in Gainesville called “Kids in the Woods” has recognized the lack of youth engagement in the outdoors and created field trips and curriculum for students designed to help make sure they are comfortable in the great outdoors. No matter how you engage the youth in your life with nature, it is important that they get outside, get dirty, and go beyond their comfort zone. Their health, academic success, and even motor skills needed for sports and daily life will reap the benefits!

by Ray Bodrey | Mar 20, 2017
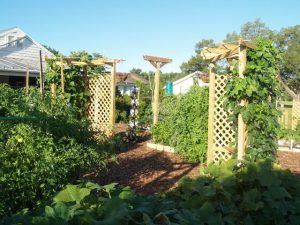
Figure 1: Edible Landscaping.
Credit: Dr. Gail Hansen, Environmental Horticulture-UF/IFAS
Edible landscaping has become a trend for many gardening enthusiasts. A combination of edible plants along with traditional ornamentals can create an artful presentation. There are some challenges when designing such a landscape, but in those challenges opportunities’ may be found. One of the most difficult challenges is making sure your garden or landscape is healthy and vibrant year-round since many edibles are short-lived annuals. These include plants such as eggplant, pepper, lettuce, artichoke and some annual herbs. There is a solution to this concern. First, know your edible plant’s propagation and maturity months. This way you can offset plantings to ensure color in your landscape. Another key measure is to mix some evergreen ornamentals in with short season edibles and long season edibles. Examples of long season edibles include berry shrubs, fruit trees and biennial or perennial herbs.

Table 1: North/Central Florida Front Yard Edibles.
Credit: Dr. Gail Hansen, Environmental Horticulture-UF/IFAS.
When designing your edible landscape, think about style and theme to help guide you through the process. A formal design has more straight edges and geometric shapes, whereas the more natural approach has meandering edges and irregular shapes. A color scheme in harmony is very important. Remember, an edible landscape should not just be a production food garden but a visual treat. The goal is not to grow a high yield garden, but only to produce supplemental edibles to make the endeavor worthwhile.
Dr. Gail Hansen, Associate Professor of Environmental Horticulture at the University of Florida, has developed twelve ideas when creating an edible landscape:
- Combine reliable, low-maintenance ornamental with edible plants. Use evergreen ornamentals to maintain enough green structure, so that potential cool season bare spots are not visual.
- Use support structures for an artistic effect and to assist in growth of some plants. Trellises, arbors and even tomato cages are some examples that can be used.
- Use containers in areas to keep the landscape more organized. Planters will also help in maintenance, as plants will be easier to reach and the soil will be easier to manage.
- Create some hard edges in your landscape. Raised beds, garden walls and borders will give defining lines to the landscape and promote a clean appearance.
- A pathway through the landscape will both provide an access to plants and give an inviting appeal. Brick pavers, gravel and mulch are good examples of pathway material.
- Remember color is key. Create a visually pleasing combination of plant color, form, texture and sizes.
- Always start by keeping it simple. So, start small and simple. Then, you can begin filling in the landscape.
- Look for one unique feature to create an added interest to you landscape and provide growth to plants. This could be a shade house for ferns and other hanging baskets or a hay bale, where lettuce, tomatoes or peppers could grow upon.
- Select appealing and easy to grow plants that you want to eat!
- Let plants reach maturity before taking them out of the landscape. For example, rainbow chard will grow larger, if allowed to continue to grow after seed has been produced.
- Use the Florida-Friendly Landscaping principle, “Right Plant, Right Place”, when adding edibles to your landscape. Match the growing needs with the most suitable location.
- Consider your location and layout for irrigation. All plants need some degree of water. An above ground drip irrigation system is usually the most flexible and adjustable irrigation method in regards to overall plant watering needs in a landscape.
Following Dr. Hansen’s ideas will help you create the edible landscape of your dreams. For more information on edible landscaping, please contact your local county extension office for more details.
Supporting information for this article can be found in the UF/IFAS EDIS Publications, “Landscape Design with Edibles” by Dr. Gail Hansen: http://edis.ifas.ufl.edu/pdffiles/EP/EP47500.pdf
UF/IFAS Extension is an Equal Opportunity Institution.