by Daniel J. Leonard | Aug 20, 2019
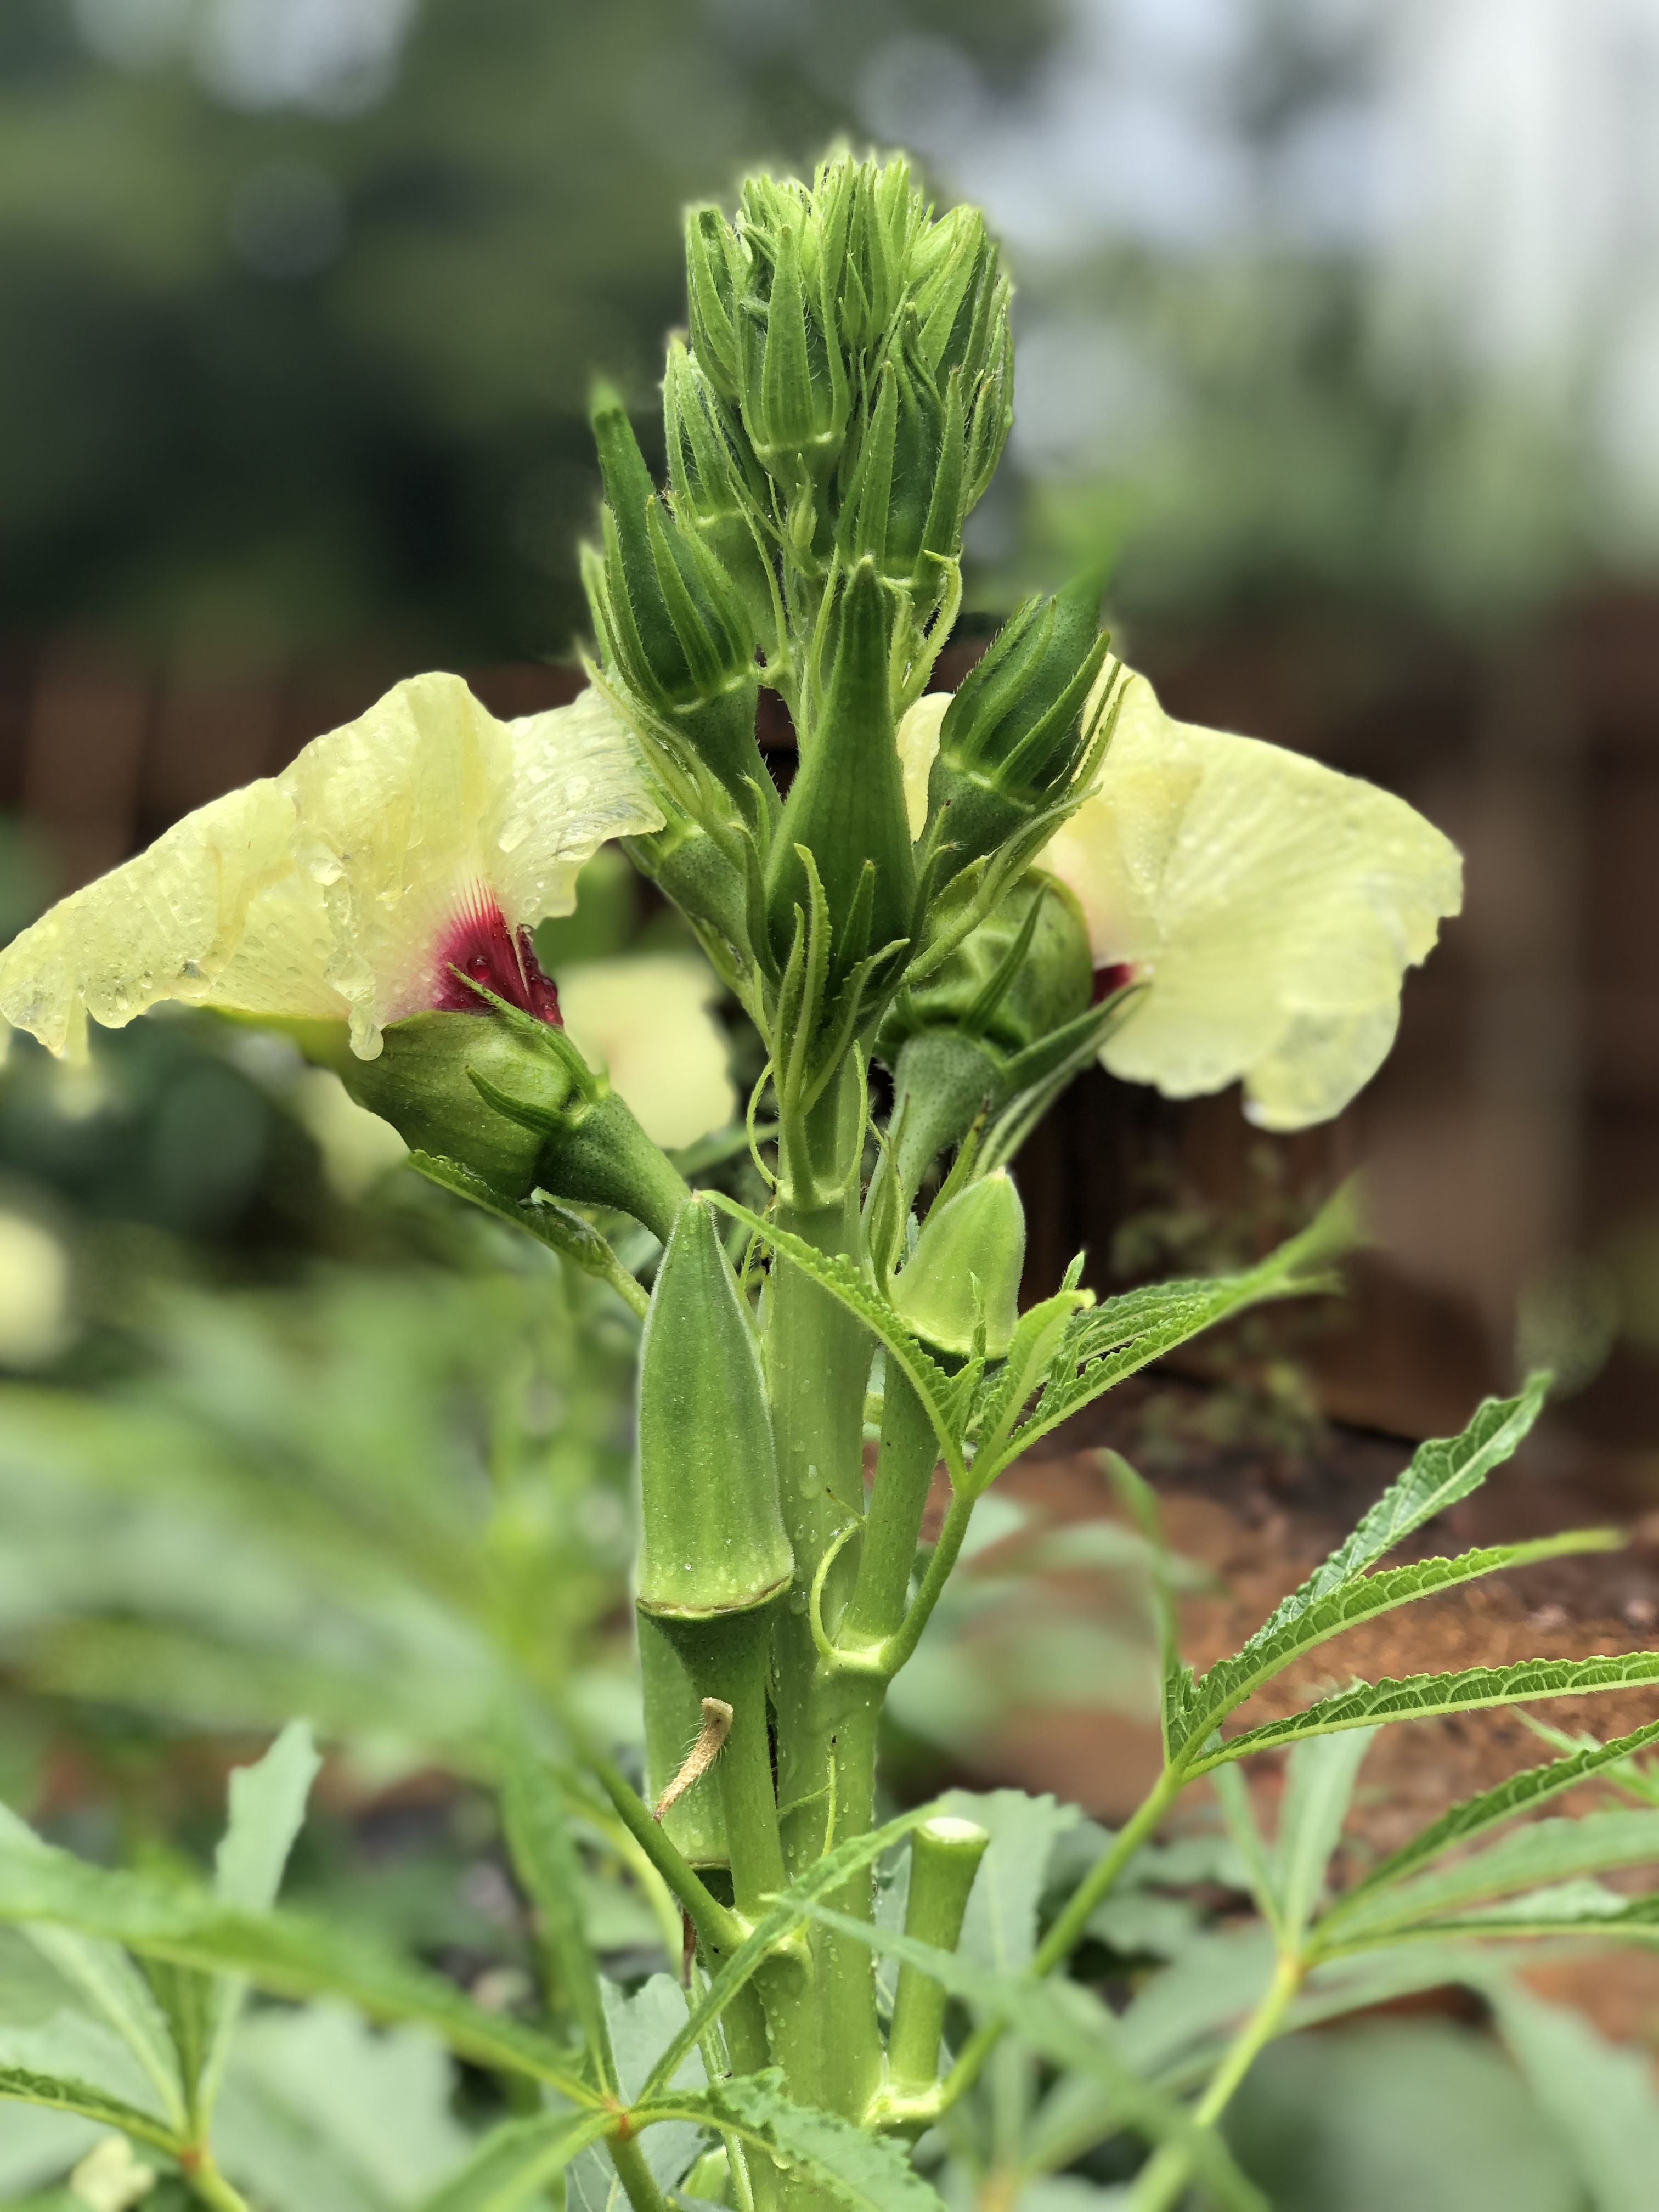
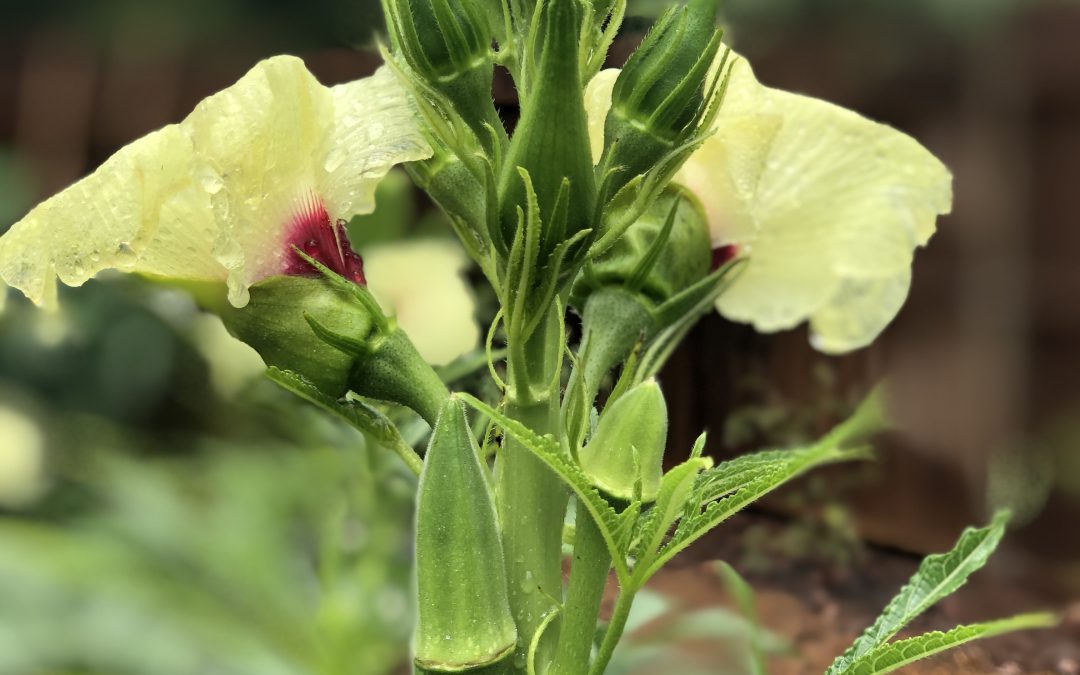
Though Okra (Abelmoschus esculentus) fruit isn’t much more than a thick green hull, slime and seeds and the plant itself is impossibly irritating to the skin, few plants are as integral to Southern heritage. In my mind, okra is among the best vegetables Panhandle gardeners can grow. Not only is it a gorgeous plant – Okra belongs to the Mallow family which also includes beauties like Hibiscus and Cotton – but it’s exceedingly versatile in the kitchen, excellent fried, grilled, roasted, boiled (though you have to acquire a taste for slimy textures to enjoy this method) and most famously, as a thickening agent in Cajun gumbo. Because of this exalted status in Southern culture, whether you enjoy eating okra or not, it’s almost mandatory here to include the plant in one’s garden. Most gardeners stick with the old standard varieties such as ‘Clemson Spineless’ or ‘Cowhorn’ and there is nothing wrong with them, however, these plants are almost too prolific for most gardens (growing upwards of 6-7’), especially for those of us growing in the close confines of raised beds. In the search for a less rambunctious but still ultra-productive cultivar, this summer I trialed ‘Jambalaya’, an F1 hybrid developed by Sakata Seed in 2012, with impressive results!
‘Jambalaya’ Okra in the author’s garden.
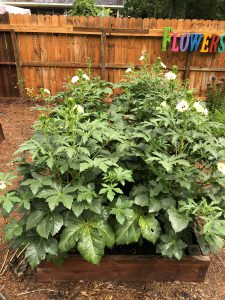
From my experience growing the cultivar this summer, ‘Jambalaya’ merits consideration in the garden, and is a must for raised bed gardeners, for two primary reasons. First, it was bred to be compact and is considered a dwarf cultivar. This is an awesome attribute, as I typically end the growing season picking okra from a small ladder! Most seed purveyors tout the plant as reaching a maximum height of 3-4’ and while this estimate might be a little conservative, I can attest that ‘Jambalaya’ is greatly reduced in height compared to the standard cultivars. The second advantage of growing this variety is that it begins producing very early relative to its peers and bears heavily. ‘Jambalaya’ fruit begin to ripen in about 50 days, about ten days to two weeks earlier than ‘Clemson Spineless’, a definite advantage if rotating behind a late maturing spring crop like potatoes as I typically do. Though ‘Jambalaya’ is a dwarf plant, in no way are yields reduced. My specimens have produced continuously since late-July and will continue to do so as long as adequate fertility and consistent harvesting are provided.

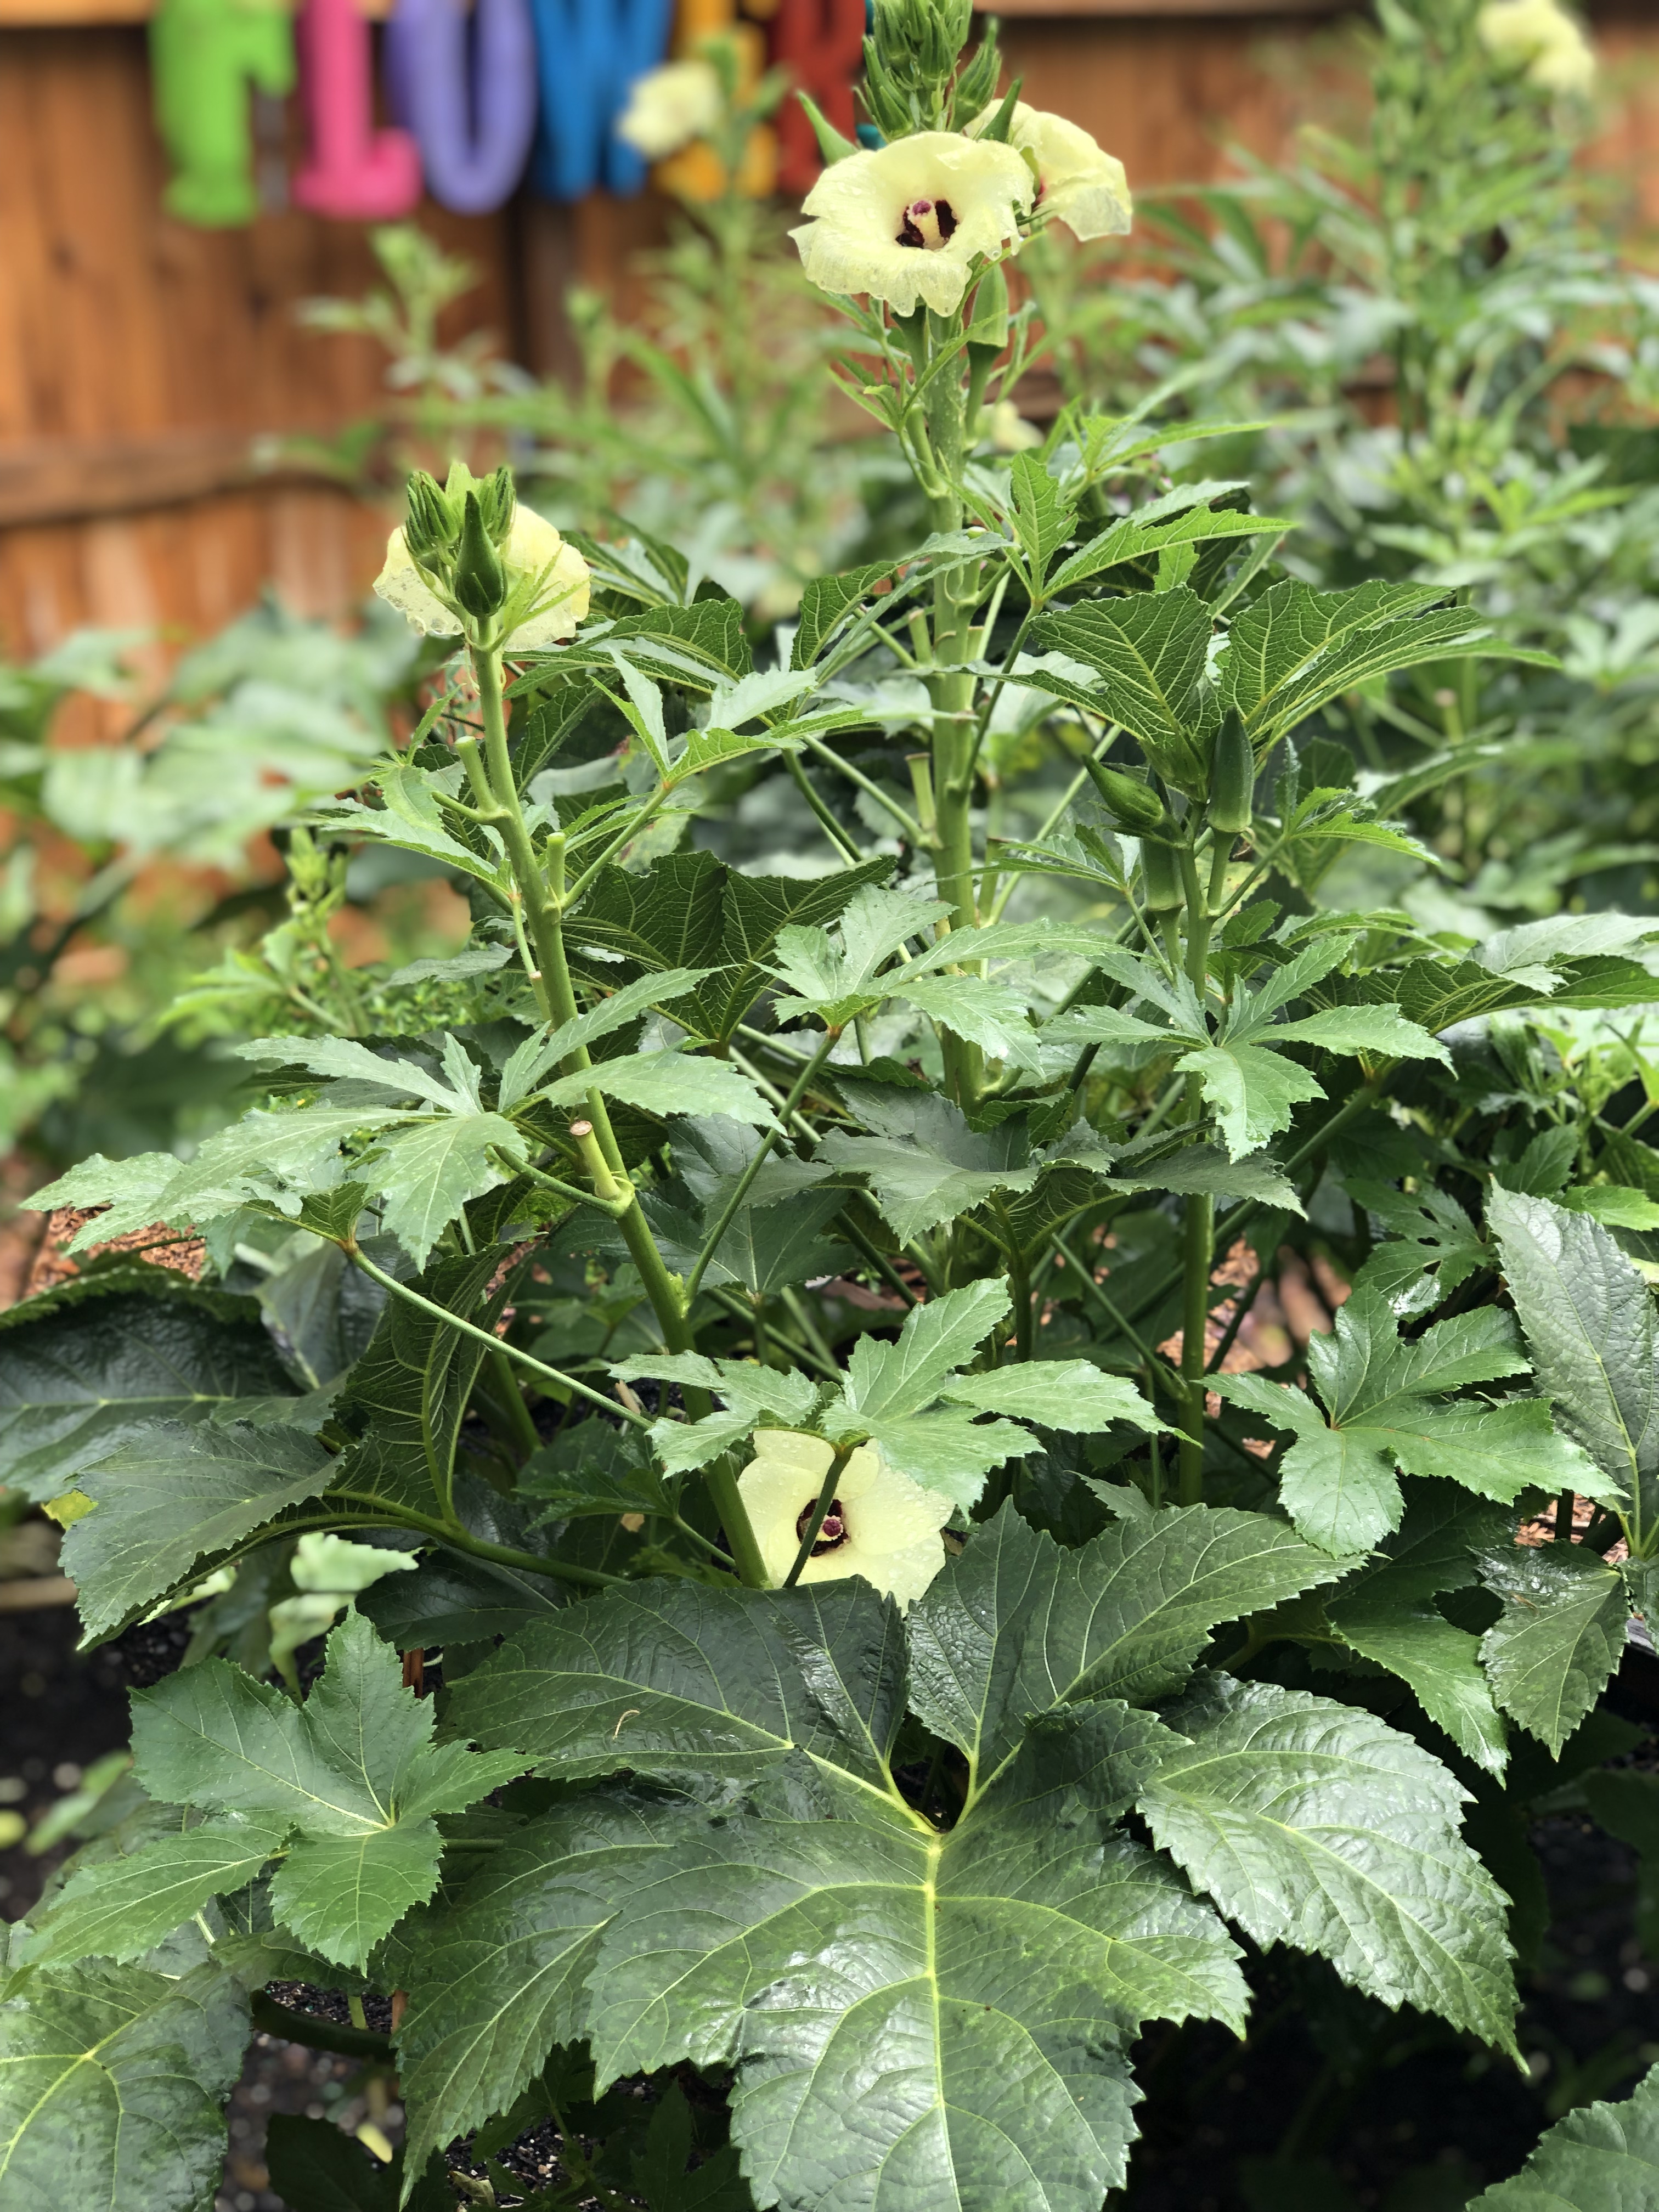
‘Jambalaya’ flower & fruit production.
Like any other okra cultivar, ‘Jambalaya’ has a couple of basic requirements that must be met for plants to thrive. In general, all okra cultivars love Southern summers and patience sowing seed is recommended, allow the soil to warm to at least 70 degrees before planting. Okra also prefers full sun, at least 6 hours per day, any less and yields will be reduced and plants will stretch towards the light. Belonging to the Mallow family, okra requires consistent moisture, particularly when in the flowering and fruiting phase. Finally, it is critical to keep up with your okra harvest as the plants produce! Okra pods grow quickly and should be harvested when they are no more than 3-4” long and still tender, larger pods are tough to the point of being inedible!

‘Jambalaya’ in the author’s garden.
Whether you’re new to the okra growing game or you’re a seasoned gumbo gardener, I highly encourage you to give ‘Jambalaya’ Okra a look next summer. While ‘Jambalaya’ is available through many seed sources, Johnny’s Selected Seeds sells a conveniently small package perfect for backyard gardeners, though they’ll be happy to provide larger quantities as well. In ‘Jambalaya’ you’ll find a nice compact plant that won’t outgrow your space, provide you a summer long harvest of tender green pods, and will rival the ornamentals in your landscape for the title of prettiest plant on your property! Happy gardening and as always, if you have questions about vegetable gardening or any other horticultural or agronomic topic, please contact your local UF/IFAS County Extension office!
by Mark Tancig | Aug 19, 2019
Horticulture Extension Agents are asked a wide variety of questions, from plant identification to erosion control, from herbicide selection to water regulation. We’re usually expected to know the answer on the spot, too. We’re also expected to write a lot and share information with the public. Well, oftentimes, those factors come together to give us writing inspiration. A challenging question leads to research and gathering of information, which leads to an answer that should be shared so others can learn from it. A recent question regarding the use and regulation of backflow preventers from a longtime gardener inspired my latest knowledge quest and what I found seemed important enough to share with other gardeners.
I would guess that backflow preventers probably aren’t a common item on people’s minds, unless you’re a plumber or in the water supply business. However, backflow prevention devices help ensure that when we turn on the tap to drink, cook, clean, flush, bathe, and yes, garden, that the water isn’t contaminated.
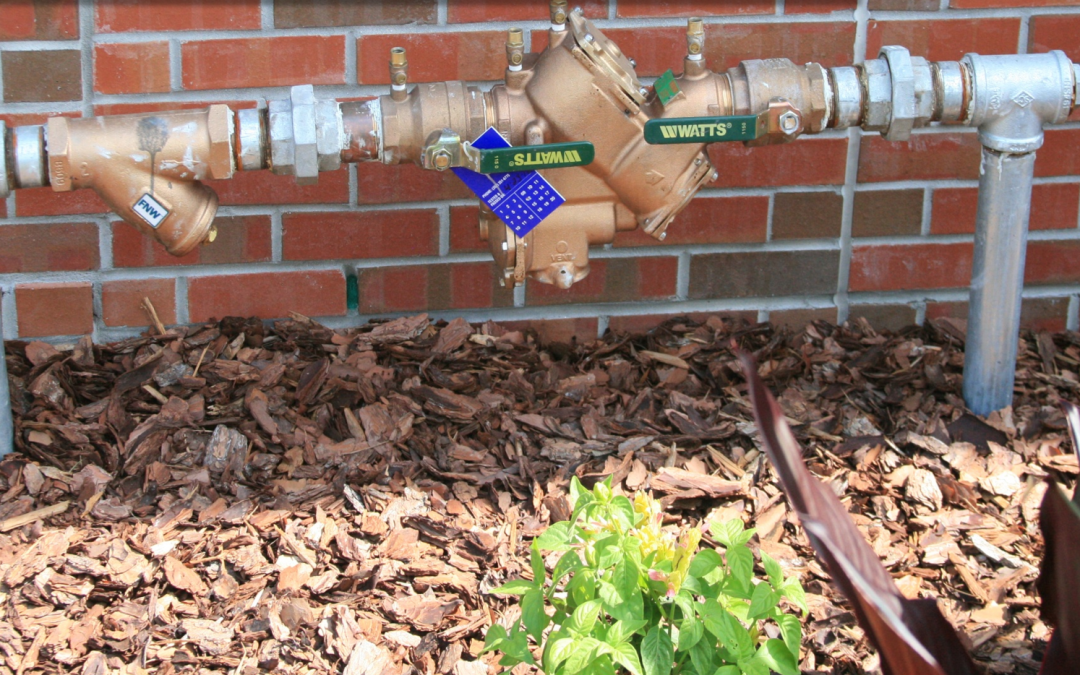
These larger backflow preventers are required to be installed and regularly inspected for certain plumbing systems. They usually hide under utility boxes or fake rocks. Credit: UF/IFAS.
Backflow preventers do just what their name implies, they prevent backflow. Backflow in a plumbing system happens when pressure in another part of the system drops, causing water from other locations to move in to equalize the pressure difference. This can be a problem in a potable water system when the main line loses pressure and water from a contaminated line is pulled in to the main line, potentially contaminating many users water. This can happen when a pipe breaks or during fire-fighting activities, for example. Contaminants of concern include chemical and biological agents, such as heavy metals, industrial compounds, bacteria, and pesticides.
Many of our indoor fixtures have built-in backflow preventers, such as toilets and bathtubs. Exterior backflow preventers, usually found under boxes or fake rocks near the water connection, are required for plumbing systems considered to be more of a hazard risk or where higher pressures could more easily flow back into the line. Examples of such plumbing systems include those with fire-fighting systems, hospitals, several-storied buildings, those associated with certain industrial processes, and, finally back to gardening, irrigation systems. In 1990, the Florida Building Code required that all residential irrigation systems include a backflow preventer. While the Florida Building Code also requires backflow preventers on all hose connections, i.e. spigots, many residential homeowners do not have these in place nor do water suppliers have the budgets to inspect each home’s spigots. A survey of 200 homes in the Midwest during 2002 found that 91% of homeowners did not have a backflow preventer attached to their spigots. I’m not sure north Florida would fare much better.
Gardeners should be aware of this responsibility and go ahead and install a backflow preventer on their outdoor spigots. This is especially true for those that use hose-end fertilizer or pesticide applicators, mix pesticides, or leave a pressurized hose connected to a sprinkler or other device. In addition to chemicals, all sorts of bacteria, algae, and other contaminants can grow in or enter a hose and get sucked back into the house’s line or, worse, the public supply line.
Backflow preventers are cheap and easy to install. A simple brass backflow preventer that connects between the spigot and the hose runs from $3 to $10 and will typically last for several years. You know it’s still working when water leaks out of the backflow preventer as you turn the spigot off. That’s a pretty easy and inexpensive fix to make sure the potable water source stays clean.
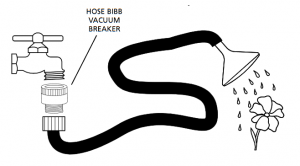
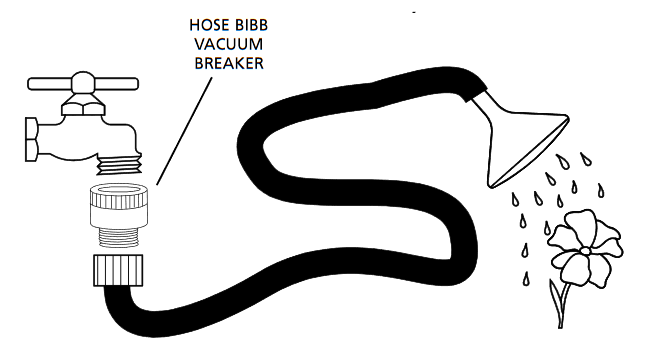
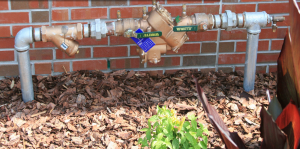
A simple and inexpensive hose bibb/spigot backflow preventer can help gardeners protect their potable water supply. Credit: Univ. S. Cal.
For more information on backflow prevention devices, and to keep writing ideas coming in, please contact your local UF/IFAS Extension Office.
by Matt Lollar | Aug 1, 2019
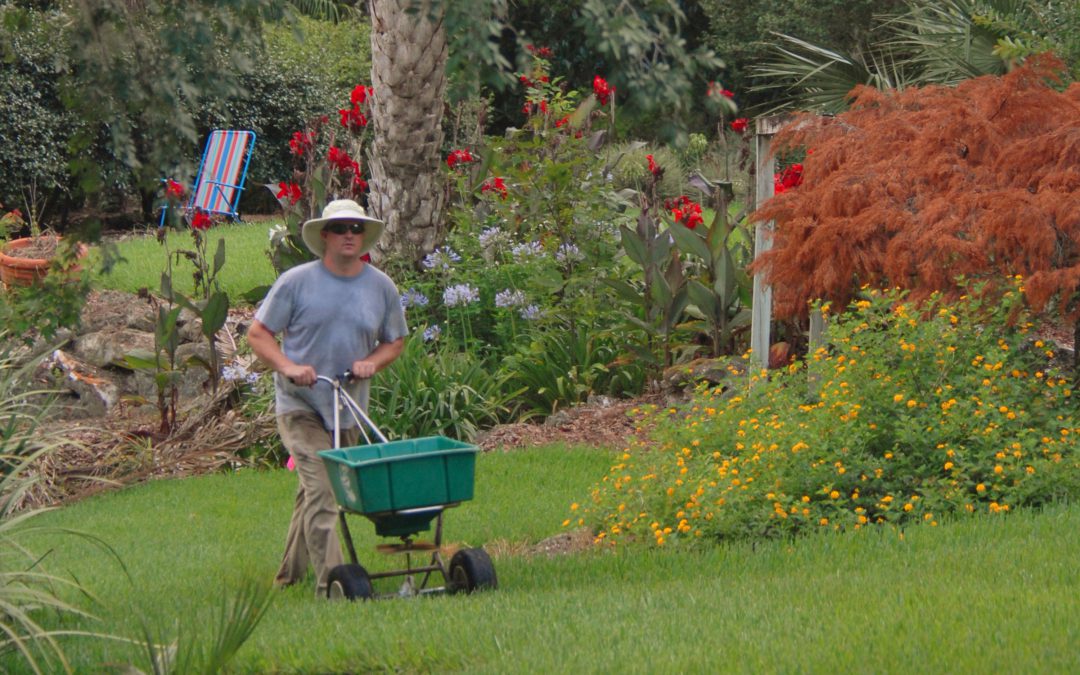
Large patch Rhizoctonia solani (known as brown patch in cool season grasses) is a common disease of many turfgrass species. It usually occurs during the cooler months from October through May when temperatures are below 80 degrees Fahrenheit. However, signs and symptoms of large patch and other Rhizoctonia diseases can be observed throughout the summer. Less common Rhizoctonia species that occur during the summer months are Rhizoctoni zeae and Rhizoctonia oryzae. Extended periods of turf wetness from excessive rainfall or overwatering provide ideal conditions for the disease to develop and spread.

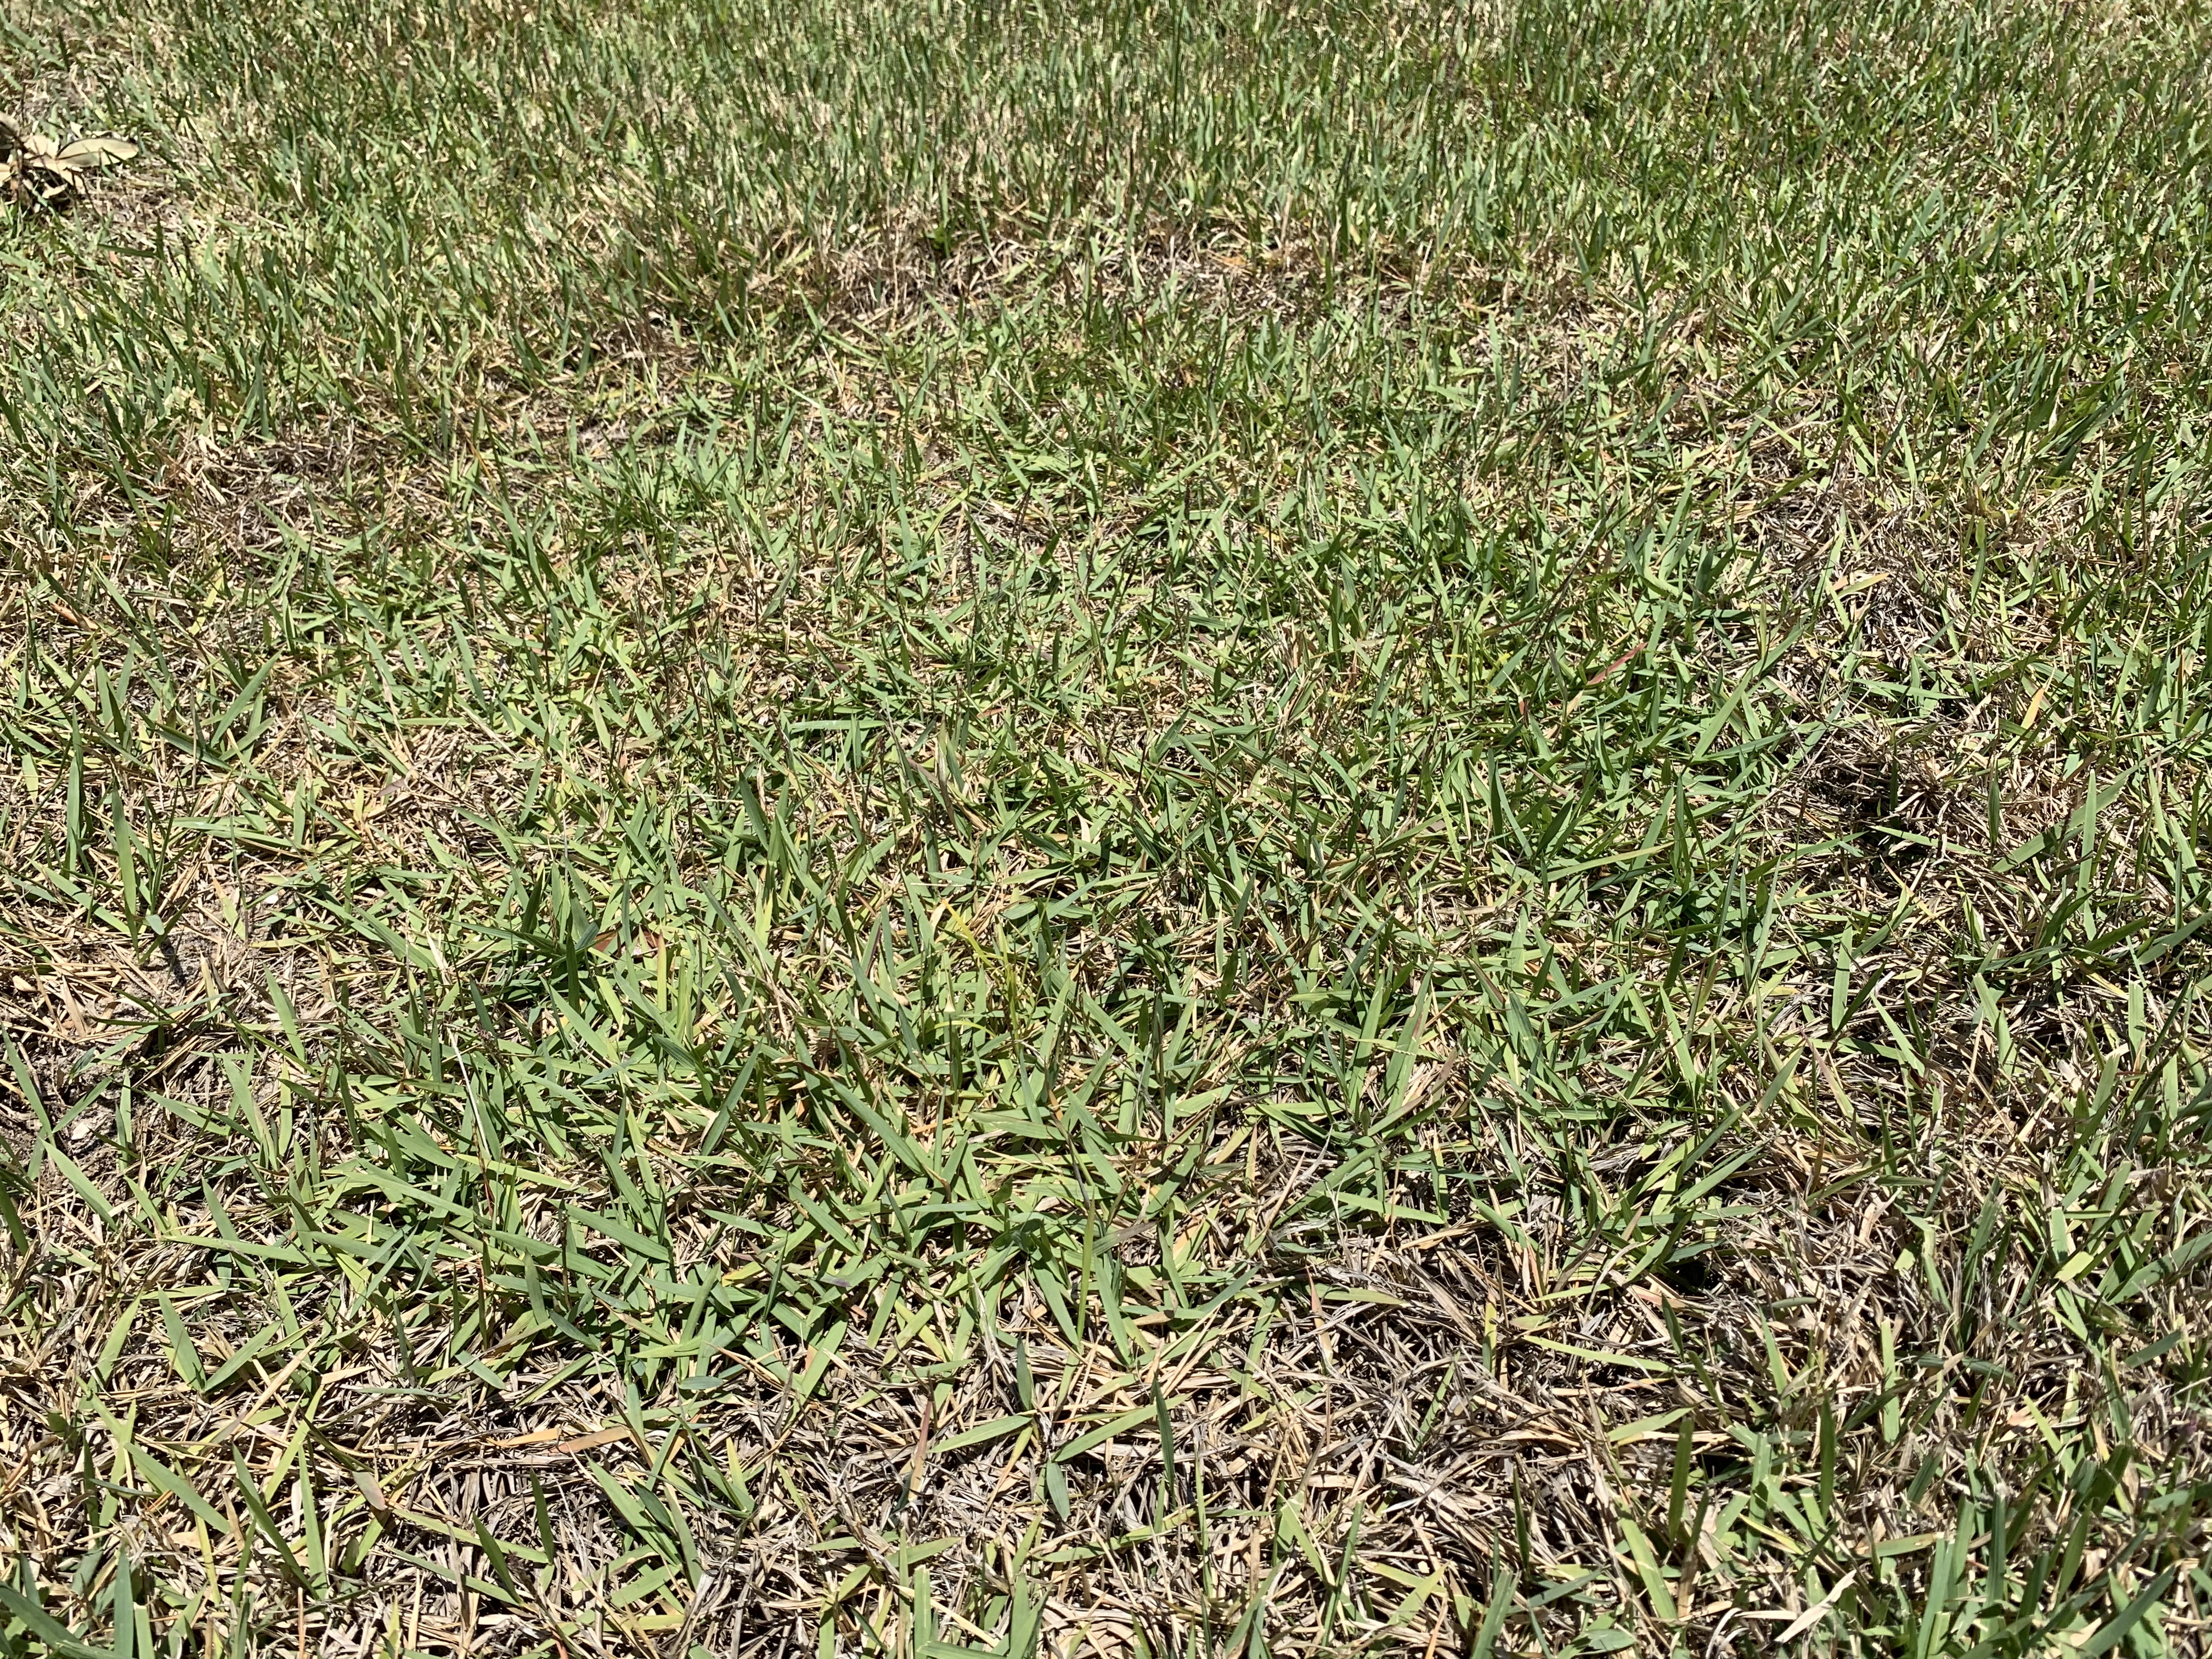
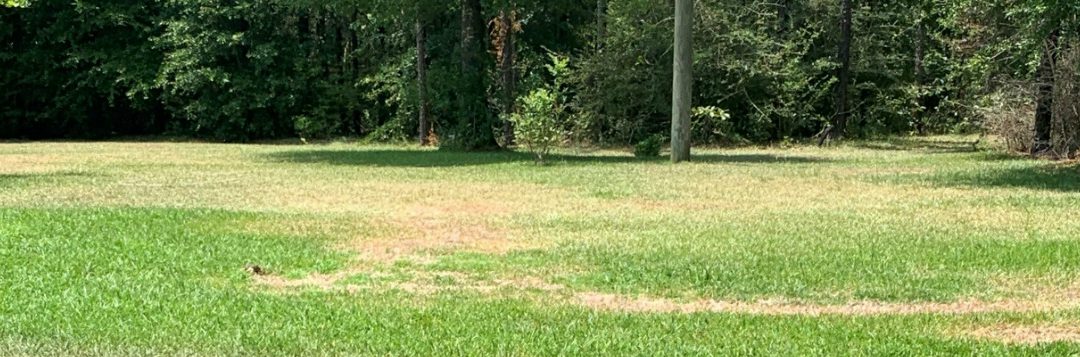
Rhizoctonia in a zoysiagrass lawn. Photo Credit: Matt Lollar, University of Florida/IFAS Extension – Santa Rosa County
This summer in Santa Rosa County, Rhizoctonia has been positively diagnosed in both St. Augustinegrass and zoysiagrass lawns and suspected in a number of centipedegrass lawns. The disease usually starts as small, yellow patches (about a foot in diameter) that turn reddish brown, brown, or straw colored as the leaves start to die. Patches often expand to several feet in diameter. It is common to see rings of yellow or brown turf with otherwise healthy turf in the center. The fungus infects portions of the blades closest to the soil, eventually killing the entire leaf. Grass blades can easily be pulled off their stems, but roots are not affected by the disease.
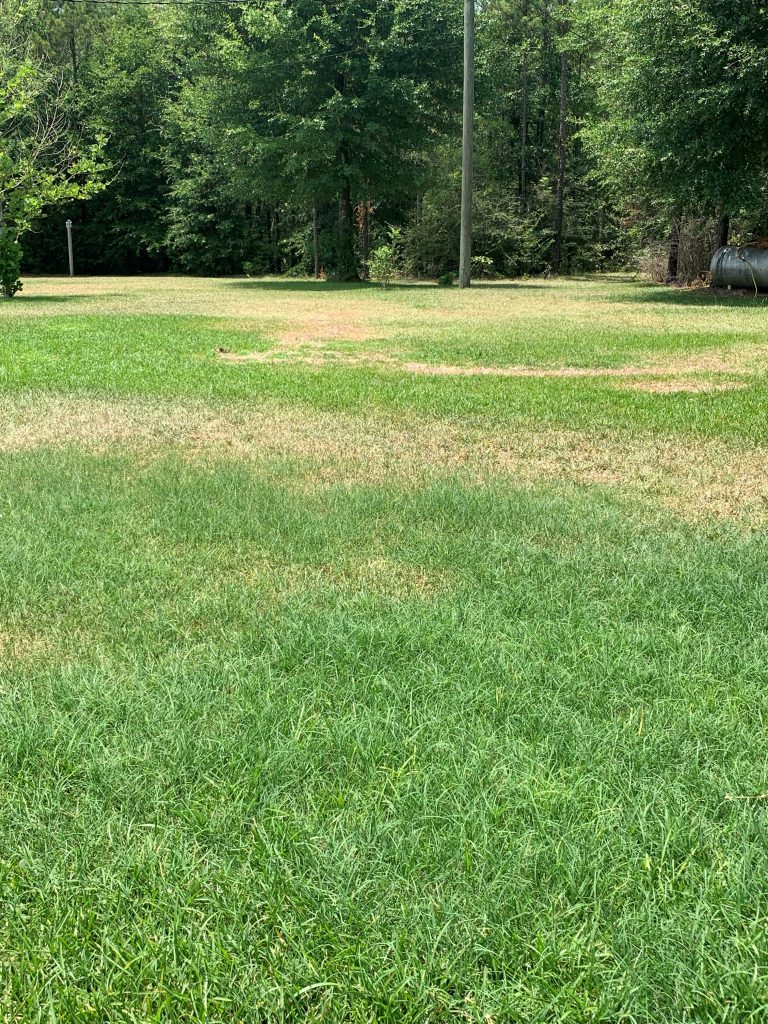
Rhizoctonia in a St. Augustinegrass lawn. Photo Credit: John Atkins, University of Florida/IFAS Extension – Santa Rosa County
Overwatering and excessive fertilization can both contribute to the development of Rhizoctonia disease. Improper timing of fertilizer application can also promote disease development. In the Florida Panhandle, turfgrass is actively growing from April to October. Slow-release fertilizers are recommended to allow for a more even distribution of nutrients over the course of multiple months. Recommended fertilizer rates are based on turfgrass species, geographical location, and fertilizer analysis. Please refer to the UF/IFAS Publication: “Urban Turf Fertilizer Rule for Home Lawn Fertilization” for rate recommendations.
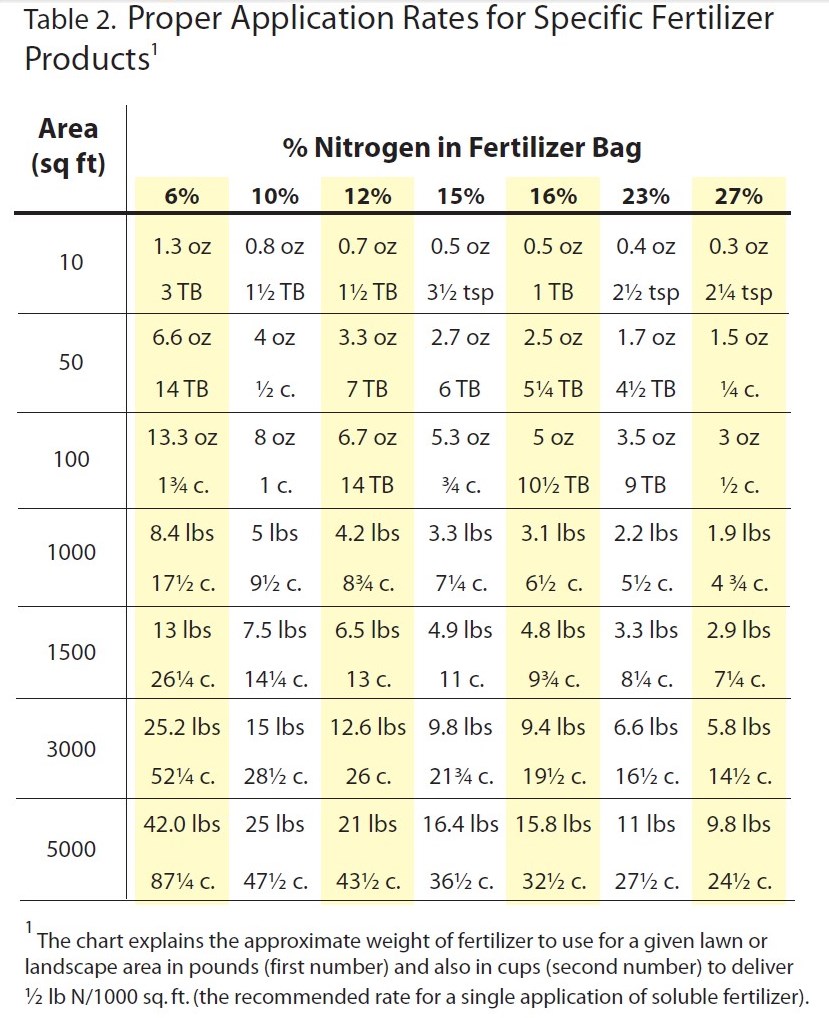
Chart excerpted from Florida-Friendly Landscaping publication.
If large patch or another Rhizoctonia disease is confirmed in your lawn, then chemical controls are necessary to keep the disease from spreading. Fungicide products containing the active ingredients azoxystrobin, chlorothalonil, fludioxonil, flutolanil, iprodione, mancozeb, metconazole, myclobutanil, polyoxin D, propiconazole, thiophanate-methyl, thiram, triadimefon, trifloxystrobin, or triticonazole are viable options for keeping the disease from spreading. For best results, follow the fungicide label for application instructions. It’s important to not only treat the affected areas, but also the healthy turf surrounding these areas in order to keep the diseased spots from growing in size.
Unfortunately, turf diseases are often not noticed until large patches of declining and dead turf are noticed. In these cases when large dead patches exist in the lawn, it is usually necessary to resod these areas. As with most problems that arise in the landscape, good cultural practices are the most proactive way to mitigate the chances with turfgrass diseases. The UF/IFAS Florida Friendly Website provides up-to-date solutions and recommendations for caring for Florida landscapes.
by Daniel J. Leonard | May 27, 2019
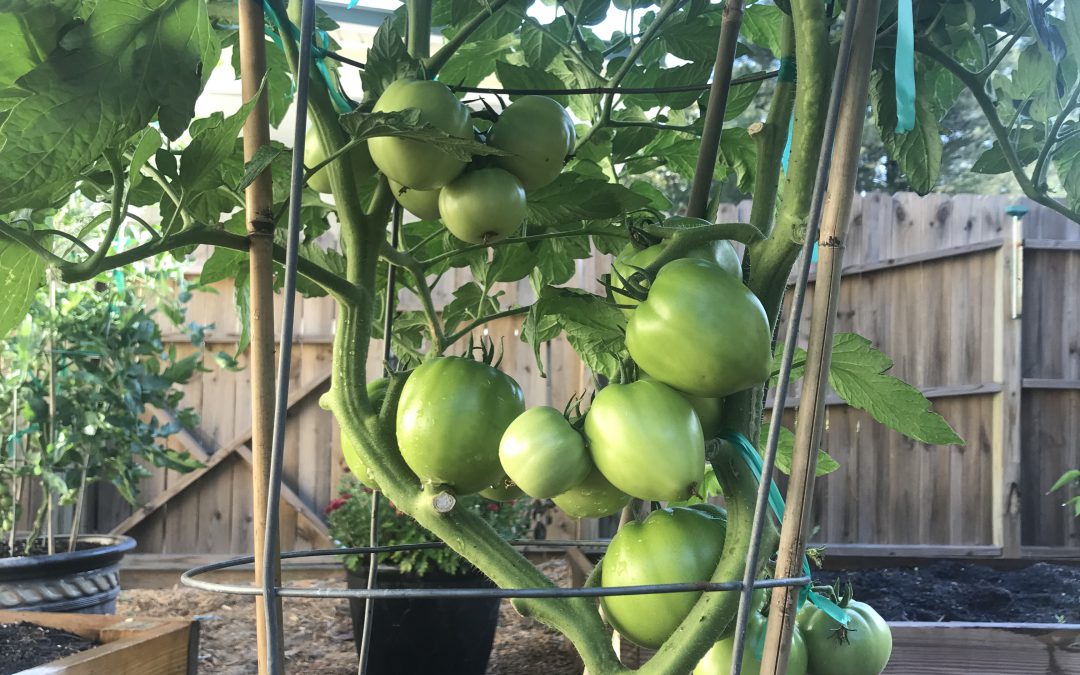
Talk to nearly any Panhandle gardener and one of the first things brought up in conversation is the difficulty growing large, beefsteak/slicing tomatoes (Solanum lycopersicum) in their home garden. Large tomatoes are indeed among the more challenging garden vegetables in North Florida, affected by myriad pests, pathogens and abiotic issues. However, giving up growing this garden favorite is unwarranted as success can be had by following a couple of often overlooked, simple steps to ward off potential problems.
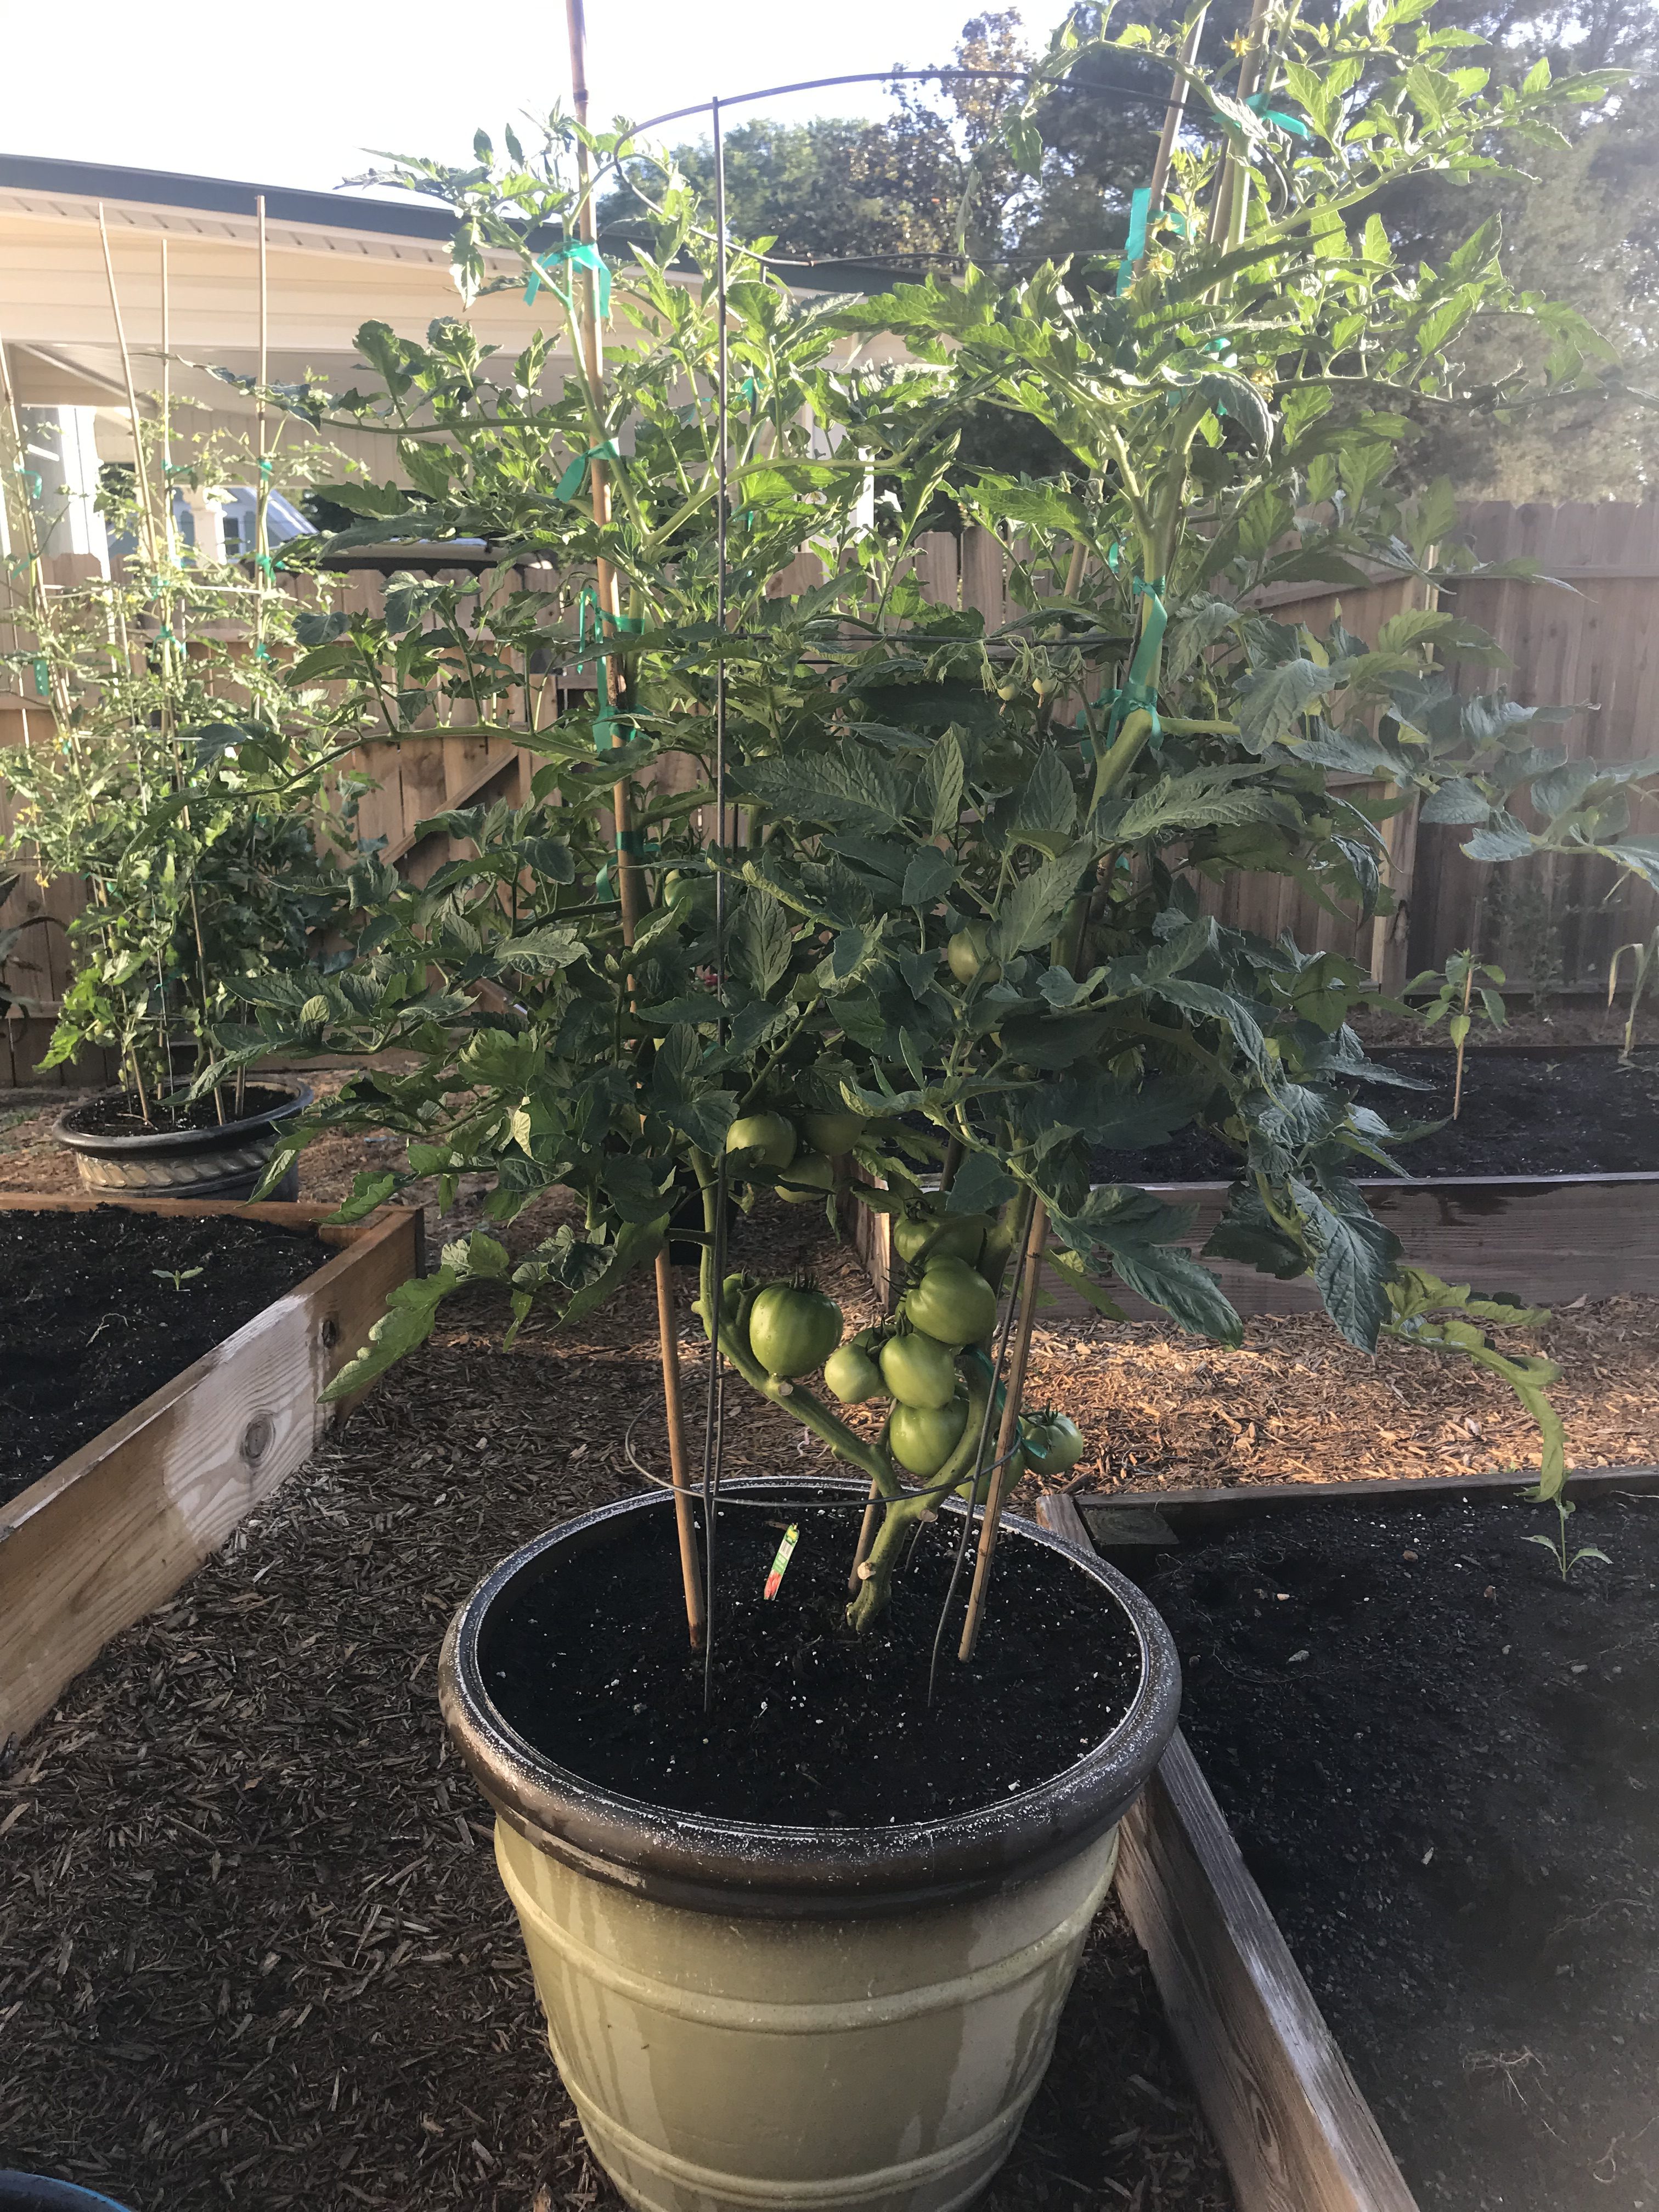
Choose Resistant Cultivars – One of the major recent gardening trends is the rise of heirloom veggies, particularly heirloom tomatoes. While many of these varieties certainly are interesting and often possess superior flavor/texture, heirlooms are, as a group, extraordinarily susceptible to disease in our climate. Fortunately for gardeners, there are a number of excellent varieties available with large resistance profiles to many common diseases and a similar taste profile to heirloom favorites! ‘Big Beef’ (pictured), ‘Better Boy’, ‘Celebrity’, and ‘Skyway’ are just a few of the many great cultivars with extensive disease resistance available as transplants at garden centers or as seed from quality online seed vendors.

Tomato ‘Big Beef’ in 15 gallon decorative container
Start Early – Once, you’ve selected the proper cultivar, the next key is to get them in the ground early! I’m convinced one of the primary reasons folks fail with tomatoes is waiting for “traditional” garden planting dates. For instance, an old tradition in the South is to plant your garden on Good Friday before Easter. However, according to Johnny’s Selected Seeds Southeast Sales Representative Blake Thaxton, tomatoes should be germinated and growing in the garden no later than March 15. Mr. Thaxton notes two primary reasons for this, the most important being pest/disease avoidance. Beefsteak tomato varieties take around 70 days from planting to harvest, so a March 15th planting date yields ripe tomatoes around the third or fourth week of May, when pest/disease pressure is still manageable. Pests and disease occurrence becomes exponentially worse in the Panhandle as May trickles into June and July, therefore it is critical that your fruit begin ripening prior to this onslaught. An important second motivation to plant early is that tomatoes stop setting fruit when nighttime temperatures rise above 75°F. At these temperatures, tomato pollen is rendered sterile and though the plant will continue flowering, no fruit will be set.
Mulch – Another overlooked best management practice in backyard veggie gardening is mulching! Those of us who tend flower beds already know many benefits of mulch like soil temperature moderation, weed prevention, and moisture conservation. But for tomato growers, mulch has another benefit – disease prevention! Several serious diseases that affect tomato are soil-borne pathogens (i.e. Early Blight, Late Blight, Bacterial Spot, etc.). These pathogens find their way onto plants either indirectly via water splashing from soil onto leaves or direct contact from leaves and fruit resting on the soil. To prevent these pathogens from infecting plant tissue, apply an organic mulch (preferably wheat straw or tree leaves) under and around plants. This simple step goes a long way toward season-long, yield-saving disease prevention.
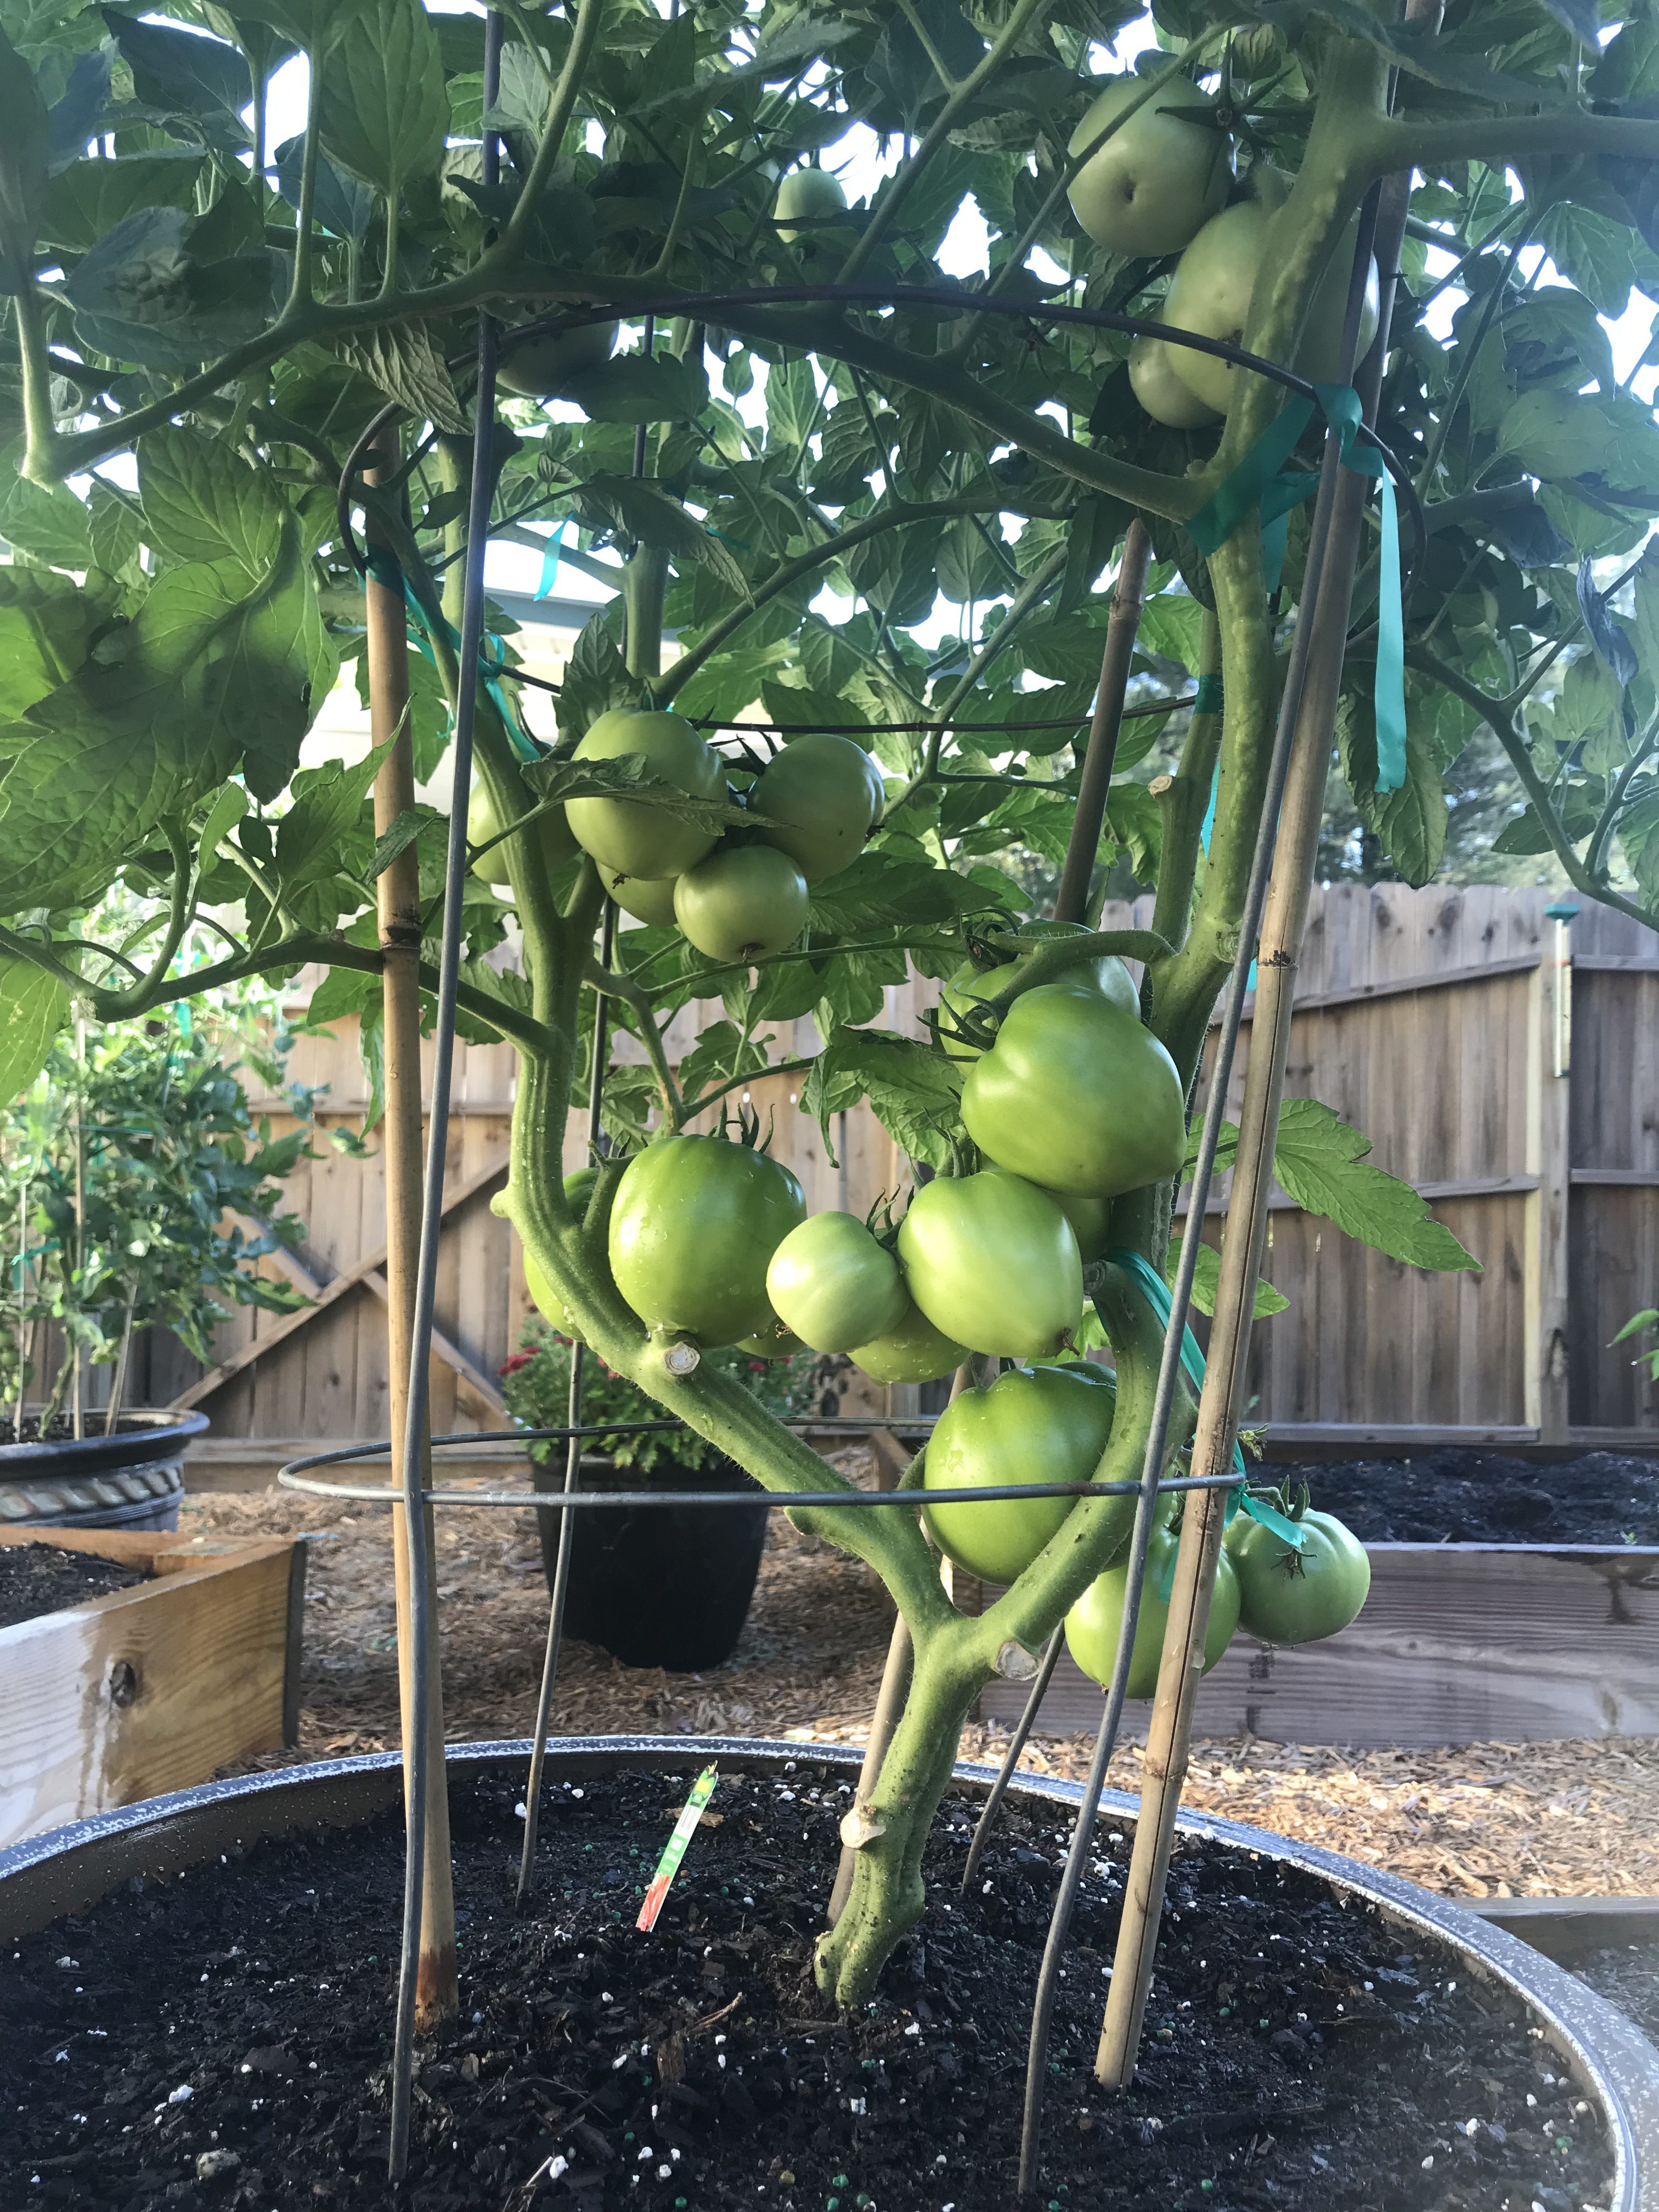
Consistent Watering – Everyone knows plants need water but what you might not know is that irrigation consistency makes a huge difference in plant health, particularly tomatoes. Consistent watering is key in helping ward off one of the most frustrating tomato maladies, blossom end rot (BER) – you know, the one where the bottom end of your perfectly good tomato fruit turns to a brownish mush! Though BER is caused by calcium deficiency, the condition is commonly induced by creation of distinct wet and dry periods from non-regular watering, interfering with calcium uptake and availability to the plant. So, while you may have adequate soil calcium, if you don’t water correctly, the condition will happen anyway! It’s also good to keep in mind that mature tomato plants use large quantities of water daily, so during the heat of summer, plants in containers may need to be watered multiple times daily to maintain consistently moist soil. Think about it, you don’t drink 8 glasses of water when you wake up and then never drink again throughout a hot day. A tomato is no different. Allowing your plants to wilt down before providing additional water ruins productivity and can induce BER.
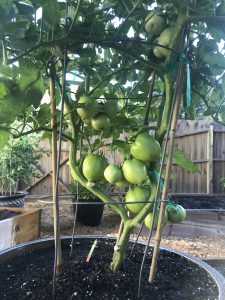
Tomato ‘Big Beef’ demonstrating pruning for soil clearance and airflow.
Pruning – I get it. Once you’ve nursed your baby tomato from a wee transplant or seed into a rapidly growing and flowering plant, it seems counter-intuitive to break out the pruners, but to keep your tomato plant as healthy as possible for as long as possible, that is what you must do! Pruning tomatoes should accomplish two things. First, remove the bottom layer of foliage from the plant base, so that water will not readily splash onto the lowest remaining leaves. (I tend to remove all leaves up to the second set of flowers 8-12” from the soil’s surface.) As with mulching, this prevents bacterial and fungal pathogens from spreading easily from the soil surface onto your plant. Second, tomato plants, especially the vigorous indeterminate varieties, often grow more foliage than is necessary for fruit production. This excess foliage can prevent airflow and trap moisture in the canopy of the plant, promoting disease. To open up the canopy and allow for more airflow, I prune off leaves that grow from the primary stems inward to the center of the plant. The idea is to keep the inside of the plant open while allowing enough leaves to power photosynthesis and shade the developing fruit below.
Tomatoes are notoriously hard to grow, but by following a few easy preventative practices, gardeners can greatly increase their chances of realizing harvestable fruit come summer. Please keep in mind that this is not an exhaustive list that will ensure disease-free plants over the entire growing season (you should also get a soil test to make sure your pH and soil fertility are correct and ideally you’d never work in your tomatoes when they are wet, etc., but this is a good place to start!). However, a little bit of planning and prevention early in the season can make growing tomatoes a lot less frustrating! As always, if you have questions regarding tomatoes or any other horticultural topic, please contact your local UF/IFAS Extension Office. Happy gardening!
by Matt Lollar | Apr 9, 2019
The Evidenced-Based Zoysiagrass Management Workshop is returning to Milton on April 23 at the University of Florida – Milton Campus. Attend to get updates on managing zoysiagrass and to earn CEUs. Register at: UF/IFAS Evidence-Based Zoysiagrass Workshop
by Daniel J. Leonard | Apr 8, 2019
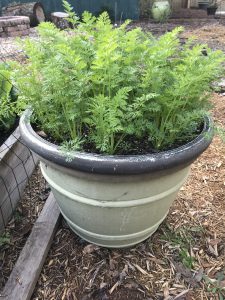
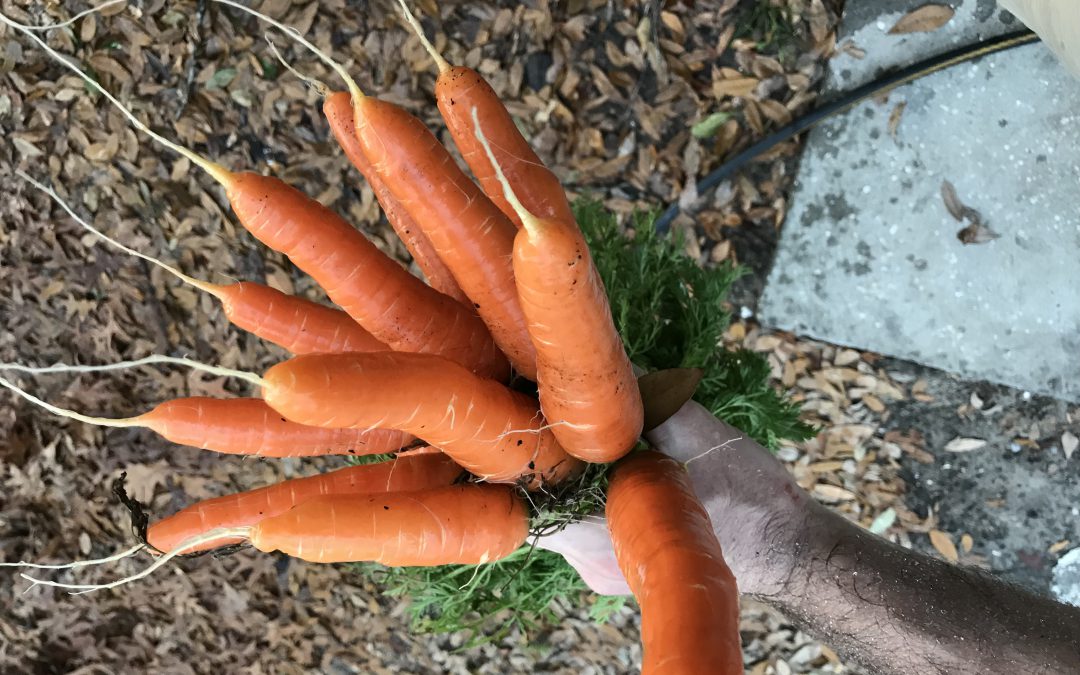
Carrots growing in a large container.
After tending a home vegetable garden for any length of time in the Panhandle, you begin to learn some things. Tomatoes are awfully hard to grow. Raised beds drastically lower the difficulty of gardening in general. You should never plant mint in a permanent veggie garden. Swiss Chard has to be started early because it grows as molasses creeps. Of all of these anecdotal maxims I’ve discovered, the one with the most flavor return on my gardening investment is that carrots should always be a part of your cool season garden. A fresh carrot out of the garden is hard to beat. The difference between a grocery store carrot and one fresh out of your own garden is astonishing and will change your culinary life. Though carrot season in Florida is just ending (my final batch was harvested yesterday), it’s the perfect time to learn about growing carrots here and plan to get some in the ground this fall!
There are a number of reasons to grow and eat carrots. They’re obviously very healthy, though I dispute the whole eat carrots and you’ll have great eyesight thing – apparently I acquired the taste for them too late to help. They go well in more dishes than they don’t. However, the real two reasons you should supplement your grocery store carrot purchases with home grown harvests are that they’re so easy to grow and that there are so many more options than the standard long, thin orange varieties adorning the produce aisle shelves.
‘Bolero’ Carrots
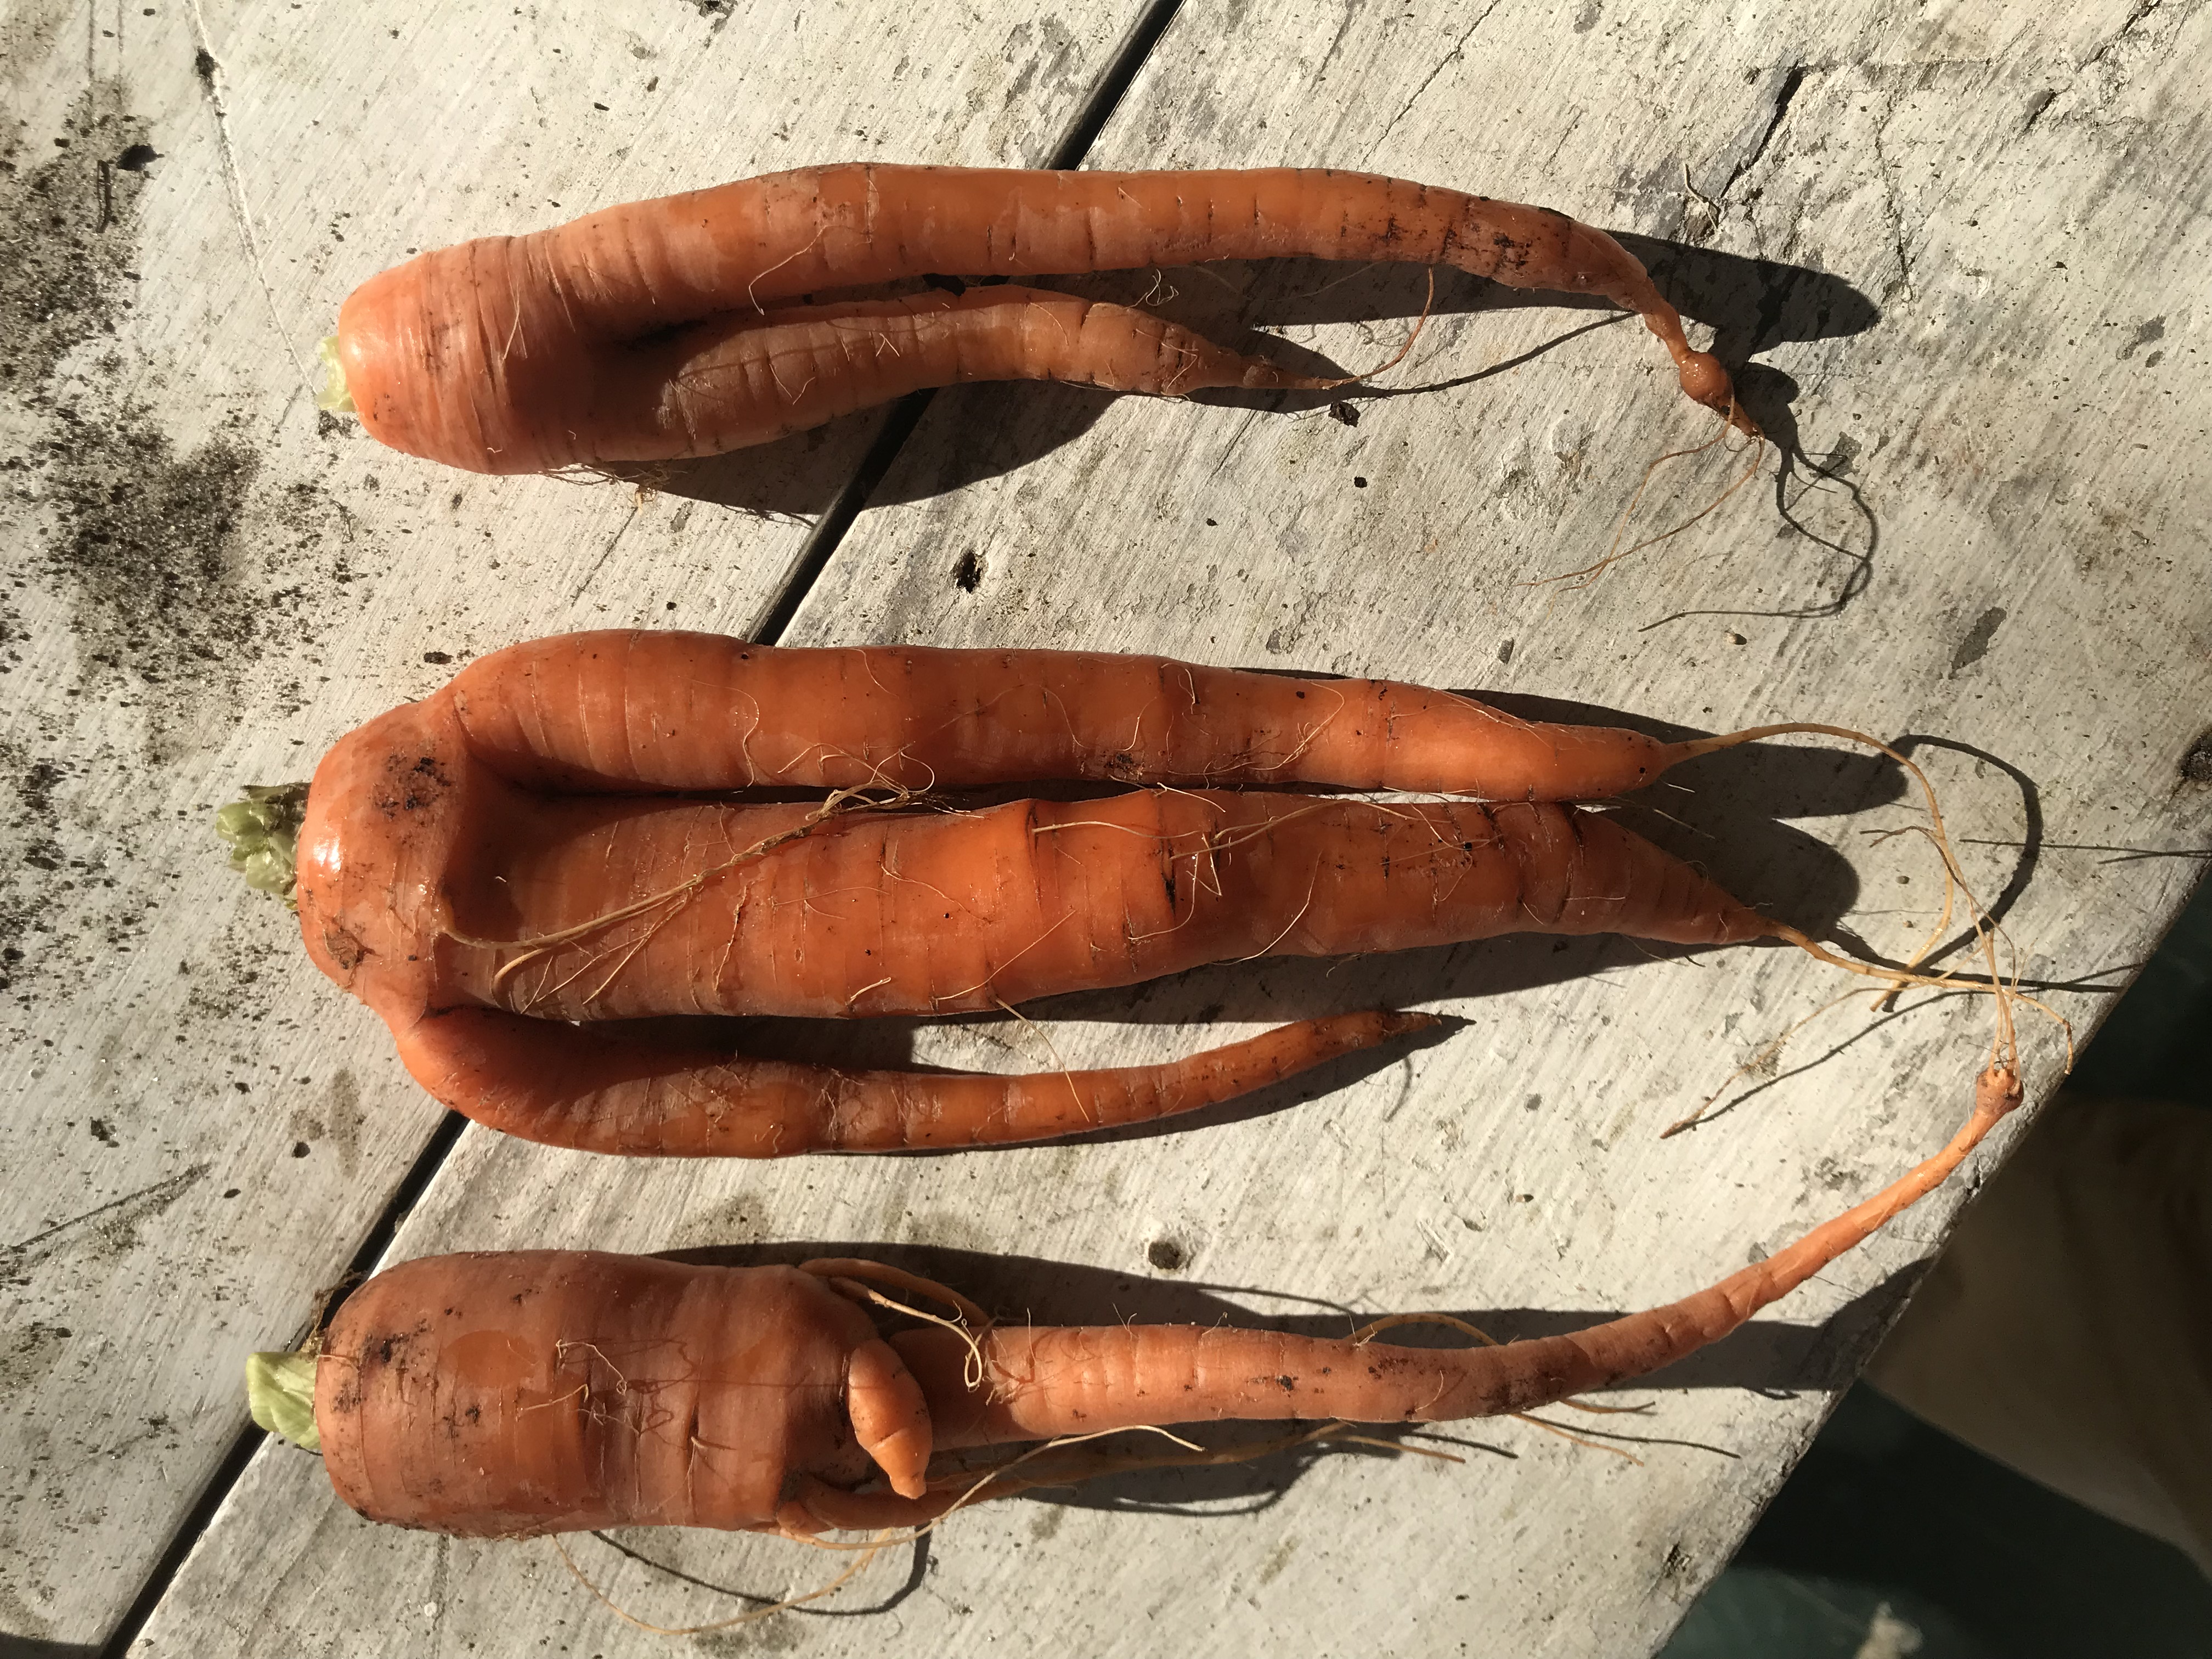
Though carrots are remarkable easy to grow, they do ask a couple of things of gardeners. They are a cool season vegetable and are generally planted from seed beginning in late August through early September in the Panhandle, though successive plantings can continue through at least February if you want to extend your harvest. Also, like many other root vegetables, carrots don’t transplant well so direct seeding in the garden is a must. But before you even consider seeding, care must be taken to make sure the soil bed you’ll be seeding in has been properly prepared. One of the few ways to fail growing carrots is to not start with a loose soil free from any potential obstructions. If the development of the carrot root is disturbed by anything during the germination and growing process (this includes manure aggregates or other clumpy soil, sticks, rocks or even a hard layer of soil hiding under your loose compost), the end product will be deformed. To prevent this, thoroughly till your raised bed soil to at least 12” and break up any larger soil particles that are left with your hands. If you don’t get your soil bed perfect though, fear not, deformed carrots are definitely edible, they just won’t look like they’re supposed to and are more difficult to clean and process!
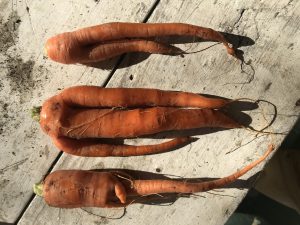
Deformed carrots due to clumpy compost!
Once you’re ready to plant, I’ve found it easier on poor eyes and fumbling fingers like mine to sprinkle the tiny carrot seeds in shallowly furrowed rows 10”-12” apart and thin the seedlings later, rather than trying to individually space seeds the recommended 1”-3” apart. Finally, these colorful little veggies love water and require good fertility. To ensure good expansion of the edible root, maintain consistent moisture and fertilize at planting with a good slow release fertilizer. Additional fertilizer applications may be required later in the growing season as most carrots take around ten weeks to gain maturity.

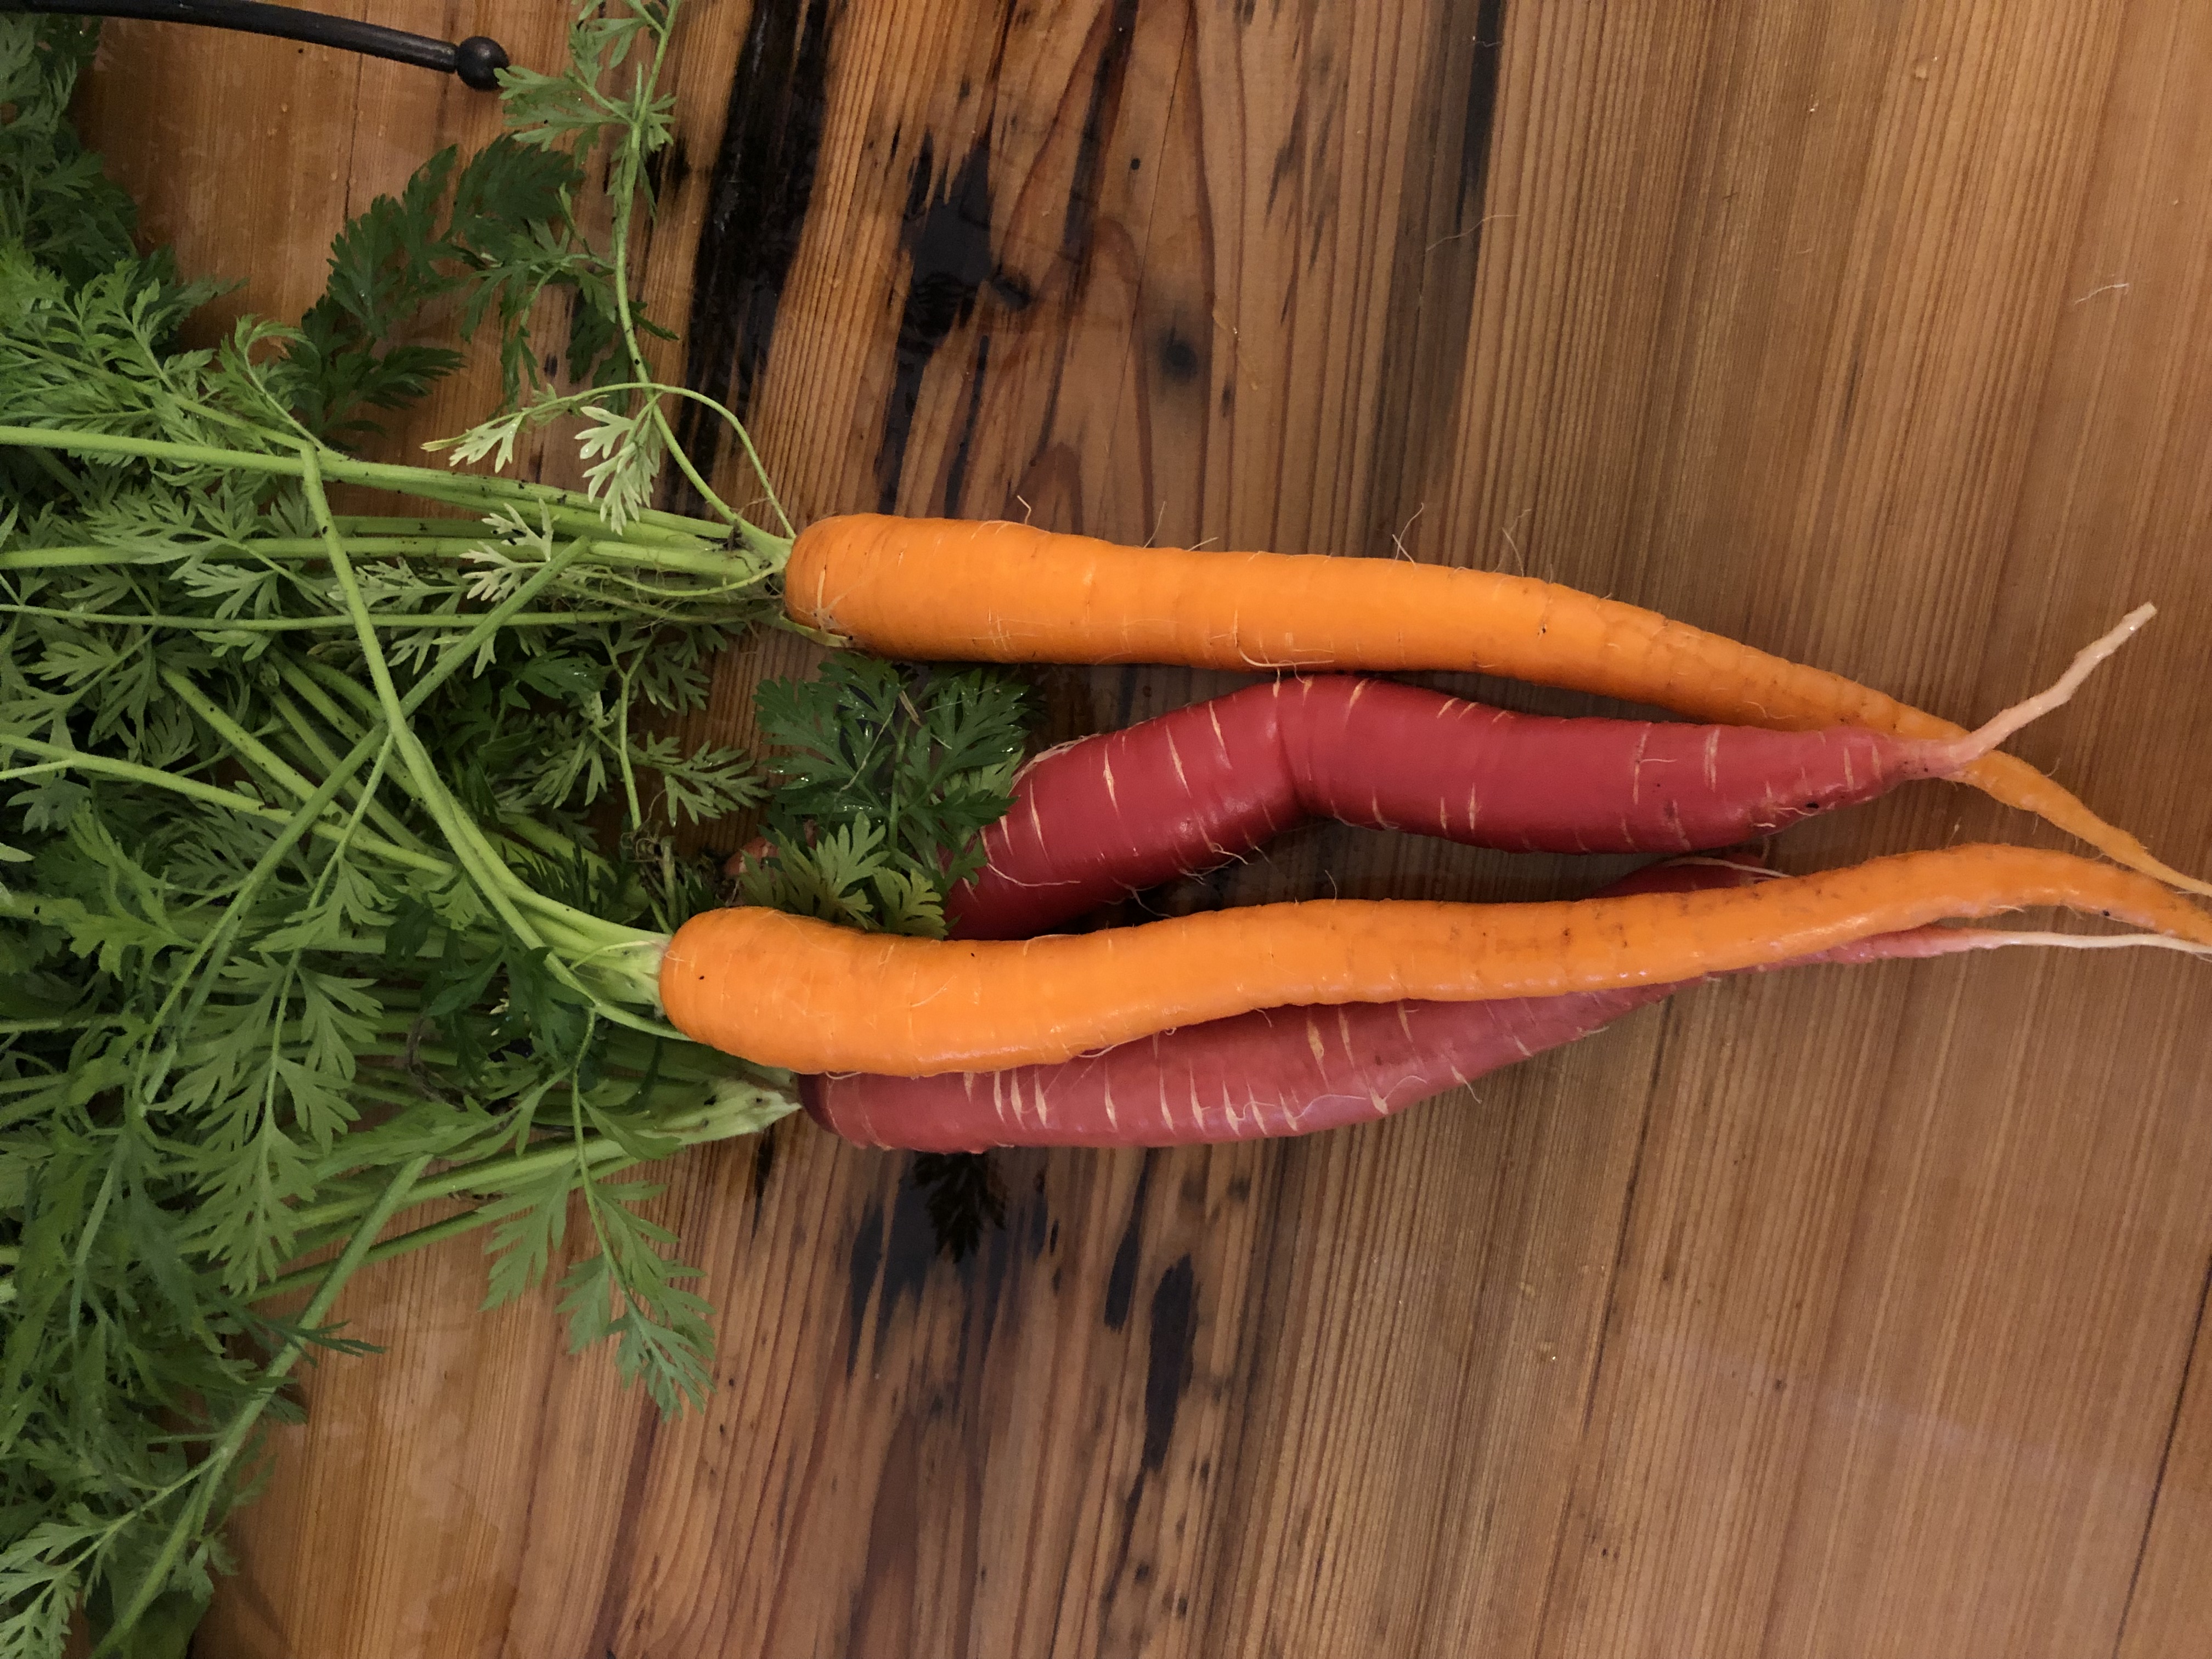
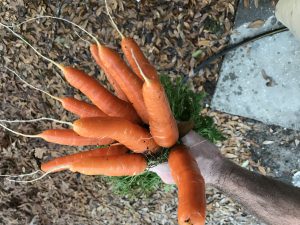
‘Sugarsnax’ (orange) and ‘Malbec’ (red) carrots
In this age of online catalogs, farmer’s markets, and demanding consumers who crave interesting food, the selection of carrot varieties available for gardeners to grow has never been better. Among the hundreds of individual cultivar options are several broad types of carrots you’ll need to choose from. You’re probably familiar with the Imperator types. These are the extra-long, durable carrots most often find in stores. If you have a deep raised bed or other large container, Imperator varieties can be extremely rewarding! I grew the Imperator-type ‘Sugarsnax’ this year and highly recommend it for ease of growing, size and flavor. Next up are the Nantes types. These carrots are medium length and cylindrically shaped. Sometimes called “storage” carrots, these types tend to store well for long periods of time after harvest and retain their flavor well. I’ve tried a few over the last several years and can recommend ‘Bolero’ and ‘Napoli’ with confidence. There is even a carrot type for those of you with shallow raised beds (8” or less) that can’t accommodate the previously listed types! Chantenay type carrots are excellent performers in these situations as they are generally a bit shorter and possess a conical shape with roots wider at the top and tapering to the tip, making a deep soil bed a bit less critical. Finally, there are even some excellent cultivars of carrots in colors other than orange! That’s right, you can grow white, purple, yellow, and even red carrots! I’ve done very well with ‘Purple Haze’ (purple with orange interior), ‘White Satin’ (creamy white color), and ‘Malbec’ (deep, rich red) and highly recommend all three. Keep in mind that the red and purple carrots tend to lose their color when cooked, so the greatest effect is seen when eaten fresh. All of these cultivars can be found at nearly any of the numerous online and catalog seed retainers such as Johnny’s Selected Seeds, Baker Creek Heirloom Seeds, Burpee, and others.
As you can see, carrots are an easy to grow, extremely rewarding vegetable for the home gardener; give some a try in your raised beds next fall! And as always, if you have any questions about growing carrots or any other gardening related question, contact your local UF/IFAS Extension office!