by Julie McConnell | May 26, 2017

Blue Morpho Butterfly feeding on banana. Photo: J_McConnell, UF/IFAS
Have you been thinking about creating a butterfly garden but don’t know where to start?
Afraid it’s too much upkeep or has to look wild and untamed?

Red Admiral Butterfly. Photo: J_McConnell, UF/IFAS
Spend a Saturday morning with the UF/IFAS Master Gardeners of Bay County to see how to design, install, and maintain a colorful low maintenance butterfly garden.
Next Saturday, June 3rd, is the free Butterfly Gardening Workshop in Panama City at the UF/IFAS Extension Office at 2728 E. 14th Street. Come learn about butterfly gardening and see our vibrant garden.
Please register ahead of time so that we can supply enough materials for all attendees by calling 850-784-6105 or sign up online.
by Daniel J. Leonard | May 18, 2017
If you’re like me, growing turfgrass is often more of a hassle than anything else. Regardless of the species you plant, none tolerates shade well and it can seem like there is a never-ending list of chores and expenses that accompany lawn grass: mowing (at least one a week during the summer), fertilizing, and constantly battling weeds, disease and bugs. Wouldn’t it be nice if there were an acceptable alternative, at least for the parts of the lawn that get a little less foot traffic or are shady? Turns out there is! Enter the wonderful world of perennial groundcovers!
Perennial groundcovers are just that, plants that are either evergreen or herbaceous (killed to the ground by frost, similar to turfgrass) and are aggressive enough to cover the ground quickly. Once established, these solid masses of stylish, easy to grow plants serve many of the same functions traditional turf lawns do without all the hassle: choke out weeds, provide pleasing aesthetics, reduce erosion and runoff, and provide a habitat for beneficial insects and wildlife.
The two most common turfgrass replacements found in Northwest Florida are Ornamental Perennial Peanut (Arachis glabra) and Asiatic Jasmine (Trachelospermum asiaticum); though a native species of Mimosa (Mimosa strigillosa) is gaining popularity also. All of these plants are outstanding groundcovers but each fills a specific niche in the landscape.

Perennial Peanut Lawn
Perennial Peanut is a beautiful, aggressive groundcover that spreads through underground rhizomes and possesses showy yellow flowers throughout the year; the show stops only in the coldest winters when the plant is burned back to the ground by frost. It thrives in sunny, well-drained soils, needs no supplemental irrigation once established and because it is a legume, requires little to no supplemental fertilizer. It even thrives in coastal areas that are subject to periodic salt spray! If Perennial Peanut ever begins to look a little unkempt, a quick mowing at 3-4” will enhance its appearance.

Asiatic Jasmine
Asiatic Jasmine is a superb, vining groundcover option for areas that receive partial to full shade, though it will tolerate full sun. This evergreen plant sports glossy dark green foliage and is extremely aggressive (lending itself to very rapid establishment). Though not as vigorous a climber as its more well-known cousin Confederate Jasmine (Trachelospermum jasminoides), Asiatic Jasmine will eventually begin to slowly climb trees and other structures once it is fully established; this habit is easily controlled with infrequent pruning. Do not look for flowers on this vining groundcover however, as it does not initiate the bloom cycle unless allowed to climb.

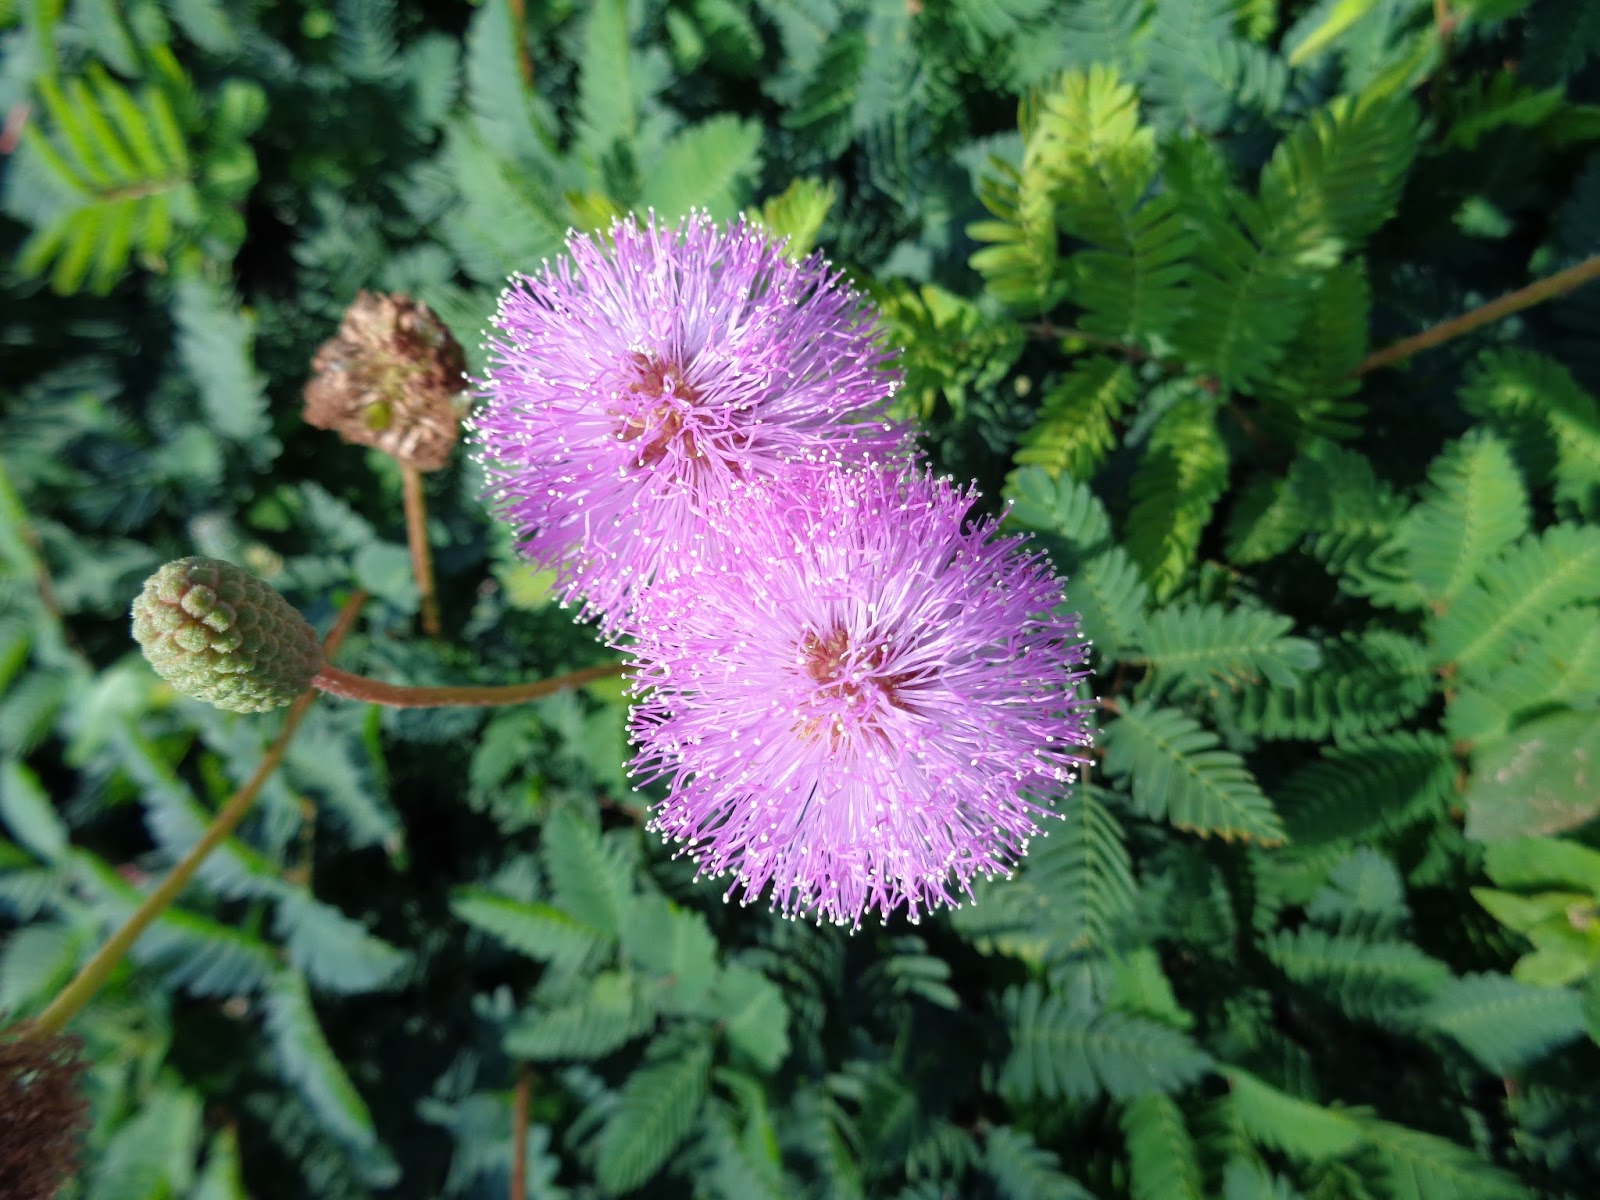
Sunshine Mimosa
For those that prefer an all-native landscape, Sunshine Mimosa (Mimosa strigillosa), also known as Sensitive Plant, is a fantastic groundcover option for full-sun situations. This herbaceous perennial is very striking in flower, sending up bright pink, fiber-optic like blooms about 6” above the foliage all summer long! Sunshine Mimosa, like Perennial Peanut, is a legume so fertility needs are very low. It is also exceptionally drought tolerant and thrives in the deepest sands. If there is a dry problem spot in your lawn that receives full sun, you can’t go wrong with this one!
As a rule, the method of establishing groundcovers as turfgrass replacements takes a bit longer than with laying sod, which allows for an “instant” lawn. With groundcovers, sprigging containerized plants is most common as this is how the majority of these species are grown in production nurseries. This process involves planting the containerized sprigs on a grid in the planting area no more than 12” apart. The sprigs may be planted closer together (8”-10”) if more rapid establishment is desired.
During the establishment phase, weed control is critical to ensure proper development of the groundcover. The first step to reduce competitive weeds is to clean the site thoroughly before planting with a non-selective herbicide such as Glyphosate. After planting, grassy weeds may be treated with one of the selective herbicides Fusilade, Poast, Select, or Prism. Unfortunately, there are not any chemical treatments for broadleaf weed control in ornamental groundcovers but these can be managed by mowing or hand pulling and will eventually be choked out by the groundcover.
If you are tired of the turfgrass life and want some relief, try an ornamental groundcover instead! They are low-maintenance, cost effective, and very attractive! Happy gardening and as always, contact your local UF/IFAS County Extension Office for more information about this topic!
by Beth Bolles | May 1, 2017
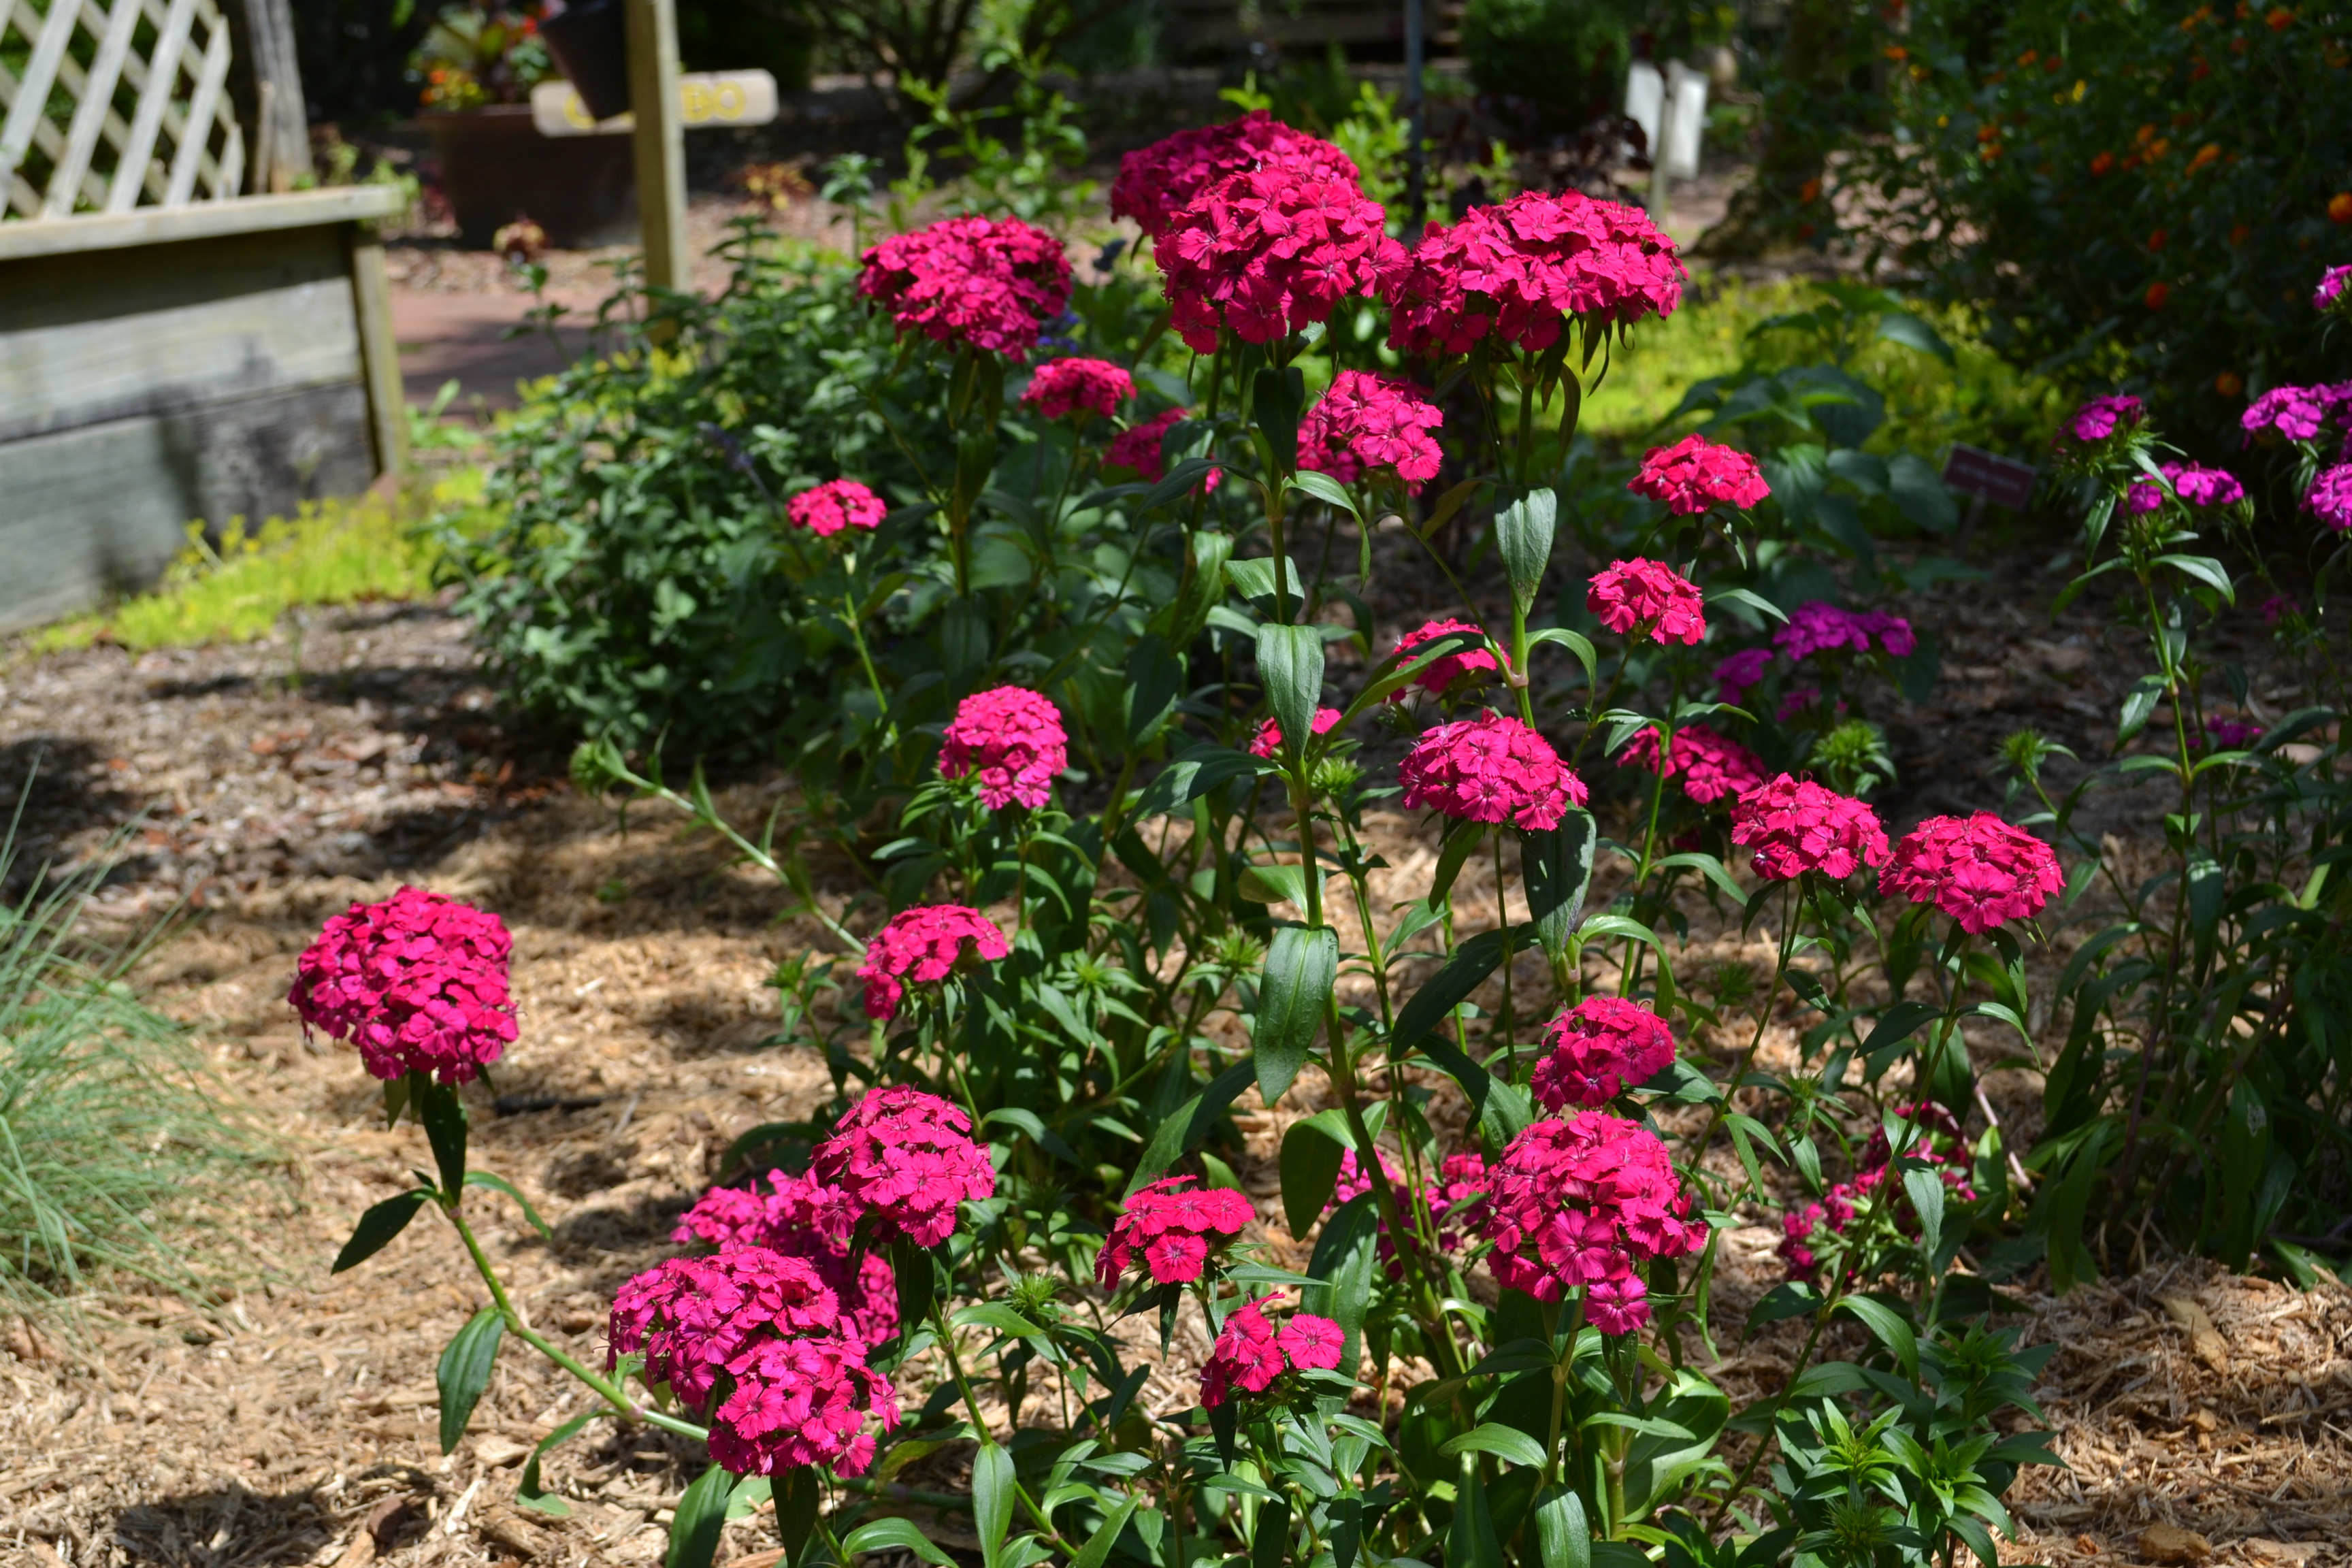
We may shy away from drama in our lives but drama in the garden is always welcome. One plant series that will be a prominent feature in any garden bed is the Amazon Dianthus series.
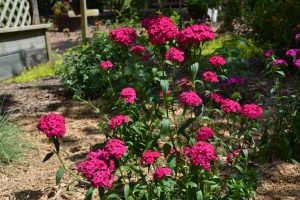
Amazon Dianthus series is showy in the garden or in a container. Photo by Beth Bolles, UF IFAS Extension Escambia County
Although we normally consider Fall the time to plant dianthus, the Amazon Series developed by PanAmerican Seed company can be planted in Spring for blooms that extend into Summer. This is the combination of two dianthus and the results are plants with striking colors and longer blooming cycles.
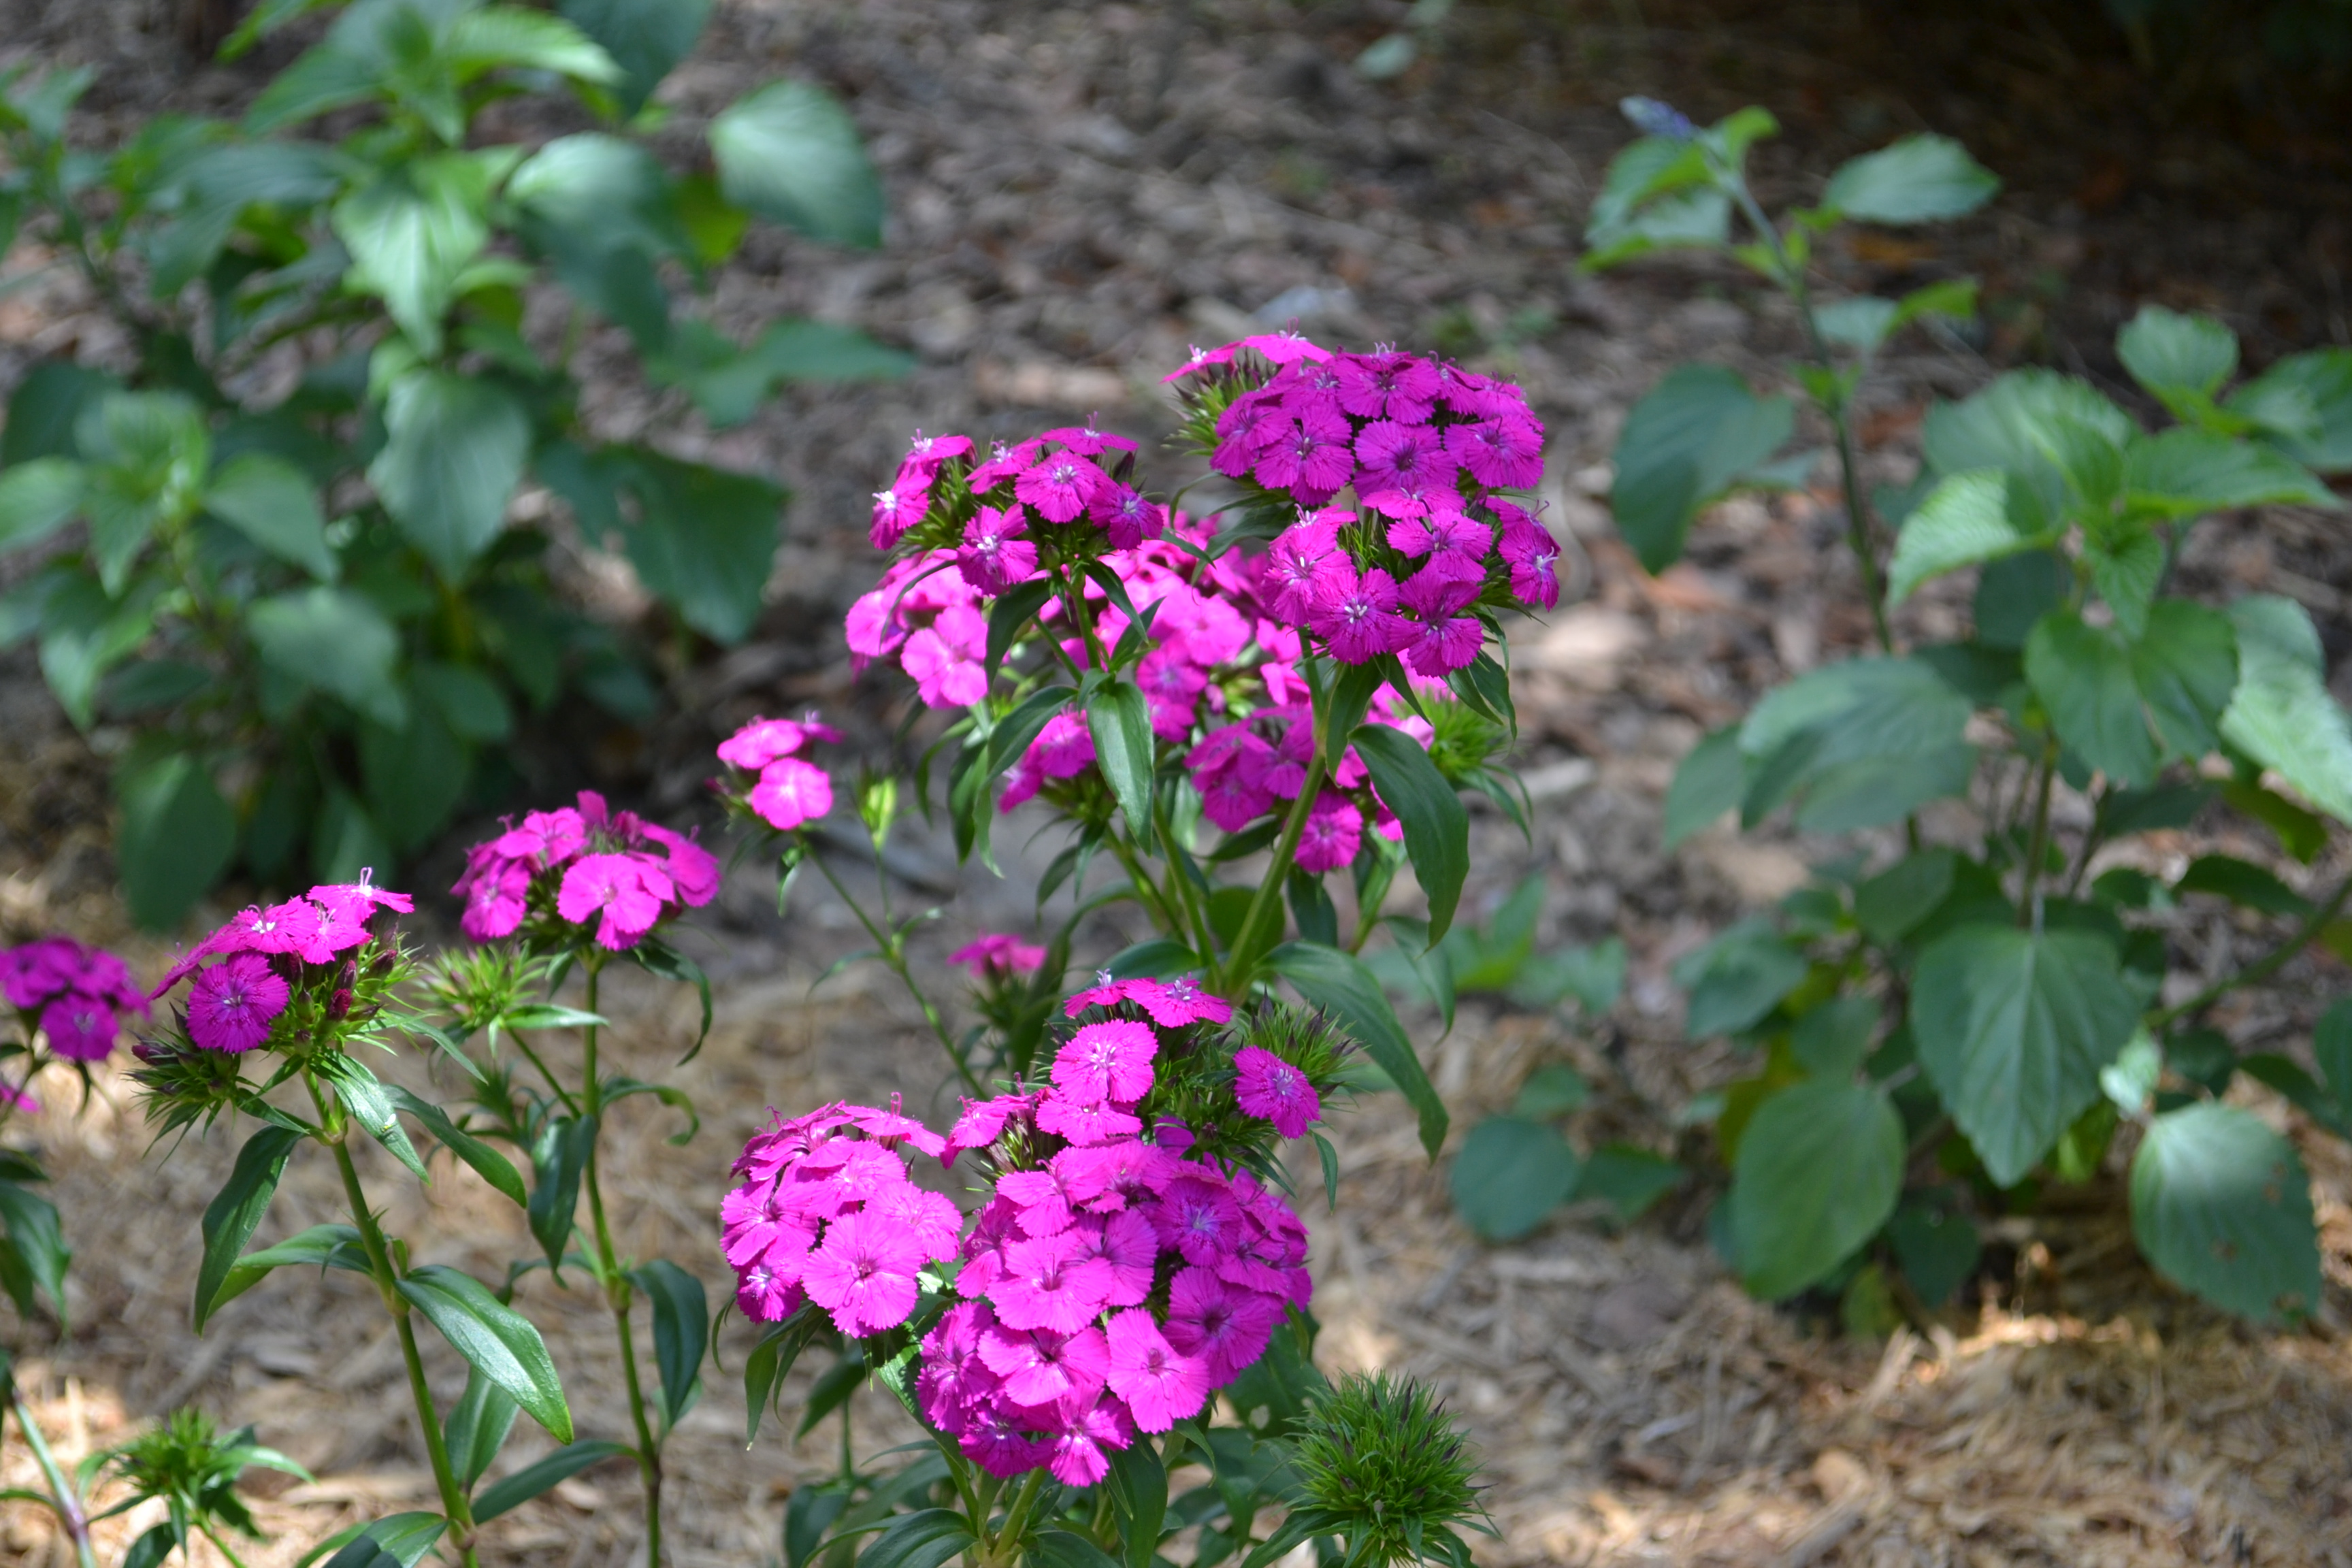
The Amazon series comes in a few bright colors including Amazon Neon Cherry, Amazon Neon Pink, and Amazon Rose Magic. Flowers are held on stems about 1.5-2′ tall and foliage is an attractive dark green. Plants are generally low maintenance but be sure to deadhead flowers as they fade. Plants will need rich, well drained soil and full sun.
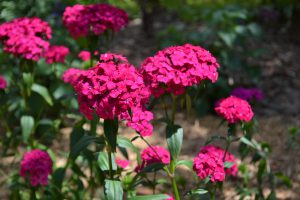
Neon Cherry. Photo by Beth Bolles, UF IFAS Extension Escambia County
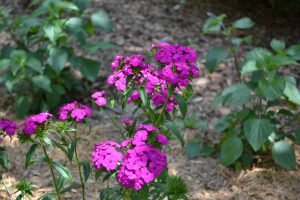
Neon Pink. Photo by Beth Bolles, UF IFAS Extension Escambia County
If you don’t have room for the Amazon dianthus series in your landscape, plants will also grow well in containers to brighten a patio or deck.
by Daniel J. Leonard | Apr 24, 2017
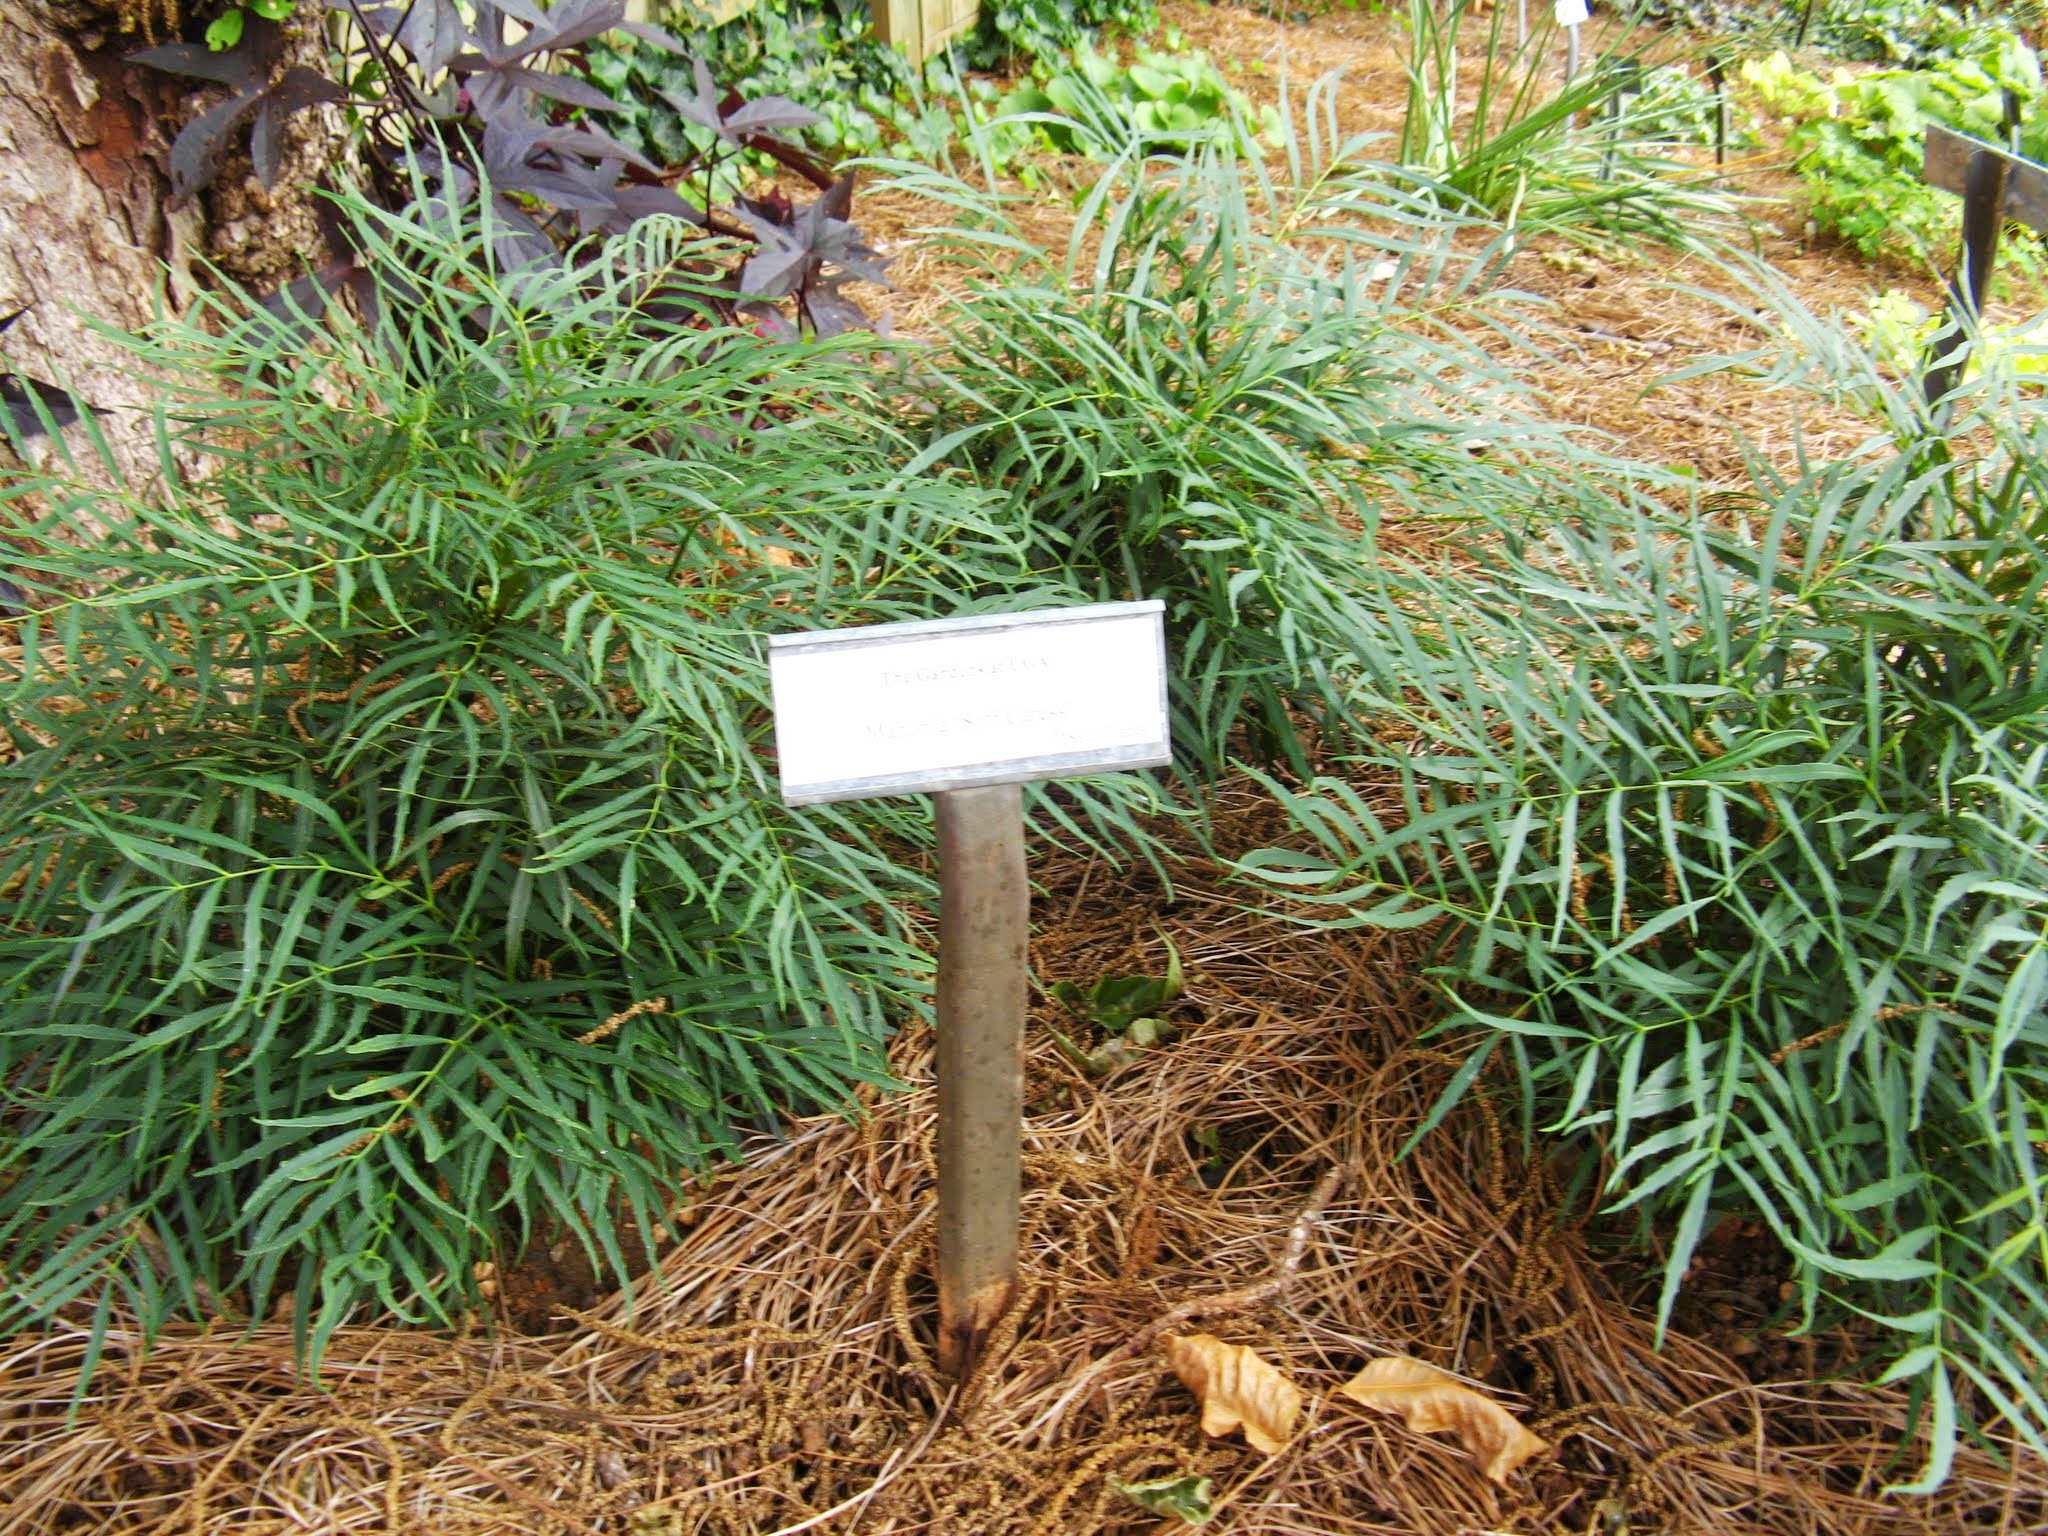
Almost every landscape has a problem area where the sun just doesn’t shine and many plants won’t make it, maybe it’s the north side of your house, under a small tree, or tucked away in an oddly-shaped alcove. We all know the same old boring green choices that work well here (Holly Fern, Cast Iron Plant, etc.) but maybe you want something a little bit different, something that will provide a pop of color and interesting texture! Look no further than a recent introduction, a whole-plant mutation discovered from the little-used Grape Holly (Mahonia spp.), aptly named ‘Soft Caress’.
‘Soft Caress’ Mahonia is a beautiful little evergreen shrub from the Southern Living Plant Collection (one of the best of the collection in my opinion) and really is a game changer for full-shade areas. Some of you may remember the traditional Mahonia, also known as Grape Holly, from your grandmother’s lawn. Those plants were coarse, spiny, produced messy purplish berries and often appeared generally unkempt. ‘Soft Caress’ is a major departure from its parent. Possessing finely-cut, deep green, bamboo-like foliage, this plant’s texture really contrasts well with many traditional shady species. As a bonus, ‘Soft Caress’ sends up brilliant yellow-gold flower spikes in the dead of winter, certainly a welcome respite from the other barren plants in the landscape; although in this unusually warm year, the plants are just now blooming in the Panhandle.

Photo courtesy: Daniel J. Leonard
‘Soft Caress’ is advertised to grow three feet in height and width, a more manageable size than the larger traditional Mahonia species, but I’m not sure I’d take that as gospel, the three-year old plants (hardly mature specimens) in my parent’s landscape are already that size and show no signs of slowing down. However, I’ve found you can easily manage their size with a once a year prune to slow down some of the more rapidly-growing canes. Be sure to time the prune as soon as possible after flowering is finished as ‘Soft Caress’ blooms only once a year and produces its flowers on the previous season’s wood, just like Indica Azaleas and old-fashioned Hydrangeas.
The uses in the landscape for ‘Soft Caress’ Mahonia are nearly endless. It pairs well with almost anything in a shady mixed shrub border. It works nicely as a foundation plant against a porch or under windows on the north or east side of a house where it will be protected from hot afternoon sun; I have employed a grouping of the plants in this way in my own lawn with success. It even thrives in containers! If you want to show off some serious horticultural design skills, mix ‘Soft Caress’ in a large container on the porch with some like-minded perennials for a low-maintenance, high-impact display that you don’t have to replant each season. All this shrub requires is partial to full shade, moist well-drained soil, and an occasional haircut to keep it looking tidy! If you’ve been struggling to find a plant that’s a little more unusual than the standard garden center fare and actually looks good in shady spots, you could do a lot worse than ‘Soft Caress’ Mahonia. 
As always, happy gardening and contact your local UF/IFAS County Extension office for more information about this plant and other gardening questions!
by Sheila Dunning | Apr 13, 2017
 This month, recognized by the Senate and Florida’s governor, reminds diggers why calling 811 before all outdoor digging projects is important to your safety. Before installing a mailbox, fence, deck, garden or tree make sure to call Sunshine 811 to have underground lines marked. 811 is the free national number designated by the Federal Communications Commission. It notifies utility companies, who in turn send their professional locators to identify and mark the appropriate location of underground line with paint and flags in colors that identify the utility type. The following colors represent the seven various utilities: red – electric, orange – communications (telephone, cable tv), blue – potable water, green – sewer, yellow – gas, purple – reclaimed water, and white – site of intended excavation. To learn more about color designation and their corresponding utility go to: http://www.call811.com/faqs/default.aspx. Locating marks are good for 30 calendar days. Any work beyond that requires another call to 811. If the marks are destroyed before your project is done, stop digging and call 811.
Hitting an underground utility line while digging can cause injuries. Utility service outages can also impact an entire neighborhood and damage the environment. The depth of utility lines varies, and there may be multiple utility lines in one common area. Even if you think you know where an underground line is, time tends to change things. Erosion or tree roots can shift those utility lines. Failure to call before digging results in one unintentional utility hit every eight minutes nationwide. You could also be financially affected with costly fines and high repair costs.
The Common Ground Alliance (CGA) Damage Information Reporting Tool (DIRT) provides industry stakeholders with a way to anonymously submit data into a comprehensive database for analysis of the factors that lead to events. An event is defined by the CGA DIRT User’s Guide as “the occurrence of downtime, damages, and near misses.” The number of events submitted to DIRT for 2011 totaled 207,779. However, according to CGA DIRT “when a call is made to the one call center (811) prior to excavation, 99% of the time there will be no damage”.
Calling 811 in Florida is the law. At least two full business days before digging, do-it yourselfers and professional excavators must contact 811 by phone to start the process of getting underground utility lines marked. This is a free service. Be sure that all utilities have been marked before grabbing the shovel. If you don’t see locate marks, don’t assume there are no underground utility lines. Verify with the Sunshine 811 Positive Response system. Follow up on your one call ticket by contacting 811 again on the third day. Sunshine State One Call is a not for profit corporation which began with the 1993 adoption of the “Underground Facility Damage Prevention and Safety Act,” Chapter 556, Florida Statutes. Online you can visit: www.online811.com, or call (800) 852-8057. If you provide a valid e-mail when requesting your locate ticket, positive response updates will automatically be sent to you when all utilities have responded. For more information on Florida’s law, visit www.Sunshine811.com.
by Molly Jameson | Apr 7, 2017
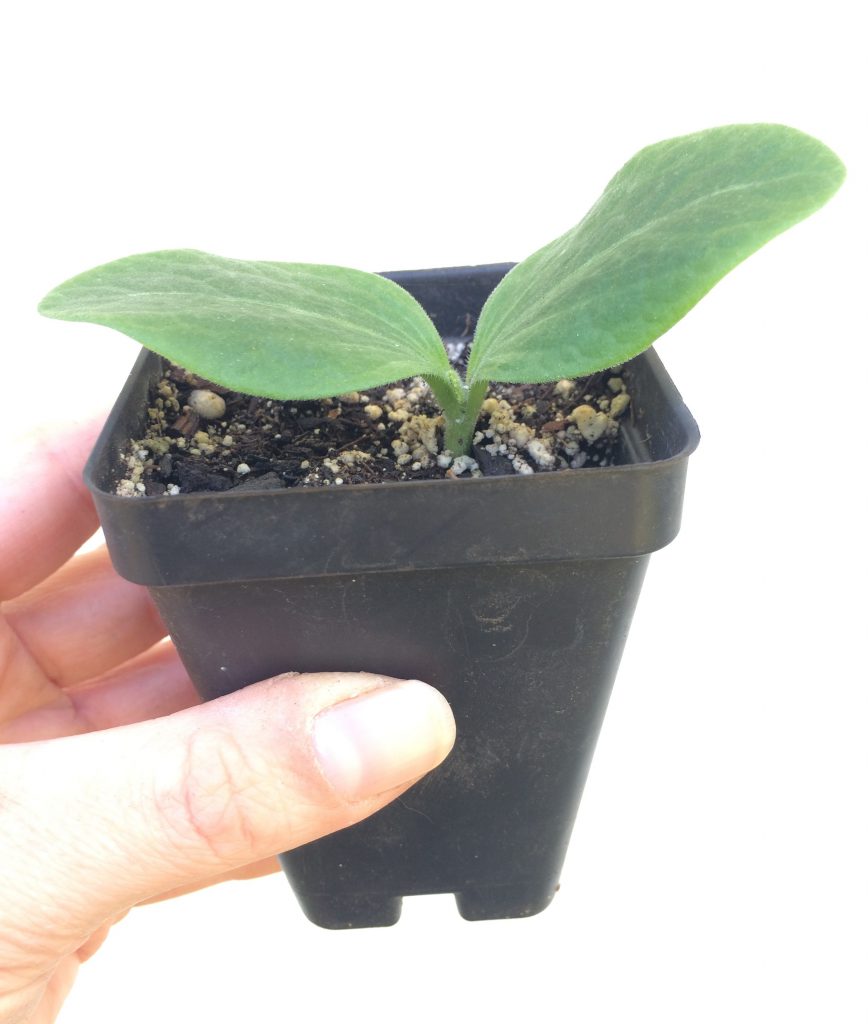
Be careful planting cucurbit transplants, as they have sensitive roots. Photo by Molly Jameson.
When I think of the end of winter and the hot temperatures that will soon be here to stay in the Florida Panhandle, I often feel a little melancholy. But the one silver lining that always picks me back up is remembering what warmer temperatures will mean in the garden. This is the start to all the fun, colorful, fruiting crops. Think of the oranges, reds, yellows, and even purples that will soon fill their vines.
As an extension agent, one of the questions I am often asked is whether to start summer vegetables from seed directly in the garden, or to start seeds in pots and transplant them later. The answer is – as is often the case – it depends.
Are you planting tomatoes, peppers, or eggplant? Well, the beginning of April is too late to start from seeds with these crops in our neck of the woods. Buy transplants! Are you growing beans, okra, or root crops? Now that we are past the risk of frost, put those seeds directly into your garden. Are you growing cucurbits, like squash, cucumbers, or melons? You have a choice. You could seed them directly, or you could start seeds in pots. What is the advantage of starting in pots, you ask? Well – this will give you the chance to pick the strongest plants and will allow you to transplant them exactly where you want them. The disadvantage? Other than the extra work, cucurbits tend to be sensitive to disturbance. Be sure to handle with care and do not over water once your seedlings have sprouted.
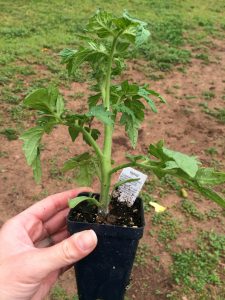
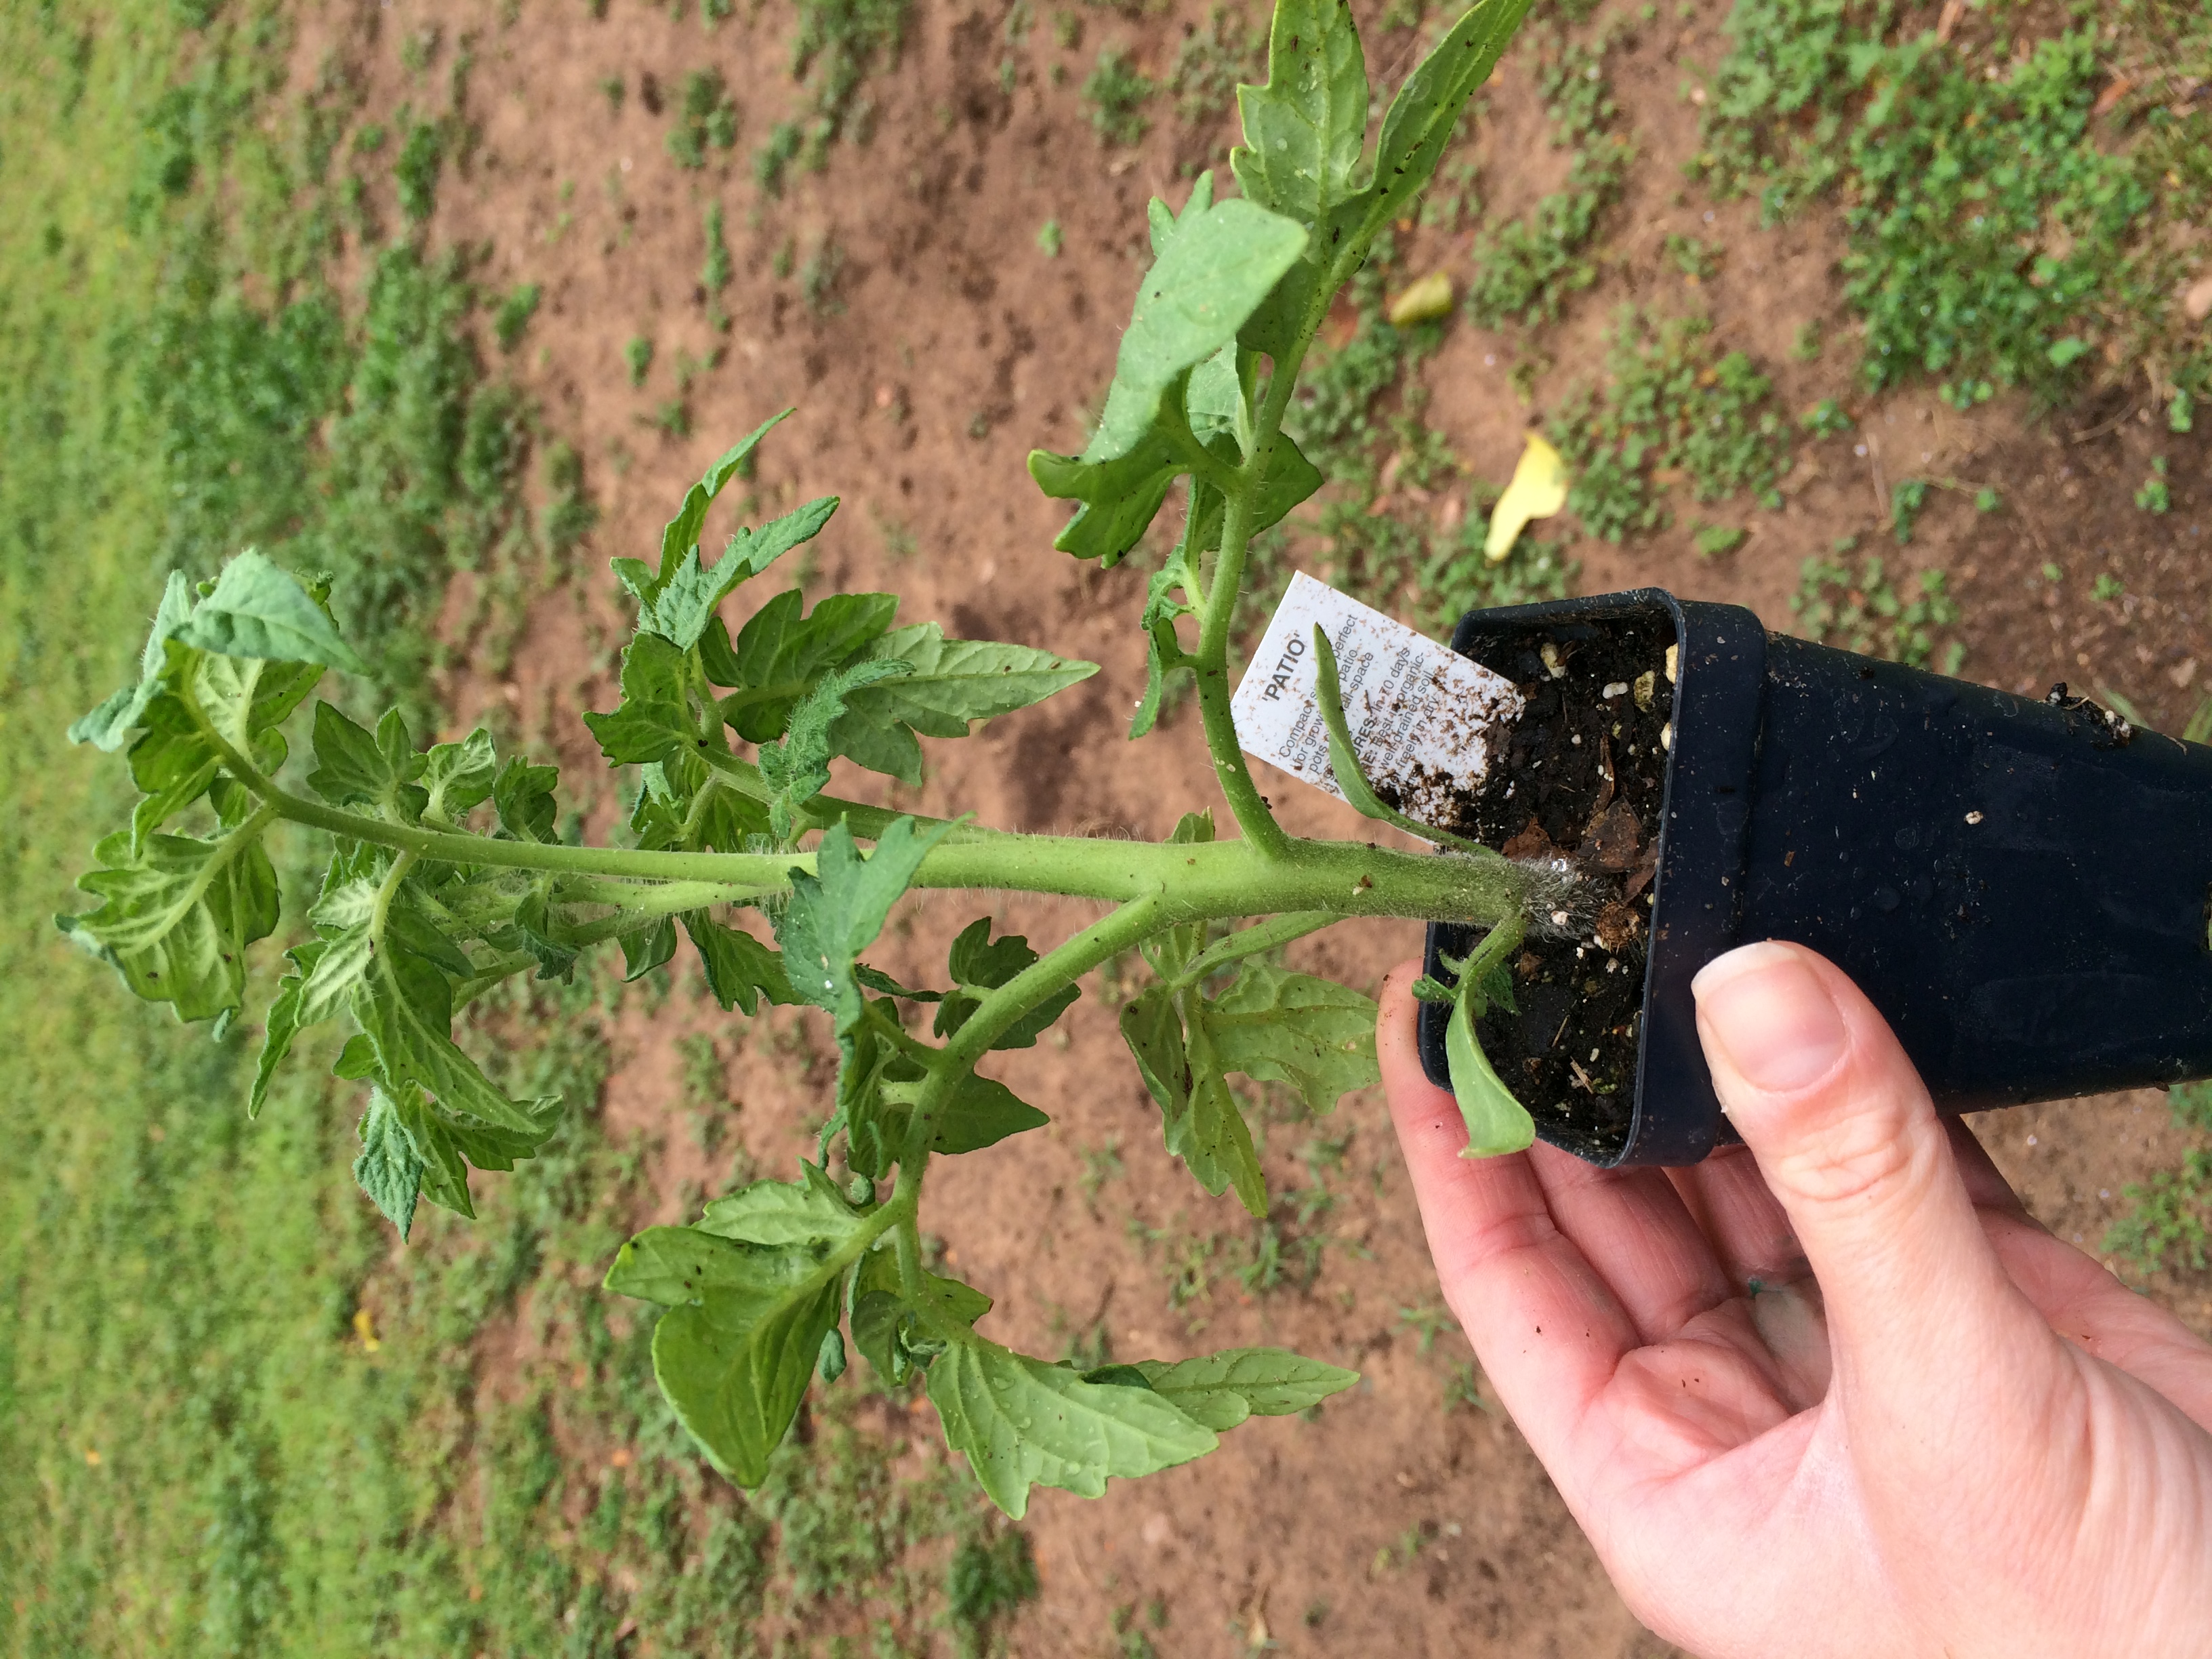
Transplant into the garden when the plant is about the length of its pot. Photo by Molly Jameson.
Whether you grew the seeds in pots yourself or acquired transplants elsewhere, there are certain practices you can follow to ensure your plant babies have a good start. Here are a few tips when it comes to transplanting into the garden:
What should be considered when purchasing transplants? When purchasing transplants, it is important to make sure the plant is healthy. Look for plants with strong stems, green leaves, and no signs of pest or disease damage. Ideally, the plant should not be much taller than the length of its pot, and should be about as tall as it is wide. Also, avoid vegetable plants that are already producing fruit, this is an indication they have been in their pot too long, prompting them to become stressed. When stressed, annuals often feel they need to hurry and produce seeds to carry on the next generation.
When should transplants be planted into the garden? For spring gardens, plant transplants once danger of frost has passed (late March in the Panhandle), when the transplant has had time to develop a strong root system, and when the transplant is about the length of its pot. If you are growing your seeds indoors or in a greenhouse, allow the plant to “harden-off” by placing the plants outdoors in partial shade for a few hours a day for about a week before transplanting.
What is the transplanting process?
- First, prepare your garden site with compost and other soil amendments.
- Water your plants very thoroughly just before planting to decrease transplant shock. The entire root system should be completely wet.
- Dig a hole that is at least double the width of the plant’s root ball.
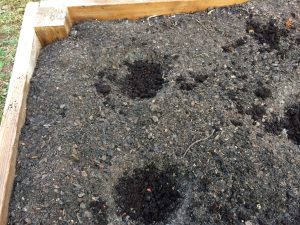
Add fresh compost or worm castings to each planting hole to give your plants an extra nutrient boost. Photo by Molly Jameson.
- Add one to two handfuls of fresh compost or worm castings to each hole. These soil amendments will improve soil health, introduce beneficial microbes, and provide a slow- release nutrient source for your growing seedlings.
- Avoid covering any leaves or stems under the soil surface. Remove these lower leaves and stems with sharp garden clippers to minimize the size of the wound.
- Avoid touching the stem and avoid disturbing the root ball when removing the transplant from its pot. Gently squeeze the pot to loosen the potting soil and turn the transplant sideways or upside down with the palm of your hand to gently “catch” the transplant.
- Unless the transplant is a tomato, plant it so that the soil level is about the soil level of the transplant, making sure the plant has good structure to decrease susceptibility of falling over as it grows.
- If transplanting a tomato, plant deeper than the soil level of the transplant, as tomatoes can grow what are called “adventitious” roots – roots that grow from their stem – that will improve overall root development.
- Make sure to cover up all roots, and water the soil around the plant thoroughly. Continue to water deeply, keeping the soil moist but not soggy, for the next three to four days while the plant becomes established. You can then begin to switch to a normal watering pattern.
- Always water the soil around the plant, not the plant leaves, throughout the season to decrease susceptibility to disease.
Remember: gardening is a science and an art! And just like art, there are many aspects that are open to interpretation. Have fun gardening – experiment and try new techniques. Keep a journal tracking all your gardening adventures. With time, this can become your road map to the sweetest of summer fruit.