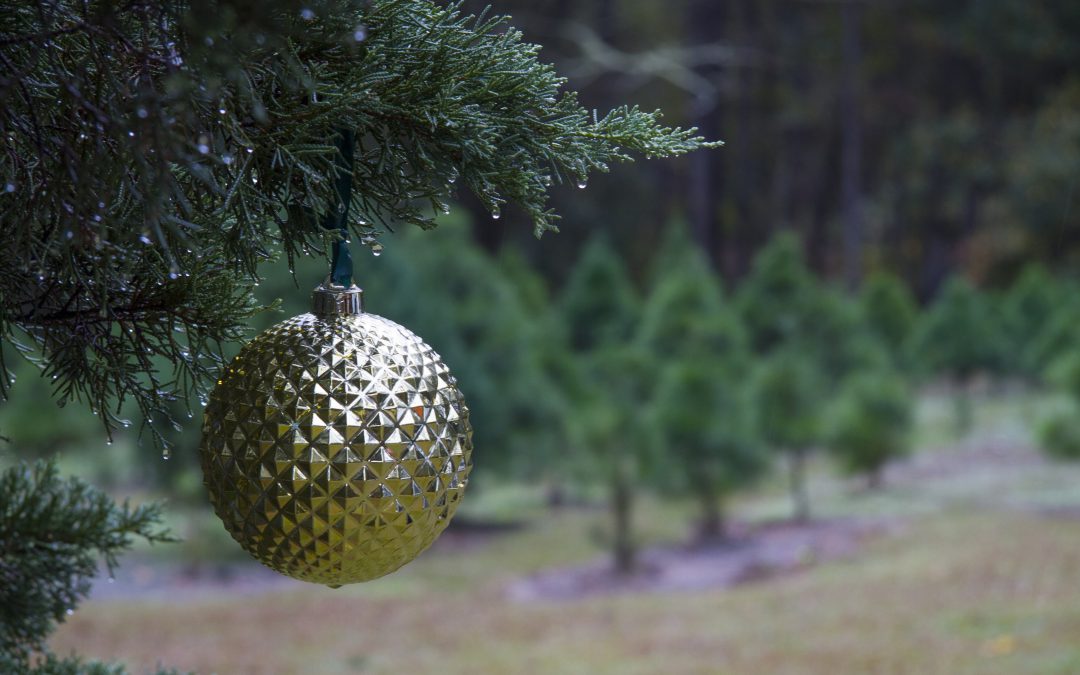
Christmas cactus, poinsettia and amaryllis are some of the flowering holiday plants that can be kept for enjoyment after the holidays are gone.
These plants require bright, indirect light. They should be placed close to a sunny window and turned once a week to prevent them from leaning toward the light. In rooms with poor light, place your plants under incandescent or fluorescent lamps, but not too close to incandescent light due to the excessive heat.
Keep temperature cool for best results with plants associated with the holidays. Ideal temperatures are lower than found in most homes. But your plants should do well if the day temperature range is 65°F degrees to 75°F but cooler at night.
It’s important to keep the plants evenly moist. This includes the Christmas cactus since it is not a typical cactus. Avoid moisture extremes of letting the plants become bone-dry or waterlogged.
The flowers will eventually fade on your holiday plants. Once this happens, remove the faded flowers. This will improve the appearance and prevent the plant from setting seed, which will provide more energy for growth.
The poinsettia eventually will begin dropping its leaves. This is normal. The plant is going into a resting stage. When it begins to drop its leaves, decrease watering until you’re watering only enough to keep the root and stems from drying out excessively. In April, prune the stems to about six inches, resume normal watering, fertilize and place where it will get plenty of light but not direct sun. Forcing poinsettias to re-flower for the Christmas Season can be a challenge within the average home environment.
With amaryllis, each flower lasts only a few days. But since multiple flowers are produced, plants may remain in flower for a week or more. After the last flower fades, remove the bloom stalk. Leaves begin to emerge at flowering and continue to elongate after flowering when additional leaves may appear. It is essential that the leaves remain on the bulb so that it can manufacture “foods” needed for re-flowering. It should be kept under high indoor light and watered and fertilized regularly.
When the danger of frost has passed, amaryllis can be placed outdoors and grown under light shade. By late summer, the leaves will begin to die and the bulb enters a resting stage. Reduce watering, store in a cool dry place, and allow the bulb to rest two to three months. Resume watering and the plant should re-flower in four to six weeks. Amaryllis can also be planted outside in our climate and will re-flower each year with proper maintenance.
It’s getting close to that time of year again! You may be the giver or receiver of a wonderful holiday plant soon. Dish gardens, potted flowering plants (such as azalea, begonia, poinsettia, or chrysanthemum), plants with attractive foliage, and even patio citrus make great gifts. However, special care is needed to keep them healthy throughout the holiday season and beyond!
For plants intended to be “house plants”, over watering, over fertilizing and poor placement are the most common problems encountered by caretakers. The first thing you need to keep in mind about gift plants is that most of them have been growing in a carefully controlled greenhouse environment for some time. These types of plants are acclimated to a specific temperature & humidity level. Therefore, they’re sensitive. When they’re moved into your home atmosphere, they typically go into a level of shock. If you received a gift plant, you’ll have to help it overcome this shock by paying careful attention to the important factors- light, temperature, water, and fertilization.
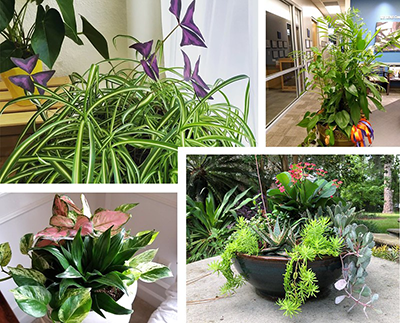
House Plants & Indoor Garden Examples Credit: UF/lFAS Communications
Indoor areas often restrict light and provide very low humidity. Plants with dense foliage prefer light, but not continuous direct light all day. Placing a plant near a window or near light fixtures should suffice for photosynthesis requirements. However, flowering plants such as mums and poinsettias will stand more light than most foliage plants and should be placed in very bright areas. Most indoor plants grow well in temperatures of 60 to 70 degrees. Be careful to not place plants in drafty locations where sudden changes in temperature occur. Also, don’t place plants close to radiators or air conditioner vents/returns. These areas typically dry soil excessively and could cause plants to wilt.
Watering is one of the major causes of failure with plants in the home, especially for containers which don’t have drainage holes. Most house plants will require a thorough soaking once a week. Water only when necessary and don’t let the pots stand in saucers of water unless the plants are very tolerant to excess water. Overwatering can kill plant roots, increase chances of disease, and eventually kill the entire plant.
Proper fertilization is another important part of growing healthy plants. Fertilizer labeled for house plants or 10-10-10 are good, general-purpose, complete fertilizers to use. Always follow all the directions on the bag or container, so that you don’t over fertilize, causing the plant’s demise.
Following these basic practices to keep house plants healthy should keep your gift plant looking attractive for the remainder of the holiday season and beyond.
For more information on house plants, please visit:
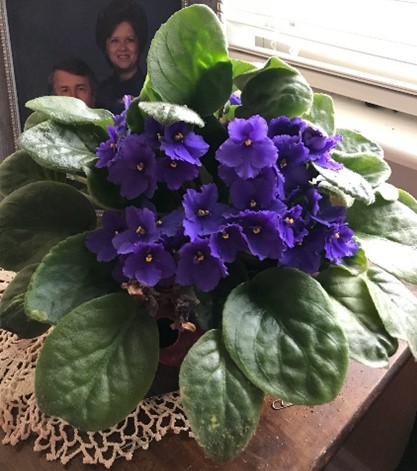
Caring for African Violets: A Guide for Enthusiasts
Photo Credit: Martha Mitchell.
African violets (Saintpaulia ionantha) are beloved houseplants known for their vibrant blooms and ease of growth indoors. Since their introduction to the United States, they have become favorites among plant enthusiasts for their adaptability and stunning flowers, making them staples in homes and offices. African violets thrive in bright, indirect light and moderate temperatures, and they come in various flower colors, including pink, purple, white, and combinations of these hues. Here’s how to ensure your African violets thrive with proper watering, fertilizing, and propagation.
Watering
The quality of water is crucial for African violets. Use water that is safe for drinking, making sure it is at room temperature or slightly warmer to avoid causing yellow spots on the leaves. The watering needs of African violets vary based on soil mixture, drainage, light, temperature, and humidity. For example, clay pots require more frequent watering than plastic pots due to higher evaporation rates. Water your African violets when the soil surface is dry to the touch or if wilting is noticeable.
There are two methods to water African violets: top watering and bottom watering. For top watering, apply enough water to saturate the soil and discard any excess that drains out. For bottom watering, place the pot in a container with about an inch of water. Once the soil surface becomes moist, remove the pot, let it drain, and discard any remaining water. Self-watering pots are also an option, and you can create one by making a “water wick” from a material like a braided nylon stocking. Insert the wick into one of the pot’s drainage holes and ensure it reaches the bottom of a water reservoir. Whether you water from the top or bottom, avoid letting the plant sit in water.
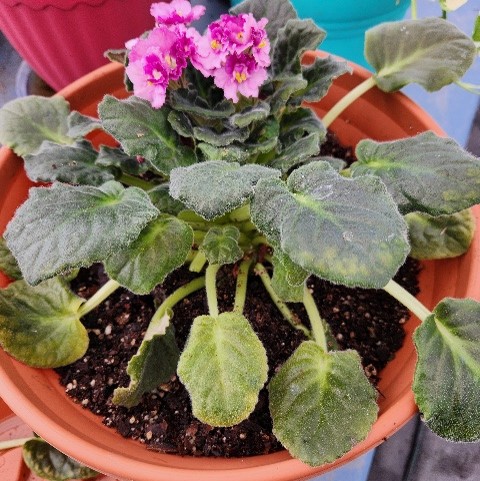
Fertilizing
African violets benefit from regular feeding with water-soluble fertilizers like 20-20-20 or 15-30-15. Mix the fertilizer at one-fourth the recommended rate and apply it every time you water, ensuring the soil is moist before application. If your plant shows signs of needing nutrients, such as gradual loss of leaf color, reduced growth, and fewer flowers, fertilize and observe for ten days. Be careful not to over-fertilize, as this can result in tight centers and rusty-appearing new leaves.
Photo credit: Donna Arnold, FAMU Extension.
Propagation
Propagating African violets is simple and can be done using leaf cuttings. Choose a healthy leaf from the middle of the plant, snap or cut it off, and trim the petiole (leaf stem) to about 1–1.5 inches. Insert the petiole into a propagation medium. Roots typically form at the petiole base within three to four weeks, new leaves appear three to four weeks and flowering occurs six to nine months later.
Additional Tips
When purchasing an African violet, it usually adapts well to its container for a while. Although these plants prefer a crowded environment, repotting them annually into lightweight potting media is advisable.
Maintaining sanitation is essential to prevent diseases. Ensure all pots, tools, and materials are clean before use. With proper care and attention, African violets can flourish, bringing beauty and joy to any indoor space. By following these guidelines on watering, fertilizing, and propagating, you can enjoy healthy and vibrant African violets in your home. for more information, contact your local Extension Office or click on the links below:
Winter is probably the easiest time of year to kill the plant you brought in from the cold. And, the fastest way is by overwatering. Grueling growing conditions like lower light levels, dry air, shorter days and chilly temperatures really stress out plants, which makes them susceptible to insect and disease problems. Then the pests finish them off.
The secret to helping plants survive winter is adjusting care routines to suit seasonal growing conditions. Here are a few things to consider.
Light
In winter, the sun is lower in the sky and light levels near windows drop up to 50 percent. Houseplants that grow near a sunny eastern or northern window in summer may need a southern or western exposure in winter. Likewise, tropical plants that were able to withstand direct sun outside will need to be in the brightest spots possible or may require extra lighting inside. Plants are likely to lose leaves in order to adjust to the light change. The new leaves that grow back will be accustomed to the lower light. Remember that if those plants are going back outside in the spring. They will need to be shaded for a while or the new leaves will sunburn.
To help plants cope with changing light levels:
Move plants closer to windows, if possible.
Clean windows to allow maximum light transmission.
Shift plants to new locations near brighter windows for winter.
Wash dust off plants so leaves can make maximum use of available light.
Add artificial light. Fluorescent bulbs provide adequate light. They’re cheaper than traditional grow lights and produce less heat. Position bulbs 4 to 12 inches away from plants for effective results.
Temperature
Most of these plants and prefer temperatures between 65° F and 75° F during the day and about 10-15 degrees cooler at night. For tropical plants, temperatures below 50°F can cause problems. Hopefully, you had the chance to bring them in with the first cool spell a month ago.
Adjust thermostats for your comfort, but remember your plants need some consideration.
Avoid placing plants near cold drafts or heat sources.
Keep plants several inches away from exterior windows.
Humidity
Homes may offer only 5-10 percent relative humidity in winter. Houseplants like 40-50 percent. Signs of low humidity stress on plants include brown leaf tips and appearance of pests like spider mites.
Raise humidity around plants with a room humidifier.
Place plants on a pebble-lined tray filled with water. Keep the water level just below the pebbles. As the water evaporates, it raises humidity around plants.
Mist plants with room-temperature water. Avoid wetting walls or furniture.
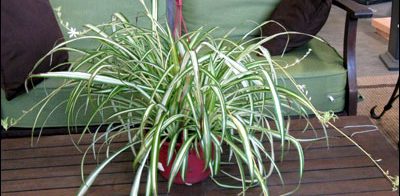
A spider plant on a coffee table. Photo Credit: University of Florida/IFAS
Water
The most common problem plants suffer from in winter is overwatering. Most plants need soil to dry out almost completely before watering. How can you tell if plants need water?
Don’t just spot test the soil surface. Plants need water when the root zone is dry. Poke your finger into soil up to 2 inches. If the soil is dry, water.
Lift the pot. Soil is lighter when it’s dry. Learn how wet soil feels by lifting pots immediately after watering.
Exceptions to drying out between watering: Potted citrus and ferns require consistently moist soil. Always research plant moisture needs if you’re unsure.
When you do water, never allow plants to sit overnight in water that collects in the drainage saucer.
Fertilizer, Pruning and Repotting
Save these tasks until spring. Winter growth is usually leggy. Prune and fertilize to encourage bushy growth when the sunlight and temperatures increase. The right time to repot most tropical and houseplants is during periods of active growth – in spring and summer. The exception is potted woody plants that go completely dormant in winter. Transplant those prior to bud break in early spring.
The subject of plant propagation by leaf and cane is a continuation from my article on propagating plants by layering, written in late October. Plants can be generated in multiple ways with leaf and cane techniques emerging as a possible indoor winter and early spring project. Not all plants can be propagated with a leaf or parts of leaves. Fortunately, some of the plants that can are ones we all enjoy growing indoors or in protected areas outdoors, like a covered porch and other similar locations. Do an assessment of indoors windows with bright light and a few hours of sunlight for the best success. If you are fortunate to have a backyard greenhouse that is heated, you may want to try it there.
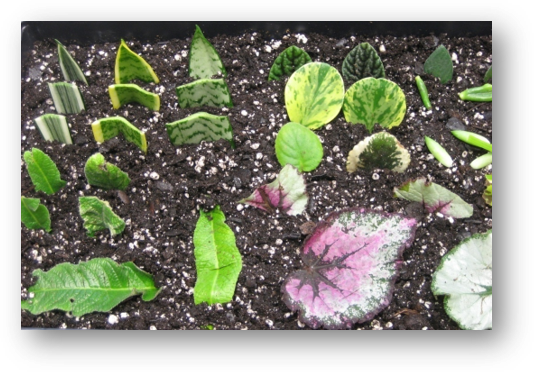
One of the simplest ways to grow a new plant is by clipping a leaf and petiole section off an existing plant that has certain characteristics you like (bloom color or the growth of the plant). African violets and sedum are plants that can be easily propagated in this manner. The length of petiole connected to the leaf should be around 1 ¼ – 1 ½ inches in length, this portion of the leaf will be planted in potting mix. I would suggest planting two in a small to medium sized container to increase the chance of a successful rooting and the new plant establishing. When the new plant leaves have emerged, usually in 6 – 10 weeks, they are clipped away from the original leaf and petiole. Some will reuse the original and replant, but I tend to discard and begin with a new one.
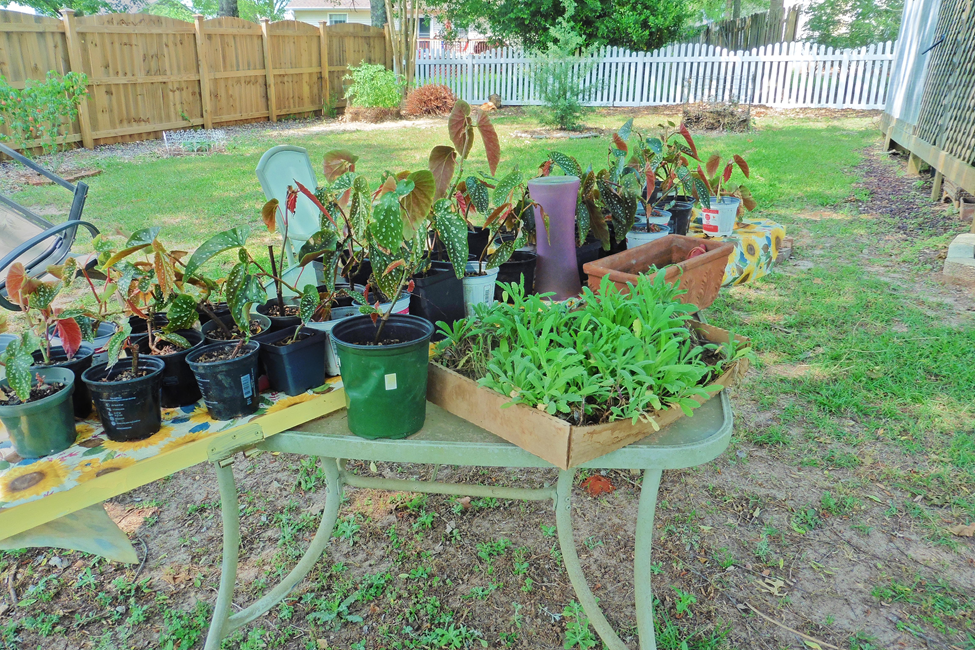
Plants being propagated by leaf cuttings. Photo Credit: University of Florida/IFAS
Next up is trying to propagate using a leaf without the petiole. This form of propagation can occur with plant that possess fleshy leaves that are thicker, with more energy to produce a new plant. The jade plant, snake plant and African violet are examples of plants that root and form new plants successfully in this way. Place a leaf or a piece of leaf vertically into a container filled with slightly damp plant media. Be sure the leaf midvein is placed into the soil as this will likely be the site of the new plant’s emergence.
Cane cuttings are yet another process for propagating a new plant. If you have ever grown a Dieffenbachia, better known as dumb cane or corn plant, they can become leggy and require staking to keep limbs from bending away from the center of the plant. If you look closely, you may see dormant adventitious buds (nodes). These buds will be the future leaf emergence area for the new plant. With a sharp clean knife cut remove a 6 – 10-inch section of the stem. The top leaf areas and smaller stem section can be removed and discarded.
Next, cut so that two stem sections are together with at least 2 nodes. Place the sections horizontally or vertically with the bottom third of the section indented into the potting media for go plant to soil contain. Make sure the node is facing upward. Once rooted with new leaves emerging, you may transplant them into a selected pot for future growth and establishment.
As mid to late spring arrives and the danger of frost passes, you can move the plants to a covered porch or under tall shade trees with filter sunlight for the summer and early fall. Enjoy creating new plants and maybe share a few with family and friends!
The flower of the Christmas season is the poinsettia, a tropical plant from Mexico that changes its leaf color when the daylength changes. Poinsettias were originally noticed for their bright red color and are now available in many colors, shapes and sizes, thanks to decades of work by plant breeders. As much as we love them, caring for poinsettias during and after the holiday can be a challenge. Here are a few tips to extend the bloom for a longer period and encourage it to grow for the months to come!
Photo credit: Tyler Jones.
Provide plenty of sunlight. A sunny window facing south is ideal. Be careful to not let the leaves touch the glass. Keep temperatures around 55-60F at night and 65-70F during the day.
Keep soil slightly moist on the surface. Wait until the surface feels dry before watering, then add just enough to soak in. If water collects below the pot, pour it out. Those decorative wrappers make it hard to tell, so be sure to check. However, don’t wait for wilting before watering as that is too dry. Both overwatering and underwatering can lead to wilting and excessive leaf drop. Check the soil each day.
Don’t fertilize while “blooming”. While the colored parts of poinsettias are actually modified leaves called bracts and the true flowers are the tiny yellow centers, we often refer to the entire non-green portion as a bloom. The plant can maintain its nutritional needs throughout the flowering time without additional fertilizer.
In the spring, cut the plant back, fertilize and move outside. Remember, poinsettias require temperatures to always stay above 60F. If we receive any cool nights, bring it in for the night. Let the rootball become quite dry throughout April. You may have to move it under a cover if the April showers are occurring every few days.
If you want to try your luck at re-blooming, re-pot it in a slightly larger container and cut it back to about 4” high in mid-May. Keep it in nearly full sun. A little shading in the heat of the day is helpful. Water consistently and fertilize every two weeks with a water-soluble, complete fertilizer. As it grows, you will need to pinch the plant back every six weeks or so until October, I usually remove about half of the stem that has grown out. To get coloration in time for Christmas, find something dark to cover the plant or move it to a dark location each day. The poinsettia must be in complete darkness from 5 p.m. to 8 a.m. until the leaves start to turn color, usually 10 weeks. That means moving or covering and uncovering at the same time every day. Any deviation will delay the color change. Once you see a complete set of leaves coloring, the plant can be exposed to regular daylengths. If this sounds like too much work, spent poinsettias do make good compost and garden centers will be happy to sell you a new one!
Remember, poinsettia sap does contain a latex-like chemical that can cause allergic reactions. Small animals, young children, and adults with allergies should not handle poinsettias. If eaten, get medical attention immediately.