by Molly Jameson | Mar 18, 2021
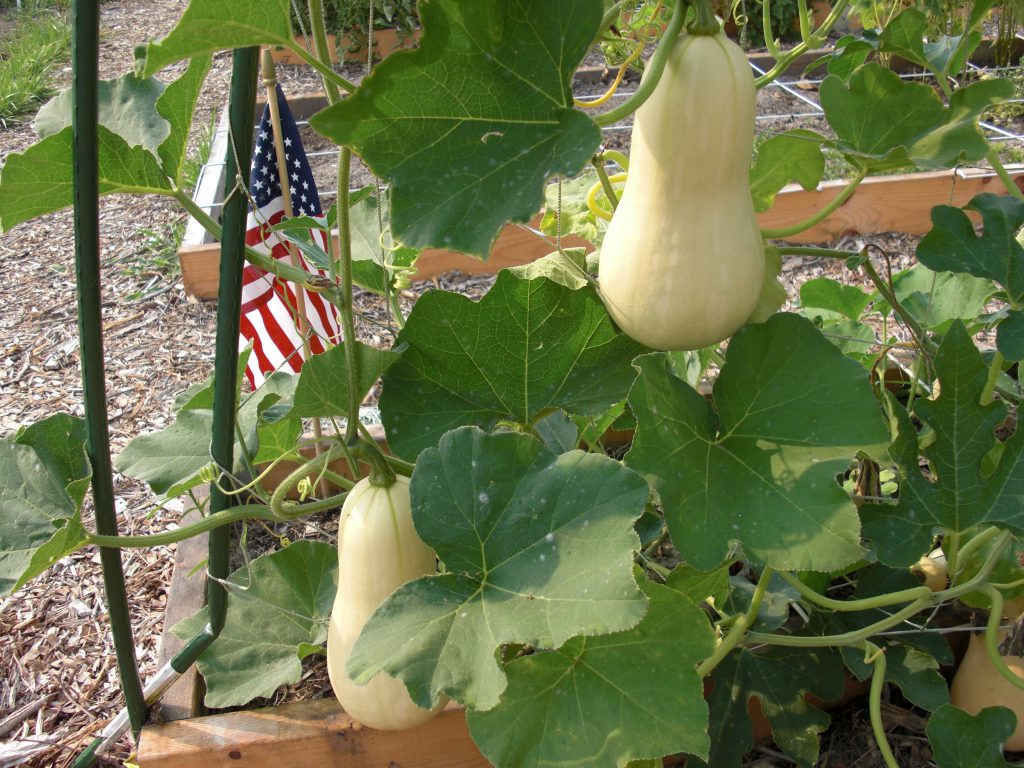
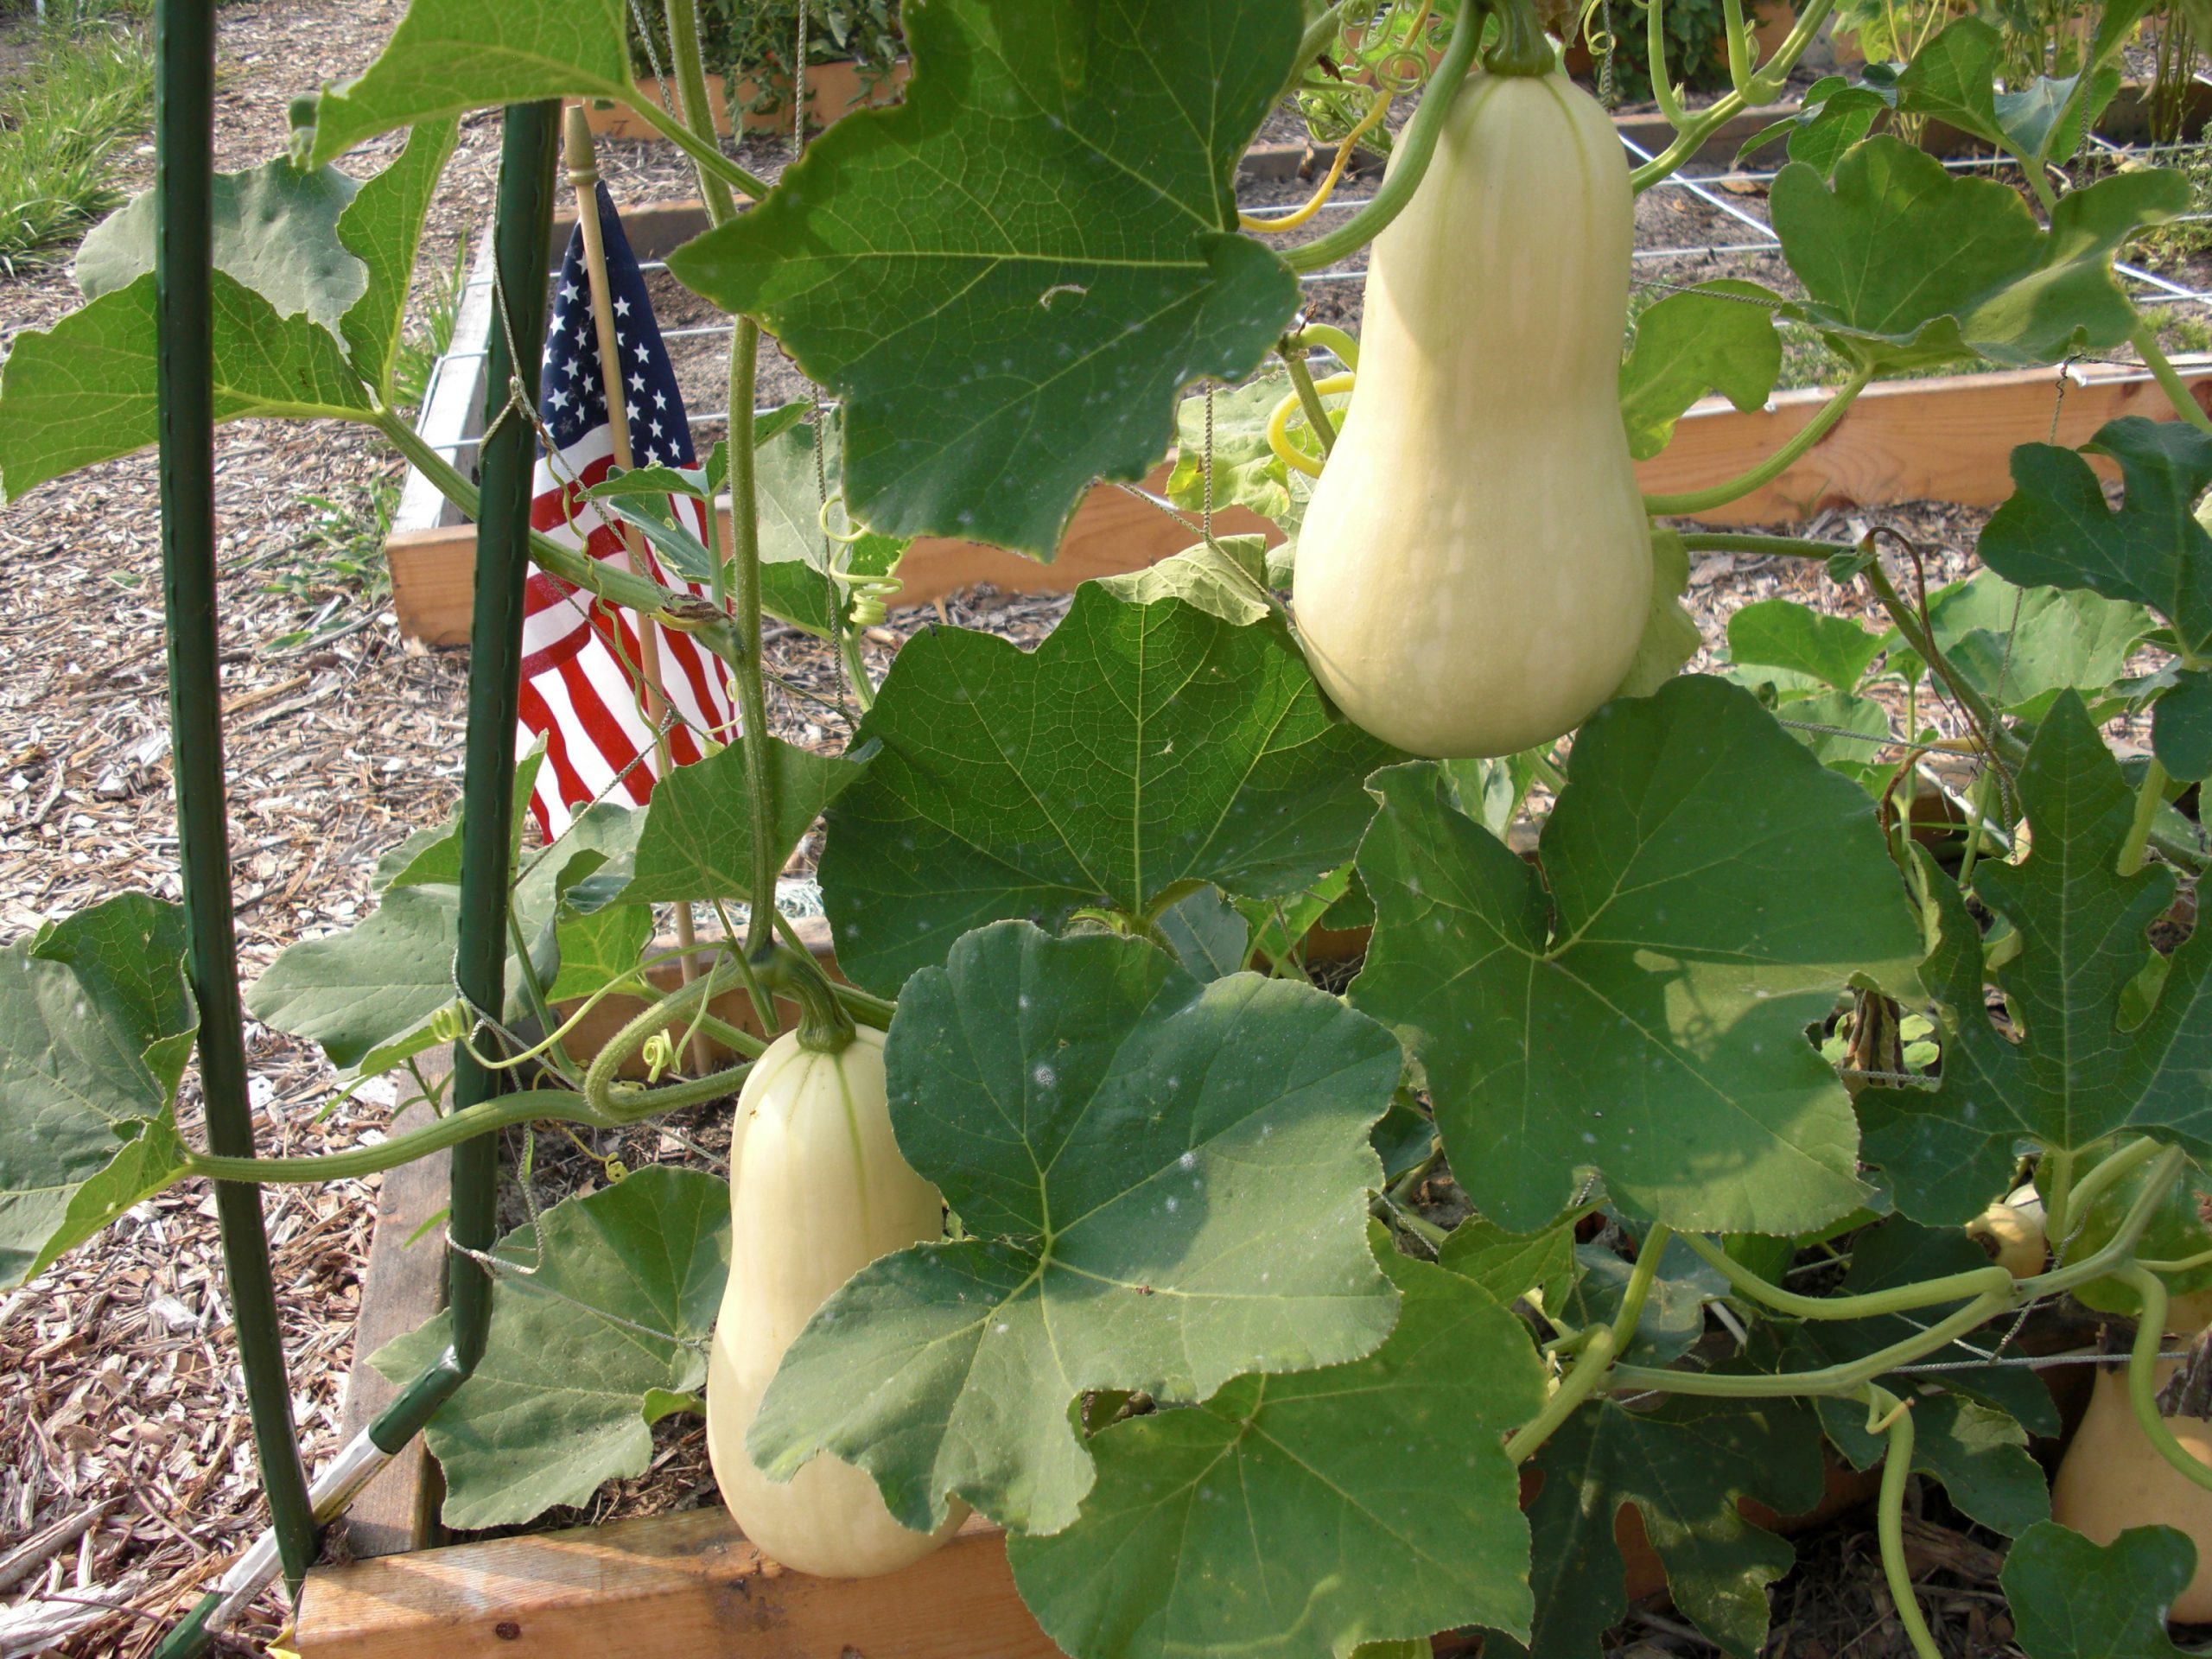
Butternut squash is more resistant to squash vine borers and it has a vining growth habit, perfect for growing on a trellis. Photo by Janis Piotrowski.
Last spring, I fought the good fight against a very pesky garden pest. As the pandemic ramped up, I started working remotely from home, which I figured would at least afford me the ability to scout my patch of summer squash a bit more diligently.
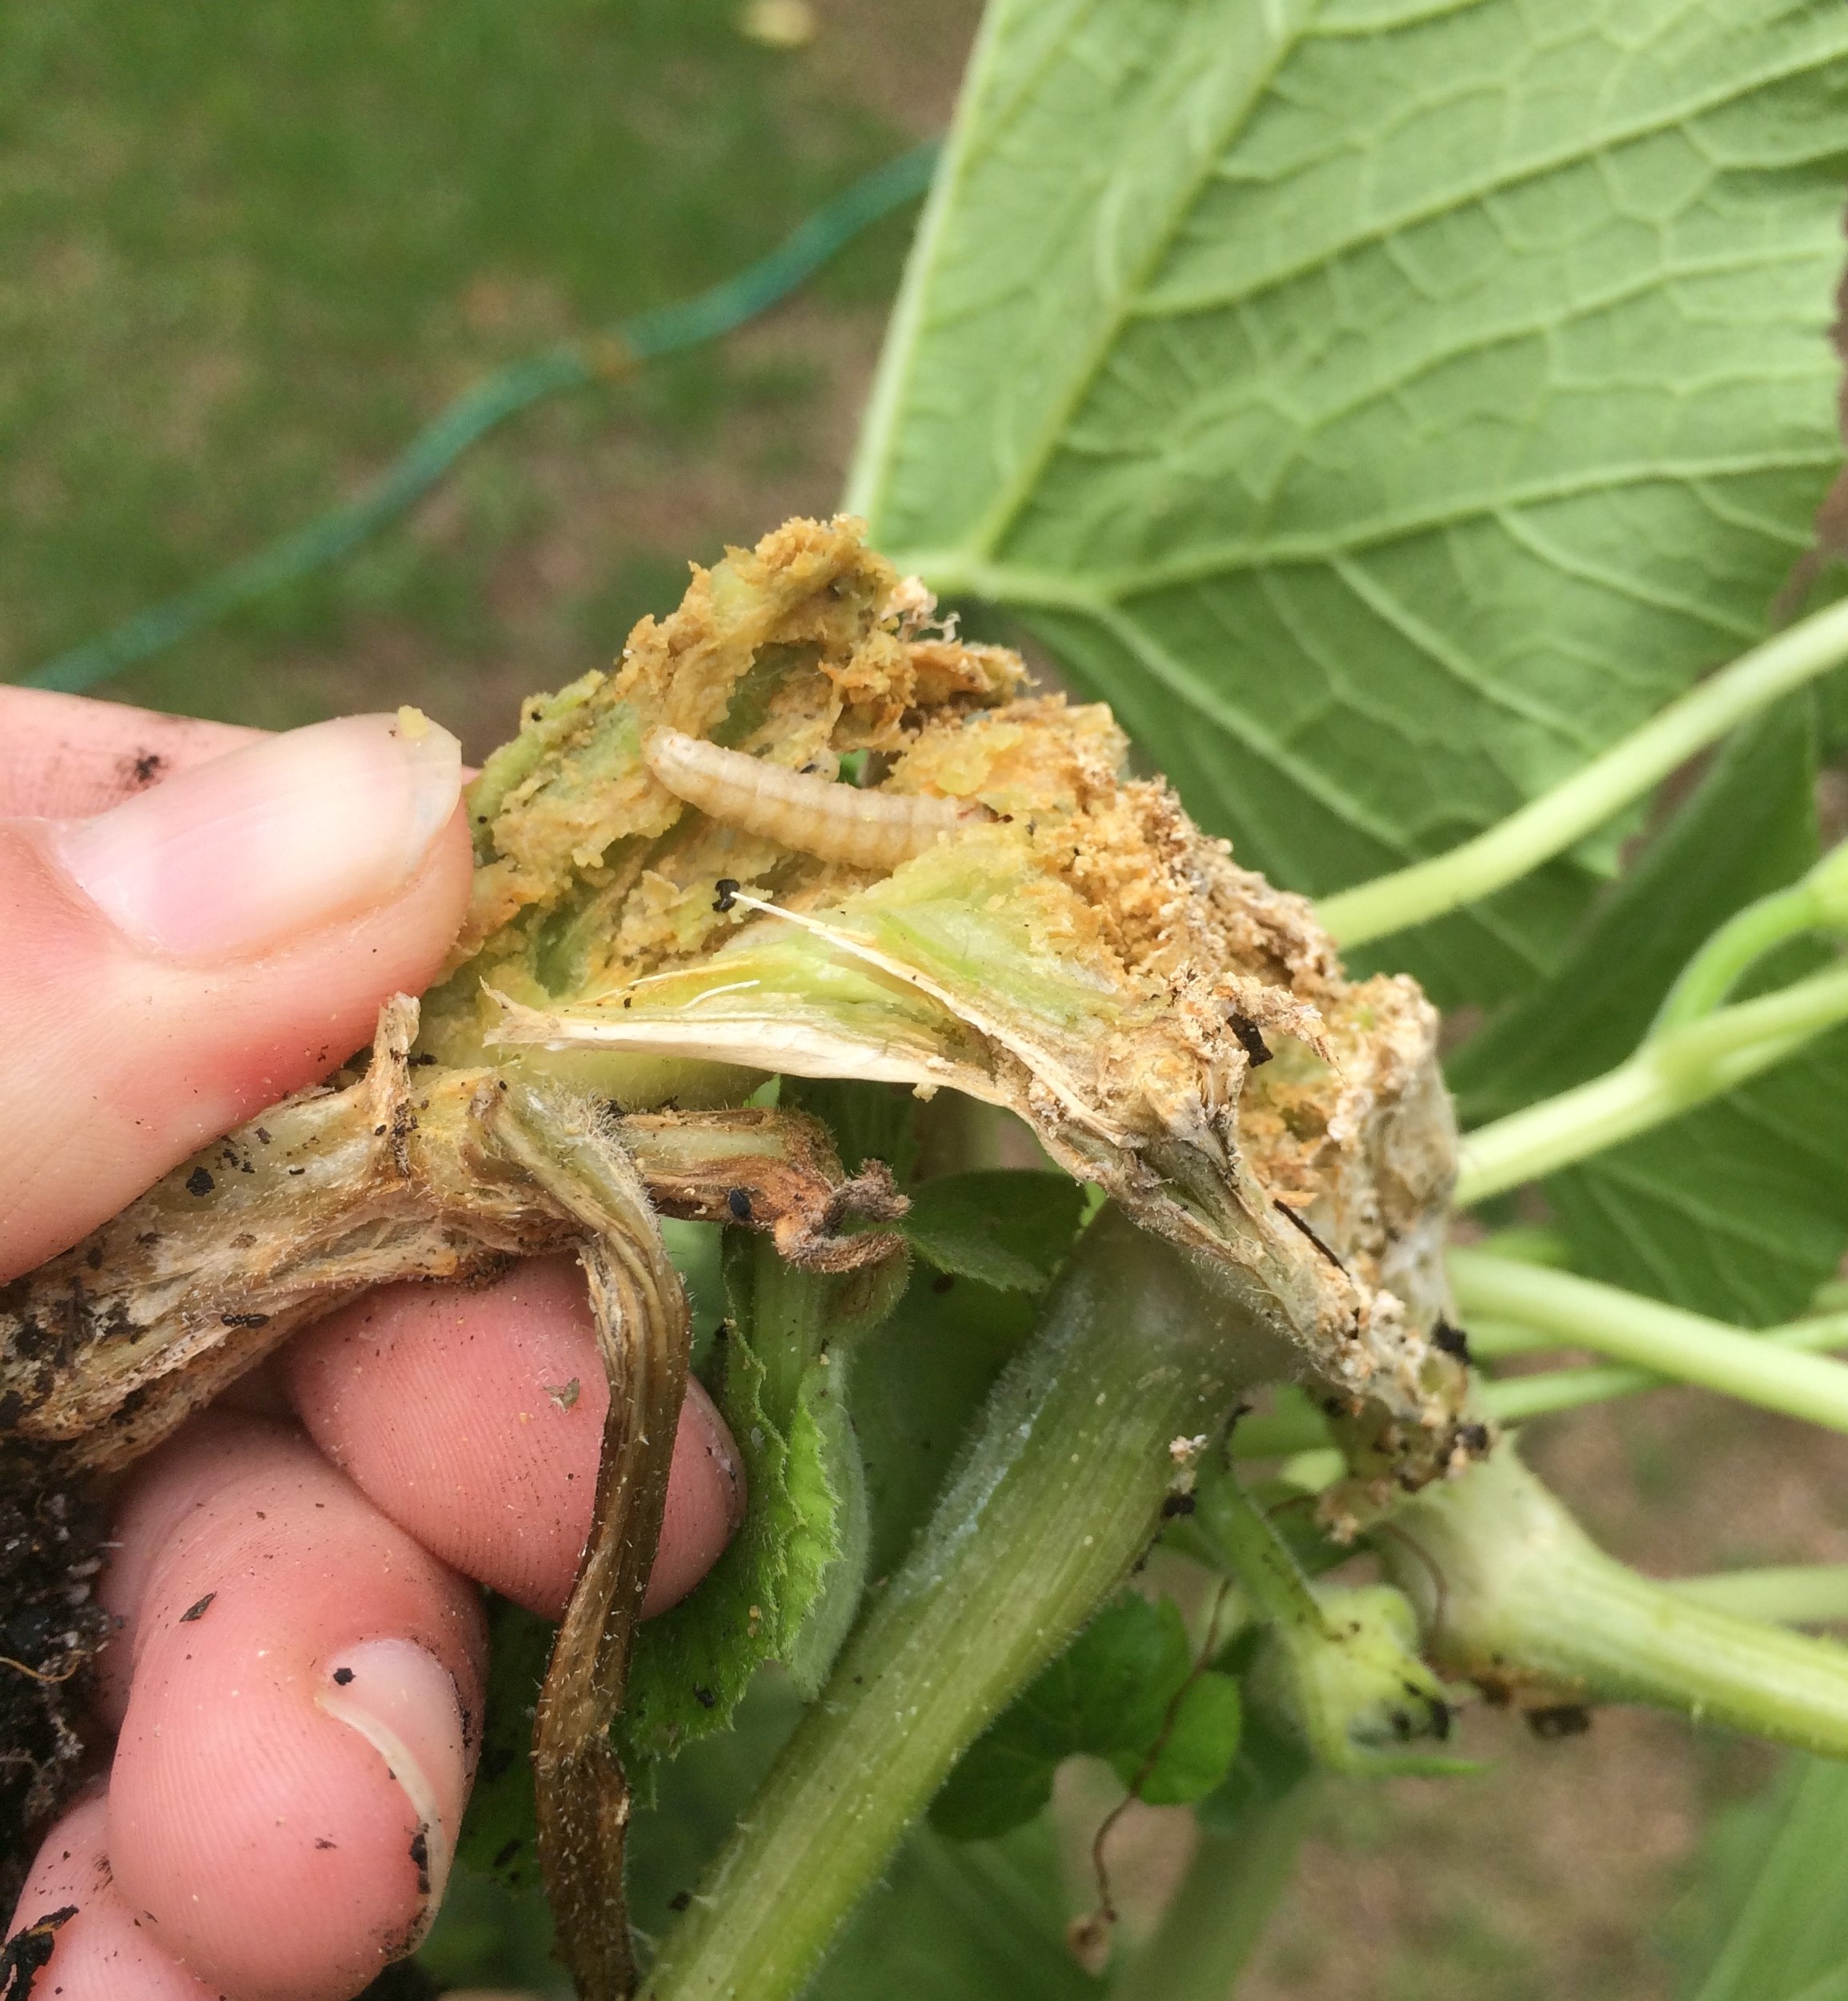
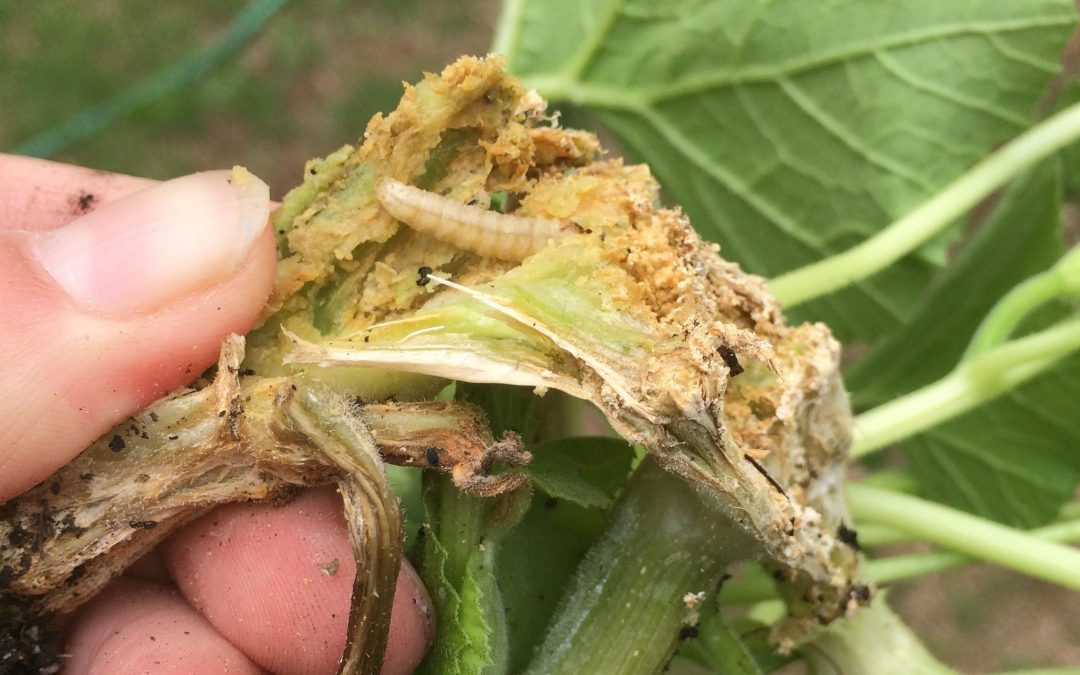
I was able to successfully remove a few tiny eggs that had been deposited individually on the base of the squash’s elongating bright green stems. And, since I planted early in the season, I was able to harvest a few beautiful looking – and very delicious tasting – summer squash for the dinner table. But alas, most of my hard work succumbed to my biggest garden foe: Melittia cucurbitae. Aka, the squash vine borer.
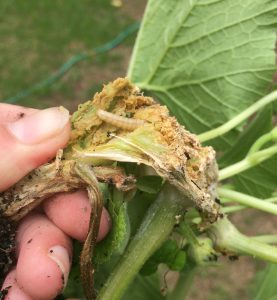
Squash vine borer larvae can most easily navigate the stems of summer squash varieties. Photo by Molly Jameson.
This year, I am trying a new approach. Instead of marching through my garden morning and night swatting wildly at borer moths – or repeatedly coating Baccillus thuringiensis biological insecticide spray over the squash stems every week – I am switching it up. This year, it is all about Cucurbita moschata. Aka, butternut squash.
How can this cucurbit avoid the mighty squash vine borer, you ask? Well typically, after hatching, squash vine borer larvae will quickly chew into the succulent stem of a summer squash variety. These large, hollow stems then act as an open highway for the borers, and they easily work their way up. The stems of butternut squash, on the other hand, are less palatable for the larvae. Their vining habit produces stems that are harder to navigate, thicker, and tougher than summer squash stems. Although not completely resistant, they are certainly not the borers’ preferred host plant.
And thankfully, butternut squash is quite delicious. It can be roasted to accompany just about anything, including spaghetti, lasagna, salads, chilis, and stews. It can also be blended into soups or purees to be paired with herbs and spices, such as turmeric, sage, garlic, and thyme. Or, it can be used as a filling in pies or frittatas, brushed with brown butter to sweeten up the plate as a delicious side dish, or be paired with goat cheese and crackers to be served as an appetizer.
Sometimes, simply omitting your toughest garden foe’s favorite host plant is the best path to both garden and dinner plate success.
by Mark Tancig | Feb 11, 2021
Gardeners worldwide and throughout time have bemoaned weeds. In Florida, we get to enjoy weeds all year long! Our February Gardening in the Panhandle (GIP) Live episode focused on weeds and weed control. Many homeowners are interested in ways to control weeds and UF/IFAS Extension and your local extension agents are here to help. The following is a summary of the topics we discussed and links for more research-based information on weeds.
What is a Weed?
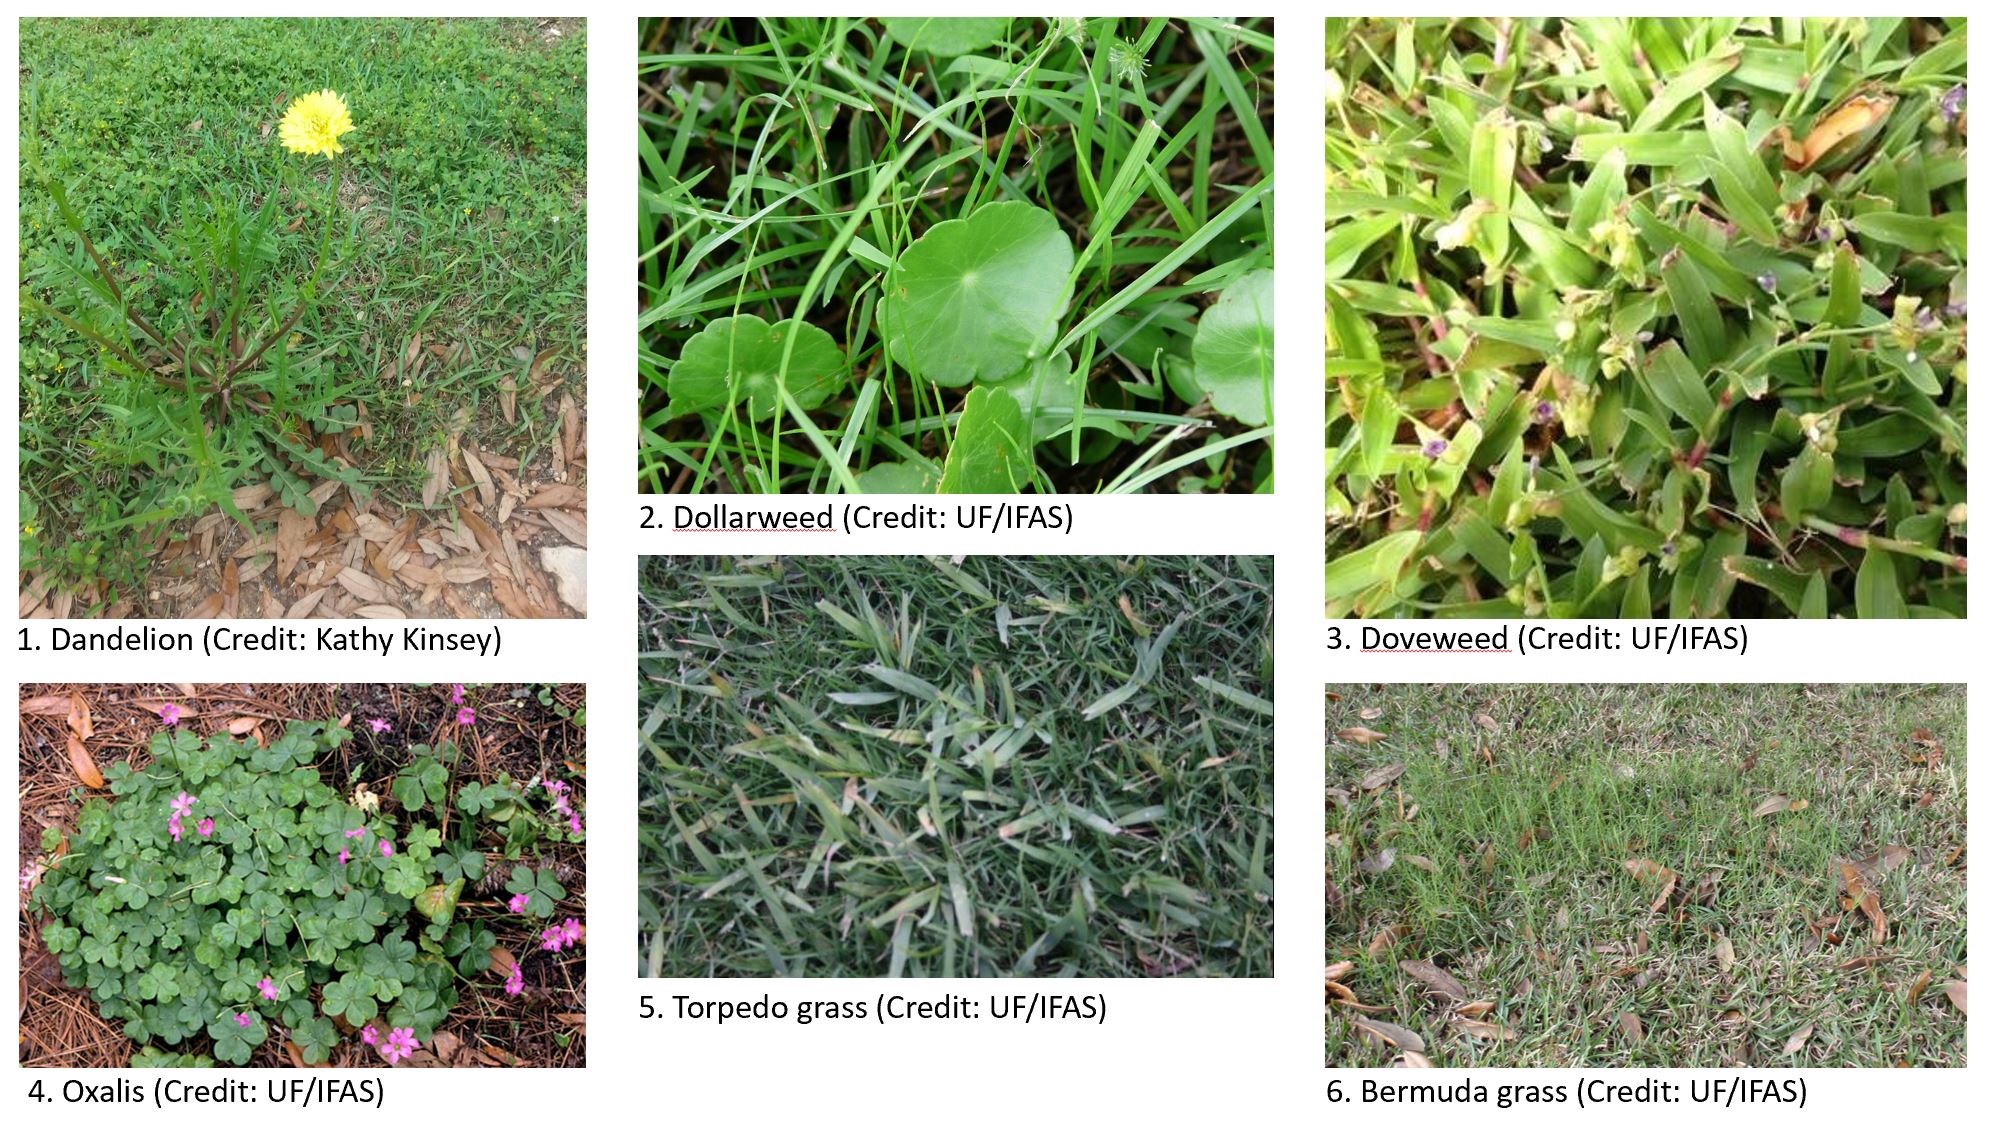
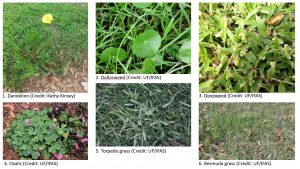
Many folks come to the extension office holding a plant and ask, “Is this a weed”? Well, whether it is a weed or not is up to the individual, as the only definition for a weed is “a plant out of place”. Bermudagrass and Oxalis are good examples of plants that some try to grow while others try to kill. One person’s weed is another’s wildflower! However, to be clear, plants classified as invasive by UF/IFAS and governmental entities are officially weeds. There are resources to help identify several common plants that are generally considered weeds by most homeowners and landscapers.
Weed ID Links
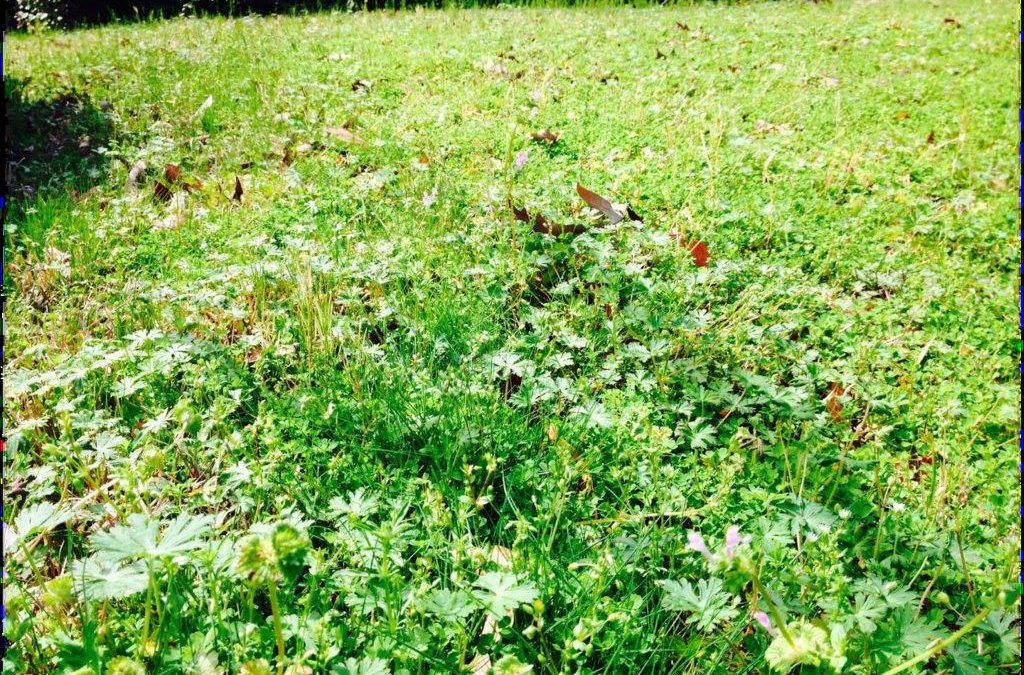
Common, and aggravating, weeds.
How to Prevent Weeds?
There are some general gardening practices that can help prevent weeds so there is less of a need to control them. A lawn that is healthy is less likely to be invaded by weeds and the use of mulch can greatly reduce weed growth in planting beds. Other practices, like the placement of weed fabrics/cloths are less effective and/or less practical in many garden situations.
Weed Prevention Links
How to Control Weeds?
Once you know and/or decide that what you have is a weed and that it needs to be dealt with, then you have to consider your control options. Prevention, as mentioned above, is key but sometimes you may need to use other methods of control, such as physical, mechanical, and/or chemical means. With chemical weed control, it is important to always read and follow the product label.
Weed Control Links

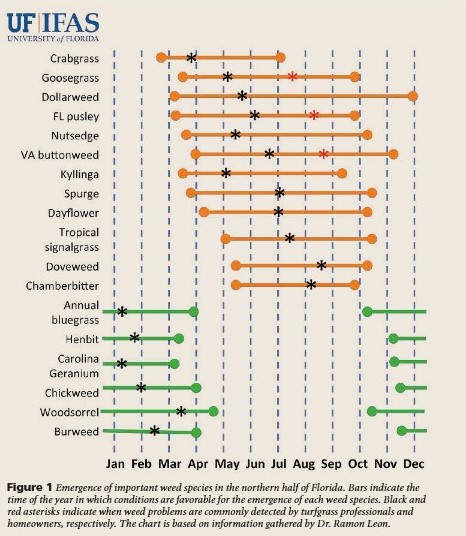
General dates of common annual weed emergence. Credit: Dr. Ramon Leon, UF/IFAS.
Specific Weed Recommendations
When managing pests, proper identification is key to effective control. Because some weeds are annuals, and present either during the cool or warm season, and others are perennials, proper weed identification can provide a more detailed control strategy. Use the weed ID links above and the document links below for more precise, and effective, weed management.
Species-Specific Control Links
If you need additional assistance with weed control, please contact your local county extension office. Please tune in for future GIP LIVE episodes for more research-based information on gardening topics.
by Larry Williams | Feb 11, 2021

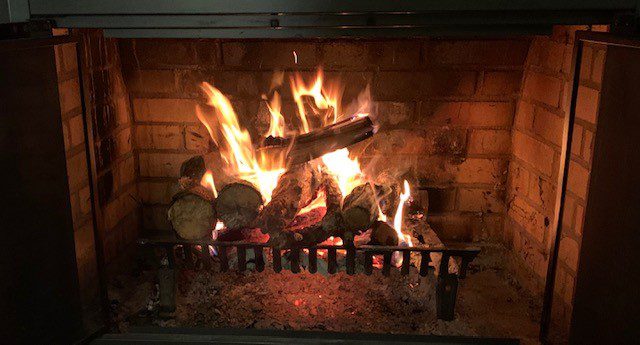
Be careful when bringing firewood indoors. Photo credit: Larry Williams
Your firewood pile could be “bugged.” Many insects like to overwinter in wood. A wood pile is an ideal place for some insects to survive the winter. They don’t know that you intend to bring their winter home indoors during cold weather.
During colder weather, you can unknowingly bring in pests such as spiders, beetles and roaches when you bring in firewood. It’s best to bring in firewood only when you are ready to use it. Otherwise, those pests could become active and start crawling around inside your house. Many insects are potential problems indoors and there are usually control options once insects move into your home. However, preventing the insects from getting inside is the best approach.
If you store wood indoors for short periods of time, it is a good idea to clean the storage area after you have used the wood. Using a first-in, first-out guideline as much as possible will reduce chances of insect problems.
It’s best to keep your wood pile off the ground and away from the house. This will make it less inviting to insects and help the wood dry. It’s not difficult to keep the wood off the ground. The wood can be stacked on a base of wooden pallets, bricks or blocks, which will allow air movement under the wood. The wood can also be covered with a waterproof tarp or stored in a shed. Regardless of how it is stored, avoid spraying firewood with insecticides. When burned, insecticide treated wood may give off harmful fumes.
Some critters that live in firewood can be harmful to humans. To avoid a painful sting or bite from insects, spiders or scorpions (no Florida scorpion is considered poisonous, but they can inflict a painful sting), it is a good practice to wear gloves when picking up logs from a wood pile.
Firewood can be a good source of heat during our cold weather. If you’re careful with how you handle your firewood, hopefully it will warm you, not “bug” you.
by Daniel J. Leonard | Feb 2, 2021
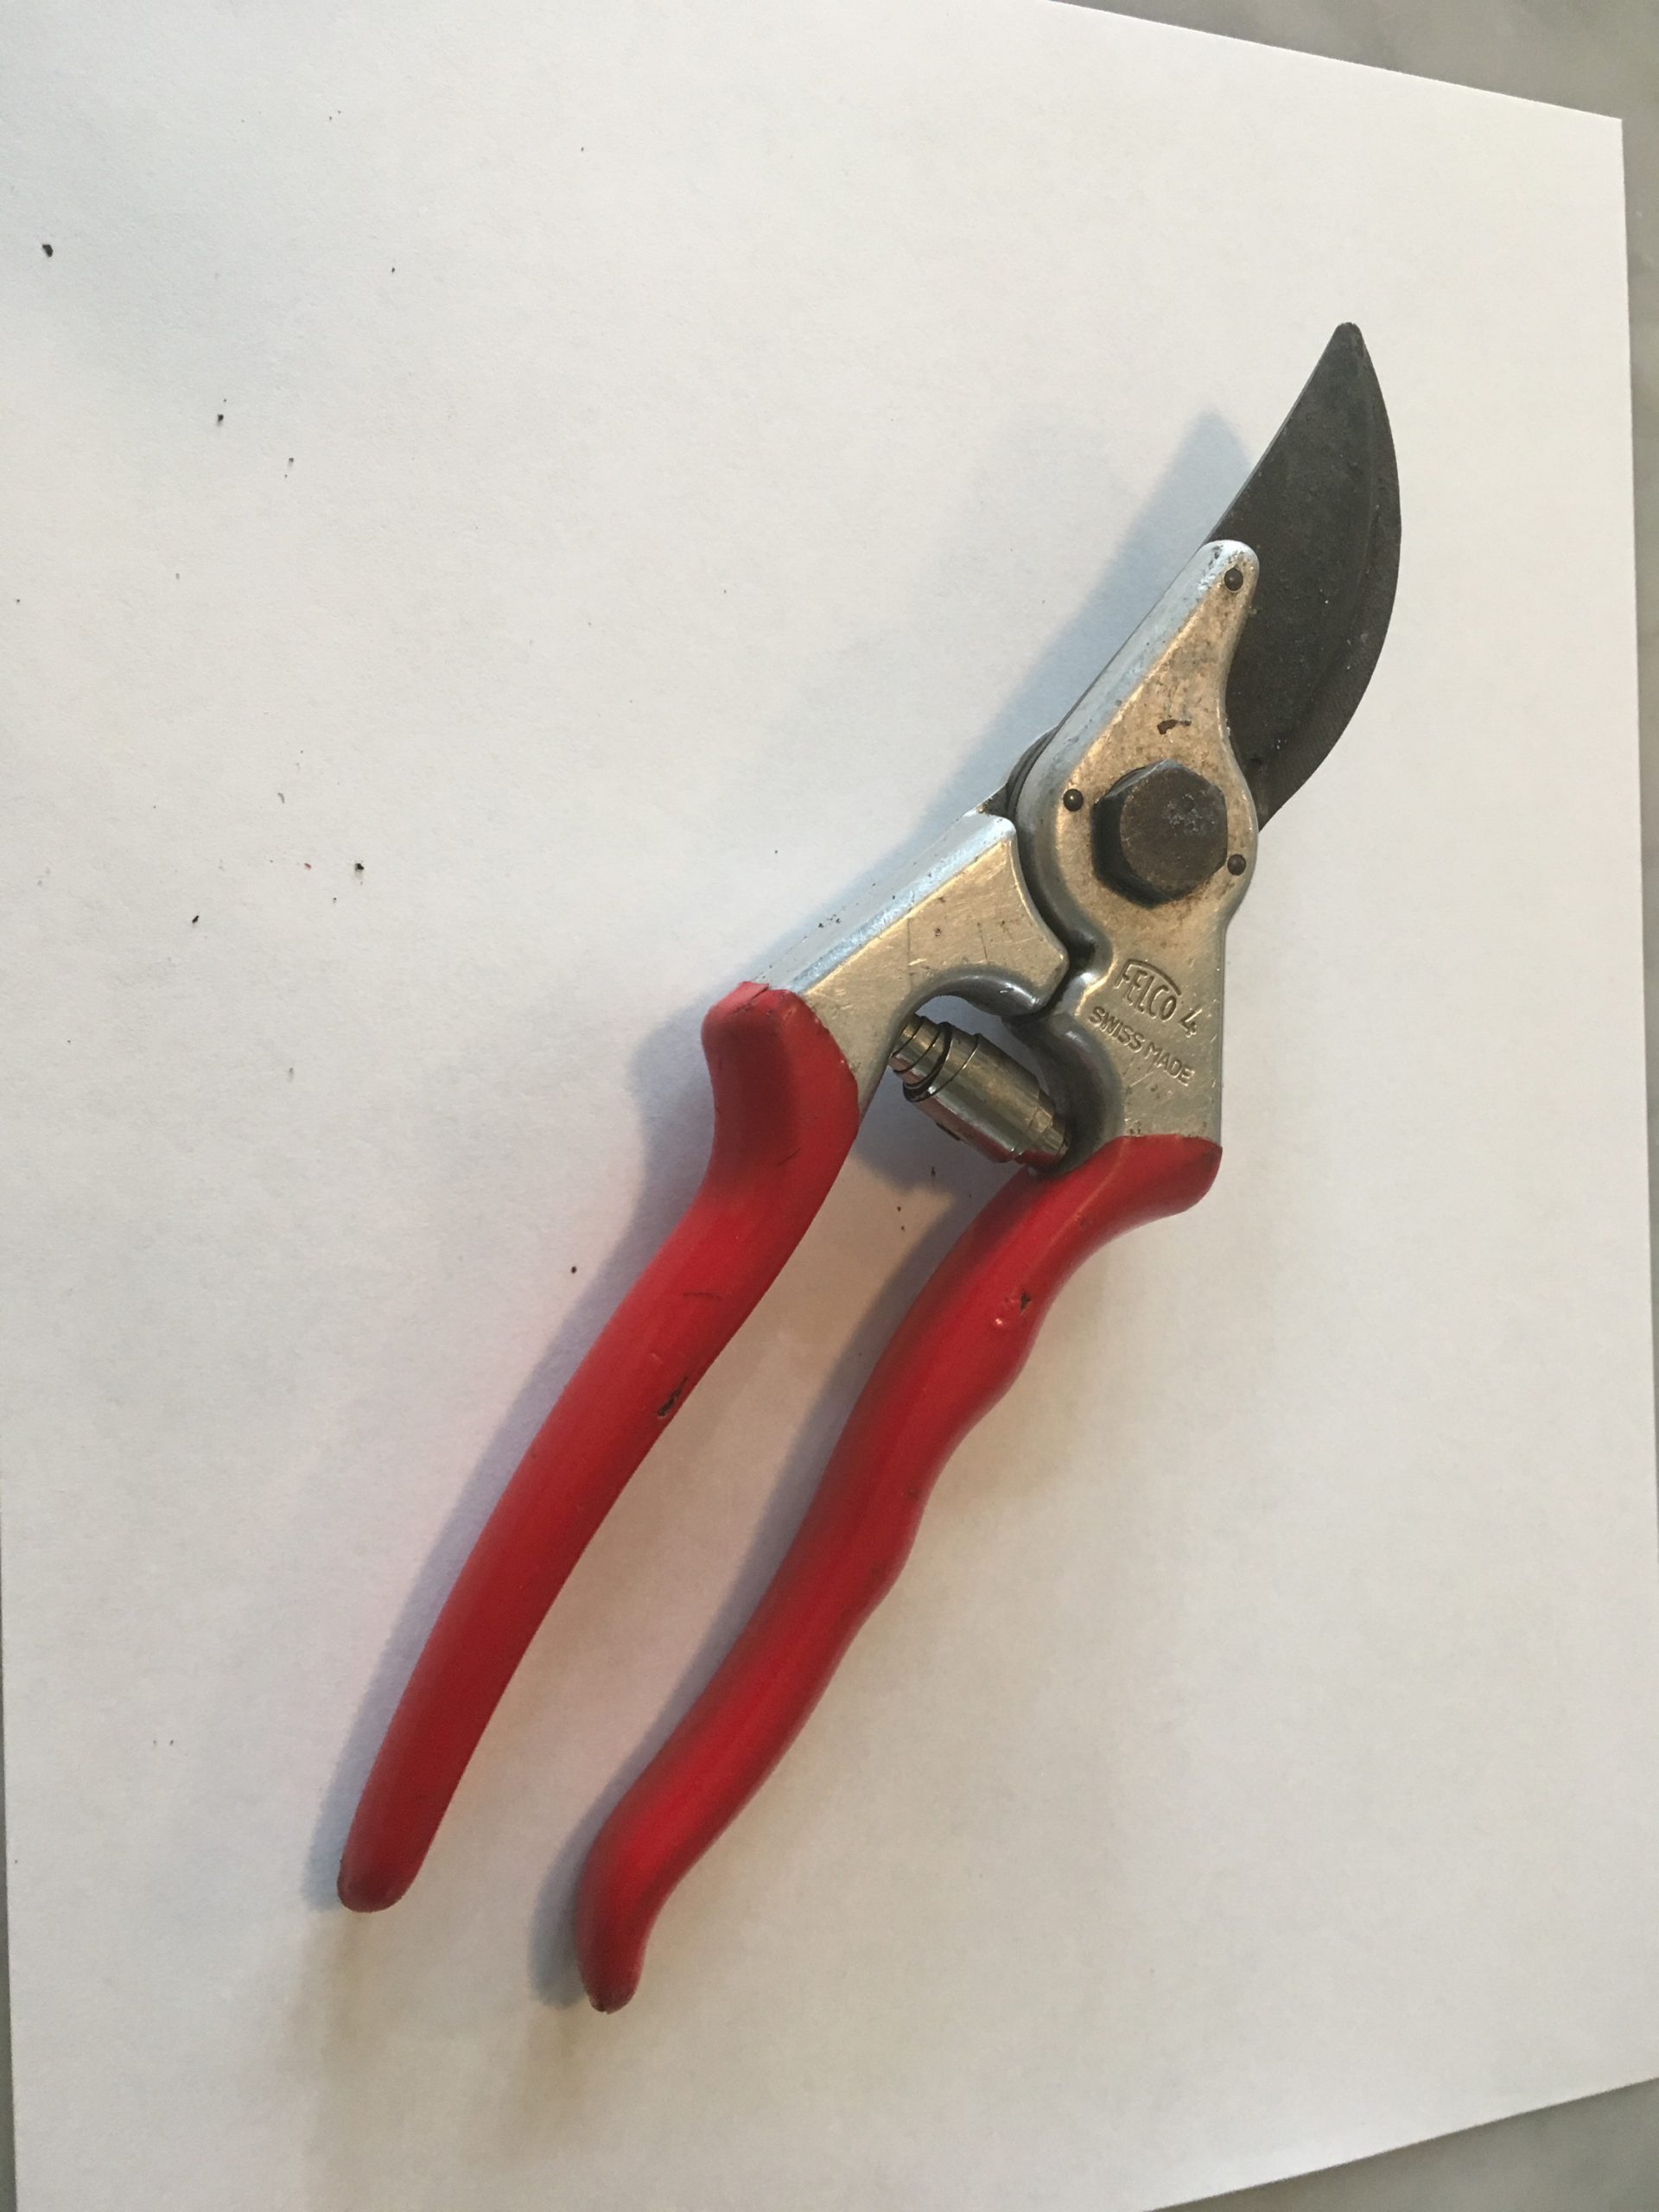
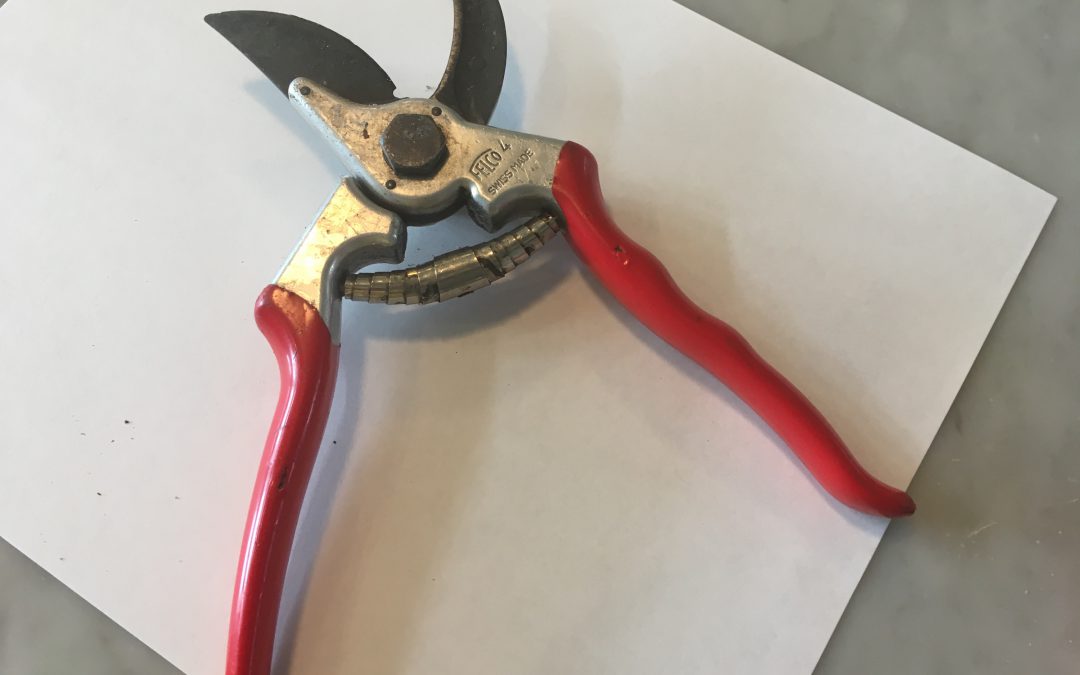
There is an old saying that rings true in pretty much any situation – “You get what you pay for.” Gardening tools, especially pruners, are no exception. We’ve all been there, fumbling around with a pair of rusty, dull, cheap garden pruners that just barely get the job done. Unfortunately, they can also do considerable harm to the plants you’re trying to improve, as anything short of a nice, sharp, clean cut introduces the potential for insect/disease infestation and will produce a wound that takes much longer to heal, if it ever heals properly at all. You wouldn’t want your doctor to start hacking away at you with a dirty, second-rate scalpel. Don’t subject your plants to the same treatment! While I’m not advocating blowing hundreds or thousands of dollars outfitting your garden tool shed with top of the line everything, investing in a pair of quality bypass hand pruners will pay dividends many years into the future and make your gardening experience much more enjoyable!

The classic Felco #4 bypass hand pruners. Photo courtesy of Walton County Master Gardener Andrea Schnapp.
Found in three designs, from old-fashioned anvil pruners that smush and smash their way to a cut, to ratcheting pruners that make short work of larger branches but tend to be cumbersome and complicated, to bypass pruners that produce clean cuts in a scissor-like manner, hand pruners accomplish many tasks in the landscape. From cutting small limbs, to harvesting vegetables, to deadheading annual flowers and everything in between, there isn’t a more frequently used, versatile tool. Therefore, it makes sense to buy a quality pair that will perform excellently, still be snipping long after your pruning days are over (if you take care of them), and that are comfortable enough you will enjoy using them. When shopping for your pair of “forever” pruners, there are a few things to look for.
- Only use bypass style pruners. Your plants will appreciate it.
- Look for heavy duty pruners with frames made from quality aluminum or stainless steel; they won’t rust and won’t easily bend or break.
- Buy pruners with replaceable parts. This is especially key because springs eventually rust and gum up and blades break and will eventually lose their ability to hold an edge over time (though you can and should resharpen them).
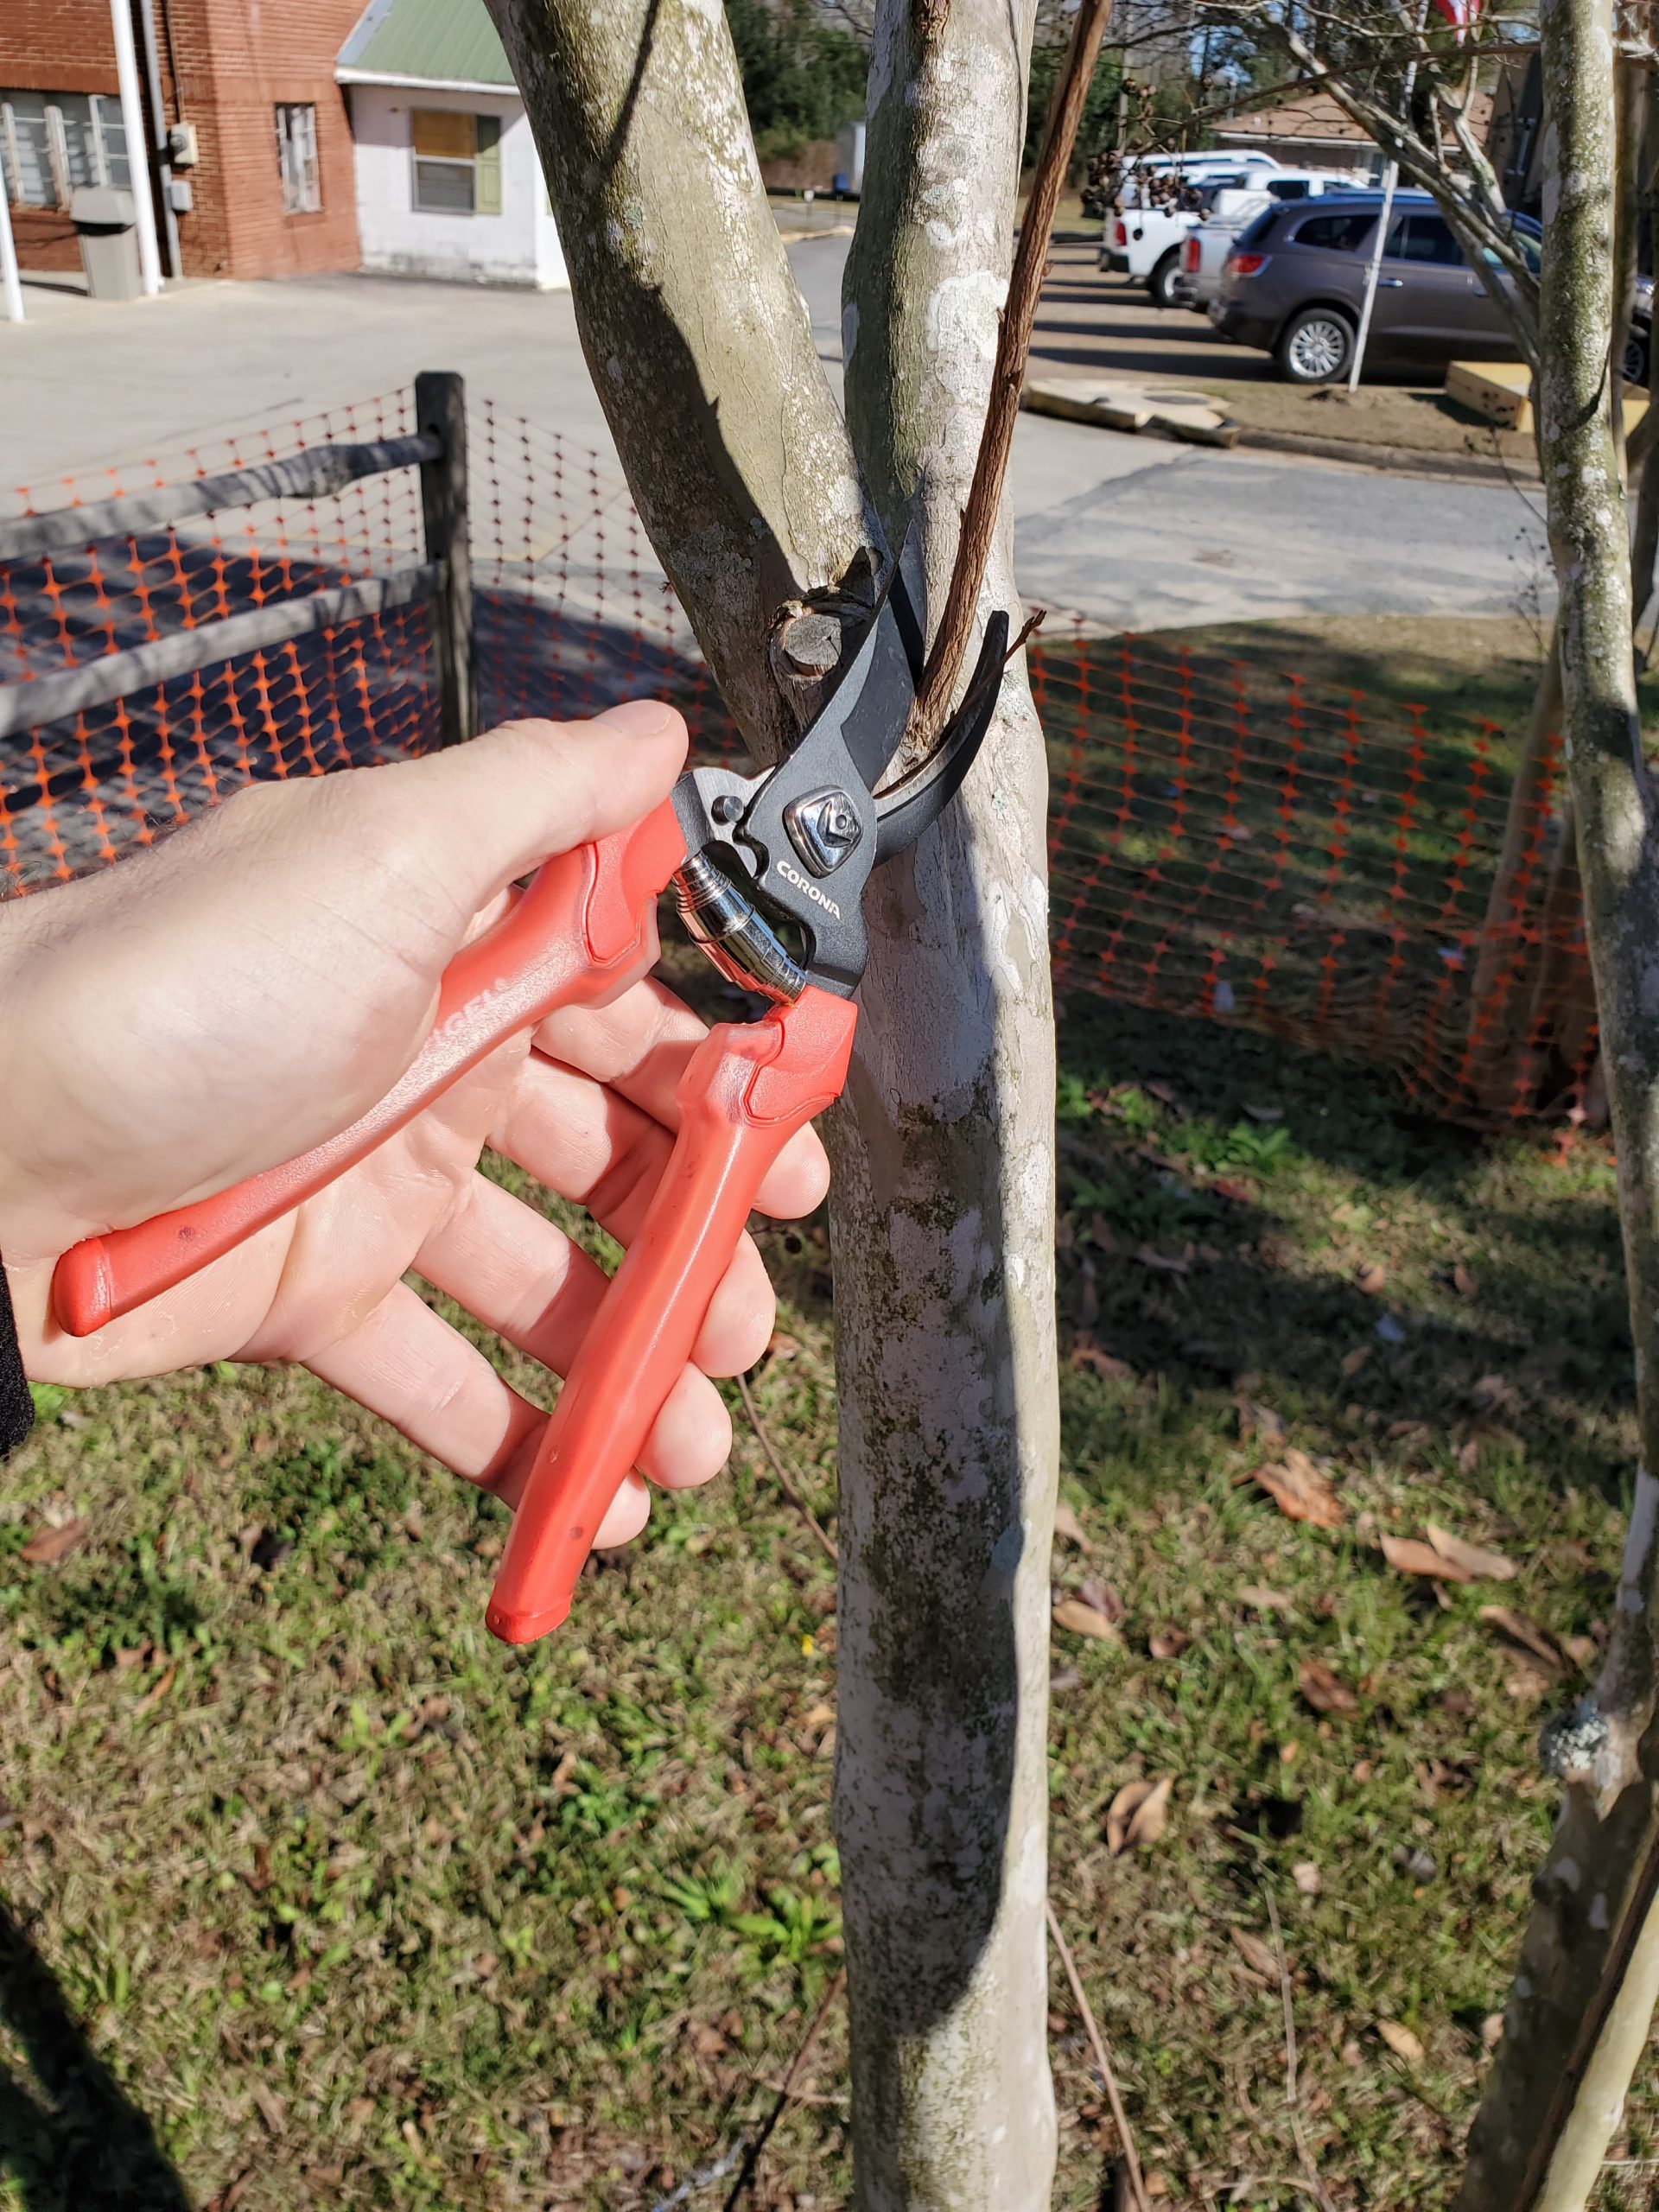
There are two commonly found brands that fit all three above criteria, albeit at different price points. For a high quality “budget” blade, various models from Corona do an excellent job for the money ($20-30) and won’t hurt your feelings too badly if you happen to lose a pair. Should you decide to splurge a little, Felco makes sharp, indestructible pruners, in multiple models around $50 to fit all size hands. Felco has become the horticulture industry standard and you’d be hard pressed to find a nursery owner or landscaper that didn’t own a pair (or two).

Corona ComfortGel bypass hand pruner. Photo courtesy of Daniel Leonard.
Regardless of which brand you buy (and there are many more than the two above listed) a pair of well-made pruners, if taken care of, should last a lifetime and make your gardening experience much more enjoyable for you and your plants! If you have any questions about gardening tools or equipment or any other horticulture or agronomic topic, feel free to contact your local UF/IFAS Extension Office. Happy Gardening!
by Pat Williams | Oct 21, 2020
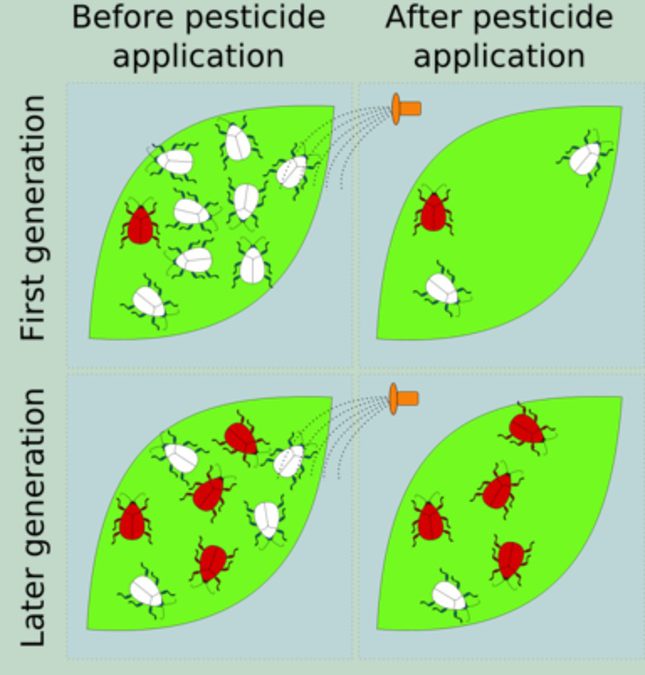
Normally, you will have one of four answers: “yes”, “no”, “I don’t know” or “what are super bugs?” The answer to the last one is an insect or other pest that has become resistant to chemical treatments through either natural selection (genetics) or an adaptive behavioral trait.
The next question is do you treat insect or pest problems at home with a purchased EPA registered chemical (one purchased from the nursery or other retailer)? If you answered yes, then the next question is how many times in a row do you apply the same chemical? If you only use one chemical until the product is used up, then you might be creating super bugs. Do you ever alternate chemicals and if you answer yes, do you understand chemical Modes of Action (how the pesticide kills the pest)? If you do not, then chances are the rotating chemicals might act in the same way. Thus, you are creating super bugs because in essence you are applying the same chemical with different labels.
Click on image for a larger view. Taken from https://edis.ifas.ufl.edu/in714.
One of the first ways to reduce creating super bugs is to practice Integrated Pest Management (IPM). The very last step of an IPM philosophy is chemical control. You should choose the least toxic (chemical strength is categorized by signal words on the label: caution, warning, and danger) and most selective product. A chemical label advertising it kills many pests is an example of a non-selective chemical. You want to choose a chemical that kills your pest or only a few others. In Extension education, you will always hear the phrase “The label is the law.” To correctly purchase a chemical, you must first correctly identify the pest and secondly the plant you want to treat. If you need help from Extension for either of these, please contact us. Before purchasing the chemical, always read the whole label. You can find the label information online in larger print versus reading the small print on the container.

IRAC phone app.
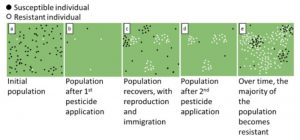
You now have the correct chemical to treat your pest. Wear the recommended personal protective equipment (PPE) and apply according to directions. If your situation is normal, the problem is not completely solved after one treatment. You might apply a second or third time and yet you still have a pest problem. The diagram explains why you still have pests or more accurately super bugs.
Now the last question is how do we really solve the problem given that chemicals are still the only treatment option? A bit more work will greatly help the situation. You need to download the Insecticide Resistance Action Committee (IRAC) guide and find the active ingredient on your chemical label (http://edis.ifas.ufl.edu/pi121 or https://irac-online.org/modes-of-action/ and select the pdf). If you are like me, you can just download the IRAC MoA smartphone app and type in the active ingredient; otherwise, Appendix 5 in the pdf has a quick reference guide. Either way, you will know the Group and/or Subgroup. A lot of commonly purchased residential chemicals fall within 1A, 1B or 3. The successful treatment option is to select chemicals from different group numbers and use them in rotation. If you start practicing this simple strategy, your treatment should be more successful. Then when someone asks if you are creating super bugs, your answer will be no.
If you have any questions about rotating your chemical Modes of Action, please contact me or your local county Extension agent. For more resources on this topic, please read Managing Insecticide and Miticide Resistance in Florida Landscapes by Dr. Nicole Benda and Dr. Adam Dale (https://edis.ifas.ufl.edu/in714).
by Daniel J. Leonard | Oct 14, 2020
Article by Jessica Griesheimer & Dr. Xavier Martini, UF/IFAS North Florida Research and Education Center, Quincy
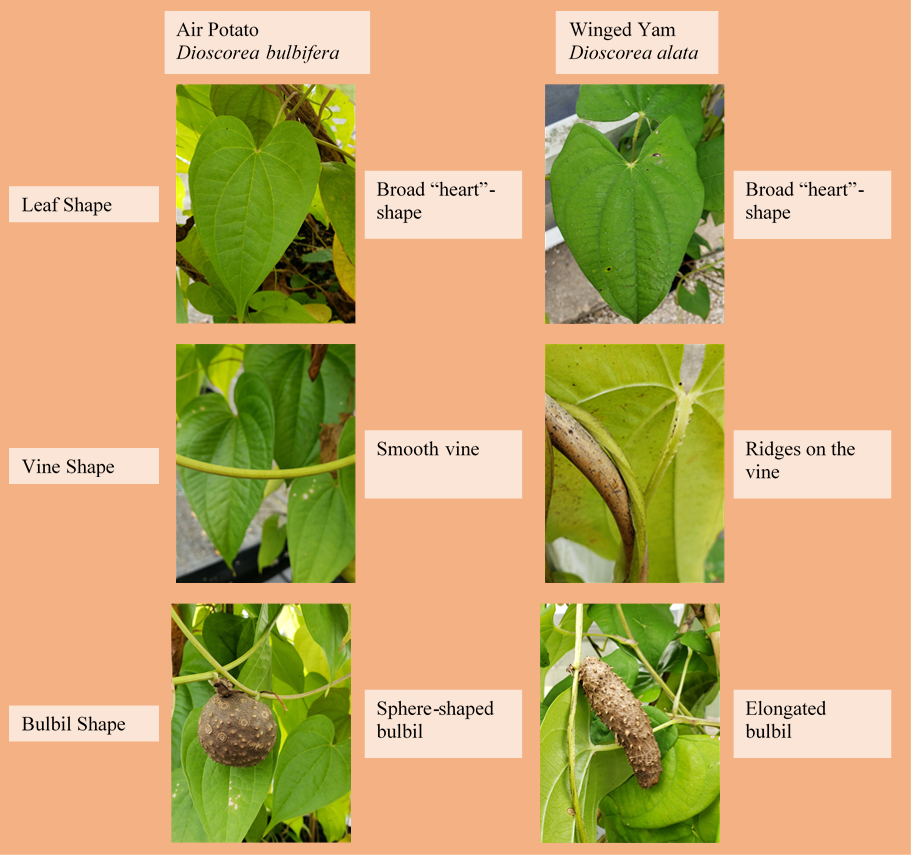
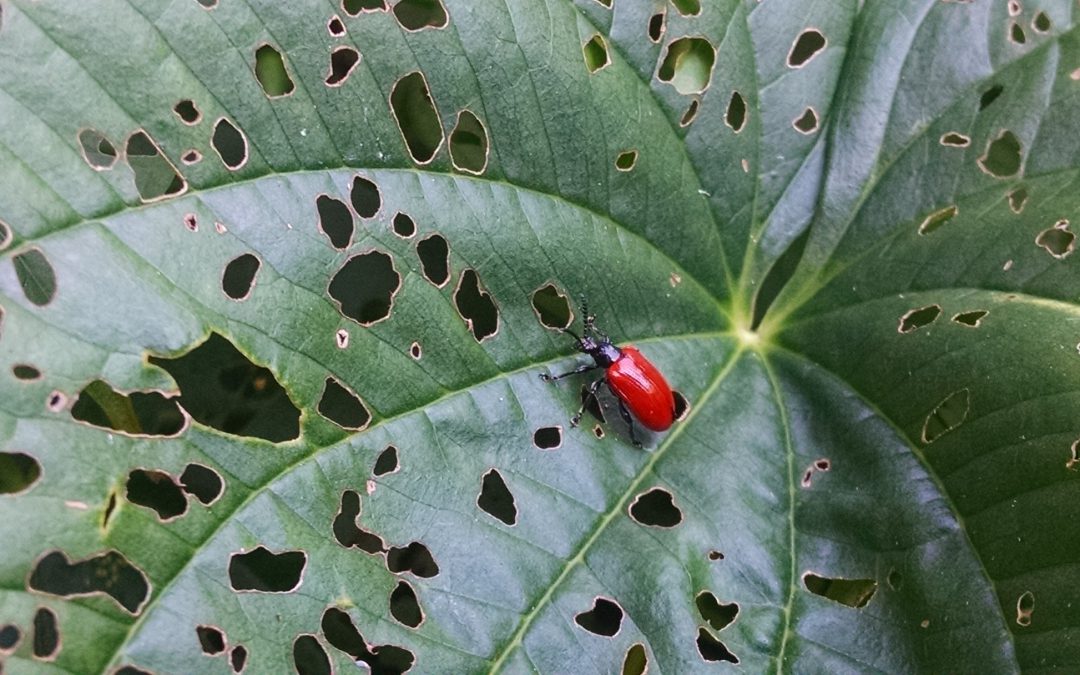
Dioscorea bulbifera, commonly known as the air potato is an invasive species plaguing the southeastern United States. The air potato is a vine plant that grows upward by clinging to other native plants and trees. It propagates with underground tubers and aerial bulbils which fall to the ground and grow a new plant. The aerial bulbils can be spread by moving the plant, causing the bulbils to drop to the ground and tubers can be spread by moving soil where an air potato plant grew prior. The air potato is commonly confused with and mistaken as being Dioscorea alata, the winged yam which is also highly invasive. The plants look very similar at first glance but have subtle differences. Both plants exhibit a “heart”-shaped leaf connected to vines. The vines of the winged yam have easily felt ridges, while the air potato vines are smooth. They also differ in their aerial bulbil shapes, the winged yam has a long, cylinder-shaped bulbil while the air potato aerial bulbil has a rounded, “potato” shape (Fig. 1).

In its native range of Asia and Africa, the air potato has a local biocontrol agent, Lilioceris cheni commonly known as the Chinese air potato beetle (Fig. 2). As an adult, this beetle feeds on older leaves and deposits eggs on younger leaves for the larvae to later feed on. Once the larvae have grown and fed, they drop the ground where they pupate to later emerge as adults, continuing the cycle. The Chinese air potato beetle will not feed on the winged yam, as it is not its host plant.Current methods of air potato plant, bulbil, and tuber removal can be expensive and hard to maintain. The plant is typically sprayed with herbicide or is pulled from the ground, the aerial bulbils are picked from the plant before they drop, and the underground tubers are dug up. The herbicides can disrupt native vegetation, allowing for the air potato to spread further should it survive. If the underground tuber or aerial bulbils are not completely removed, the plant will grow back.
The Chinese air potato beetle is currently being evaluated as a potential integrated pest management (IPM) organism to help mitigate the invasive air potato. The beetle feeds and reproduces solely on the air potato plant, making it a great IPM organism choice. During 2019, we studied the Chinese air potato beetle and its ability to find the air potato plant. It was found the beetles may be using olfactory cues to find the host plant. Further research is conducted at the NFREC to increase natural aggregation of the beetles on air potato to improve biological control of the weed.
Chinese Air Potato Leaf Beetle.
If you have the air potato plant, or suspect you have the air potato plant, contact your local UF/IFAS Extension Agents for help!