by Gary Knox | Feb 3, 2015
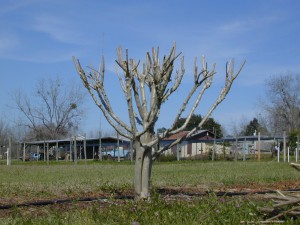
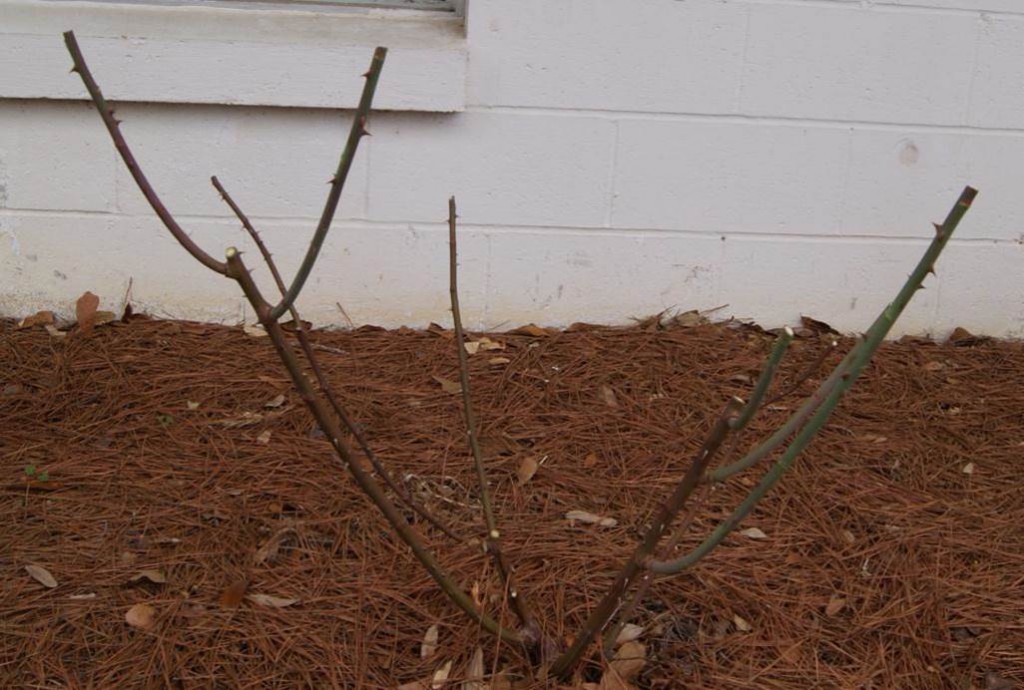
Figure 1. Topping is the drastic removal of large-diameter wood (typically several years old) with the end result of shortening all stems and branches. Topping is not recommended for crapemyrtle.
As the holidays fade and the New Year begins, we often see crapemyrtles being “mutilated” from improper pruning: main stems that are several years old are cut back, often leaving branch stubs 2 – 5 inches or more in diameter. This form of crapemyrtle mistreatment goes by various names, including topping, heading, stubbing, rounding, dehorning and (my favorite) “crape murder”.
Whatever you call it, topping a crapemyrtle is almost always unnecessary. Over the years, many people viewed this type of improper pruning and unthinkingly perpetuated the practice in their own yards, not realizing the unfortunate consequences.
Research at the University of Florida found that topping crapemyrtle delays flowering up to one month. For example, unpruned trees may begin flowering in June whereas topped trees begin flowering in July. This research also found topping reduced the number of flowers and shortened the flowering season. Finally, topping stimulated more summer sprouting from roots and stems. Sprouting results in greater maintenance since sprouts are usually removed to maintain an attractive plant appearance.
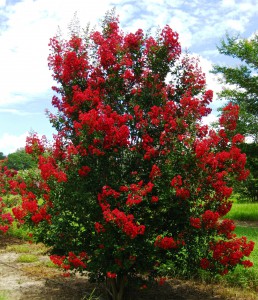
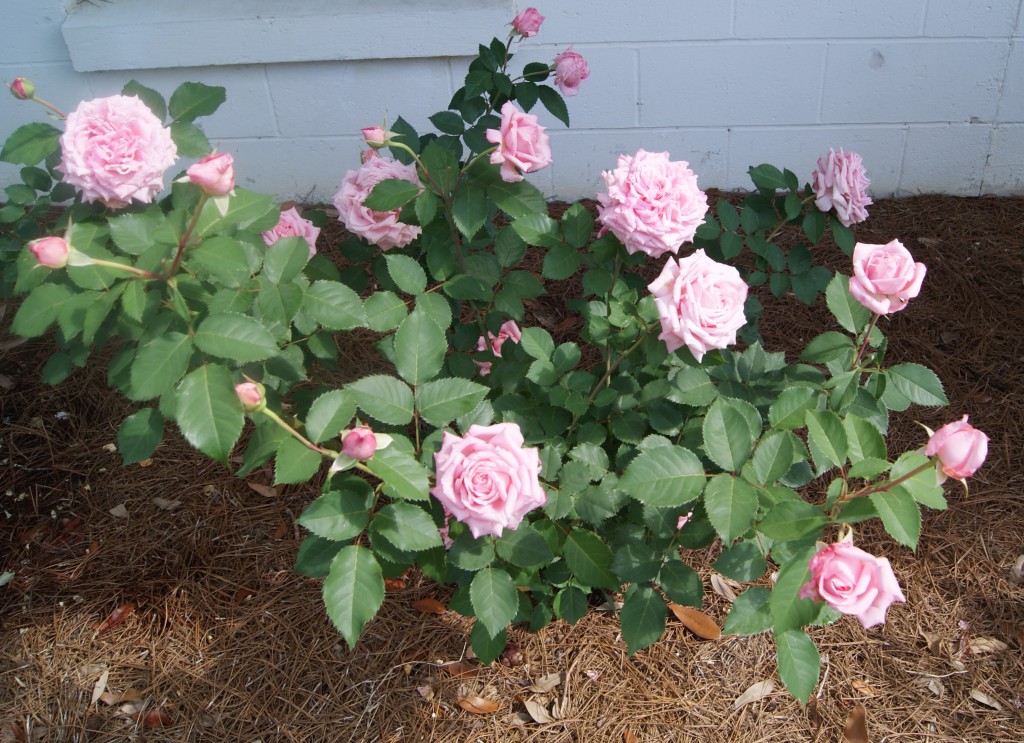
Figure 2. With proper cultivar selection and placement in the landscape, crapemyrtle develops into a beautifully shaped tree that rarely needs pruning. This crapemyrtle is Red Rocket®.
If a crapemyrtle is located where it requires routine pruning to fit into its surroundings (for example, under the eave of a roof), it should be replaced with a smaller growing crapemyrtle. A dwarf crapemyrtle (maturing at a height of 5 feet) would fit this location well. Medium crapemyrtle cultivars (growing up to about 15 feet in height) and tall or tree-size crapemyrtle cultivars (often growing 20 – 30 feet tall in 10 years) are best reserved for open areas.
Crapemyrtle thrives under full sun conditions in areas with ample room for the cultivar size and away from walkways and roads. Proper selection of crapemyrtle cultivar and proper placement in the landscape can result in a low maintenance crapemyrtle without the need for significant pruning.
For more information, please see Crapemyrtle Pruning.
by Sheila Dunning | Dec 23, 2014

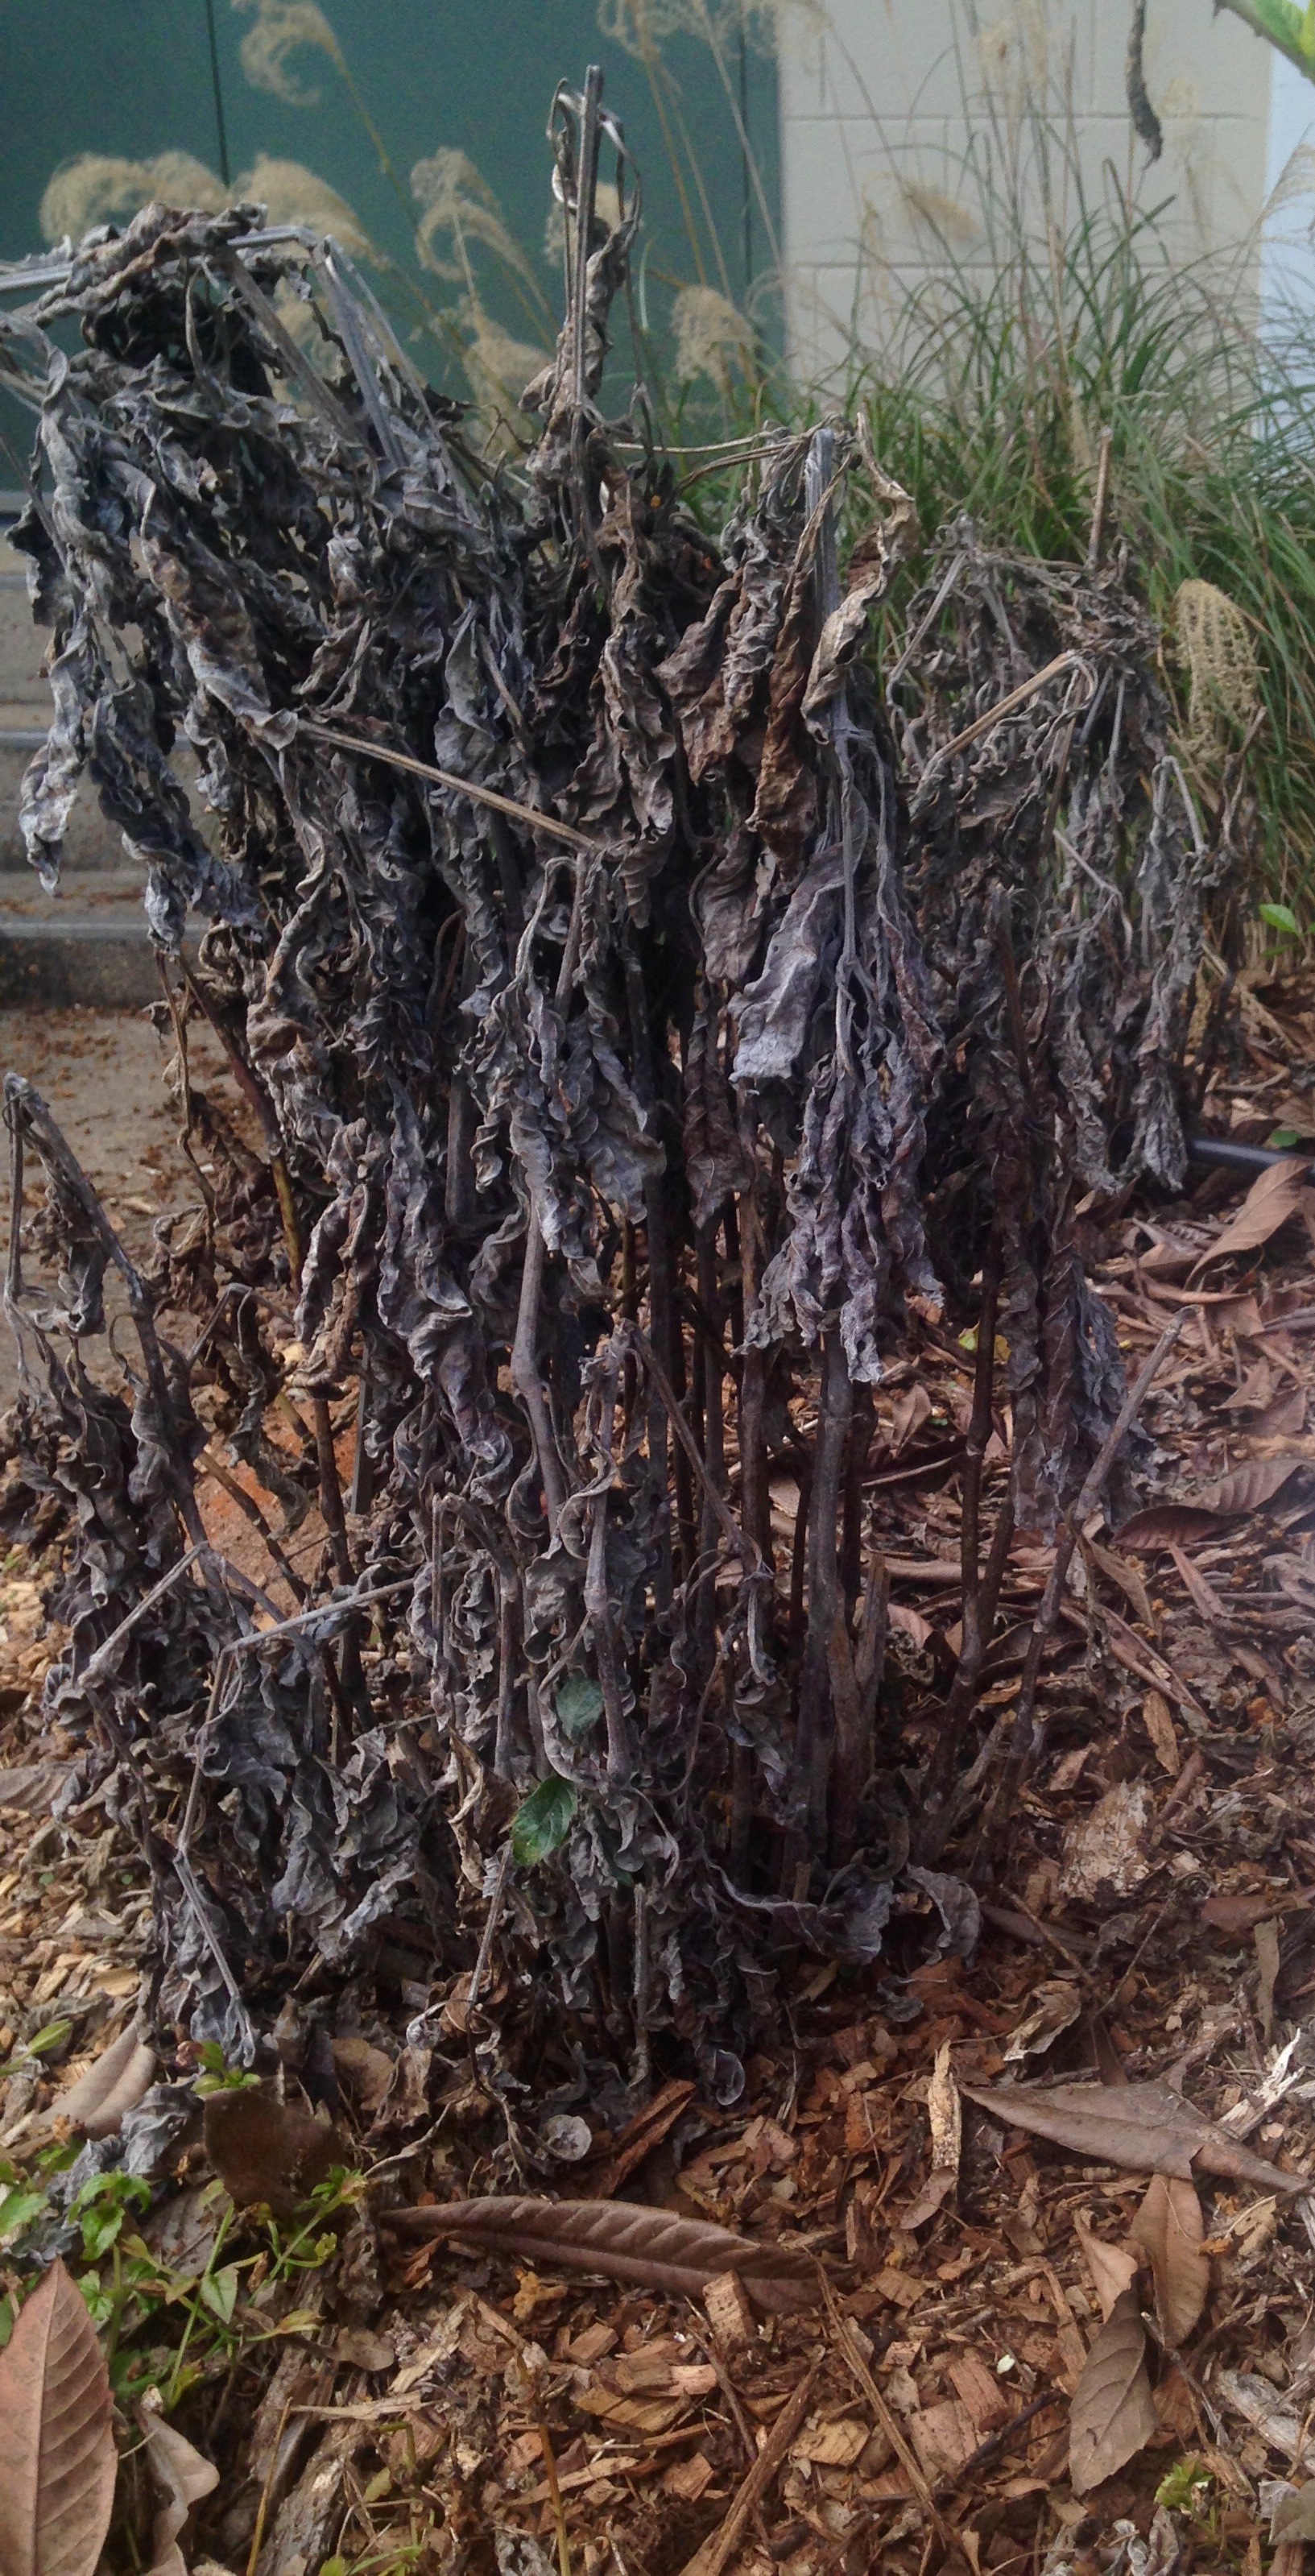
A frozen perennial plant. Photo credit: Taylor Vandiver UF/IFAS Extension.
When you look out at your landscape nobody has to tell you that winter temperatures in Northwest Florida Afterwards, the temperatures warm up and you feel compelled to do something about it. You just need to “turn your back and slam the door”. “Conceal, don’t feel; don’t let them know”. Cold injury can affect the entire plant or just certain plant or parts such as fruits, flowers, buds, leaves, trunks, stems, or roots. Many plant parts can adapt to tolerate cold. Root systems in the landscape are seldom ‘frozen’ in Florida. “The cold never bothered” them “anyway”. While dead, unsightly leaves may be removed as soon as they turn brown after a freeze, the remaining dry looking stems serve as food storage and should be allowed to remain. If they are removed before the weather is warm enough for the plant to resume growth, the root system may not be enough to support the plant and it will die. So, “let it go, let it go, let it go”. “The perfect” landscape “is gone”. “The past is in the past”. “It’s funny how some distance makes everything seem so small”.Tropical plants and summer annuals do not adapt or harden to withstand temperatures below freezing, and many suffer injury at temperatures below 50°F (10°C). Subtropical plants can harden or acclimate (become accustomed to a new climate) to withstand freezing temperatures, and properly conditioned temperate plants can withstand temperatures substantially below freezing.
Recently planted, unestablished plants may be more susceptible to cold injury. One type of winter injury is plant desiccation or drying out. This is characterized by marginal or leaf tip burn in mild cases and totally brown leaves in severe cases. Desiccation occurs when dry winds and solar radiation result in the loss of more water from the leaves than can be absorbed and/or transported by a cold root system. Plant water needs should be checked after a freeze. Plants may have lost substantial moisture during a windy freeze. Plants will transpire (lose water vapor) on a sunny day after a freeze. Cold injured wood can be identified by lightly scraping the bark with your fingernail and examining the color of the cambium layer (food conducting tissue) just underneath. Green tissue indicates the plant is still alive at that point; black or brown coloration indicates dead or injured tissue. 
After a particularly harsh cold event, some plants may be very slow to recover, so some patience is required. “It will rise” with “the break of spring”. Branch tips may be damaged while older wood is free of injury. Delay pruning until new growth appears next spring to ensure that live wood is not removed. In the meantime, take Elsa’s advice and “let it go, let it go, let it go”. You may be “too relieved to grieve”. I hope I haven’t infringed on any copyrights by letting you know “It’s okay to put off the yard work in the name of plant physiology”.
Enjoy the holiday season!
For more information please see:
Treating Cold Damaged Plants

by Beth Bolles | Dec 2, 2014
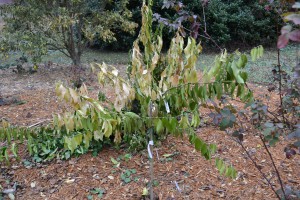
Our recent cold weather was not only a surprise for many locals but also for many plants that still had plenty of green growth. After a couple of nights of freezing temperatures, even deciduous trees that had not dropped their leaves, look a little ratty.
Since it is just the beginning of December and we are likely to have many more days this winter with cold weather, now is not the time to react to plants that were damaged. There are a few exceptions of plants that you can prune back, but in general patience is the key for the winter garden and cold-damaged plants.
Here are a few guidelines.
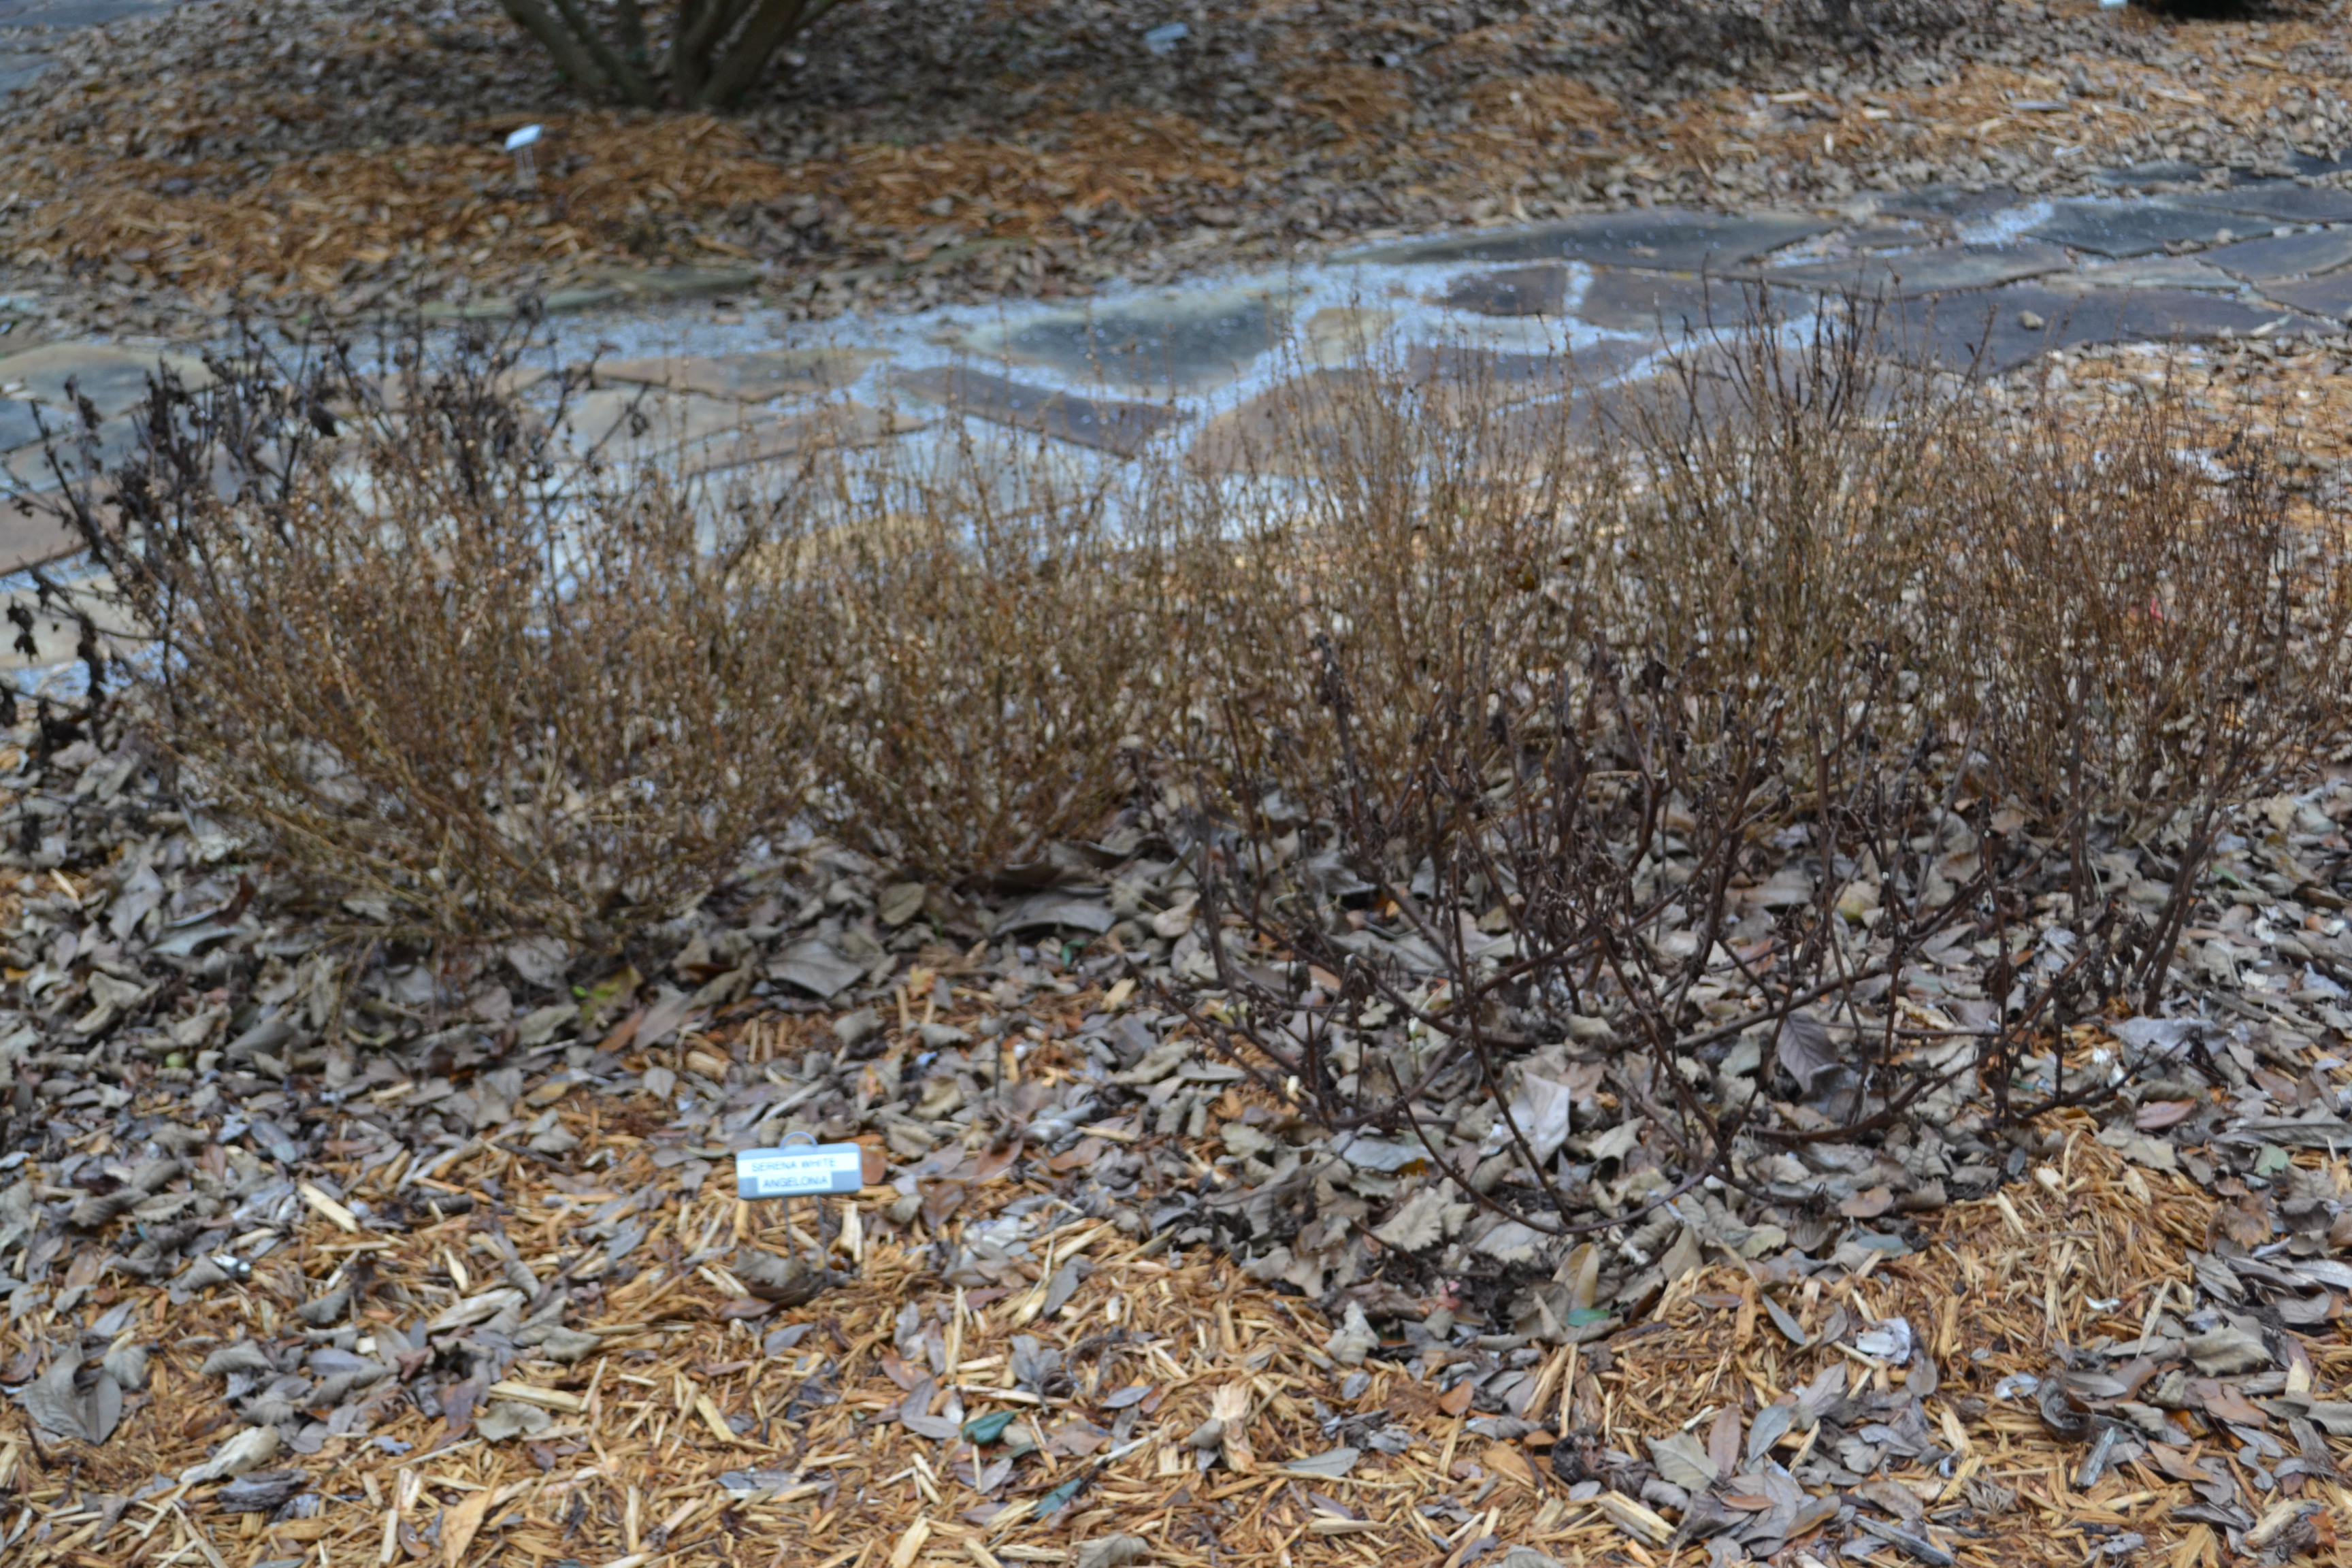
Unless planted in very protected spots, annuals like coleus and angelonia were killed by recent cold air. You may remove these plants or cut them back close to the group to make garden areas look neater. You may want to add some new winter annuals to brighten up these spots.
Warm season annuals can be removed from the garden.
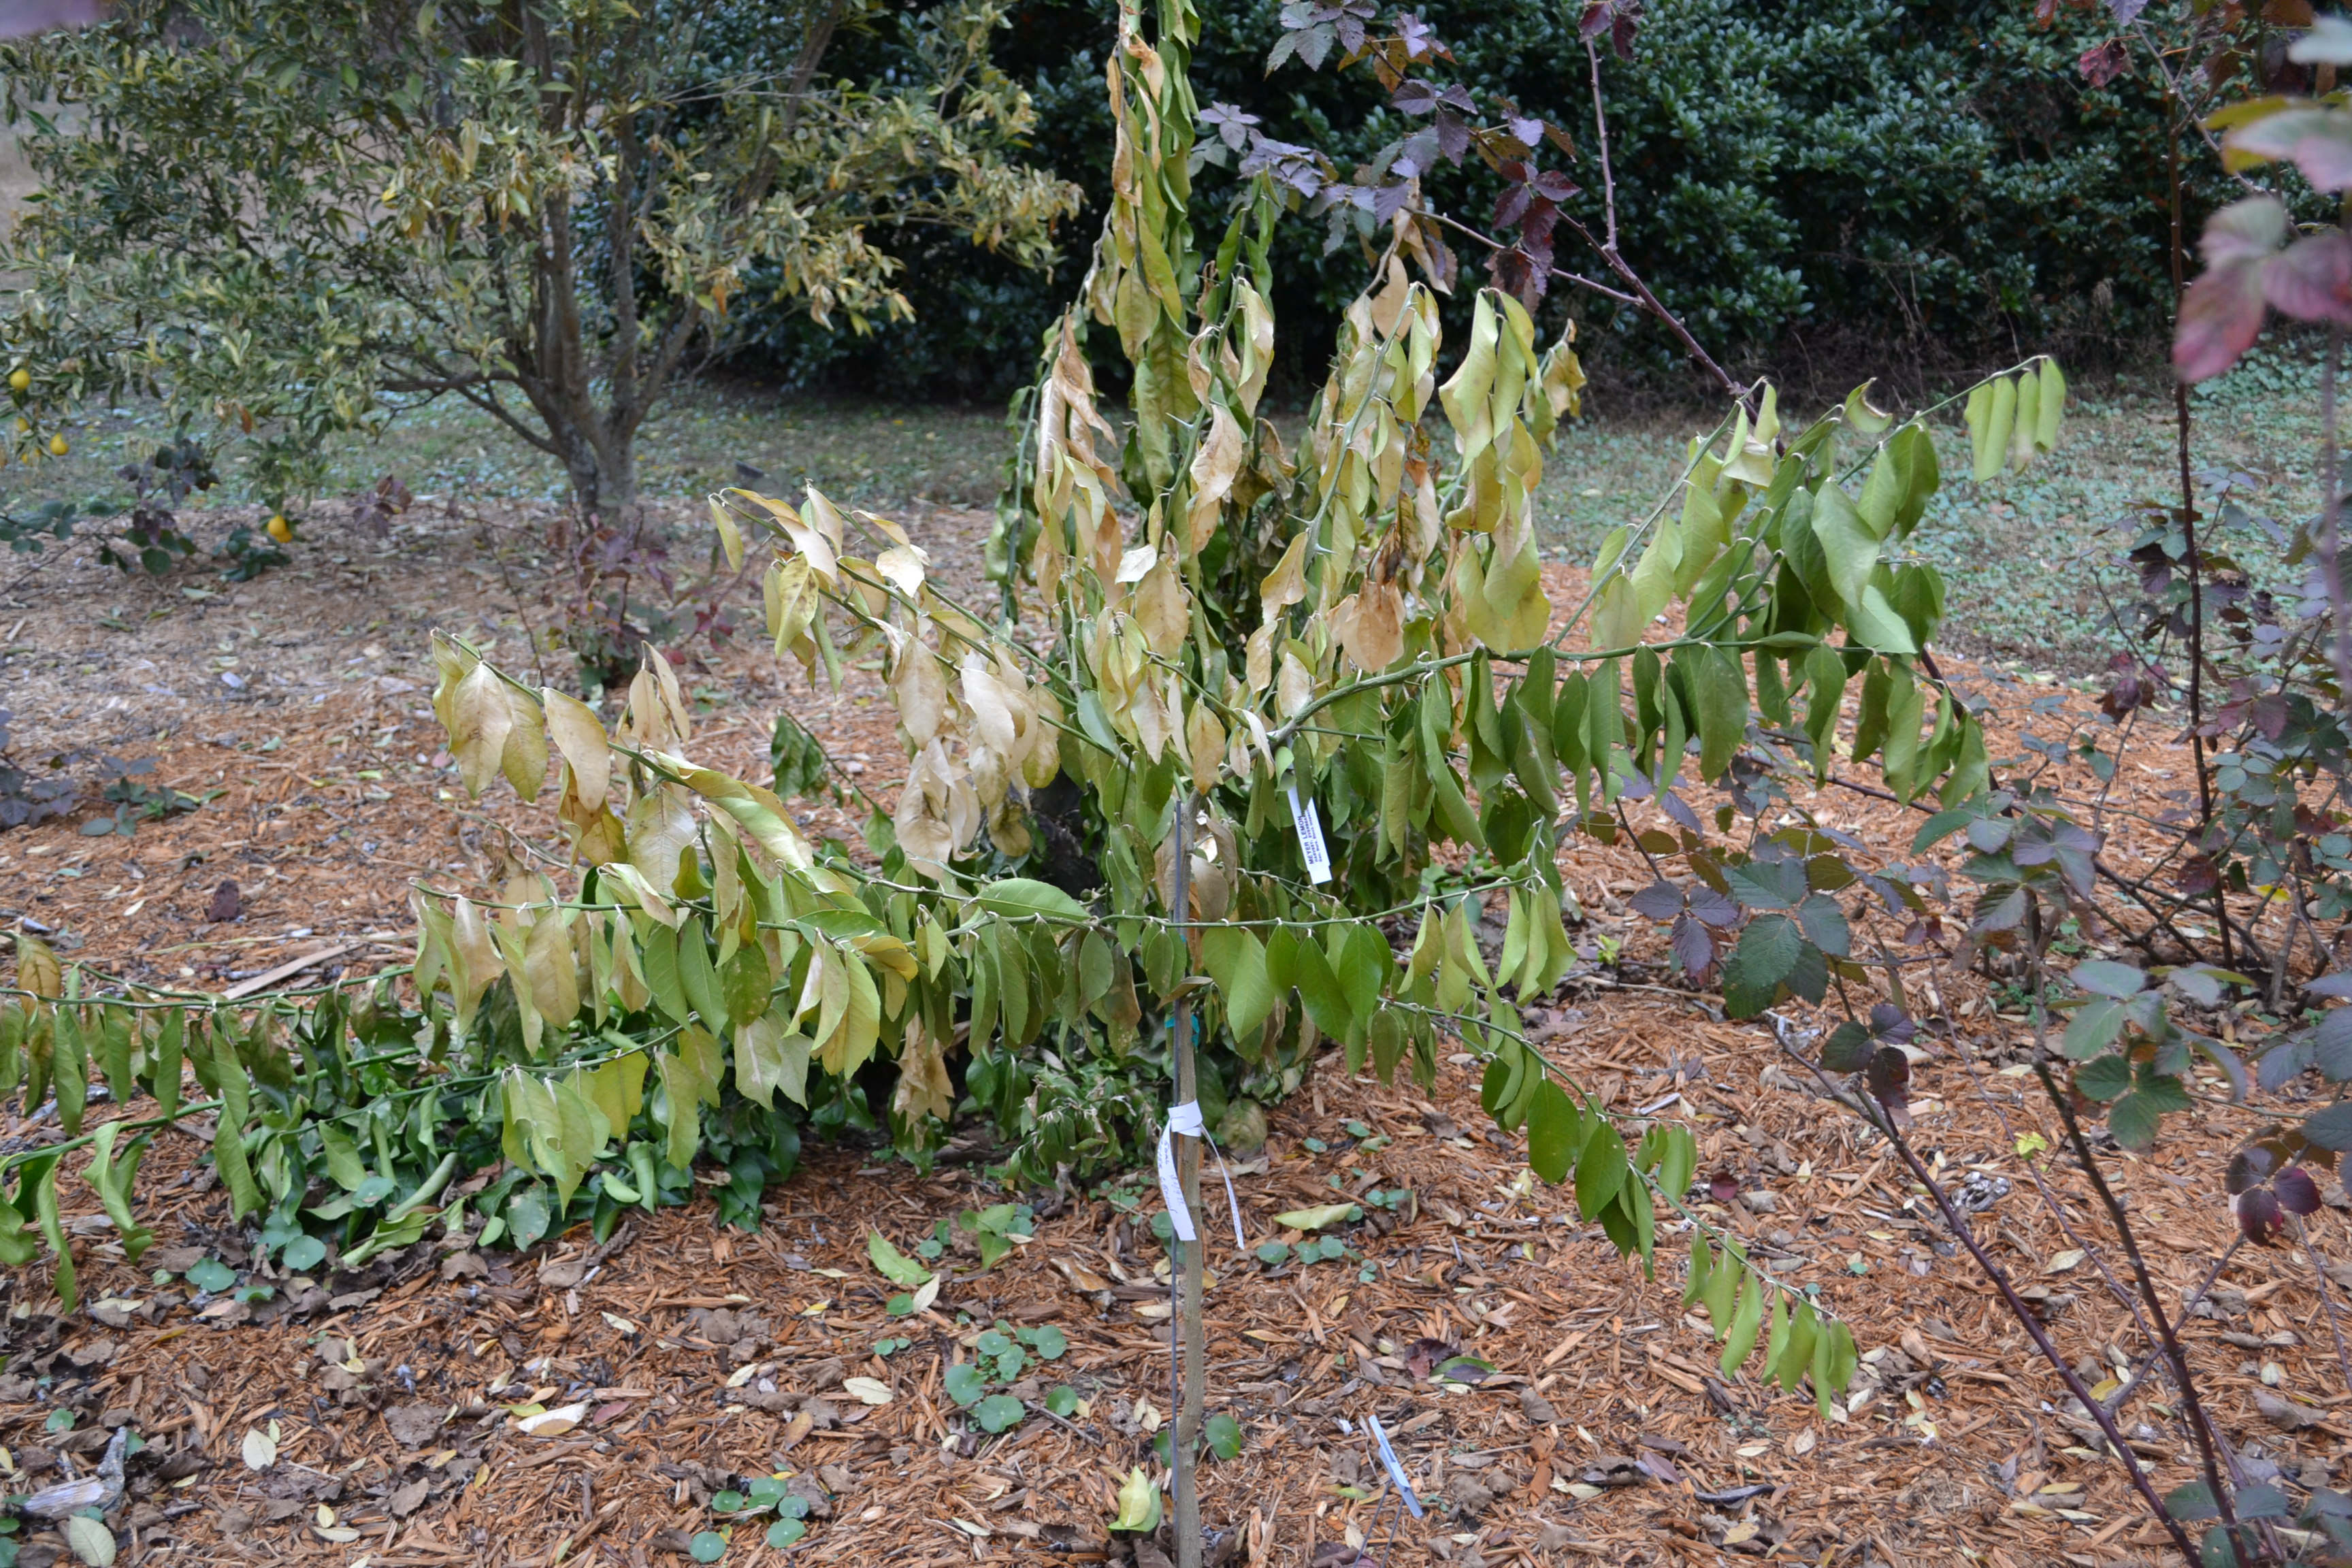
Both young and mature citrus trees experienced injury since many plants still had tender growth. Do not prune out any damage at this time. We will wait until next Spring to learn where the growth will resume and then prune as necessary to remove dead branches.
The tender growth on a young Meyer lemon was damaged by cold air.
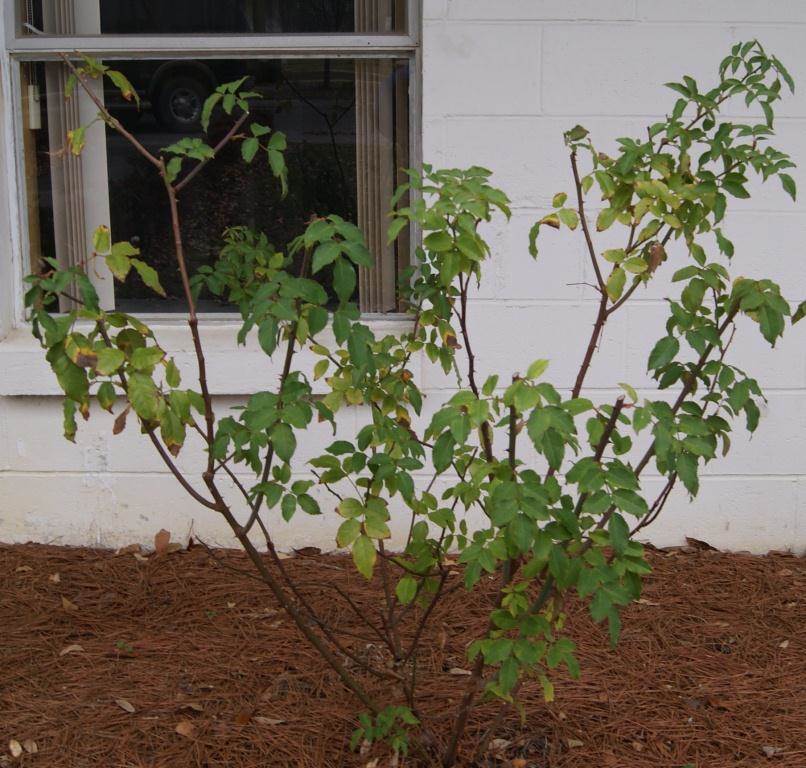
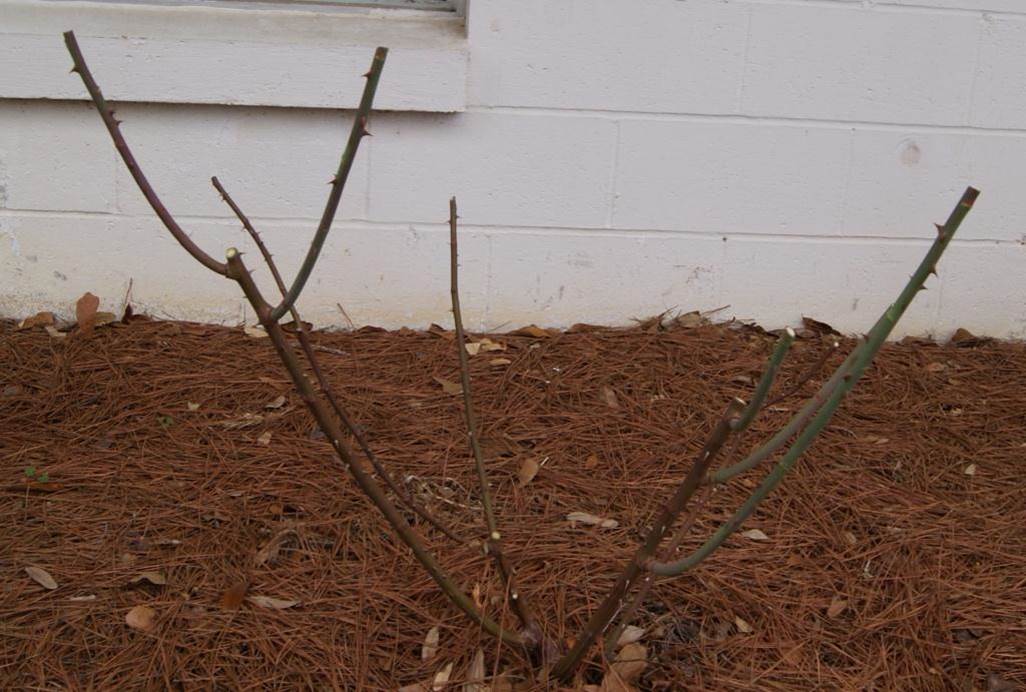
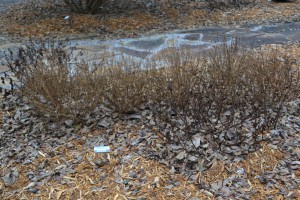
As expected, the above ground portions of flowering perennials were severely injured by cold air. It is best not to prune these back now since the layer of branches and foliage may help insulate lower branches that could still have some life. If you are not able to tolerate the look of cold-damaged perennials in your garden, consider only pruning half of the plant just to make a neater appearance in the garden. When warm weather returns next year, we may be surprised to see growth resume on lower stems.
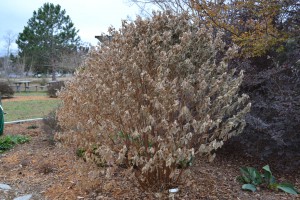
Many flowering perennials like Tibouchina will return from the ground next year.
Deciduous trees that would have normally dropped leaves before the cold have full canopies of dead leaves. Trees will eventually drop these leaves aided by winter winds and rainfall.

This Japanese maple will eventually drop it’s cold-damaged leaves and offer attractive bark and structure in the winter garden.

by Matthew Orwat | Mar 18, 2014
March may seem a little early to worry about fungal diseases, but recent prolonged wet weather and warmer temperatures have made the climate just right for a variety of leaf diseases in the Florida Panhandle. One in particular, Blackspot (Diplocarpon rosae), is particularly problematic for the discerning rose grower. Blackspot is just beginning to be seen this season on non-resistant rose cultivars throughout the central Florida panhandle.

Monsieur Tillier, a rose that shows promise for blackspot resistance, is also part of the Earthkind program. Image Credit Matthew Orwat
Blackspot spores are spread from the canes or leaves of the previous season’s growth by rain or overhead irrigation. To minimize innoculum (black spot spores) remove all leaves from the previous season and any dead leaves at the base of the plant. After the annual pruning in mid to late February, it is a good idea to spray roses with sulfur or copper based fungicidal soap. This helps kill spores that have been laying dormant throughout the winter. Be careful not to spray these products when temperatures rise above 80 ° F. Doing so could burn the plants, although these products will damage tender young growth as well at temperatures below 80 ° F .
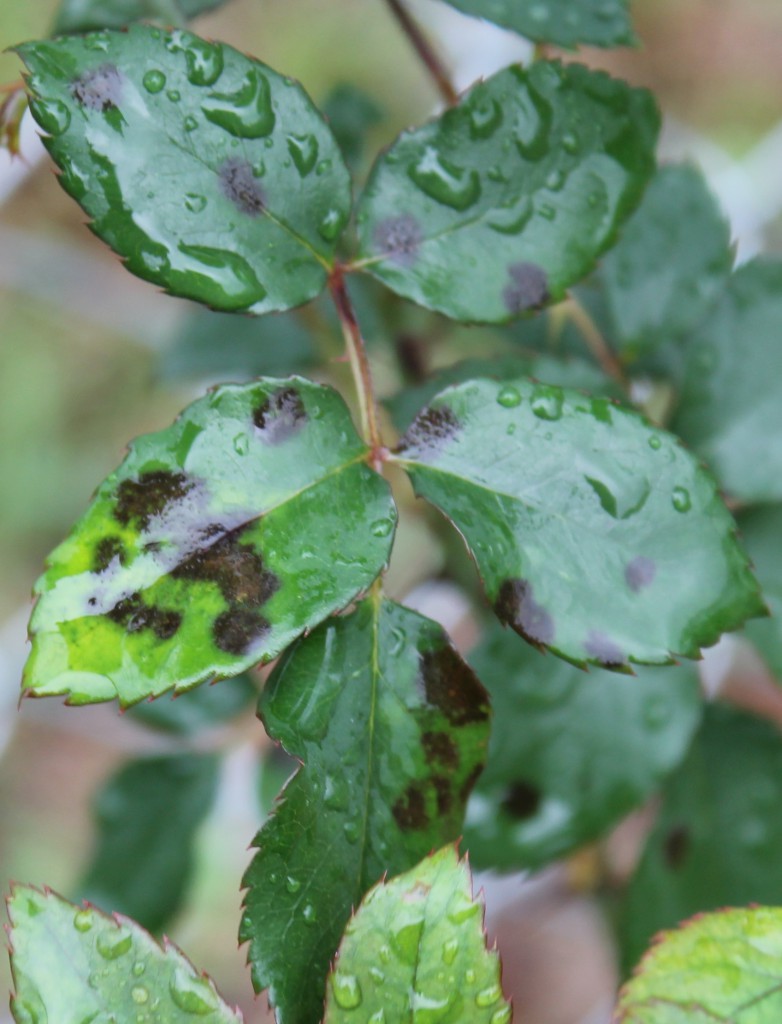
Wet, blackspot affected leaves. Image Credit Matthew Orwat
While dormant sprays often allow rose gardeners to get ahead of the disease, the best defense for the home garden is to plant resistant cultivars. There are several old and new resistant cultivars on the market. Some new resistant cultivars of note include Home Run and Knockout. Also, several older cultivars have demonstrated excellent resistance, such as Mrs. B.R. Cant and Spice. The author has been working with several older rose cultivars at the UF / IFAS Washington County Extension demonstration garden that have shown resistance during the last three years. While this demonstration garden is not a scientific study, several roses that have demonstrated some merit include Belinda’s Dream, Monsieur Tillier, Mme. Antoine Mari, Rosette Delizy and Souvenier de la Malmaison. Another resource for information on disease resistant roses is the Texas Earthkind rose program from Texas A&M University. While disease resistance is not always identical in different parts of the county, their recommended list gives the beginning rose gardener a good place to start.

Mrs. B. R. Cant, a tea rose from 1901 has shown very good blackspot resistance at the UF IFAS rose trials in Quincy, FL. Image Credit Matthew Orwat
Several other cultural methods that will prevent spread of this disease among the rose garden include avoiding overhead irrigation, planting in well ventilated areas and proper plant spacing. These techniques attempt to make the garden environment inhospitable for blackspot proliferation.
Regardless if these management techniques are followed, if traditional large, long-stemmed, high maintenance Hybrid Tea roses are desired, most Florida rose gardeners will need to begin a spray schedule to prevent the onslaught of blackspot. Several fungicides are on the market to aid in this process, but remember that they must be used regularly (every 7-14 days) and modes of action must be rotated. This means that different types of fungicide must be rotated so that resistance to a particular fungicide by the blackspot organism does not develop. Below is a table of recommended fungicides for homeowner blackspot control. For more information, please consult the UF IFAS Extension publication P268, Blackspot of Rose.
Fungicide products marketed toward homeowners for control of black spot on roses
|
Active ingredient
|
Fungicide group
|
Trade name
|
|
Copper hydroxide
|
M1
|
Hi-Yield ® Copper |
|
Copper Sulfate
|
M1
|
Bonide® Copper Dust |
|
Copper Octanoate
|
M1
|
Bonide® Liquid Copper, Natural Guard Copper Soap, Ortho® Disease B Gon® Copper Fungicide |
|
Sulfur
|
M2
|
Bonide® Sulfur Dust, Ferti-lome® Dusting Sulfur, Green Light, Hi-Yield® Dusting Wettable Sulphur, Ortho® Bug-B-Gon® Rose & Flower Care |
|
Mancozeb
|
M3
|
Bonide® Mancozeb |
|
Captan
|
M4
|
Bonide® Captan 50WP, Hi-Yield® Captan 50W Fungicide |
|
Chlorothalonil
|
M5
|
Bonide® Fungonil, Ferti-lome® Broad Spectrum, Hi-Yield® Vegetable, Flower, Fruit and Ornamental Fungicide, Monterey, Ortho® Disease B Gon™ Garden Fungicide , Monterey Fruit Tree, Vegetable & Ornamental Fungicide |
|
Myclobutanil
|
3
|
Spectracide Immunox® Multi-Purpose Fungicide |
|
Propiconazole
|
3
|
Ferti-lome® Liquid Systemic Fungicide, Monterey Fungi-Fighter |
|
Tebuconazole
|
3
|
Bayer Advanced™ Disease Control for Roses, Flowers & Shrubs |
|
Tebuconazole + Imidacloprid
|
3 +
|
Bonide® Rose RX Systemic Drench, Feti-lome® 2-N-1 Systemic |
|
Triforine
|
3
|
Ortho® RosePride® Disease Control |
|
Calcium Polysulfide
|
NC
|
Hi-Yield® Lime Sulfur Spray |
|
Neem Oil
|
NC
|
Bonide® RX 3 in 1, Green Light® Neem Concentrate, Green Light® Rose Defense®, Monterey |
|
Acetamiprid + Triticonazole
|
NC + 3
|
Ortho® Bug B Gon® Insect & Disease Control |
|
Acephate + Resmethrin + Triforine
|
NC + NC + 3
|
Ortho® RosePride® Insect, Disease & Mite Control |
| Fungicide Group (FRAC Code): Numbers (1-37) and letters (M) are used to distinguish the fungicidal mode of action groups. All fungicides within the same group (with same number or letter) indicate same active ingredient or similar mode of action. This information must be considered in making decisions about how to manage fungicide resistance. M=Multi-site inhibitors, fungicide resistance is low; NC= not classified. Source: http://www.frac.info/ (Fungicide Resistance Action Committee, FRAC).
Always read a current product label before applying any chemicals.
|

by Taylor Vandiver | Feb 25, 2014
Considering it is the month of Valentine’s, roses are an appropriate subject to discuss. Not bouquets couriered to various locations all over town, but bushes in the landscape that have been strategically neglected over the winter. Now their time has come; pull on the gloves and get to work.
February is the perfect time to prune rose bushes. Pruning is a step that is required to maintain healthy roses. When roses are pruned, new growth is promoted by removing dead, broken or diseased canes. Pruning also allows the gardener to give their plant an attractive shape and encourage flowering, which is ultimately the reason roses are planted!

Belinda’s Dream rose before pruning. Image Credit Matthew Orwat
Deciding which roses to prune will depend on their class. Hybrid tea, grandiflora and floribunda roses are repeat bloomers and need a moderate to heavy annual pruning this time of year. Some old-fashioned roses and climbers that bloom only once a year should be treated differently and pruned immediately after flowering. They set their buds on old wood from the previous year’s growth; therefore, pruning them would remove most of this year’s blooms. An exception to this would be dead, diseased or damaged wood on any rose bush or canes that are crossing and rubbing. This should be removed immediately upon notice.
There are certain techniques that should be used when pruning any type of rose, no matter the time of year. Any pruning shear, saw or lopper you use should be sharp and sterile. Always wear protective gloves when dealing with roses, unless you don’t mind coming back bloody and mangled.
[warning]
Crown gall and canker can be spread between gardens and individual plants by dirty shears. To prevent the spread of disease, always disinfect pruning shears when beginning to prune with a 5-10% bleach or 20% rubbing alcohol solution, especiallly if they have been used in any other garden. If crown gall or canker has been found in one’s own garden, shears should be disinfected between each plant, no exception. This should also occur when bringing new plants into the garden, until they have been observed to be disease free.
[/warning]
The first step when pruning any rose is to remove dead, damaged or weak stems leaving only the most vigorous, healthy canes. Try to cut the stems one inch below darkened areas, making sure to cut back to green wood. Always make your cut at a 45-degree angle; this will keep water from sitting on top of a stem and causing rot. When pruning try to open up the center of the rose bush. Pruning like this will increase air circulation and help prevent diseases.
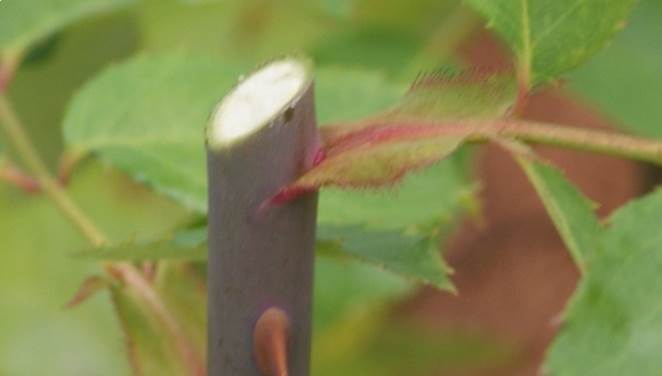
Pruning Cut on Belinda’s Dream rose. Image Credit Matthew Orwat
Since roses send out new growth from the bud just below a pruning cut, try to make pruning cuts above a leaf bud facing out from the center of the plant. Make your cut about ¼ inch above the bud and at the same angle as the bud. If any rubbing or crossing branches are noticed, the weakest of those branches should be removed.
Deadheading, or removing spent flowers, can also be done at this time of year. When deadheading, remove the flower by making a cut just above the next five or seven-leaf branch down on the stem. This will allow for a strong and healthy cane to grow in its place. If no live buds remain, remove the entire cane.
Modern reblooming roses (hybrid teas, floribundas, and grandifloras) should be pruned just as the buds begin to swell, which is around mid to late February. When practicing hard pruning, try to leave about four to eight large, healthy canes the diameter of your finger or larger on the shrub. For a more moderate approach, prune shrubs as discussed earlier and cut them back to about 12 to 24 inches from ground level. Generally, any cane thinner than a pencil should be removed.
Belinda’s Dream rose after pruning. Image Credit Matthew Orwat
Don’t worry about pruning recently purchased new roses. Newly purchased roses have most likely been pruned, and no further cutting is necessary. Hopefully with the help of this article you can make a date to spend some quality time with your roses this season. The price of neglect is overgrown roses that are not nearly as attractive.
First flush of properly pruned Belinda’s Dream shrub rose. Image credit Matthew Orwat
Article written by Taylor Vandiver with additional content about sanitation by Matthew Orwat
by Carrie Stevenson | Oct 7, 2013
After severe weather of any kind, homeowners must often spend a considerable amount of time dealing with impacts to their landscapes. Below are a few lessons we have learned from hurricanes and tropical storms in the past. Many thanks to fellow agent Beth Bolles for her contributions to this article.
Dealing with Toppled Trees
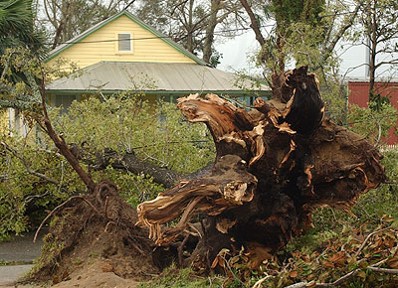
It may be difficult to turn an uprooted favorite tree into firewood, but this is probably the best choice. A small or young tree may be replanted successfully if done immediately. These trees will require bracing for up to two years until the root systems regrow and are able to support themselves. If the roots have been exposed for an extended period of time, don’t try and save the tree. Exposed roots should be covered with soil or moist burlap for protection from drying out. Large or older trees will typically not survive this ordeal even with the best of care. Because the root system is compromised, attempting to keep the tree may create a hazard down the road with the next storm.
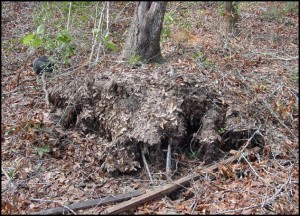
If a tree is completely uprooted, its odds of recovery are severely limited and it is best to remove the tree. Photo courtesy Beth Bolles, UF IFAS Extension
When removing fallen trees, think ahead about whether you plan to remove stumps. It’s a lot easier to pull instead of dig stumps out of the ground, so leave a four-foot stump to make your life easier. Be careful using power equipment like chain saws. It may be better to hire a professional to deal with removing large trees, especially around power lines.
Exposed Roots or Leaning Trees
Any exposed roots should be covered immediately. Cover roots with nearby soil at the same level roots were originally growing. Do not bank the soil higher because this will cut off oxygen supplies to roots in an already oxygen deprived, saturated soil.
If small trees are leaning and need straightening, they can be staked and treated like a newly planted tree. Larger trees with trunks greater than six inches in diameter can be saved but should be removed if they are a hazard to structures, power lines, or roadways. Reset the trees with stakes or guy wires for support. Trees with trunks measuring less than two inches in diameter can be supported with two or three forty-eight inch, two inch by two inch wood stakes placed one foot outside of the root ball inserted eighteen inches into the ground. Larger trees should be anchored with three or four guy wires or cables. Cover guy wires that are in contact with the trunk with rubber hoses to prevent damage.
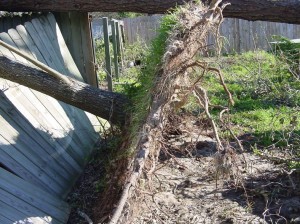
A leaning, partially uprooted tree may recover if it is righted and its roots are covered back with soil. Photo courtesty Beth Bolles, UF IFAS Extension
Replace the soil around the area and firm to assure there are no air pockets around the roots. Make sure the top root coming off the trunk is level with the existing soil. If many trees were swaying back and forth during the wind, there may be air pockets underneath the trees. If this is obvious, add soil and water to eliminate any air pockets. If root damage is obvious, do not fertilize at this time because salts in the fertilizer may damage new feeder roots.
Broken Branches
Broken branches should be removed from trees and shrubs as soon as possible to prevent tearing into trunk wood. Make clean cuts just outside of the branch collar to avoid damaging the trunk. If these are large branches, make three separate cuts to prevent tearing. Make the first cut on the underside of the branch about fifteen inches from the trunk and one-third through the branch. The second cut is made from the top, a few inches out from the first cut. This cut should remove the weight of the branch so the next one will not rip the trunk. The remaining stub can be held while the last cut is made. Make the last cut just outside the branch bark ridge and end outside the trunk collar (swollen area on lower side of branch). This is not a flush cut with the trunk and should leave a small protrusion on the trunk. Do not use wound dressing on the cut surface, as this practice is no longer recommended.
If trees lost all of their branches, it is advisable to remove the tree. The natural shape is gone and trees like pines will typically not recover. Some trees may lose the majority of their leaves, but these will flush back out so they should be okay.
Repairing Lawns
Keep a close eye on lawns for disease problems due to all the rain. Brown patch and take-all root rot would be the major concerns. Rake and remove all debris to give lawns a chance to dry out. If lawn areas are damaged, now is the time to replace with plugs or sod so they can establish before winter. Sod webworms are bad now so don’t mistake this damage for diseases. If adult moths are obvious and grass blades are closely cropped, this is due to caterpillar damage…not disease.
Watering
Most soils are saturated and irrigation systems should be in the off-mode. If there is standing water around trees or in other low areas, use a hose to siphon water to a retention pond or a better-drained area. Once soils dry out and the sun comes out, keep a close eye on plants as they may require more frequent irrigation because of root damage. Coastal areas flooded with saltwater may experience damage from extended exposure to high salinity; it is recommended to run a sprinkler system to flush out a lawn after the water retreats.
If you have questions, contact your local UF IFAS Extension Office!