by Mary Salinas | Jul 20, 2015
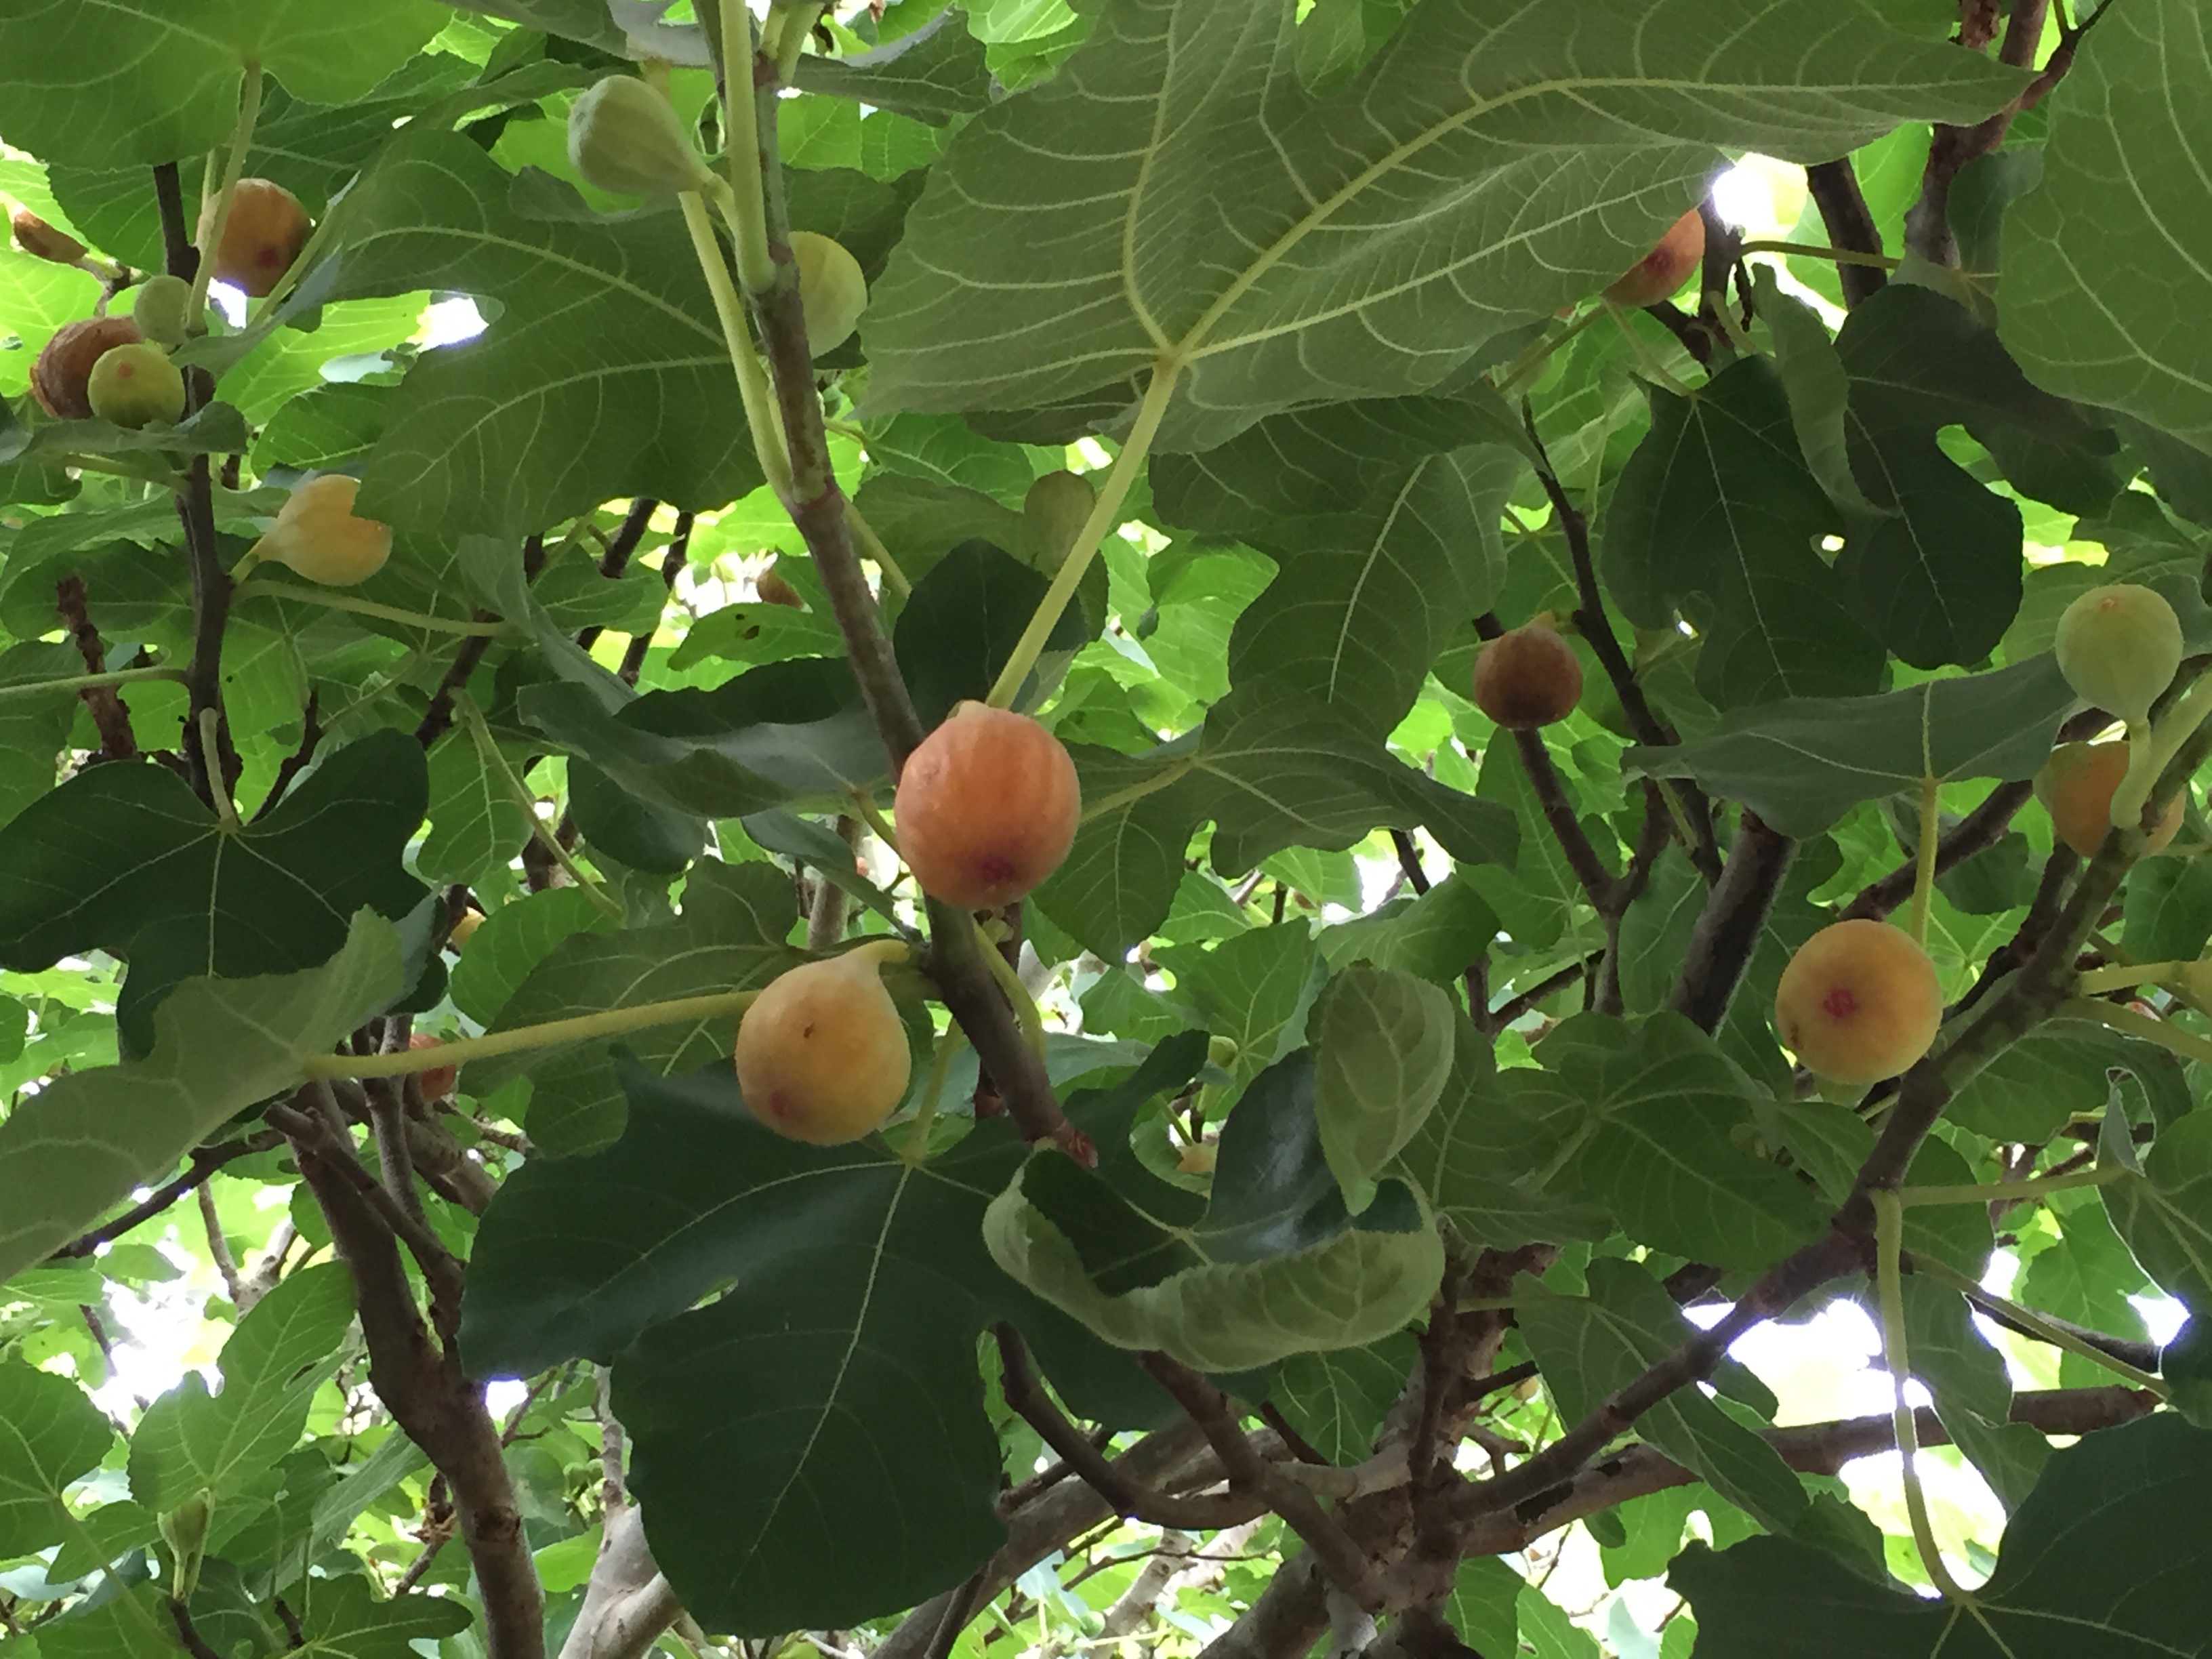
July always brings the blessing of abundant figs on my trees. A new crop waits to be picked and enjoyed every day for nearly a month. The tender sweet fruit can be enjoyed fresh, prepared into jams or used in a myriad of recipes.
Ripe figs ready to pick. Photo credit: Mary Derrick, UF/IFAS Extension.
The fig (Ficus carica) is native to Asia Minor and the Mediterranean regions of the world and has been cultivated for an estimated 7,000 years. Spanish explorers brought the fig with them to Florida in 1575 and it has had a presence here ever since. Since the fig is adapted to a dry climate in its native regions, the humidity it encountered in Florida can cause fruit to split; but new cultivars have been developed to minimize this problem.
Fig trees usually grow to a maximum of 25 feet and have large bright green leaves that fall in the autumn. Fruit develops from June to August, depending on the chosen cultivar.
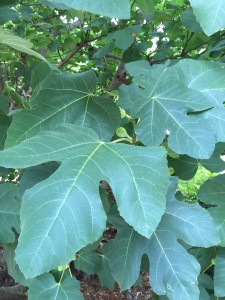
The large fig leaves are quite ornamental. Photo credit: Mary Derrick, UF/IFAS Extension.
Choose a spot for planting a fig tree that receives full sun and good drainage. Once established, figs are drought tolerant and only need supplemental irrigation if we have an extended drought. No structural pruning is required but you can prune to keep the tree from growing so tall that you cannot pick the delicious fruit. Be sure to do your pruning just after the fruit is gone as the fruit develops on the terminal ends of the branches from last year’s growth.
Many figs grow and fruit sufficiently without applied fertilizer, however, a light fertilization with a 10-10-10 with micronutrients can be helpful for small trees getting established and those with reduced fruiting. Young trees can benefit from a ½ pound three to five times from February to August while large trees could use up to 4 pounds per application on the same schedule.
There are a few pests that do damage figs; the most common, though, are the birds and squirrels that get the fruit before you do. Seldom do figs need to be sprayed when grown in the home garden.
For more information:
The Fig
Fig nutrition facts and recipes
by Larry Williams | Jul 7, 2015
There are a number of plants in my landscape that bring back fond memories – plants that I propagated.
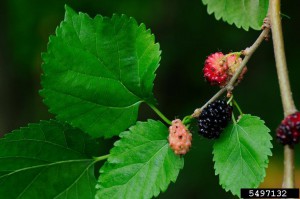
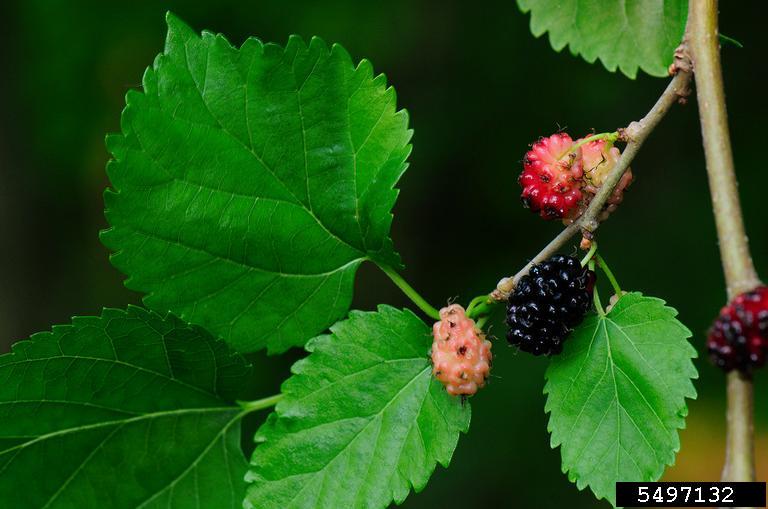
Red Mulberry. Photo credit: Vern Williams, Indiana University, bugwood.org.
There’s a mulberry tree in my backyard that I rooted years ago. I took the cuttings from an old mulberry tree in my hometown. As a boy, I climbed the tree, got in trouble once for coming home with mulberry stains on my clothes. I liked the berries and still do. I have good childhood memories about the tree.
About twenty years ago I visited the property adjacent to my childhood home. The tree was still there. It was during mulberry season. I enjoyed a few mulberries. I took about eight or ten cuttings from the tree. About a year after my visit, the property sold. The new owner bulldozed the tree.
But because of the cuttings that I rooted, the tree still lives and not just in my memory. The trees produced by those cuttings are genetically the same as the parent tree. Essentially, they are clones. The one in my backyard produces mulberries each year.
You too can propagate memories. Not all plants can be propagated from cuttings but many can be. Sometimes trial and error is necessary to learn proper timing in taking cuttings. But most reliable references will provide the time of year to take cuttings based on the plant species.
Stem cuttings should be removed from the parent plant with a clean, sharp knife or pruner. Ideally your cutting should be 4-6 inches in length and not much thicker than a pencil in diameter.
Take the bottom two-thirds of leaves off on each cutting. The cuttings should be stuck upright in a propagation medium. I usually use a good quality potting mix and mix in a little course sand or perlite for better drainage. The cuttings should be inserted deep enough to hold them upright, usually ½ to 1 inch.
To help promote rooting of moderate to difficult to root plants, wound the cuttings by scraping the lower ½ to 1 inch of the stem with a clean, sharp knife. The scrape should remove the bark or “skin.” Then dip the cutting in a rooting hormone covering the scrape with the rooting powder prior to inserting the cutting into the rooting medium.
I usually use a four inch pot, gallon size pot or bedding plant flat with drainage holes as a rooting container. I may stick as many as ten stem cuttings in a gallon size pot. I place the container of cuttings in a shady location outdoors and keep it moist. The cuttings should produce roots in two to sixteen weeks, depending upon plant species and the environment.
After the cuttings have rooted, carefully remove them and individually plant each rooted cutting in its own four inch to one gallon size pot. Keep the potting medium moist but not soggy. After the roots adequately fill the pot, the plant should be strong enough to be planted in the ground.
As your rooted cuttings grow, hopefully they will provide fond memories.
by Mary Salinas | Jul 7, 2015
Butterflies are not only beautiful to look at in your landscape; they serve as important pollinators and indicators of the health of our environment. Attracting them to your garden and incorporating some features to get them to stay and make it their home involves a little planning ahead of time for optimum results.

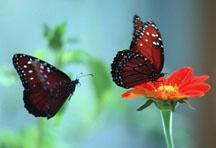
Queen butterfly. Photo credit: Milt Putnam, UF/IFAS.
Choose a location that provides some protection from wind. Trees and shrubs that provide wind protection also serve as a safe harbor from rain and predators. The garden should be mostly sunny with some part sun areas. Ensure that any new plantings have access to a convenient irrigation source so they can be successfully established and maintained in good health.
Now you’ll need to choose the plants. Adults feed on the nectar of many flowering trees, shrubs, perennials, and annuals and, fortunately, there are usually many choices that will meet your site requirements and your taste preferences. In order to keep the butterflies in your garden, certain plants need to be available to serve as host plants for their young. Determine which species of butterfly is common in your area and that you want to attract. Most species have very few plants on which the caterpillars can feed so those host plants need to be chosen wisely. Determine whether any of the plants you already have are host plants and they can be integrated into your butterfly garden. For example, cassia is a host plant for the Cloudless Sulphur and citrus is a host plant for the Giant Swallowtail.
In choosing your nectar plants, select those that are native or Florida-Friendly as they are lower maintenance, giving you less trouble in the long run. Choose plants that have flowers in a variety of color, size, and shape. Different butterflies like to feed at different elevations, so choose trees, shrubs, perennials, and annuals of varying heights. In order to have nectar available throughout the time when the butterflies occur, include plants that bloom at different times of the year. And include some plants that bloom from spring to late fall, like pentas or moss verbena.
Larger plants should be placed in the background with smaller plants layered in the foreground. When you plant smaller annuals and perennials, place them in masses to better attract the butterflies. Consider placing host plants in an area that is in close proximity to the nectar plants, but in an area of your garden that is not a focal point. Host plants can get quite ragged looking from hungry caterpillars!
Good maintenance practices will enhance the health of your garden. Regular fertilization and irrigation if needed will help keep your plants in bloom and healthy; healthy plants are less susceptible to disease and pests. Avoid pesticides as they may harm the very creatures you are trying to attract. Never use Bt or systemic pesticide. If you must, target a pest with lower risk oils or soaps and then only treat the affected plants. Lastly, be aware of beneficial insects that will help you achieve satisfactory control of a pest.
Now that your plants are placed there are several things to do to make your butterfly garden complete. Add a spot where water can puddle on the ground for the adult butterflies to drink. They require minerals from the soil that get dissolved in the water. Also add a rock or log in a sunny spot where butterflies can rest and sun themselves. And consider placing a comfortable place for you to sit and enjoy the beauty of your garden and its inhabitants!
For more information:
Butterfly Gardening in Florida
by Carrie Stevenson | Jun 29, 2015
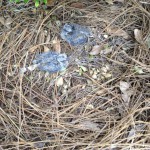
These fledgling doves were found out of their nest and on the ground in late May. Photo credit: Carrie Stevenson
A few weeks ago, the neighbor boys came running over to show my children the baby birds they found in their front yard. We expected they would lead us to a tree and point out fledglings in a nest, but instead the young mourning doves were lying on the ground in a pile of pine straw. Their nest had fallen from a perch in a low windowsill. According to the local Wildlife Sanctuary of Northwest Florida, mourning doves are notoriously bad nest-makers.
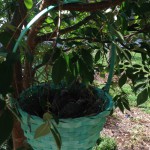
Doves in their new nest! Photo credit: Carrie Stevenson
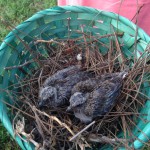
Close-up of young doves. Photo credit: Carrie Stevenson
So, with no regard to the (untrue) wives’ tale that human scent affects a mother bird’s willingness to return to her babies, I scooped up the birds and kept them in a box inside for the night. Our neighborhood has plenty of roving cats, raccoons, and even coyotes, so this protected the vulnerable young birds from predators.
The next morning, the kids and I made a new perch for the birds from an old basket by placing the nest inside it and hanging it from a nearby tree. At that point, we left the area alone, so as not to frighten the mother bird away. Within hours, she was back, fussing around the nest and bringing food.
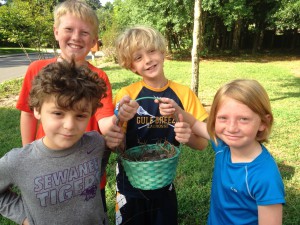
Establishing a conservation ethic towards land, water, and wildlife while children are young will ensure good stewardship for generations to come! Photo credit: Carrie Stevenson
This happy ending illustrates a an important point—trust nature! Often, out of well-intended concern, people bring young (uninjured) animals to a wildlife sanctuary simply because they are afraid they’ve been abandoned. If young are moved, their parents will never find them again. While rehabilitation facilities do their best to return wildlife to their native habitat, there is no substitute for a young animal to learn to find food, hide, or fly from their own kin. In our situation, we intervened enough to keep the birds safe from predators, but didn’t completely relocate them from their home.
It was a lesson that these four budding wildlife conservationists will never forget.
by Sheila Dunning | Jun 23, 2015
 Air potato (Dioscores bulbifera) is a perennial, herbaceous self-twining vine that can grow over 60 feet in length, enabling it to climb over and smother many native plants. The Florida Exotic Plant Pest Council (FLEPPC) lists air potato as a Category 1 invasive plant, which means that it has disrupted natural communities and ecological functions by displacing native plant species.
In 2012, a leaf feeding beetle (Lilioceris cheni) was introduced into South Florida from China for biological control of air potato. Although it is too early to determine any potential long-term impacts, the initial results have been promising. The larvae and adults of the air potato leaf beetle feed on the leaf tissue and occasionally the bulbils. The damage to the growing tips of the plant have dramatically reduced its ability to cover native vegetation. Extensive damage to air potato was evident within three months after the first release. Additionally, testing by scientists at the USDA/ARS Invasive Plant Research Laboratory in Fort Lauderdale concluded that the beetle will not complete development on any other plant found in Florida.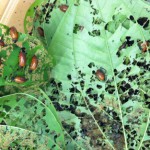
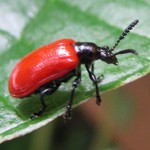 The female air potato leaf beetle lays an average of 1,200 eggs, which develop into larvae in about four days. The young beetles skeletonize the air potato leaves for the next eight days and then pupate into foam-like cocoons. Clumps of cocoons fall to the ground and the adult beetles emerge 13 to 16 days later. There can be a new generation of air potato leaf beetle every month while the weather is warm. For the winter, the adults hide in leaf litter and wait for spring.
The question now is: “How well will they survive through a longer, colder Northwest Florida winter?”. USDA scientists, UF Extension agents and citizen scientists in Bay and Okaloosa County hope to find out. Earlier this month, June 2015, air potato leaf beetles from the Hayslip Biological Control and Research and Containment Laboratory in Ft. Pierce were released into areas containing air potato. They will be monitored over the next year. Look for an update next summer.
by Taylor Vandiver | Jun 15, 2015
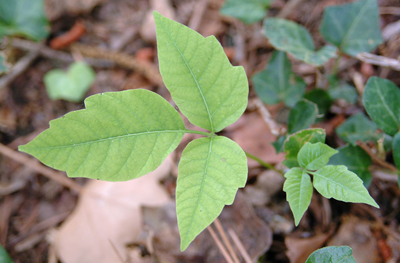
As summer comes to its apex you may find yourself longing to move your activities outdoors and commune with nature. However, as you are reveling in the warm weather while hiking, camping, biking, gardening, etc. remember that there are native plants of a less friendly nature hiding in plain sight. I’m sure you have all heard the tried and true mantra “Leaves/leaflets of three, let it be”, we suggest you hum that to yourself as you head outdoors in order to save yourself from the consequences of an accidental poison ivy encounter.
While I am not a native of Florida, I grew up in the Deep South and I have had many dealings with our aforementioned foe. Poison ivy (Toxicodendron radicans) is a native to North America which contains an oil known as urushiol. This oil can cause a severe skin rash (dermatitis) when any part of the plant is contacted. The reaction and rash, in susceptible humans, usually starts with itchiness and swelling, followed by the reddish inflammation of tiny pimples or formation of blisters at the areas of contact. The rash can begin as early as an hour after contact or up to five days after contact. All parts of poison ivy, including the hairy-looking aerial roots, contain urushiol at all times of the year, even when bare of leaves and fruit in winter. An allergic reaction can occur by touching the plant directly or indirectly contacting it through animals, tools, clothing, shoes and other items. Also, be aware when preparing your campfires and bonfires that the smoke from burning poison ivy contains oil particles that can be inhaled and cause lung irritation.

A picture of poison ivy with its characteristic 3 leaflets.
Now that you know the consequences of coming in to contact with poison ivy, let’s talk about where you can find it and how it can be identified. Poison ivy can grow in shady or sunny locations throughout Florida. It’s habit can be a woody shrub up to 6 feet tall or a vine up to 150 feet tall that climbs high on trees, walls and fences or trails along the ground. Leaves emerge with a shiny reddish tinge in the spring and turn a dull green as they age, eventually turning shades of red or purple in the fall before dropping.
Poison ivy has little or no effect on animals, but, as we discussed, they may carry the irritating substance on their hair and thereby transmit it to us more susceptible humans. Not only are the berries attractive to birds, but the leaves and fruit are also an important food source for deer.
Poison ivy is often confused with another native, the Virginia creeper (Parthenocissus quinquefolia). However, this trailing or climbing vine can be distinguished from poison ivy rather easily by its five divided leaflets. Also, Virginia creeper has blue-black berries and tendrils that end in tiny sticky pads that attach to trees and other surfaces.
So, what methods of treatment are available to those who suffer the wrath of poison ivy? If you suspect that you have come into contact with poison ivy always wash your skin with strong soap and cold water immediately! If you scrub with hot water you will open up your pores and let the oil into your skin, causing further irritation. Remove and wash all clothes, including shoes and socks in a strong detergent and warm or hot water. Keep your hands away from eyes, mouth and face. Don’t scratch the rash! To soothe the itch apply calamine lotion, zinc oxide or other doctor recommended products. Always call and visit your doctor if these measures don’t work, you know you are highly allergic or the rash persists.
So, how can you stop poison ivy at the source and avoid these painful symptoms? The first approach would be to eradicate an area by hand removal. Anyone who is extremely sensitive to the oil should ask for help when removing these plants. Always wear proper clothing that covers all areas that could potentially come in to contact with the plant. Also, lotions and creams containing the active ingredient bentoquatam can be used before the weed whacking begins. A suggested technique for removal using chemicals is to cut out a section of actively growing vine and promptly applying a legal herbicide to the bottom half of the cut stem to control re-sprouting. Choose a herbicide only after reading the pesticide label. Some products are labeled for specific sites, and pesticide registrations change over time. Please check with your UF/IFAS Extension service for current recommendations. Hopefully, this article will help you take preventative and proper measures against poison ivy and give you a more care free and informed attitude when partaking in summer activities!


