Storm debris turned into holiday cheer in Bayou George. Photo: J_McConnell, UF/IFAS
By the time this article publishes, we will be more than 70 days since Hurricane Michael toppled or damaged an incredible number of trees in the Panhandle. Enormous piles of once stately shade trees line the streets in neighborhoods and business districts in. The cleanup efforts have been phenomenal, over 4 million cubic yards of storm debris picked up in Bay County to date, but there is still a long way to go in the recovery process.
So, as gardeners, how can you help our community get back on track amidst your own struggles to recover? A few Florida Friendly Landscaping™ Principles come to mind.
#1 Right Plant, Right Place – as you rebuild your landscapes, make sure to choose the appropriate plant for the location. Consider mature size and give those plants space to thrive!
#4 Mulch – do you have bare ground that will eventually become landscape beds or turf but no resources or time to replant yet? Consider mulching the area to keep soil from eroding and to help improve soil though decomposition of natural products. Hint – see Recycling for free sources!
recommended depth in beds or under dripline of tree canopy (excluding within 12” of trunk) is 2-3 inches
leave an 18-24 inch buffer around building foundations mulch free to reduce conducive termite conditions
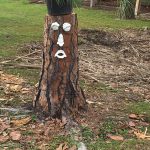
Dress up stumps with plants and whimsical designs. Photo: D_VanderMeer, UF/IFAS Master Gardener
#7 Recycle – driving around town I have seen some really creative uses for stumps, trunks, and branches that homeowners have constructed and messages of hope that bring a smile to my face. Another method of recycling is to use the chipped vegetative debris as mulch, either available as “utility mulch” by cities and counties or you may have some in your own yard right now.
Utility mulch does come with some words of caution because there is an increased risk of introducing weeds to your landscape with untreated storm debris. However, if you need mulch for pathways or planting beds you will be helping your community’s cleanup effort by reducing waste accumulation. Just watch for “volunteer” plants and manage as needed.
In Bay County, there are 4 locations where you can load and haul off your own utility mulch from storm debris
Under the Oaks Park – 5843 E. U.S. 98, Panama City, FL 32404
G. Harder’s Park – 8110 John Pitts Rd., Panama City, FL 32401
Chapman Park – 2526 Rollins Ave., Bayou George, FL 32404
Laird Park – 6310 Laird Park Rd., Panama City, FL 3240
For sources in your county, check with your Solid Waste Department for utility mulch availability.
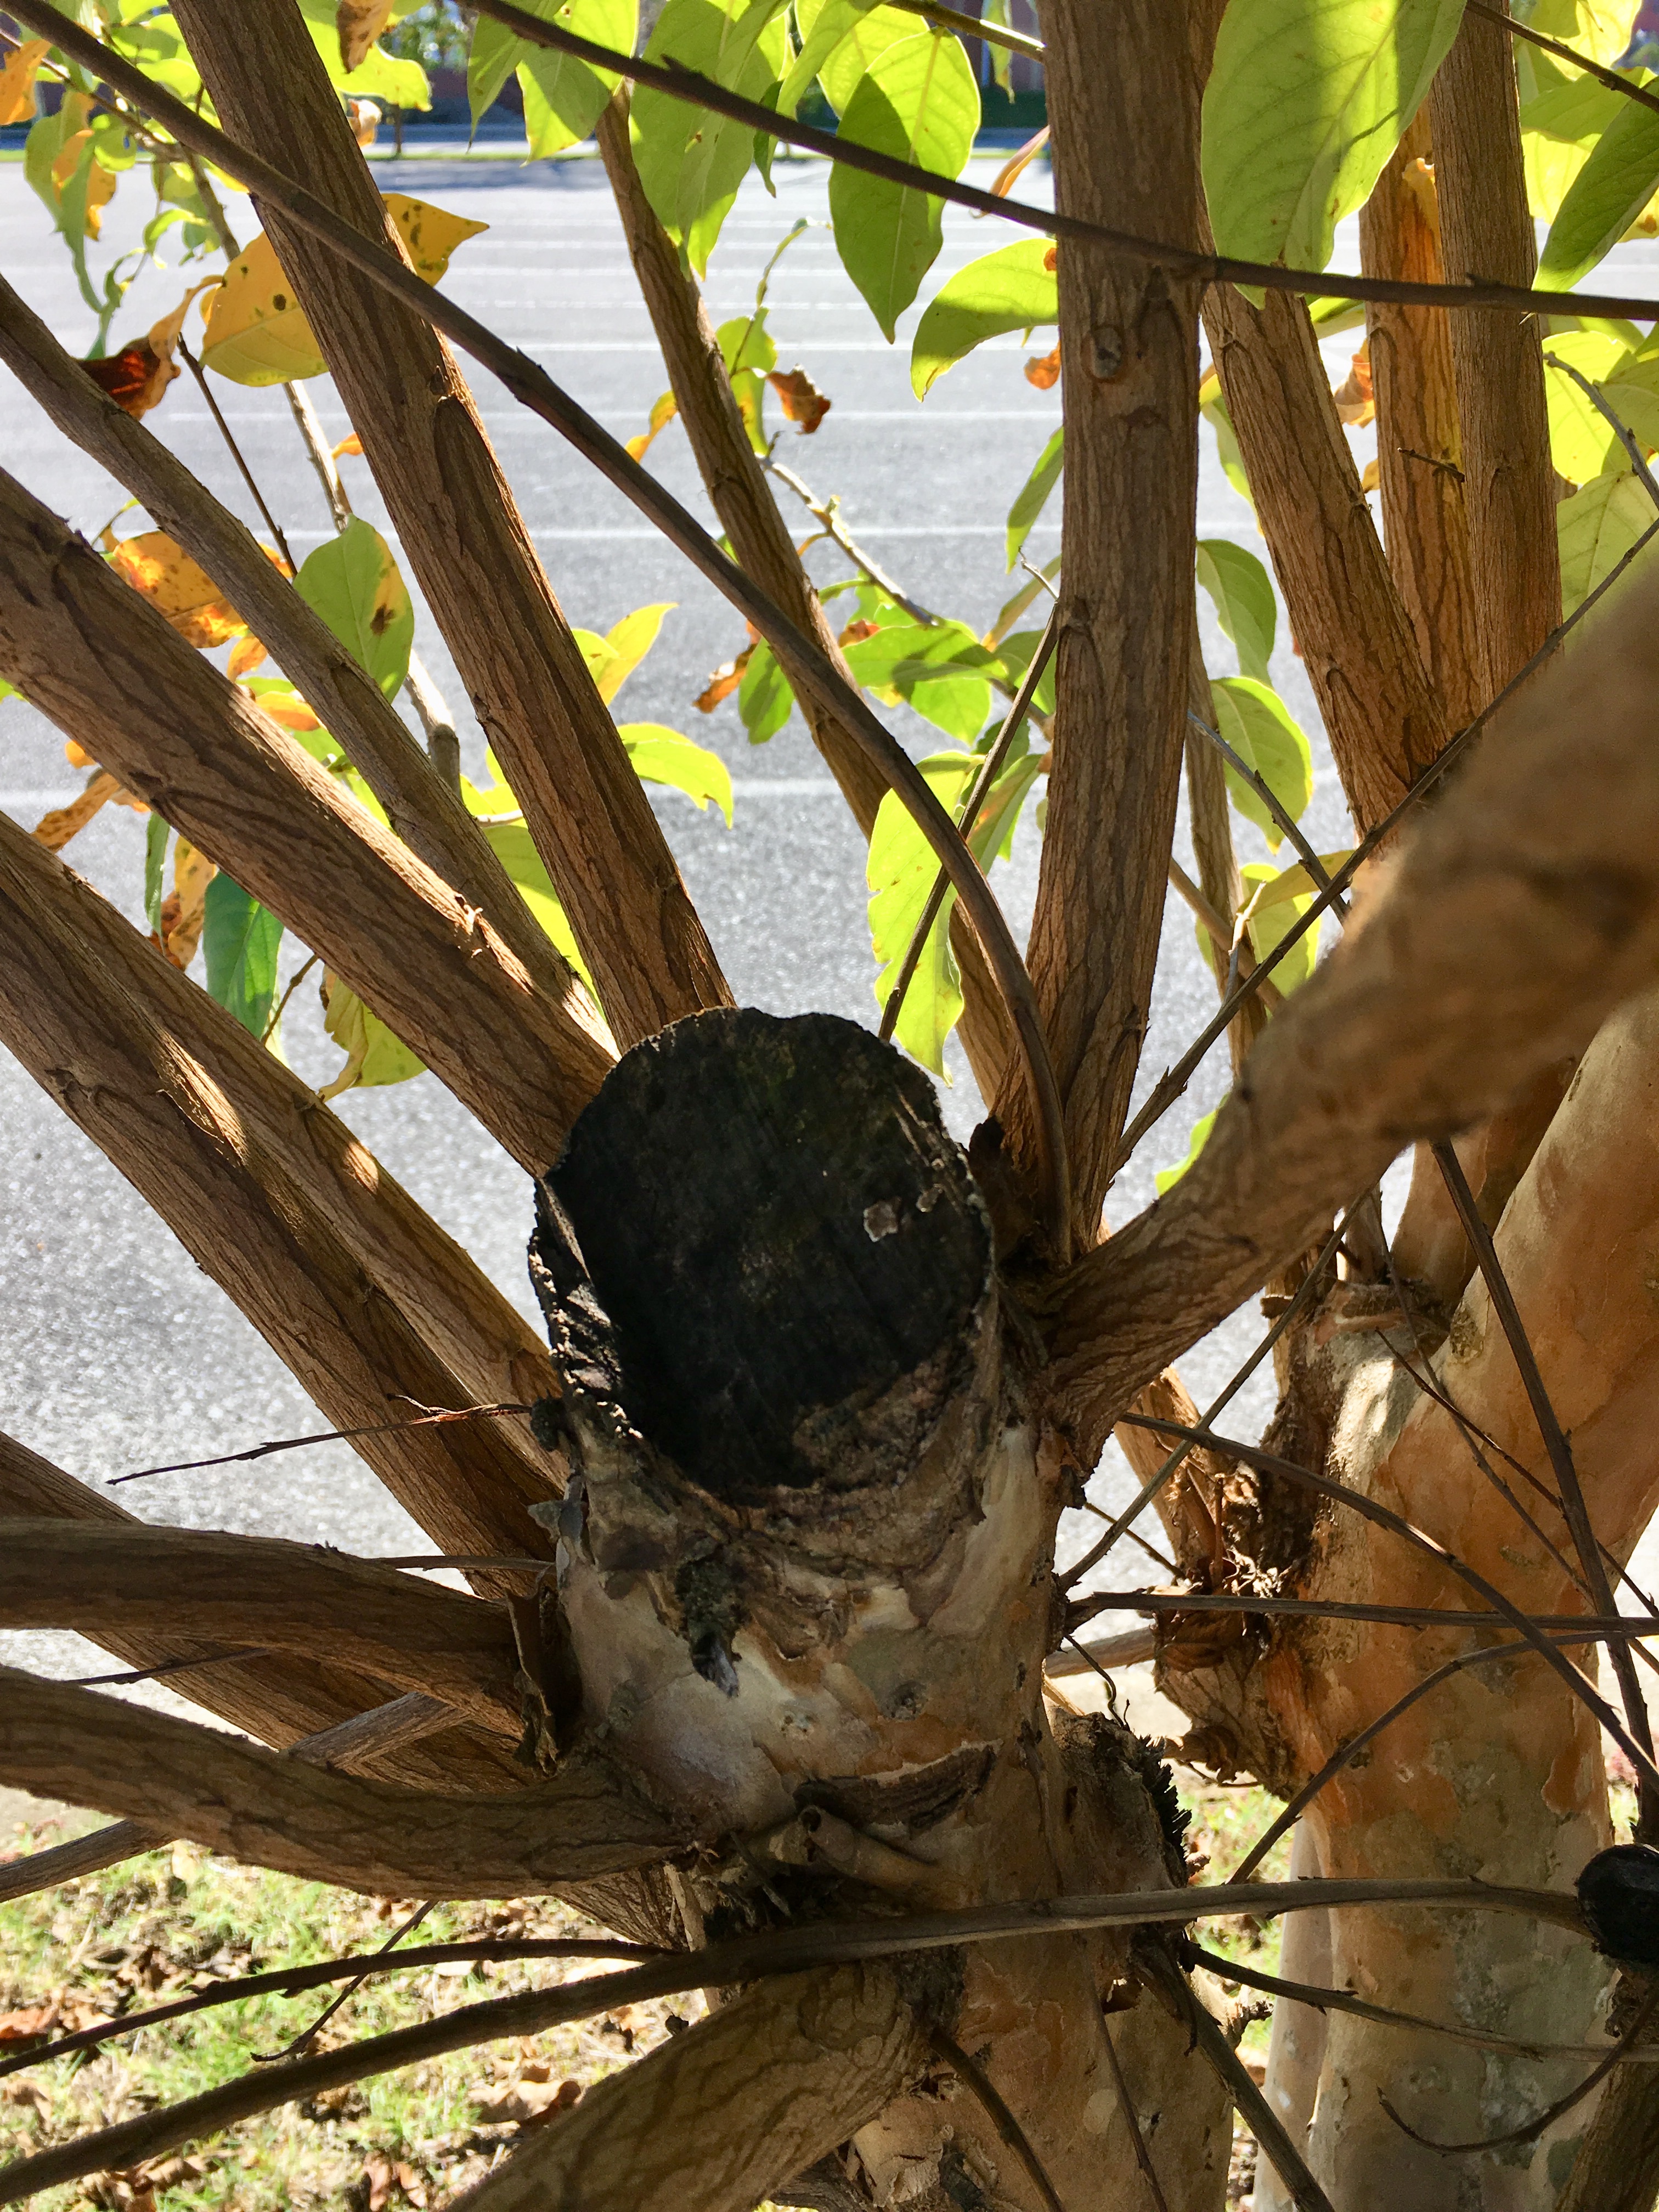
Improperly pruned crape myrtle tree. Photo credit: Larry Williams
Too often people hack away at crape myrtle trees and “butcher” them. The term “crape murder” was coined to describe this drastic topping of crape myrtles.
Properly selected and properly placed crape myrtles need little pruning. A crape myrtle that requires routine pruning to force it to fit into a smaller space should be considered for
replacement with a smaller-maturing cultivar. The real problem here is that you have the wrong plant in the wrong place. The person that planted the tree did not do their homework. To avoid having to annually “butcher” a nice tree, choose a smaller maturing crape myrtle.
After topping, the tree will insist on growing to its genetically designed size, again and again.
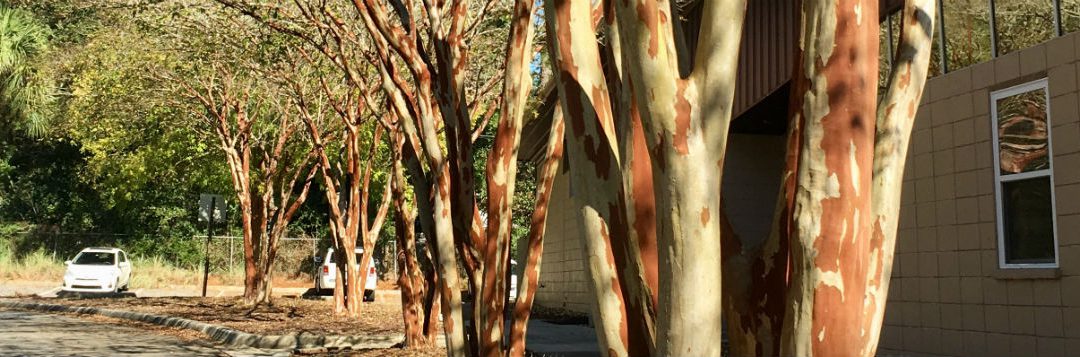
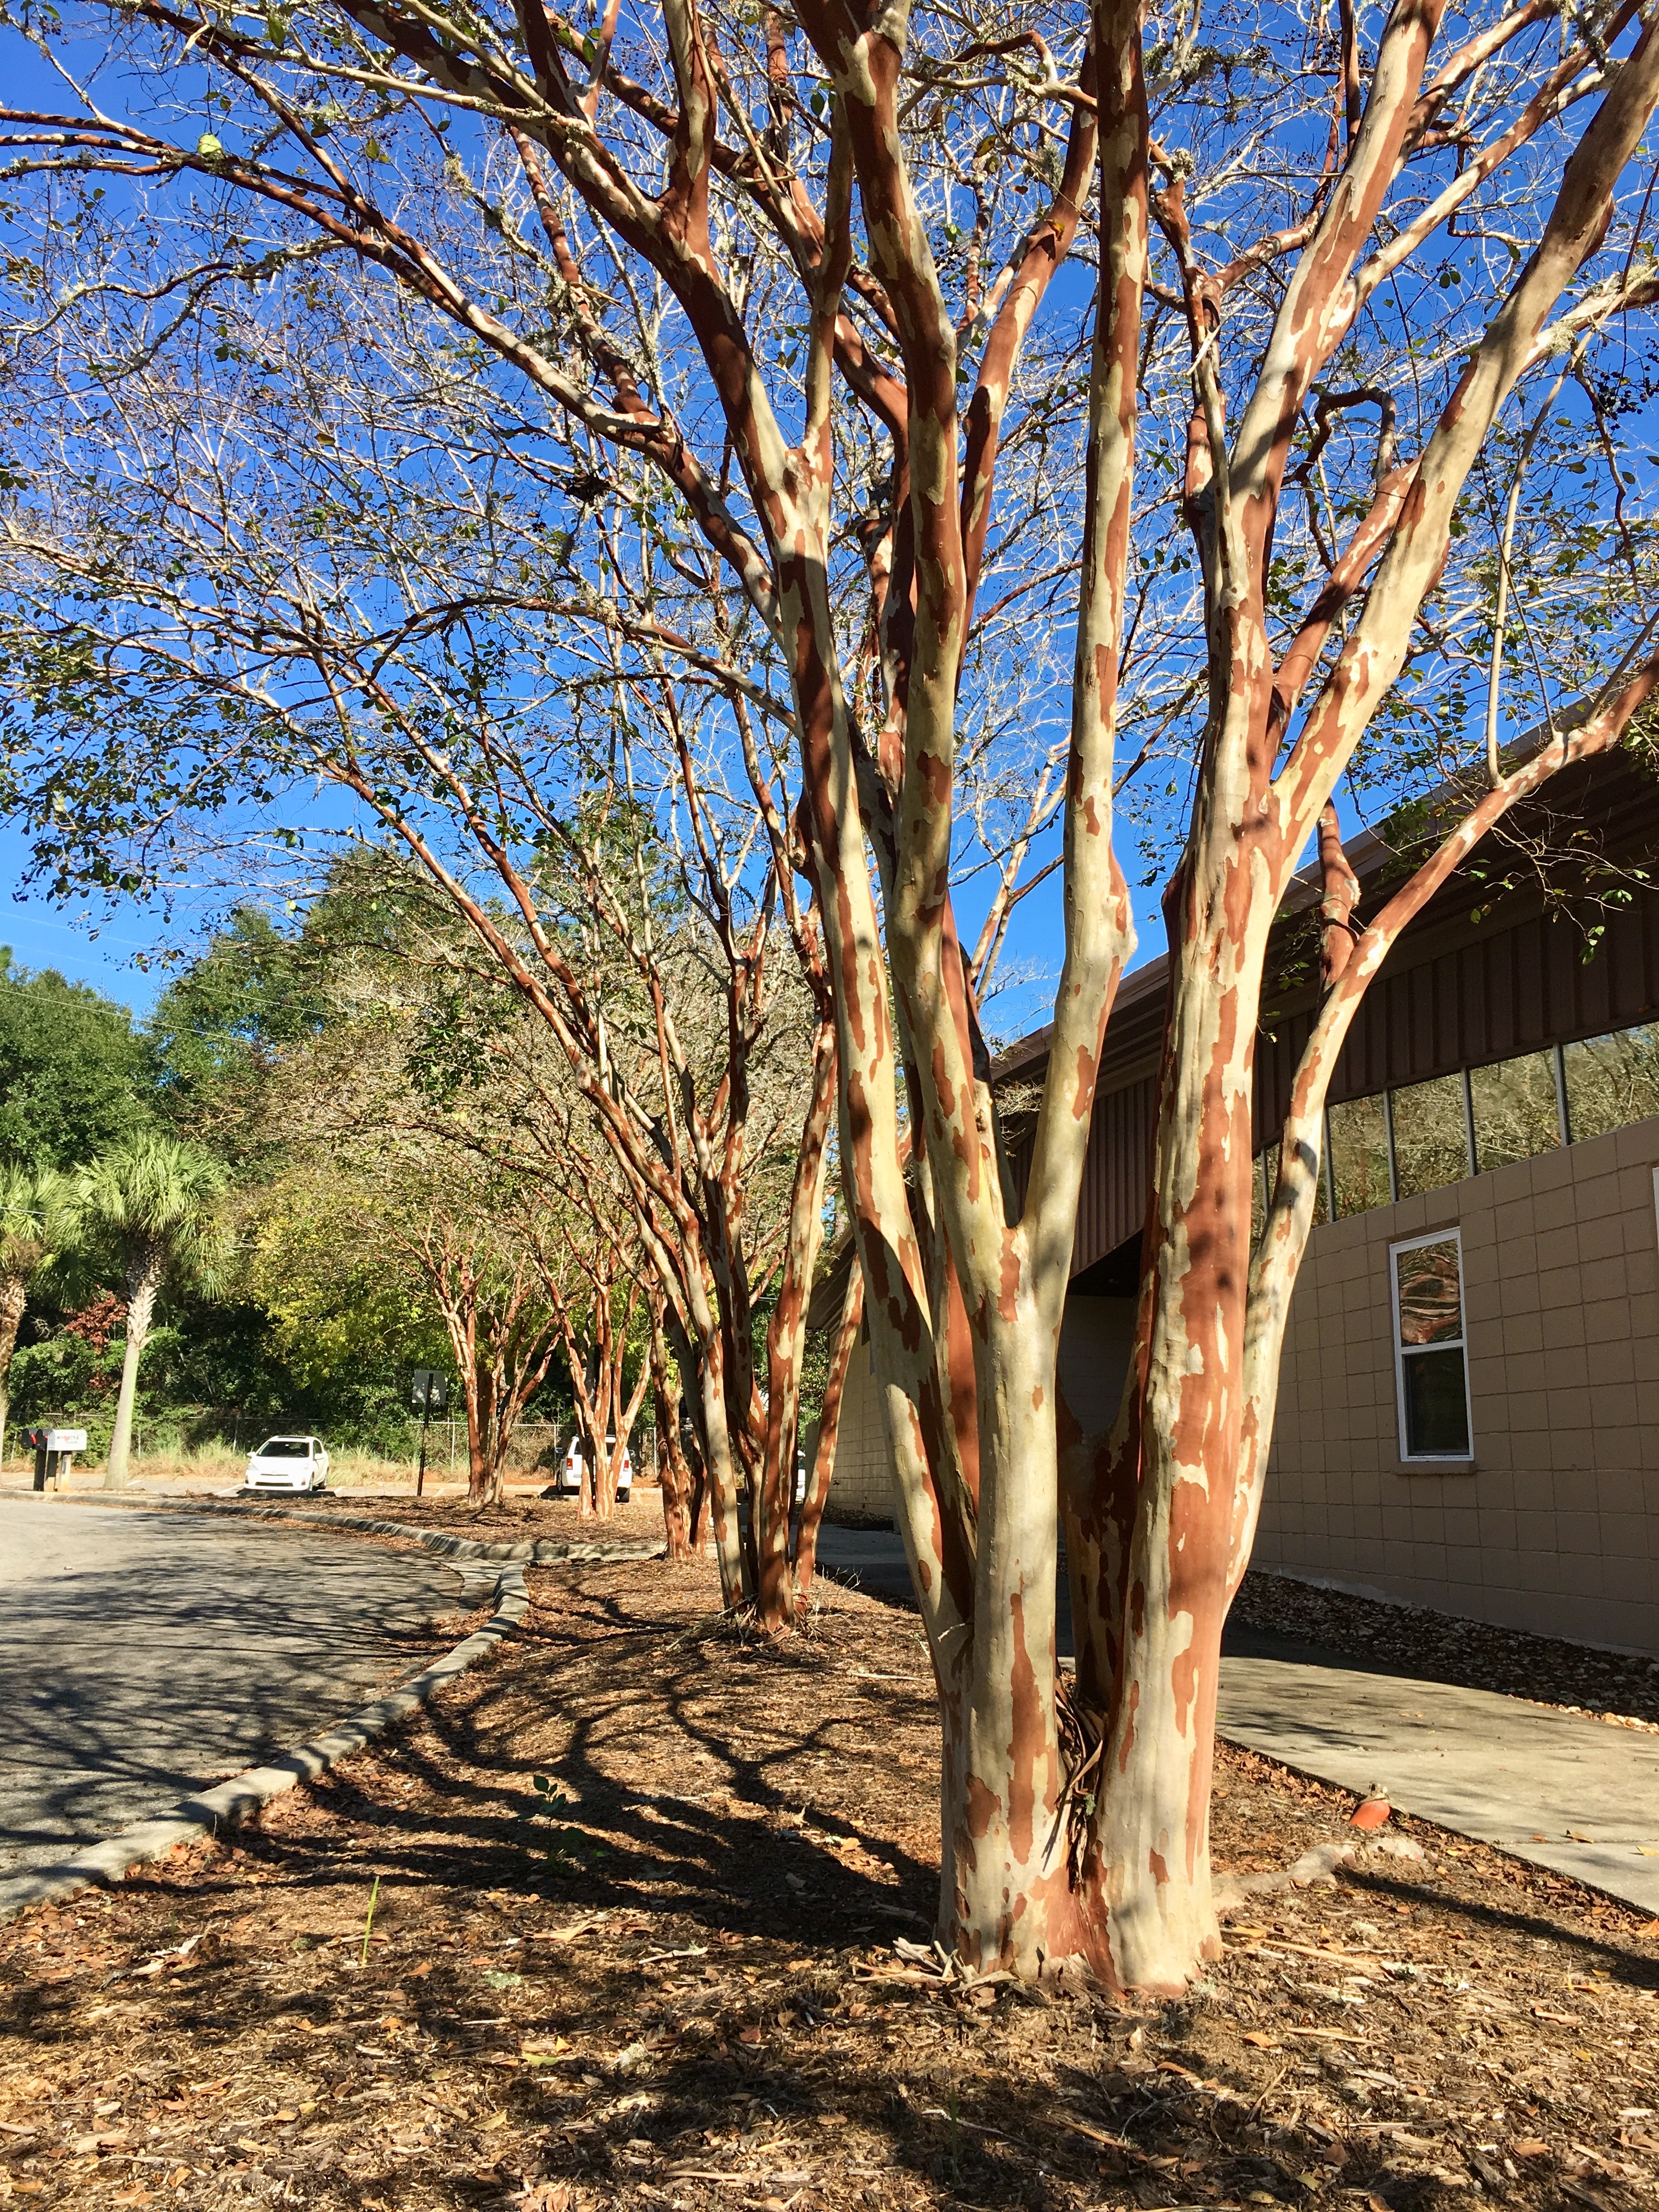
What crape myrtle trees are supposed to look like. Photo credit: Larry Williams
If you want a crape myrtle that will naturally stay below four feet in height, buy a dwarf cultivar such as Pocomoke. There are semi-dwarf cultivars that grow to about twelve feet or less in height such as Acoma. There are intermediate crape myrtles that top out at less than twenty feet in height such as Osage. And there are crape myrtles that grow greater than twenty feet in height such as the popular Natchez cultivar. Choose the right size plant to fit the selected space.
Topping trees is a bad practice. It weakens a tree by removing food reserves that were stored in the now removed wood. It also radically reduces the size of the canopy decreasing the plant’s ability to produce food
through photosynthesis. The large open cuts caused from topping invite wood-rotting organisms and ultimately decay. Topping results in many dead stubs throughout the tree. Topping a crape myrtle forces the tree to produce many unsightly root suckers. Ultimately, topping results in an ugly, odd-looking, higher maintenance and short-lived crape myrtle.
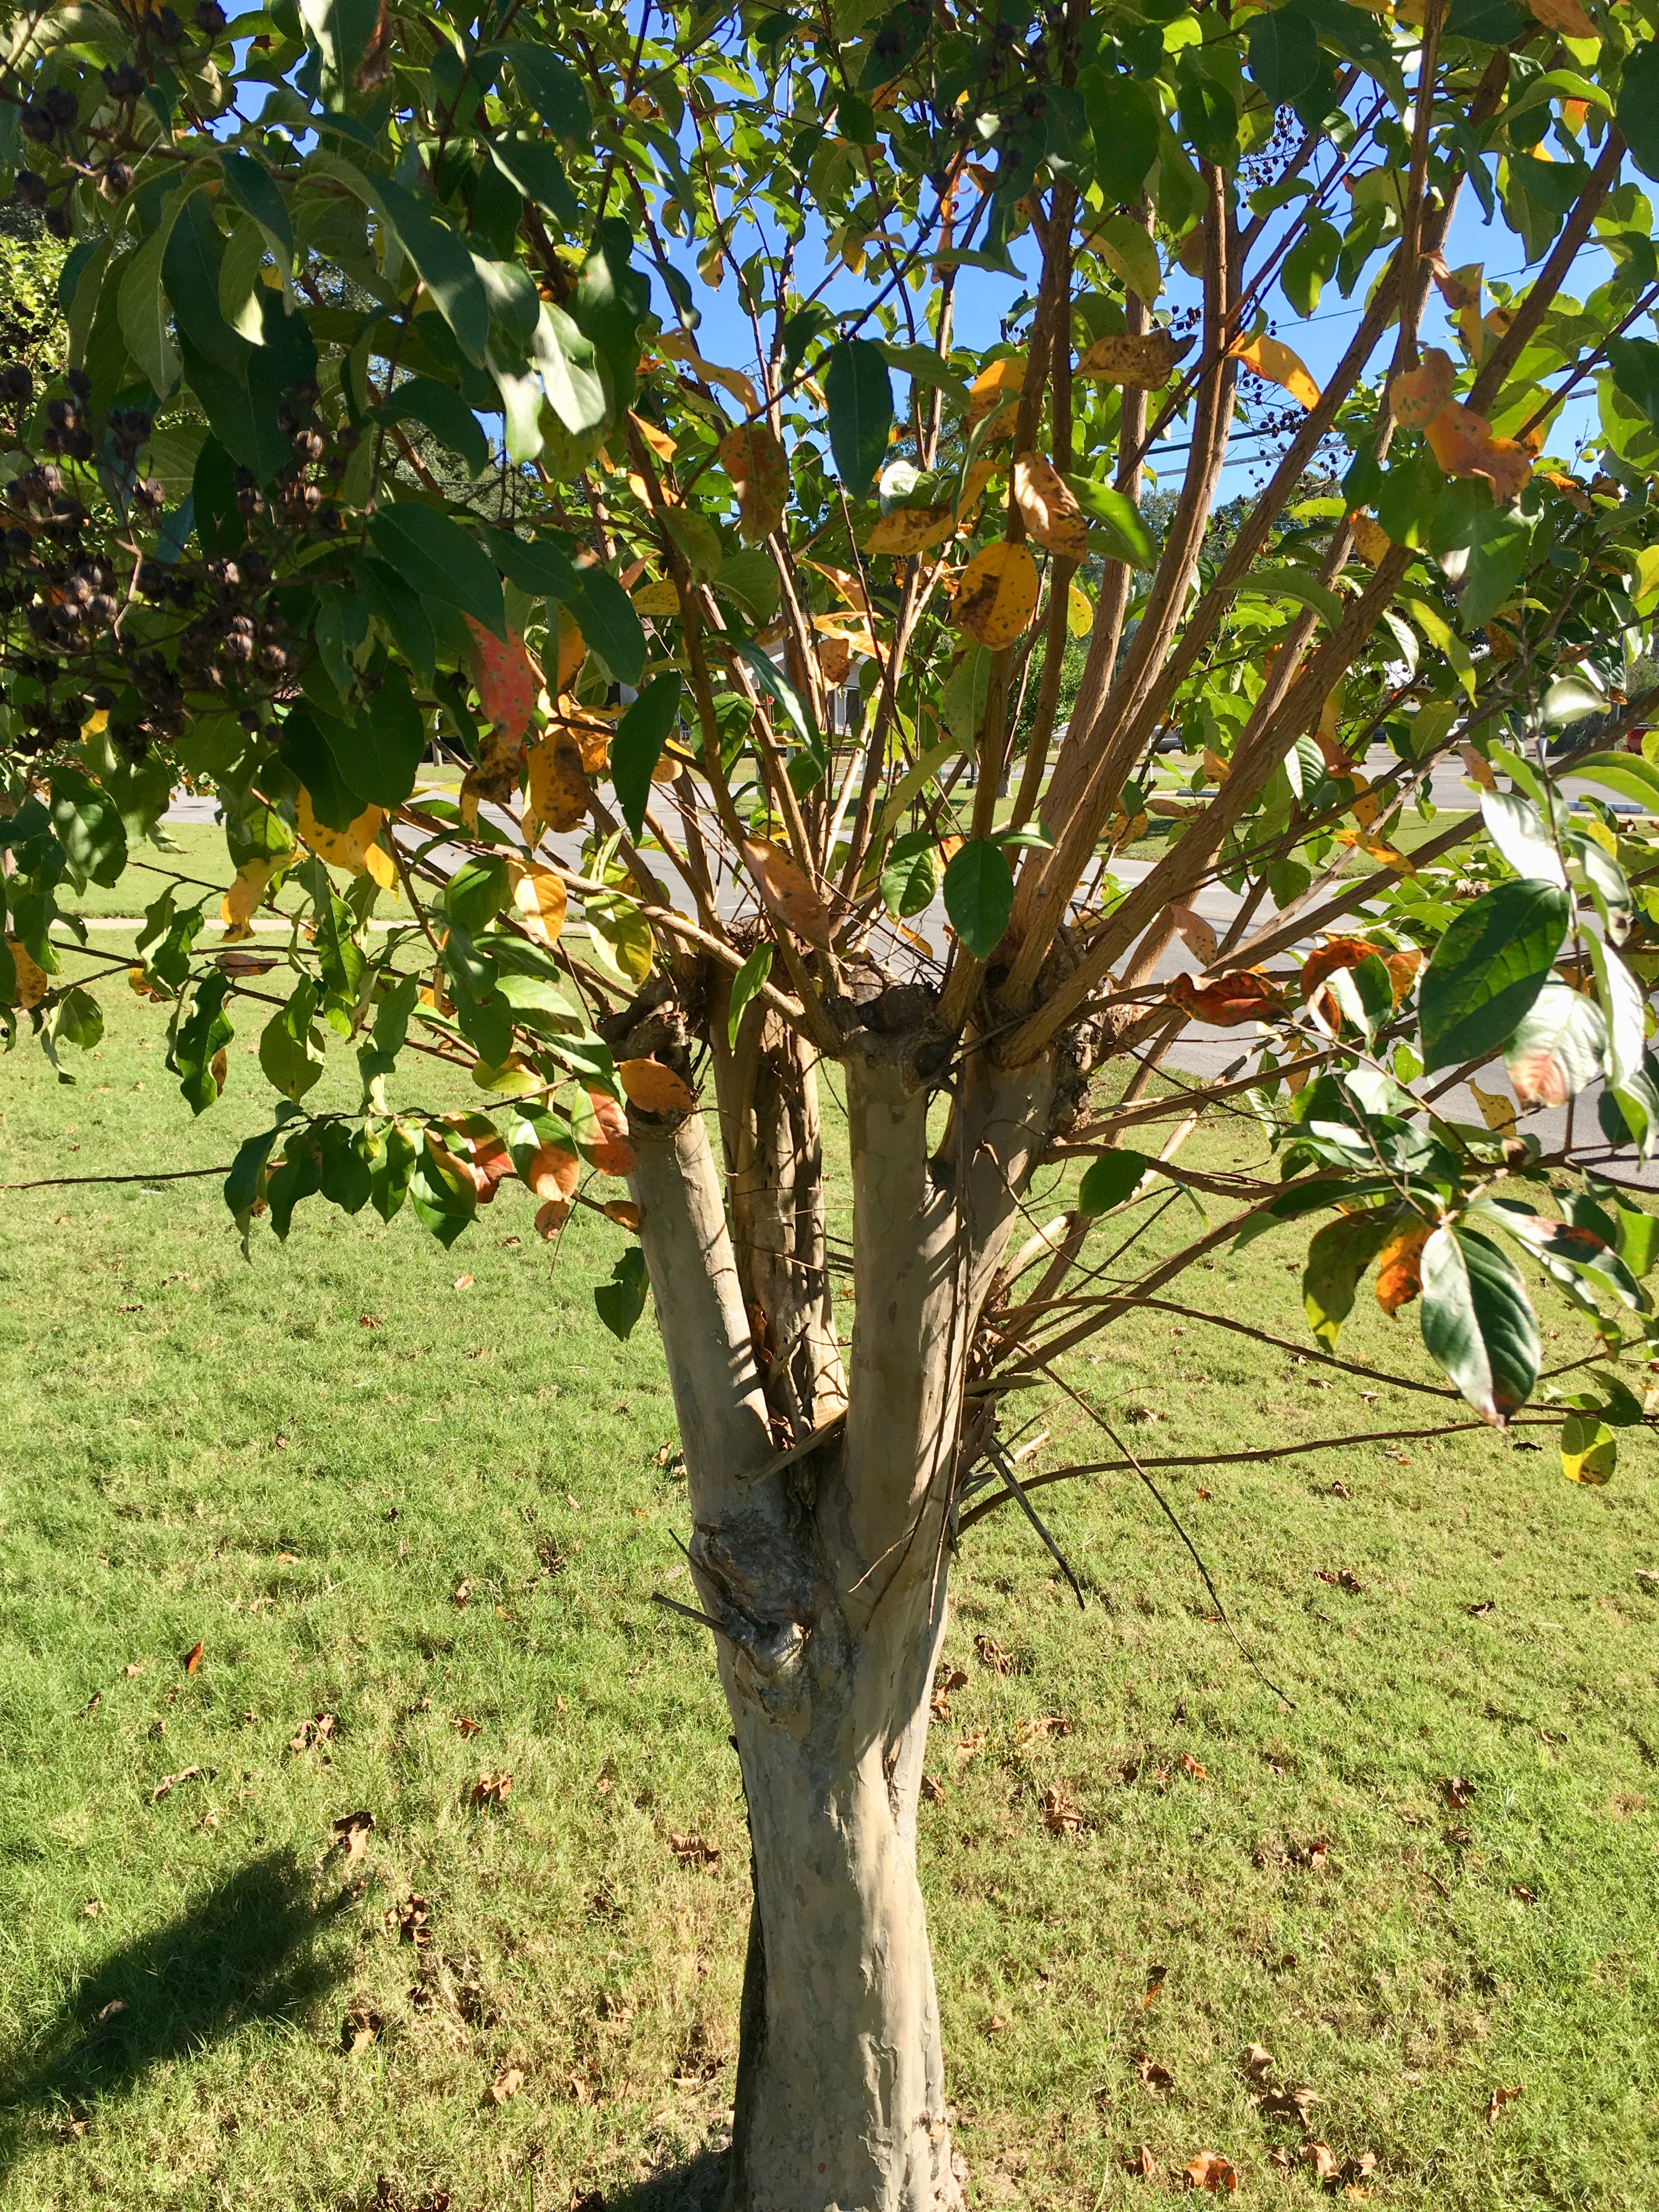
Note open wound, decay and weak attachment of multiple shoots as a result of improper pruning. Photo credit: Larry Williams
Many people believe crape myrtles have to be cut way back in order to produce an abundance of blooms. Flower clusters may be slightly larger on topped trees. But topping usually delays flowering up to one month and since the tree is smaller, it produces fewer flowers. The long, weak shoots supporting the large, heavy flower clusters on topped crape myrtles bend awkwardly and are more likely to break away from the plant.
When pruning crape myrtle trees, avoid cutting back or shortening branches much larger than your finger, although cutting larger branches back to a side branch or to the trunk when needed is fine.
More information on crape myrtle selection and care is available at the below links.
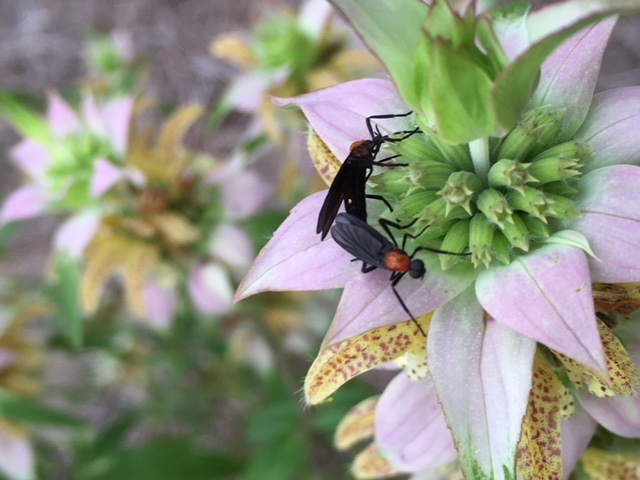
In 2016, I wrote an article for Gardening in the Panhandle called “Attract Pollinators with Dotted Horsemint” introducing readers to this tough native plant that supports native pollinators. If you have flowers in your garden, you probably have pollinators and a whole lot of other insects but if you want a plant that lets you observe a really diverse palate of bugs dotted horsemint Monarda punctata.
When I find I have some downtime at home I have a habit of wandering the yard looking for interesting insects. Admittedly, I usually have my phone in hand hoping to get a great photo or video of my arthropod visitors, but it is a productive task, too. As strange as it may sound, I can count this hobby as part of my integrated pest management landscape maintenance strategy – scouting!
My favorite plant to visit on my scouting run is normally not afflicted with pests, but it hosts so many different insects it always gets a stop on my rounds. When dotted horsemint is in full flower it is visited by a lot more than pollinators. I’ve recorded daily visits from assassin bugs, ants, beetles, flies, dragonflies, spiders, thread-waisted wasps, honey bees, butterflies, and moths.
Here’s a photo album of frequent visitors to my dotted horsemint from this summer – enjoy!
A very popular landscape shrub installed by both professionals and homeowners is Loropetalum or Chinese fringe. This shrub offers attractive foliage and flowers along with being evergreen.
When you visit a nursery to select this plant for your landscape, realize that there are now many selections of Loropetalum available. Learn about a few of the common selections in this recording of ‘In the Garden’, with UF/ IFAS Extension Escambia County Horticulture Agent Beth Bolles, so that you are successful at matching the appropriate plant with your landscape needs.
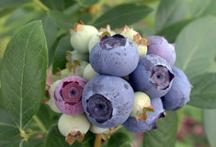
Rabbiteye Blueberry cultivars are the primary species grown in the Panhandle and are much more popular than the Southern Highbush Blueberry that dominates production further south. Our environment is more hospitable to Rabbiteye; consequently, they tend to be more drought tolerant and less susceptible to disease. The harvest season for Rabbiteye Blueberries is also relatively long. Harvesting can extend from May to July, depending on cultivar selection.
Rabbiteye blueberry season starts to wrap up this month in the Panhandle, as late season cultivars begin their mature fruiting stage. This is also the time of year when we receive seemingly daily afternoon thunderstorms. These frequent rainfall events can compromise blueberry plants over the long term if good management measures are not in place.
Blueberry. Photo credit: Eric Zamora, UF IFAS.
One of the primary issues experienced with Rabbiteye Blueberry is Phytophthora Root Rot (PRR). This disease is a problem this time of year due to increased rain events and poor draining soils. PRR is caused by the fungus, Phytophthora cinnamomic. Infection by this fungus can lead to plant death if not managed; however, it is a condition that is easier to detect than most diseases. A clear sign of infection is the appearance of symptoms resembling fall color development in the foliage (leaves turning various shades of yellow, orange and red). Foliage color change is followed by leaf drop. A preventative fungicide can be used to treat this condition, but cultural methods (such as transplanting in well drained soils and using at least 3” of pine bark as mulch) will greatly reduce the risk of infection. Remember, blueberries, like azaleas and camellias are also acidic soil loving plants. Soils in the pH range of 4.0-5.5 are necessary for overall plant health and high fruit yields. Pine bark mulch, in addition to improving drainage and organic matter content, will assist in maintaining an acidic pH.
Botrytis Flower Blight or Gray Mold, caused by Botryospheria spp., is another potential issue experienced in late spring/early summer due to lingering moisture. To prevent Botrytis, avoid any overhead watering during the budding and flowering stage or keep watering to the early morning hours so moisture doesn’t linger overnight. Stem Blight can also occur this time of year. Symptoms of Stem Blight are of dying branches, which should simply be removed with sharp shears. There is no chemical control for stem blight and the best defense against this condition is good cultural practices that will in turn reduce plant stress.
In addition to potential fungal diseases, increased summer temperatures and rainfall often also bring an increase in insect populations. Most insecticides that are safe for ornamental landscape plants and fruit crops are safe for blueberries, just be sure to check the label for application rates, directions and precautions. Also, pay close attention to the label for the HI or harvest interval. This is the number of hours or days that need to pass before you can safely harvest fruit once an application of insecticide is made.
For more information on growing blueberries, please contact your local county extension office.
Supporting information for this article can be found in the UF/IFAS EDIS publication, “2017 Florida Blueberry Integrated Pest Management”, by Jeffrey G. Williamson, Phillip F. Harmon, Oscar E. Liburd & Peter Dittmar: http://edis.ifas.ufl.edu/pdffiles/HS/HS38000.pdf
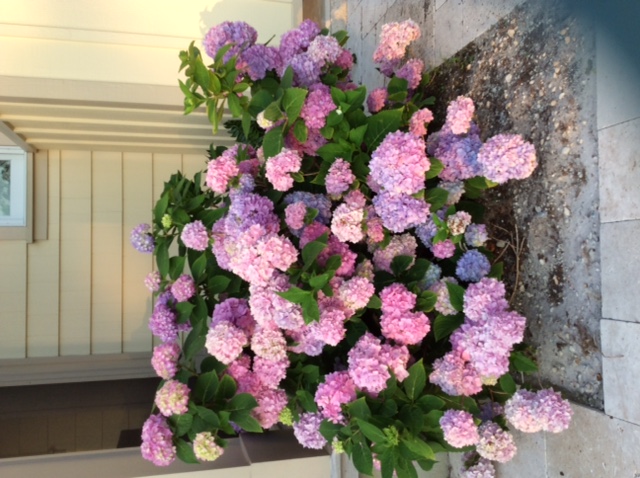
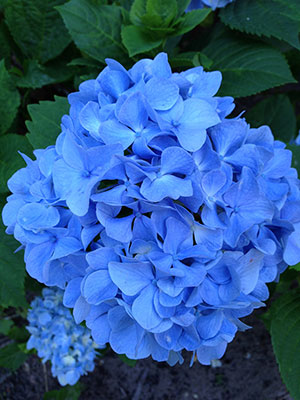
H. macrophylla ‘Bloomstruck’ Photo courtesy of Andrea Schnapp
Generally, when folks find out what I do for a living, among the first questions asked is “What is your favorite plant?” Being somewhat of a plant nerd, that can be a tough question to answer! However, I usually circle back to the same answer, “Hydrangea”. There are many reasons my fellow gardeners and I love hydrangeas. It’s undeniable that few plants conjure more fond memories of summers gone by or cause more impulse purchasing at nurseries than a hydrangea in full, billowy bloom. Additionally, few specimen shrubs give more floral firepower and ask so little of the gardener in return. My own love affair with hydrangea stems from my first propagation experience, a softwood cutting of Hydrangea macrophylla ‘Nikko Blue’ (taken with the help of someone who knew a lot more about what they were doing than I did) that, seemingly magically, sprouted roots in a makeshift greenhouse, a cypress box with an old, crusty, sliding glass door. Hydrangeas hooked me. However, even with all of those attributes to its name, Hydrangea, as a genus, remains underappreciated and underutilized in modern landscapes. Let’s shed some light on the two primary reasons for gardeners’ failure and frustration with hydrangeas in the landscape and highlight some of the best Hydrangea species and cultivars to look for at the nursery!
First, hydrangea has a reputation as being a high water user. As the name (hydrangea comes from “hydor”, which is Greek for water) might suggest, hydrangeas are indeed water sensitive. However, this does not necessarily mean they require more or less water than other plants, rather they simply betray drought quicker than most other plants. This feature makes hydrangea particularly useful in the landscape as an indicator plant. As a general rule, hydrangeas (particularly those planted in too much sun) wilt in the afternoon heat; this is totally normal. However, if the plants remain wilted the next morning, it is an indicator to the gardener that irrigation is required! If they don’t get irrigation soon after telling you they need it, the plants may begin to decline. Rather than being viewed as a drawback, think of this feature as an early warning system. Name another plant that looks out for us gardeners like that!
The second primary reason people fail with hydrandea is improper site selection. Attempting to grow hydrangea in full sun in Florida leads to less than spectacular results. All species of hydrangeas are most happy when sited to receive at least some afternoon shade, if not filtered shade throughout the entire day. Exposure to blistering afternoon sun is problematic and results in increased wilting from heat stress, increased irrigation requirements and “bleached” flower coloration. Remember, there are fewer frustrating things than growing the right plant in the wrong place!
Now that you know how not to fail with hydrangeas, it’s time to select the proper plant for your property! Three primary species perform noticeably better here than the rest of their kin and deserve the gardener’s consideration in Northwest Florida: H. macrophylla (Bigleaf Hydrangea), H. quercifolia (Oakleaf Hydrangea), and H. paniculata (Panicle Hydrangea).
H. macrophylla
H. macrophylla, the old-fashioned hydrangea everyone’s grandmother grew, is truly one of the standouts in the shady, Southern landscape and commands attention when in flower. Sporting giant “mopheads” of inflorescences in gorgeous hues of blue (or pink, depending on soil pH), H. macrophylla is an extremely low maintenance plant, requiring only periodic irrigation and infrequent fertilizer; H. macrophylla even tolerates salt spray and can be grown on the Gulf Coast! By far, the greatest percentage of questions I receive concerning H. macrophylla involve plants not flowering because of pruning at the wrong time of year. For best flowering results, time pruning of once-blooming traditional cultivars like ‘Nikko Blue’ soon after flowering is finished in late summer. These plants set flower buds on the previous season’s wood; pruning older cultivars in the fall or winter may rejuvenate the plant but will prevent flowering the next year! Fortunately, over the last twenty years, advances in Hydrangea breeding have given gardeners the option of planting remontant cultivars that bloom on current season’s wood. Commonly sold remontant cultivars like ‘Endless Summer’, ‘Penny Mac’, ‘Bloomstruck’, and ‘All Summer Beauty’ have an early summer flower display like the traditional types but then continue to flower periodically throughout the rest of the summer! Even better, they may be pruned at any time without worry of damaging the next season’s flower show!
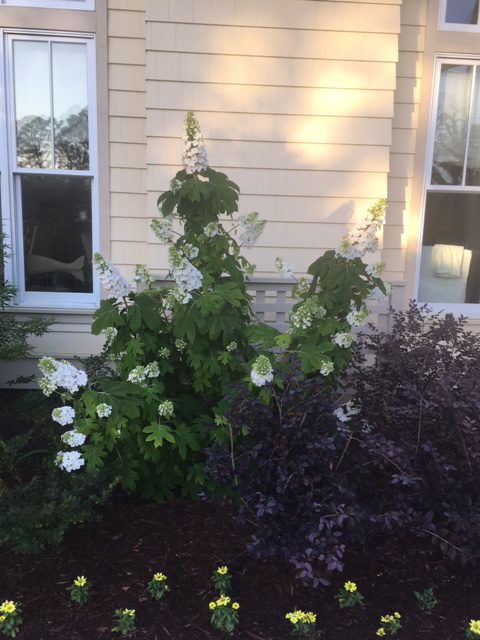
H. quercifolia (Oakleaf Hydrangea) Photo Courtesty of Andrea Schnapp
Those looking to diversify their hydrangea collection should next look to the native Oakleaf Hydrangea (H. quercifolia). The Oakleaf Hydrangea is a Florida native, growing wild on the steep, shady ravines along the northern end of the Apalachicola River. If the plants never flowered, the Oakleaf would be worth planting; its massive leaves, oak-shaped as the name suggests, can grow up to a foot in length and provide some of the best fall foliage color available to Floridians. However, the real show, as with all hydrangea species, are the flowers. This species flaunts 8”-10” white, panicle shaped flowers that are held elegantly above the coarsely textured foliage. In addition to these features, Oakleaf Hydrangeas couldn’t be easier to grow; obtaining heights up to 10’ and asking very little of the gardener other than adequate irrigation and some shade in the heat of the day! Look for the author’s favorite cultivars: ‘Alice’, ‘Semmes Beauty’, and ‘Snowflake’. Each of these cultivars and selections of the common species H. quercifolia perform very well in Northwest Florida.
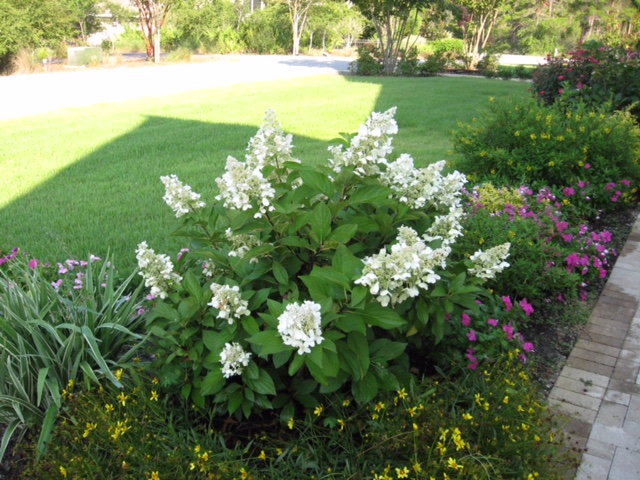
H. paniculata ‘Quickfire’ Photo courtesy of Andrea Schnapp.
Finally, the newest hydrangea species introduced to Florida gardens, H. paniculata, has made significant inroads in the landscape industry over the last decade. Primarily grown as the cultivar ‘Limelight’, H. paniculata overcomes some of the weaknesses of the two aforementioned species, namely it tolerates full-sun and persists on much less water, making it a potentially more sustainable plant for many landscapes. This plant, like the remontant H. macrophylla cultivars, blooms on new wood and even seems to enjoy a hard pruning each winter; plants pruned this way seem to be more vigorous the next season and produce larger greenish-white flower panicles than unpruned specimens. Though it is a relative newcomer, H. paniculata, particularly ‘Limelight’, is a worthy addition to any landscape.
As you can see, there is a hydrangea for every yard and no true Southern landscape is complete without a few. When perusing your local garden center this summer, look for the selections and species mentioned above, plant properly, and enjoy the ensuing annual flower show for many years into the future! Who knows, you may be hooked by hydrangeas as I once was!