by Joshua Criss | Jan 29, 2026
Whelp, the new year has come and gone. We find ourselves facing the beginning of a new gardening year. This naturally brings out the question of what can even be planted this time of year with all the cold that has set in over the last week? Luckily for you, IFAS has an answer with our North Florida Gardening Calendar. In this document, you’ll find several cool-season vegetables for planting, none the least of which is the humble potato (Solanum tuberosum).

UF/IFAS Photo: C. Hutchinson
A Brief History
Potatoes were originally domesticated in South America, specifically along the Andean mountain range. They were brought to Europe by Spanish explorers, where they were largely relegated to ornamental and livestock feed due to an association with the family Solanaceae.
This changed as European royals began to promote the crop widely. Most notably here are Fredrick the Great’s assigning guards to potato fields and Marie Antoinette’s use of potato flowers in fashion. The commoners noticed, and not long after, potatoes were seen on tables across the continent.
Due to its high nutritive value and ability to grow in poor soil, the potato supported population growth and quickly became a staple crop across Europe. In some areas, such as Ireland, this became a detriment as a single blight nearly destroyed the entire country.
Time for Local Growth
Potatoes have a rich history worldwide, but this small starchy crop can be grown even here in Northwest Florida.
Soil
Soil preparation is likely to be minimal in the Panhandle. Our soils are usually naturally acidic, which is perfect for your spuds. You will want to ensure that the soil is well-drained, and adding organic matter will likely provide some nutritional benefits. As always, the best way to determine fertilization is through testing. Potatoes are heavy feeders, and you’ll likely need multiple applications of nitrogen and potassium. Call your Extension Office for advice on both soil testing and fertilizer application.
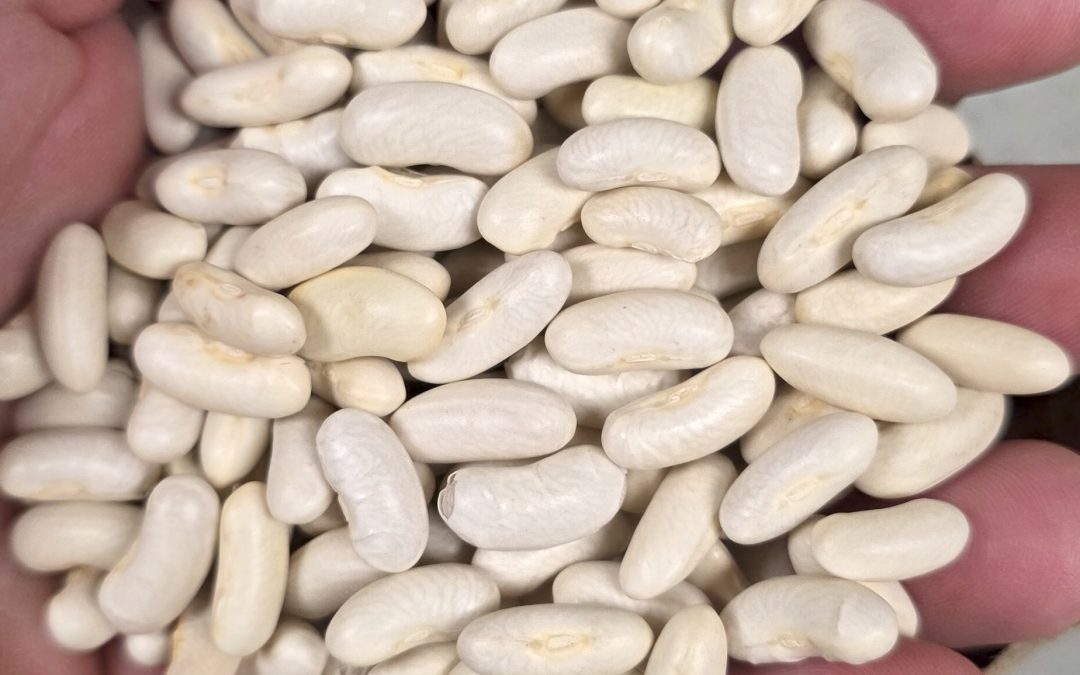
Seed
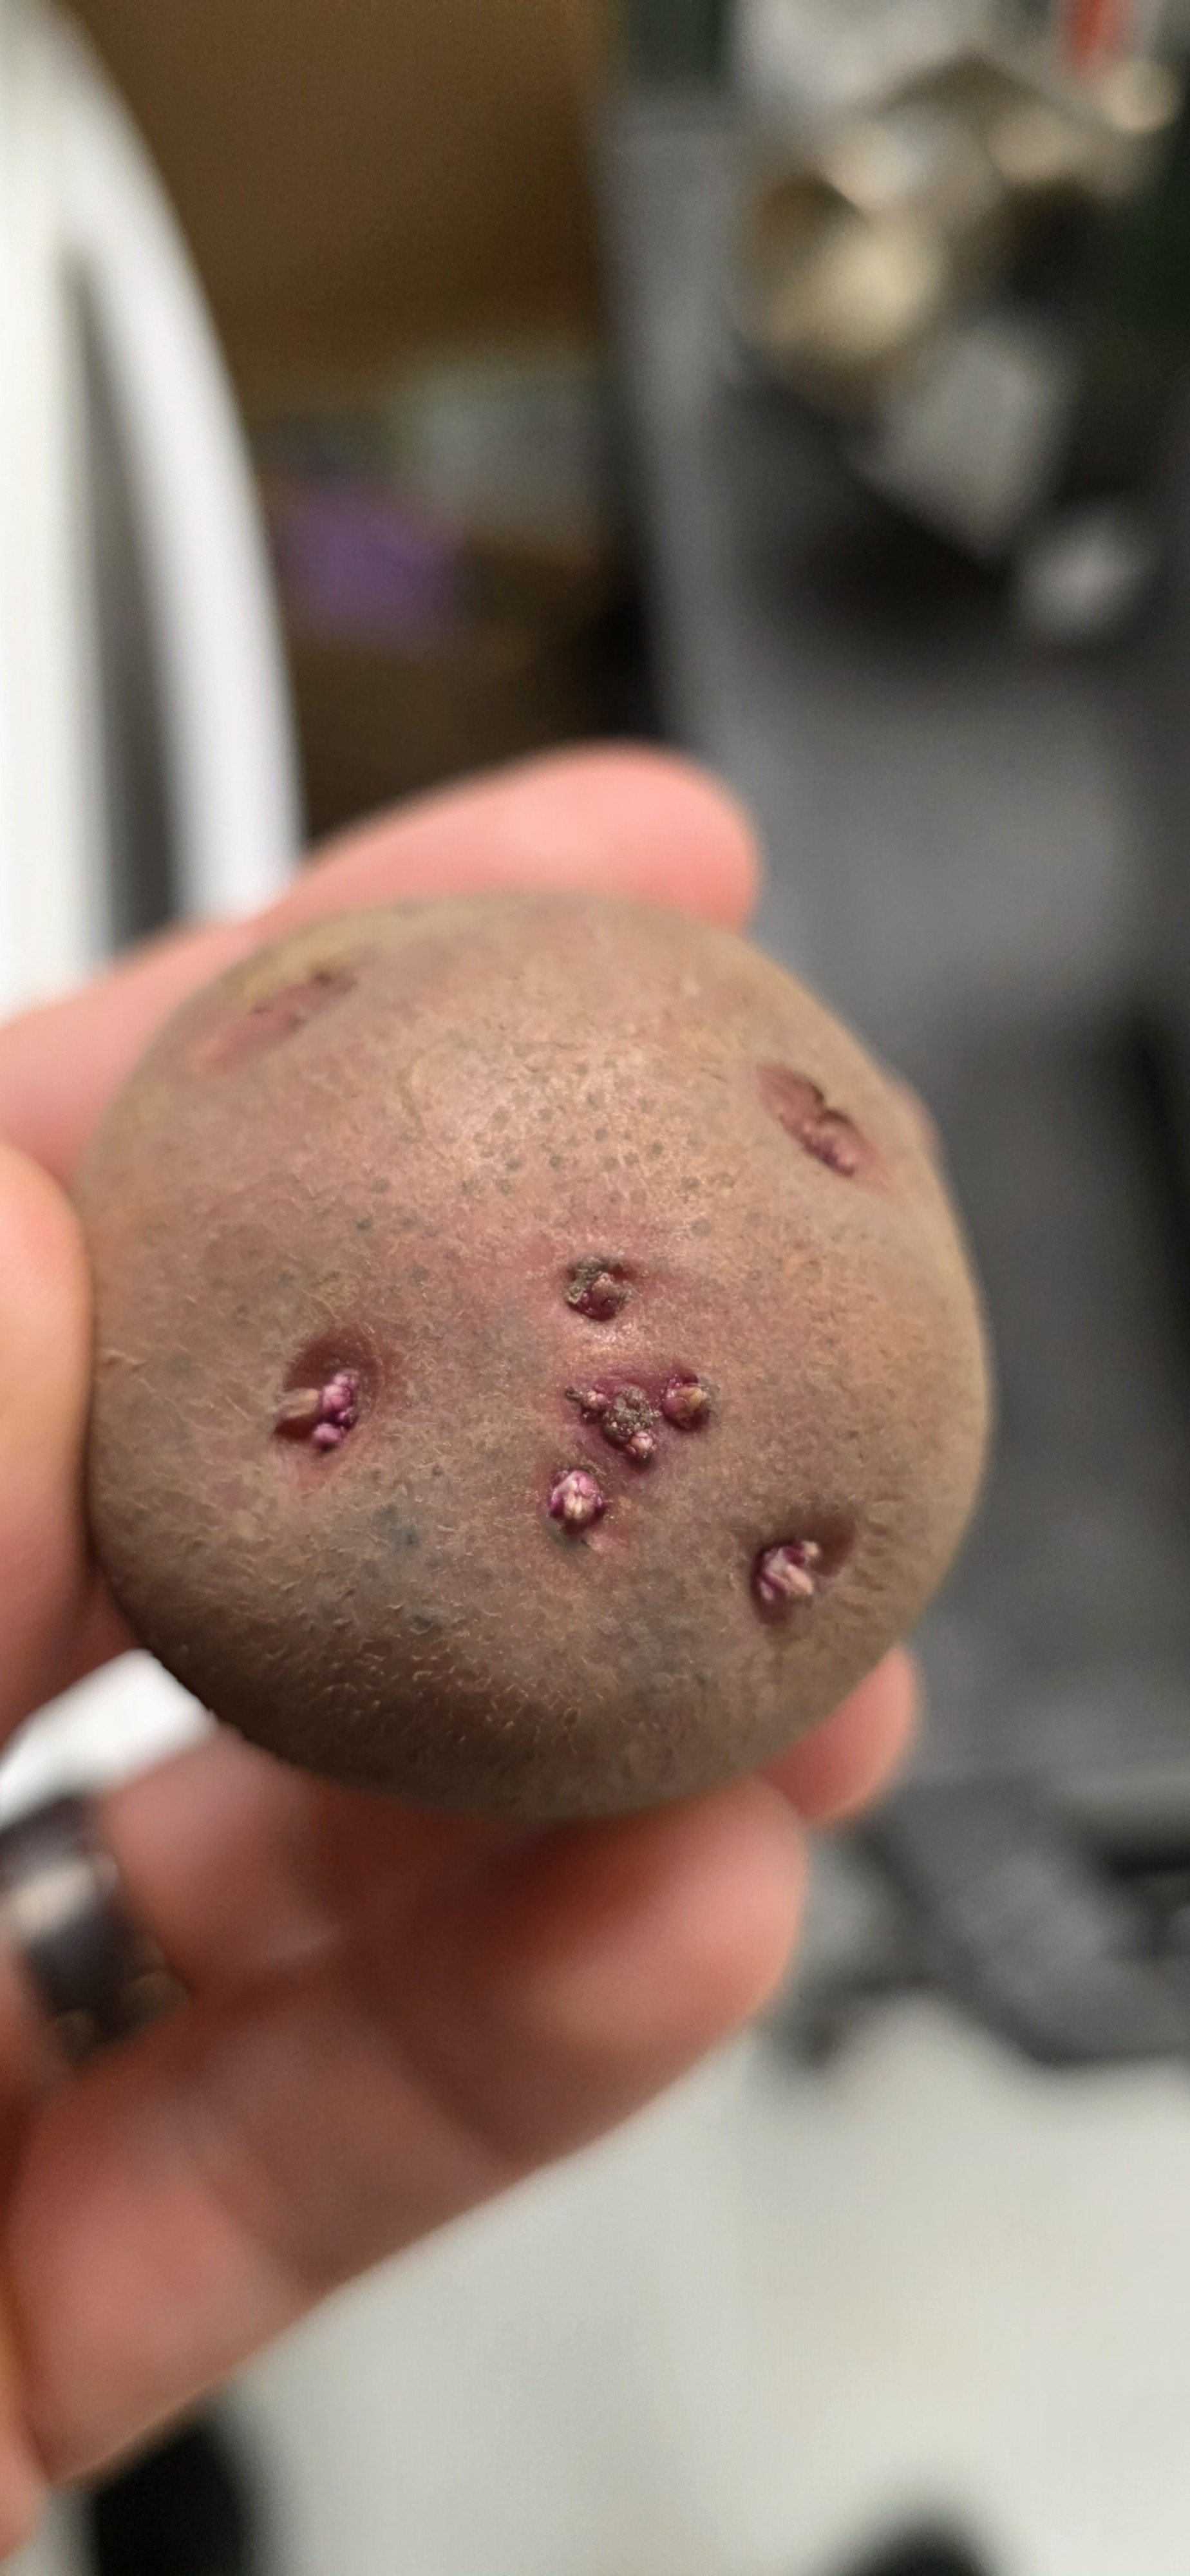
Begin in January by selecting seed potatoes. You’ll likely see videos online of people using grocery-store potatoes as seed stock, but this isn’t advisable, as they may harbor more pathogens. Leave the seed potatoes in a lit room for a few days to break their natural post-harvest dormancy. At this point, some of the “eyes” may begin to sprout. Whether sprouted or not, the seeds may be cut into roughly egg-sized pieces. Ensure each piece has at least one eye. Allow them to dry out for a few days before planting.
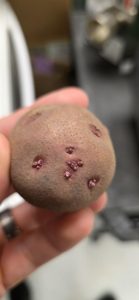
Potato beginning to sprout photo: J. Criss
How To Grow and Harvest
Space the pieces around 6-8 inches apart, roughly 4 inches below the soil surface. When you see the sprout emerge from the surface, add a few inches of soil, a process known as hilling. Maintain adequate soil moisture and scout regularly for insect and pathogen signs.
Vines will begin to show signs of dieback around 80-115 days after planting. Allow the tubers to remain in the soil for another 2-3 weeks after this die-off. Discard any green potatoes and any remaining seed pieces. Dig the potatoes, and store them in a cool, dry place for an additional two weeks. After this, store them as you would store-bought potatoes, and they should be good for up to 6 months.
To Sum Up
Potatoes can certainly be a challenge for those who’ve never tackled them before, but mastering their growth is something for which every gardener should strive. For more information on this topic, consult this document. For any questions about this or any other horticultural concern, contact your local Extension Office.
by Molly Jameson | Oct 3, 2025
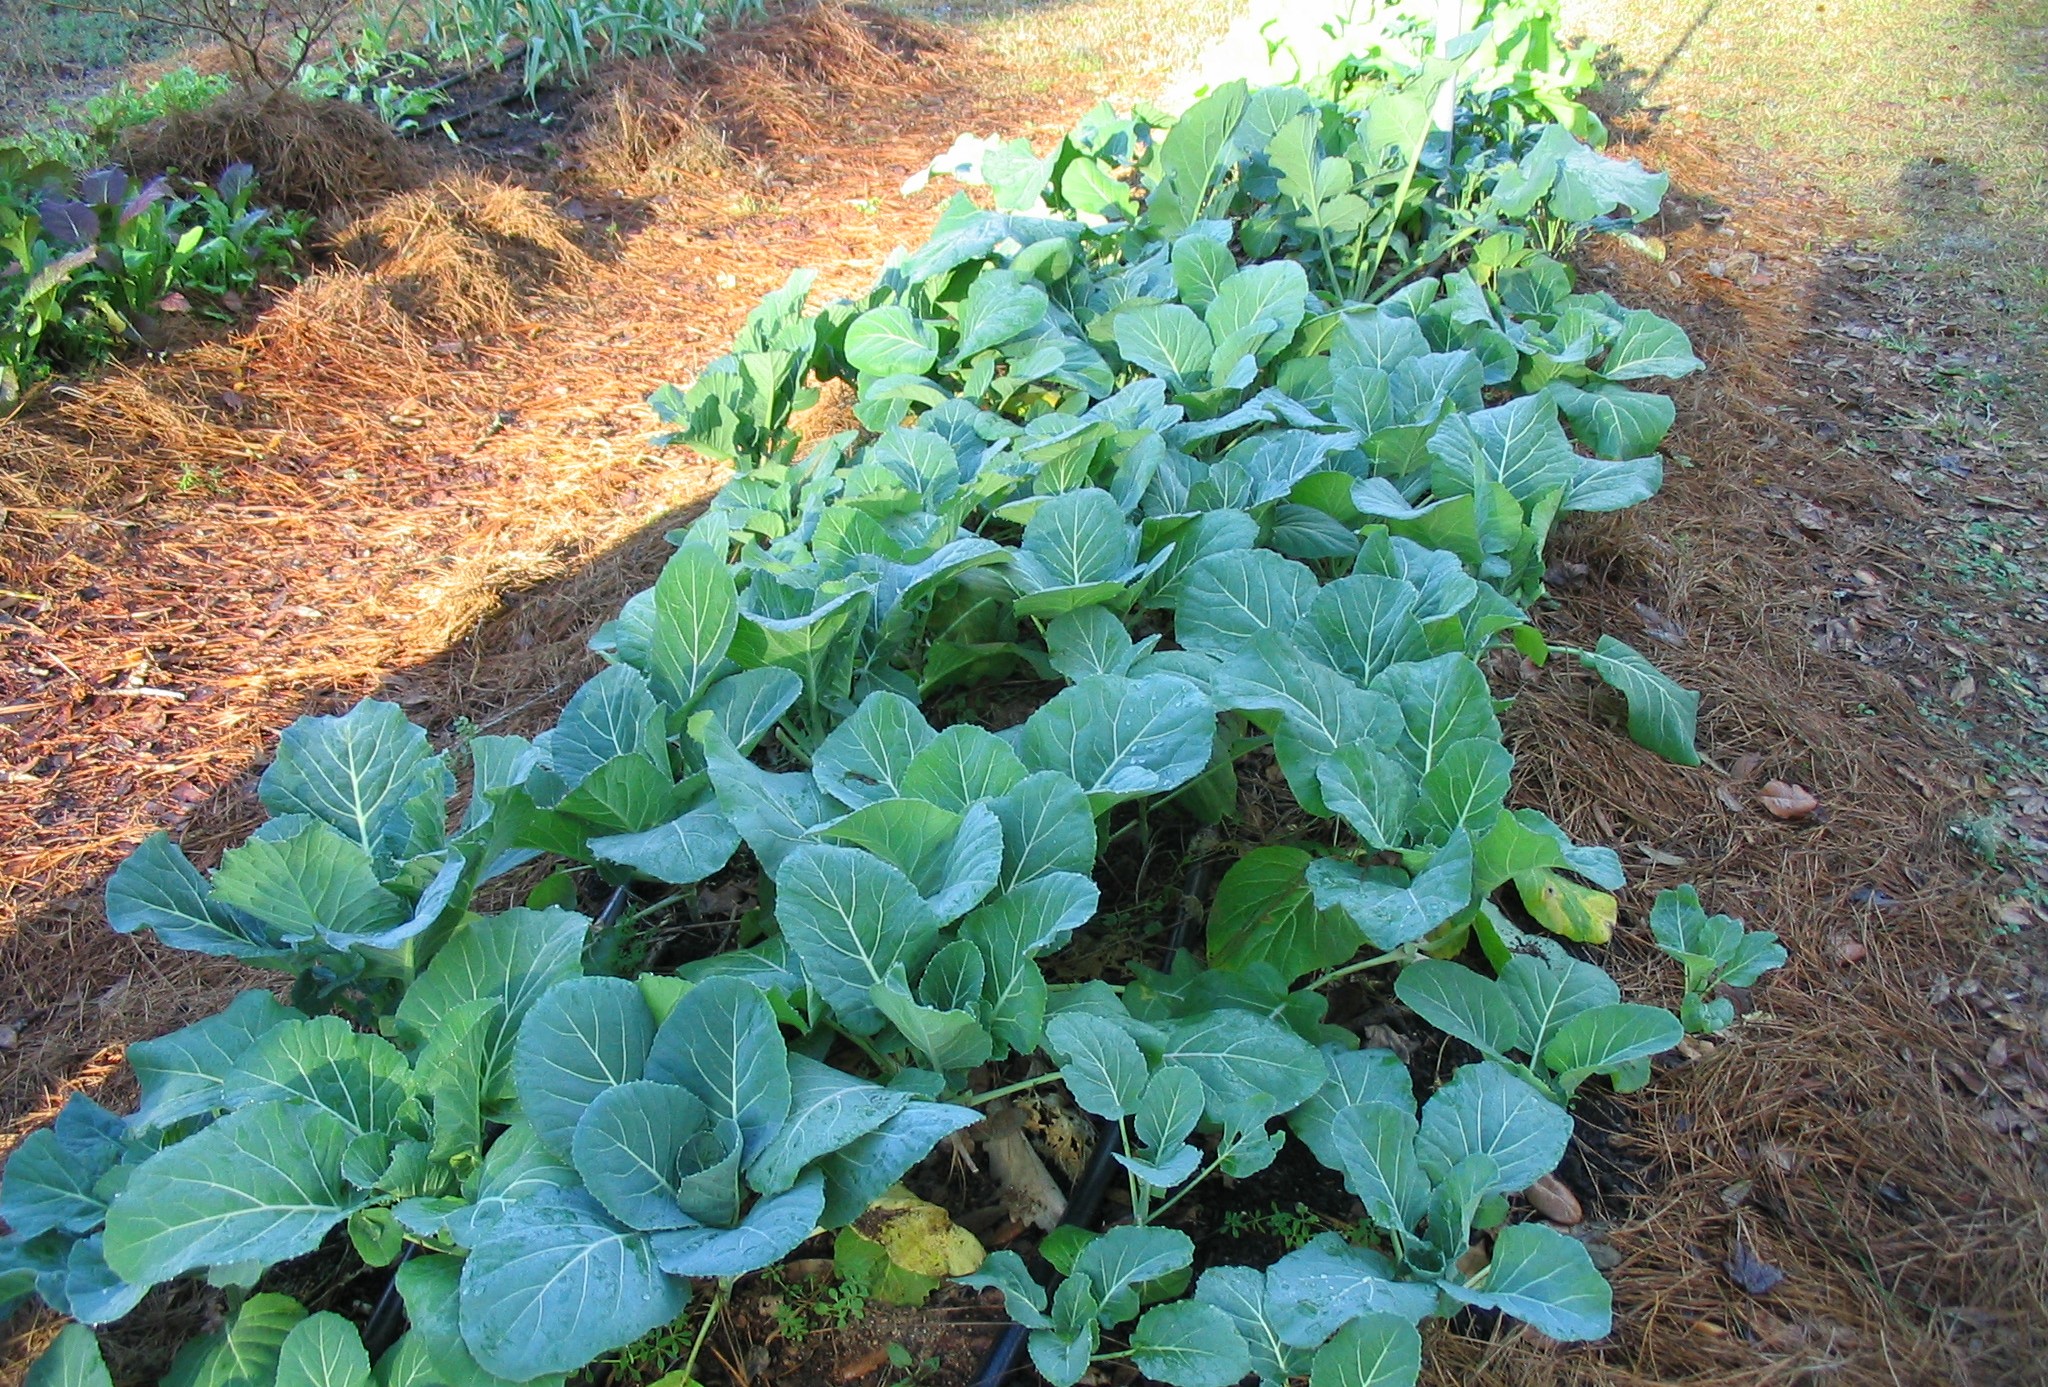
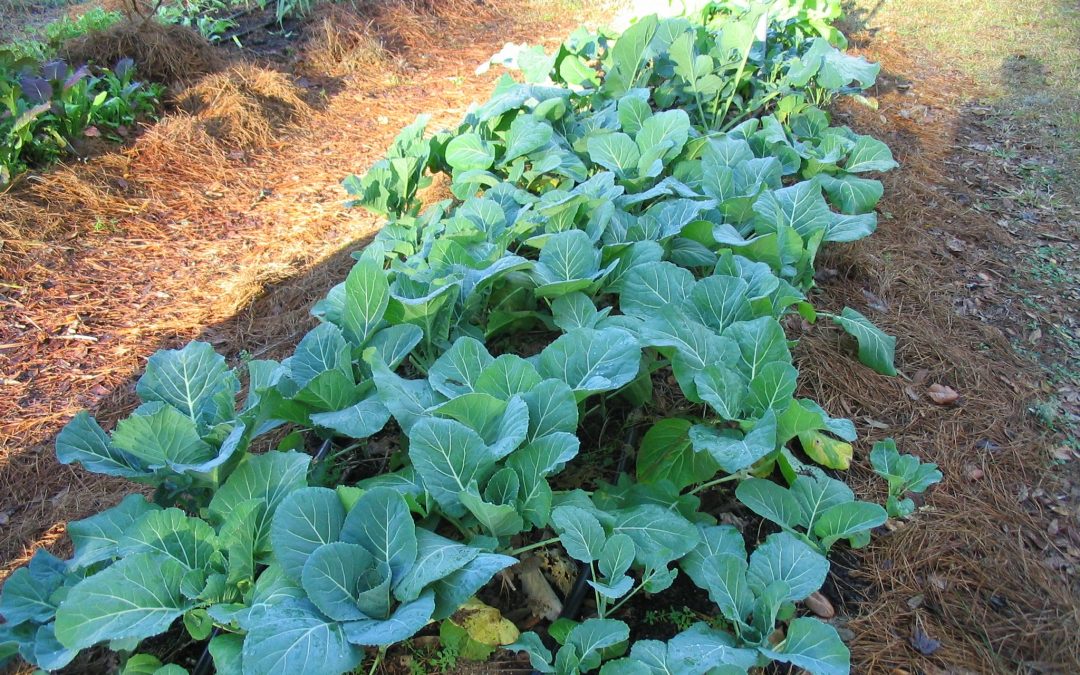
Even a short row of collards can yield basket after basket of tender leaves. Photo by Donna Legare.
Fall Gardening Spotlight: Collard Greens
When cooler weather finally rolls into the Panhandle, collard greens (Brassica oleracea var. acephala) are one of the most reliable crops you can grow. Members of the cabbage family, Brassicaceae, collards are hardy, low-maintenance, and don’t mind a little frost – in fact, a nip of cold will sweeten their flavor. In my neighborhood, it’s not unusual to see collards thriving in gardens all the way through winter and early spring.
Collard seeds can be directly sown starting in late August, with transplants best set out from September through November. If you start from seed, expect to harvest in two to three months. For a quicker turnaround, grab transplants from a local nursery and you’ll be cooking collards by Thanksgiving.
When late summer and early fall heat lingers, young plants may need a little extra care. Providing afternoon shade with a 40 to 50% density shade cloth can keep seedlings from wilting and help them establish more smoothly during warm spells in September. Regular, even watering is also important, but make sure the soil drains well.

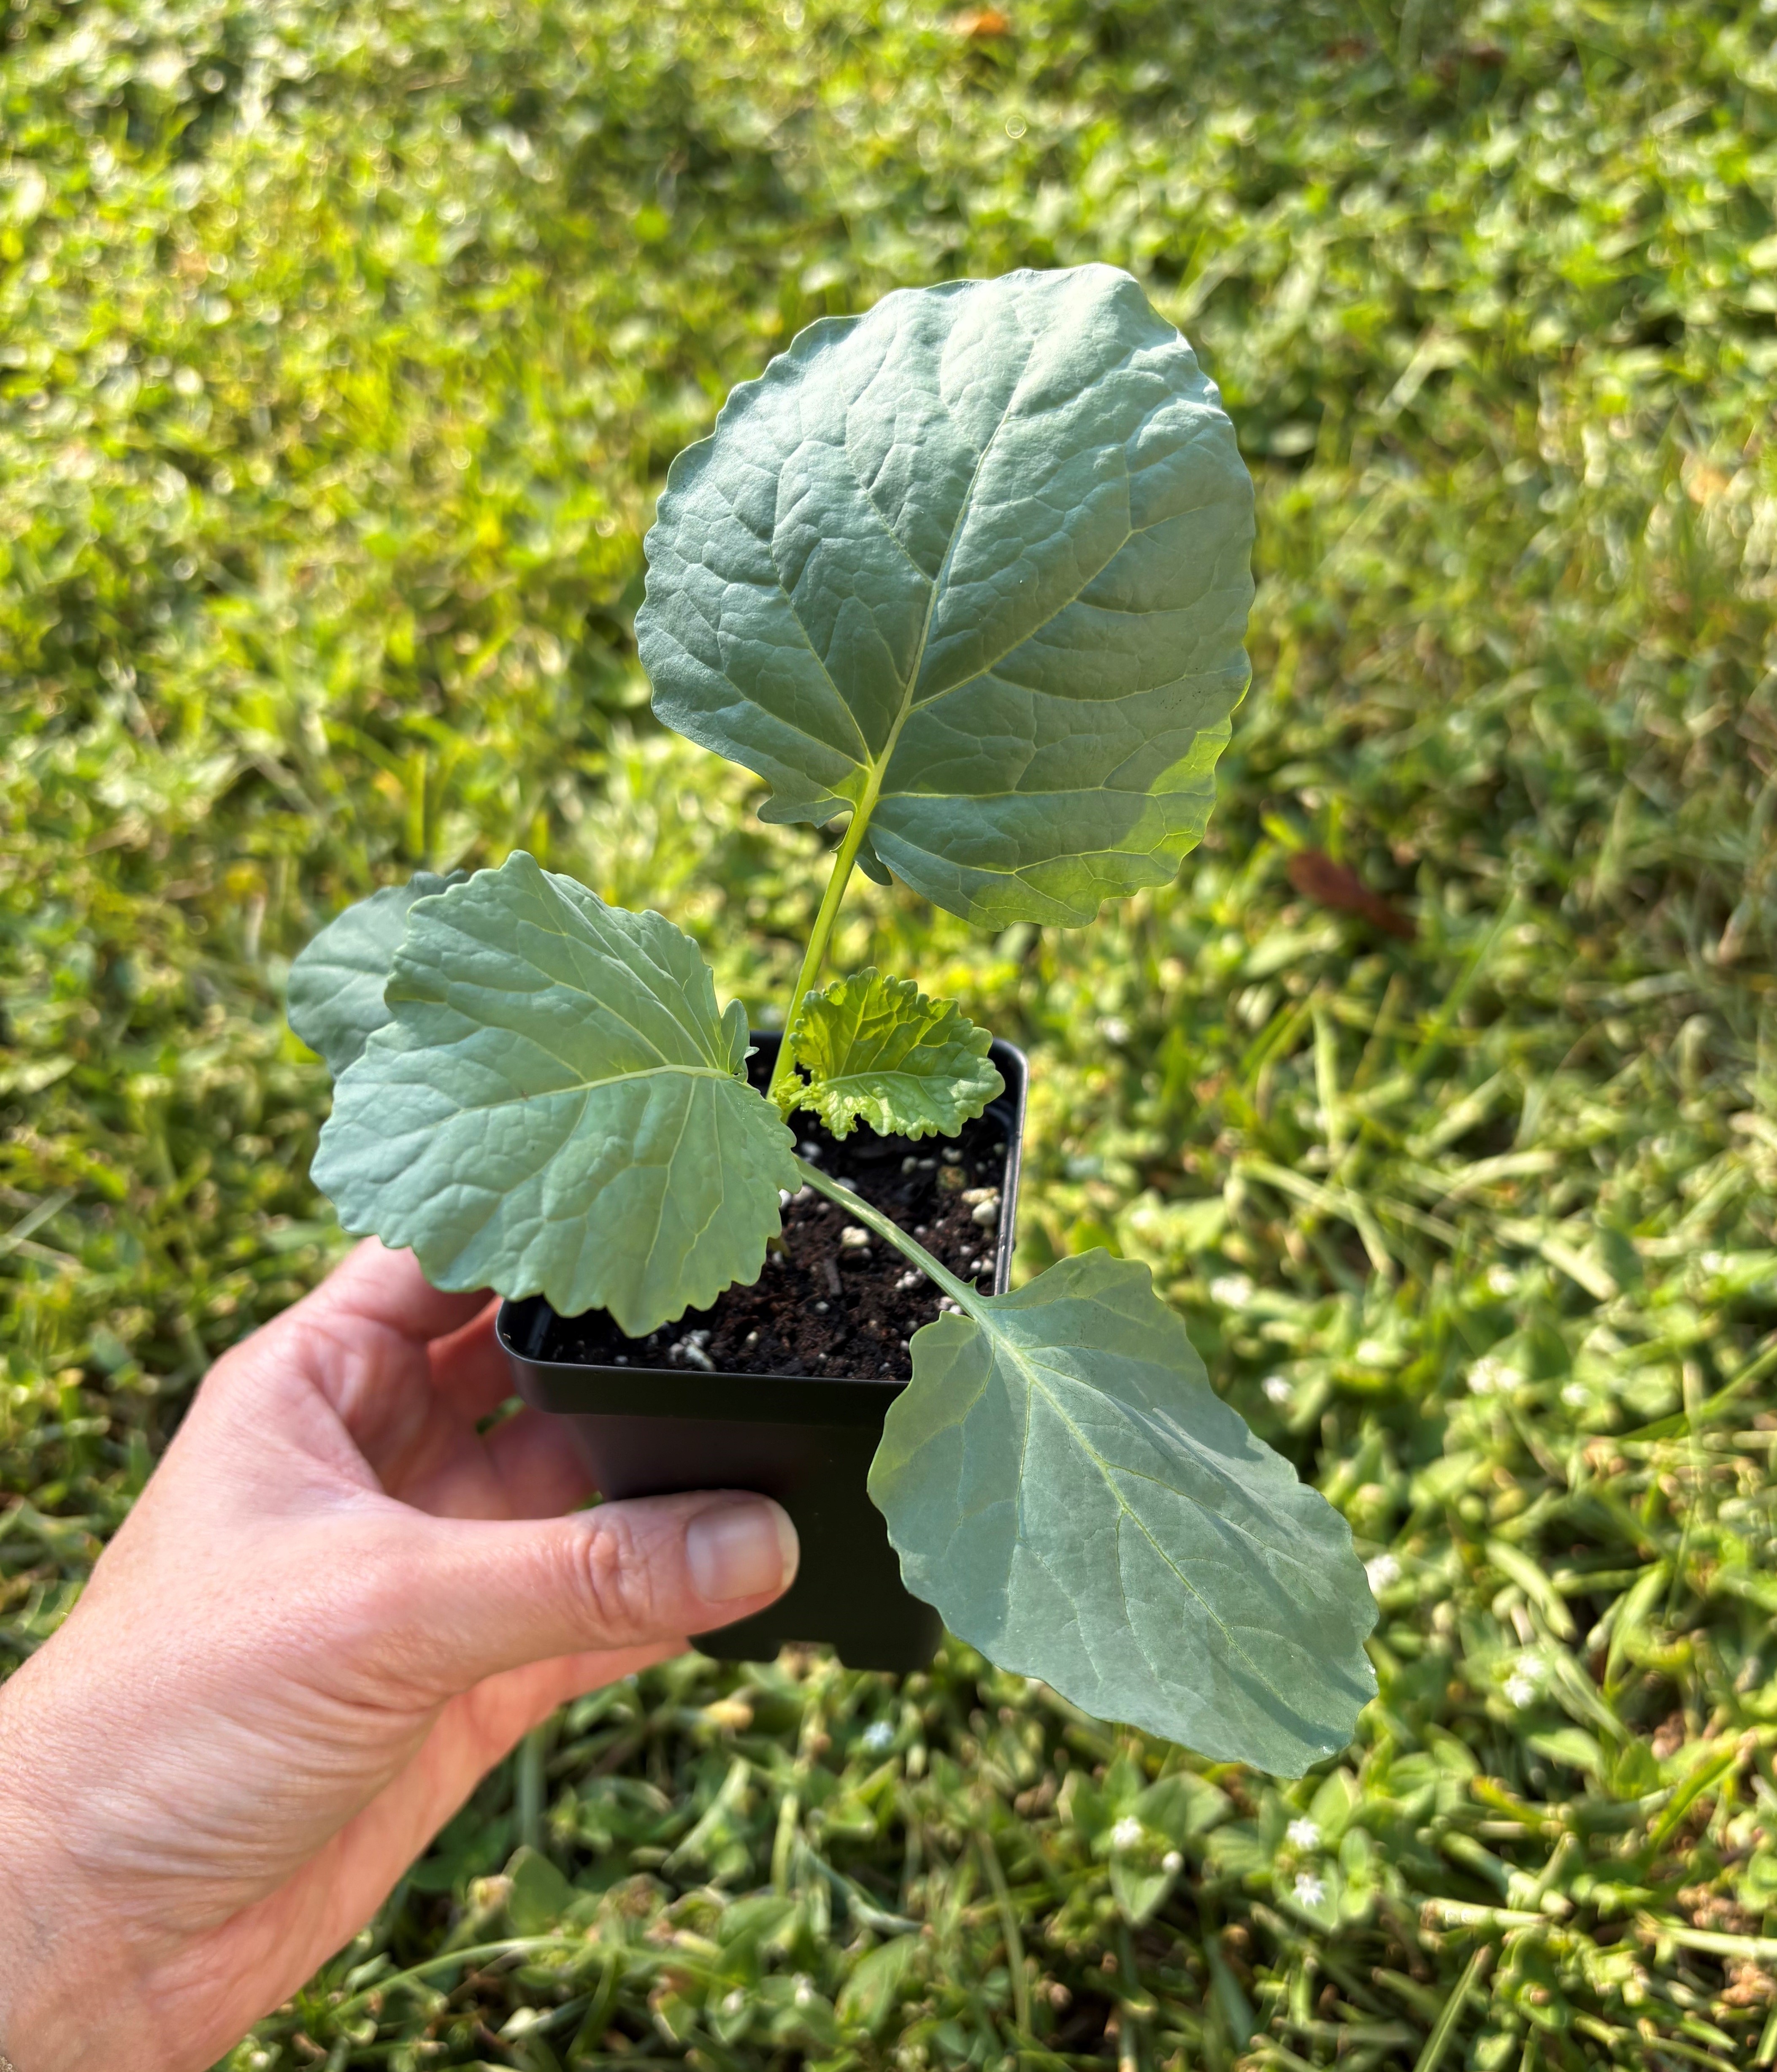
A Georgia Southern collard started indoors in August and up-potted in early September, now ready for transplanting into the fall garden. Photo by Molly Jameson.
Space plants 12 to 18 inches apart in rows two to three feet wide, since collards grow large and need room to spread. In raised beds, you can space plants the same 12 to 18 inches apart in all directions, often in a staggered grid, to make the most of the space. For a steady supply, consider staggering plantings every couple of weeks through early November. Collards are among the more forgiving fall crops – just give them at least six hours of sun, nutrient-rich soil, and steady moisture.
One thing I’ve learned from experience: don’t be shy about picking leaves. Collards will keep producing as long as you harvest from the bottom up, leaving the center growing tip alone. I’ve found the leaves taste best when they’re picked young, around 10 to 12 inches long. If you leave them on longer, they’ll toughen up a bit but hold up well in slow-cooked dishes. Even a short row in the garden can keep a family in collards for much of the season, which helps explain why they’ve been a fixture in Southern kitchens for generations.
Some varieties that do well in our area include several open-pollinated classics. ‘Georgia Southern’ has stood the test of time for its tender, large leaves, while ‘Vates’ is another reliable option, known for its compact size and resistance to bolting. For a collard that’s as pretty as it is productive, try the heirloom ‘Alabama Blue.’ Its bluish leaves are streaked with purple, adding beauty to the garden as well as the plate. If you’d like to try hybrid varieties, look for ‘Champion,’ bred from ‘Vates’ with improved cold tolerance and disease resistance, or ‘Top Bunch,’ which grows quickly and recovers fast after harvest. You’ll usually find at least one or two of these on the racks at local plant nurseries.
While collards are tough, do keep an eye out for caterpillars such as cabbage loopers and diamondback moths, which can chew holes in the leaves. Picking them off by hand usually can keep them under control if you scout often, though a light spray of Bacillus thuringiensis (Bt) can also help if they get ahead of you. Be sure to follow the label directions carefully when applying.
Once you’ve got a basket full of collards, you can make them as simple or as dressed up as you like. I usually just sauté them in olive oil with garlic, salt, and a pinch of smoked paprika. They also slip nicely into soups, mix well with pasta, and can even be blended into green smoothies.
Collards are tough, productive, and delicious – and if you plant a few this fall, you might just find yourself sharing leaves with neighbors well into the new year.
by Lauren Goldsby | Sep 25, 2025
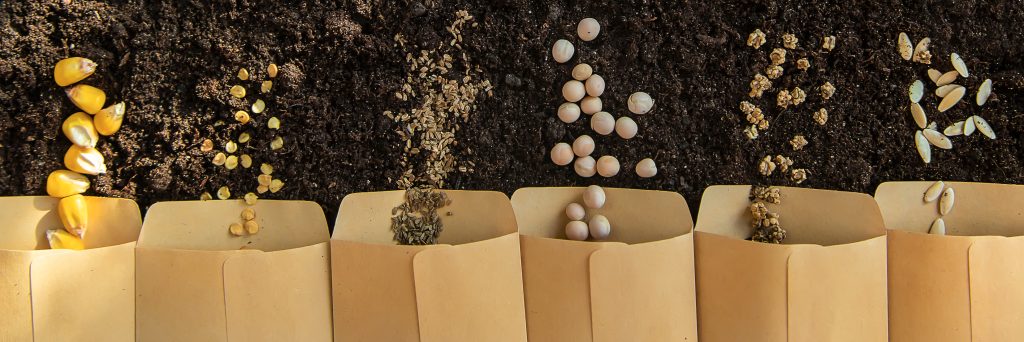
While planning my fall garden I have been partaking in one of my favorite pastimes—shopping for seeds. This is always more fun to me than planting the seeds. Seeds come in many different packages and just like wine, you can be drawn in just from the carefully crafted label. Many of the seed labels I encountered shared the same marketing phrase, “non-GMO seeds”, which is like seeing a gluten free label on your pineapple. It was never an option!
Genetically engineered plants take decade(s) to produce, test and release. They are expensive and are not typically sold in small quantities. These patented seeds will not be sold to you by accident. GMO crops that are grown and sold in the US on a commercial scale include alfalfa, apple (Arctic), canola, corn, cotton, eggplant, papaya, pineapple (pink), potato, soybean, squash, sugarbeet, and sugarcane. More information about each crop here: https://www.ams.usda.gov/rules-regulations/be/bioengineered-foods-list
Recently, a few GE seeds have been developed for the home gardener.
The Firefly Petunia glows in the dark thanks to the insertion of genes from a bioluminescent mushroom. More info
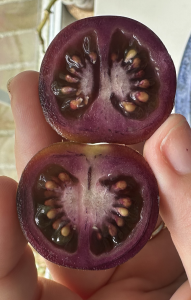
The Purple Tomato has purple skin and purple flesh thanks to the insertion of snapdragon genes. This is the first genetically engineered food crop developed for the home gardener. More info
These seeds are only available from certain retailers, and you will pay a premium for this technology.
When purchasing seeds consider other factors like season and variety. “Right plant, right place” – you hear us say those four words again and again here at the Extension Office. That’s because plant selection is one of the most important things to consider for gardening success. If you were to start a watermelon from seed right now it may do well at first. However, they thrive in the heat of the summer, and they will not like the short, cool fall days. A plant growing in the wrong environment will be stressed. That stress attracts pests and can make a plant more susceptible to pathogens.
Set yourself up for success by growing plants when they are in season. Don’t be tempted by the seeds you see on the aisle end caps. These are not always specific to each region and just because they are selling it now does not mean it should be grown right now. Decide what you are going to grow before you go to the store! The Florida Panhandle Planting Guide is a great resource to use for planning your garden. If you find that you purchased seeds for the wrong season save them for the next one—and consider that your newest hobby may be seed collecting.

by Abbey Smith | Jul 27, 2025
It may still be scorching hot outside, but it’s not too early to be thinking ahead of what to plant in your fall garden this upcoming season. There’s much to do to prepare, so knowing the right steps to get ahead will save you time. There are many options for fall and winter vegetables to grow in the Florida Panhandle and picking what is best for you or your family is essential.
The first step when planning a fall garden is to clean all debris from your previous plantings to prevent disease. The next would be to take a soil test. It’s essential to know the nutrients existing in the soil to have a successful growing season and thriving plants. You can contact your local extension office about soil testing availability in your area. Once you know the nutrient levels of your soil in your garden, you can make applicable amendments, such as adding compost. Some people opt to grow a cover crop in between growing seasons. For more information on cover crops in the garden, check out this article: Cover Crops in the Garden
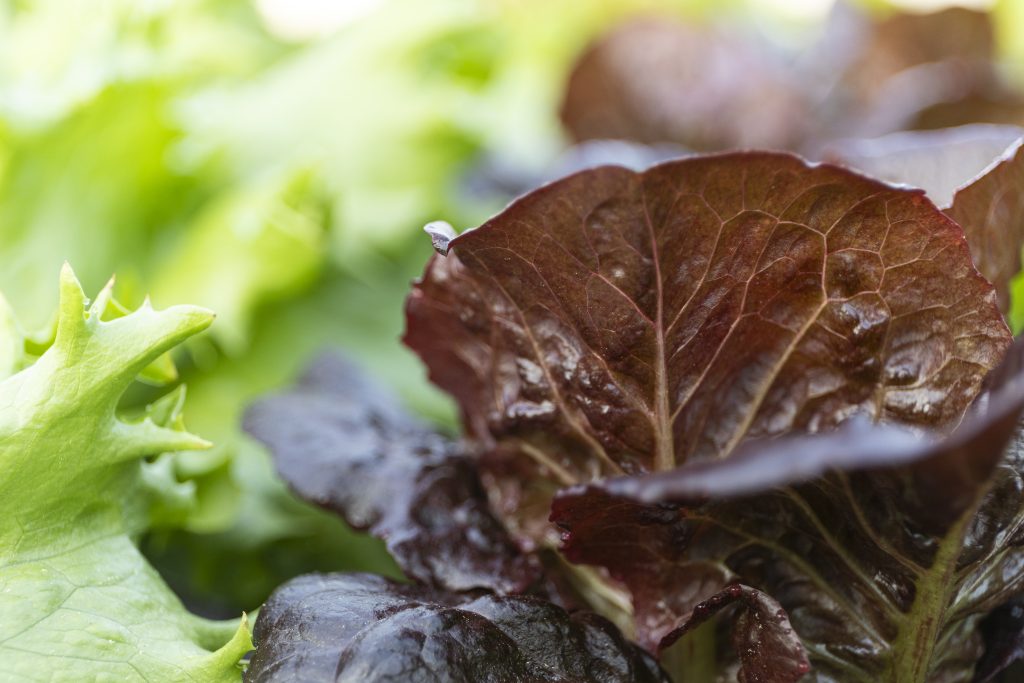
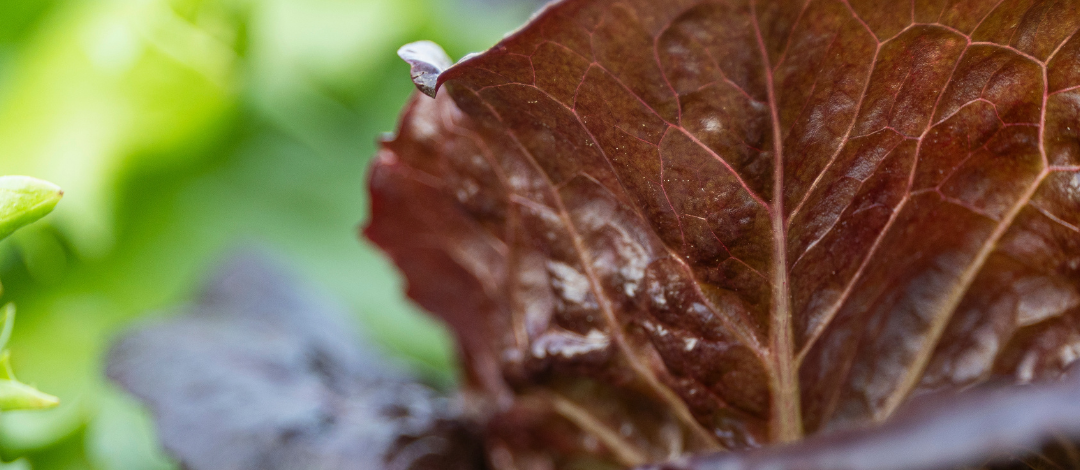
Lettuce leaf. Photo Credit UF/IFAS Cat Wofford
It’s important to know what vegetables grow best at specific times of the year. Most vegetable plants grown in the fall are considered “hardy” or semi-hardy.” A plant’s hardiness determines their level of cold tolerance. While it stays relatively warm in the fall here in North Florida, it is important to understand the lowest temperature a vegetable plant can withstand. You should also know your USDA Hardiness Zone. As of 2023, the Florida Panhandle is considered 9A under the USDA Hardiness Zone map.
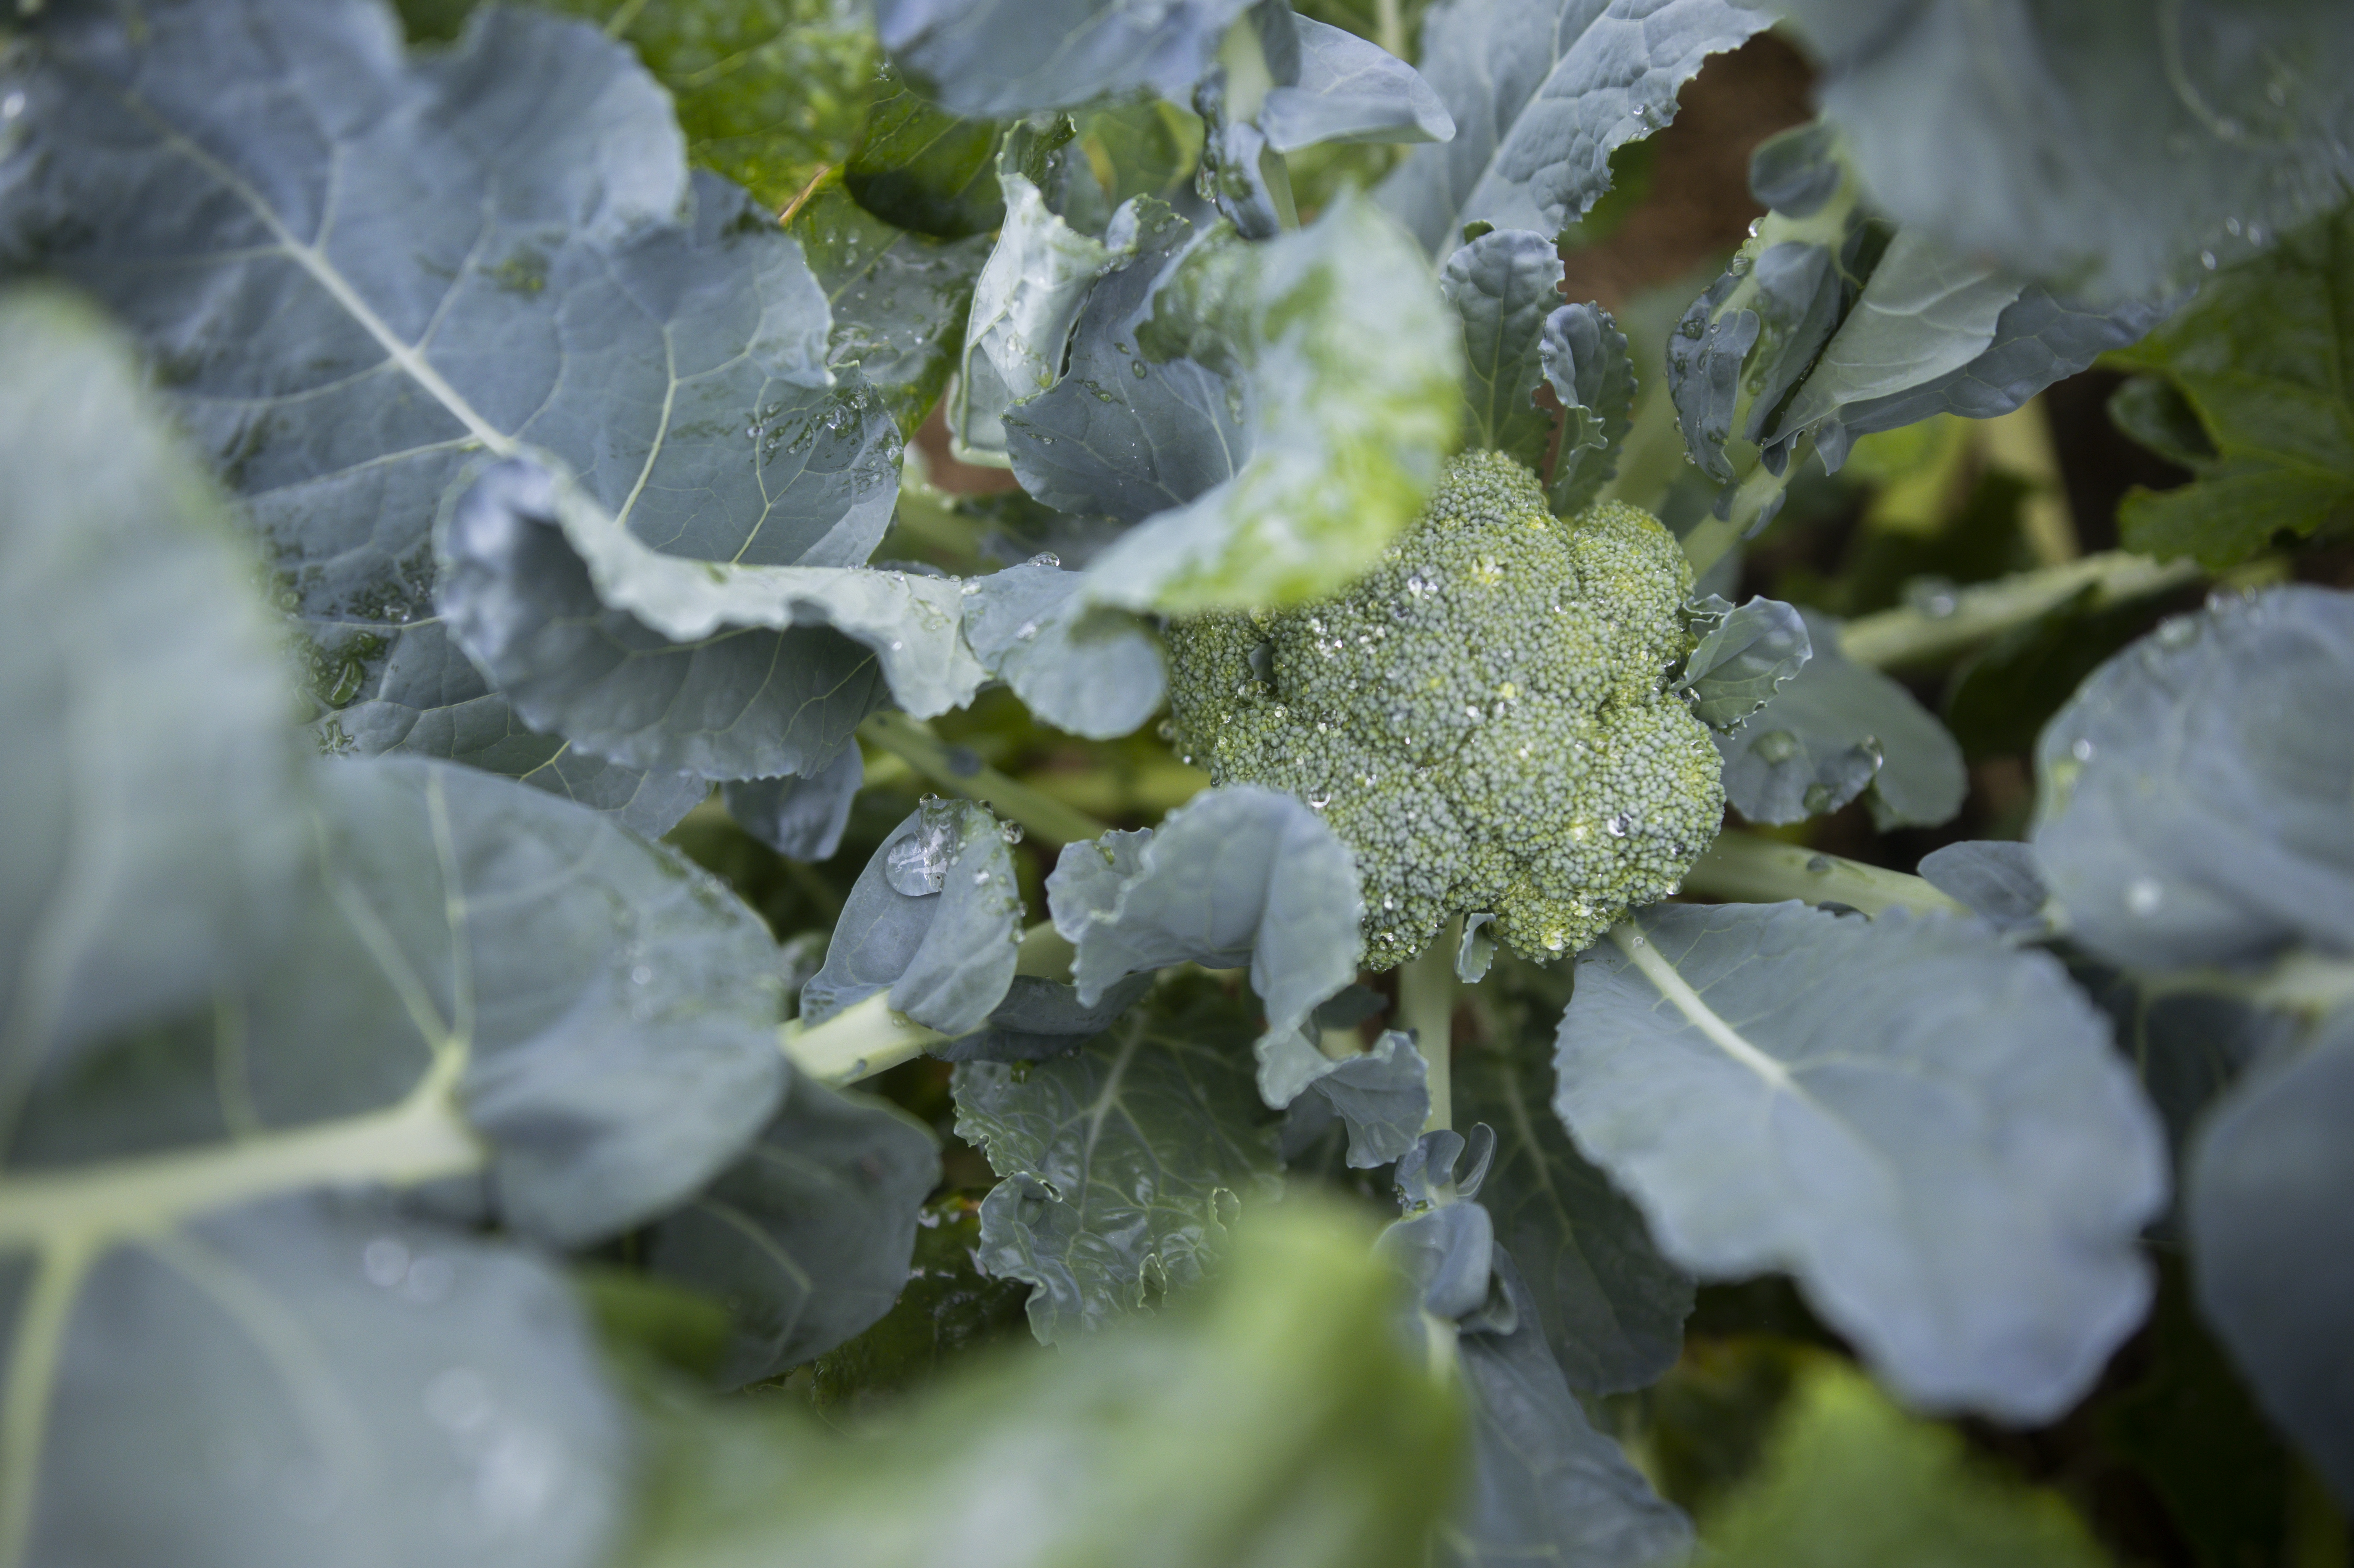
Many fall vegetables can be sewn directly into the ground. Some examples of fall vegetables are leafy greens like lettuce, kale, and swiss chard. There are other vegetables in the brassica family that thrive in the fall like broccoli, cauliflower, and brussels sprouts. To get more ideas of what to plant when, refer to the Florida Panhandle Planting Guide

Broccoli on the plant. Photo Credit: Tyler Jones, UF/IFAS
If you would like to learn more about fall gardening and how to prepare the vegetables you grow, the UF/IFAS Jackson County Extension office will be hosting a Garden to Table Workshop on August 28 from 6:00 pm to 8:00 pm. For more information on how to register visit: https://JacksonCountyFCS.eventbrite.com
by Joshua Criss | May 22, 2025
Sweet potatoes (Ipomea batata) are a much ballyhooed southern food staple. Valued primarily for their tuberous roots, they also boast an edible leaf. That, however, is not the end of their story. Some cultivars find use strictly as an ornamental. While not the subject of this article, you will typically find these dangling over rock walls or cascading from a hanging basket. While these can be quite impressive, this article will focus on the edible version of this plant, and its nutritional benefits.
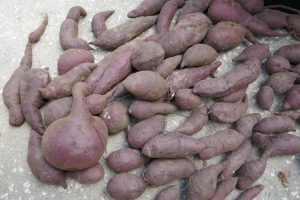
UF/IFAS photo: M. Bailey
What Cultivar?
As with any vegetable, these have been heavily bred to optimize growth and yield in our southern environment. In Florida’s Panhandle, ‘Centennial’ and ‘Beauregard’ are two varieties that perform admirably. They have a vining growth habit and are very productive. For those gardeners with less space, ‘Vardaman’ sweet potatoes. This cultivar has a bushy growth habit rather than a trailing vine.
Planting
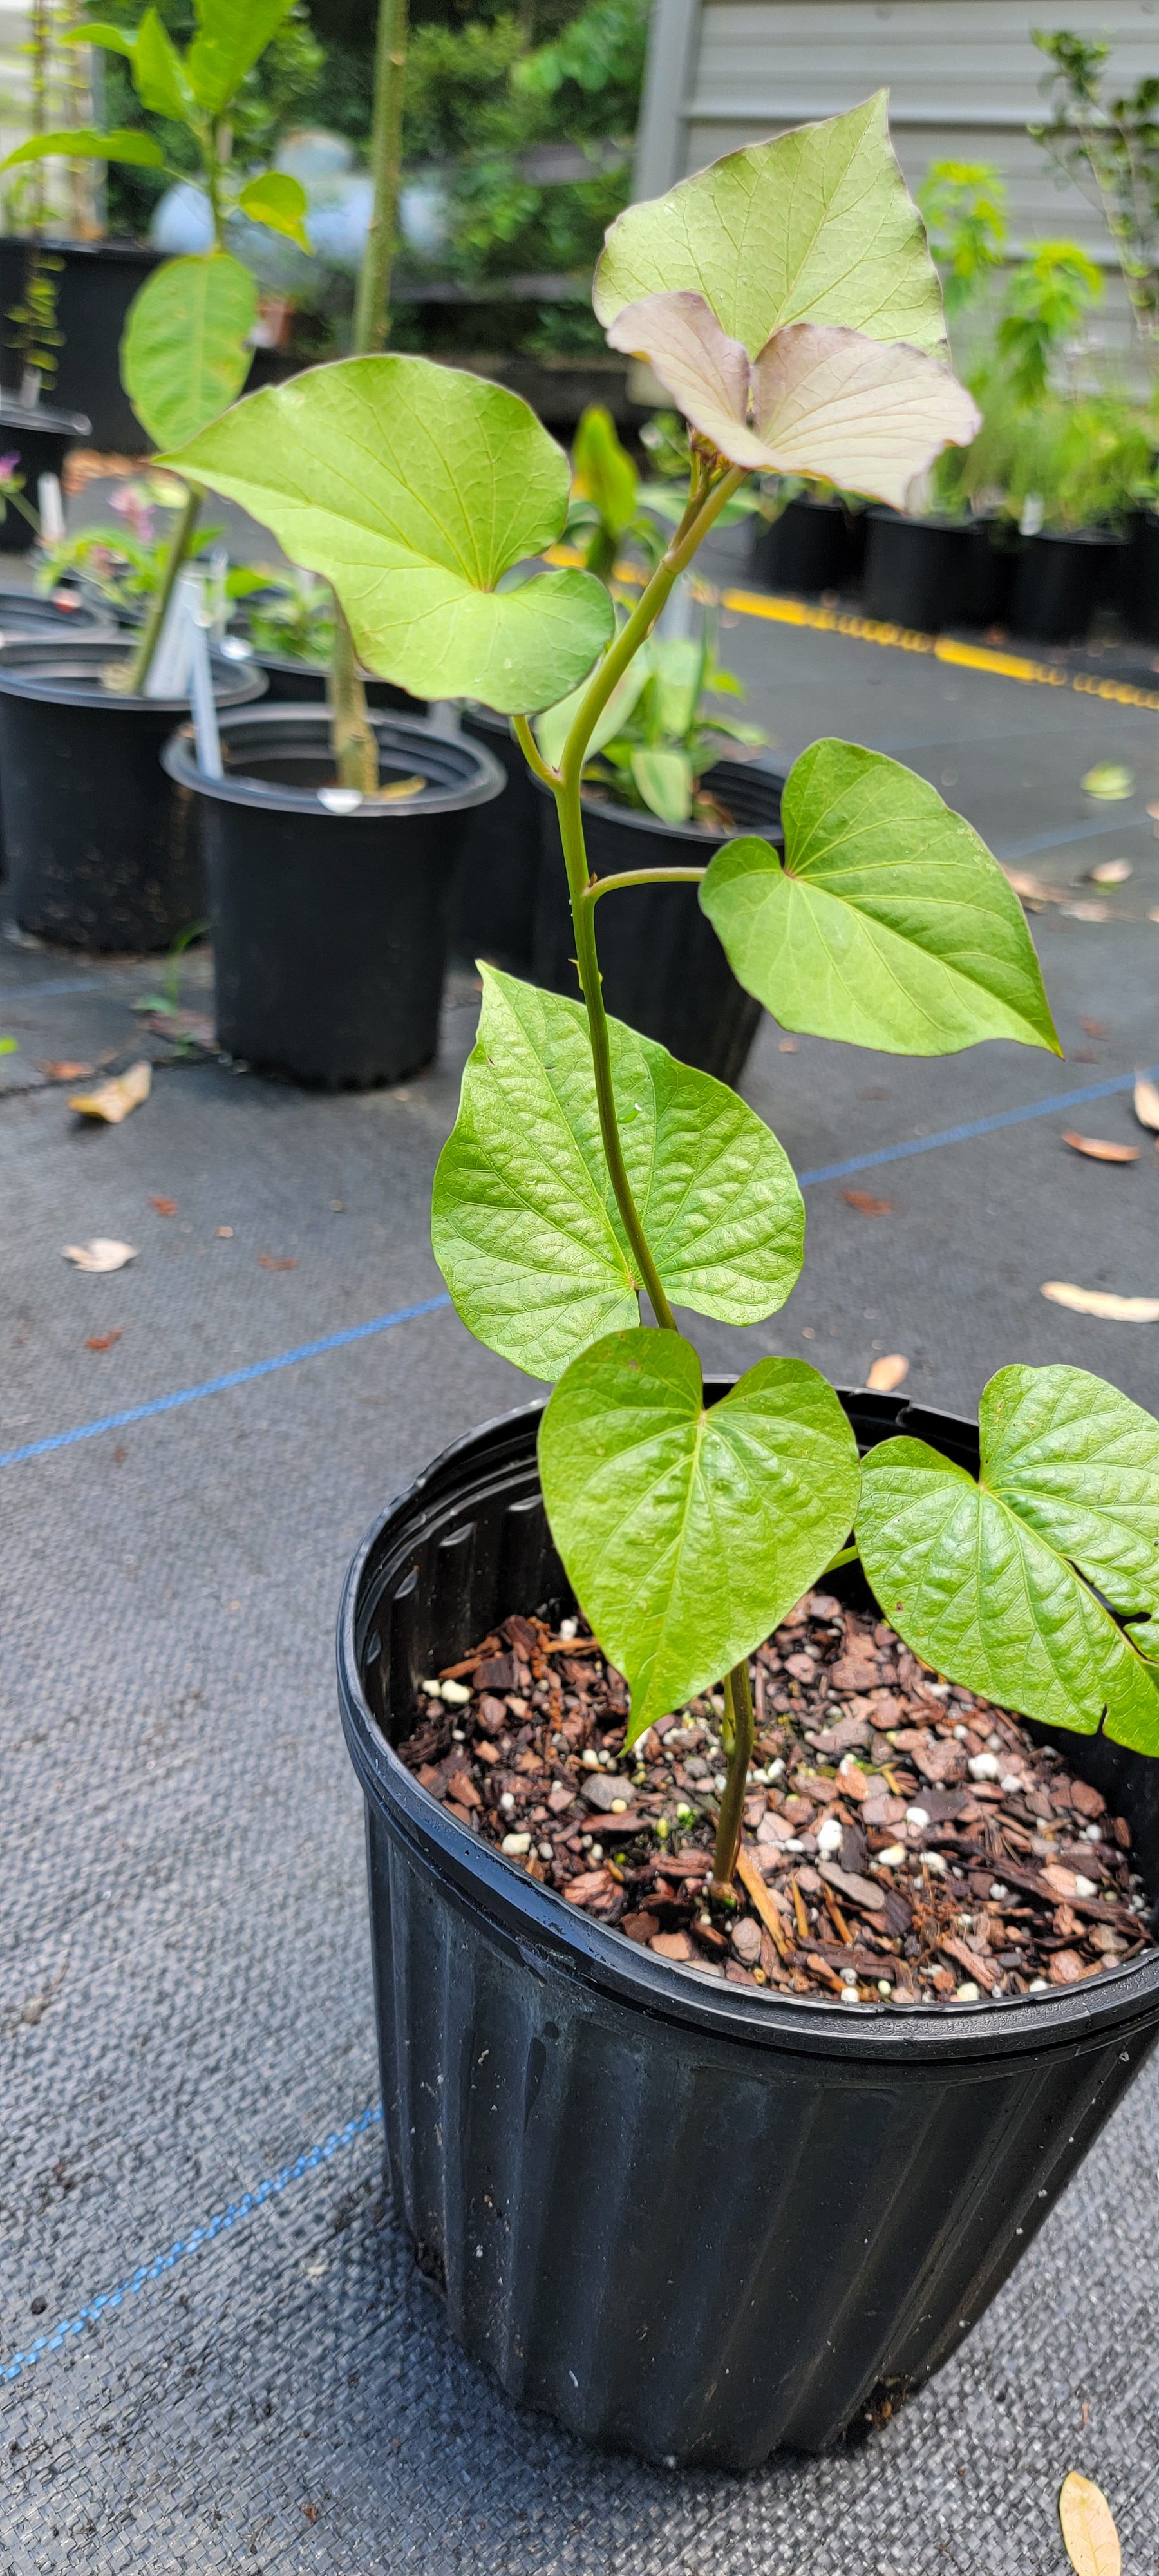
Sweet potatoes are not planted by seed, but rather from a “slip”. These are the vegetative growth from the mature sweet potatoes. While it is possible to grow these yourself, it is better to utilize certified disease-free slips from a reputable garden supply store. Use slips that are 6 to 9 inches long, planting them in rows 48 to 54 inches on center, with plants spaced 12 inches apart.
Sweet potatoes can be planted in early spring through late June. These plants thrive in sandy soils, which are typical in the Panhandle with very little fertilization (approximately 0.04 lbs. of N on a 10 x 3-foot row). The downside to sweet potatoes is their exceptionally long growth season of 100 to 150 days after planting.
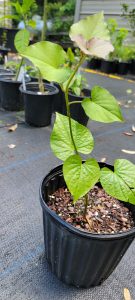
UF/IFAS photo: J. Criss
Pests
There are some pests which you’ll need to be wary when growing sweet potato. Most notably of these is the sweet potato weevil (Cylas formicarius). Even small amounts of damage from this insect can induce sweet potatoes with a foul taste. Control them through cultural practices such as turning your soil several months prior to planting, and adequate irrigation. Wireworms and beetle larvae are also concerns with sweet potatoes. Sample for grubs throughout the growing season, remove vegetation post harvest, and rotating your crops will keep these pests at bay. If all else fails, there are insecticidal options available. Consult your local extension agent to choose the appropriate option.
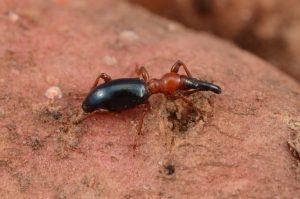
Sweet potato weevil UF/IFAS Photo: L. Buss
Time to Cure
Post harvest, sweet potatoes should be placed in a dark 85° room with 90% humidity for about two weeks. This is known as curing and will convert some of the starches of this vegetable to sugar making it slightly sweeter. Once the curing process is finished, store them in a cool, dry pantry at temperatures below 50°. This will keep them a viable staple in your pantry for several months.
The end result of all this work will be a food high in vitamin A, vitamin C and fiber that can be used for anything from home fries to pies.
To Sum Up
Growing your own vegetables in your own garden is a very rewarding experience. Sweet potatoes are an easy way to produce a lot of food for your family. If you’d like to know more about growing sweet potato, please consult these document. For more information on this topic or any other horticultural concern please contact your local U/IFAS extension office here.
by Molly Jameson | May 15, 2025
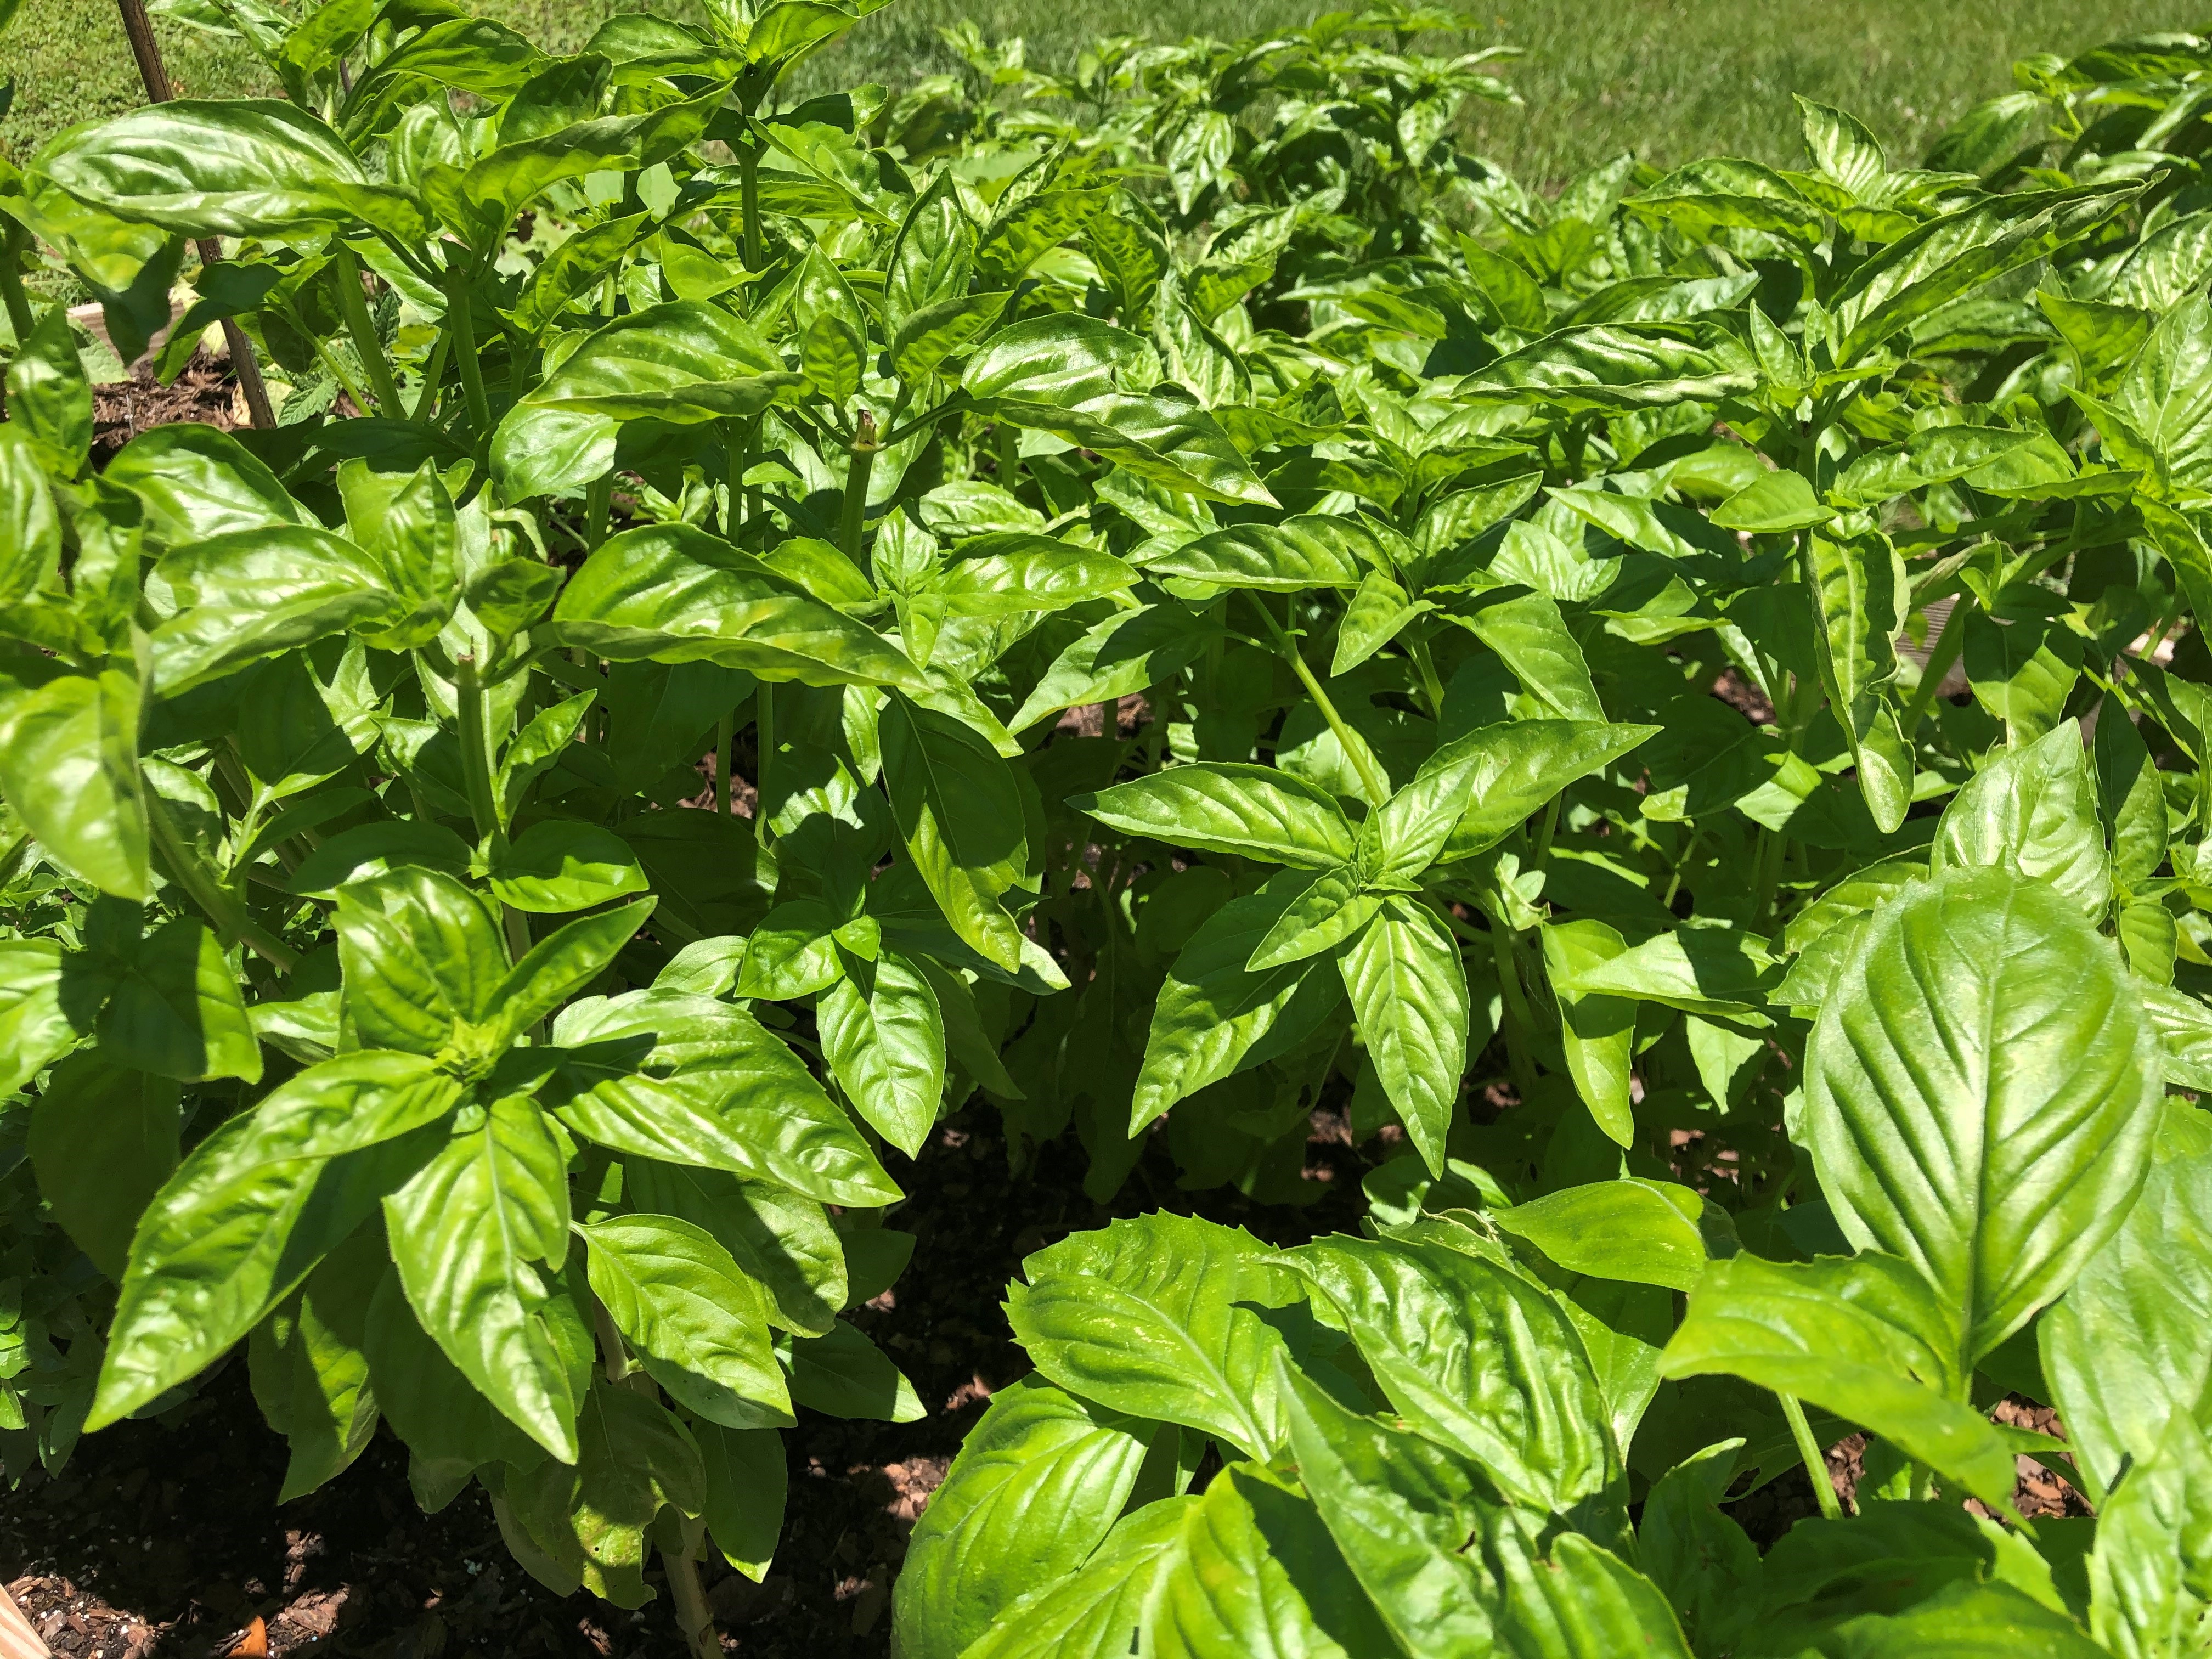
Sweet summer basil thrives in the heat – regular harvesting encourages bushier growth and delays flowering. Photo by Molly Jameson.
As the weather heats up, many spring vegetables begin to bolt, wilt, or shut down entirely. But for gardeners willing to shift gears, summer presents an opportunity to grow a new cast of crops that thrive in high temperatures, intense sun, and even occasional drought. Whether you’re growing in raised beds, in-ground rows, or large containers, these heat-loving vegetables are well-suited to our long summer season in the Panhandle.
Here are some of the best summer veggies to keep your garden productive when the thermometer climbs:
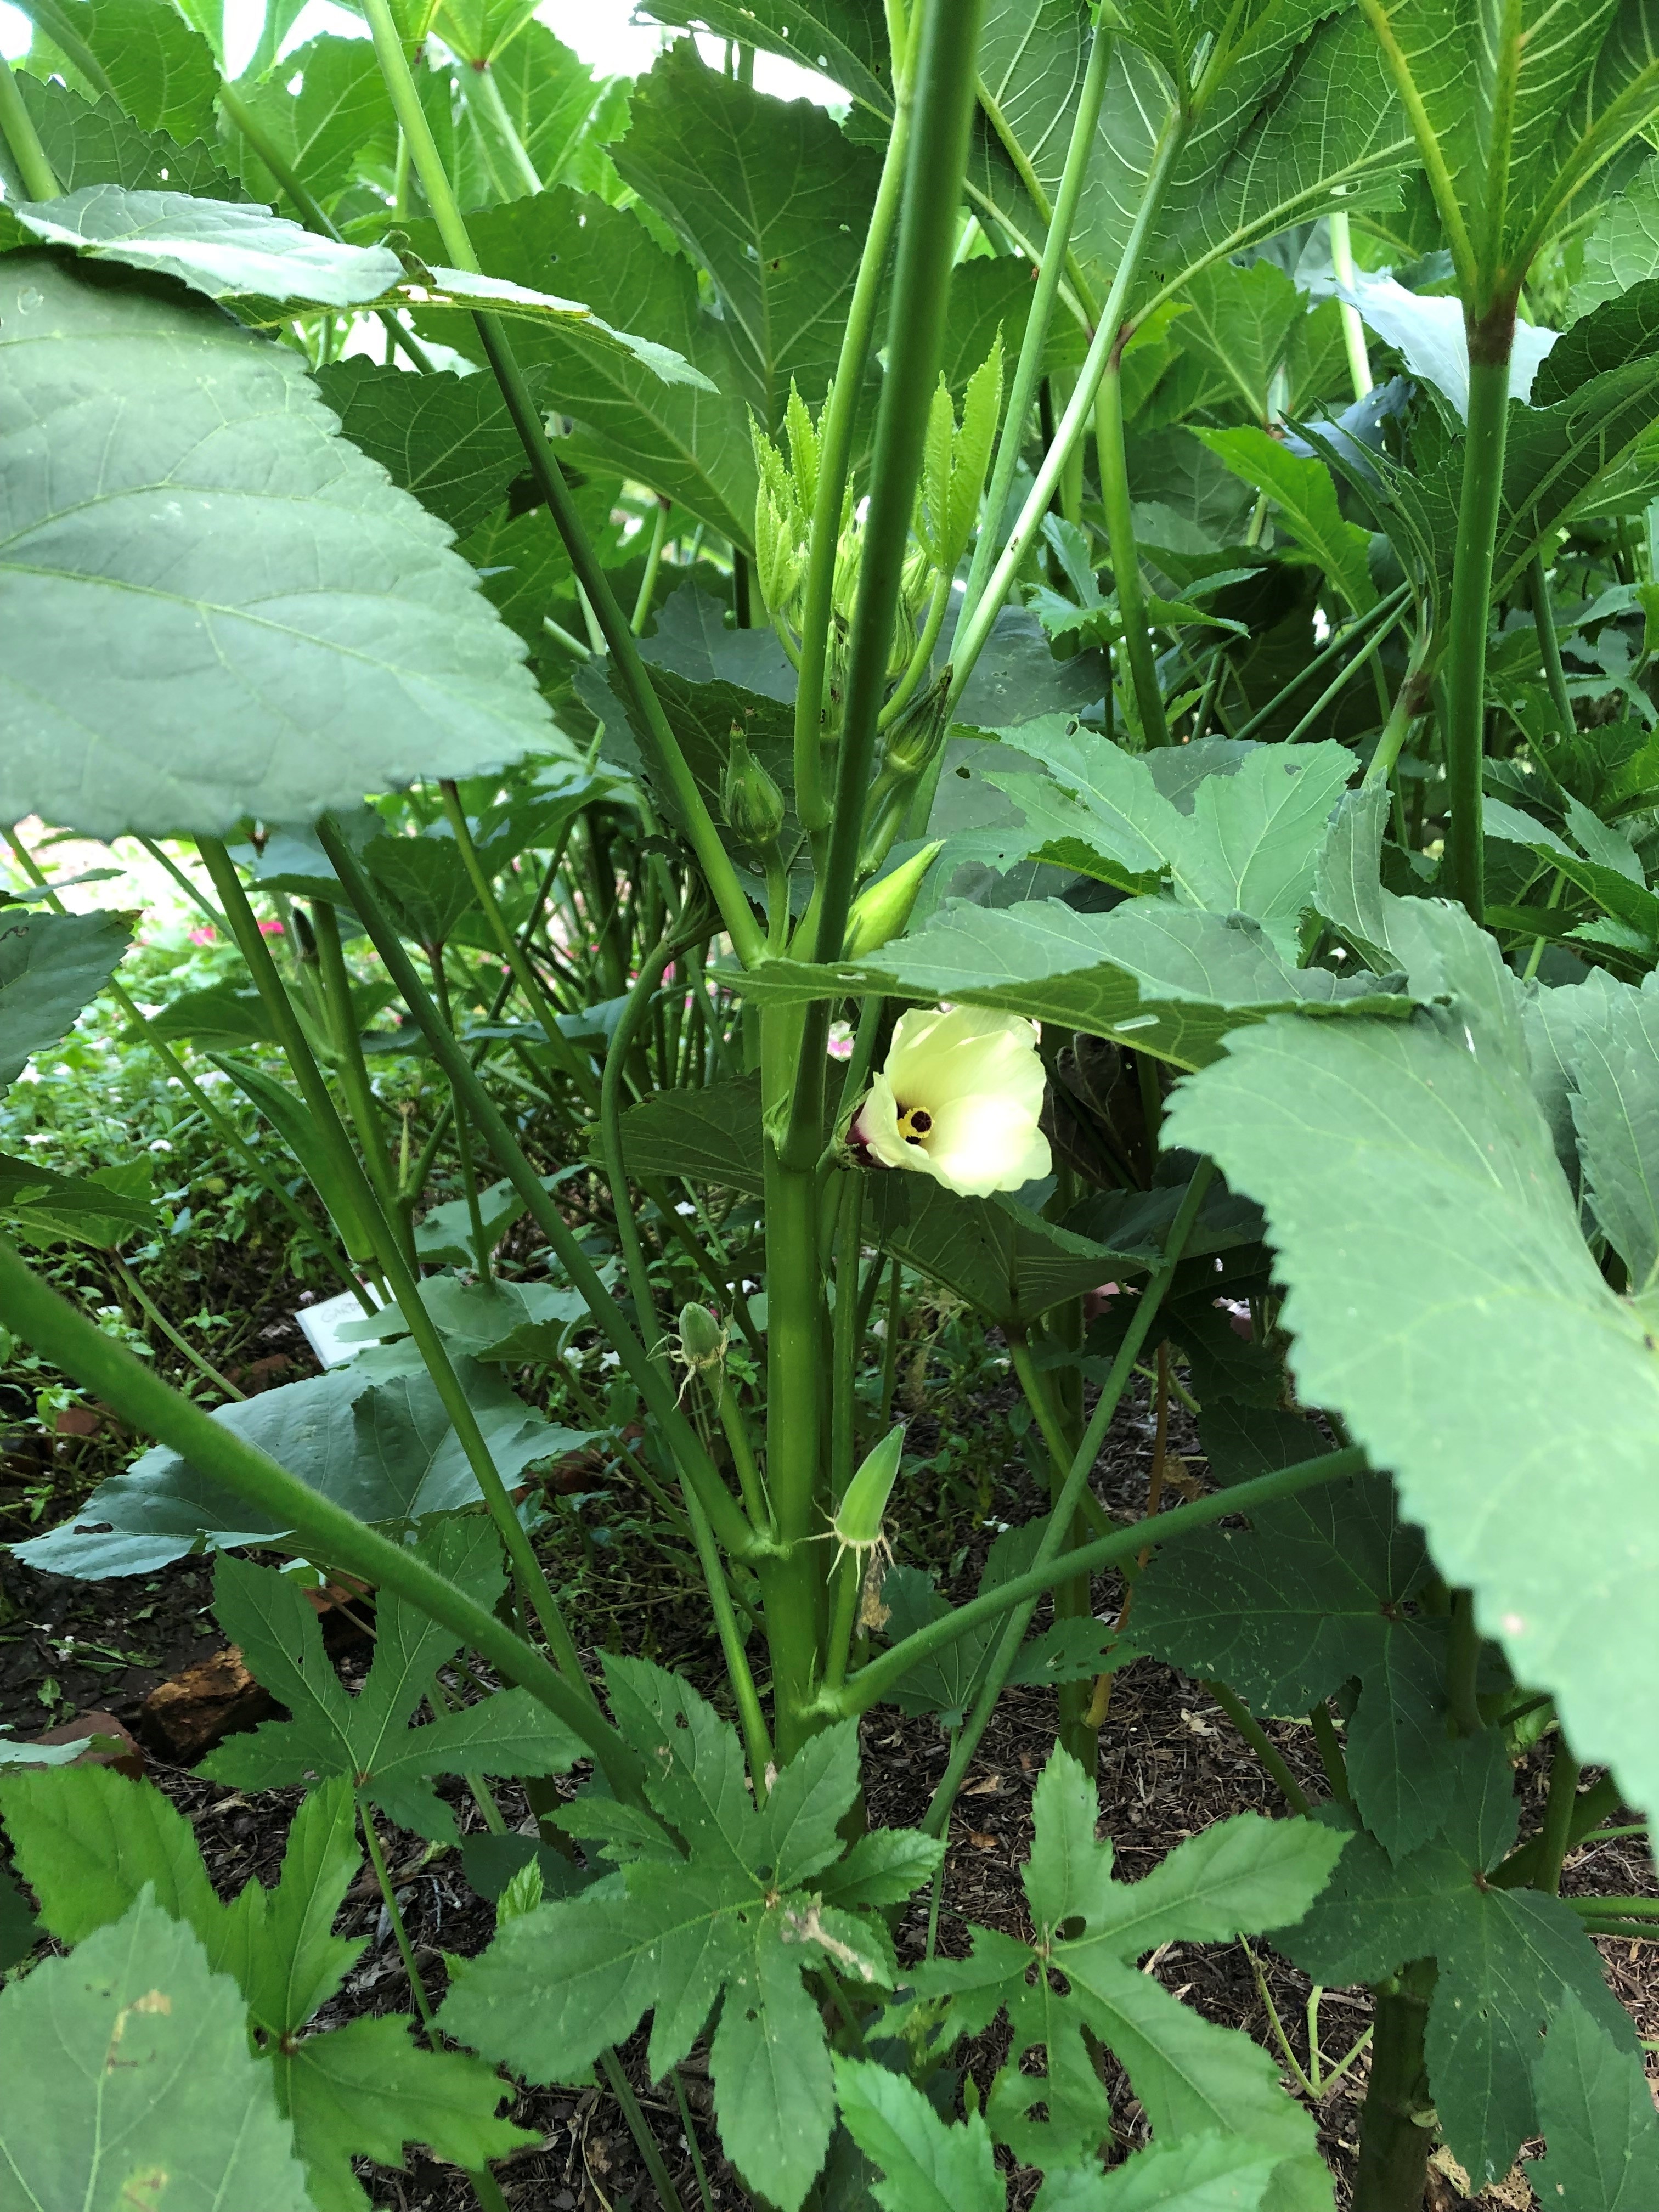
Okra

Okra thrives in the summer heat, producing edible pods just days after flowering. Photo by Molly Jameson.
Okra is a true warm-season crop that thrives in the heat and even tolerates periods of drought. For better germination, soak seeds in water for several hours or overnight before planting. Sow seeds directly into the garden once soil temperatures are at least 65°F and the danger of frost has passed – typically from late March through July. Plant seeds 1 inch deep and 4 to 6 inches apart in rows spaced 3 feet apart. Once seedlings are several inches tall, thin them so the remaining plants are spaced 1.5 to 2 feet apart. Pick pods when they’re two to four inches long, usually within a few days of flowering, to avoid tough, fibrous texture. Regular harvesting encourages more production throughout the summer.
Okra varieties well suited for our area include ‘Clemson Spineless’ and ‘Emerald,’ both known for their productivity and tender pods.
Southern Peas

‘Zipper Cream’ southern peas are heat-tolerant and productive, with easy-to-shell pods and creamy, mild flavor. Photo by Molly Jameson.
Also known as cowpeas or field peas, southern peas are a staple crop across the South for good reason – they tolerate heat, sandy soil, and inconsistent rain. Sow seeds directly in June through August, spacing them about 2 to 4 inches apart in rows 18 to 30 inches apart, depending on the variety. Southern peas are nitrogen fixers, so they can improve soil fertility over time.
Popular southern pea varieties include ‘Pinkeye Purple Hull,’ ‘California Black-eyed,’ ‘Creel Crowder,’ and ‘Zipper Cream.’ These plants are also relatively pest- and disease-resistant, making them a great low-maintenance option.
Sweet Potatoes
Sweet potatoes are grown from slips – vine cuttings taken from sprouted tubers. These slips should be planted after the danger of frost has passed and soil temperatures are consistently above 65°F, typically April through June. Space slips about 12 to 18 inches apart in loose, well-drained soil. While mounding isn’t always necessary, creating raised ridges or planting in raised beds can help promote tuber development and improve drainage, especially in heavier or poorly drained soils. Sweet potatoes require a long growing season – around 90 to 120 days – but they produce abundantly and require minimal care once established. Their vines also form a dense ground cover that suppresses weeds and reduces soil erosion.
Two reliable sweet potato varieties for Florida gardens are ‘Centennial’ and ‘Beauregard,’ both known for their sweet flavor, high yields, and adaptability to southern growing conditions.
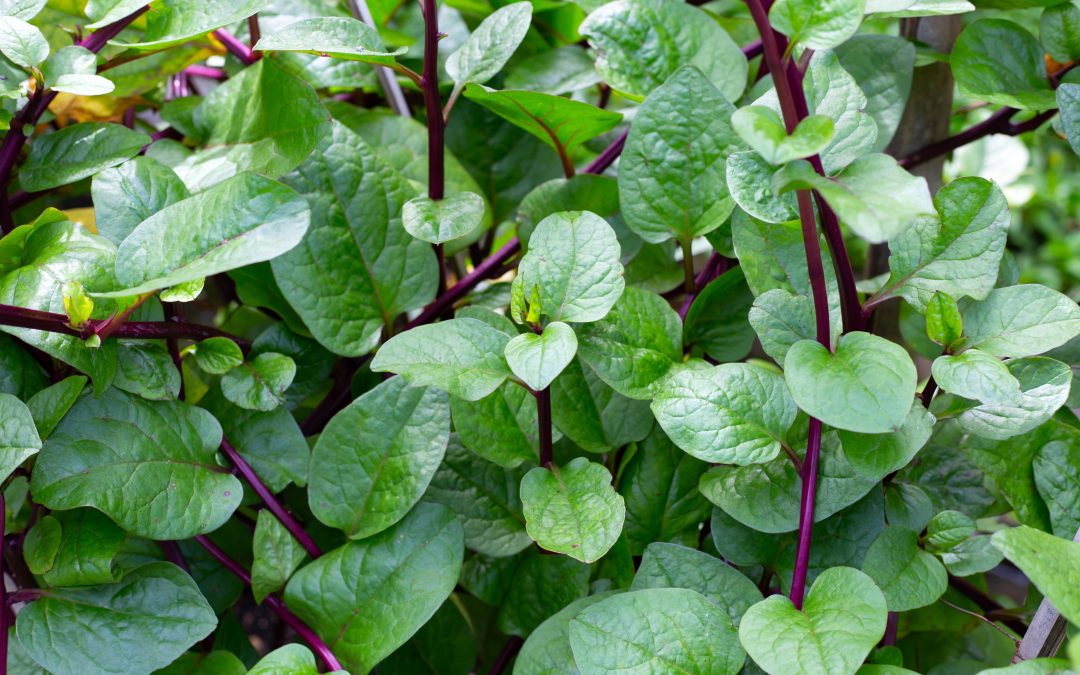
Malabar Spinach
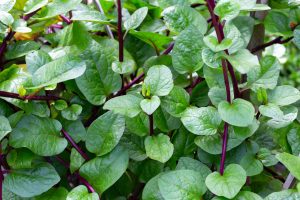
Red-stemmed Malabar spinach thrives in summer heat, producing tender, edible leaves on vigorous climbing vines. Photo by Bowonpat, Adobe Stock.
Malabar spinach is not a true spinach, but it provides tender, edible leaves throughout the hot months when traditional greens fail. It grows as a climbing vine, so give it a trellis or support to climb. Sow seeds directly into the garden or transplant young seedlings from mid-April through early June. This plant enjoys both sun and partial shade, and its thick, glossy leaves can be harvested regularly for salads or to thicken soups and stews. Just like regular spinach, frequent picking promotes new growth.
Both red-stemmed and green-stemmed Malabar spinach types are available, with the red-stemmed variety more commonly grown for its ornamental appeal.
Basil
Basil is a heat-tolerant herb that loves full sun and thrives in the warmth of summer. It can be direct-seeded or transplanted once the weather settles into consistent warmth, typically March through May in North Florida. Space plants about 10 to 12 inches apart and harvest often to prevent flowering and promote bushier growth.
In addition to classic sweet basil, try Thai basil or lemon basil for unique flavors that hold up in hot dishes and drinks alike.
Peppers
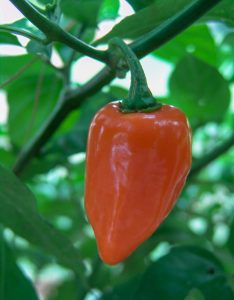
Habanero plants yield intensely hot peppers with a distinct tropical flavor. Photo by Gerald Holmes, Strawberry Center, Cal Poly San Luis Obispo, Bugwood.org.
Peppers – especially hot varieties – are well-adapted to Florida summers, although they benefit from a bit of afternoon shade during the most intense heat. Start with healthy transplants in spring or early summer, spacing them 18 to 24 inches apart. Keep the soil consistently moist and apply mulch to help retain moisture.
For sweet pepper options, try ‘Corno di Toro’ or ‘Sweet Banana.’ For heat lovers, datils, jalapeños, and habaneros all perform well in warm conditions. Just note that some varieties may slow production during extreme heat, then pick up again as temperatures moderate.
Take a Break with a Cover Crop
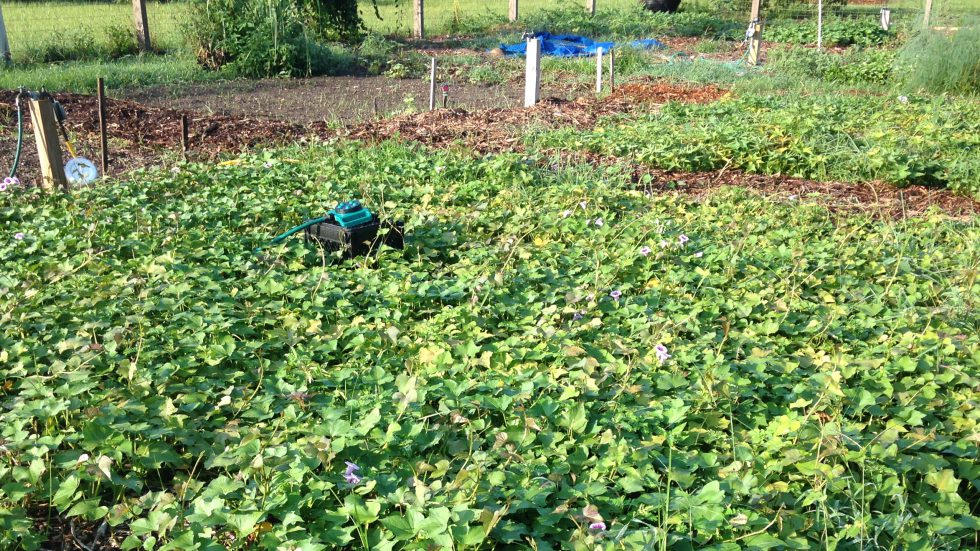
If summer gardening starts to feel overwhelming, you don’t have to plant every square foot. Consider giving part of your garden a seasonal rest with a warm-season cover crop like cowpeas, velvet beans, buckwheat, or even sweet potatoes. These vigorous growers help suppress weeds, improve soil structure, and add organic matter – and in the case of legumes like cowpeas and velvet beans, they also fix nitrogen to benefit future crops. Sweet potatoes, while edible, can also serve double duty as a weed-smothering ground cover.

Sweet potato vines form a dense summer ground cover that suppresses weeds and protects the soil. Photo by Janis Piotrowski.
For a lower-maintenance splash of color, consider heat-loving flowers like sunflowers, French marigolds, or zinnias – all of which attract pollinators and beneficial insects while brightening up your garden space.
Don’t let the summer heat bring your garden to a standstill! By choosing vegetables that are naturally adapted to our hot, humid conditions, you can keep your garden thriving and productive all season long.