Video: Cantaloupe in the Home Garden
Learn a little about cantaloupe that is growing in the late spring garden. Beth Bolles with UF IFAS Extension in Escambia County shares experience from her backyard garden.

Learn a little about cantaloupe that is growing in the late spring garden. Beth Bolles with UF IFAS Extension in Escambia County shares experience from her backyard garden.
Whether it’s the warm or cool season of the year, vegetable gardening is as popular activity as any. In writing articles, I usually discuss best management practices on a backyard garden scale. But, what if you don’t have much of a backyard?
Many Floridians live in apartments, condominiums, mobile home parks, or simply homes built on small parcel lots with little open gardening space. This doesn’t mean you can’t grow vegetables. You just have to be a bit creative and that’s when the fun starts. In addition to being an enjoyable activity, mini vegetable gardening can be practical and ornamental. Containers can fit almost anywhere in the landscape, such as porches, balconies, roof tops and that spot on your property where nothing seems to fit.
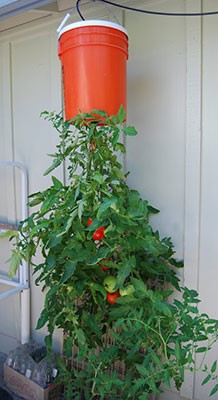
Tomato Bucket Gardening. Photo courtesy UF/IFAS Gardening Solutions.
There’s practically no limit to the kinds of containers one can use for mini vegetable gardening. Some examples are pots and pans, milk jugs, hollow concrete blocks, bushel baskets, trash cans, barrels, buckets and even plastics bags and “to go” food containers. As long as the container will hold soil and let excess water drain, you’re good to garden.
So, what can I use as a growing medium? Traditional garden soil will work fine. Mixing garden soil 1:1 with mushroom compost is also acceptable. Adding lightweight components to the soil mixture such as perlite or vermiculite will make it easier if you need move the container from time to time. This will also help with drainage. Sprinkling a handful of 6-6-6 or 8-8-8 fertilizer and gardening lime into the mixture will give plants much needed nutrients for development.
This growing medium will not require fertilizer applications very often. A small amount every two to three weeks should be adequate for most vegetable plants. Whether the fertilizer you choose is solution or dry form, be sure to use small amounts and water the product thoroughly into the root zone. A heavy application of fertilizer may cause plant burn.
So what vegetable crops grow best in containers? Most any crop will do well in containers. Some examples are tomato, pepper, eggplant, collard, cabbage, turnip, mustard, strawberry, broccoli, cauliflower and many herbs. Container gardening is a fun and rewarding hobby. You’ll enjoy both the activity and the delicious produce you’ve grown.
For more information contact your local county extension office.
Supporting information for this article was provided by Extension’s Emeritus Vegetable Specialist Jim Stephens of UF/IFAS Extension. More information can be found at this website: http://gardeningsolutions.ifas.ufl.edu/plants/edibles/vegetables/growing-vegetables-in-containers.html
UF/IFAS Extension is an Equal Opportunity Institution.

White tailed deer. Photo credit: Rebekah D. Wallace University of Georgia bugwood.org.
There doesn’t seem to be any shortage of deer in the panhandle, especially when it comes to them strolling in my yard looking for something tasty to eat. My vegetable garden suffered repeated assaults by hungry deer this past fall and winter. The garlic and cayenne pepper-based products only worked for a few days when freshly applied. I had to try something new this spring.
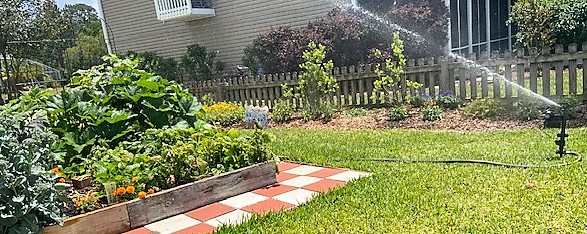
And my new method has worked. I purchased a motion activated high impact sprinkler that can be set to activate day or night. It has worked like a charm! There are various vendors but I purchased mine through a hardware store online for about $70. I put a splitter on my closest outdoor spigot and have a dedicated hose running to the sprinkler. This allows me to also have a regular hose for watering attached to the spigot. The hose must be turned on all the time. One problem that I am hoping to avoid this summer is that the water in the hose may get too hot in the summer heat and split the hose, so I am looking to maybe trench to keep the hose and the water inside a bit cooler.
Motion activated impact sprinkler protecting the vegetable garden from ravenous deer. Photo credit: Mary Salinas, UF/IFAS Extension.
You can also choose plants that deer do not like to eat such as live oak, dogwood, muhly grass, coneflower and black-eyed Susan. However, keep in mind that when food is scarce deer will forage on plants that they normally would not eat. Southern magnolia is considered quite deer resistant but the one I planted this past winter was mostly defoliated by deer.
The University of Florida has a publication with many other strategies on controlling deer: Coping with Deer Damage in Florida.
It’s been a challenging spring in this guy’s garden! Despite getting the normal early start required for successful gardening in Florida, I’ve been affected by Bacterial Leaf Spot stunting my tomatoes, cutworms that reduced my watermelon plantings by half, and an eternal test of my patience in the form of a dog that seems to think my raised beds are merely a shortcut to a destination further out in the yard. My latest adversary is the most potentially destructive yet, an outbreak of Southern Armyworm (Spodoptera eridania).
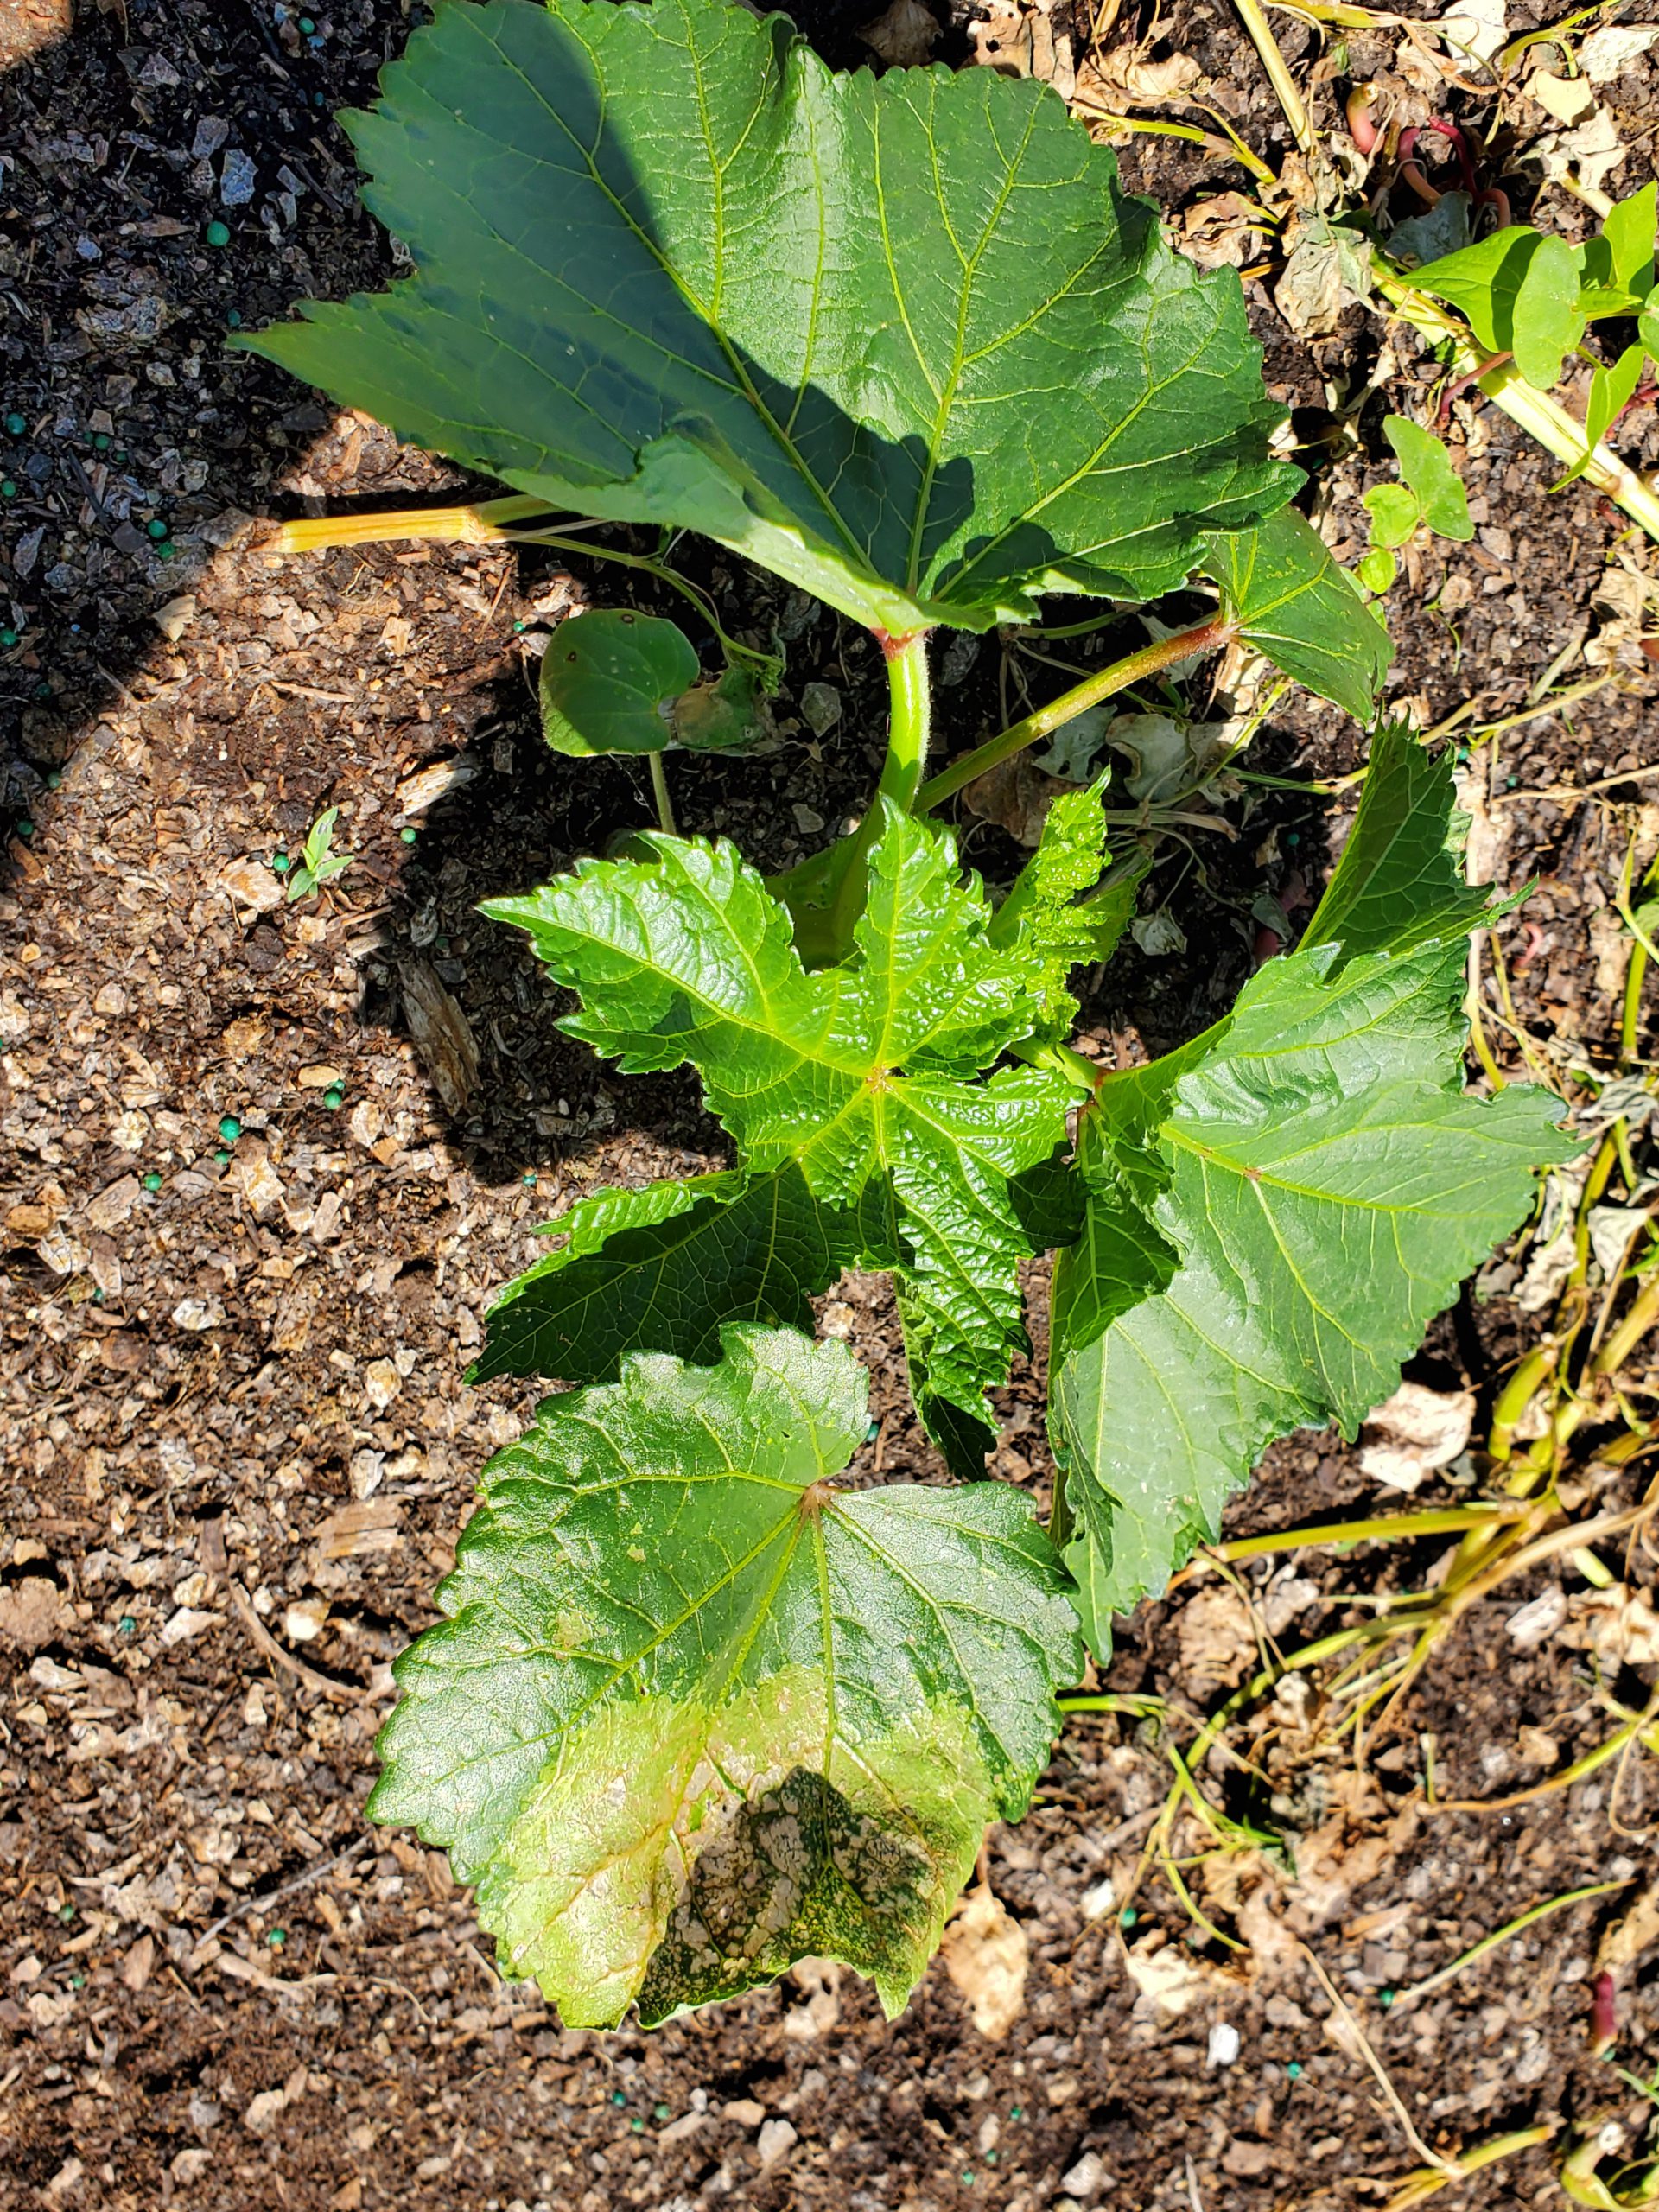
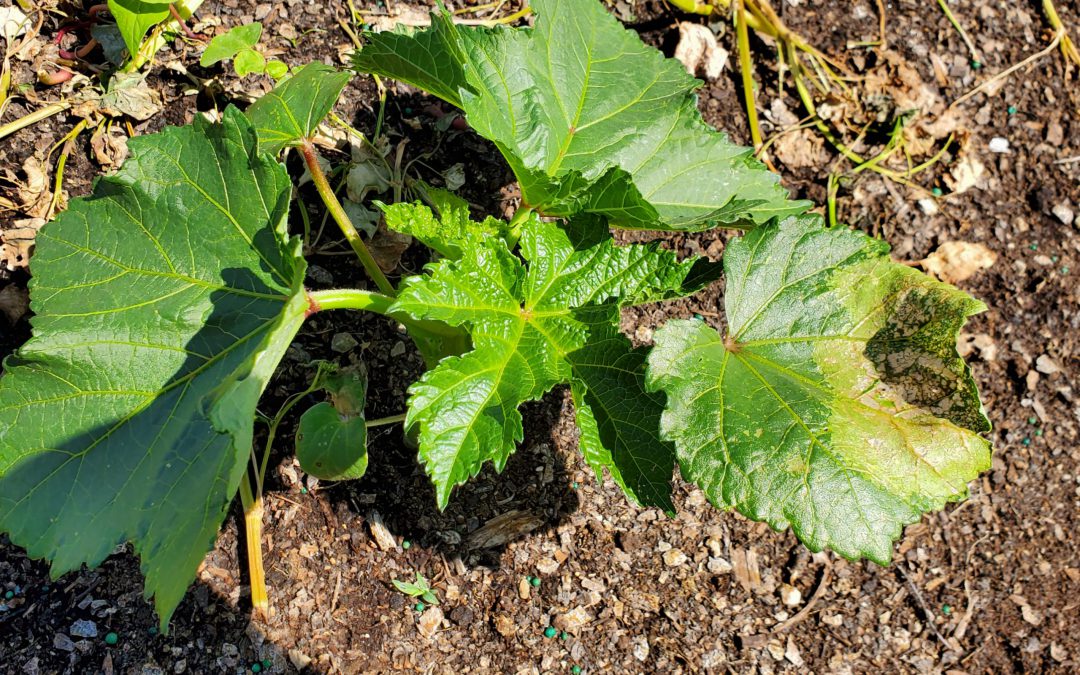
Early Southern Armyworm damage on Okra seedlings. Photo courtesy of the author.
Unlike some serious garden pests that wait until the heat of summer to emerge, Southern Armyworms begin appearing in spring gardens around the end of April. Adult moths can survive mildly cold weather and venture into the Panhandle as soon as warmer spring weather arrives. Once the adult moths arrive, egg masses are then laid on the undersides of leaves and hatch in a little under a week. Once loosed upon the world, Southern Armyworm larvae (caterpillars) become indiscriminate, voracious feeders and congregate in extremely large numbers, allowing them to destroy small, developing garden vegetable plants in a manner of days. Young larvae feed on the undersides of leaves and leave little but a skeleton. As larvae grow larger, they become solitary and begin to bore into fruit. Once they’ve eaten the good stuff (leaves and fruit), large larvae turn to branches and even plant stems!
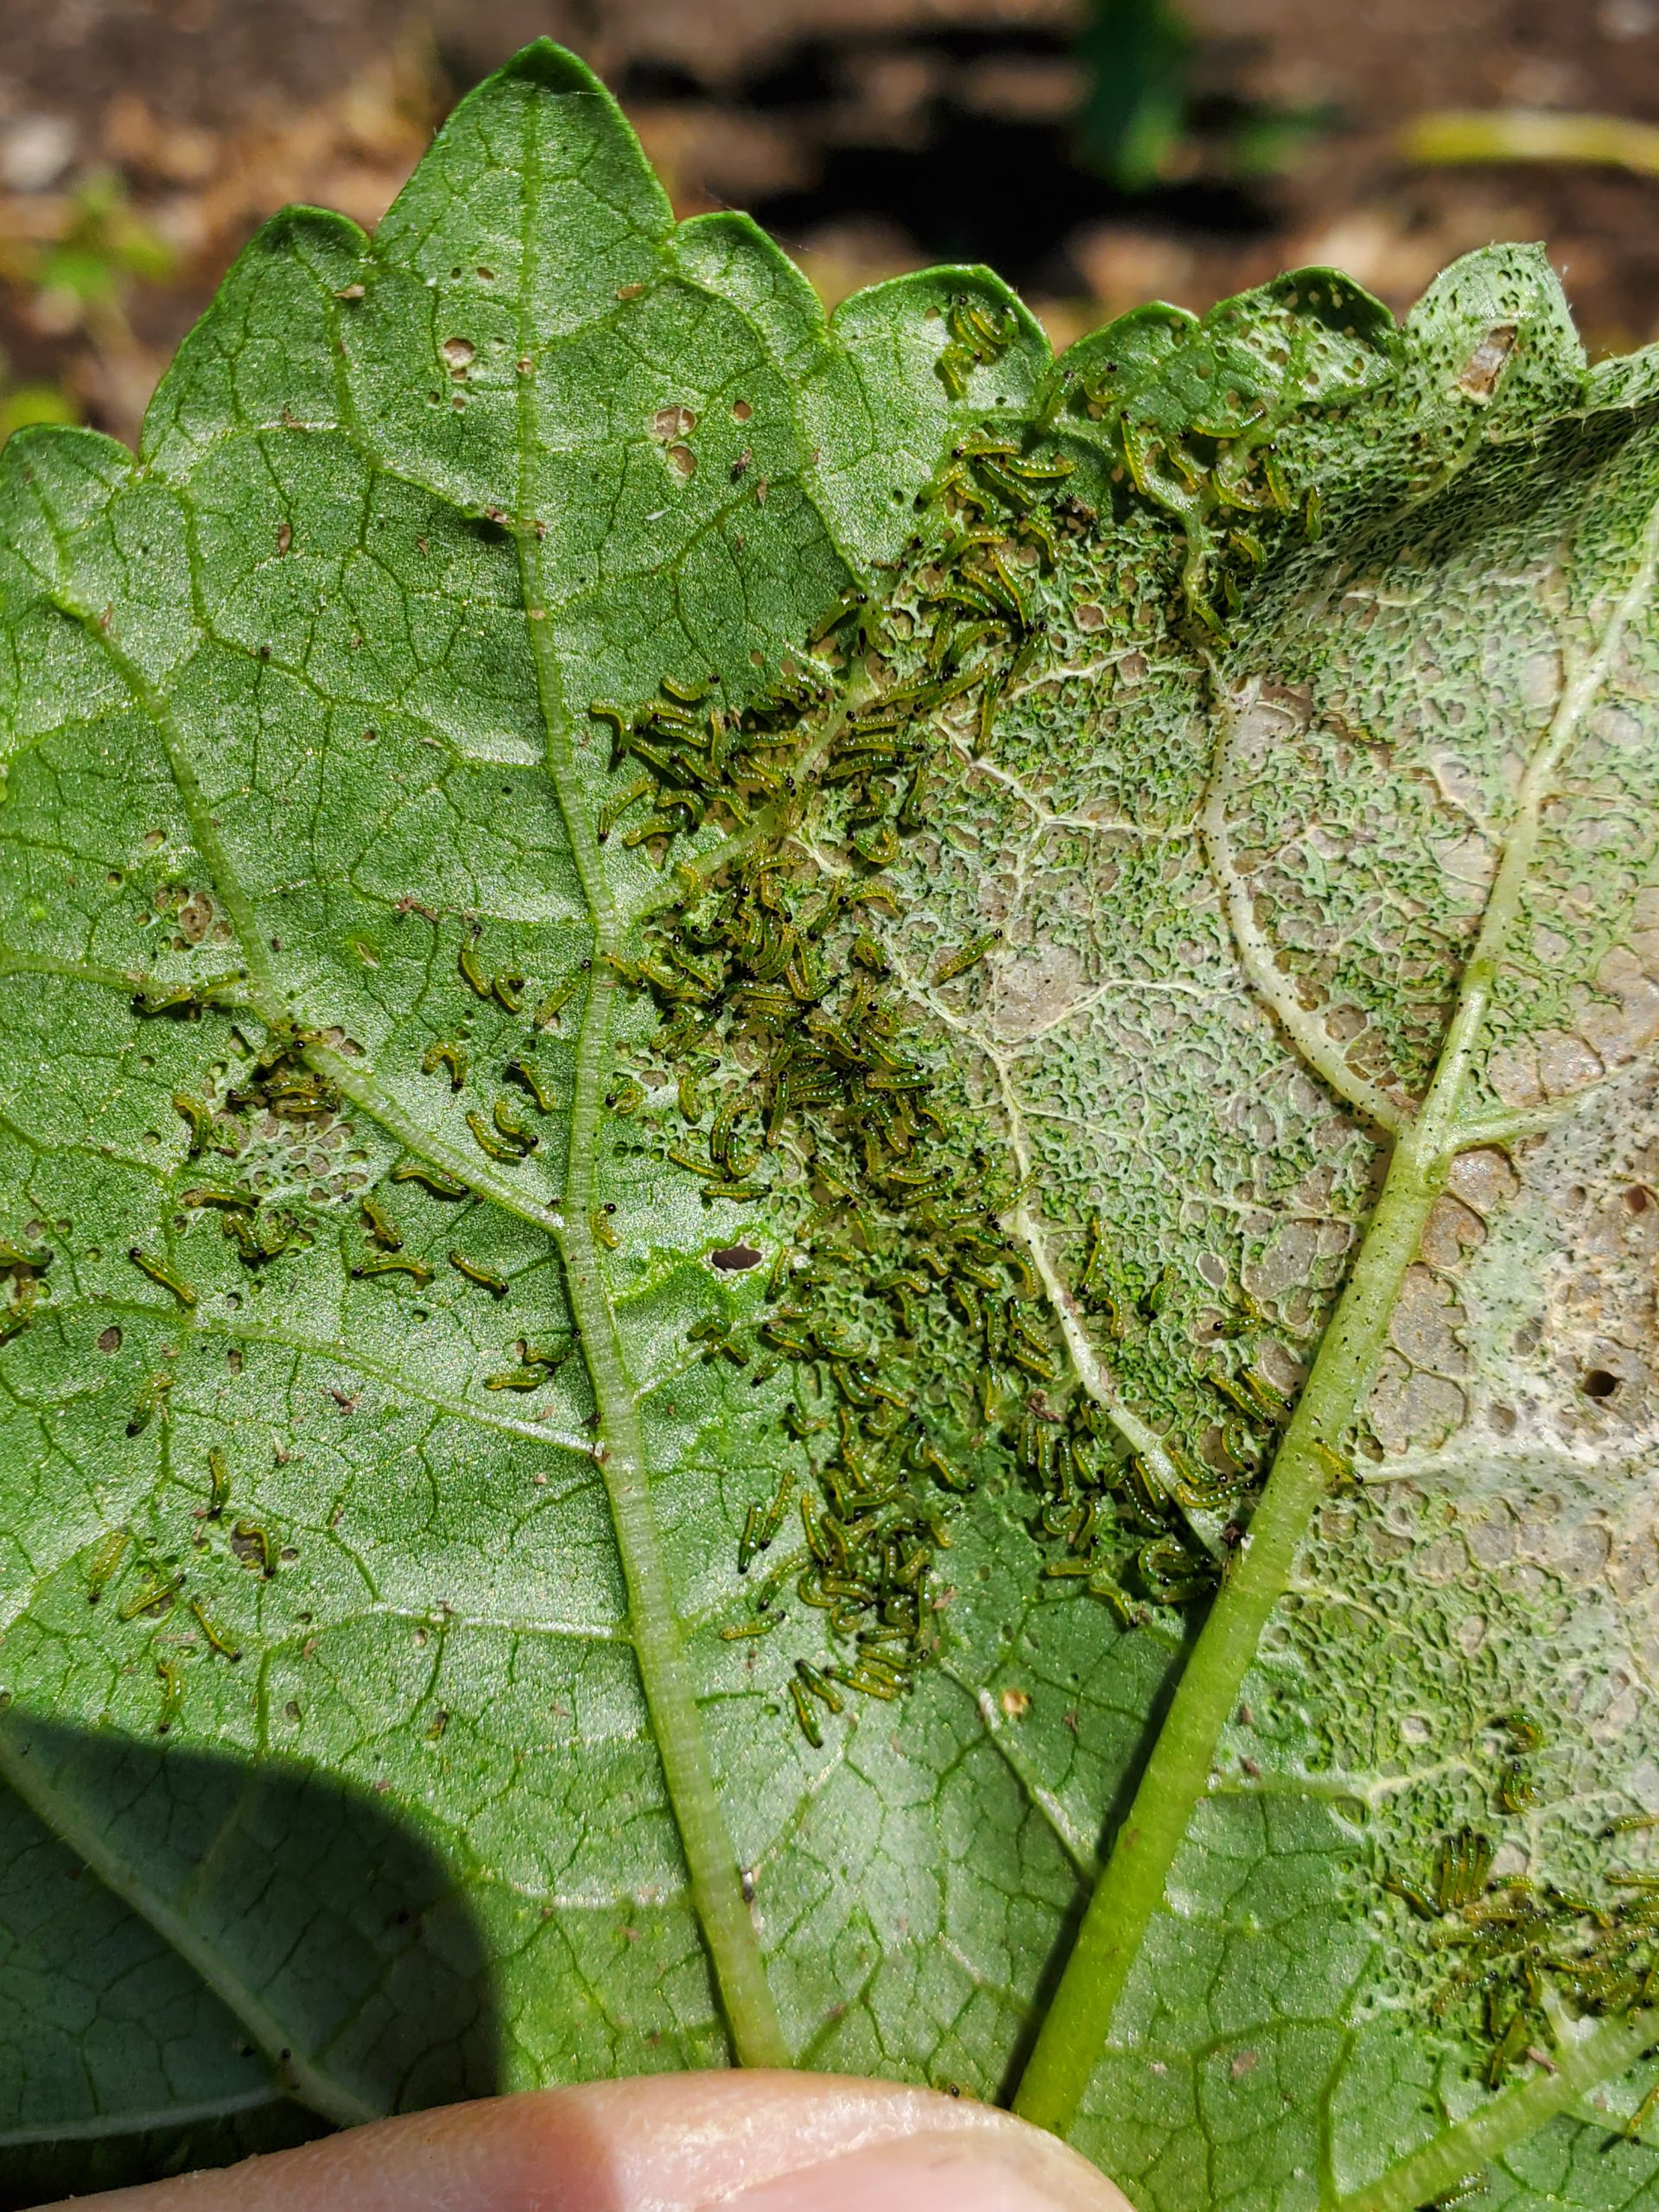
Southern Armyworm larvae feeding on Okra leaves. Photo courtesy of the author.
The good news for gardeners is that Southern Armyworm, and most other caterpillar pests, are easily controlled if outbreaks are caught early. Scouting is critical for early detection and good control. Armyworm damage generally appears from above as brownish-gray sections of affected leaves with a yellowish ring surrounding these sections, this ring indicates the current feeding zone. Affected areas will appear transparent and “lacy” due to the skeletonizing effects of larval feeding. If you see leaves that look “off” in the manner just described, check underneath for the presence of a horde of tiny greenish worms.
If found in this early stage, an application of Bacillus thuringiensis (Bt), a biological pesticide utilizing a bacterium destructive to caterpillars, is extremely effective. Bt has to be ingested by caterpillars with leaf tissue to work; thorough coverage of leaf surfaces is critical for maximum control. I generally follow up with a sequential application of Bt a day later to ensure that I achieved good coverage of the plant surfaces and, therefore, good control. Unfortunately, Bt is much less effective on older larvae. Infestations not caught early require harsher chemistries like carbamates, pyrethroids and organophosphates for adequate control.
Don’t let armyworms or other caterpillar pests destroy your garden, get out there daily and scout! You have a short window for easy caterpillar control with a harmless to people, natural product, Bt. Don’t waste it!
For more information about Southern Armyworm, other caterpillar pests, Bt, or any other horticultural topic, please consult your local UF/IFAS Extension Agent. Happy Gardening!
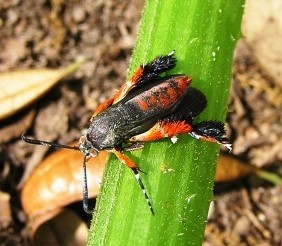
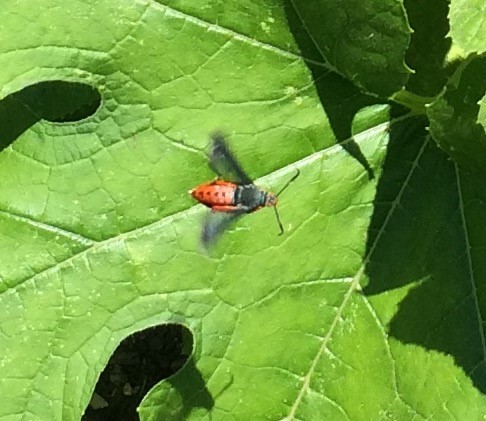
Adult squash vine borer moths are easy to identify, as they are reddish orange and have black dots along their upper abdomen. Photo by Theresa Friday.
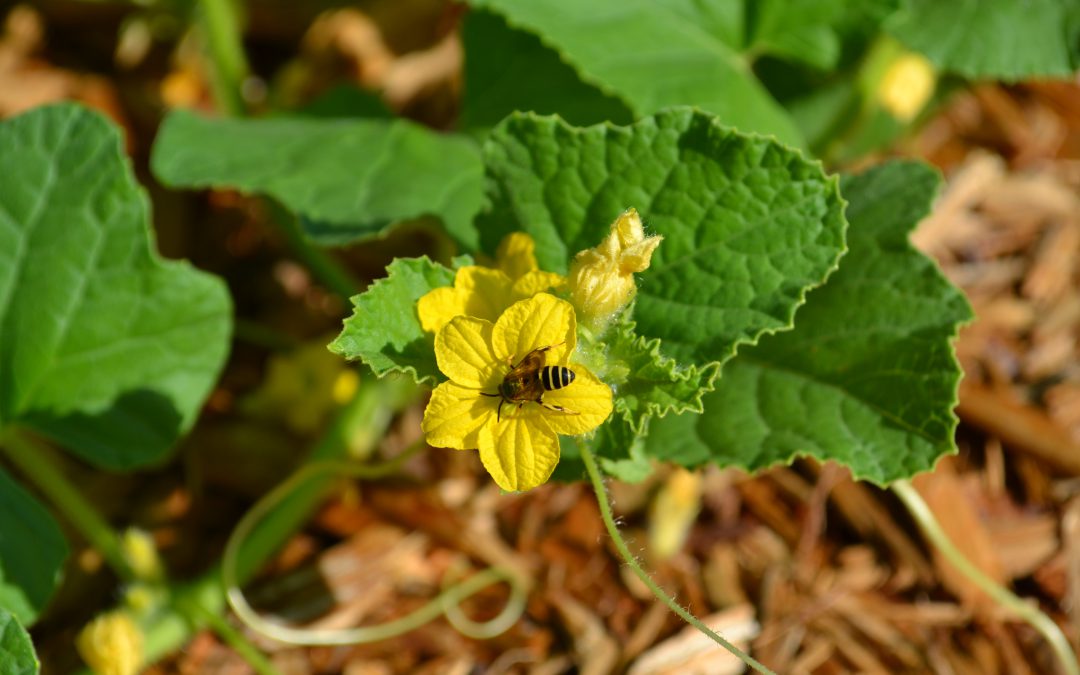
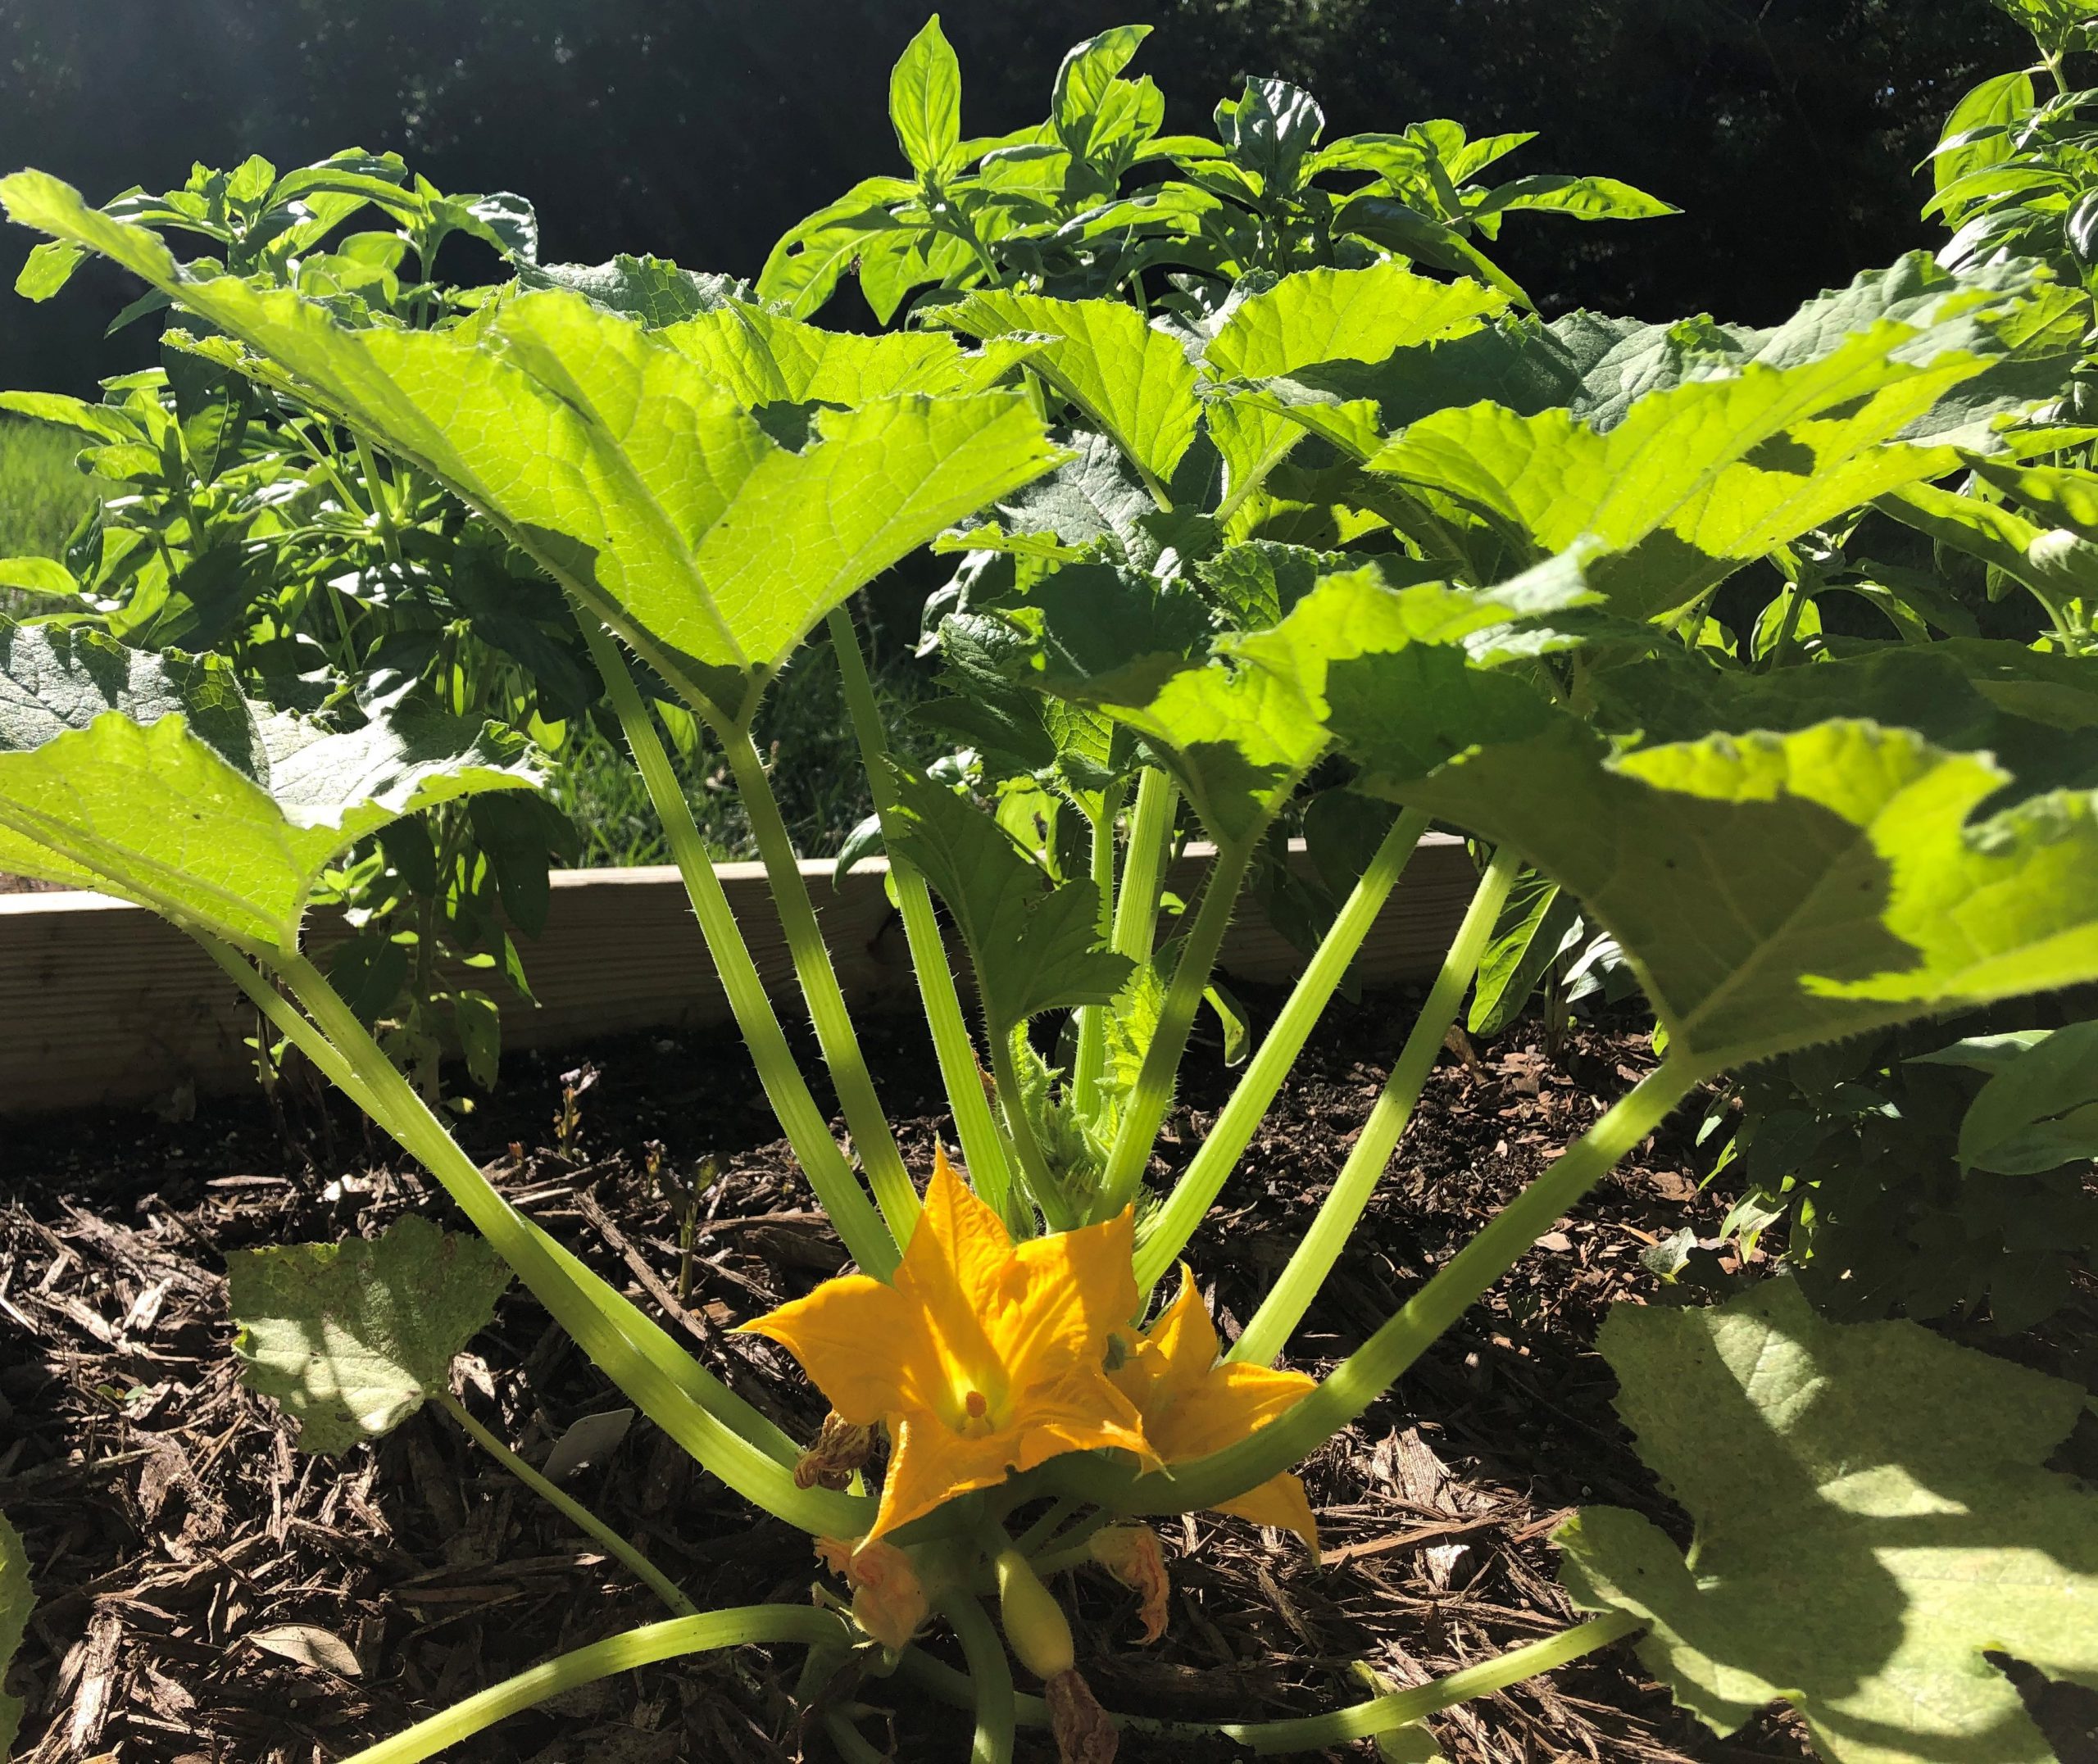
It’s been a few weeks, and your squash seedlings are really starting to take off. The days are blushing with summer warmth and the flicker of lightning bugs in the evening indicates the cool nip of spring is winding down. In your garden, this has culminated in lengthening cucurbit stems that now show off a beautiful bright shade of green. Squash blossoms appear overnight and begin to expand and take shape, nestling themselves under the backdrop of slightly darker green squash leaves.
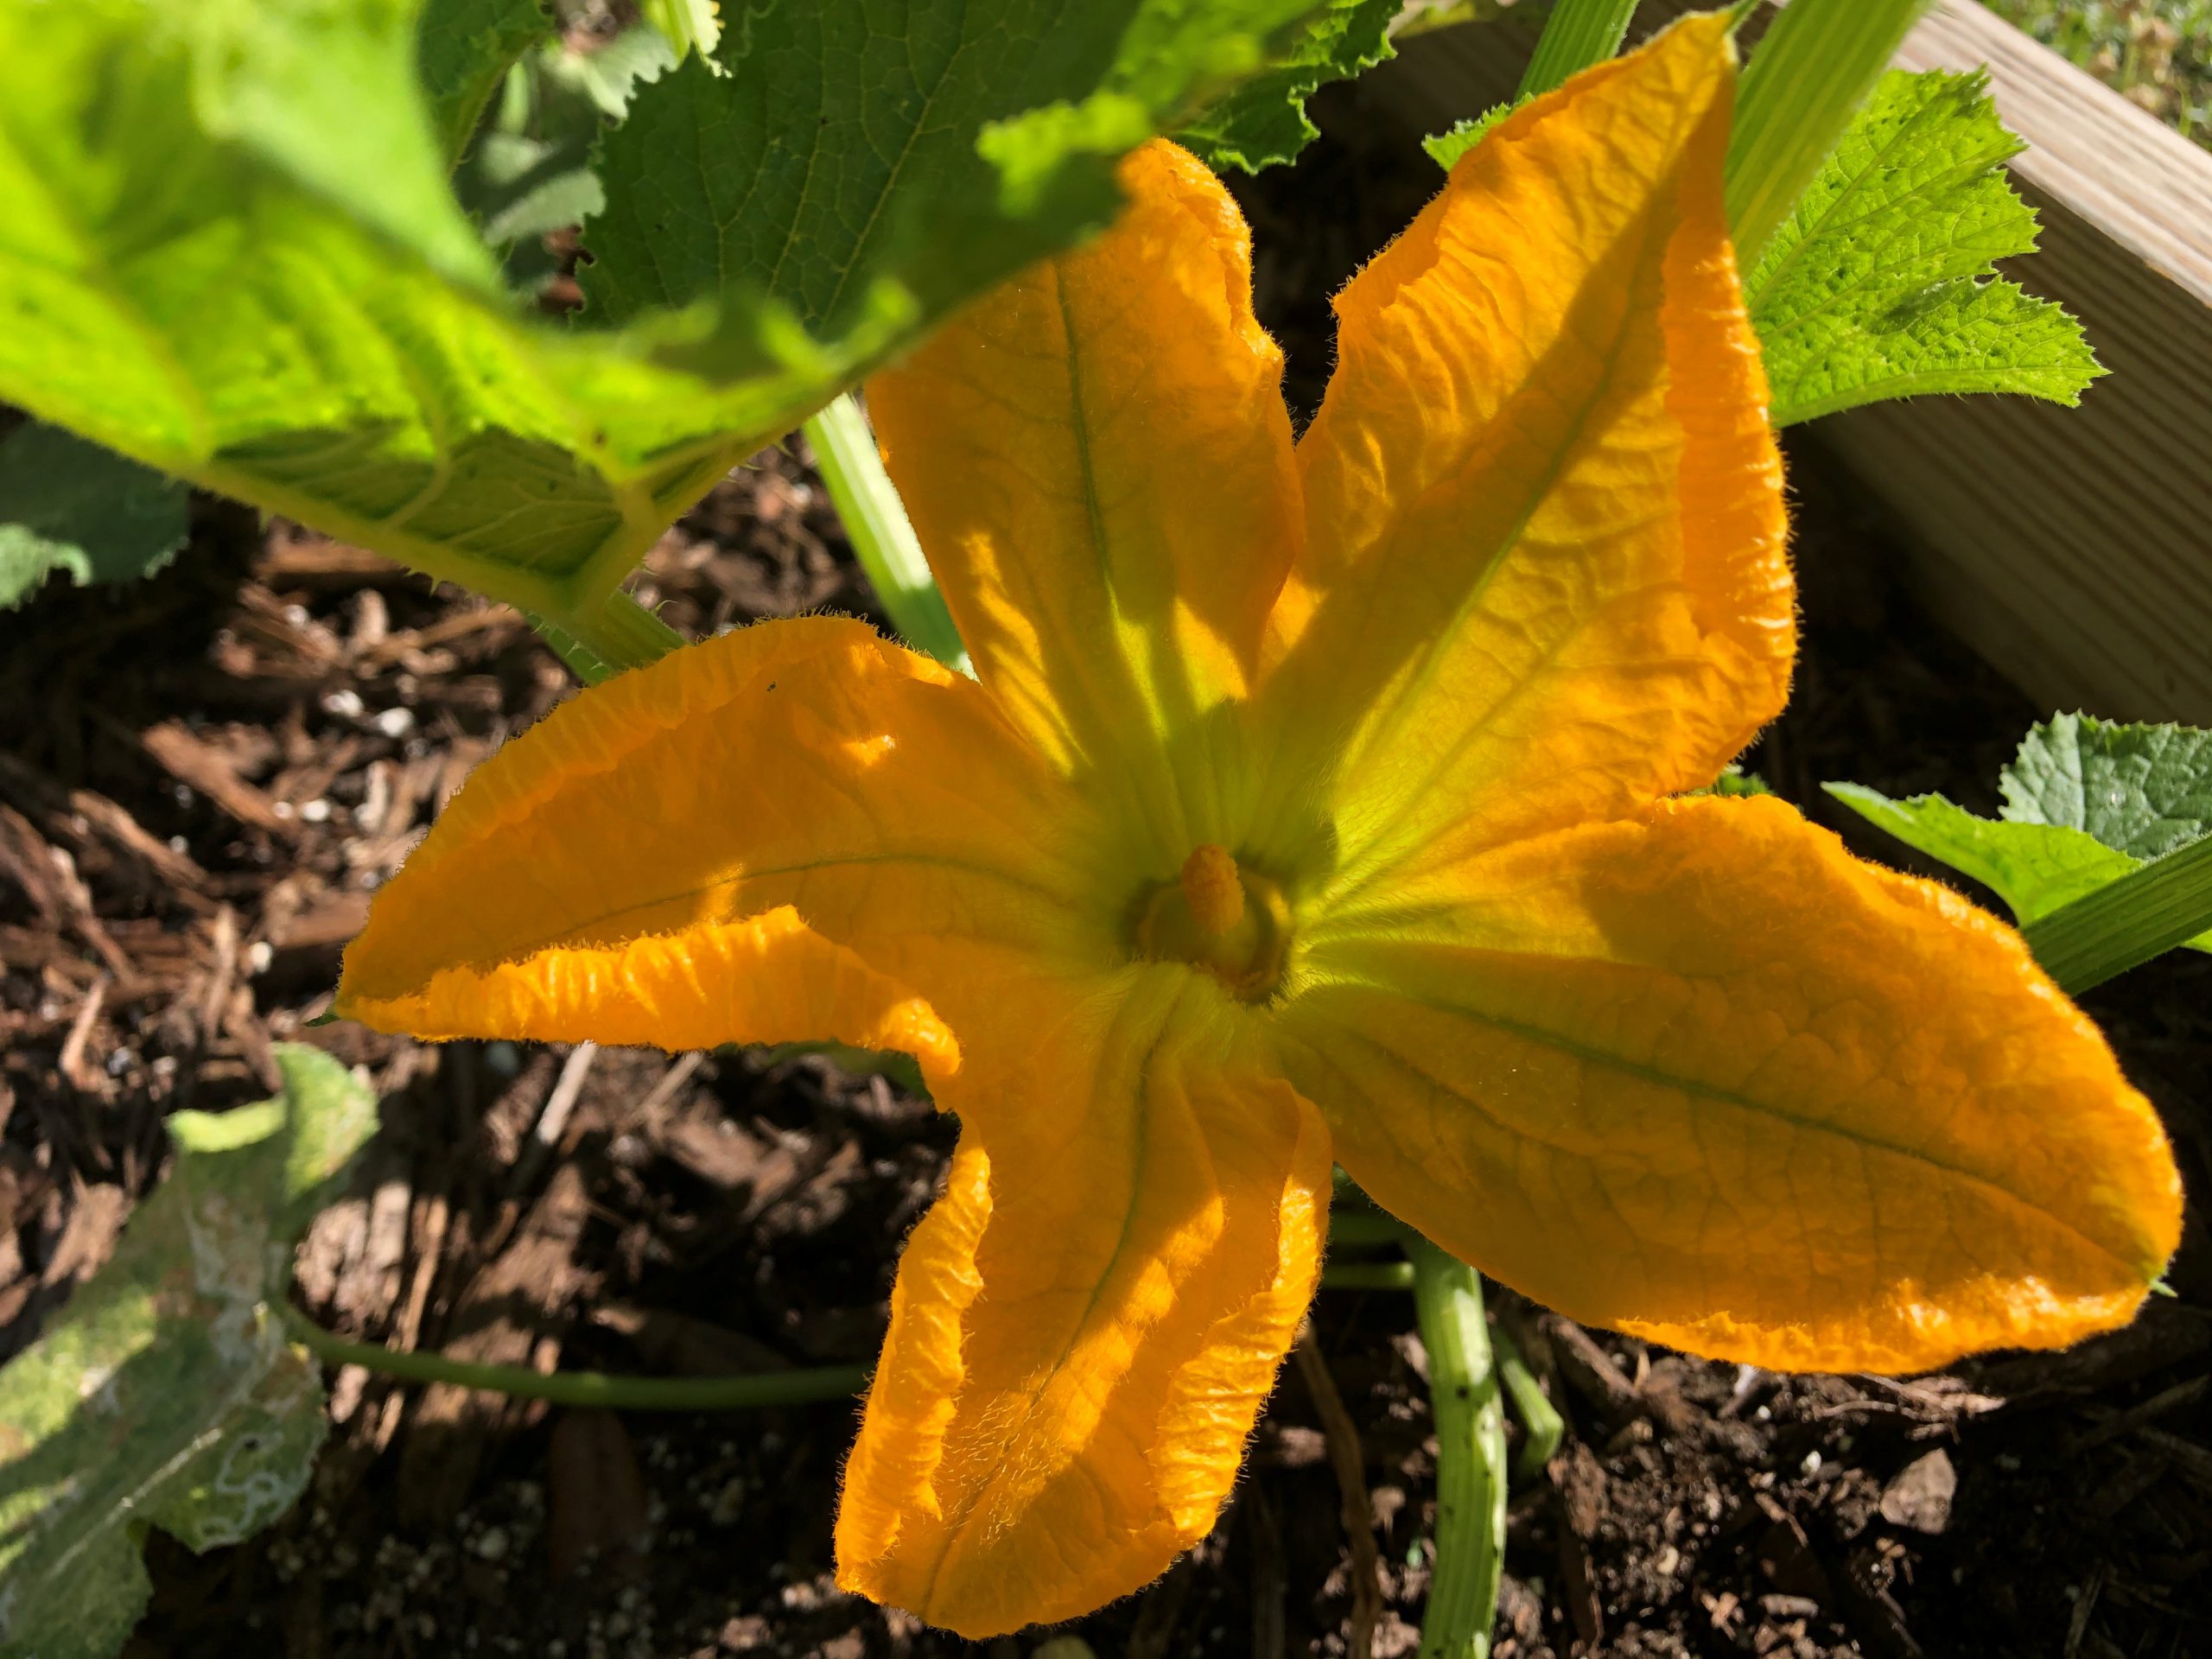
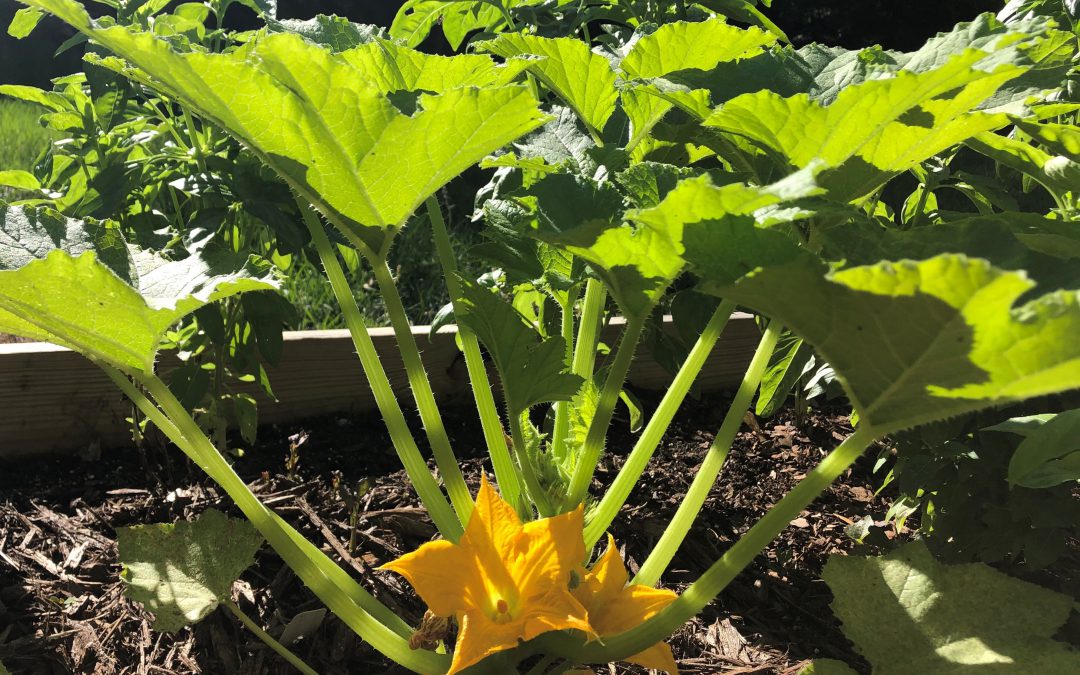
Black beauty zucchini blossom in the morning sun. Photo by Molly Jameson.
A few more nights go by, giving you a chance to explore some recipes. Maybe it’s time to fire up the grill and make grilled summer squash, sprinkled with fresh mint or thyme. Perhaps you’ll make a summer squash pesto pizza. Afterall, your basil is ready for its first harvest. If you are ahead of the game, you might even have some vine-ripening tomatoes that would pair nicely with squash in a creamy pasta sauce.
Your culinary dreams are running wild when you start to notice the wilt. You panic, and think you’ve forgotten to water the garden. But no, you’ve given your garden a consistent dose of water every morning. Your basil looks fine. Your tomatoes look great. What is going on?
Squash vine borer adult in flight. Photo by Molly Jameson.
You have fallen prey to the dreaded squash vine borer (Melittia cucurbitae).
These garden pests rely strictly on plant species within the genus Cucurbita. If the squash vine borer didn’t wreak such havoc in your summer garden, you might find its striking red and black features fascinating. Unfortunately, if your squash plants are wilting unexpectedly, this daytime roaming moth may have already done its damage.
Adults lay single reddish-brown, millimeter-long eggs on the lower end of the main stem – or on leaves, leaf stalks, fruit buds, or in the soil near the squash plant. Within one to two weeks, larvae hatch, bore into the stem of healthy cucurbits, and begin to chew their way up. Multiple larvae can infect a single plant. This blocks the transport of water and nutrients, leading to the dreadful wilt that often signifies that it is too late.
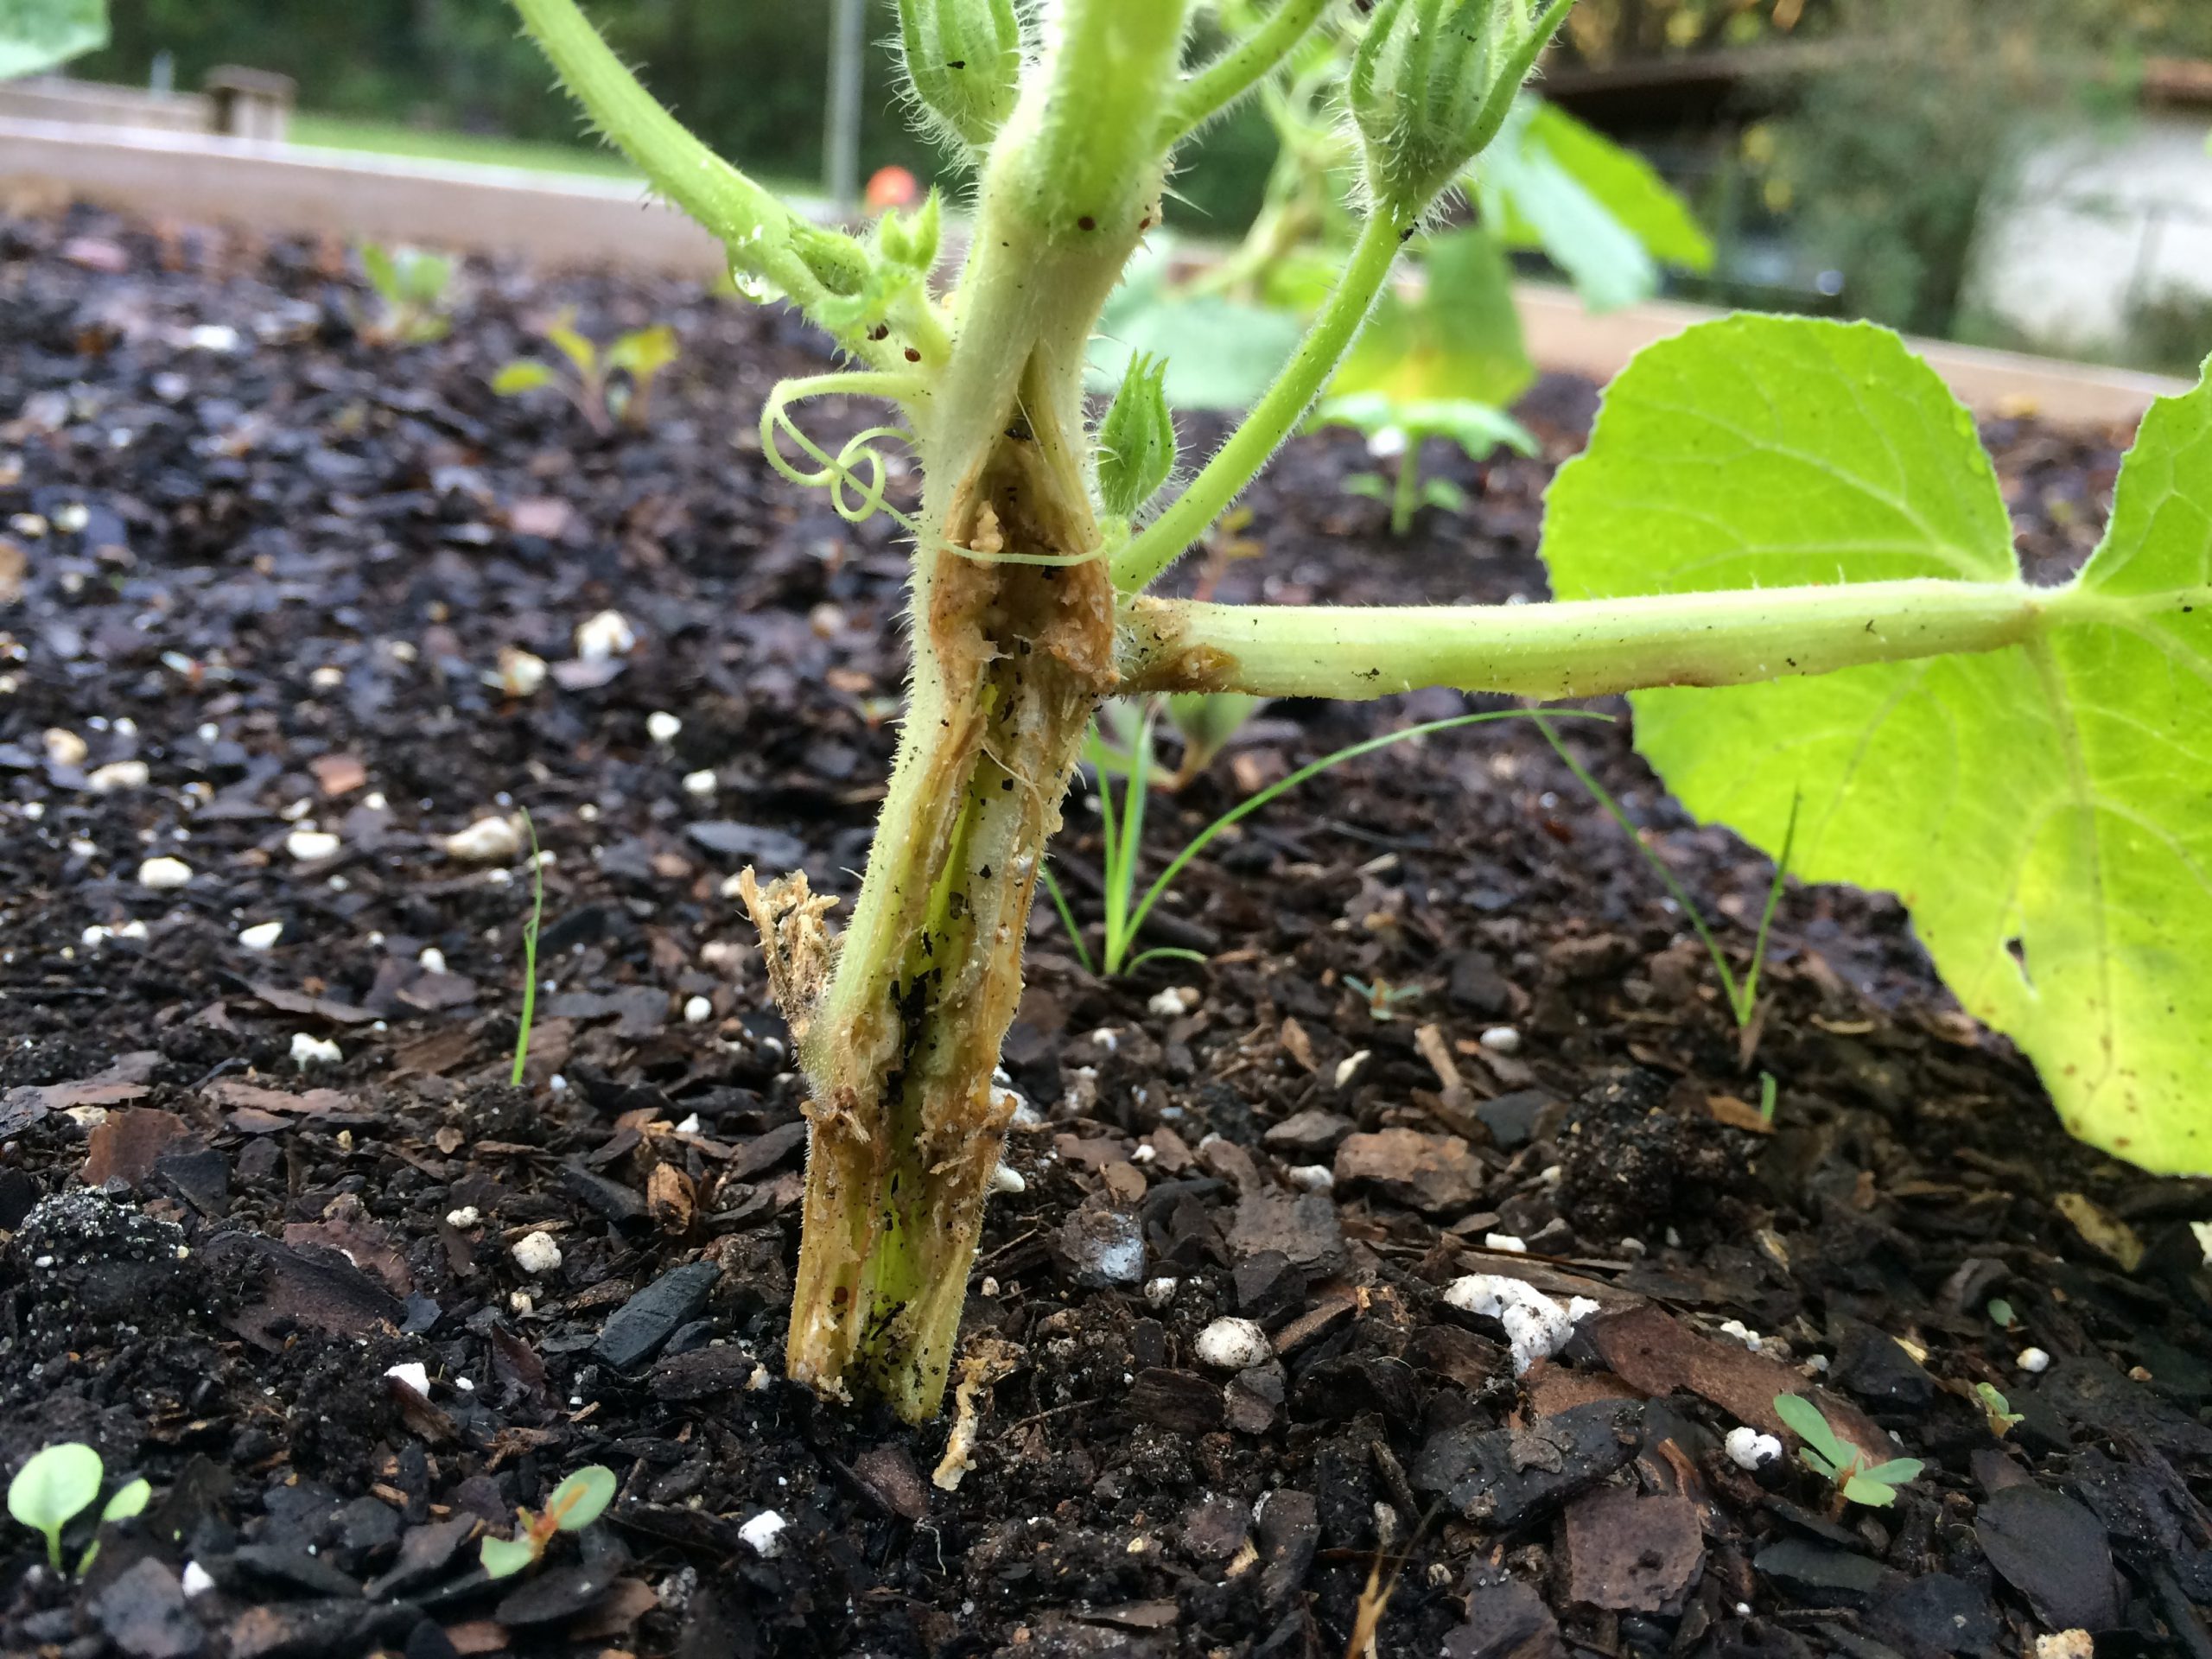
A squash plant severely damaged by squash vine borer larvae. Photo by Molly Jameson.
So, what can be done? Once the wilting has begun, you may be able to reap a small harvest, depending on the timing of infestation. Adult females emerge from cocoons from May to October in Florida and have two generations per season. They prefer cucurbit varieties with large tubular stems, such as yellow squash, zucchini, and pumpkins, but can also infest watermelon and cucumbers.
If you have some cucurbits that do not show signs of infestation but others that are on the decline, it might be worth removing and destroying the infested plants. At the end of the season, cultivate your soil one to two inches deep, as this is where they overwinter in cocoons. Destroying infested plants and cultivation can help reduce the overwintering population.
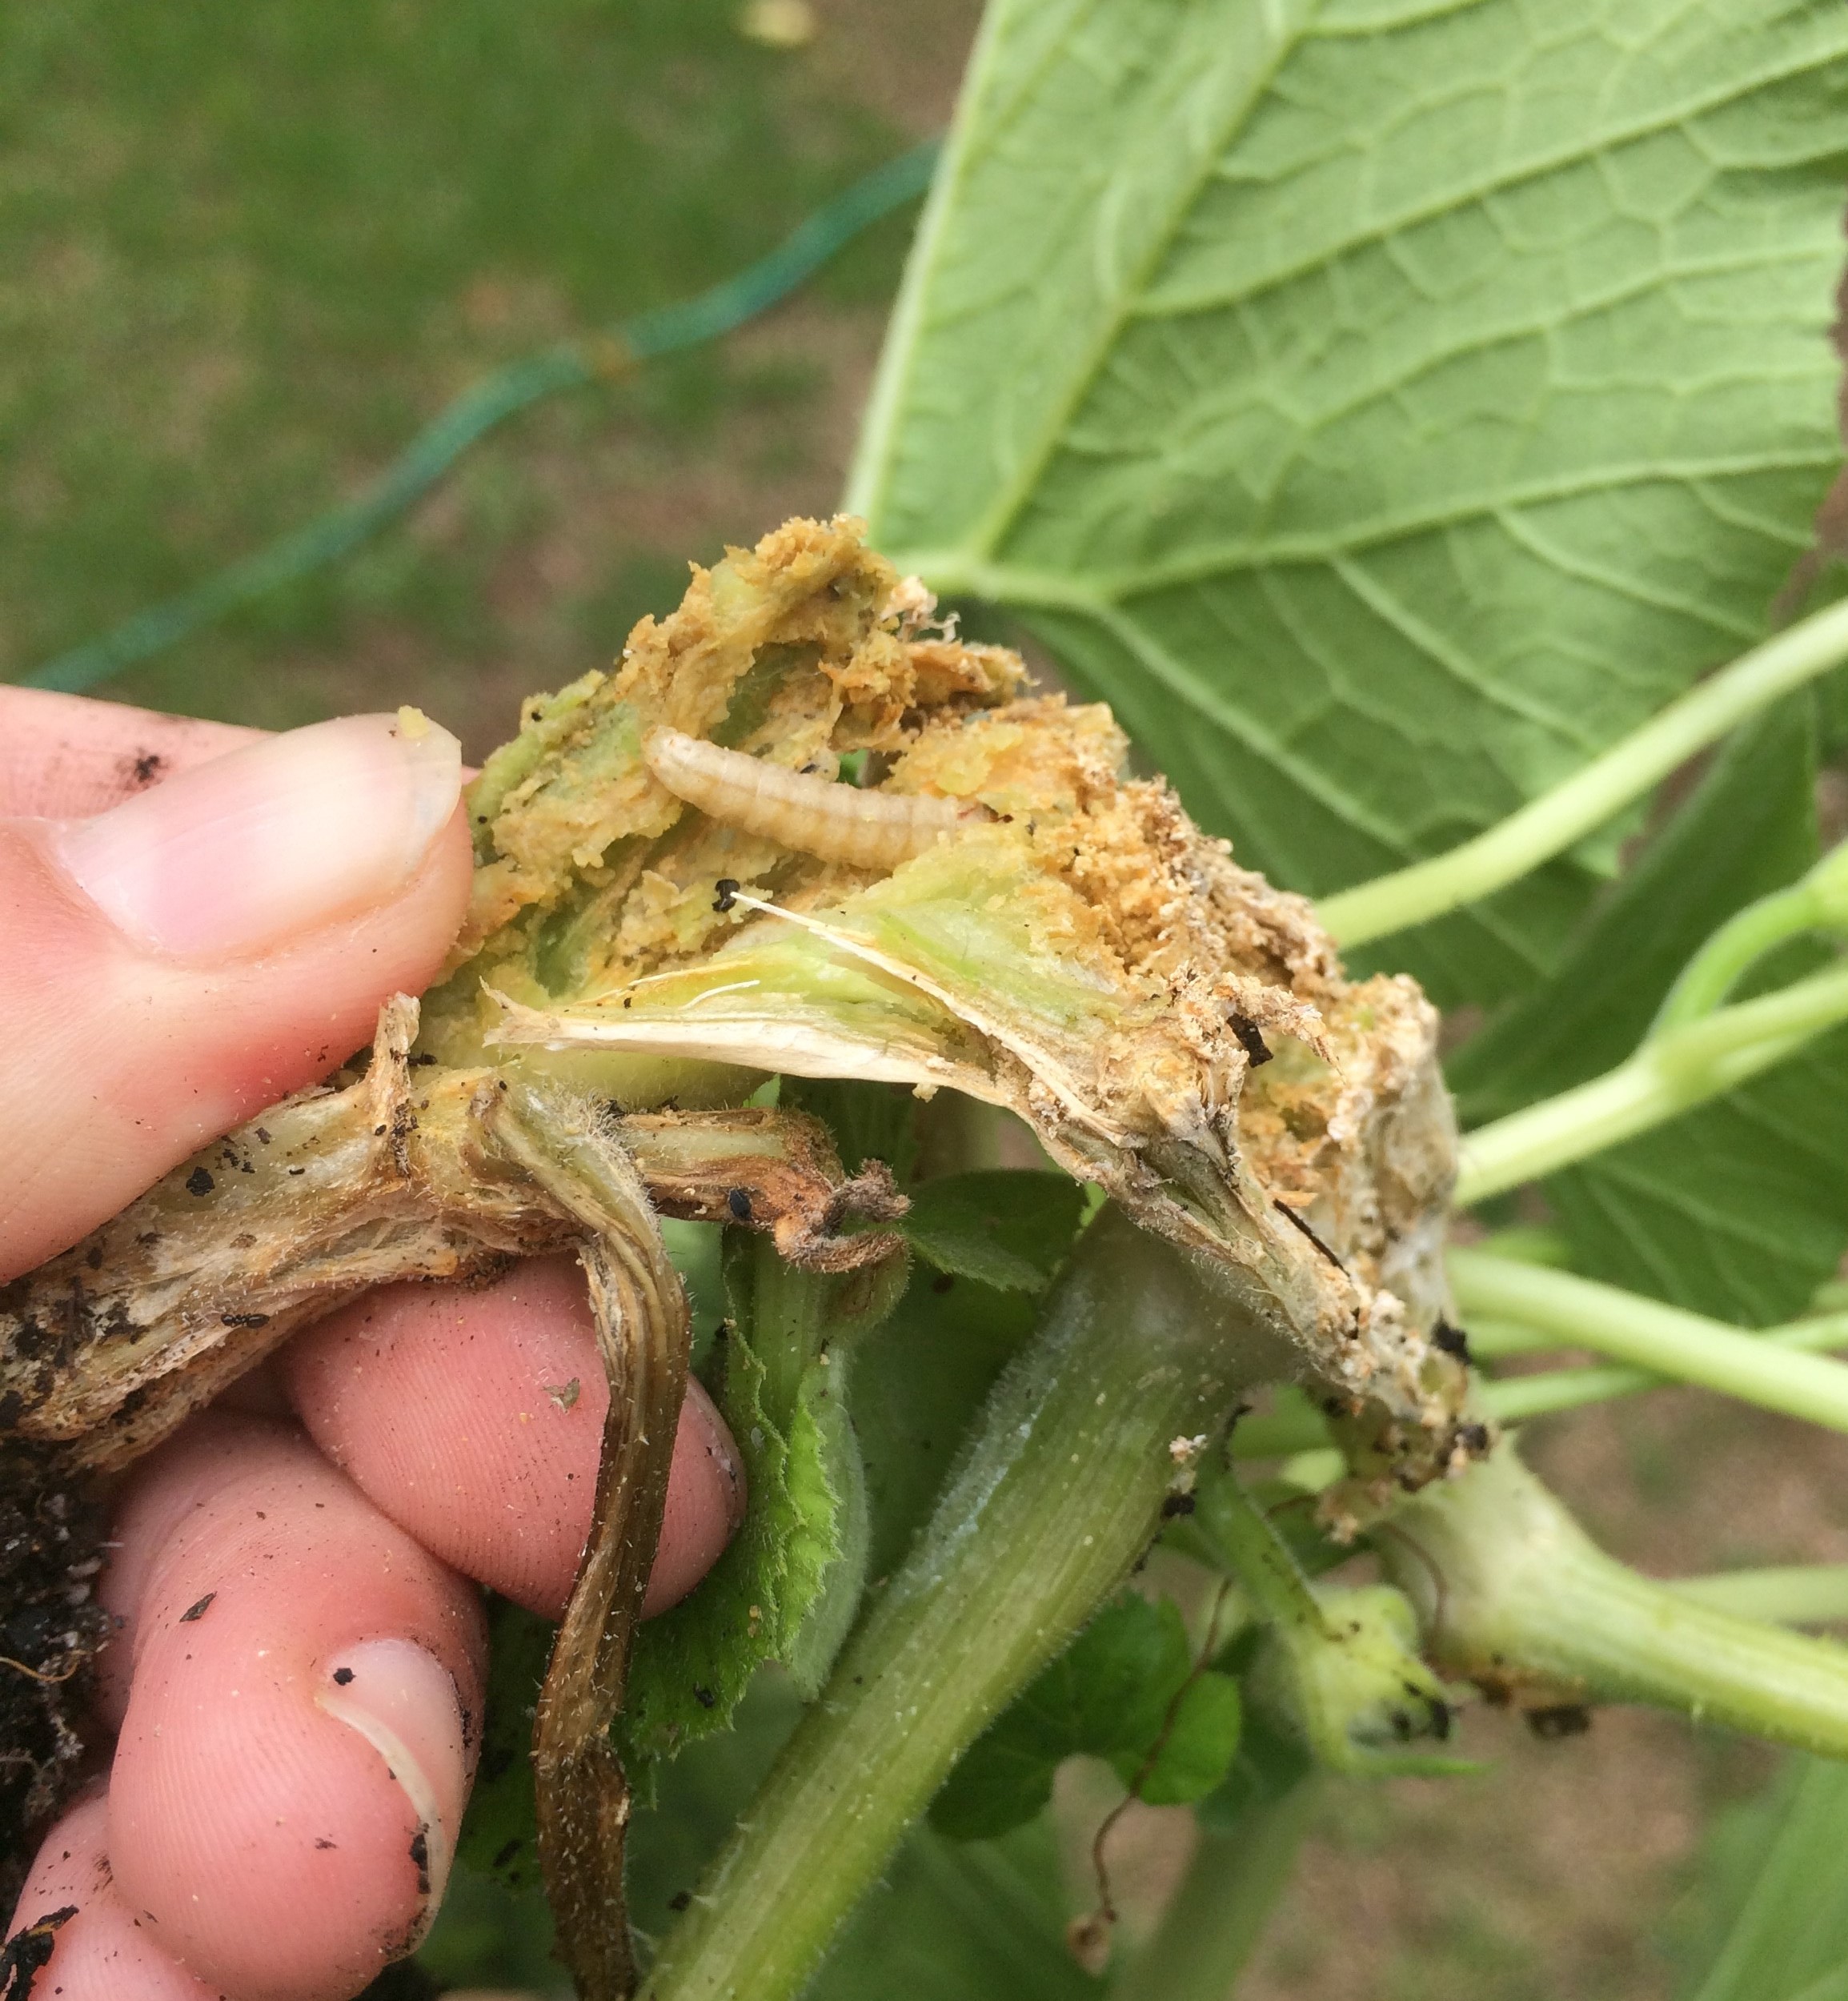
Squash vine borer larvae inside a squash stem. Photo by Molly Jameson.
In North Florida, try seeding squash indoors in March and plant seedlings in the garden in early April. The earlier you plant, the better chance you have of beating the borers. Of course, you must balance the risk of borers with the risk of a late frost.
You may also want to install lightweight floating row covers that can prevent the female from depositing her eggs. But again, it’s a delicate balance, as you do not want to prevent beneficial insects from pollinating your squash once it is producing blossoms.
Scout your plants diligently each day and keep on the lookout for eggs and adults. Adults are attracted to the color yellow, so yellow sticky traps or yellow bowls of water may lure them in. Build up the soil around developing plants to act as a shield against egg laying and boring.
A healthy straightneck squash plant beginning to set fruit. Photo by Molly Jameson.
Once your plants slow their fruit production and you’ve had your fill of grilled squash, squash pizza, and creamy squash pasta, go ahead and remove the plants to prevent late infestations that can then overwinter. Lastly, rotate areas in which you plant cucurbits each year to break borer life cycles.
Vegetable gardening involves innovation and ingenuity. A clever gardener is always striving to balance weather, timing, insects, plants, soil, and everything in between. With a little planning and persistence, I know you can prevail against the tenacious squash vine borer.
For more information about squash vine borers, check out the UF/IFAS EDIS publication, Squash Vine Borer Melittia cucurbitae (https://edis.ifas.ufl.edu/in1068).
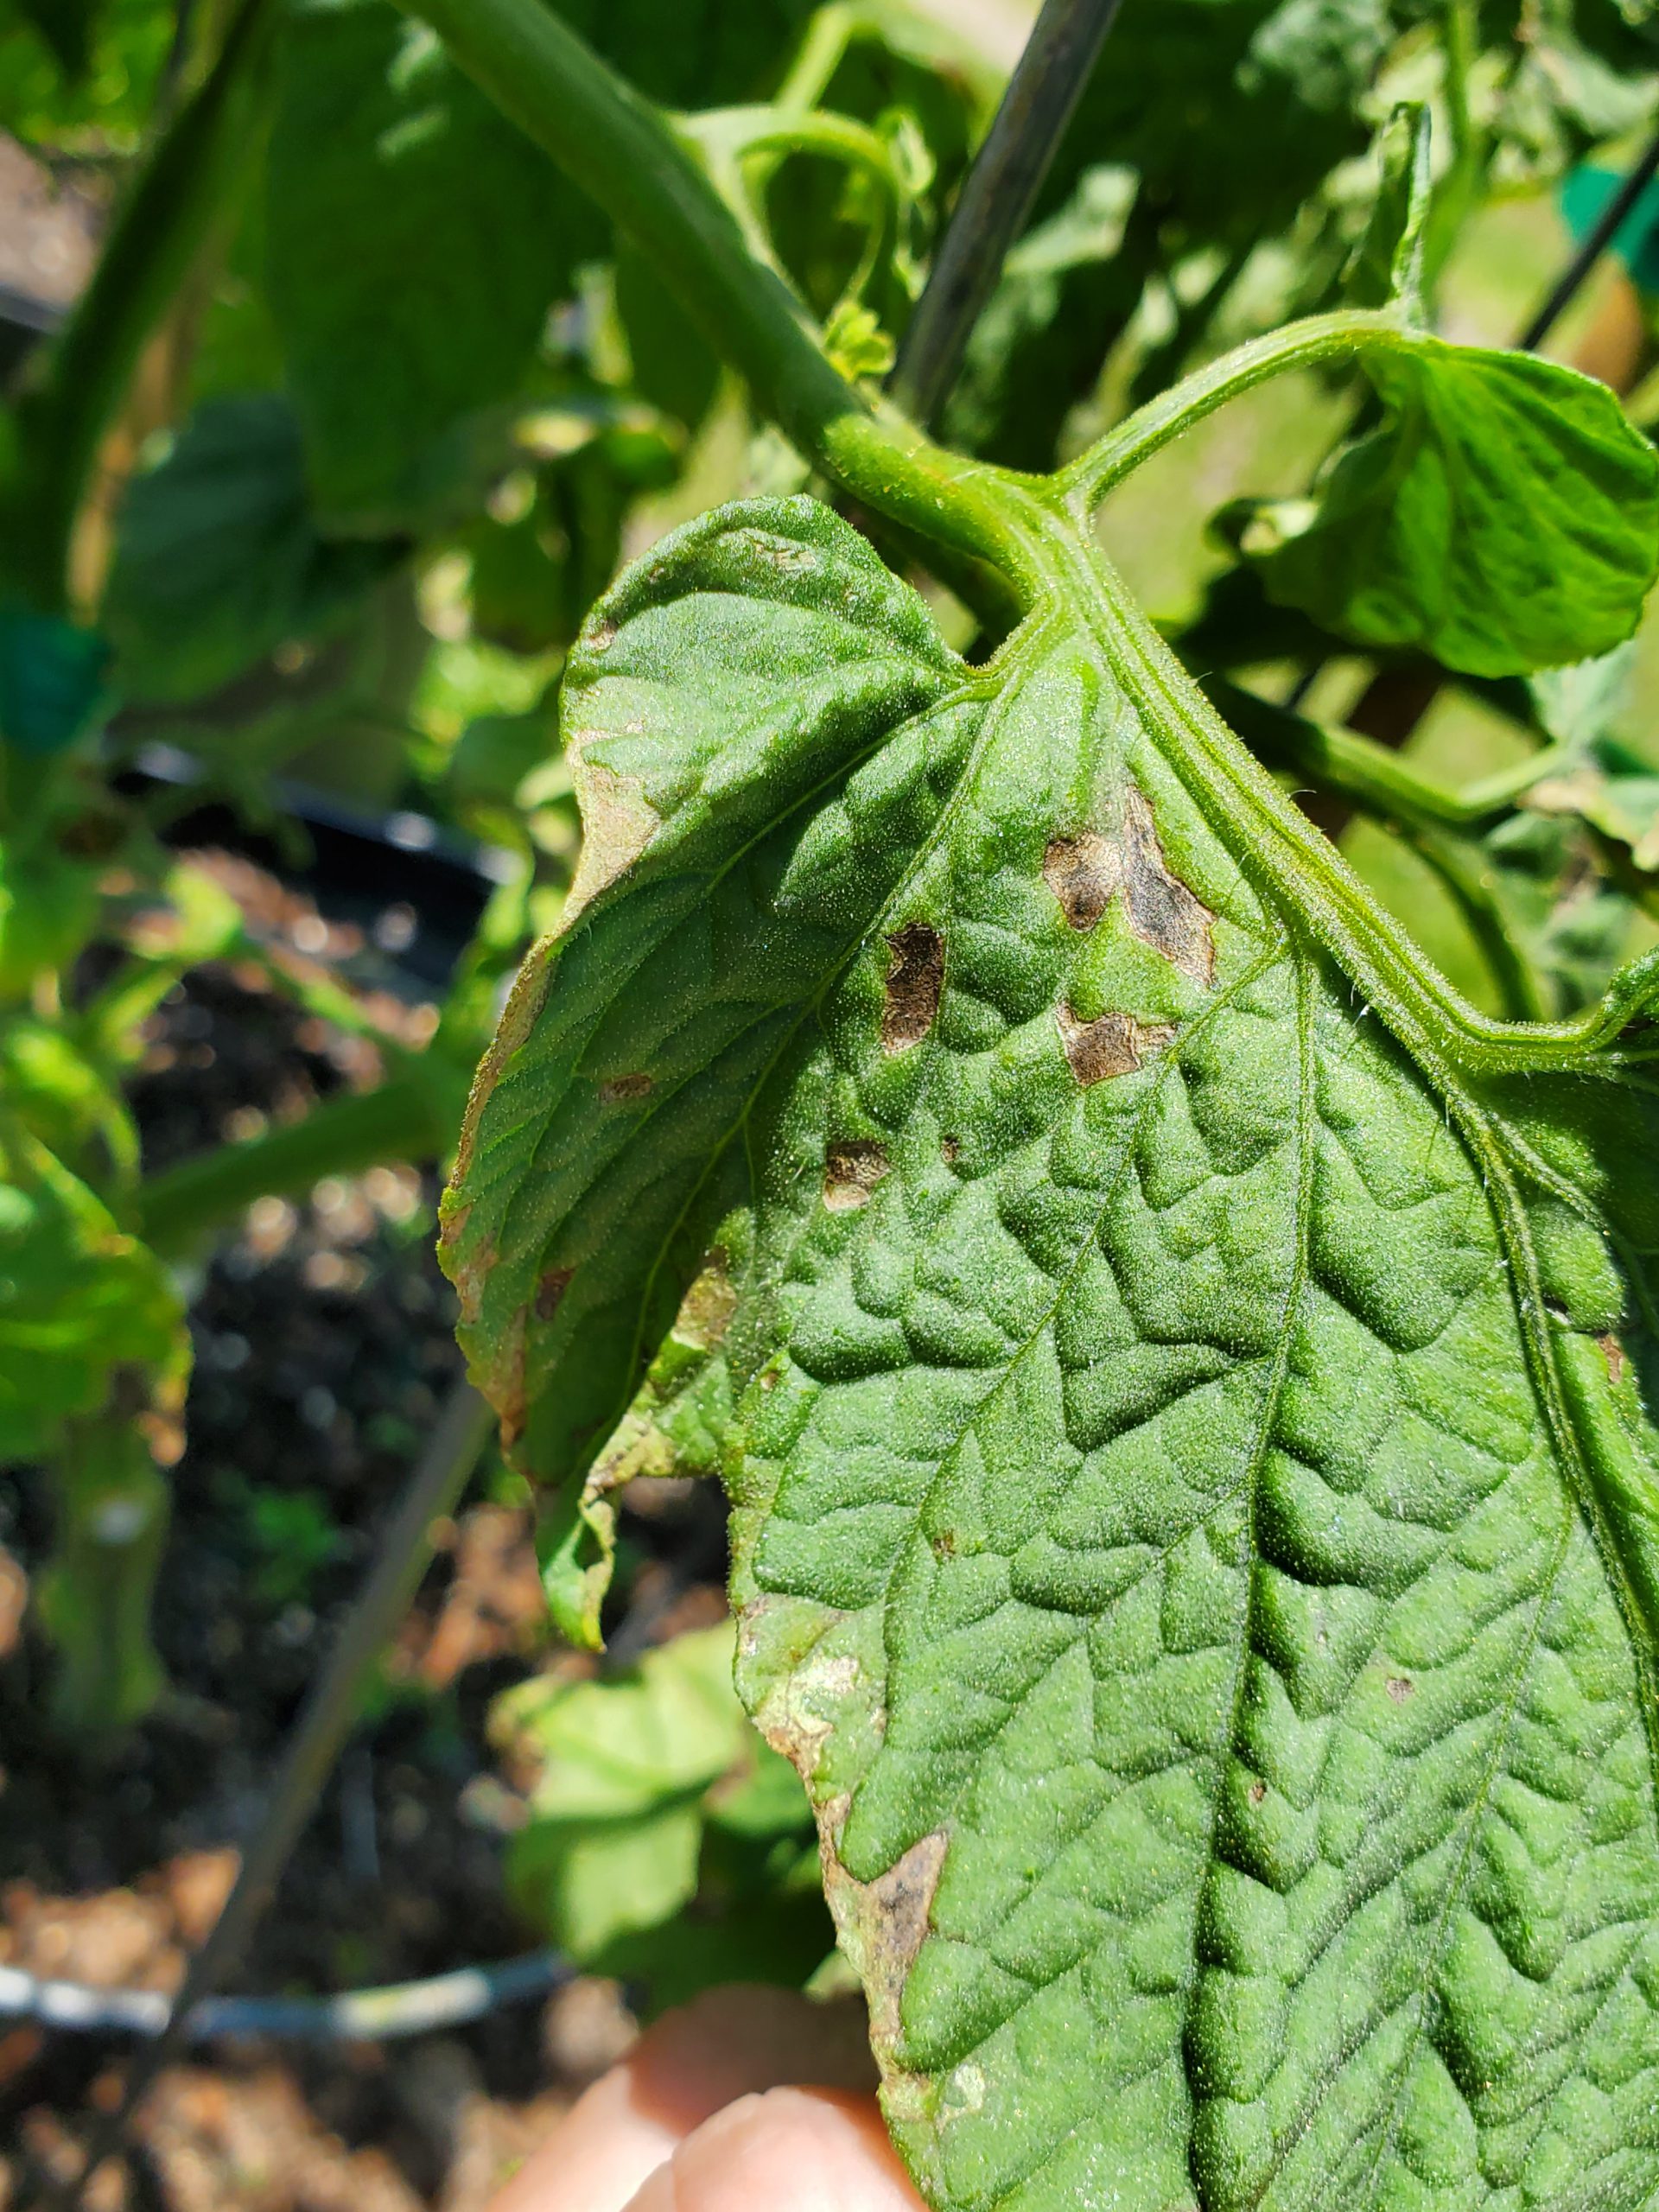
Early BLS symptoms appear on lower leaves. Photo courtesy of the author.
Tomatoes are among the most notoriously difficult vegetable species to grow in Florida. Even when you do everything right (choose disease resistant varieties, buy clean seed/healthy transplants, plant early, rotate crops, scout for insects, prune and support vines, etc), things can go wrong in a hurry. Bacterial Leaf Spot (BLS) caused by the pathogen Xanthomomas perforans, is one of those things. BLS often hitches a ride into gardens undetected on seed and transplants and presents itself as warm and humid weather arrives in late April/early May. Outbreaks typically happen in concurrence with the frequent heavy rainstorms that accompany these months and quickly wreak havoc on tomato plants.
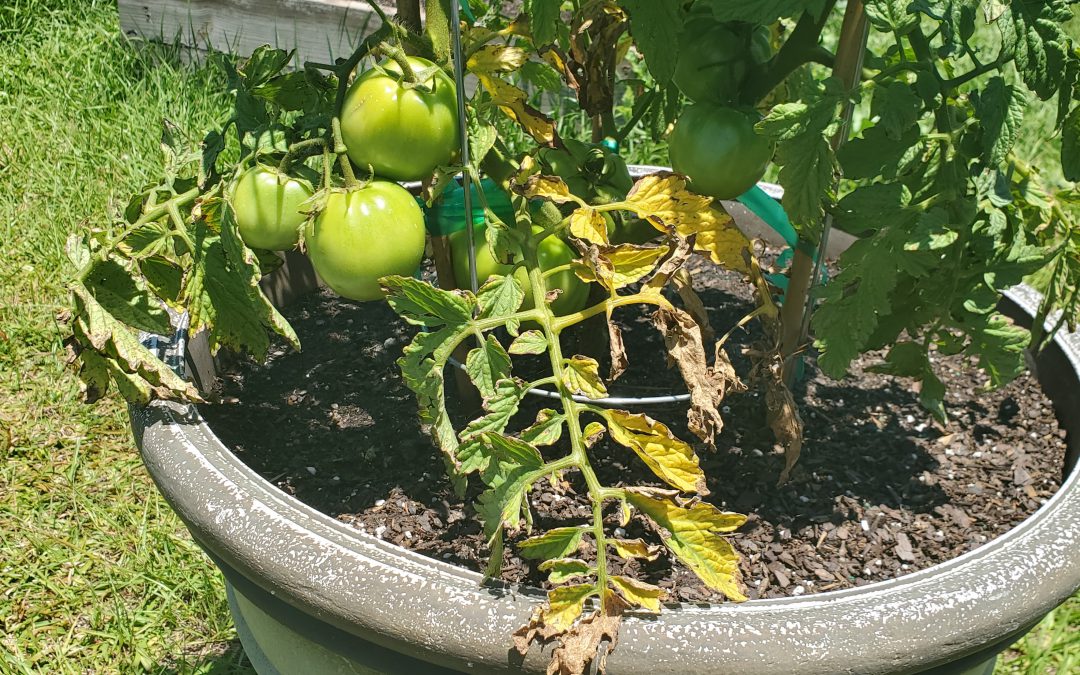
BLS occurrence, much worse in some springs than others, has exploded this year in home gardens. First noticed on the plant’s lower leaves, BLS pathogens enter through natural openings in leaves called stomata, manifest as small, “water-soaked” leaf lesions and then develop within days into dark circular spots, sometimes surrounded by a yellow halo. As conditions worsen, all these individual infections cause a general yellowing or “blighting” of entire leaves. Though the issue begins on tomato leaves, BLS can affect all parts of the plant, including stems, flowers and fruit too! It’s at this point, when blighted leaves become obvious and lesion developing on flower stalks cause both flowers and small fruit to drop, that most home gardeners notice that something is up.
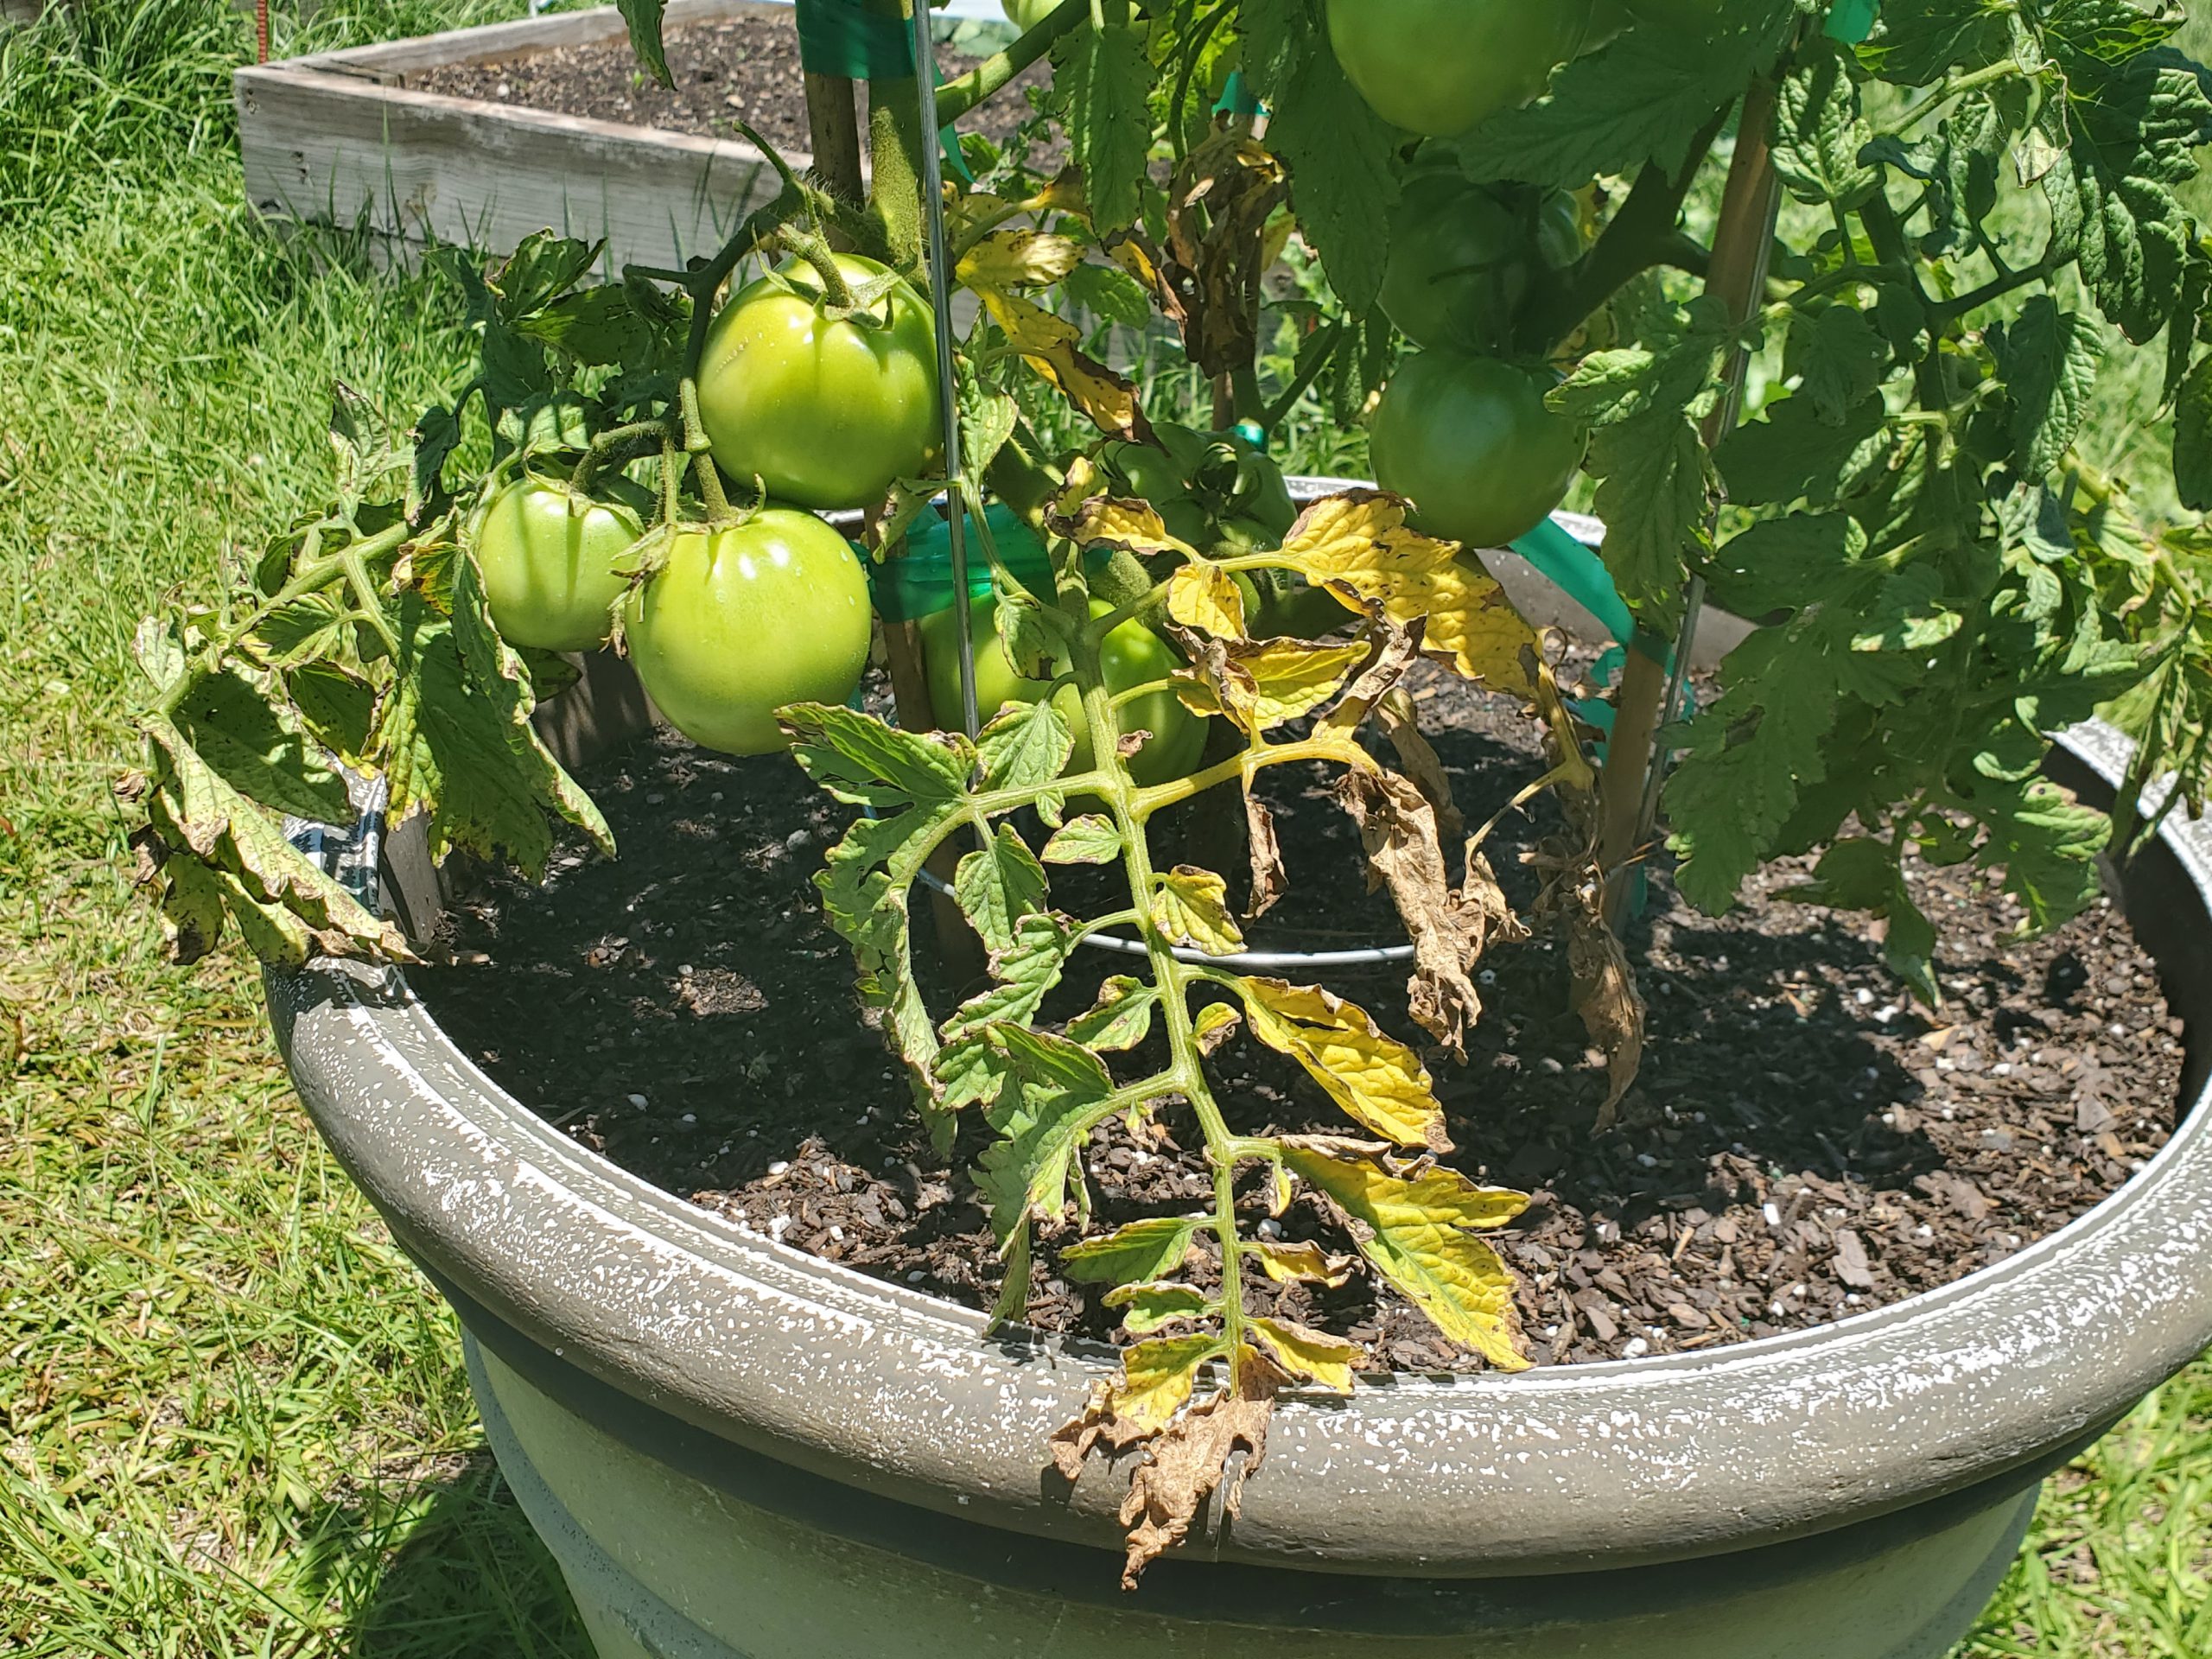
Advancing progression of BLS with “blighted” leaves. Photo courtesy of the author.
Unlike with many other pathogens, gardeners don’t have an abundance of options to control BLS. However, taking the following preventative measures can reduce the pathogen’s impact and stave off disease progression until ripe fruit can be harvested.

BLS lesions on tomato flowers. Photo courtesy of the author.
While BLS is an extremely destructive pathogen of both home and commercially grown tomatoes, growers can lessen the disease’s effects by following the preventative measures outlined above and spraying with a copper/mancozeb mix if necessary. Growing tomatoes this year hasn’t been easy, but it’s worth it to fight back and realize a harvest despite difficulties like BLS!
If bacteria have given you the blues or other garden issues are bringing you down, give your local UF/IFAS County Extension Agent a call! We’re here to help you be successful in all your horticultural endeavors. Happy gardening!