by Eddie Powell | Aug 12, 2014
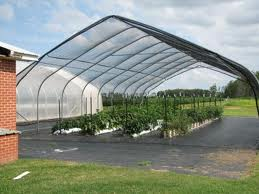
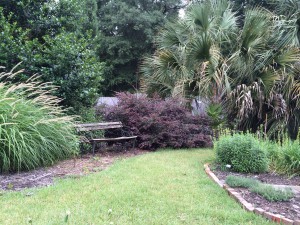
Shade House for early fall crop
Credits: UF/IFAS
In fall, many Florida homeowners enjoy growing their own vegetables but are faced with late summer heat issues. This happens during the first few days of August here in north Florida. Most cole crops are recommended to be planted for the fall as early as August 1, but they must be protected from the hot weather or they may need to be replaced if hot weather damages them. A diverse selection of both heat-resistant and tender plants should be planted in order to prevent total devastation of the garden by extremely hot weather.
The site selection for tender plants should be number one on your list when protecting from heat. Fall vegetable plants need a site with good air flow to protect them from the early season hot temperatures. Arranging susceptible plants along a shade barrier can protect them from direct hot sun, especially from afternoon sun. Poorly drained soils result in weak shallow roots which are more susceptible to drying out during a heat wave.
Plants grown with the correctly applied rate of nutrients will tolerate hotter temperatures better and recover from wilt injury faster than plants grown with little to no nutrients. Watering vegetable garden plants early in the day can help protect them. A well-watered soil will stay cooler than a dry soil and keep plants hydrated. However, saturated soil conditions can damage the root systems of most plants over a few days, so make sure the ground is well-drained.
Healthy vegetable plants are more resistant to heat than vegetable plants weakened by disease, insect damage, or nematode damage. Routine inspection for pests and implementation of necessary control measures are essential. Feel free to contact your local county extension office for information on pest identification and recommended controls.
Shade cloth coverings can help protect vegetable plants more from extreme hot temperatures during the beginning of fall gardening. Shade Cloth that extend to the ground and are not in contact with the vegetable plants foliage can lessen heat injury to the plant. If the vegetable plant foliage is in contact with the cover it is often dried out or injured because of heat transfer from cover the foliage can burn the leaves. One example of excellent plant covers is shade cloth or even an old trampoline cover. To learn more on heat protection of vegetable plants call your local UF/IFAS Extension Service
by Sheila Dunning | Jul 28, 2014

The “Dog Days” are the hottest, muggiest days of summer. In the northern hemisphere, they usually fall between early July and early September. The actual dates vary greatly from region to region, depending on latitude and climate.
In ancient times, when the night sky was un-obscured by artificial lights, the Romans used the stars to keep track of the seasons. The brightest constellation, Canis Major (Large Dog), includes the “dog star”, Sirius. In the summer, Sirius used to rise and set with the sun, leading the ancient Romans to believe that it added heat to the sun. Although the period between July 3 and August 11 is typically the warmest period of the summer, the heat is not due to the added radiation from a far-away star, regardless of its brightness. The heat of summer is a direct result of the earth’s tilt.
Spending time outdoors this time of year is uncomfortable, potentially dangerous, due to the intense heat. However, the chinch bugs are very active in St. Augustine grass, and the summer flowers need water. So, take care of those tasks early in the day and then retreat to the air conditioning to plan your fall planting.
Plant tomato plants in August for tomatoes in October. Varieties such as Phoenix, Florida 91, Solar Set and Heat Wave II are good selections for setting fruit in high temperatures, should summer temperatures continue. Otherwise, try some of the newer UF/IFAS recommended varieties for fall planting in North Florida such as Bella Rosa, Tribute or Finishline. For more information on tomato selection refer to Tomato Cultivars for Production in Florida. For information on other vegetables for fall gardening refer to the Florida Vegetable Gardening Guide. Plan to attend the Fall Gardening program at the Extension office this September.
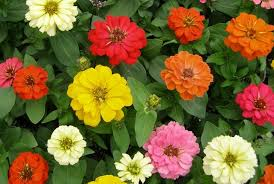 Many bedding plants flower quickly and can add color to the fall landscape. These include pentas, African marigolds, torenia, zinnias, melampodium and scaevola. Other can be planted in October for blooms all winter-long. Plan spaces and color themes for calendulas, pansies, snapdragons and violas. Add in ornamental cabbage or kale and some dusty miller to accent the garden. They too will perform through the cold. For more information on Annuals for the Florida Garden refer to Gardening with Annuals in Florida.
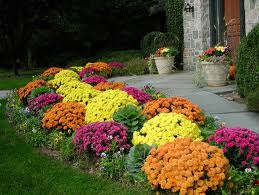
Dependable fall blooming perennials include lion’s ear (Leonotis leonurus), pineapple sage (Salvia elegans), firebush (Hamelia patens), cigar plant (Cuphea micropetala), yellowbells (Tecoma stans) and firespike (Odontonema strictum). Also, garden mums (Chrysanthemum sp.) and many different Irises will add color again in the spring. To gain information on perennials for Florida refer to Gardening with Perennials in Florida.
Webster’s second definition of “dog days” is a period of stagnation or inactivity. But, even when the heat forces you to slow down on the labor-intensive work, there is plenty of gardening “activity” to do. Stay in the air conditioning and plan that spectacular fall and winter yard.
by Larry Williams | Jul 15, 2014
Florida Betony (Stachys floridana), commonly called rattlesnake weed, is a Florida native plant. It’s thought to have been confined to Florida until it was moved to other Southeastern states during the 1940s or 1950s in nursery containers. It is now found from Texas to North Carolina. Its square stems are characteristic of the mint family of which it is a member.
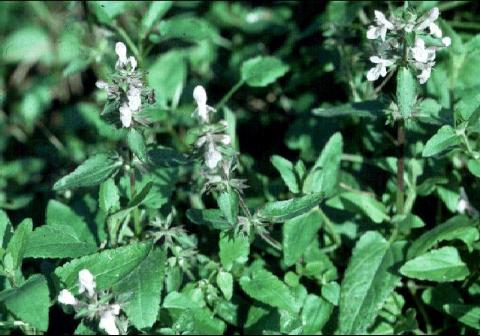
Florida Betony foliage & flowers Photo Credits: UF/IFAS Extension
Underground white, fleshy tubers, which resemble a rattlesnake’s rattle in shape, provide the main means of reproduction. Pinkish-purple flowers are followed by a dried fruit that splits open releasing tiny seeds, which are a lesser means of reproduction. The white tubers have been used for hundreds of years as a starchy vegetable and are sometimes boiled like peanuts.
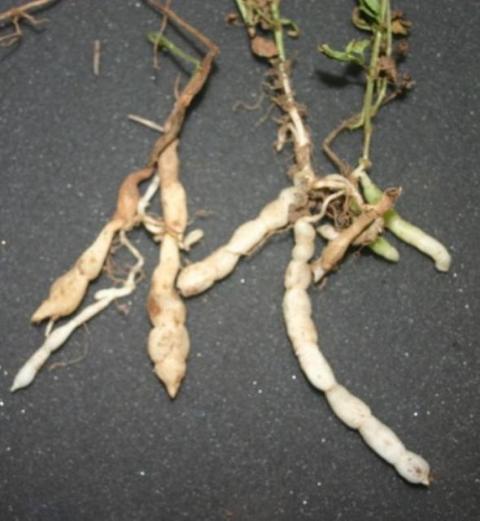
Florida betony weed tubers Photo Credits: UF/IFAS Extension
The tubers make Florida Betony tough to control. Even when above ground foliage and stems are killed due to herbicide use, the tubers allow the regeneration of the plant repeatedly. When attempting to control this weed, it helps to be more persistent than the plant. Many people give up.
Even though it is a perennial, the above-ground portion of the plant grows during fall and spring and becomes dormant during hotter weather.
You can remove the weed by digging, making sure to remove the entire root system (including the tubers). But persistence and patience is required. Herbicide control usually involves repeat applications approved products in lawns. Glyphosate herbicides such as Roundup can be used to control Florida Betony in plant beds. But do not get the herbicide on any green portion of desirable ornamentals.
Always refer to the product’s label for specific uses, application rates and turfgrass tolerance when using any herbicide.
So, why not just dig up the Florida Betony in your lawn and have a native plant feast?
by Larry Williams with content by Matthew Orwat
by Roy Carter | Jul 15, 2014
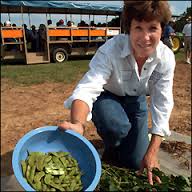
Vegetable Soybean Pods
Image Credit Ann Blount, NFREC, UF IFAS Extension
I am sure you are familiar with soybeans, but probably not in the way we’ll describe it. If you frequently visit health food stores, or the health food section of your supermarket, you’re bound to have seen this vegetable in its dried form. It’s a substitute for meat in many dishes, and it’s used to enhance the nutritional value of numerous foods.
Surprising as it may seem, the soybean is a nutritious and versatile green vegetable. While we’re all fairly familiar with the many uses of dried soybeans, most of us haven’t had much exposure to fresh soybeans. My information was provided by retired Extension Vegetable Specialist Jim Stephens.
There are two main types of soybeans. The one cultivated most frequently is the agronomic or field soybean. It represents 99 percent of all soybeans grown in our country. The second type, which we’re emphasizing, is the vegetable soybean, which is grown for fresh or green mature consumption. The vegetable type is about one-and-a-half to three times larger seeded than the field type.
While few Americans think of soybeans as a vegetable, it has been used as a vegetable in Asia for over 1,000 years. The varieties suitable as a vegetable are different from those used as a field crop. Major vegetable varieties are “Verde”, “Disoy”, “Bansei”, “Gaint Green”, Fuji”, and “Seminole”.
Aside from their good taste and high yield, green soybeans have excellent nutritional value. Fresh soybeans are very high in vitamin c, and they’re also high in protein, containing about three times the protein of milk and about half that of red meat. Fresh soybeans are relatively high in calories, because of their seven percent fat content. Fortunately, this is good quality vegetable fat. Soybeans also contain sizeable amounts of other vitamins and minerals.
As with most fresh vegetables, soybeans should be eaten as soon after harvest as possible. Eating quality and nutrition value begin to decrease within several hours after the beans are picked.
You’ll have an easier time removing the seeds if you place the unshelled beans in boiling water for about three minutes. This will soften the pods, and allow the tender beans to be split out by hand. As a garden-fresh vegetable, soybeans can be prepared like any other fresh shelled beans. Soybean seeds also make excellent bean sprouts.
For more information on edible soybeans contact your county extension office or www.http://edis.ifas.ufl.edu and see Vegetable Gardening in Florida by James M. Stephens, Vegetable Production Handbook for Florida, Vegetable Gardening Guide or IFAS Publication SP 103/VH 021: Florida Vegetable Garden Guide.
by Eddie Powell | Jul 1, 2014

Tomato spotted wilt on leaves
Photo Credits: IFAS
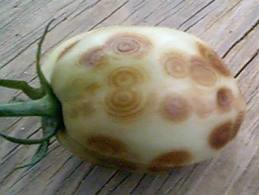
Tomato Spotted Wilt on Fruit
Photo Credit: IFAS
The spotted wilt virus has a wide host range and can affect tomatoes, peppers, plus many other vegetables and ornamental plants. Early symptoms of spotted wilt on tomato are difficult to diagnose. Young, infected plants may show an inward cupping of leaves, and the foliage may appear light color or have a slight bronze cast. As the disease progresses, plants may develop dark brown to black streaks on the main stem. Occasionally the top portion of the plant appears yellow or wilts.
The most characteristic symptom of spotted wilt appears on the fruit. On young fruit white to yellow concentric rings will develop on the fruit skin. The area within the ring typically is raised, which gives the fruit a bumpy appearance. The bright yellow rings on mature red fruit are easily diagnosed as spotted wilt.
The spotted wilt virus is transmitted from plant to plant by several species of a small insect called a thrips. Thrips are less than ¼ inch in length, light green to brown in color and are extremely difficult to find on the plants. It is very important to keep the weeds around the garden controlled because many weedy plants serve as alternate hosts for the virus vectors.
Virus diseases cannot be controlled once the plant is infected. So plant resistant varieties*! Sanitation will help with controlling virus diseases. Infected plants should be removed immediately to prevent spread of the pathogens. Perennial weeds, which may serve as alternate hosts, should be controlled in and adjacent to the garden. Avoid planting tomatoes next to peppers, or other vegetables and flowers susceptible to these diseases. Preventative control of insects, especially thrips, will help reduce the likelihood of spotted wilt.
*BHN 602, Amelia, Crista, Quincy, Bella Rosa, Top Gun, Fletcher, Mountain
by Roy Carter | Jun 23, 2014
Summertime is vacation time for people, not plants! While getting ready for that long awaited trip, it’s easy to forget about your lawn, landscape, vegetable garden and house plants. A little time spent preparing your leafy friends for your absence could save you needless worry and hours of extra work when you get back.
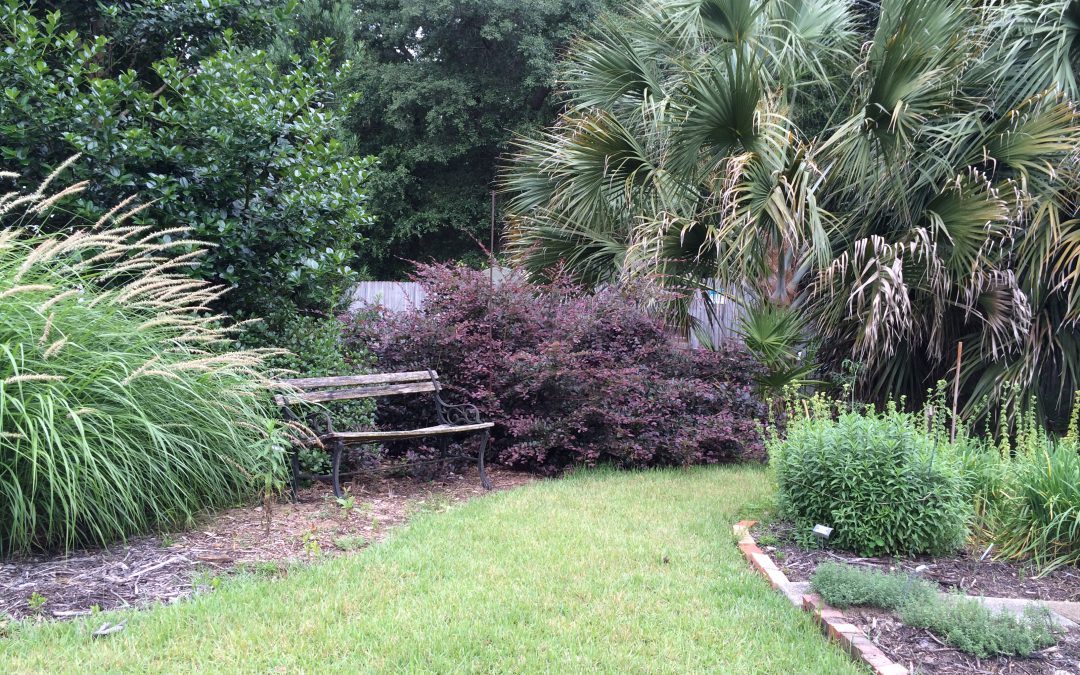
Prepare your landscape for your absence.
Photo by Mary Derrick, UF IFAS
A vacation may be relaxing and rejuvenating for you and your family, but it can be hazardous, even deadly, for your plants. Unless you make adequate preparations before leaving, you could return to vegetable disaster.
One of the first things you might do before leaving home is ask a neighbor to check your plants periodically while you’re gone. All plants need some care. During an extended vacation container grown plants require special attention and different species have different needs. Be sure you give your friend specific instructions for the care of each type.
If you can’t find someone to personally look after your plants while you’re away, there’s plenty you can do prior to departure to make sure you don’t come home to a limp landscape and sickly house plants. Outdoor container plants should be placed in a shady area to conserve moisture. Under a tree or on the north side of a building are good locations. A thick layer of mulch will help conserve moisture for landscape plantings. Mow your lawn just before leaving, cutting the grass a little closer than usual. An unkept lawn can encourage disease, and it’s a tell-tale sign that no one’s home.
Give lawn and landscape plants a heavy watering – especially recently planted beds, which will need extra moisture. Also, thoroughly spray or dust your plants to protect them from insects and diseases while you’re away. If you have flowering annuals, cut the blossoms before departing. If you don’t, they’ll soon stop blooming. Harvest all ripe or nearly ripe fruits and vegetables. Like flowers, they will continue to produce only if they’re picked frequently. Otherwise, they’ll go to seed.
Do a thorough job of weeding. If weeds are allowed to go to seed while you’re away, you can expect to encounter much more difficult problems later in the season – even next year – when the seeds sprout. Weeding eliminates a major source of competition for your landscape plants’ food and water which may be in short supply during your absence.
Plants kept indoors require special consideration. Before leaving home, place your house plants in a room which receives indirect sunlight. Direct exposure to the sun will dry the soil too quickly. Of course, you don’t want to put your plants in a room that’s too dark, either. Too little light will almost always result in leaf drop. And, just before you depart, be sure to water your house plants thoroughly. This is especially vital, because – unlike lawn grass and landscape ornamentals – house plants cannot benefit from any rain that may fall while you’re gone.
You’ll enjoy your vacation more by making sure your plants are well prepared for your absence.