by Eddie Powell | Jul 15, 2013

Image Credit: Eddie Powell
Before the new school year begins for the kids in your county, consider volunteering at your local school garden.
The following information has been adapted from the UF IFAS Florida school garden competition website article “Benefits of School Gardens”
School gardens offer benefits to volunteers and students that go beyond the classroom. They provide a platform for students, teachers, and members of the community to interact in an outdoor learning environment. This type of interaction creates opportunities for students to improve social skills and practice collaborative learning.
It is essential that school gardens are given proper care and maintenance. Giving students the responsibility to water and care for the plants instills in them a sense of accountability. Patience is another virtue that students practice through garden participation, as plants do not grow, flower, or fruit overnight.
As the garden grows and becomes fruitful, students will take pride in the efforts that they put forth. This pride can help bolster self-esteem and allow students to invest in the beautification of their school. In this age of urbanization, children’s contact with nature is limited. Thus, school gardens ensure student contact with the environment.
School gardens allow students to work in a non-threatening outdoor environment where they can interact and learn about nature. Studies have shown that students who are allowed to learn in an outdoor environment, such as a garden, have improved environmental attitudes.
School gardens are a wonderful and exciting way to make school subjects more interesting and meaningful. School gardens create a learning structure that allows for creative thought, active learning, and social skills. The garden is a living lab that can serve as an excellent resource to teach various subjects, while allowing students to learn in an environment that is atypical to the sterile classrooms to which most students are accustomed.
Teachers throughout the country are discovering how useful and educational gardening can be. School gardens should be used to teach practically every subject covered in an elementary school classroom. The garden is a perfect place for students to learn about plants, insects, weather, and many other science and math-related topics.
For more information on helping a local school garden programs, contact your county University of Florida / IFAS Extension Office, which should have a list of the schools in your area that are teaching gardening. Also remember to ask about the Farm to School Program, which has resources for school gardens.
by Mary Salinas | Jul 7, 2013
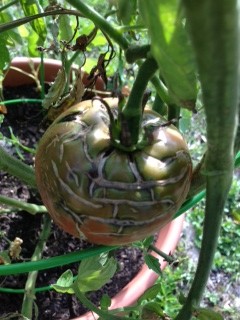
Imagine this scenario: After you have heavily invested in your tomatoes, cracks appear on your previously perfect fruit just as they are starting to ripen.
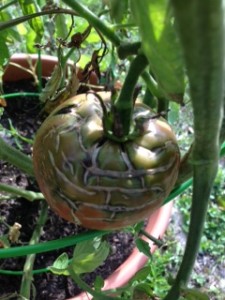
Cracking in Cherokee Purple tomato
Credit: Mary Derrick, UF/IFAS
How frustrating! Depending on the severity of the cracking the fruit will still ripen and be edible, although blemished. However, if cracking is severe, insect and disease pests may take advantage of the weakened skin and feast on the tomato.
Why does this happen?
When tomato plants have fluctuations in the amount of available water in the soil, the skin becomes susceptible to cracking. This occurs when tomatoes are allowed to dry out, then heavily watered. The excess in available moisture causes the inside of the fruit to grow more rapidly than the skin, thus cracking appears. As tomatoes grow toward maturity, they become more prone to cracking. Wide fluctuations in air temperature can also contribute to cracking.
Avoid cracking in your fruit by following these simple suggestions:
• Keep your plants evenly moist through regular irrigation and mulching
• Shade fruit with ample foliage cover
• Select varieties or hybrids that are known to resist cracking
• Harvest susceptible tomatoes at an earlier stage of development and ripen indoors.
Happy Gardening!
For additional information follow these links:
Tomatoes in the Florida Garden
Physiological, Nutritional, and Other Disorders of Tomato Fruit

by Carrie Stevenson | Jul 7, 2013
Floridians use more water than any other state for irrigation, and a typical home sprinkler system can account for half of the cost and water use in a household during the summer.
One of the most convenient and efficient ways to conserve water is to install a rain barrel. Modern rain barrels involve ancient technology that relies simply on gravity, allowing stormwater to run from a rooftop into a gutter. The gutter funnels water into a plastic food-grade barrel or other container fitted with screen to keep out debris and insects. Most rain barrels also have an overflow device near the top (for heavy storms that might fill the barrel) and a spigot at the bottom for filling a watering can or attaching a hose. Keep in mind the barrels do not have a lot of pressure and cannot irrigate an entire lawn, but are ideal for vegetable gardens and container plants. Rain barrels vary widely in design, but they can be painted to add a decorative touch, or easily screened behind a shrub.
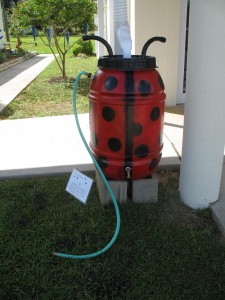
Building a rain barrel is a fun summer project for the whole family!
In addition to conserving water, rain barrels can be an effective means of reducing stormwater pollution. During a typical 1” rainstorm, an average home’s roof can yield 600 gallons of rainwater runoff that would normally flow downstream, picking up oils, greases, bacteria, trash, and pesticides along the way that end up in our water bodies. These pollutants eventually flow downstream to our creeks, bayous, and bays, contributing to non-point source pollution. Rain barrels interrupt that process by collecting stormwater runoff before it has a chance to pick up pollutants.
If you are interested in learning more about rain barrels or how to build your own, contact your local County Extension Office. Escambia County Extension will be hosting two rain barrel workshops this summer, the first on Friday, July 12 and the second on Saturday, August 3. There is a $42 charge for those wishing to build their own rain barrel after the workshop—all supplies and tools will be provided. To register for the full workshop, go online to the event registration website.
It is free to attend and hear the talk without building a barrel, but please reserve a spot by using the contact information below.
by Eddie Powell | Jul 1, 2013
The key to eating home grown delicious vegetables, is selecting the correct time to harvest. Below are some of the easiest ways to identify the correct time to pick your most common summer veggies.

- Snap Beans: Pick them before you can see the seeds bulging. They should snap easily into two. Check daily. It doesn’t take long for beans to go from tender to tough.
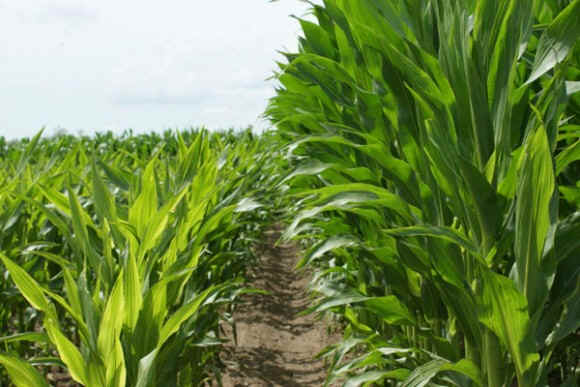
- Corn: Usually 3 weeks after the silks form, they will turn dry and brown. The kernels should exude a milky substance when pricked.
- Cucumber: Cucumbers race to the harvest with zucchini. Check daily and harvest young. Timing and length will vary with variety. The fruits should be firm and smooth. Overripe cucumbers can be very bitter or pithy, even before they start to turn yellow.
- Eggplant: Slightly immature fruits taste best. The fruits should be firm and shiny. Cut rather than pull from the plant.
- Muskmelon (cantaloupes): The general rule of thumb is that the color should change to beige and the fruit will ‘slip’ from the vine when lifted. You should also be able to notice a sweet smell when ripe.
- Peas: The pea pods should look and feel full. Peas are sweeter if harvested before fully plumped. Peas really need to be tasted to determine if they are sweet enough.
- Pumpkins: Once the pumpkins have turned the expected color and the vines are starting to decline, check to make sure the skin has hardened enough that poking it with your fingernail will not crack it. You don’t want to pick your pumpkin too soon, because it will stop turning orange once its cut, but don’t leave them out if a hard frost is expected.
- Squash: Pick young and check often. The skins should be tender enough to poke your fingernail through.
- Tomatoes: Harvest tomatoes when they are fully colored and slightly soft to the touch. Gently twist and pull from the vine.
- Watermelon: The white spot on the bottom of the melon should change to a deep yellow when ripe. Some people can hear a change in the sound made when the melon is thumped with the finger. It should make a hollow sound when ripe, but this is a skill that must be developed.
For more information about projected harvest times, check out the Florida Vegetable Production Guide, published by UF / IFAS Extension. Enjoy and share your garden’s bounty, happy harvesting.
by Blake Thaxton | Jun 17, 2013
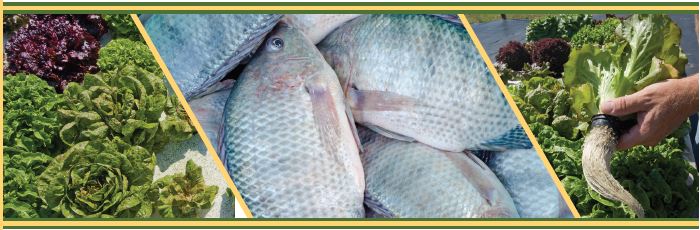
 Aquaponics is an exciting system where fish and plants grow in harmony. The aquaponic system can be a fun project for the home gardener but can also become a successful farming venture. Come and learn the basics of growing fish and plants together in an AQUAPONICS system.
Date: June 25th Time: 8:00am-3:30pm Cost: $25
Locations: UF/IFAS Extension Escambia Co., 3740 Stefani Road,Cantonment, FL 32533
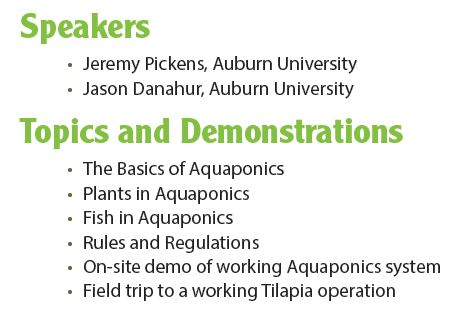
Register for the workshop at: ap2013.eventbrite.com
For more information call or email:
Chris Verlinde – (850) 623-3868 or cmverlinde@gmail.com
by Eddie Powell | May 20, 2013
Protecting new vegetable transplants in the garden can be very challenging for most gardeners.
Continue below for a few tips that will make transplanting vegetables more successful:
- Create A Collar: A collar can be made from a bottomless plastic cup or a waxed cardboard carton to protect transplant from cutworms. The collar should extend one inch above and below the surface of the ground.
- Row covers can be placed at planting to keep insects out. Remember to leave plenty of excess material for the growing vegetable plants. Remove the row cover when plants that need bees for pollination begin to flower.
- Make sure to plants stay in a continuously growing state and in a state of good health by supplying appropriate amounts of water and fertilizer. A healthy plant is more than likely going to survive an insect attack than a sick plant. However, too much fertilizer can cause plants to be more inviting to aphids and whiteflies.
- Monitor or scout the garden twice weekly for pest problems. This means inspecting the vegetable plants from both the upper and lower foliage to the soil level. It is best to keep a record book on pest problems and the performance of different varieties. Also include photographs of insects, diseases and beneficial insects. Be sure to correctly identify the insects.
- The ability to identify beneficial insects of the garden is important (praying mantis, spiders, big-eyed bugs/assassin bugs, lady beetles, and all wasps). Plant flowers in the vegetable garden that provides nectar and pollen which will attract beneficial insects.
- Most large insects like caterpillars can be removed by hand and destroyed.
- Watch for disease symptoms early and remove any diseased leaves or plants to the prevent problem from spreading. Most plants that produce fruits, pods, or ears can stand up to 20 percent loss of leaves without loss of potential yields. Do not panic and start spraying at the first sign of leaf feeding or a sick looking plant. Call or visit your local University of Florida Extension Service for recommendations on controlling any vegetable insect or disease problem.
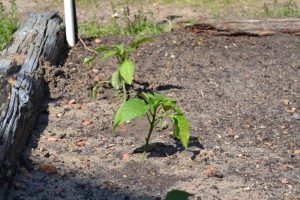
Image Credit Eddie Powell
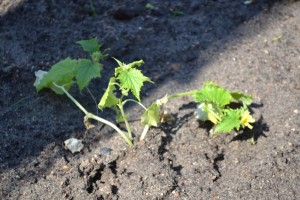
Image Credit Eddie Powell
By Eddie Powell