by Daniel J. Leonard | Aug 20, 2019
Though Okra (Abelmoschus esculentus) fruit isn’t much more than a thick green hull, slime and seeds and the plant itself is impossibly irritating to the skin, few plants are as integral to Southern heritage. In my mind, okra is among the best vegetables Panhandle gardeners can grow. Not only is it a gorgeous plant – Okra belongs to the Mallow family which also includes beauties like Hibiscus and Cotton – but it’s exceedingly versatile in the kitchen, excellent fried, grilled, roasted, boiled (though you have to acquire a taste for slimy textures to enjoy this method) and most famously, as a thickening agent in Cajun gumbo. Because of this exalted status in Southern culture, whether you enjoy eating okra or not, it’s almost mandatory here to include the plant in one’s garden. Most gardeners stick with the old standard varieties such as ‘Clemson Spineless’ or ‘Cowhorn’ and there is nothing wrong with them, however, these plants are almost too prolific for most gardens (growing upwards of 6-7’), especially for those of us growing in the close confines of raised beds. In the search for a less rambunctious but still ultra-productive cultivar, this summer I trialed ‘Jambalaya’, an F1 hybrid developed by Sakata Seed in 2012, with impressive results!
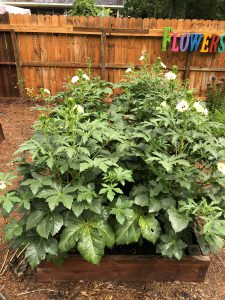
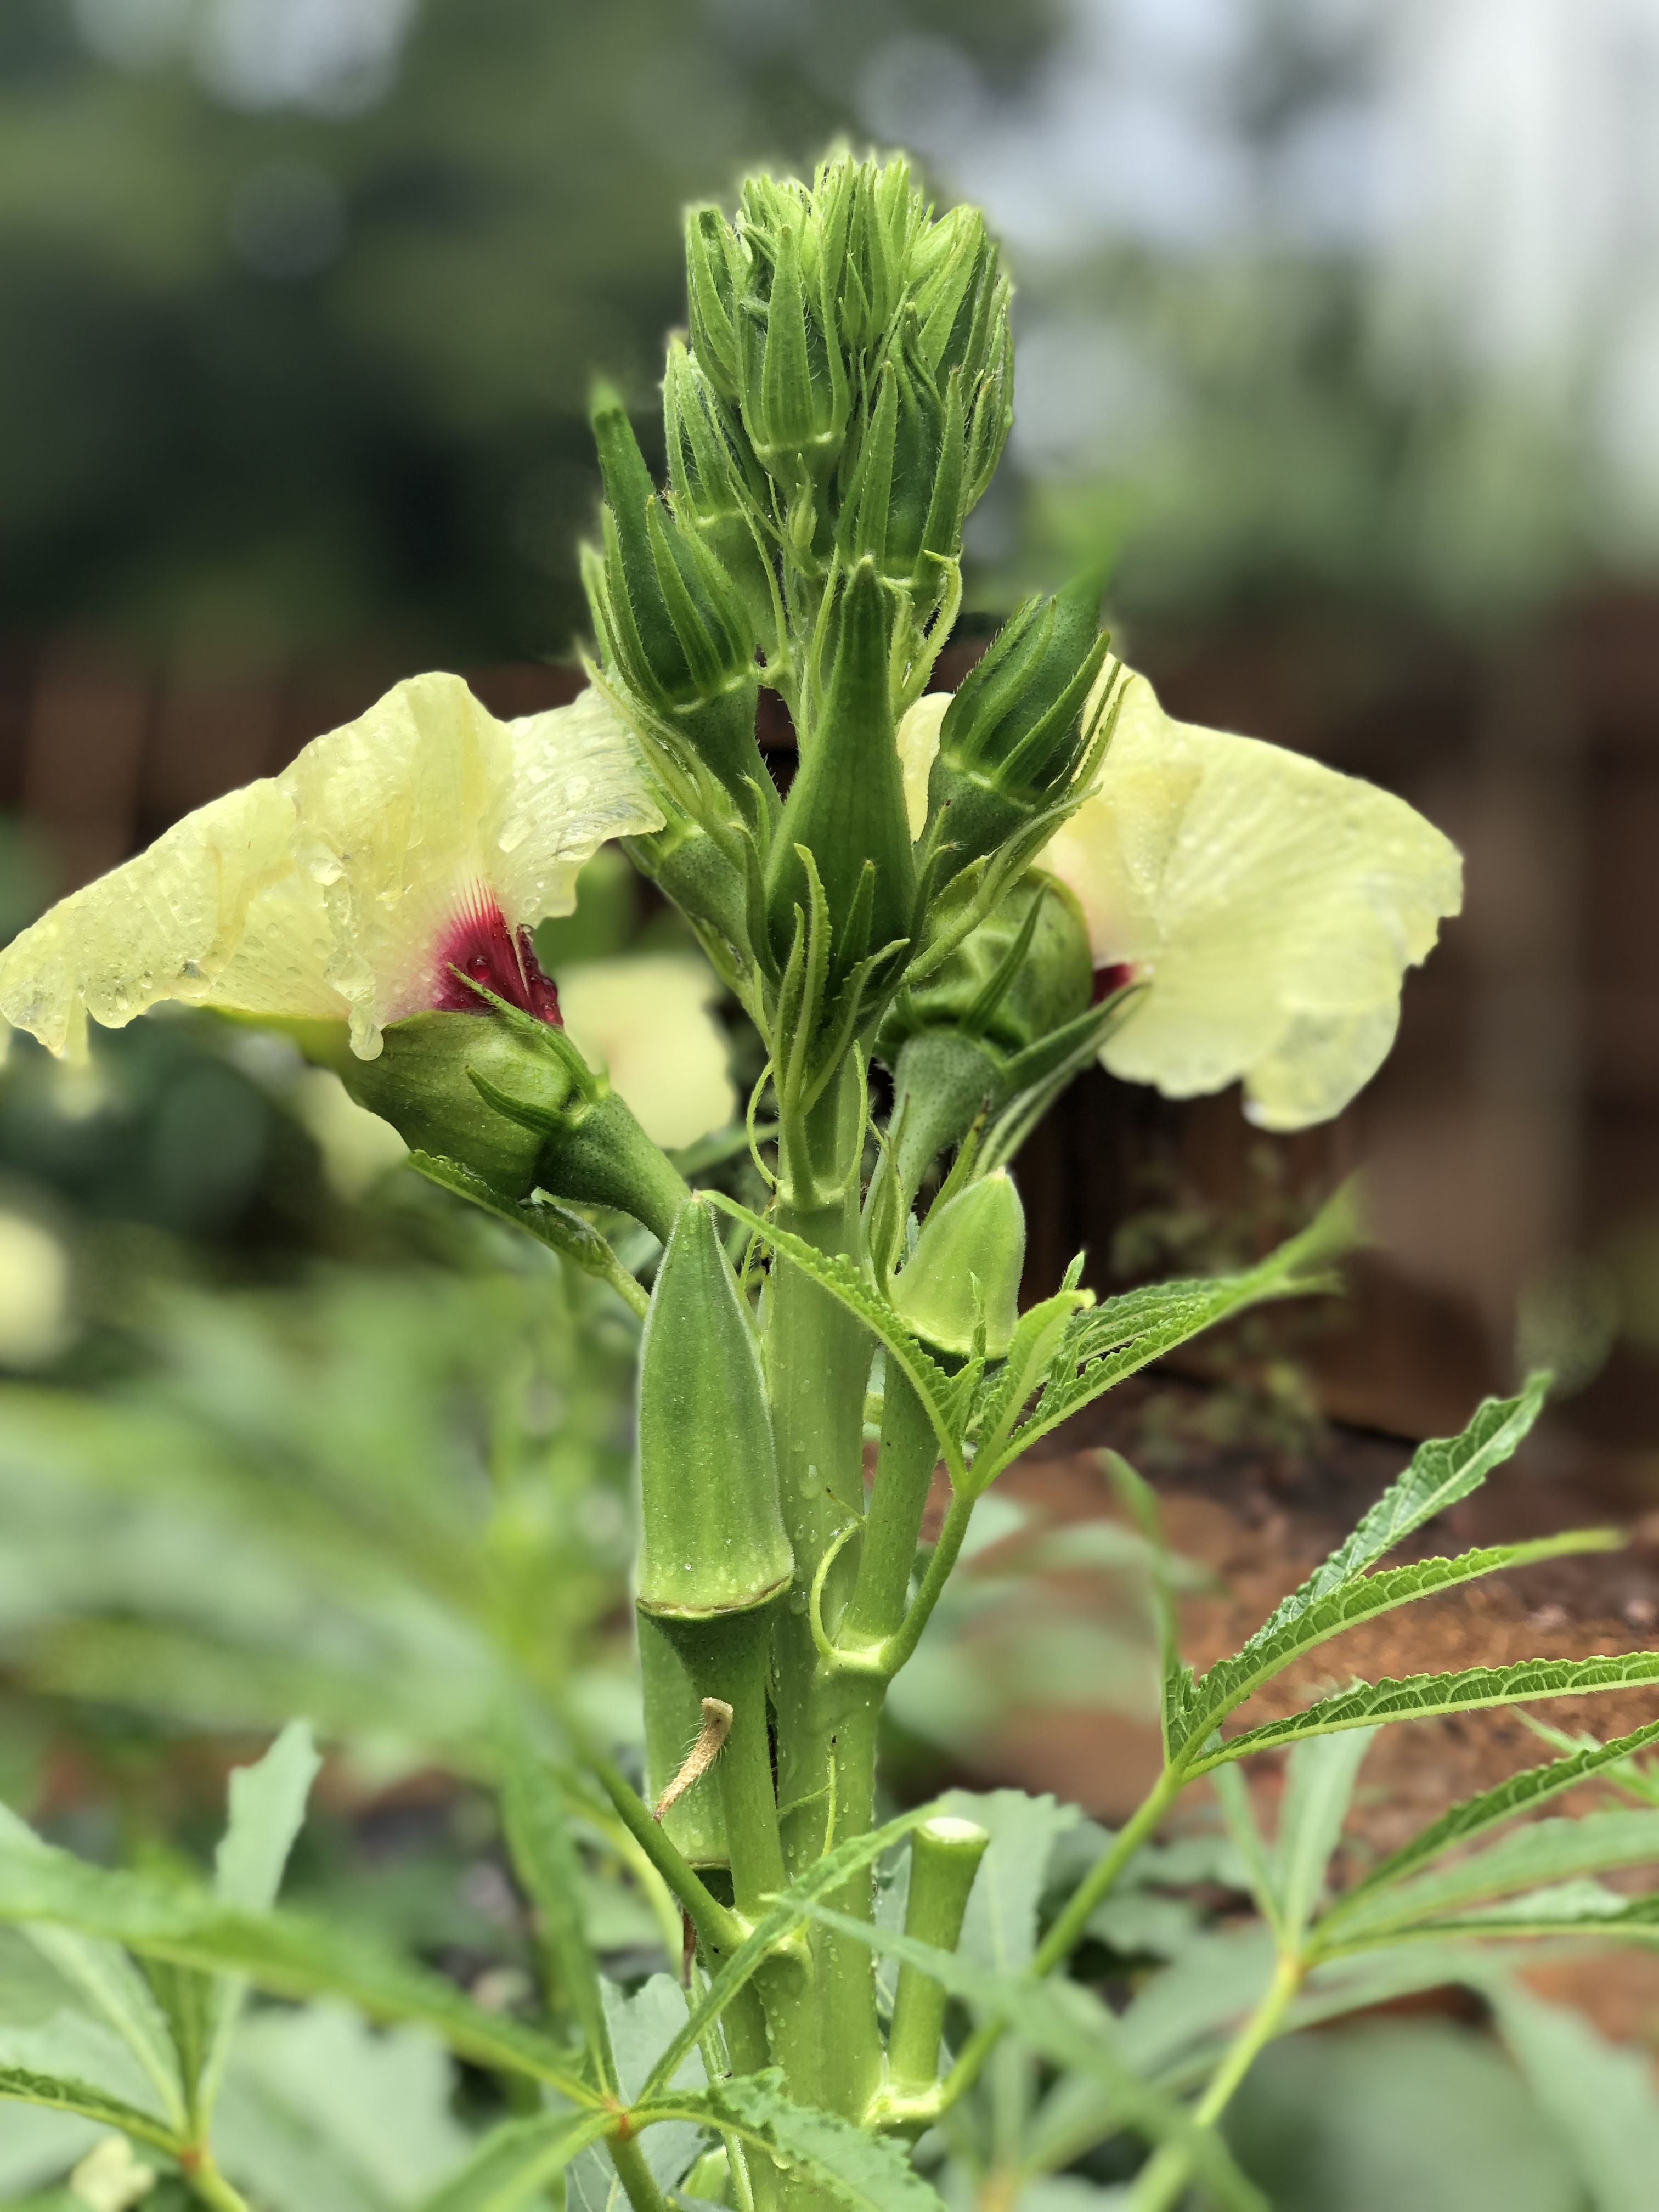
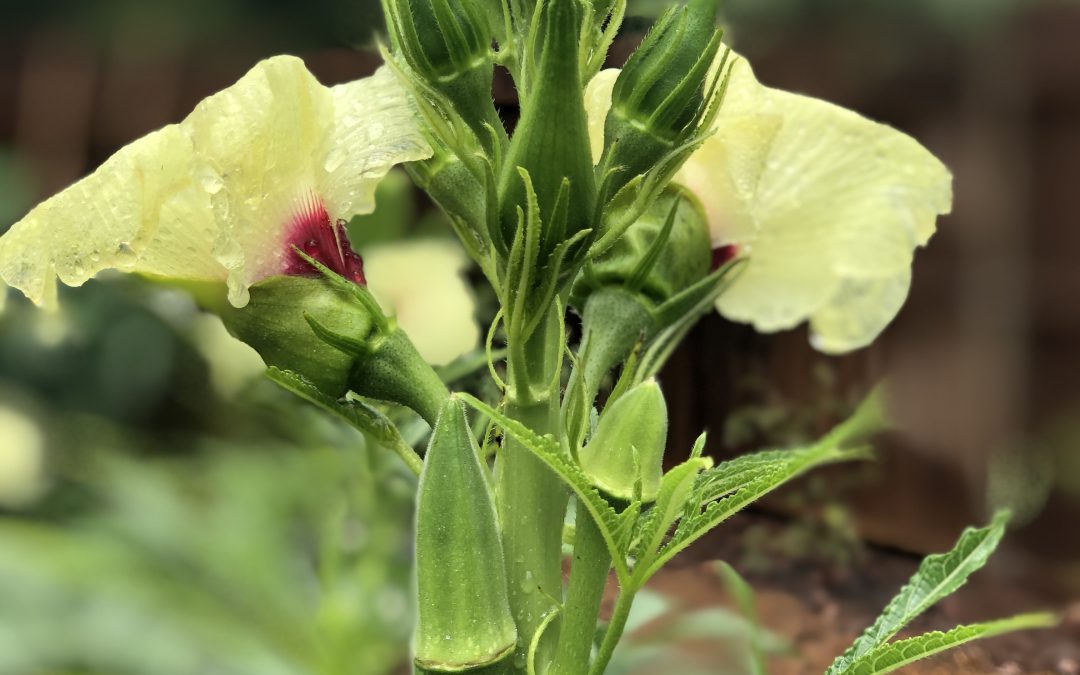
‘Jambalaya’ Okra in the author’s garden.
From my experience growing the cultivar this summer, ‘Jambalaya’ merits consideration in the garden, and is a must for raised bed gardeners, for two primary reasons. First, it was bred to be compact and is considered a dwarf cultivar. This is an awesome attribute, as I typically end the growing season picking okra from a small ladder! Most seed purveyors tout the plant as reaching a maximum height of 3-4’ and while this estimate might be a little conservative, I can attest that ‘Jambalaya’ is greatly reduced in height compared to the standard cultivars. The second advantage of growing this variety is that it begins producing very early relative to its peers and bears heavily. ‘Jambalaya’ fruit begin to ripen in about 50 days, about ten days to two weeks earlier than ‘Clemson Spineless’, a definite advantage if rotating behind a late maturing spring crop like potatoes as I typically do. Though ‘Jambalaya’ is a dwarf plant, in no way are yields reduced. My specimens have produced continuously since late-July and will continue to do so as long as adequate fertility and consistent harvesting are provided.

‘Jambalaya’ flower & fruit production.
Like any other okra cultivar, ‘Jambalaya’ has a couple of basic requirements that must be met for plants to thrive. In general, all okra cultivars love Southern summers and patience sowing seed is recommended, allow the soil to warm to at least 70 degrees before planting. Okra also prefers full sun, at least 6 hours per day, any less and yields will be reduced and plants will stretch towards the light. Belonging to the Mallow family, okra requires consistent moisture, particularly when in the flowering and fruiting phase. Finally, it is critical to keep up with your okra harvest as the plants produce! Okra pods grow quickly and should be harvested when they are no more than 3-4” long and still tender, larger pods are tough to the point of being inedible!

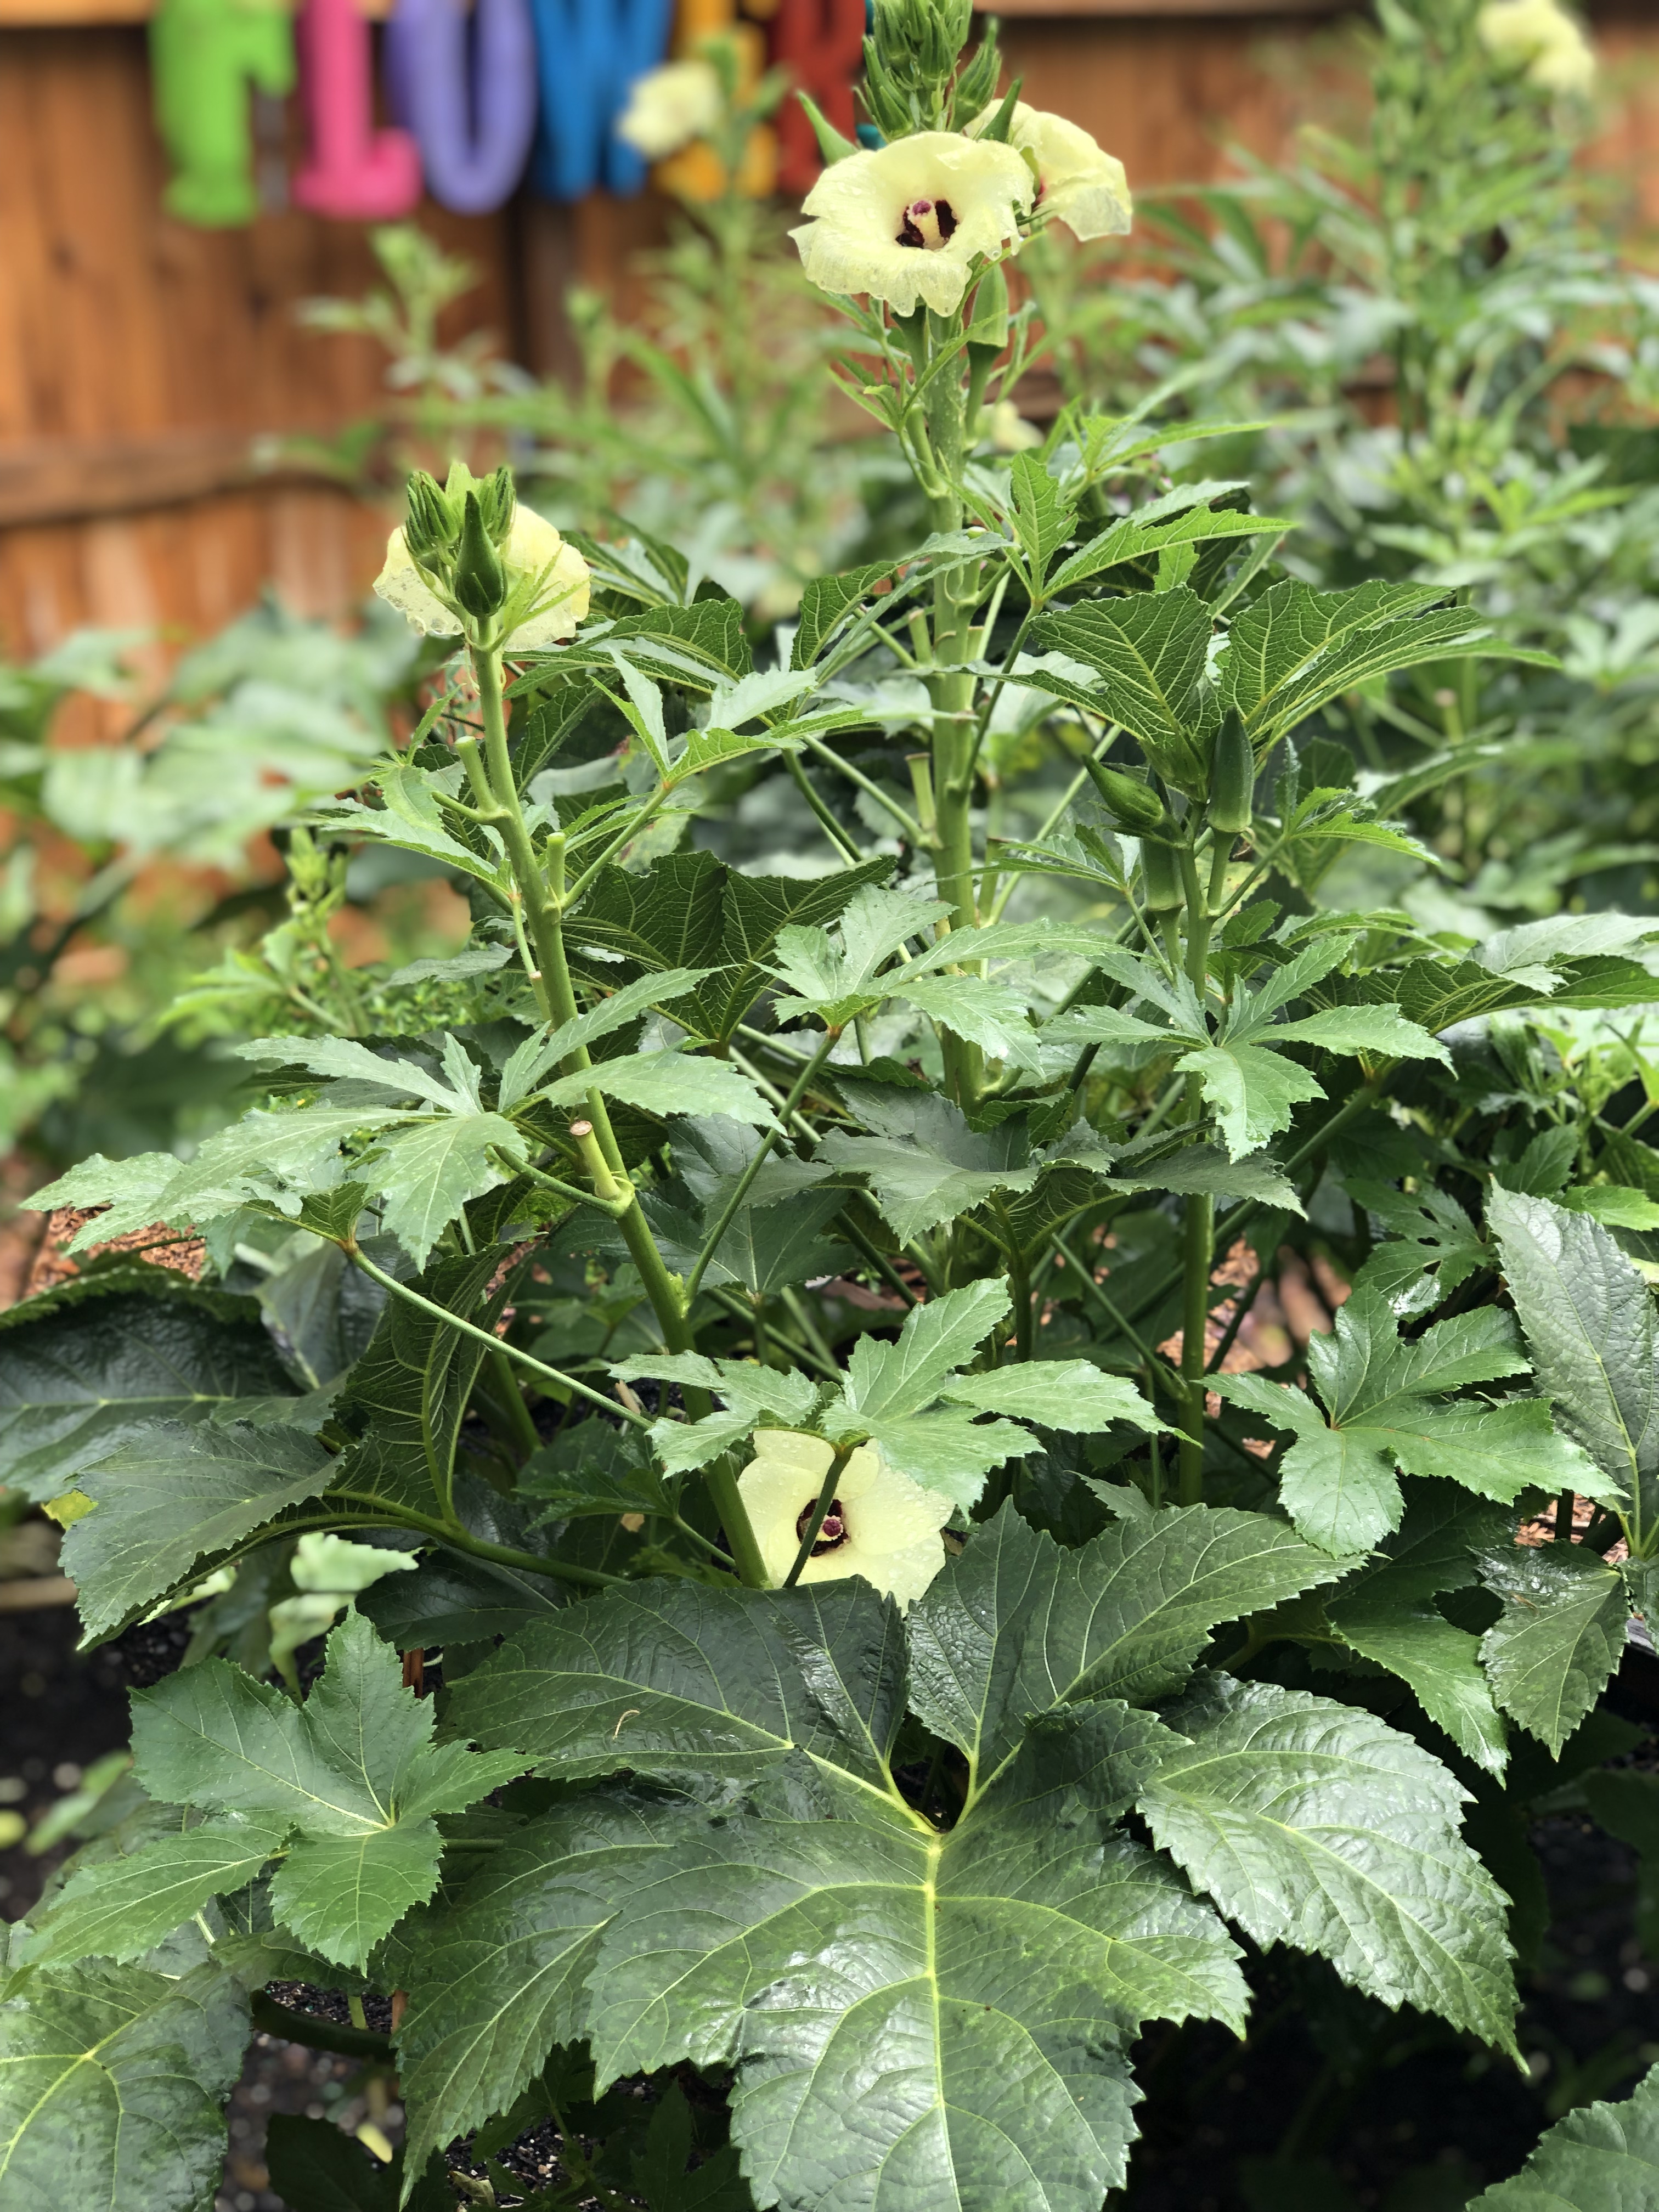
‘Jambalaya’ in the author’s garden.
Whether you’re new to the okra growing game or you’re a seasoned gumbo gardener, I highly encourage you to give ‘Jambalaya’ Okra a look next summer. While ‘Jambalaya’ is available through many seed sources, Johnny’s Selected Seeds sells a conveniently small package perfect for backyard gardeners, though they’ll be happy to provide larger quantities as well. In ‘Jambalaya’ you’ll find a nice compact plant that won’t outgrow your space, provide you a summer long harvest of tender green pods, and will rival the ornamentals in your landscape for the title of prettiest plant on your property! Happy gardening and as always, if you have questions about vegetable gardening or any other horticultural or agronomic topic, please contact your local UF/IFAS County Extension office!
by Mark Tancig | Aug 19, 2019
Horticulture Extension Agents are asked a wide variety of questions, from plant identification to erosion control, from herbicide selection to water regulation. We’re usually expected to know the answer on the spot, too. We’re also expected to write a lot and share information with the public. Well, oftentimes, those factors come together to give us writing inspiration. A challenging question leads to research and gathering of information, which leads to an answer that should be shared so others can learn from it. A recent question regarding the use and regulation of backflow preventers from a longtime gardener inspired my latest knowledge quest and what I found seemed important enough to share with other gardeners.
I would guess that backflow preventers probably aren’t a common item on people’s minds, unless you’re a plumber or in the water supply business. However, backflow prevention devices help ensure that when we turn on the tap to drink, cook, clean, flush, bathe, and yes, garden, that the water isn’t contaminated.
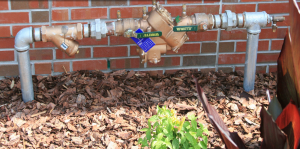
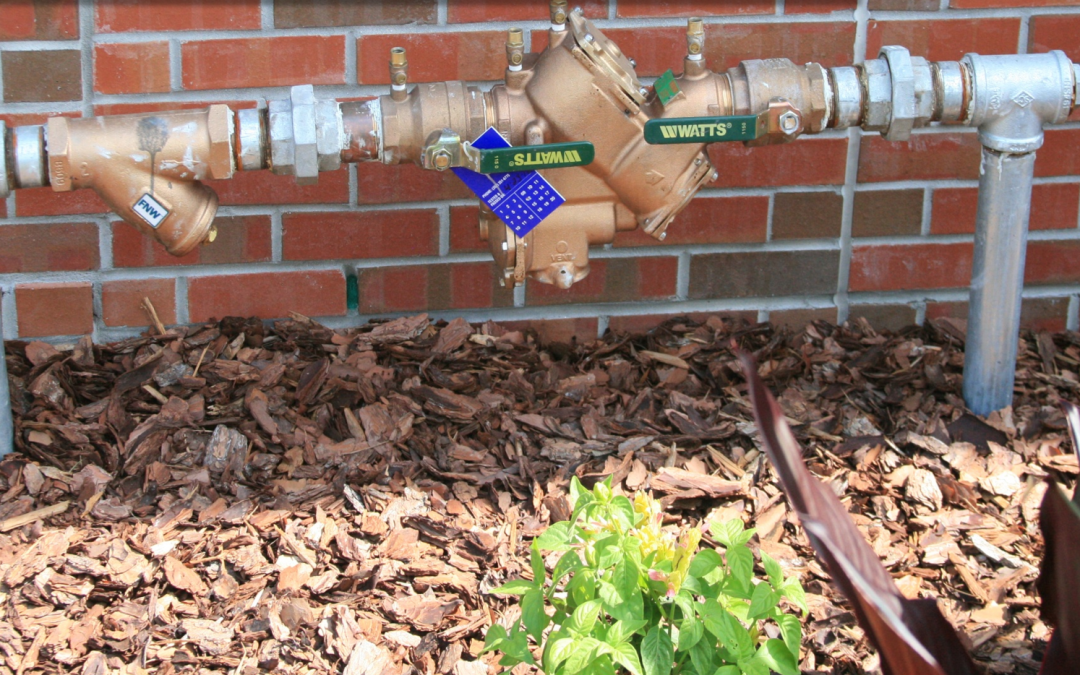
These larger backflow preventers are required to be installed and regularly inspected for certain plumbing systems. They usually hide under utility boxes or fake rocks. Credit: UF/IFAS.
Backflow preventers do just what their name implies, they prevent backflow. Backflow in a plumbing system happens when pressure in another part of the system drops, causing water from other locations to move in to equalize the pressure difference. This can be a problem in a potable water system when the main line loses pressure and water from a contaminated line is pulled in to the main line, potentially contaminating many users water. This can happen when a pipe breaks or during fire-fighting activities, for example. Contaminants of concern include chemical and biological agents, such as heavy metals, industrial compounds, bacteria, and pesticides.
Many of our indoor fixtures have built-in backflow preventers, such as toilets and bathtubs. Exterior backflow preventers, usually found under boxes or fake rocks near the water connection, are required for plumbing systems considered to be more of a hazard risk or where higher pressures could more easily flow back into the line. Examples of such plumbing systems include those with fire-fighting systems, hospitals, several-storied buildings, those associated with certain industrial processes, and, finally back to gardening, irrigation systems. In 1990, the Florida Building Code required that all residential irrigation systems include a backflow preventer. While the Florida Building Code also requires backflow preventers on all hose connections, i.e. spigots, many residential homeowners do not have these in place nor do water suppliers have the budgets to inspect each home’s spigots. A survey of 200 homes in the Midwest during 2002 found that 91% of homeowners did not have a backflow preventer attached to their spigots. I’m not sure north Florida would fare much better.
Gardeners should be aware of this responsibility and go ahead and install a backflow preventer on their outdoor spigots. This is especially true for those that use hose-end fertilizer or pesticide applicators, mix pesticides, or leave a pressurized hose connected to a sprinkler or other device. In addition to chemicals, all sorts of bacteria, algae, and other contaminants can grow in or enter a hose and get sucked back into the house’s line or, worse, the public supply line.
Backflow preventers are cheap and easy to install. A simple brass backflow preventer that connects between the spigot and the hose runs from $3 to $10 and will typically last for several years. You know it’s still working when water leaks out of the backflow preventer as you turn the spigot off. That’s a pretty easy and inexpensive fix to make sure the potable water source stays clean.
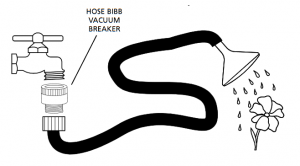
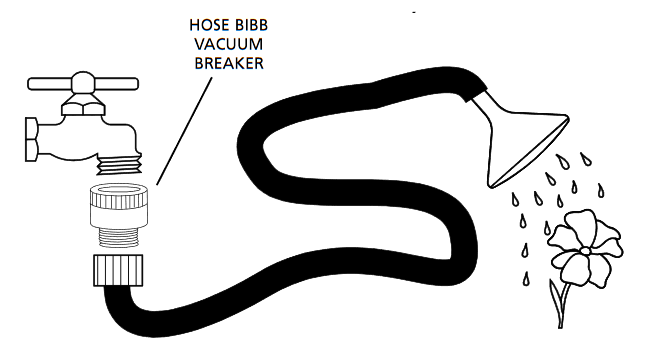
A simple and inexpensive hose bibb/spigot backflow preventer can help gardeners protect their potable water supply. Credit: Univ. S. Cal.
For more information on backflow prevention devices, and to keep writing ideas coming in, please contact your local UF/IFAS Extension Office.
by Daniel J. Leonard | Aug 12, 2019
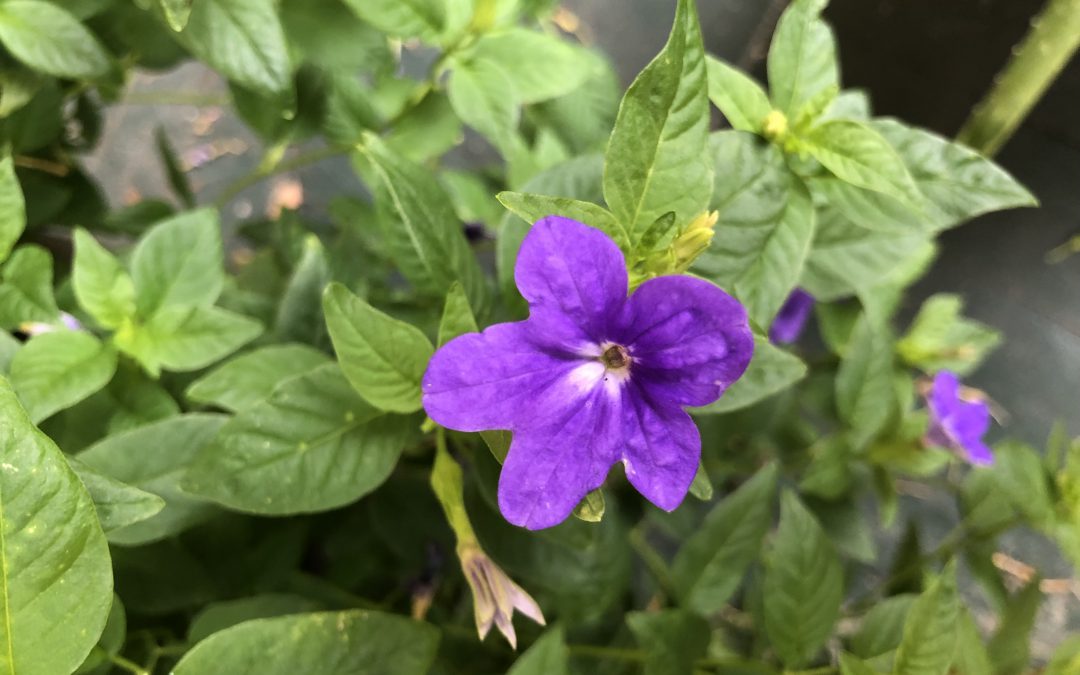
As an unabashed plant enthusiast who’s been experimenting with new plant introductions (some not really “new”, just new to me) in his own landscape, and his parent’s yard before that (sorry guys for the ‘Charmed Wine’ Oxalis that now pops up unwanted every spring) for nearly two decades now, at this point I’m pretty hard to impress. However, last year Andrea Schnapp, a UF/IFAS Walton County Master Gardener, introduced me to a newish plant that has since changed the way I choose plants to color shady pots and planting beds, a little native of tropical South America called Bush Violet (Browallia spp.), specifically the hybrid ‘Endless Illumination’.

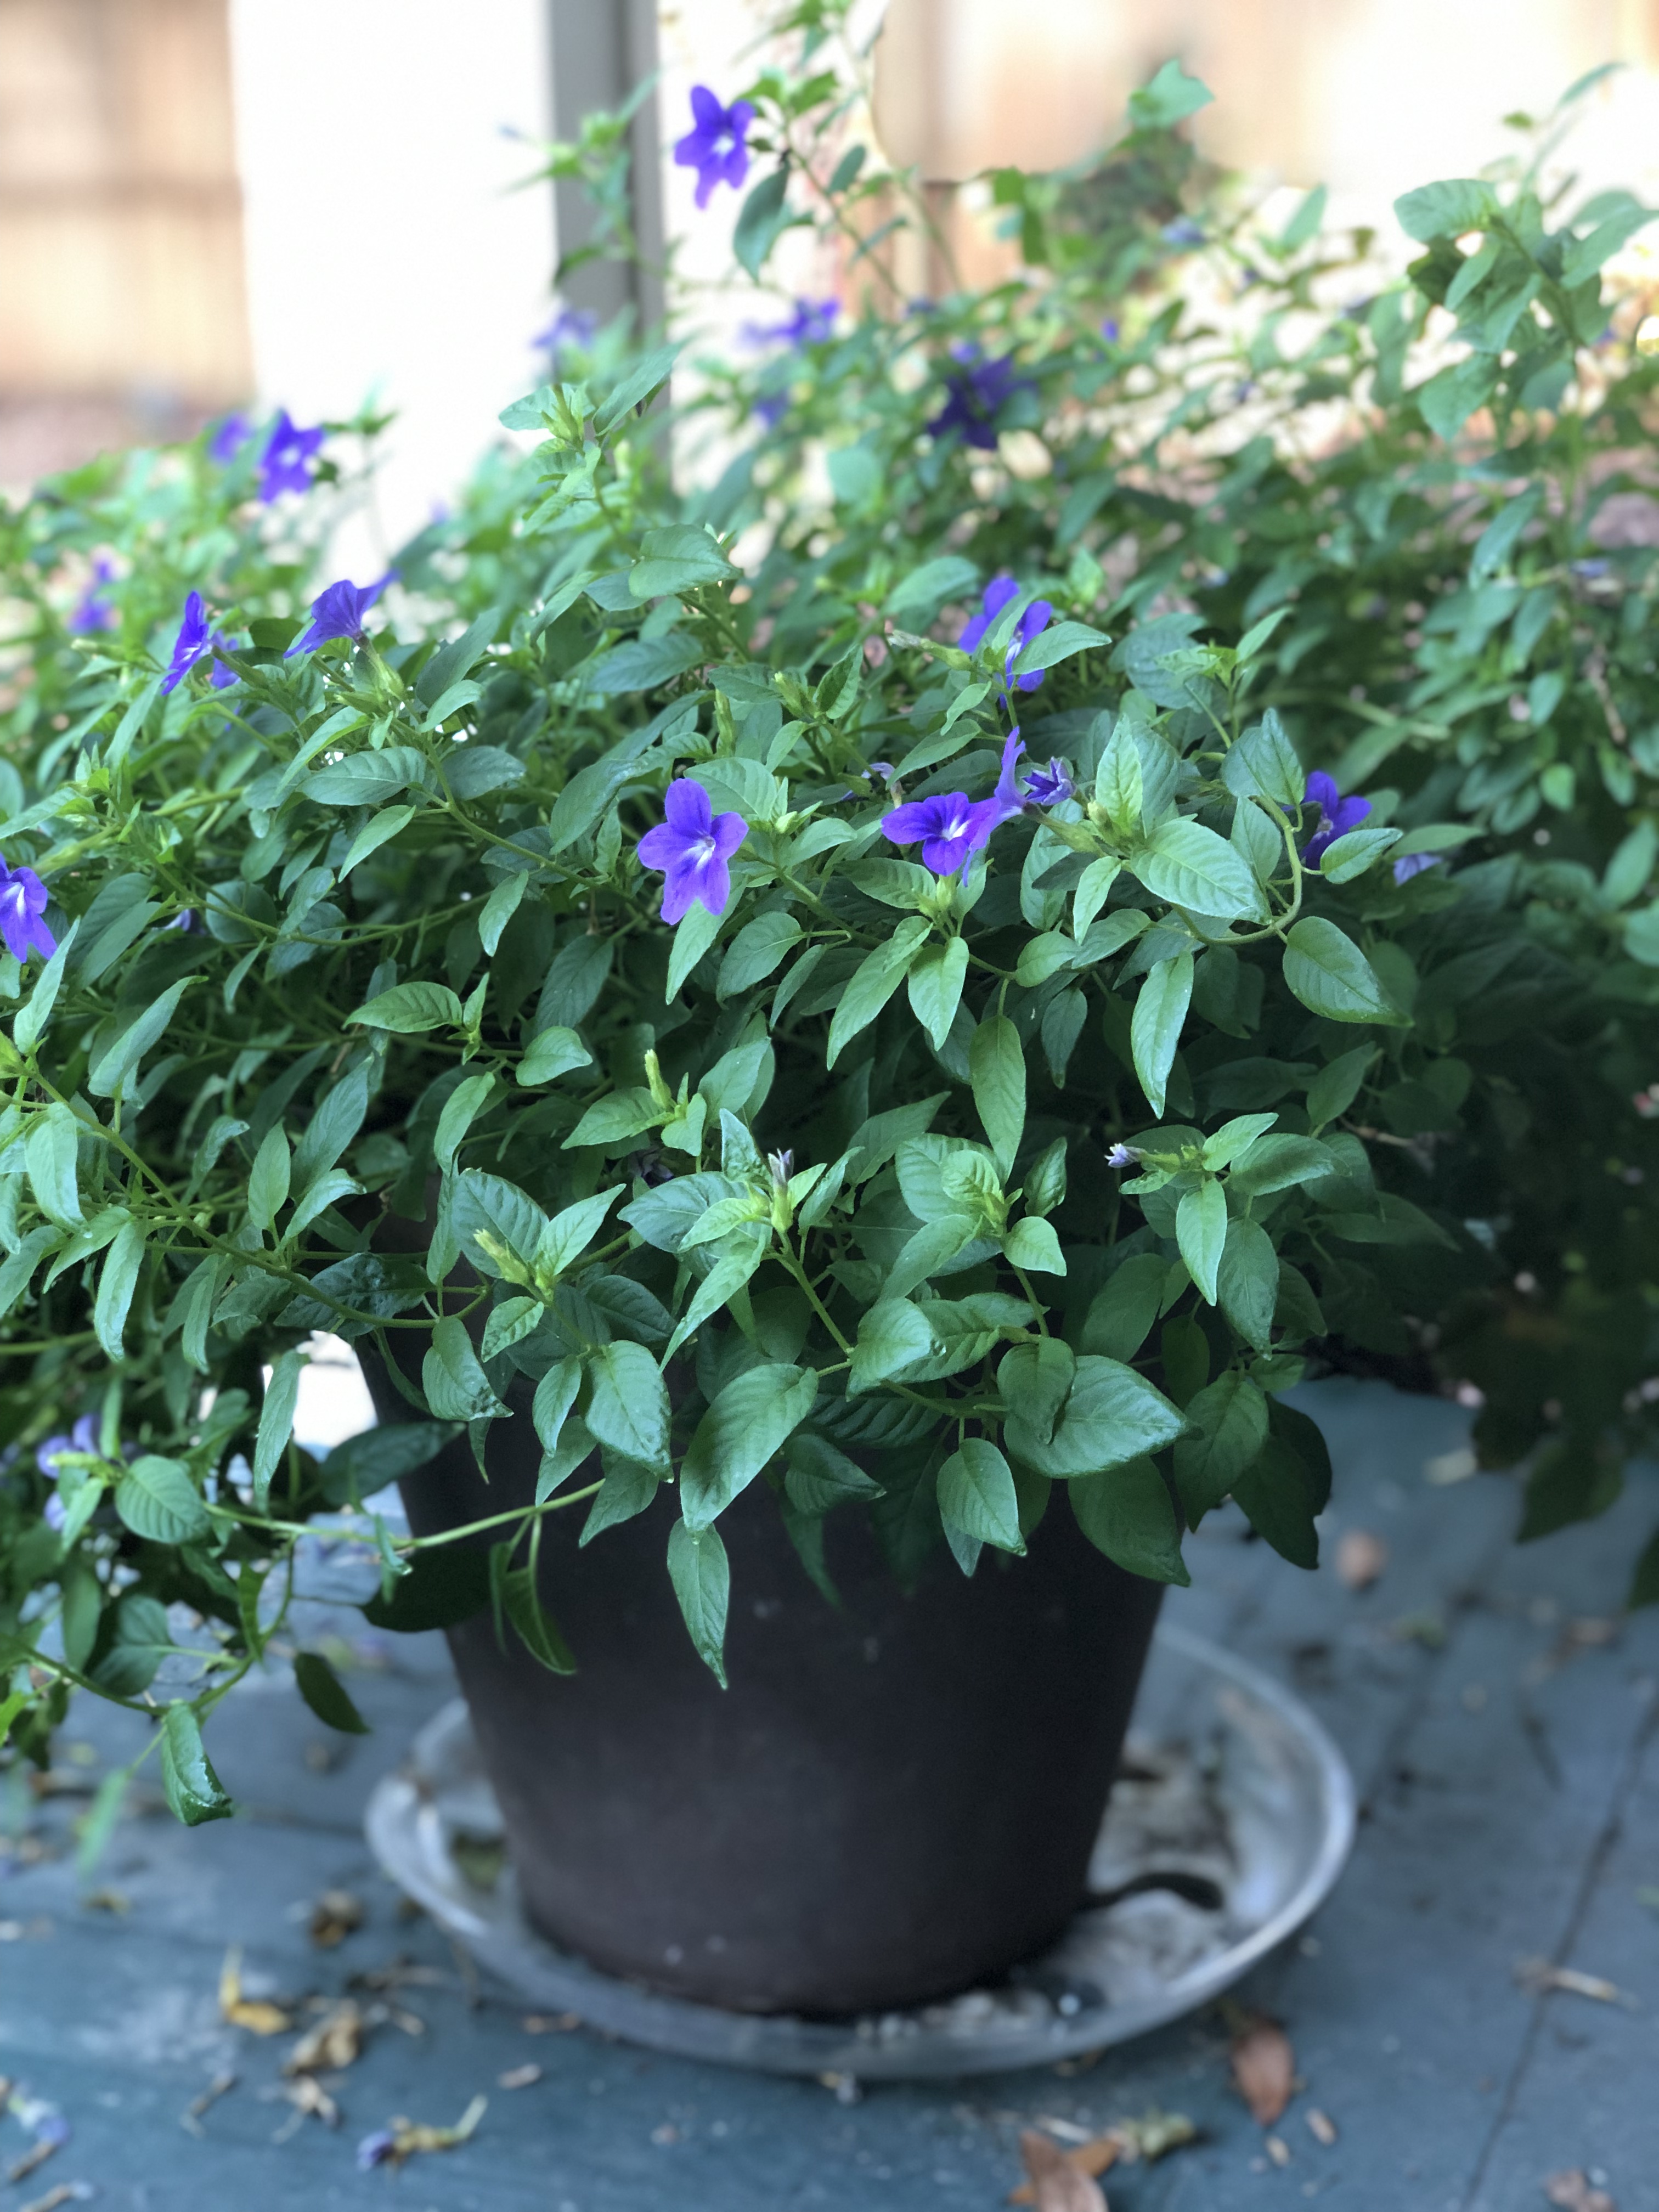
Browallia ‘Endless Illumination’ on the author’s back porch.
For decades, the standard bedding plant for color in the shade in the Deep South has been Impatiens walleriana. However, in the last few years, a new disease called Impatiens Downy Mildew has wreaked habit on the bedding plant species, virtually eliminating it as a serious player in the horticulture industry. Fortunately, the fine folks at Proven Winners introduced ‘Endless Illumination’ a couple of years ago to fill the niche formerly occupied by old-fashioned Impatiens. And boy, is ‘Endless Illumination’ aptly named. The unending masses of star shaped flowers are an absolutely brilliant purple hue that does indeed light up shady areas in the landscape. I’ve encountered few plants put forth such a proliferous display of flowers for as long of a time as this Browallia selection has, and it doesn’t even require deadheading!
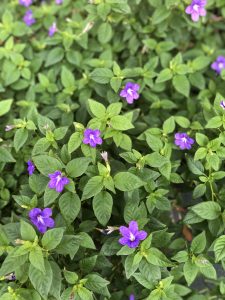
Browallia ‘Endless Illumination’ flowers.
In addition to having one of the more striking color displays of any bedding plant, Browallia happens to be a vigorous grower with an extremely hardy constitution. I’ve found ‘Endless Illumination’s mature size as listed on the sales tag as being a little conservative, instead of the 16” tall x 14” wide stated, my samples have consistently grown more than the 16” listed in height and doubled the width, no complaints here as this just means more flowers! And though my experience with Browallia has strictly been in containers so far, it has weathered heat and bounced back from drought like a champ. It’s not super important to know that the container it occupies is sited under my back porch roof and therefore is subjected to human induced drought by my forgetting to water it, good performance in droughty conditions is good performance in droughty conditions! Finally, Browallia requires the bare minimum of fertilizer to thrive. A good topdressing of a slow-release fertilizer (rates according to the product’s label, of course) at planting and an identical refresher dose mid-summer have induced great performance and no noticeable nutrient deficiencies.
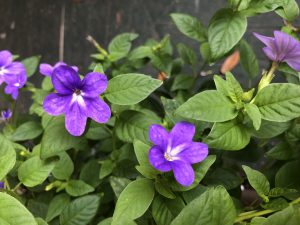
Browallia ‘Endless Illumination’ flowers
A quick note before we adjourn, when perusing nurseries next spring for Browallia, you’ll likely encounter the sister cultivar of ‘Endless Illumination’ with white flowers, named ‘Endless Flirtation’. I’d encourage you to stick with the purple flowers of ‘Endless Illumination’ as I’ve found, through personal growing experience and anecdotes from other growers, ‘Endless Flirtation’ to be noticeably fussier than and not nearly as attractive as its sister plant.
Sometimes, the misfortunes of one plant are a merely an opportunity for another plant to claim its place in the flower bed. Browallia ‘Endless Illumination’ has taken the spot occupied by Impatiens walleriana and quickly become a garden favorite. Look for this awesome little annual in garden centers next spring! And remember, if you have any questions about this newly introduced plant or any other horticultural topic, please contact your local UF/IFAS Extension office! Happy gardening!
by Sheila Dunning | Jul 11, 2019
The Irrigation Association (IA) kicks off the official start of this year’s campaign on Tuesday, July 9, 2019. The initiative promotes the social, economic and environmental benefits of efficient irrigation technologies, products and services in landscape, turf and agricultural irrigation.
Irrigation (agricultural and turf/landscape) accounts for 65-70% of total freshwater use in the United States. According to the Environmental Protection Agency’s (EPA) WaterSense program, the average American family household uses more than 300 gallons of water per day; roughly 30% of this occurs outdoors. Efficient landscape irrigation systems and practices dramatically reduce water being lost or wasted.
The starting point for improving the efficiency of a home landscape sprinkler system is to calibrate each zone (http://ufdc.ufl.edu/IR00003389/00001) and make adjustments and repairs. That includes the rain shut-off device.
Florida is one of the few states with a rain sensor law. The most recent version of the statute (2010) states the following: “Any person who operates an automatic landscape irrigation system shall properly install, maintain, and operate technology that inhibits or interrupts operation of the system during periods of sufficient moisture.” (Florida Statute 373.62). Regardless of the water source or age of the system, all in-ground irrigation systems must be connected to a functioning rain sensor of some kind.

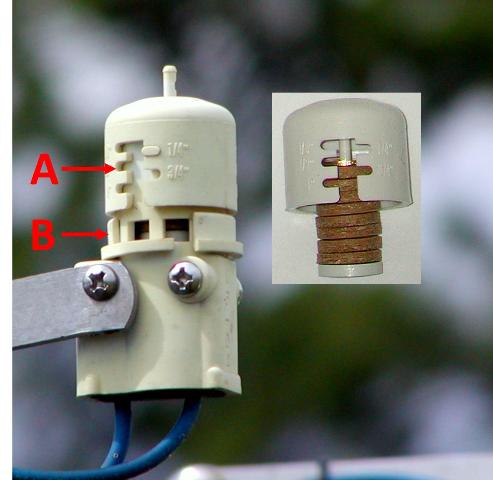
Expanding disk Rain Sensor
Expanded disk devices are the most popular rain sensor due to their low cost, ease of installation, and low maintenance. Traditionally, they are wired into the controller, but a wireless version allows for quicker installation and mounting up to 300 feet from the controller. These “mini-click” sensors contain disks made of cork that absorb rainfall and expand, triggering a pressure switch. The disk cover is rotated to adjust for the predetermined amount of rainfall required to trigger the switch. It should be set on ½ – ¾ inch, depending on soil type and rooting depth of irrigated plants. The switch continues to interrupt the scheduled controller as long as the disks are swollen. When the rain stops, the disks begin to dry out. Once they have contracted, the switch closes and the regularly scheduled irrigation cycle begins where it left off before the interruption. These small cork disks wear out in Florida’s heat and need to be replaced. By checking and repairing the sensor parts, the sprinkler system will operate much more efficiently. We have all seen irrigation systems running in pouring rain. Keep yours maintained to avoid this needless waste of water.
So, join the kids this summer. Go outside and play in the water. Turn on the sprinkler system and check it out. July is Smart Irrigation Month. Let’s see how efficient you can make your system and reduce the water waste in Florida.
by Daniel J. Leonard | May 27, 2019
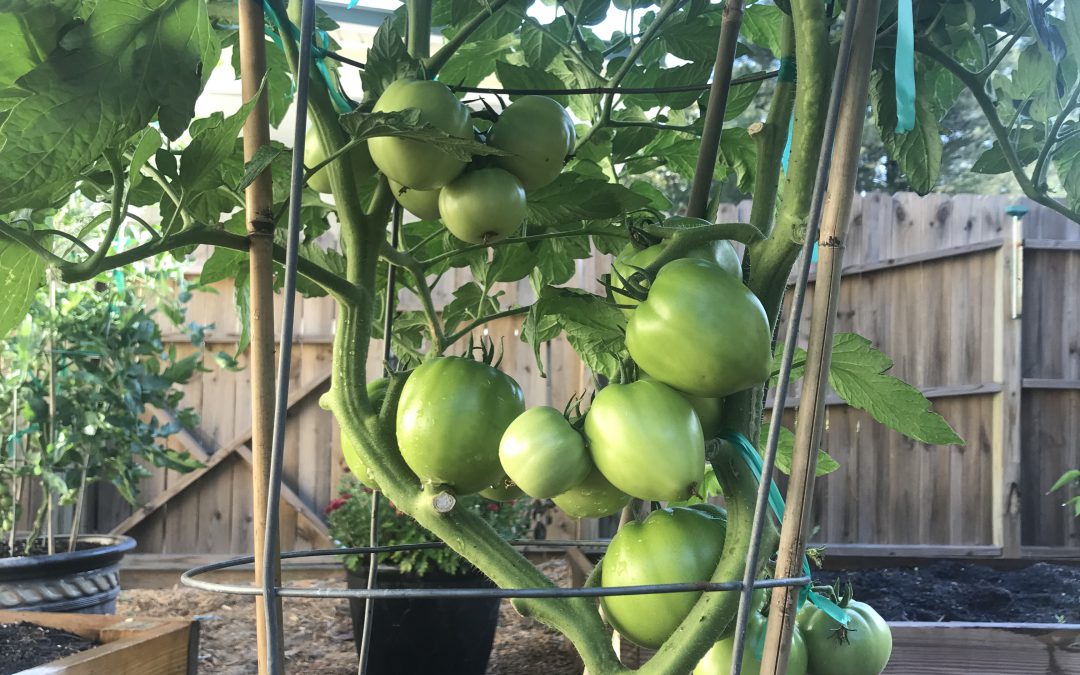
Talk to nearly any Panhandle gardener and one of the first things brought up in conversation is the difficulty growing large, beefsteak/slicing tomatoes (Solanum lycopersicum) in their home garden. Large tomatoes are indeed among the more challenging garden vegetables in North Florida, affected by myriad pests, pathogens and abiotic issues. However, giving up growing this garden favorite is unwarranted as success can be had by following a couple of often overlooked, simple steps to ward off potential problems.
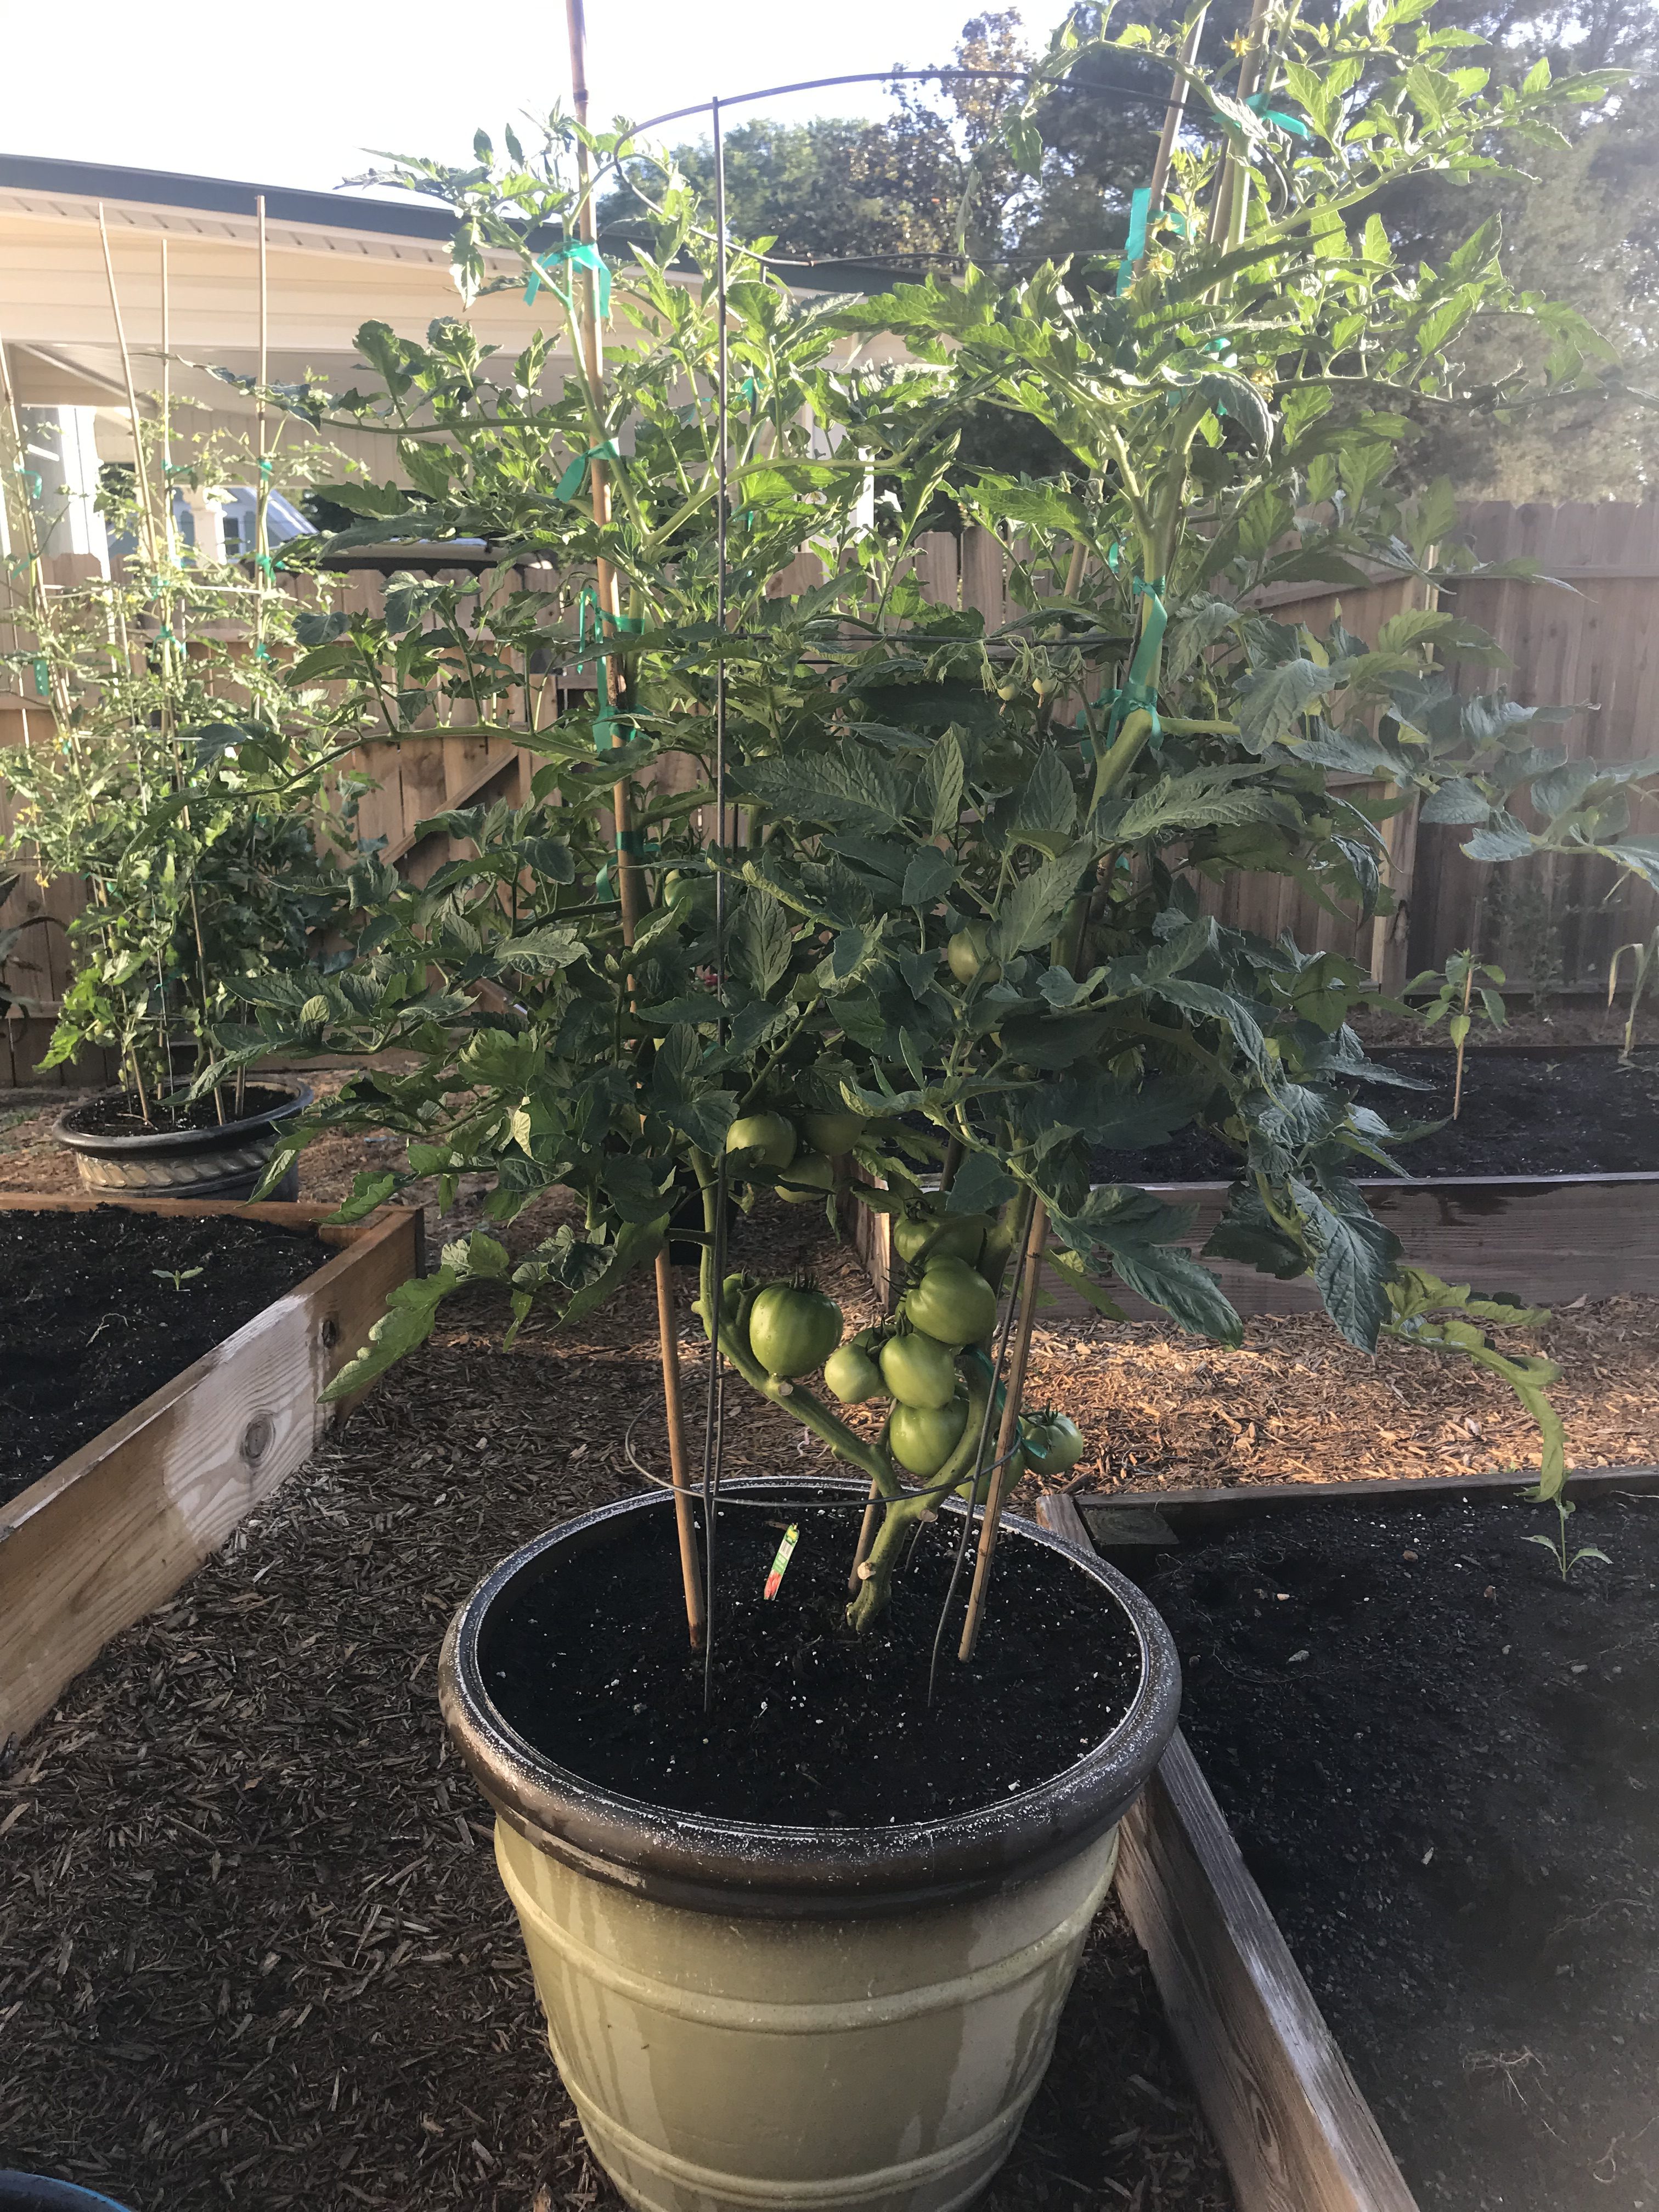
Choose Resistant Cultivars – One of the major recent gardening trends is the rise of heirloom veggies, particularly heirloom tomatoes. While many of these varieties certainly are interesting and often possess superior flavor/texture, heirlooms are, as a group, extraordinarily susceptible to disease in our climate. Fortunately for gardeners, there are a number of excellent varieties available with large resistance profiles to many common diseases and a similar taste profile to heirloom favorites! ‘Big Beef’ (pictured), ‘Better Boy’, ‘Celebrity’, and ‘Skyway’ are just a few of the many great cultivars with extensive disease resistance available as transplants at garden centers or as seed from quality online seed vendors.

Tomato ‘Big Beef’ in 15 gallon decorative container
Start Early – Once, you’ve selected the proper cultivar, the next key is to get them in the ground early! I’m convinced one of the primary reasons folks fail with tomatoes is waiting for “traditional” garden planting dates. For instance, an old tradition in the South is to plant your garden on Good Friday before Easter. However, according to Johnny’s Selected Seeds Southeast Sales Representative Blake Thaxton, tomatoes should be germinated and growing in the garden no later than March 15. Mr. Thaxton notes two primary reasons for this, the most important being pest/disease avoidance. Beefsteak tomato varieties take around 70 days from planting to harvest, so a March 15th planting date yields ripe tomatoes around the third or fourth week of May, when pest/disease pressure is still manageable. Pests and disease occurrence becomes exponentially worse in the Panhandle as May trickles into June and July, therefore it is critical that your fruit begin ripening prior to this onslaught. An important second motivation to plant early is that tomatoes stop setting fruit when nighttime temperatures rise above 75°F. At these temperatures, tomato pollen is rendered sterile and though the plant will continue flowering, no fruit will be set.
Mulch – Another overlooked best management practice in backyard veggie gardening is mulching! Those of us who tend flower beds already know many benefits of mulch like soil temperature moderation, weed prevention, and moisture conservation. But for tomato growers, mulch has another benefit – disease prevention! Several serious diseases that affect tomato are soil-borne pathogens (i.e. Early Blight, Late Blight, Bacterial Spot, etc.). These pathogens find their way onto plants either indirectly via water splashing from soil onto leaves or direct contact from leaves and fruit resting on the soil. To prevent these pathogens from infecting plant tissue, apply an organic mulch (preferably wheat straw or tree leaves) under and around plants. This simple step goes a long way toward season-long, yield-saving disease prevention.
Consistent Watering – Everyone knows plants need water but what you might not know is that irrigation consistency makes a huge difference in plant health, particularly tomatoes. Consistent watering is key in helping ward off one of the most frustrating tomato maladies, blossom end rot (BER) – you know, the one where the bottom end of your perfectly good tomato fruit turns to a brownish mush! Though BER is caused by calcium deficiency, the condition is commonly induced by creation of distinct wet and dry periods from non-regular watering, interfering with calcium uptake and availability to the plant. So, while you may have adequate soil calcium, if you don’t water correctly, the condition will happen anyway! It’s also good to keep in mind that mature tomato plants use large quantities of water daily, so during the heat of summer, plants in containers may need to be watered multiple times daily to maintain consistently moist soil. Think about it, you don’t drink 8 glasses of water when you wake up and then never drink again throughout a hot day. A tomato is no different. Allowing your plants to wilt down before providing additional water ruins productivity and can induce BER.
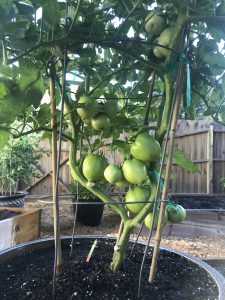
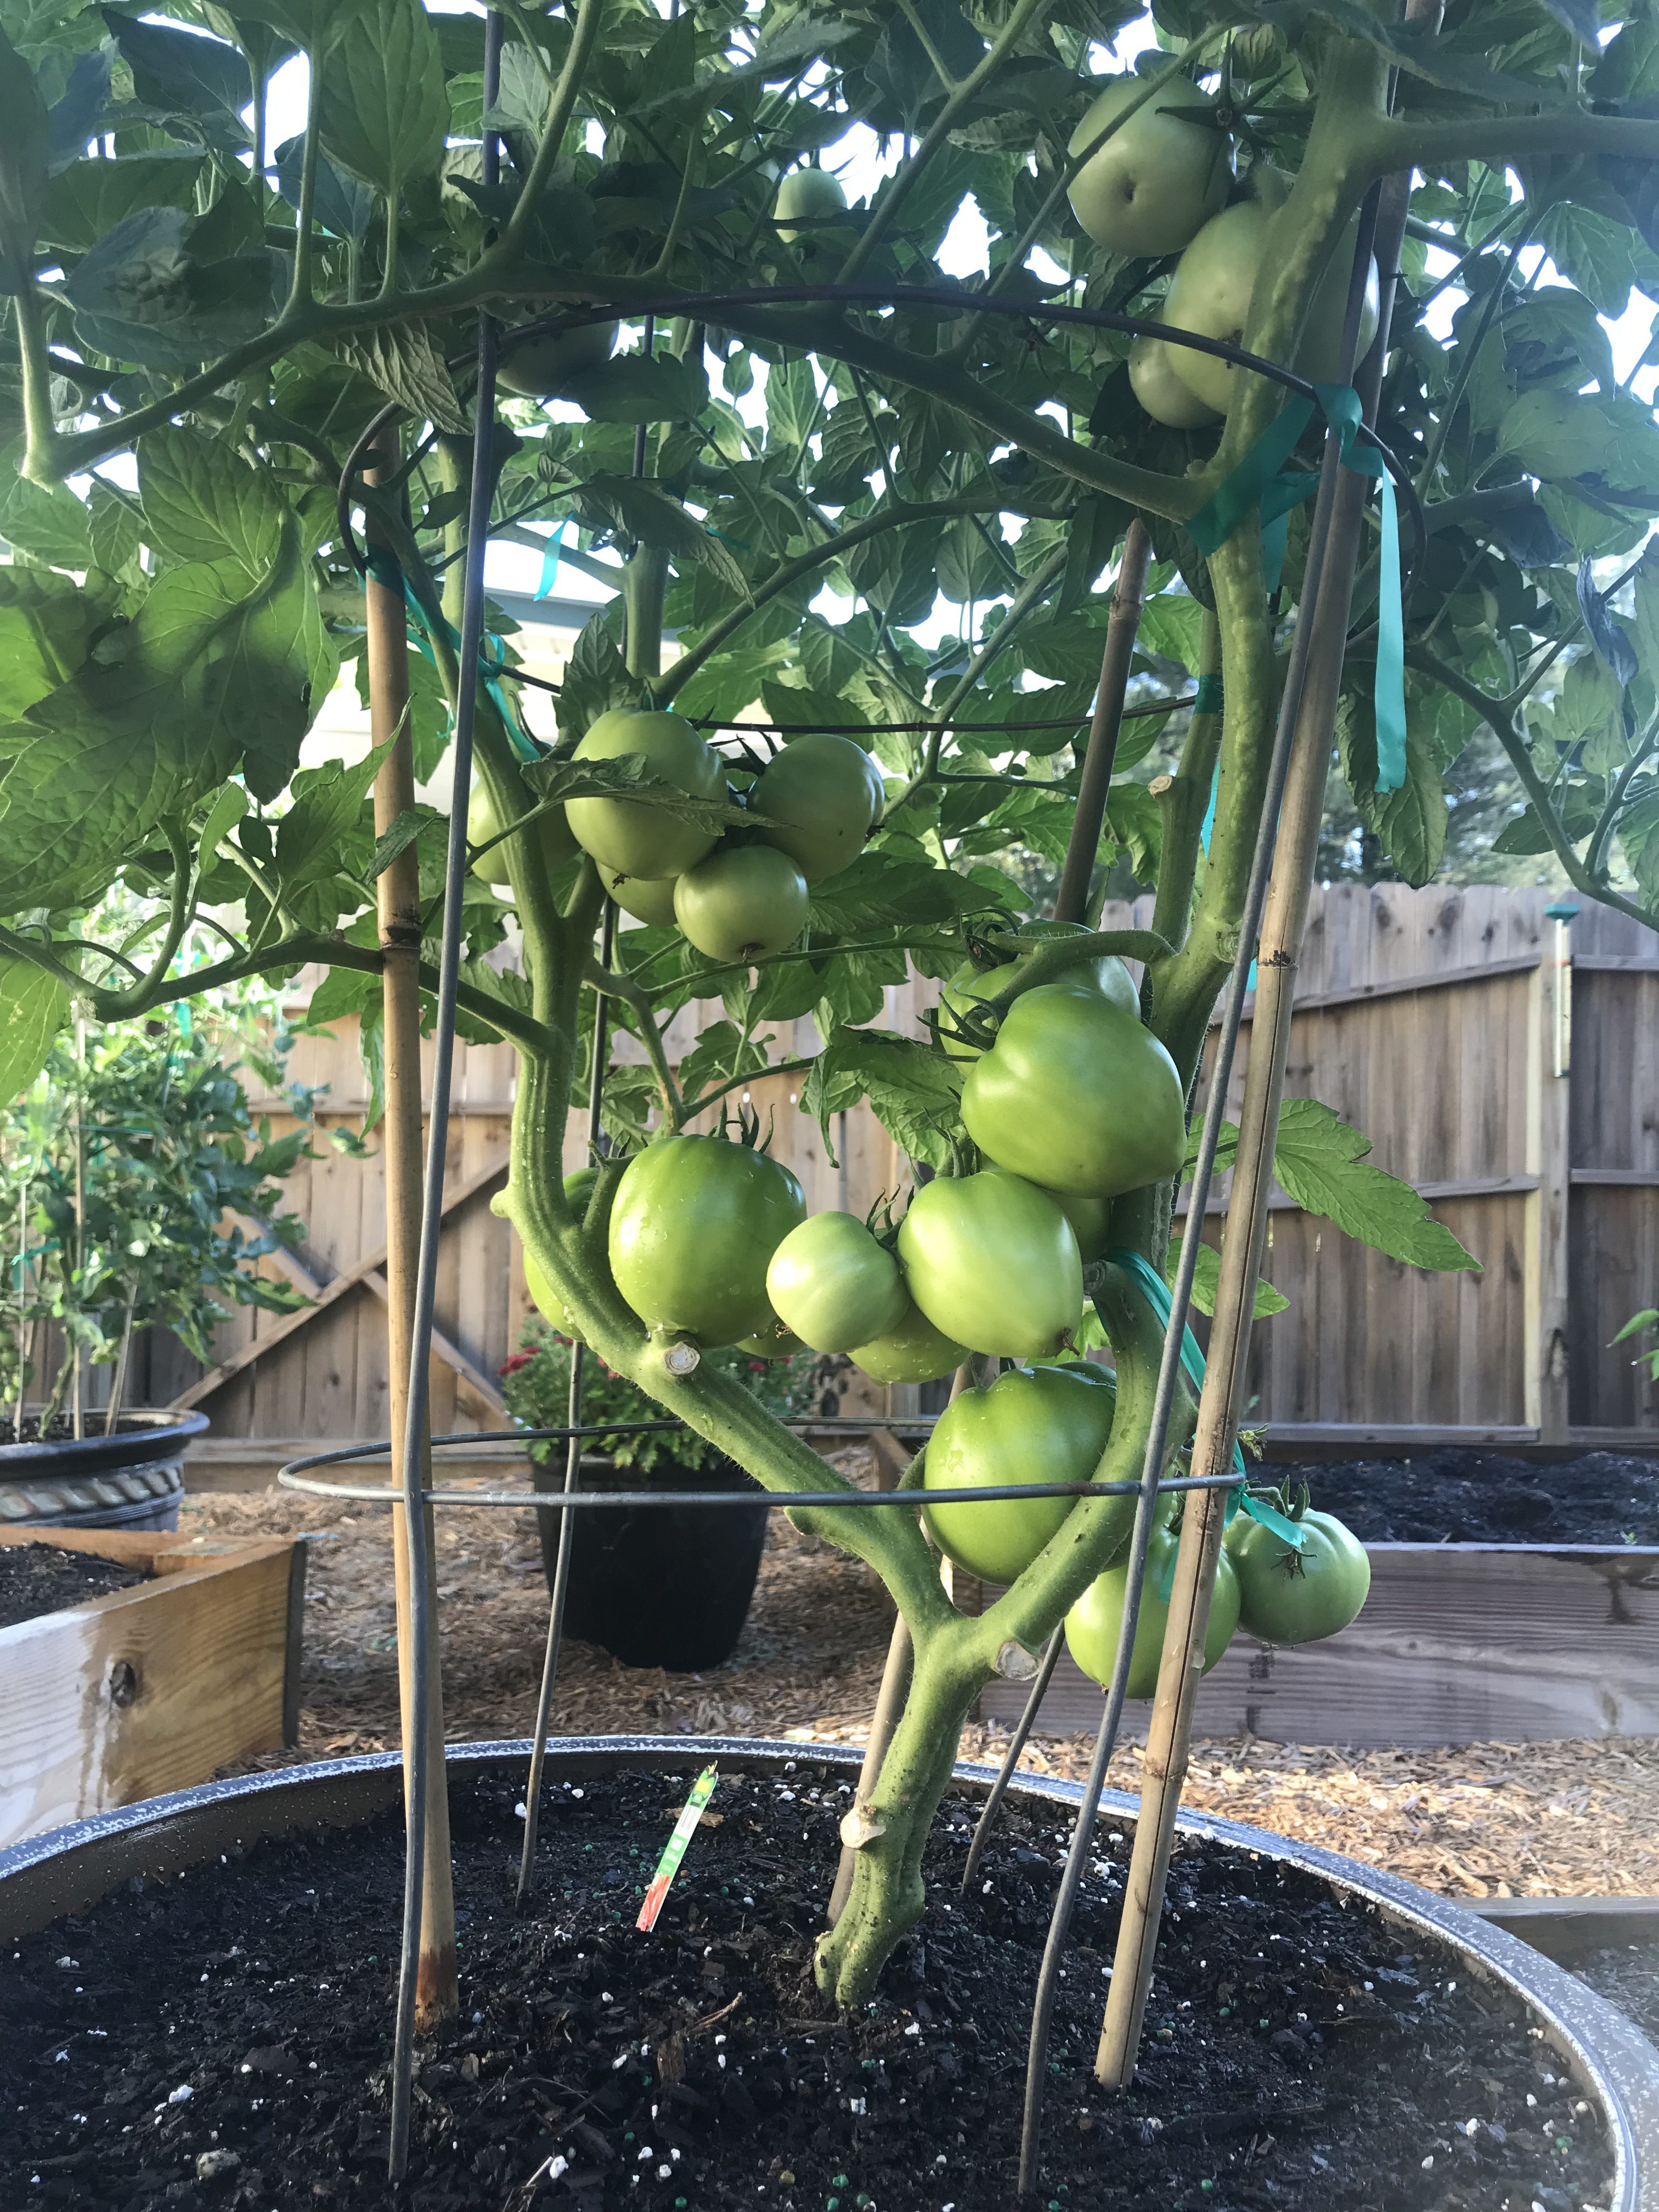
Tomato ‘Big Beef’ demonstrating pruning for soil clearance and airflow.
Pruning – I get it. Once you’ve nursed your baby tomato from a wee transplant or seed into a rapidly growing and flowering plant, it seems counter-intuitive to break out the pruners, but to keep your tomato plant as healthy as possible for as long as possible, that is what you must do! Pruning tomatoes should accomplish two things. First, remove the bottom layer of foliage from the plant base, so that water will not readily splash onto the lowest remaining leaves. (I tend to remove all leaves up to the second set of flowers 8-12” from the soil’s surface.) As with mulching, this prevents bacterial and fungal pathogens from spreading easily from the soil surface onto your plant. Second, tomato plants, especially the vigorous indeterminate varieties, often grow more foliage than is necessary for fruit production. This excess foliage can prevent airflow and trap moisture in the canopy of the plant, promoting disease. To open up the canopy and allow for more airflow, I prune off leaves that grow from the primary stems inward to the center of the plant. The idea is to keep the inside of the plant open while allowing enough leaves to power photosynthesis and shade the developing fruit below.
Tomatoes are notoriously hard to grow, but by following a few easy preventative practices, gardeners can greatly increase their chances of realizing harvestable fruit come summer. Please keep in mind that this is not an exhaustive list that will ensure disease-free plants over the entire growing season (you should also get a soil test to make sure your pH and soil fertility are correct and ideally you’d never work in your tomatoes when they are wet, etc., but this is a good place to start!). However, a little bit of planning and prevention early in the season can make growing tomatoes a lot less frustrating! As always, if you have questions regarding tomatoes or any other horticultural topic, please contact your local UF/IFAS Extension Office. Happy gardening!
by Molly Jameson | May 20, 2019
Spring is in the air, and that means temperatures are warming up and tank-tops, shorts, and flip-flops will soon be your preferred attire. Once those highs are steadily in the 80s and 90s, any outdoor activity will become coupled with a bottle of water and the occasional ice-cold glass of lemonade.
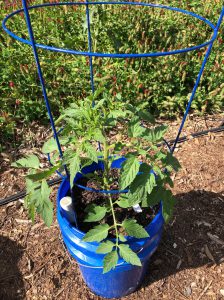
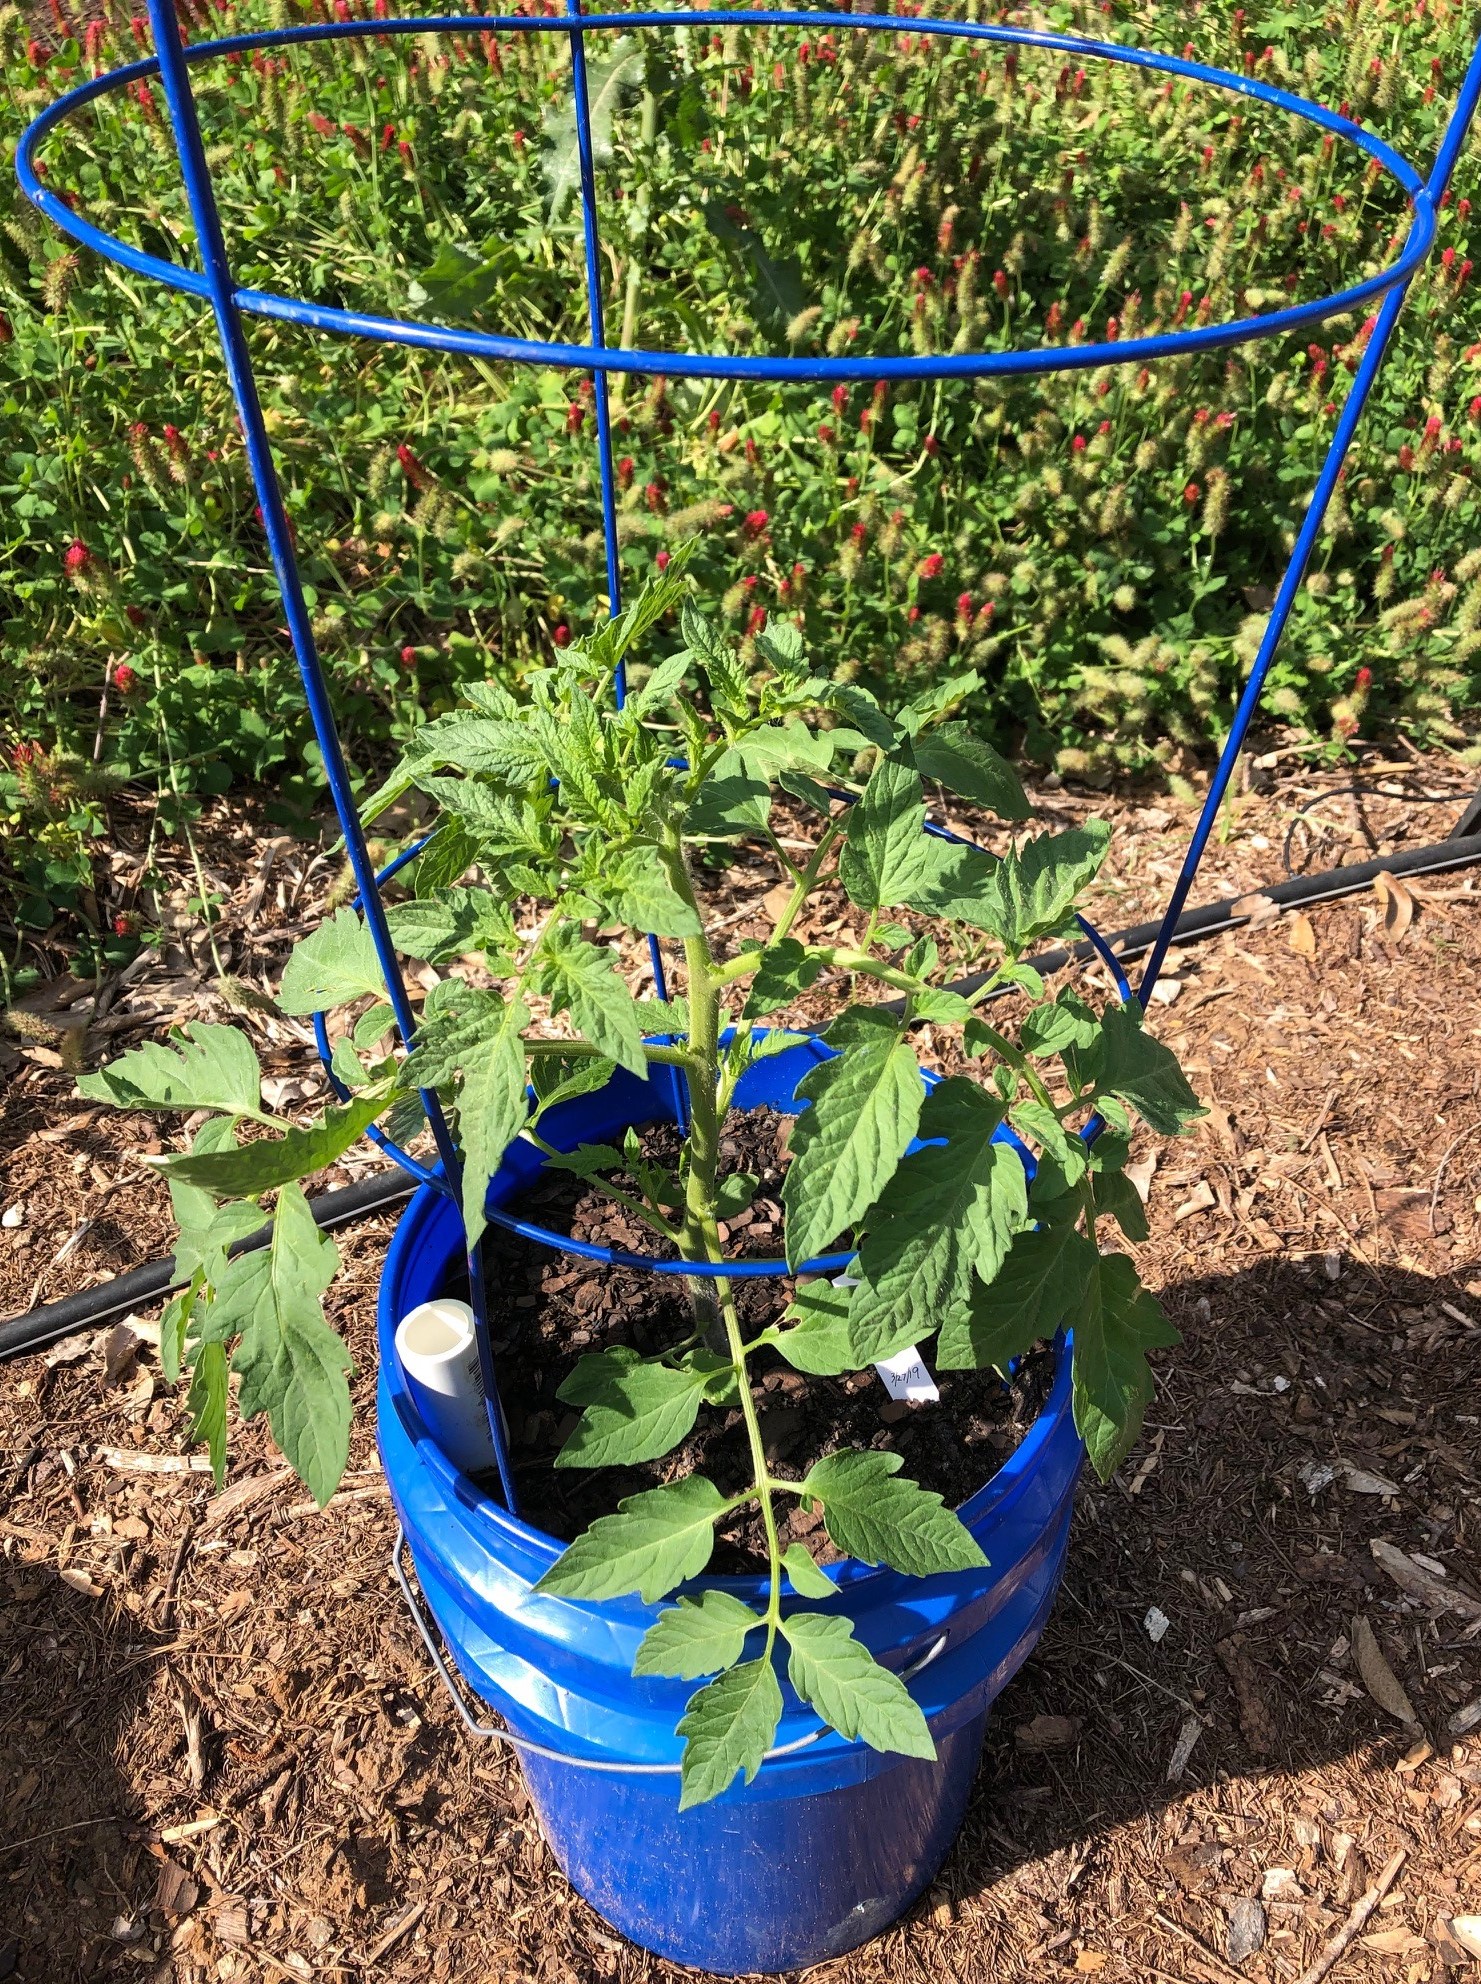
Self-watering containers allow you to continue gardening even if you plan on going on vacation this summer. Photo by Molly Jameson.
If you’re a gardener, you will notice the hot sun doing its best to dehydrate not only you, but your spring vegetable and flower beds too. And although April showers bring May flowers (and Mayflowers bring pilgrims) in many parts of the country, spring is historically one of the driest periods for the Florida Panhandle.
While spring in the Florida Panhandle can be quite dry, it is the relentless heat of summer that really drives up transpiration and evaporation rates. And herein lies the dilemma: the kids are soon to be on summer break, family vacations are on the horizon, and all your favorite summer veggies are on the brink of delivering their bounties.
If you do not have a reliable irrigation system and timer or the fortune of a very generous green-thumbed neighbor, you risk your hard work in the garden succumbing to the heat while you are away. If you find yourself sacrificing a summer garden in place of a vacation, don’t despair. There is a low-cost, homemade solution that can step in while you are away: a self-watering container garden.
Self-watering containers use the process of capillary action, where water molecules are pulled upward from a water reservoir into soil above and then into and through plant roots. The forces of cohesion, in which water molecules stay close together, and adhesion, in which water molecules “stick” to other substances, create this important phenomenon.
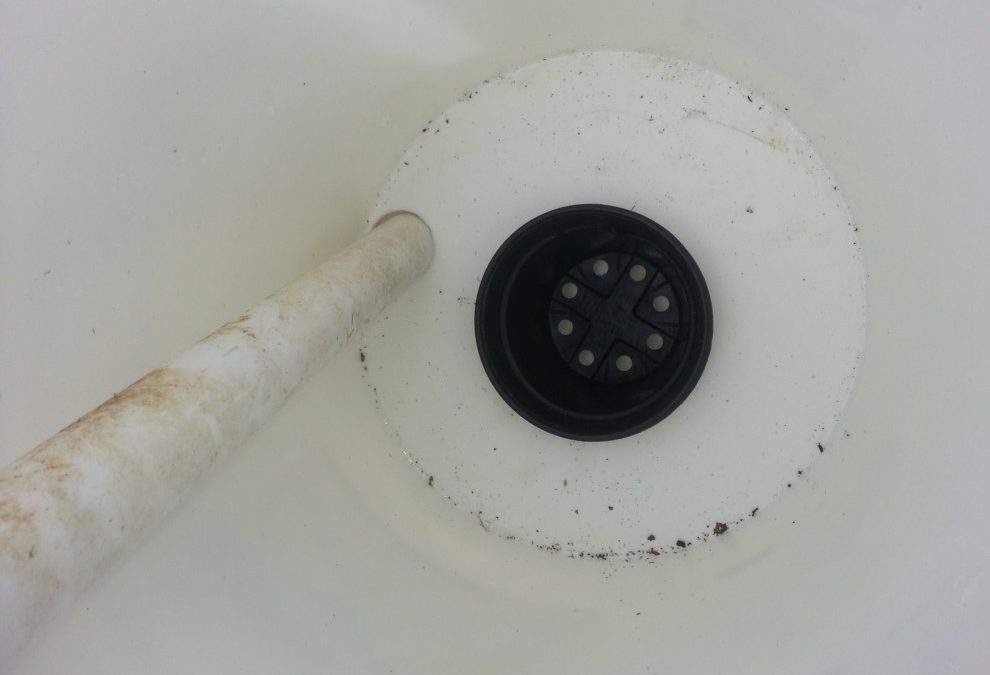
A wicking basket uses capillary action to pull water molecules up from the water reservoir and into the soil. Photo by Trevor Hylton.
While store-bought versions can be costly, you can make a self-watering container for less than $10 with just a few materials and tools. There are multiple designs for creating a self-watering container at home. Typically, designs include two five-gallon food-grade plastic buckets to hold the soil and plant; a knife or hole saw to access the water reservoir; a wicking basket or strips of cotton from an old towel, pants, or shirt to generate the capillary movement of water; a drill and drill bit for drainage; and a plastic pipe for easy filling of the water reservoir.
To make your own, view these Extension-produced self-watering container garden resources and follow the step-by-step instructions that work best for you: