by Julie McConnell | Sep 18, 2025
 Last month we focused on the 2025 Great Southeast Pollinator Census and how Florida residents and visitors could join in this citizen scientist project. Since this was only the second year Florida participated, we knew you would have lots of great questions!
Below is a recap of your inquiries and any references the panelists shared in case you wanted to dig deeper into the topic.
What is the Great Southeast Pollinator Census (GSEPC) and what is the data used for?
The pollinator census brings awareness of pollinators, encourages people to create habitat, and collects information that can be used to create baseline numbers and compare the population growth or decline over time.
How to identify bees, wasps, and other pollinators I see?
Luckily, you do not have to identify these insects to species – you only have to classify them into broad categories. Resources to help you spot key characteristics can be found here:
Bees of Florida
Pollinator Census Google Site
What time of day should I count?
Mornings and evenings are a great time to count because it is comfortable for the counter but also consider that time of day will affect the insects seen. For instance, many moths and beetles are active at night while honey bees are active during the day. Basically, there is no wrong time to count!
Will we be able to indicate which plants and whether or not they are native or non-native?
The GSEPC count sheet has a place for the plant name you are observing which can be common or scientific. There is not a designation on the form for native/non-native but if you use the scientific name that is easy to check when data is available.
Great Southeast Pollinator Census Counting Sheet
How to best encourage neighbors to get involved?
Print off some extra count sheets and invite people to join you or host a pollinator party!
What can we do to increase pollinators in our yards?
Provide nesting habitats for native pollinators such as undisturbed bare ground, hollow stems, small debris piles, and pollinator hotels. Be sure to maintain pollinator hotels to encourage use.
Responsible use of pesticides – always read labels and avoid products with pollinator warnings.
Pollinator Hotels
Plant diverse flowering plants to provide pollen and nectar and provide water resources.
Simple Steps to Create a Pollinator Paradise in Your Landscape
Provide Water for Pollinators
Are bumble bees a protected species?
There are almost 50 different bumble bee species in the United States, and not all live in Florida. Two are listed as protected species, one that occurs in Oregon and another in the Central Plains and may be in our area. The common species we see in Florida, American Bumble Bee and Eastern Bumble Bee are not currently listed as protected or endangered. Find a Species | U.S. Fish & Wildlife Service
Resources for Schools and Home Schools
Some public libraries have “Seed Libraries” and give out seed which may be appropriate for pollinators.
Seedlings for Schools Grants
Panelists favorite flowers for bees and other pollinators:
Abbey – purple coneflower and other Echinacea, Black-eyed Susan, Zinnia, Coreopsis
Beth – buttercup, goldenrod
Mark – yarrow, Stoke’s Aster (native to FL), Vitex agnus-castus Chaste Tree
Daniel – Vitex, Blue butterfly Clerodendrum, Firebush
Anything in the Aster Family!
Balance of controlling pests in vegetable garden but still welcoming pollinators.
Be tolerant of damage! Regardless of your tolerance level of damage be sure to use Integrated Pest Management strategies which may include trap crops, cover crops, and scouting regularly so you can catch pests early and hand pick when possible. If a pesticide is needed, use very specific targeted products such as Bt, soaps, or oils instead of broad-spectrum pesticides. (Always ensure products are listed for use on vegetable gardens and follow labels). Pesticide Labeling – A Guide to Users
Do you need a license to keep honey bees?
A license is not required; however, all bee hives must be registered with the Florida Department of Agriculture and Consumer Services (FDACS).
Beekeeper Registration– Florida Department of Agriculture and Consumer Services
UF/IFAS Research and Extension Honey Bee Lab has great resources for beekeepers!
If you missed this or other episodes be sure to check out our YouTube Playlist
by Beth Bolles | Sep 18, 2025
Many gardeners enjoy plants that attract butterflies and there is no shortage of beautiful flowering plants to supply nectar for all our pollinators. One critical part of making habitat for butterflies that we may need to improve upon is supplying plenty of host plants for butterfly development. While we enjoy the flight of a butterfly through our garden, we really want to offer features that keeps them around.
Your landscape likely includes a few host plants and maybe you even have a citrus tree or plant parsley every season. What many people don’t realize is how many native trees serve as host plants for butterflies. Some of these plants like specific environments while others can grow in a wide variety of habitats.
The Black cherry (Prunus serotina) and Cherry laurel (Prunus caroliniana) serve as host to a large number of butterflies. A more well know species that uses the native cherries for development is the Tiger swallowtail. Although we might consider these trees weedy, they can serve as hosts to hundreds of species of butterflies and moths along with providing berries for wildlife. The black cherry will be deciduous while the cherry laurel is evergreen. Both have flowers in late winter or early spring. Just be aware that the cherry laurel fruit can have some toxicity in different developmental stages.

Yellow form of the Tiger Swallowtail. Some females can also have mostly black coloration to prevent predation. Photo: Beth Bolles, UF IFAS Extension Escambia County.
The Winged elm (Ulmus alata) is gaining in popularity as a landscape tree. The Question mark butterfly will lay eggs on plants under the elm and then caterpillars crawl up to feed on elm leaves. The reason we don’t see this butterfly on flowers as much is that it also feeds on manures, carrion, and rotting fruit. Resting butterflies have wing patterns that make them look like leaves.
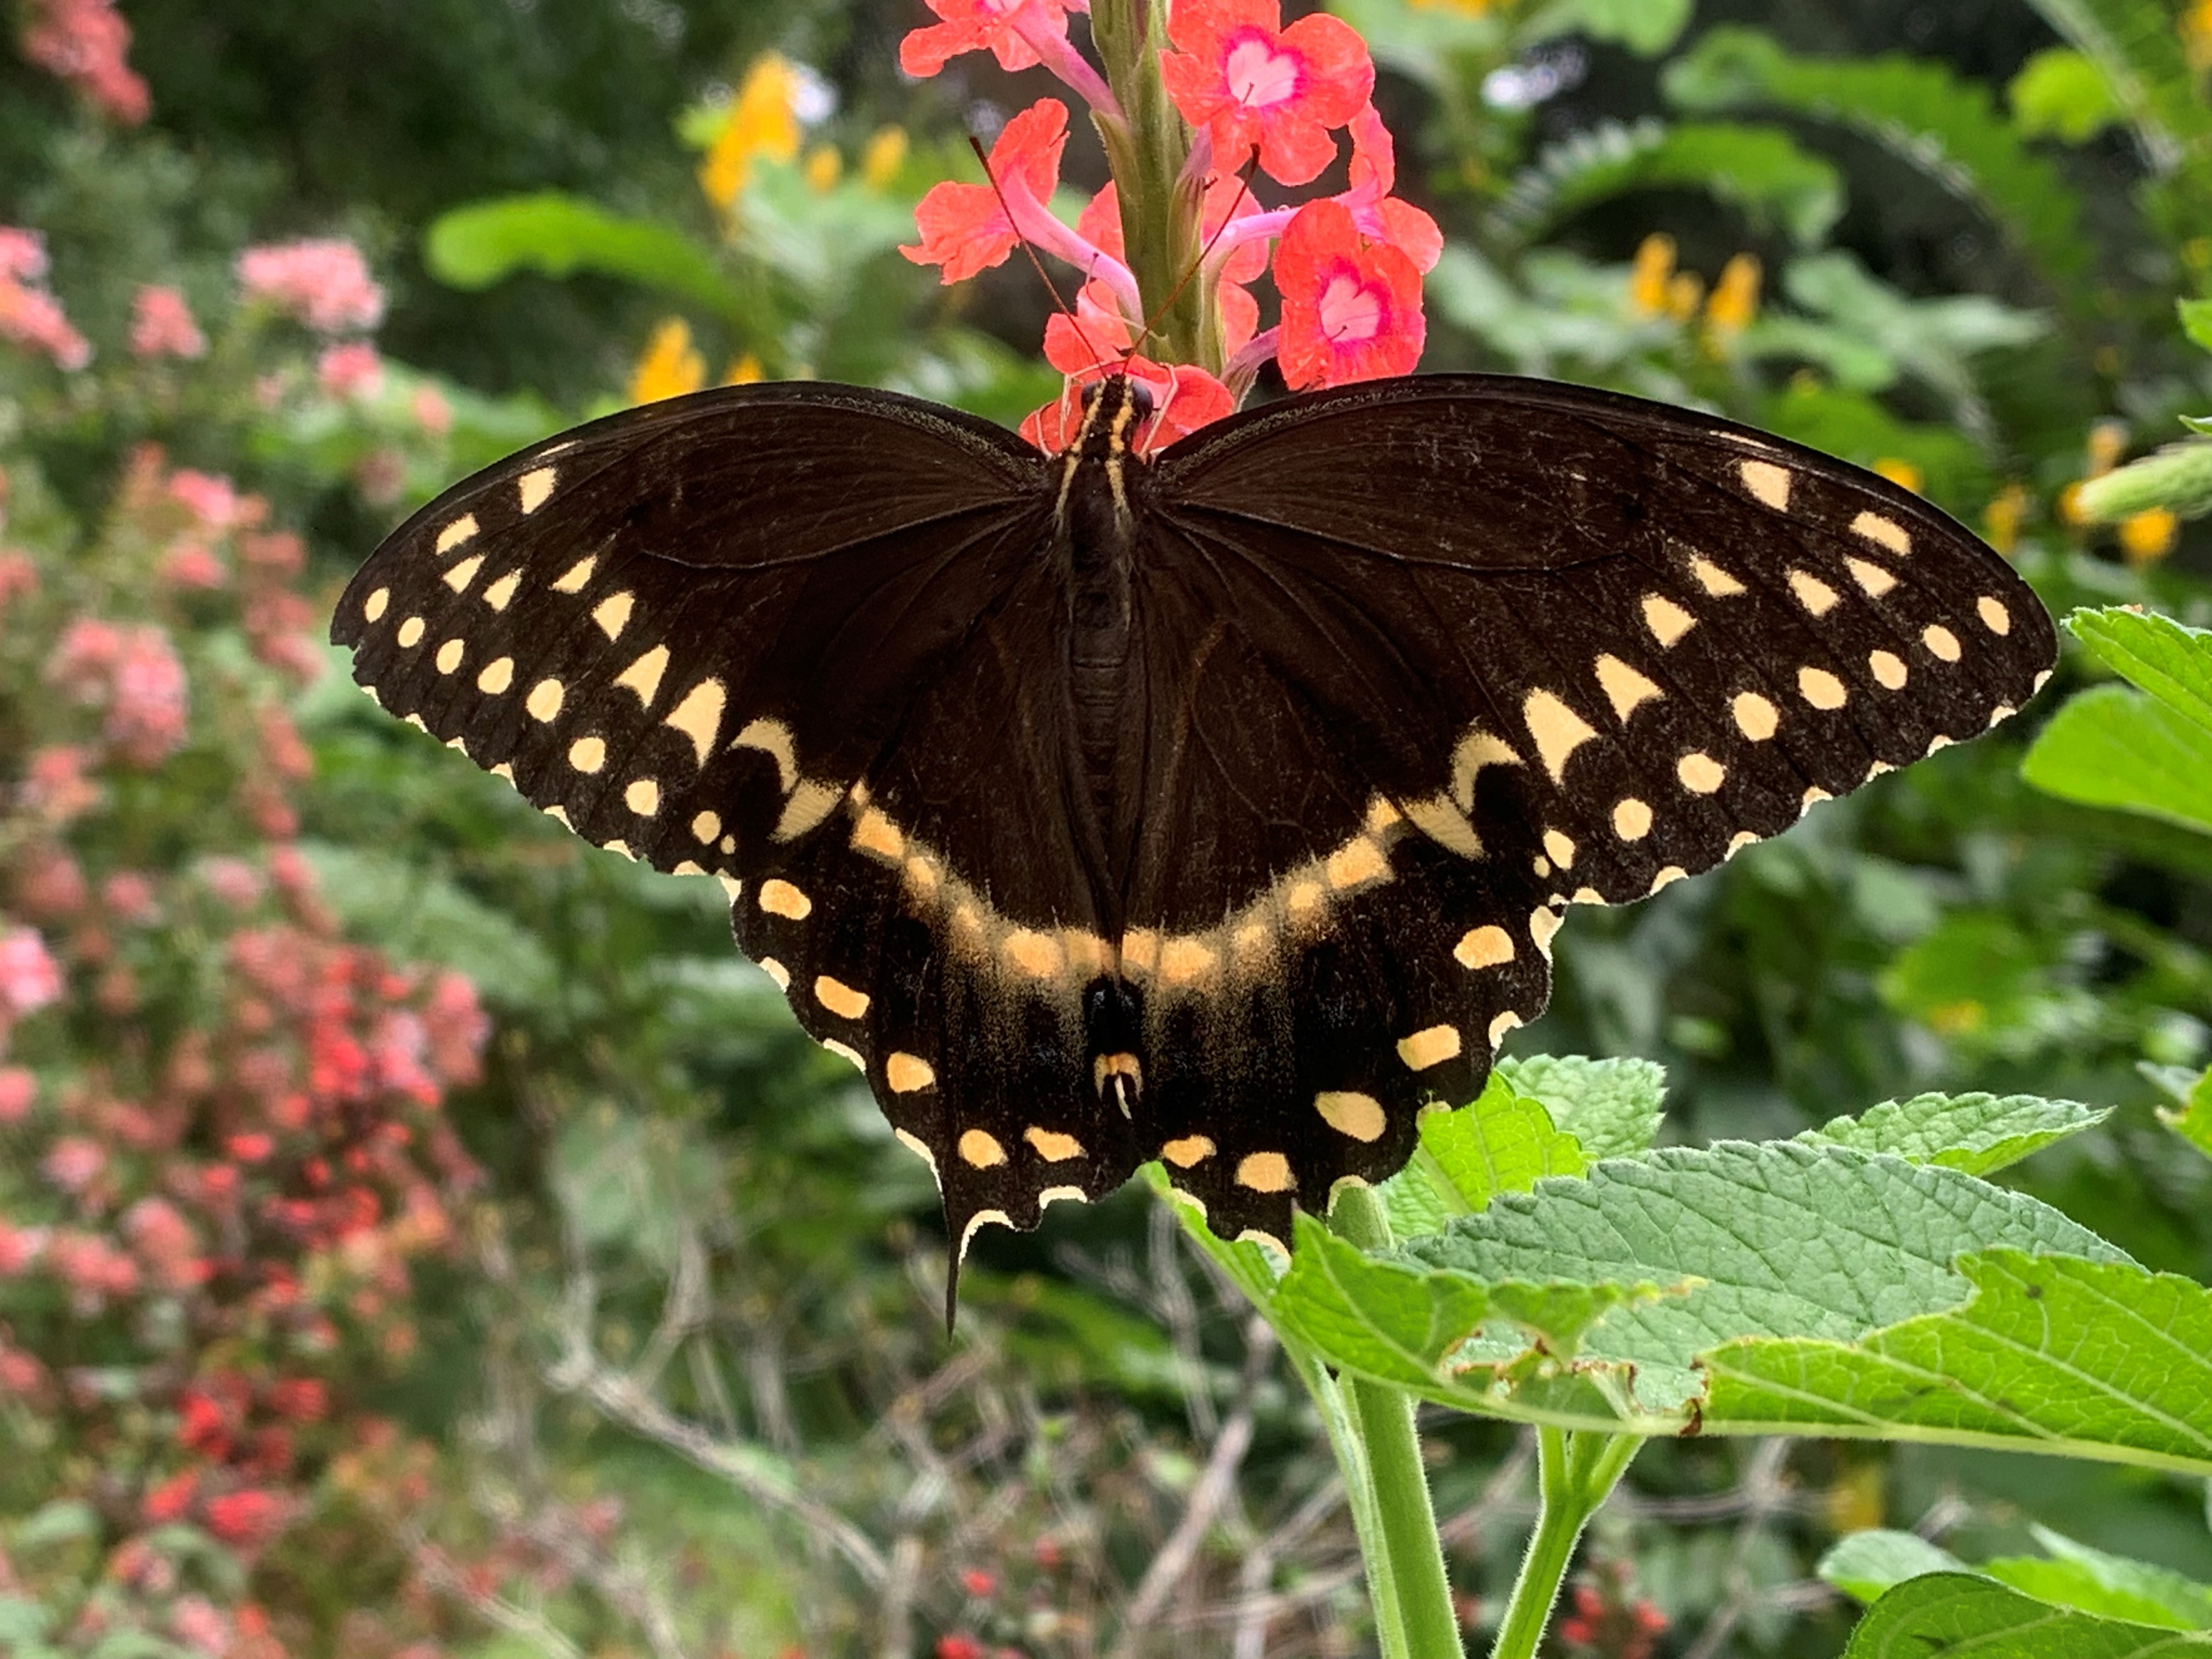
If you have a site with moist soil or can supply routine moisture, consider the Sweet bay magnolia (Magnolia virginiana). It will attract the Tiger, Palamedes, and Spicebush swallowtails for development. Flowers on the tree are not as large as those on Southern magnolia but you still have similar appearance and even a pleasant fragrance.

Palamedes swallowtail butterfly feeding on a porterweed. Photo by Beth Bolles, UF IFAS Extension Escambia County.
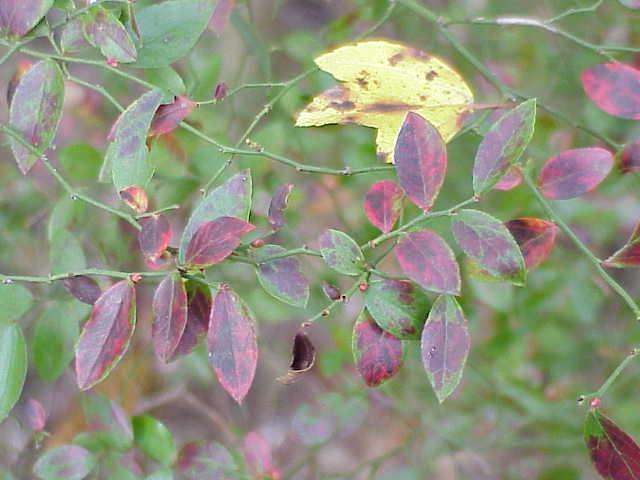
A couple of understory trees are the Pawpaw (Asimina triloba) and Sparkleberry (Vaccinium arboreum). Look for the Zebra swallowtail to find the Pawpaw while the sparkleberry will serve as host to hairstreak butterflies.
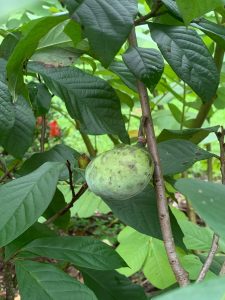
Pawpaw also offers delicious fruit. Photo by Beth Bolles, UF IFAS Extension Escambia County.
Even though landscapes may have limited spaces for every host plant, we can preserve some spaces around borders for native trees. These plants will make a positive impact for butterflies and pollinators.
by Daniel J. Leonard | Sep 11, 2025
Many turfgrass yards, including mine, are feeling the effects of an extended droughty period this month. While one of the benefits of the primary turf species grown in the area (Centipedegrass, Zoysiagrass, Bermudagrass, and Bahiagrass), is their drought tolerant nature, they aren’t impervious to drought. Even with these tough grass species the difference between a yard coming out of a drought in decent shape versus dead is as simple as remembering the answers to the following four maintenance questions.
How much should I water to keep my grass alive?
Lawngrass needs about ¾-1” of water per week to remain looking its best and growing vigorously. Obviously, unless you have an irrigation system, keeping a large yard of turfgrass in that ideal water range is going to be hard or impossible. So, what to do? I encourage homeowners to focus their efforts on keeping grass around highly visible and often used areas of the yard well-watered, letting outlying areas fend for themselves until rain resumes. To ensure you’re putting out the optimal ¾-1” of irrigation per watering event, spread a few straight sided cans (tuna or cat food cans work great) under the sprinkler’s range, allow it to run until you reach the 1” mark, and note how long it took to apply that amount of water. This will help you dial in your watering and ensure water isn’t wasted.
Should I mow during a drought?
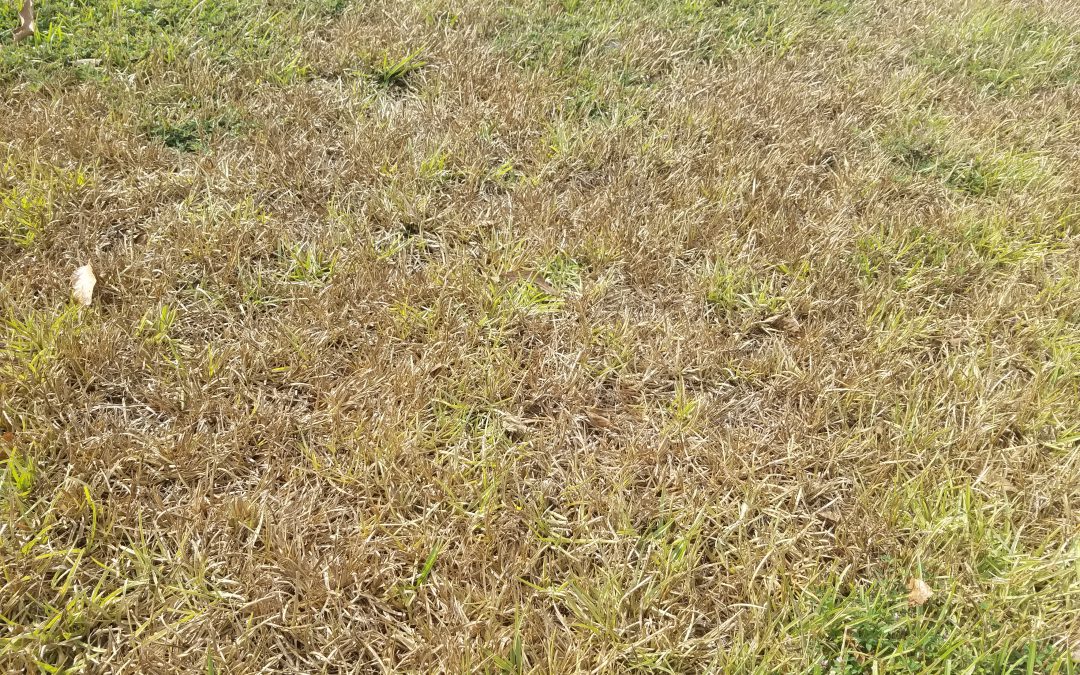
We all know that an unmown yard looks unkempt. However, given that mowing is a major stress on turfgrass, mowing during a drought can weaken your yard’s ability to recover when the drought ends. If you must mow to keep things looking neat, try to mow only areas that you keep watered and raise your mower’s deck to reduce the amount of leaf tissue you cut from the grass. Mowing in this manner will reduce stress on your turf and keep the yard from appearing weedy and unkempt. My unirrigated Centipedegrass yard has been flowering and setting seed over the last few weeks. My last mowing event (during the current dry period) was designed to only remove seedheads and minimize removal of leaf tissue.
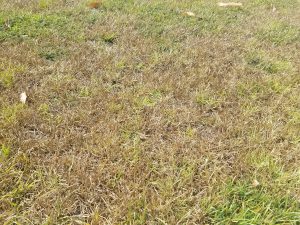
Unirrigated Centipedegrass turf showing drought stress – photo courtesy of Daniel Leonard.
Should I fertilize?
This one is easy! Don’t fertilize grass during a drought! For one, fertilizer promotes growth, and grass isn’t trying to grow during a drought, simply survive. Fertilizing in these times is another unnecessary stress. Additionally, fertilizer requires water to transport nutrients down to the plant roots. If there is no water to do so, it will simply sit there and wait on rain. Also, some or all the nitrogen in the fertilizer applied will volatize and return to the atmosphere, wasting your time, money, and effort and stressing your turfgrass in the process. Hold the fertilizer until rain begins again.
What do I do about weeds?
Turfgrass isn’t the only thing stressed during droughts; weeds are as well. During stressful events like droughts, all plants (weeds included) stop growing and enter survival mode. This has major implications for weed control, as herbicides are not particularly effective on weeds with drought defenses up. In addition to being ineffective, herbicides can injure stressed turfgrass, preventing a healthy recovery post-drought. So, keep the herbicide off the yard until the weeds, and your turf, are happy and growing again.
Maintaining an unirrigated lawn during drought is more about what you don’t do – less mowing and no fertilizer or herbicide applications – than what you do. Mowing too low, applying fertilizer, and trying to control weeds with herbicide are all potential stressors of turf and can inhibit its recovery when the rain returns. The best you can do to keep your lawn healthy in dry times is to apply ¾-1” of water per week and pray for rain! For more information about lawn management or any other horticultural topic, contact your local UF/IFAS County Extension office.
by Carrie Stevenson | Sep 11, 2025
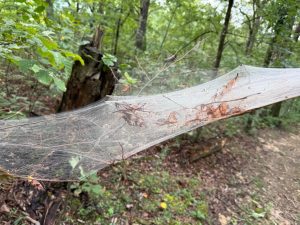
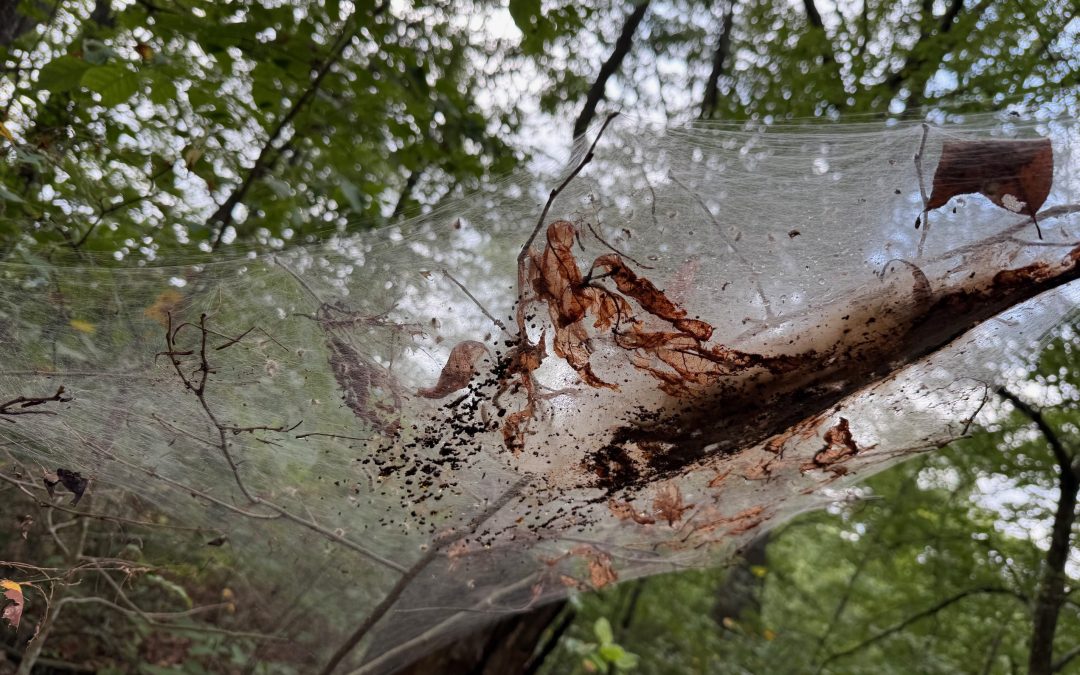
Fall webworms in a Tennessee forest. Photo credit: UF IFAS Extension
Have you ever noticed the big knots of webbing in some trees this time of year? They’re usually sort of a brown-pink hue, much too big for a spider but not really tightly wound enough to be a nest or cocoon.

A close-up of the fall webworm tent reveals dozens of tiny caterpillars and skeletonized leaves. Photo credit: Carrie Stevenson, UF IFAS Extension
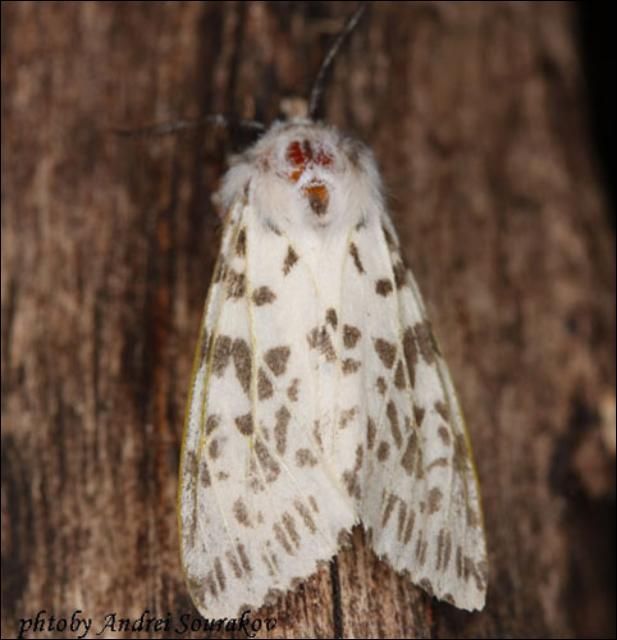
What you’re seeing actually is a cocoon of sorts—a big shared one created by hundreds of larval fall webworms (Hyphantria cunea). This common name is a bit of a misnomer. The webbing—often referred to as a tent—is built in late summer, not fall, and these are caterpillars, not worms. But I suppose it gets the idea across!
On a recent hike, I saw webbing up close, so I was able to really investigate the caterpillars inside. They are quite small, and will undergo up to five molting stages, or instars, before adulthood. Upon transformation, they will become white or speckled moths. Fall webworms are native to the entirety of the United States—in the northern end of their range the moths will be solid white, whereas further south they will have darker spots on their wings. Due to accidental introduction, fall webworms are invasive throughout Europe and portions of Asia.

Adult fall webworm, with spots on white, which is typical for members of this species from the southern part of its range. Photo credit: Lyle Buss, UF
Host plants include a wide range of more than 80 deciduous hardwood species, allowing a broader spectrum of places for the caterpillars to undergo their various larval phases. During their months in the “tent”, the larvae feed on and skeletonize the leaves encapsulated within their webbing. This causes damage to the leaves, but results in no permanent issues to the trees—being late summer and fall during their tenure, the trees eventually lose their leaves anyway.
While the tents are a bit unsightly, controlling the caterpillars or removing the webs is unnecessary. Once they’ve reached their final caterpillar stage, they’ll hide out in tree bark and leaf litter on the ground until metamorphosizing into moths the following spring. Adult moths mate and lay eggs in the late spring and summer, starting the cycle all over again.
by Ben Hoffner | Sep 11, 2025

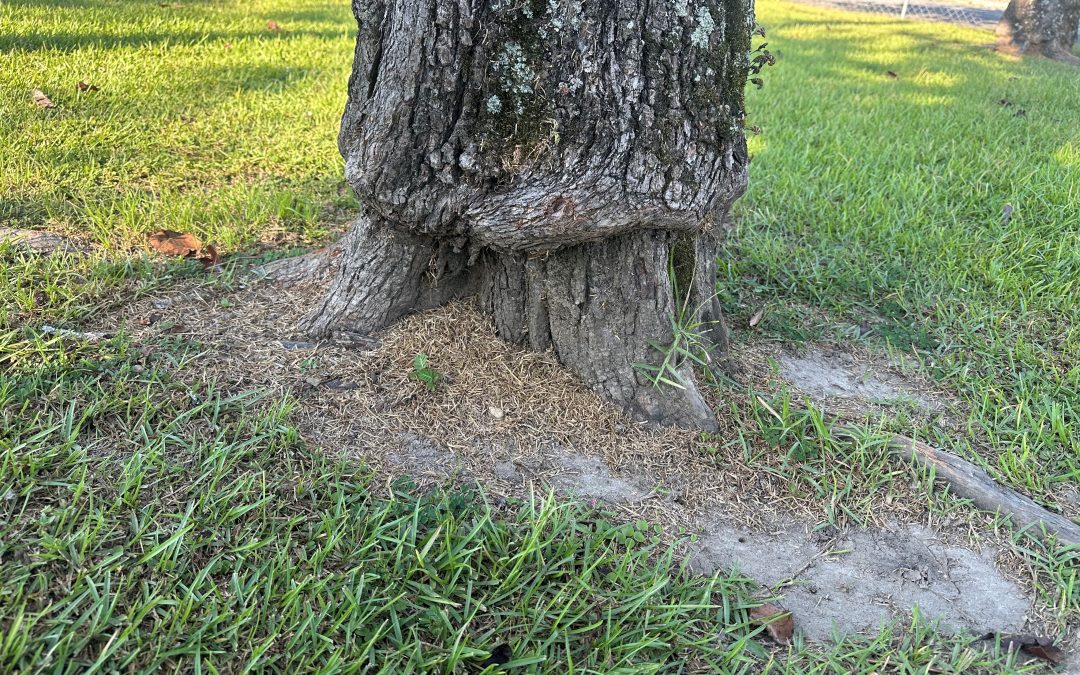
Photo credit to Daniel Leonard, Calhoun County Extension Agent
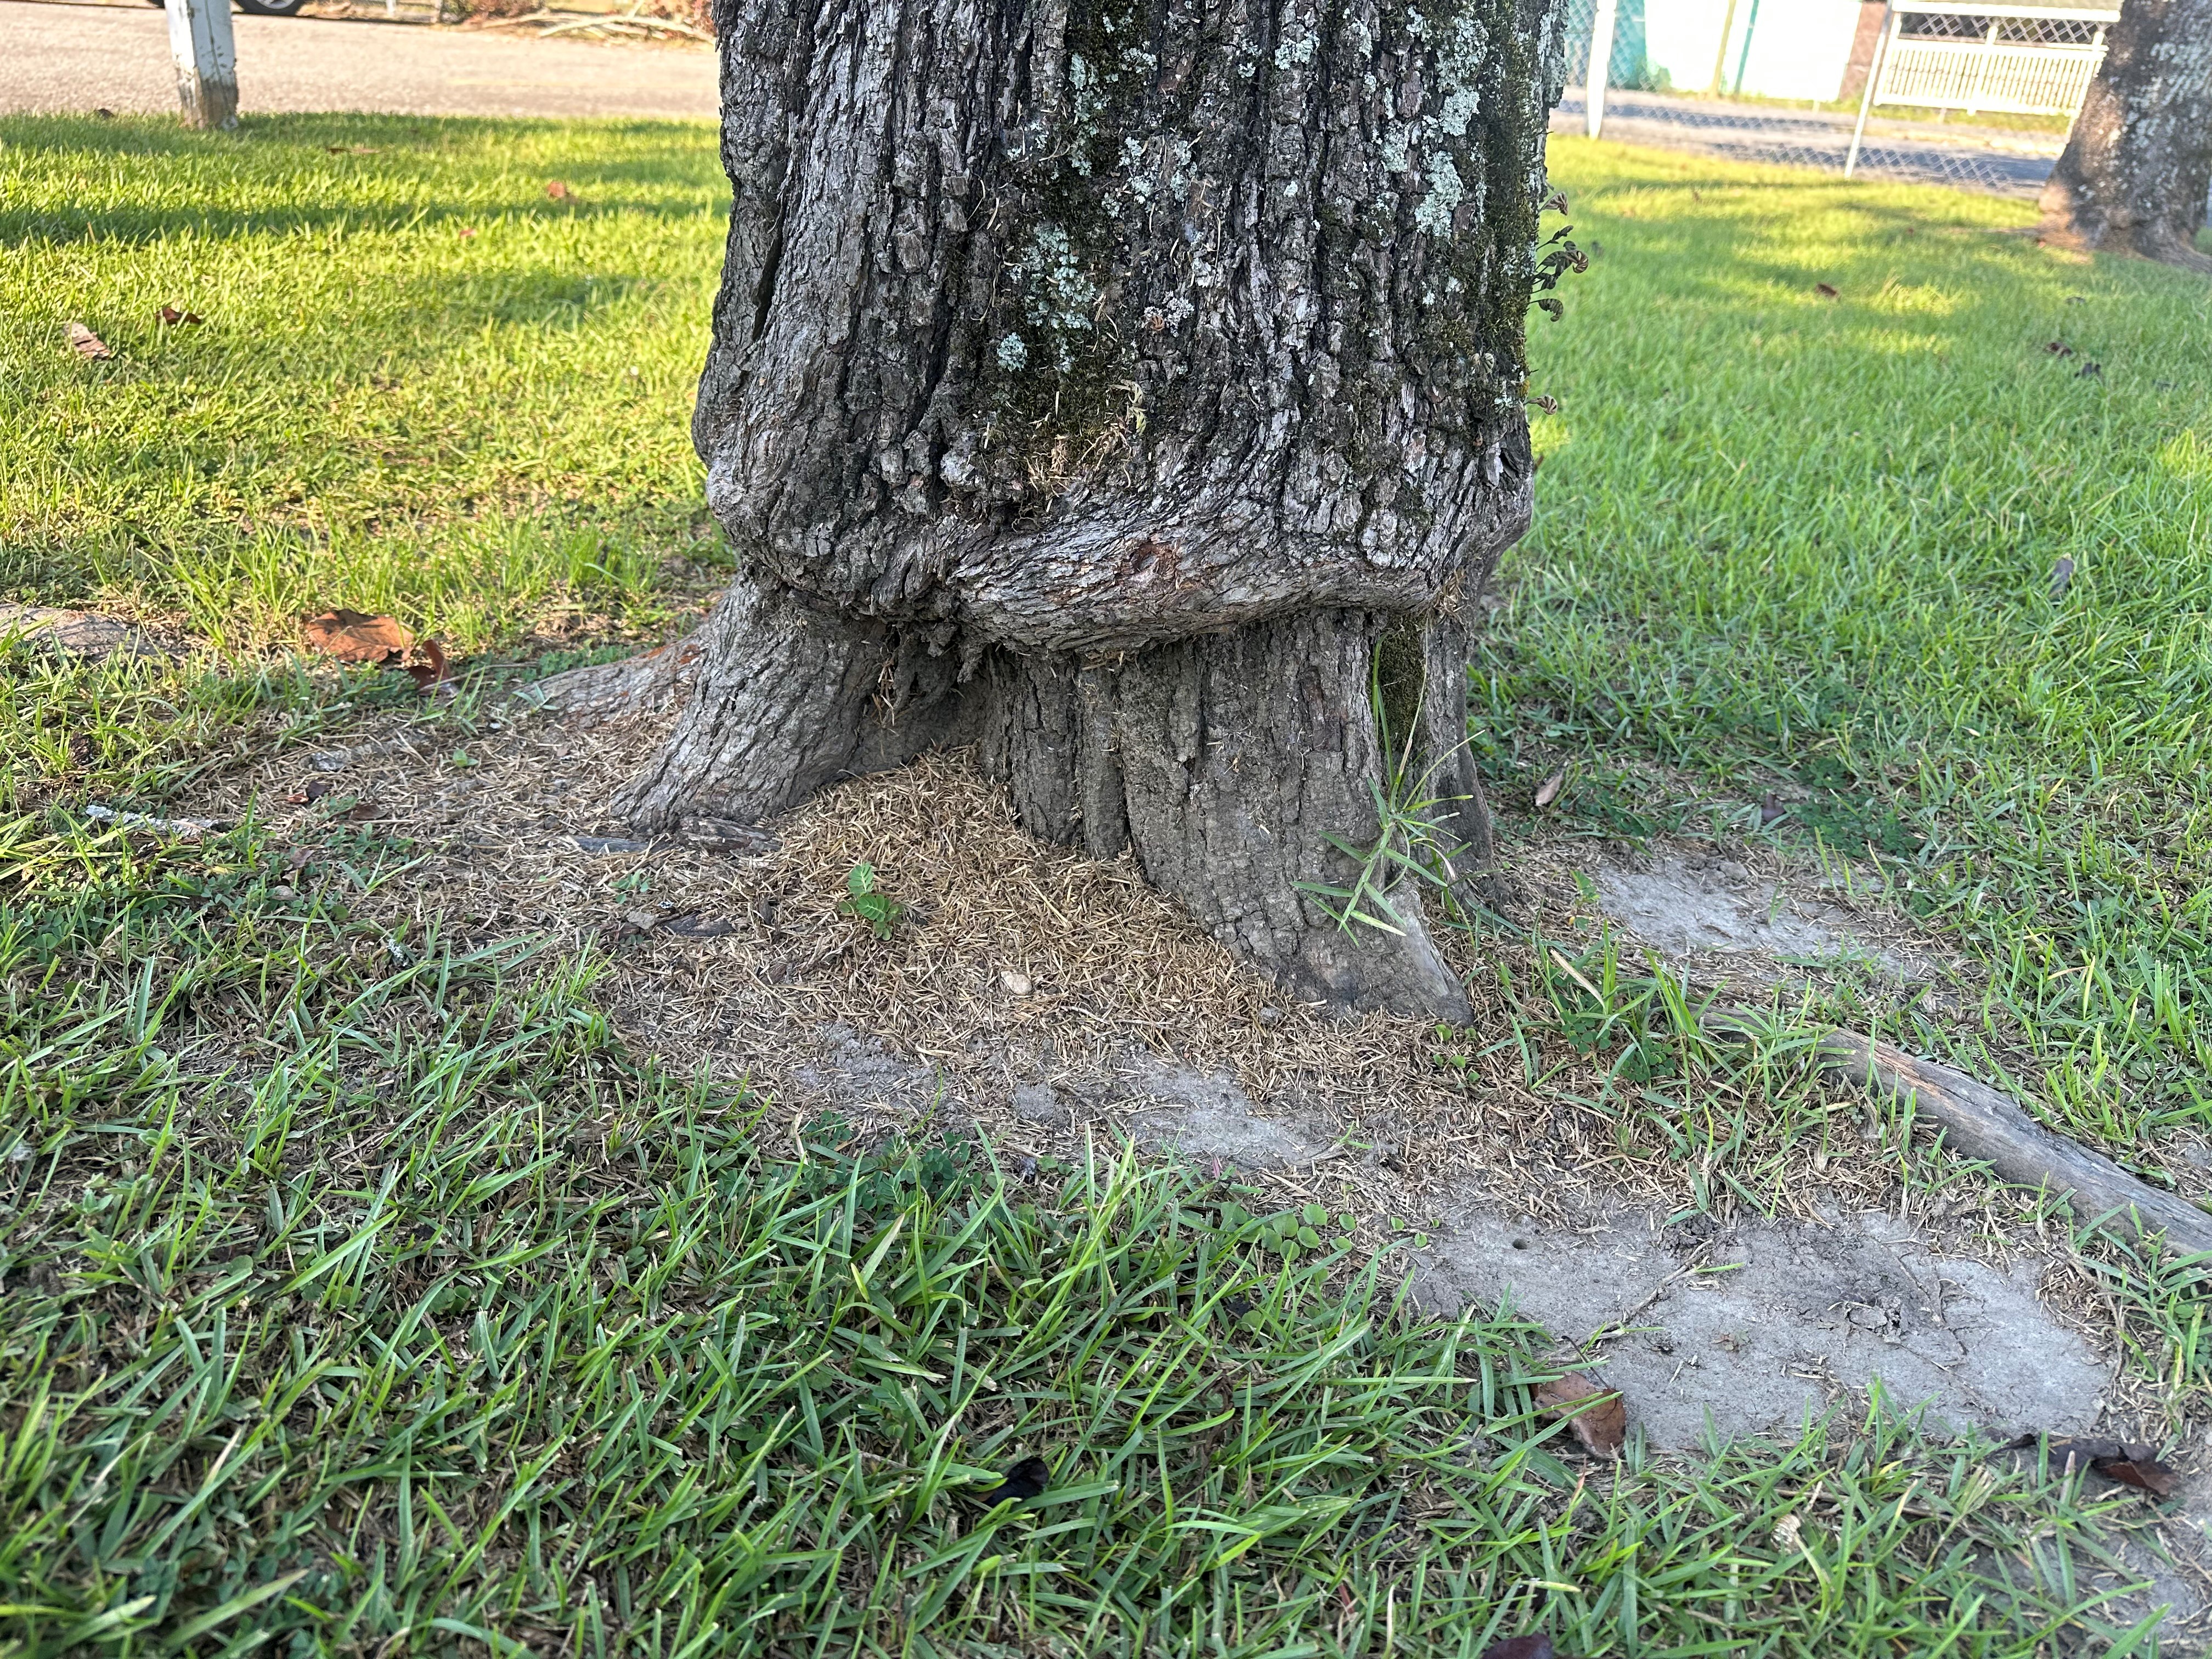
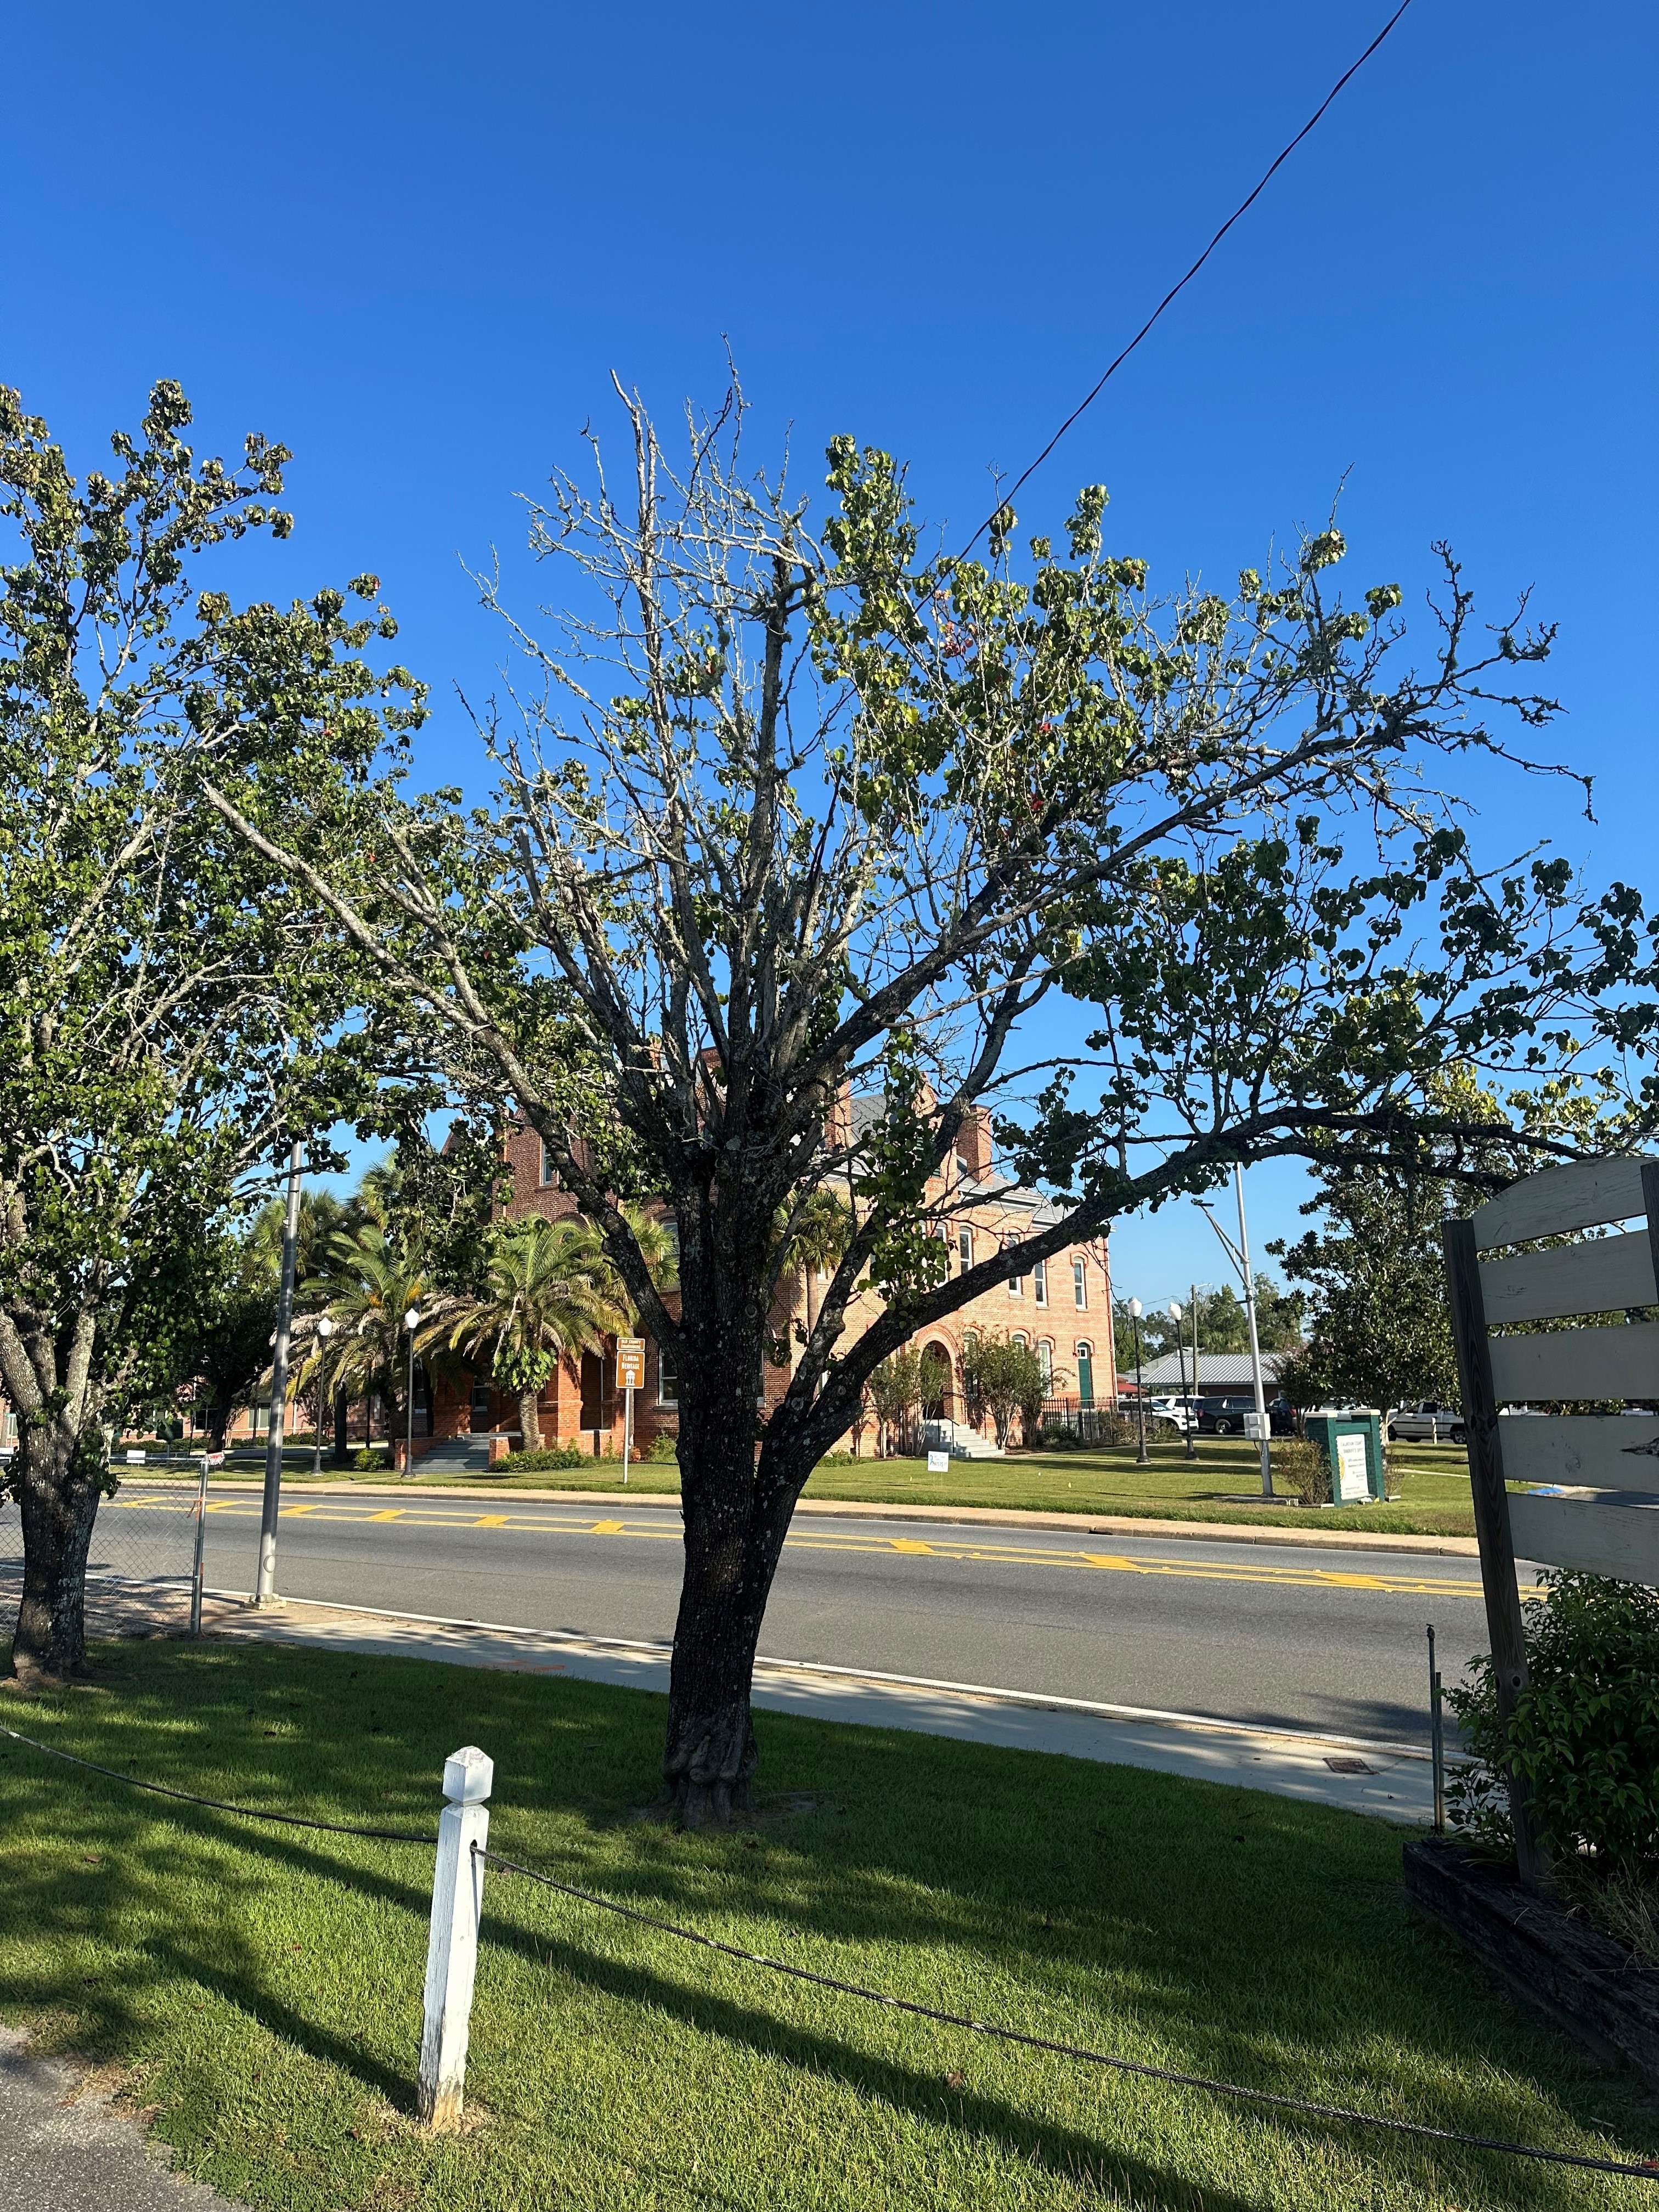
When maintaining proper care of your trees and shrubs in your lawn or landscape it is important to not damage stems and trunks. It is best practices to keep the area around the tree clean, but it needs to be done properly. Mowing and weed eating is not recommended due to the possibly of severe damage to the trunk and stems. Repeated damage from mowers and weed eaters cause damage called girdling. There are a few very effective ways to protect the trunk and stems from damage such as mulching and using tree rings/tubes.
Repeated damage to the base of the tree and stems will affect the cambium layer. The cambium layer is a thin layer of living tissue directly under the bark of the tree, and it supports the growth and well-being of the tree, actively dividing cells located between the xylem (wood) and phloem(bark). Constant damage of this layer will cut off the flow of carbohydrates to the roots, which will cause the tree to die. This layer is the green material you see after the bark of the tree has been damaged. It is imperative to keep the cambium layer damage free to insure the best tree health.
Photo credit to Daniel Leonard, Calhoun County Extension Agent
Taking preventive measures will ensure the prolonged life of your tree. Using mulch around the perimeter of the tree for protection from injury is the most effective method of protection. There are different mulch types like straw, bark, leaves, needles, wood or grass. These are examples of organic mulches. Tree rings and tubes can be helpful to protect young trees. If mulch is not the best option for the plant, other materials such as cut sections of plastic pipe or rubber tires could be an option for protection.
Mulch is not only a great way to protect your trees from injury. It also helps with retaining moisture, erosion control, weed suppression, organic accumulation and aesthetic appeal. Following simple guidelines when using mulch will make sure that you are maximizing the material used. Maintain a 2-to 3-inch layer around your established trees. Avoid “volcano mulching”. “Volcano mulching” is when mulch is piled against the base of the tree, it holds moisture. High amounts of moisture can cause the trunk to rot.
To prolong the life of your trees and shrubs you must protect them from injury that can cause girdling. Avoid constant contact with lawn mowers and weed eaters that will destroy the cambium layer. Using mulch is a very effective way for protection as well as retaining moisture, erosion control, weed suppression, organic accumulation, and aesthetic appeal.
For more information contact your local UF/IFAS Extension Office.