by Carrie Stevenson | Oct 28, 2015
Dirt, earth, humus, terra firma, soil—no matter what you call it, the ground below us is one of the most important substances on, well, Earth. As children, most of us stomped in mud puddles, dug holes, and played in sand boxes—the tactile experience of moving dirt around seems to appeal to humans innately. Just last weekend a local charity raised thousands of dollars by setting up an obstacle course for adults (and kids) called the “Mud Run,” with participants exiting the race completely covered in mud.

Kids have an innate appreciation for soil! Photo credit: Carrie Stevenson
Despite how much fun it can be to play in, the humble soil often gets overlooked. Mixtures of clay, sand, and loam seem less exciting when competing for attention with more charismatic natural phenomena such as colorful flowering plants or powerful top predator animals. Partially because of this status, soil scientists and agronomists declared 2015 the “International Year of Soils” with the goal of educating the general public on soil’s importance.
While most of us don’t think about soil on a regular basis, it is the literal foundation for producing healthy food and much of our clothing, along with fuel sources and many medicinal products. Without the small organisms and insects living in the soil to break things down, everything that ever died could still be slowly decaying on the surface of the earth. Soil is the primary player in recycling and making crucial nutrients such as phosphorus, nitrogen, and potassium available to plants. If you’ve ever tried to grow vegetables in the Panhandle, you know the high sand content and low nutrient levels of many of our native soils leave much to be desired. Gardeners know that a mix of organic materials is necessary to give soil enough structure, water-holding capacity, and nutrient sources to provide plant roots a healthy growing environment.
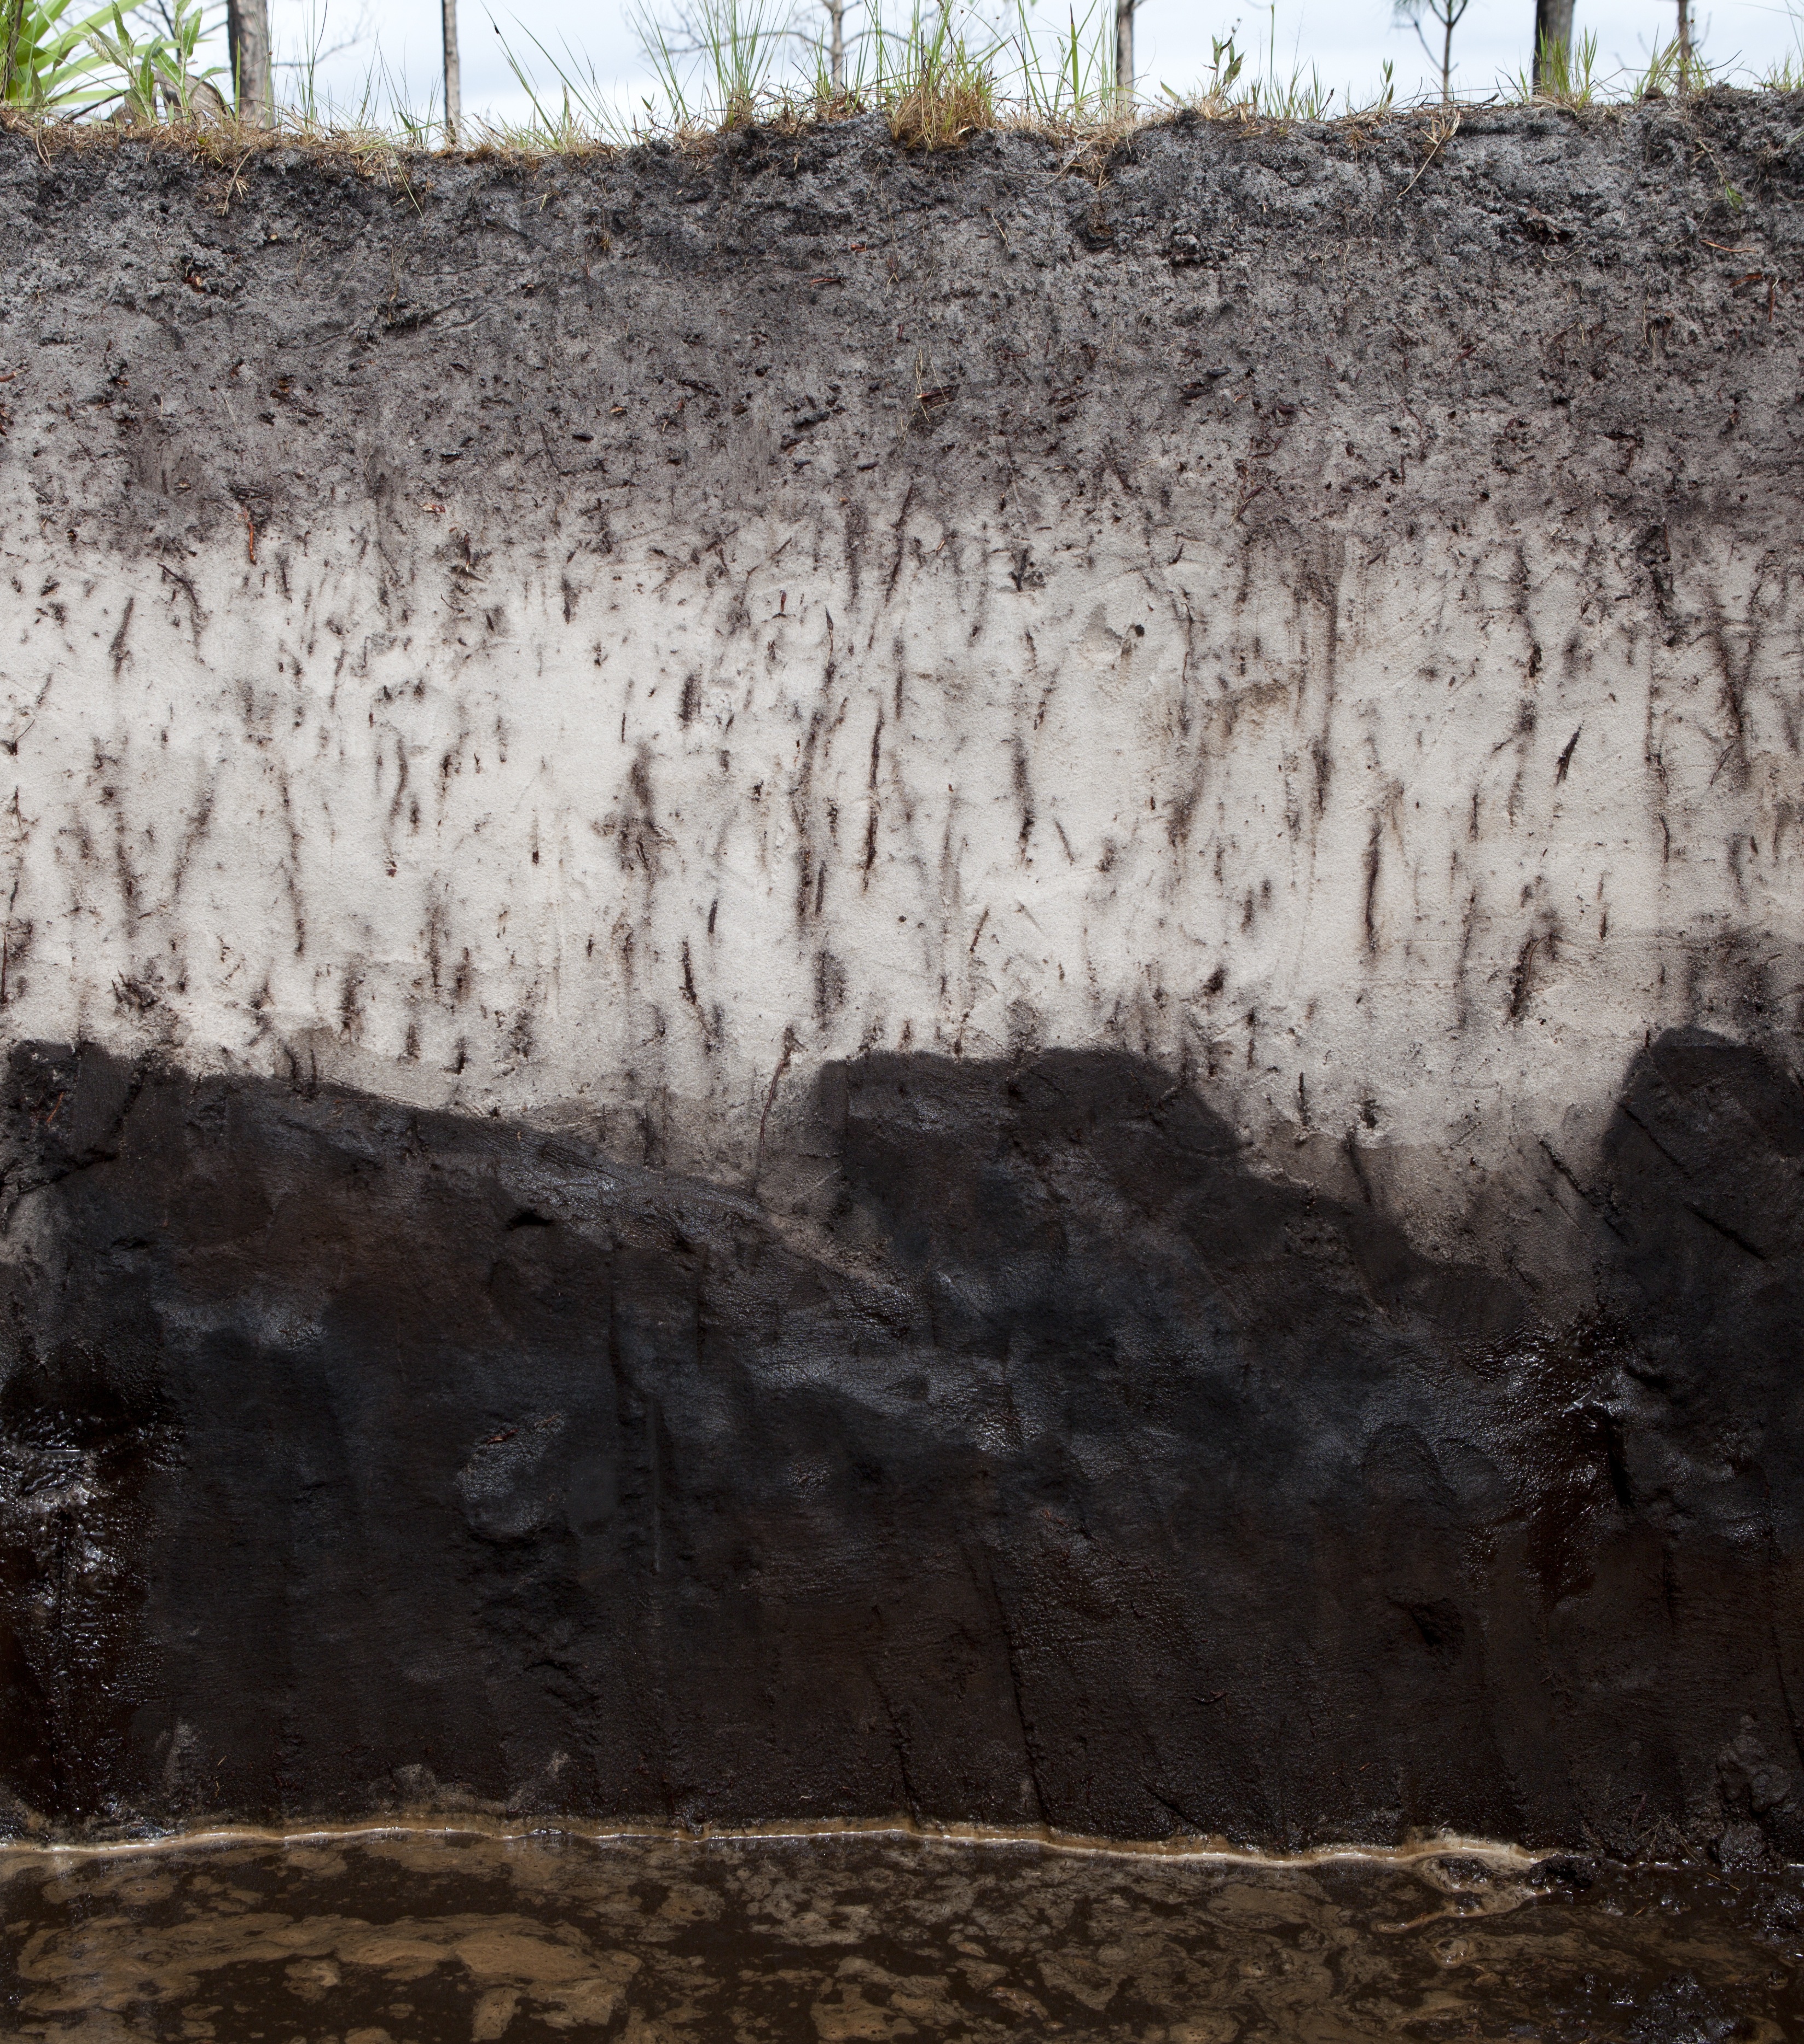
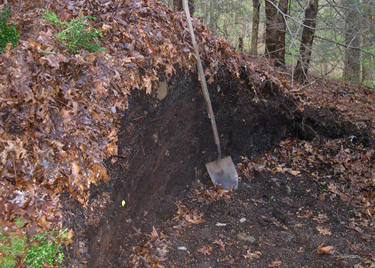
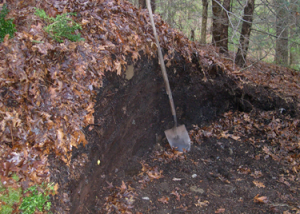
Soil profile. Photo courtesy UF/IFAS.
Soils are crucial to agricultural production, but they also play important environmental roles. On a global scale, soils are a “sink” for carbon and help combat climate change. At the same time, soils help reduce pollution through filtration and store water to recharge our drinking water aquifers. The water absorbed within healthy soils can help protect communities from both drought and flooding.
Pollution and erosion are among the biggest threats to healthy soil, and governmental agencies at all levels devote considerable funds and staff to protecting this life-giving limited natural resource. To learn more about soil and how to test for soil nutrients and pH, talk to your local Extension agent. There are many great online resources devoted to soil science, such as the Natural Resource Conservation Service’s new “Unlock the Secrets in the Soil” campaign, the USDA’s online soil surveys, and the UF IFAS Soil & Water Science Department newsletter, “Myakka.”
by Molly Jameson | Sep 3, 2015
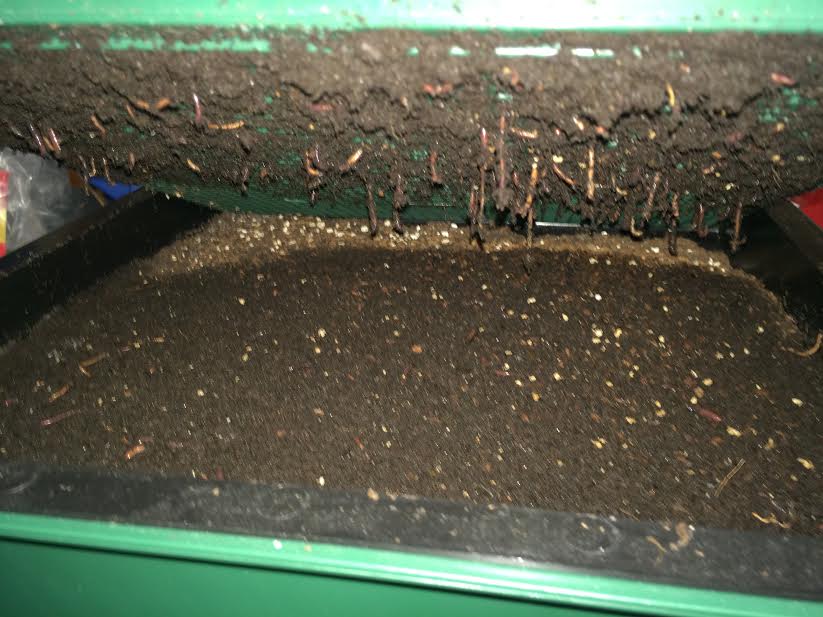
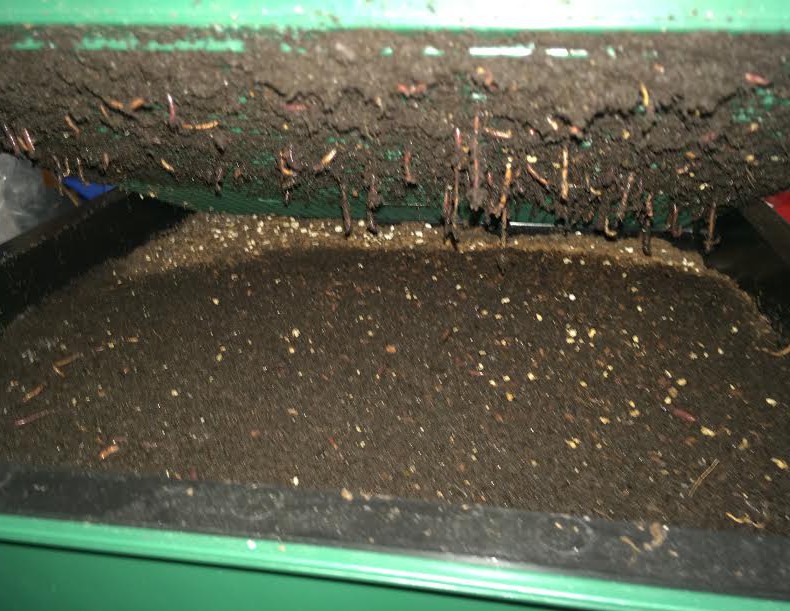
Red wigglers hanging through the bottom bin of a “Worm Factory” vermicompost system. Photo by Molly Jameson.
What if I told you there was a way to create compost indoors? No pitchfork required, no hot steamy temperatures, a simple mix of ingredients, and it would fit right under your kitchen sink? As long as you can convince your family to have worms in the house… you can start vermicomposting.
Vermicomposting uses a type of worm called red wigglers. These worms specialize in digesting organic matter, can digest their own body weight in food each day, and can double their population within months. It is, therefore, a wonderful way to responsibly dispose of food waste and can reduce your garbage by more than a third. Microorganisms inside the worms are actually doing most of the work, and the “castings” excreted are teaming with beneficial microbes and nutrients that will condition your soil and make the plants in your garden shine.
You can easily construct a vermicompost bin at home, but you can also purchase one online. Bins should hold about five gallons for one to two people or ten gallons for three to four (Rubbermaid containers work nicely). Your container should not exceed 12 inches in depth, as red wigglers do not like to burrow deeply. You will also want good aeration, so drill holes in the bottom of the bin and either place the bin in another container or put the bin on bricks and use a tray underneath to capture escaped materials. Either way, you will want a lid – as worms do not like light and need moisture – but they also need to breathe, so make sure it is not airtight. Be sure your bin is never in direct sunlight or in a location that regularly exceeds 80°F.
To get started, you will need about 1,000 worms, which weighs about one pound. Red wigglers can also be purchased online, at local nurseries, and some bait shops. Better yet – if you know vermicompost enthusiasts, they may be happy to share.
Before you purchase your worms, you want to prepare your worm bedding. Shredded newspaper and coconut fiber (coir) – which you can find at your local nursery – work great. You will also need to add a small scoop of garden soil to inoculate your bin with microbes. To get started, lightly moisten your bedding material and fill your bin about two-thirds full.
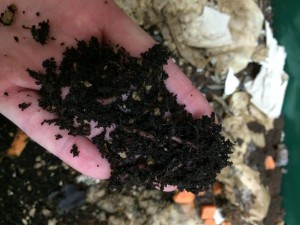
Finished worm castings will be dark, slightly moist, and will have an earthy smell. Photo by Molly Jameson.
Now it is time to add the food. Worms love vegetable scraps, most fruits, moldy bread, coffee filters and grounds, tea bags, and crushed eggshells. Chop their food into small pieces for fastest consumption. Foods to avoid include meat, dairy, large amount of citrus, and onion peels. Start out slow, and put the chopped food in the corner of your worm bin. Once your worms are settled, maintain the bin as half bedding, half food scraps. If your bin looks too dry, add more food. If your bin looks too wet, add more bedding or hold back on food a few days. Bad odors will develop only if the worms are overfed.
Give your worm bin about three to four months, and then you can begin to harvest. Add a handful of castings to potting mix or a thin layer directly to your garden. Give vermicomposting a try – your plants will thank you, your trash will not stink, and you will reduce your global impact.

by Eddie Powell | Nov 11, 2014
Compost is partially decomposed organic matter or anything that was once a living plant. It is the product of controlled decomposition of organic materials by microorganisms. Humus is completely decomposed organic matter.
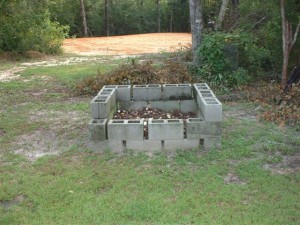
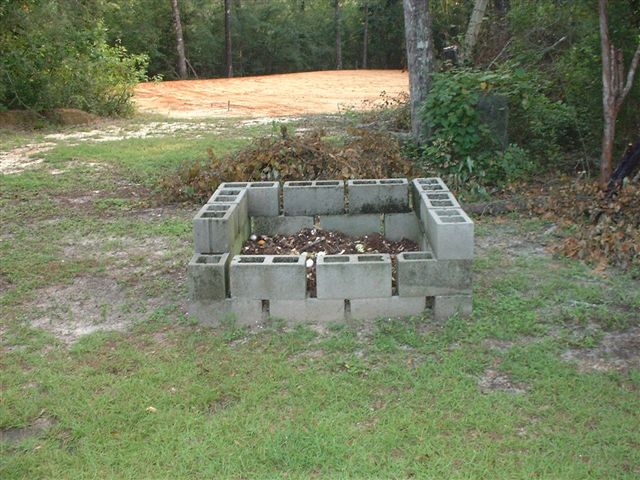
Concrete Block Compost Bin
Photo Credit : Eddie Powell
Green and brown materials with favorable proportions of carbon and nitrogen (C:N) (25:1) offer the microorganisms a “complete meal“. This helps the breakdown of the compost. Greens having high nitrogen and browns having high carbon.
“Green”
- High Nitrogen
- Fast to decompose
- Nitrogen provides the microbes with the raw element of proteins to build their bodies and reproduce.
Examples: manure, kitchen waste, grass clippings, inorganic nitrogen rich fertilizers.
“Brown”
- High Carbon
- Slow to decompose
- Carbon is the energy source for the microbes that help break down the materials.
Examples: leaves, wood chips, straw, sawdust.
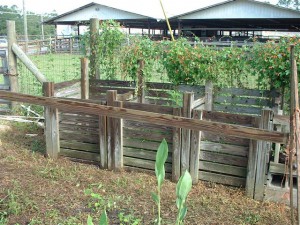
Wooden Compost Bin
Picture Credits : Eddie Powell
Layering in Compost Bin
The general rules for composting: 3 – 4″ layers alternating Green (high nitrogen) and Brown (high carbon) materials. Water each layer as you build it so material is moist not wet, like a wrung sponge. End with a Brown layer on top. Thin layers help prevent anaerobic (smelly) pockets from developing and allows microbes access to both Green and Brown food sources. Do not use meat (eggshells are OK) or dog / cat manure in your compost.
Make sure to filter your composting system because it may not break down all the larger materials, such as corncobs or wood chips.
When you screen your compost, any material larger than your screen size will be removed. The screened particles can be placed back in the compost bin to provide aeration. Additionally, the microbes attached to these pieces will help jump-start the new composting process.
For more information check out this site: Compost Tips for the Home Gardener.
by | Aug 5, 2013
With all of the rainy weather Northwest Florida has been having this summer, plenty of excess yard debris is littering our yards. Don’t put it in the landfill, Compost It !
Compost Pile
Compost is used primarily in bed preparation to improve the soil and can even be used in preparing potting mixes. Partially composted material also can be used as mulch. And since homemade compost is free, it helps reduce the cost of gardening – which means more money left over to buy plants.
Returning these organic materials to the garden maintains natural biological cycles and is an ecologically sensible means of recycling organic waste. It is never very efficient nor environmentally friendly to pile up leaves and grass clippings in bags on the curb to be hauled away to rapidly filling landfills and then go out and buy peat moss that has been dug up and shipped in from Canada.

Build Your Own!
Compost piles should be located in a convenient, but out-of-the-way, location. A source of water nearby is helpful. Avoid locating the pile against fences or other structures made out of wood, because the constant moisture can cause decay. Make the pile about 3 feet wide by 3 feet deep by 3 feet wide to 5 by 5 by 5 in size. Anything smaller will not decompose as well, and larger piles are more difficult to work.
Although compost can be made just by stacking organic matter in a pile, most gardeners prefer to enclose the pile in a bin. There are a number of commercial bins on the market, or you can make your own very easily. A 15-foot-long piece of wire fencing material bent into a circle and fastened with a few pieces of wire is inexpensive, easy to build and works well. Avoid using untreated wood to build the bin, because that could lead to termite problems.

Commercial Bins Are Available
Compost can be created simply by piling up organic matter and allowing natural decomposition to take place (this is sometimes called passive composting). There is nothing really complicated about it, although using this method requires patience. Depending on circumstances, it may take six to 12 months for the organic matter to fully compost.
Typically, composting uses various techniques to speed up the natural breakdown of yard waste. It’s important to remember that raw organic material is converted into compost by the action of fungi and bacteria. In active composting, processes are set in place to make these organisms work faster and more efficiently.
These fungi and bacteria require adequate nitrogen, oxygen and moisture to decompose organic matter rapidly. The composting process attempts to provide these requirements, and the better those essentials are supplied, the faster the process will occur. Shredding or finely chopping materials also greatly speeds up the process.
As the microbes decompose the organic materials, temperatures within the pile may approach 160 degrees at the center. When properly done, this process produces a rich, earthy smell, not the bad odors many gardeners fear will occur. In addition, properly maintained compost piles will not attract and harbor vermin such as rats.
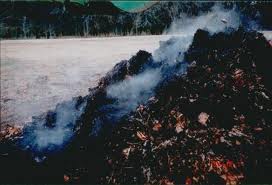
During Decomposition Compost Piles Get Very Warm
Try to include a variety of materials to encourage rapid decomposition. The more types of acceptable materials that are added the better the composting process.
Brown materials, such as brown leaves or chipped branches and stumps, are relatively low in nitrogen. Adding a commercial fertilizer or an organic fertilizer (such as blood meal) that contains nitrogen encourages rapid, thorough decomposition when these types of materials provide the bulk of what is being composted. A light sprinkling is applied over each 8- to 12-inch layer of organic matter as the pile is built.
If the pile is mostly green matter, turn it weekly to keep it loose and oxygenated.
Organic materials that can be used for composting include fallen leaves, grass clippings, shredded hedge clippings, raw vegetable and fruit trimmings, coffee grounds, dead houseplants and old flower arrangements. Manures, such as cow, horse, rabbit or poultry manures, make excellent additions to the compost and are relatively rich in nitrogen.
On the other hand, never put cooked foods, grease, meat, seafood scraps, fat or dog or cat droppings in the pile.
Oxygen is provided by enclosing the pile in a bin that has sides with a lot of ventilation openings, which allow air to move in and out. Turning the pile occasionally is labor intensive, but it ensures the pile is well aerated.
During dry weather it may be necessary to water the pile to maintain adequate moisture levels. Dry organic matter will not decompose. The pile should stay moist, but not constantly soggy. A pile that stays too wet does not contain enough oxygen and may produce sour odors. If this happens, turning the pile will correct the problem.

Water May Need to be Added During Dry Periods
As materials compost they lose more than half of their volume. When compost is ready for use, it should be dark brown and crumbly with much, or all, of the identity of the original material lost.

The Finished Product
The time it takes to finish varies depending on the materials used, how finely they were chopped and how well the appropriate moisture and oxygen levels were maintained. Two to six months is typical, but it can occur much faster. For more information, check out this great UF / IFAS publication on composting.