Daniel Leonard, Horticulture Agent at UF/IFAS Extension Calhoun County, answers commonly asked questions about raised bed gardening. In the video he discusses construction materials, the type of soil to use, fertilization, crop rotation, cover crops, and smaller container gardens.
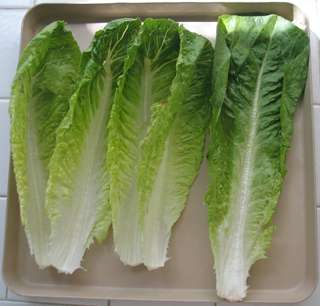
Who doesn’t enjoy a fresh, crisp bowl of salad? Lettuce happens to be a vegetable that is easily grown in Florida for fall & winter gardens. In Florida, four types of lettuce are commonly grown: crisphead, butterhead, leaf, & today’s topic, romaine.
Photo courtesy of Tyler Jones, UF/IFAS.
An interesting, little known fact about romaine lettuce is that it was cultivated extensively by the Roman Empire. By the fourteenth century, the Catholic Hierarchy had moved from Rome to Avignon, France bringing their prized lettuce along with them. During this period, the plant was known as “Avignon” lettuce. In England, romaine is called “cos” lettuce named after the Greek islands from which the lettuce was originally distributed. Of course, in the U.S., the name we give, Romaine, refers to the time when it was grown extensively in the Roman Empire.
Romaine is grown both commercially and in backyard gardens across the state. Like all lettuce, this is a cool season vegetable. September through March is a generally the extent of the growing season. Romaine can be grown from seeds or by transplants. If you are going the seeding route, just remember these seeds are very small and should be sown shallow and in a tight pattern, with 12”-18” row spacing and a light sprinkle of soil over the top. Newly planted seeds may require burlap or straw to help retain soil moisture for successful germination. Once plants reach a few inches in height, rows can be thinned to where plants are 8” apart.
Romaine needs adequate soil moisture throughout the season. Mulching around plants to retain moisture and adding a complete fertilizer such as 8-8-8 will help ensure a good yield. Lettuce is vulnerable to the usual suspects of garden pests. However, gardening in cooler months helps combat that threat.
Romaine lettuce is fun and rewarding to harvest, as well. You can pick a few leaves off a plant or harvest the entire head.
For more information, contact your local UF/IFAS County Extension office.
Supporting information for this article can be found in the UF/IFAS EDIS publication, “Romaine – Lactuca sativa L.” by James M. Stephens, Emeritus Extension Vegetable Crops Specialist, UF/IFAS: https://edis.ifas.ufl.edu/mv125
UF/IFAS Extension is an Equal Opportunity Institution.
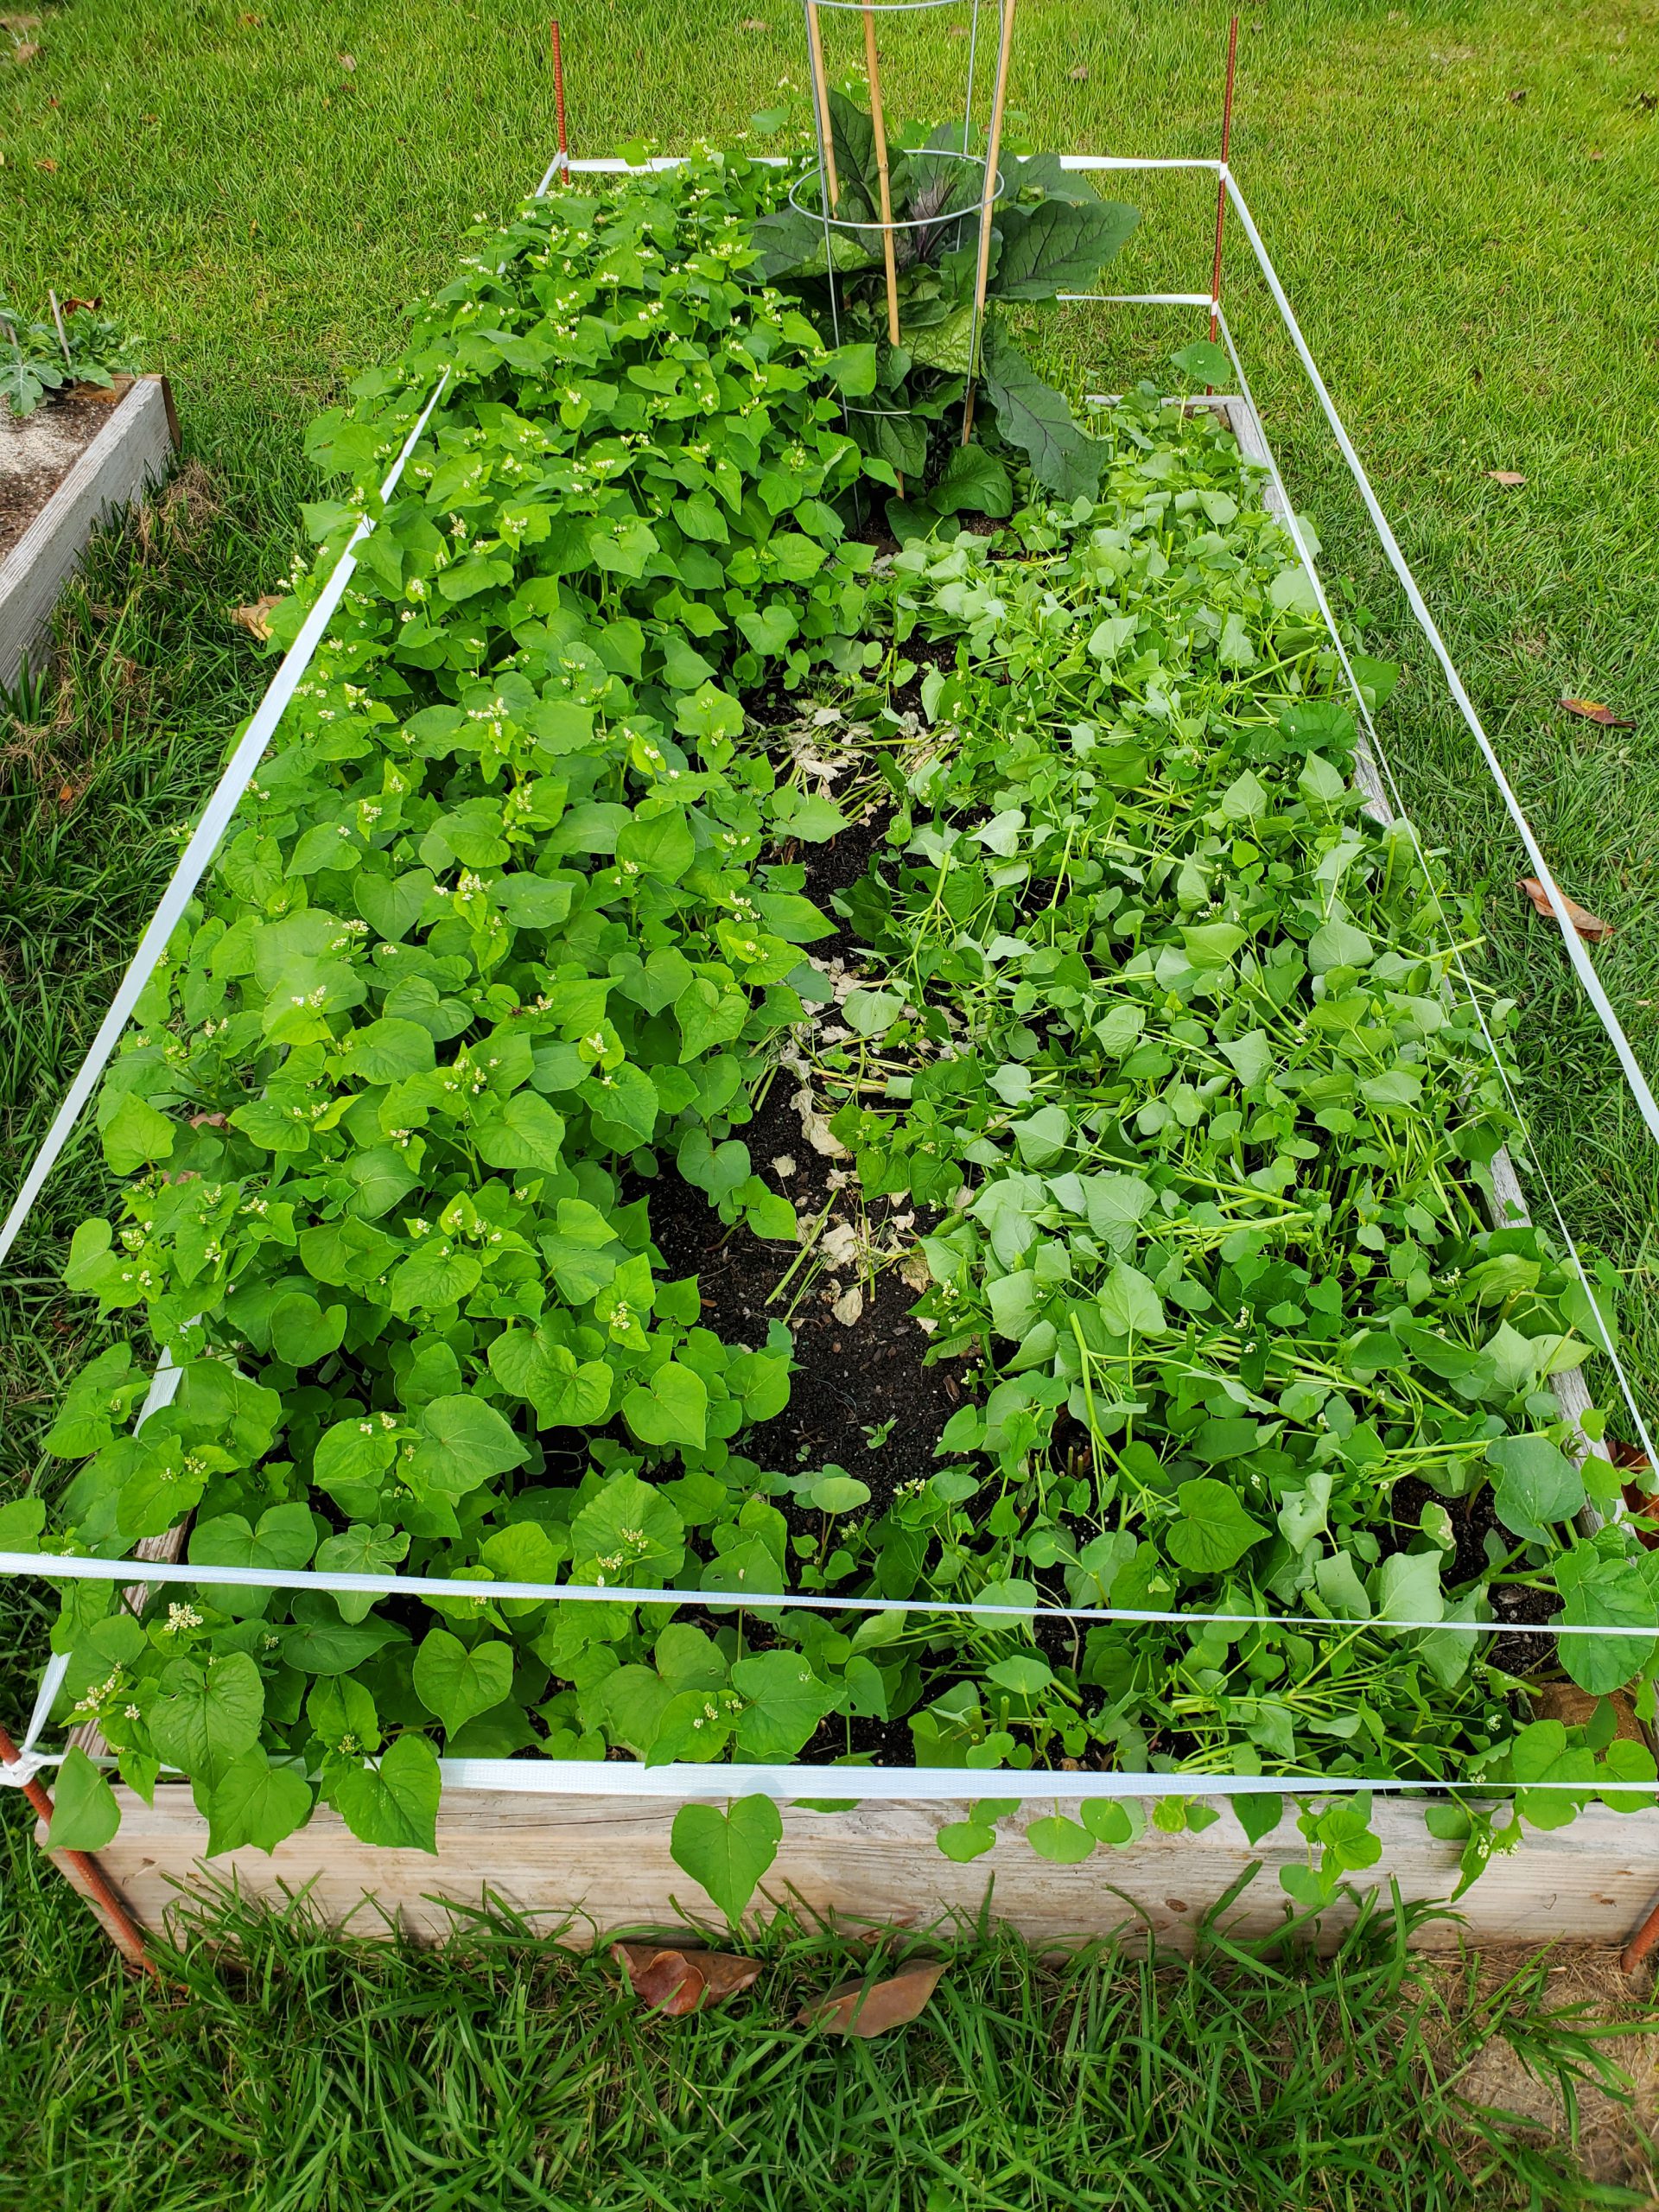
2020 has not been the most pleasant year in many ways. However, one positive experience I’ve had in my raised bed vegetable garden has been the use of a cover crop, Buckwheat (Fagopyrum esculentum)! Use of cover crops, a catch-all term for many species of plants used to “cover” field soil during fallow periods, became popular in agriculture over the last century as a method to protect and build soil in response to the massive wind erosion and cropland degradation event of the 1930s, the Dust Bowl. While wind erosion isn’t a big issue in raised bed gardens, cover crops, like Buckwheat, offer many other services to gardeners:
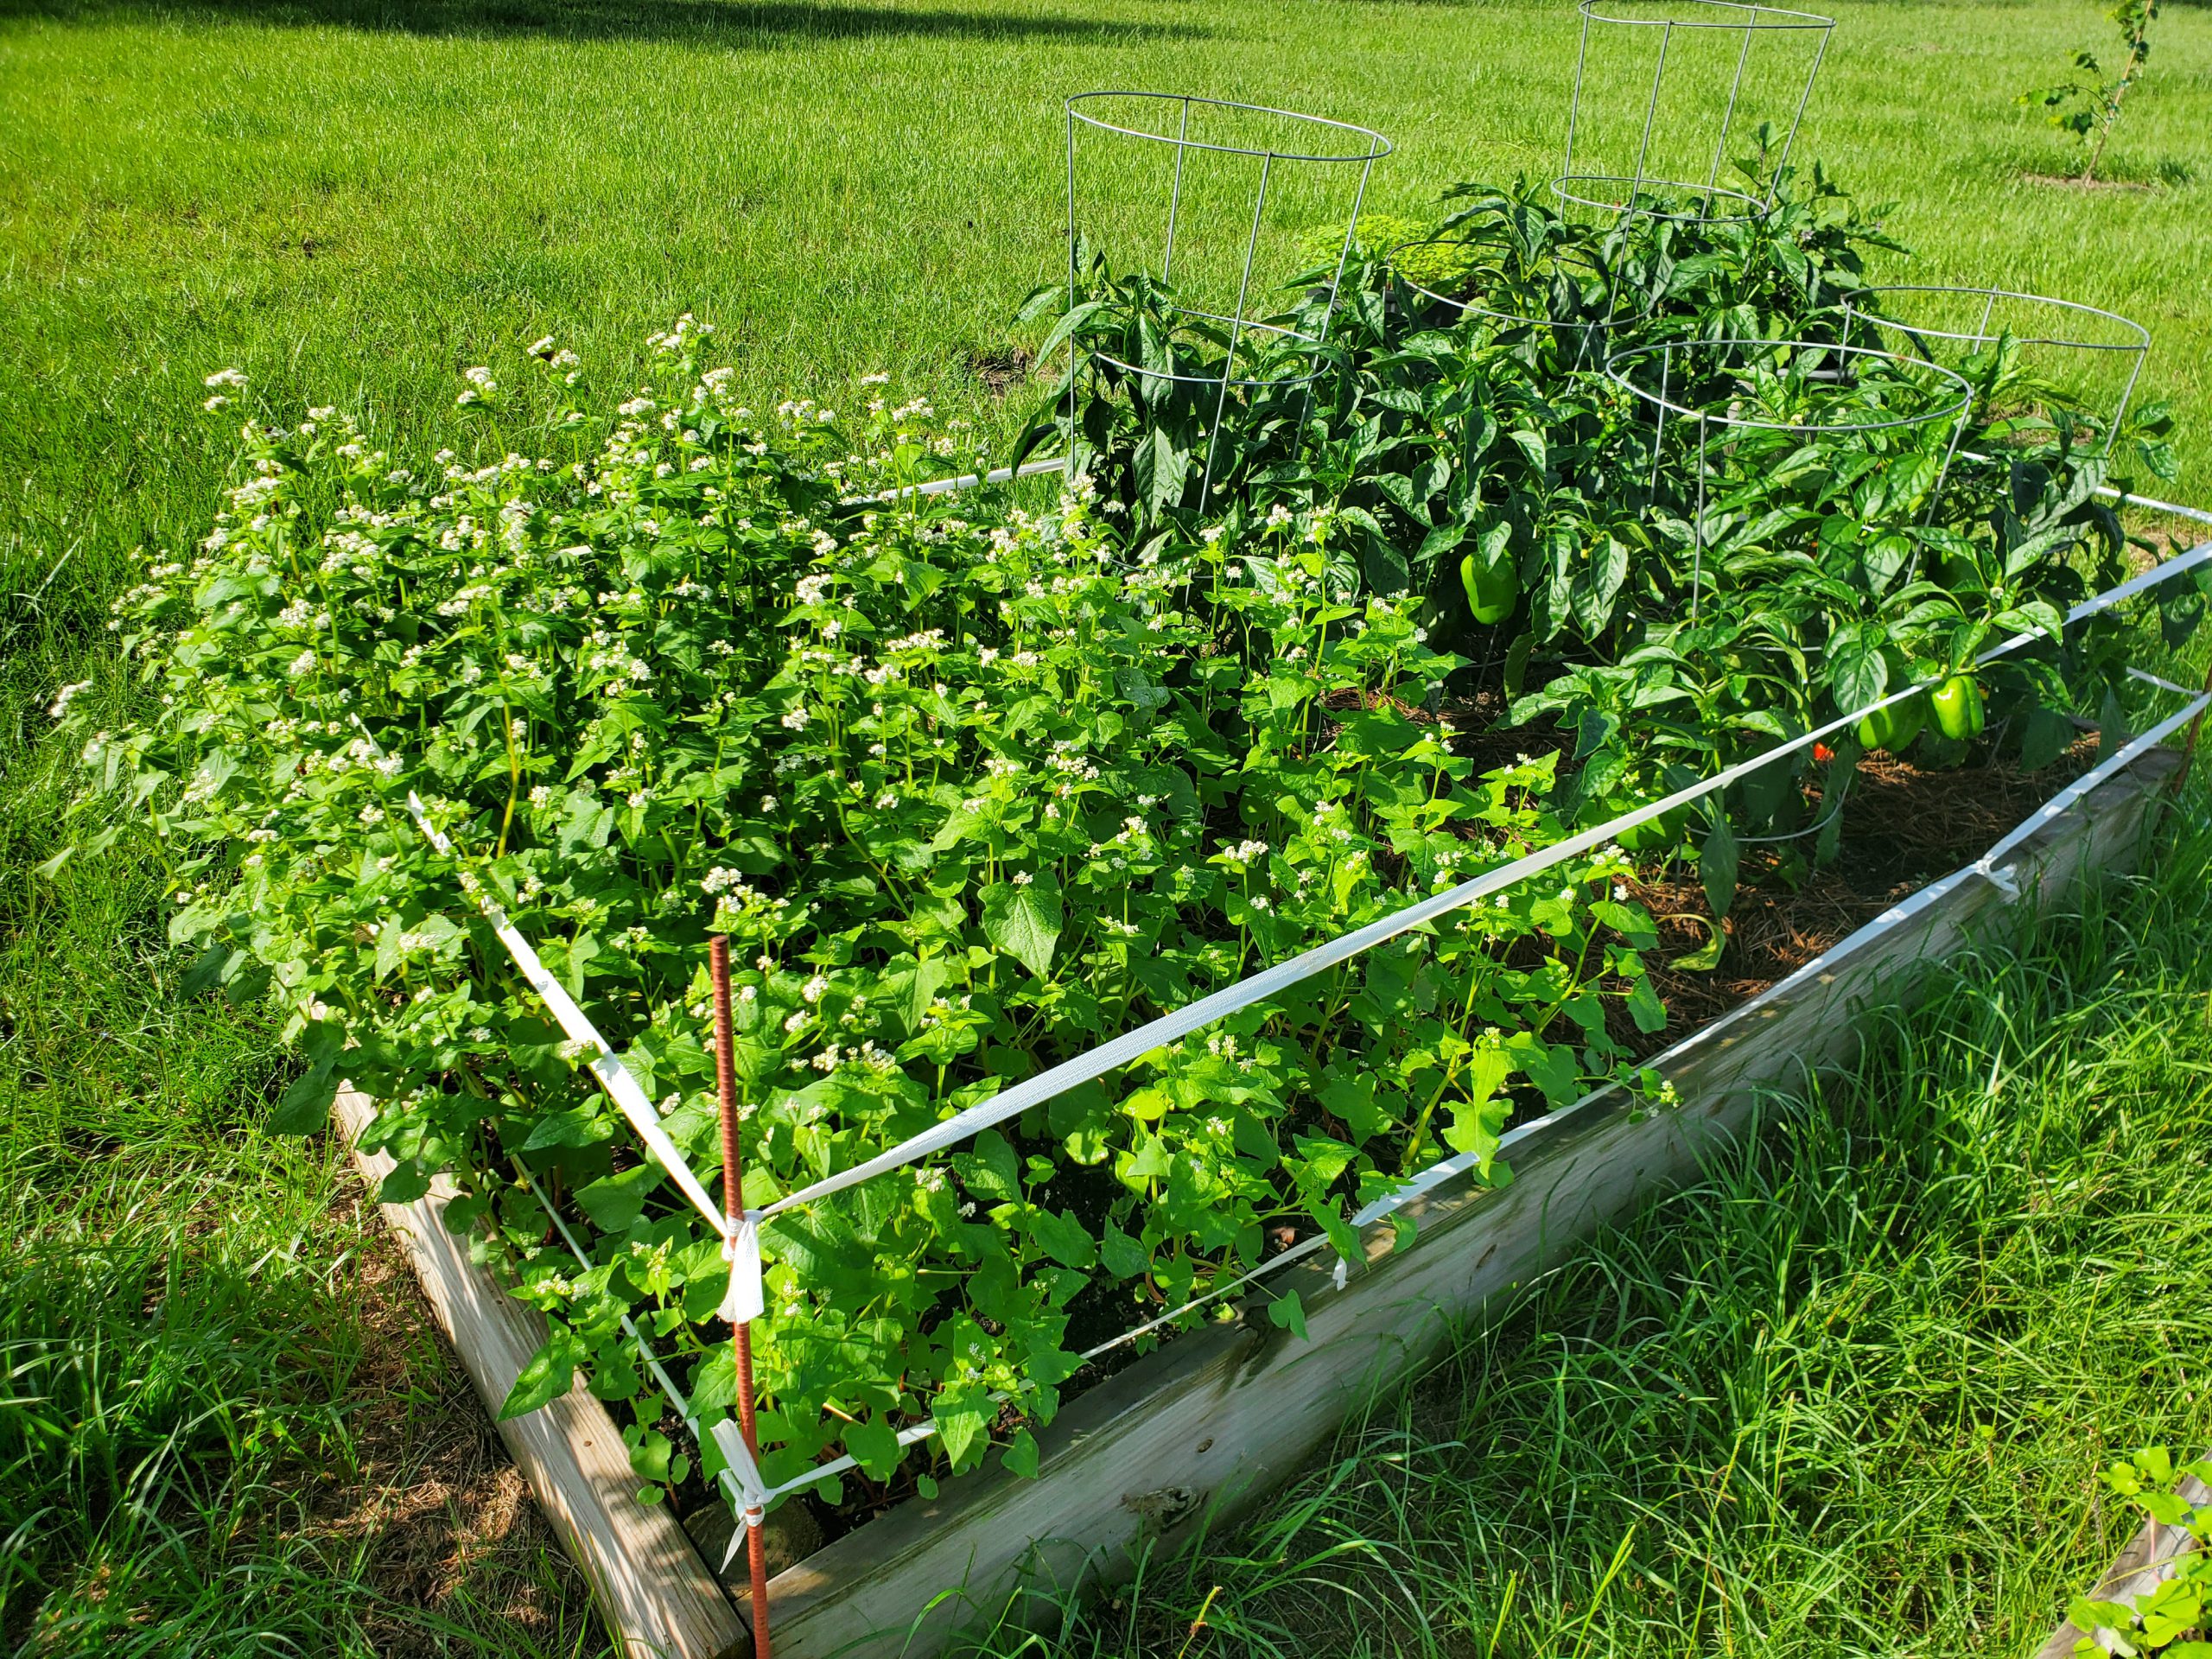
Buckwheat in flower behind summer squash. Photo courtesy of Daniel Leonard.
Covers, like Buckwheat, provide valuable weed control by shading out the competition. Even after termination (the cutting down or otherwise killing of the cover crop plants and letting them decompose back into the soil as a mulch), Buckwheat continues to keep weeds away, like pinestraw in your landscape.
Cover crops also build soil. This summer, I noticed that my raised beds didn’t “sink” as much as normal. In fact, I actually gained a little nutrient-rich organic matter! By having the Buckwheat shade the soil and then compost back into it, I mostly avoided the phenomena that causes soils high in organic matter, particularly ones exposed to the sun, to disappear over time due to breakdown by microorganisms.
Many cover crops are awesome attractors of pollinators and beneficial insects. At any given time while my Buckwheat cover was flowering, I could spot several wasp species, various bees, flies, moths, true bugs, and even a butterfly or two hovering around the tiny white flowers sipping nectar.
Covers are a lot prettier than bare soil and weeds! Where I would normally just have either exposed black compost or a healthy weed population to gaze upon, Buckwheat provided a quick bright green color blast that then became covered with non-stop white flowers. I’ll take that over bare soil any day.
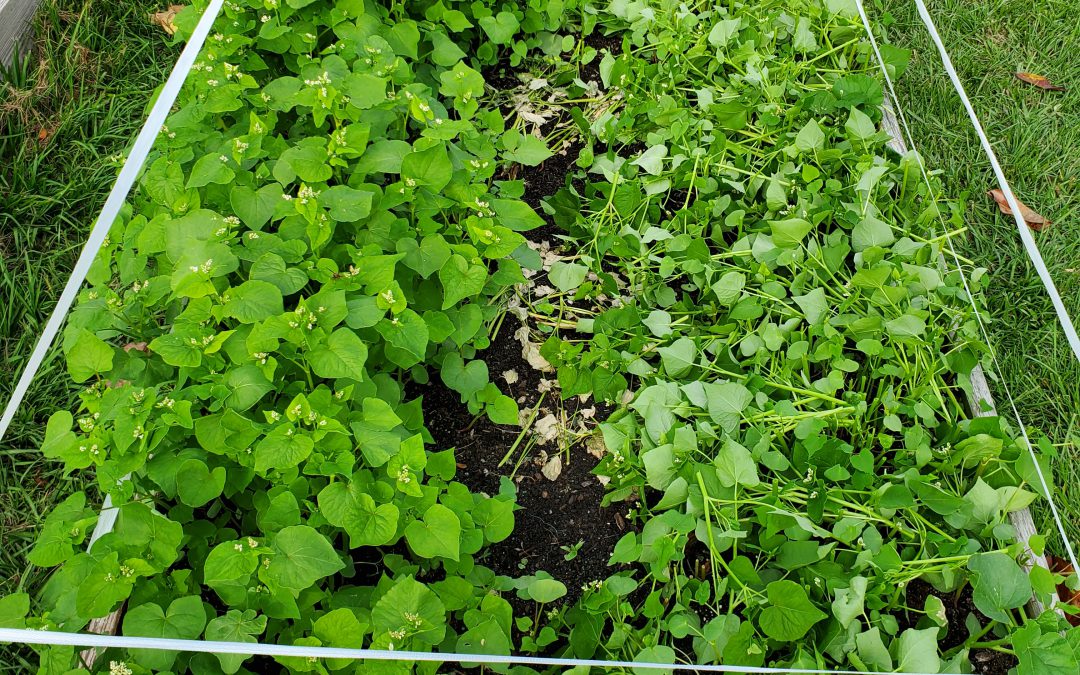
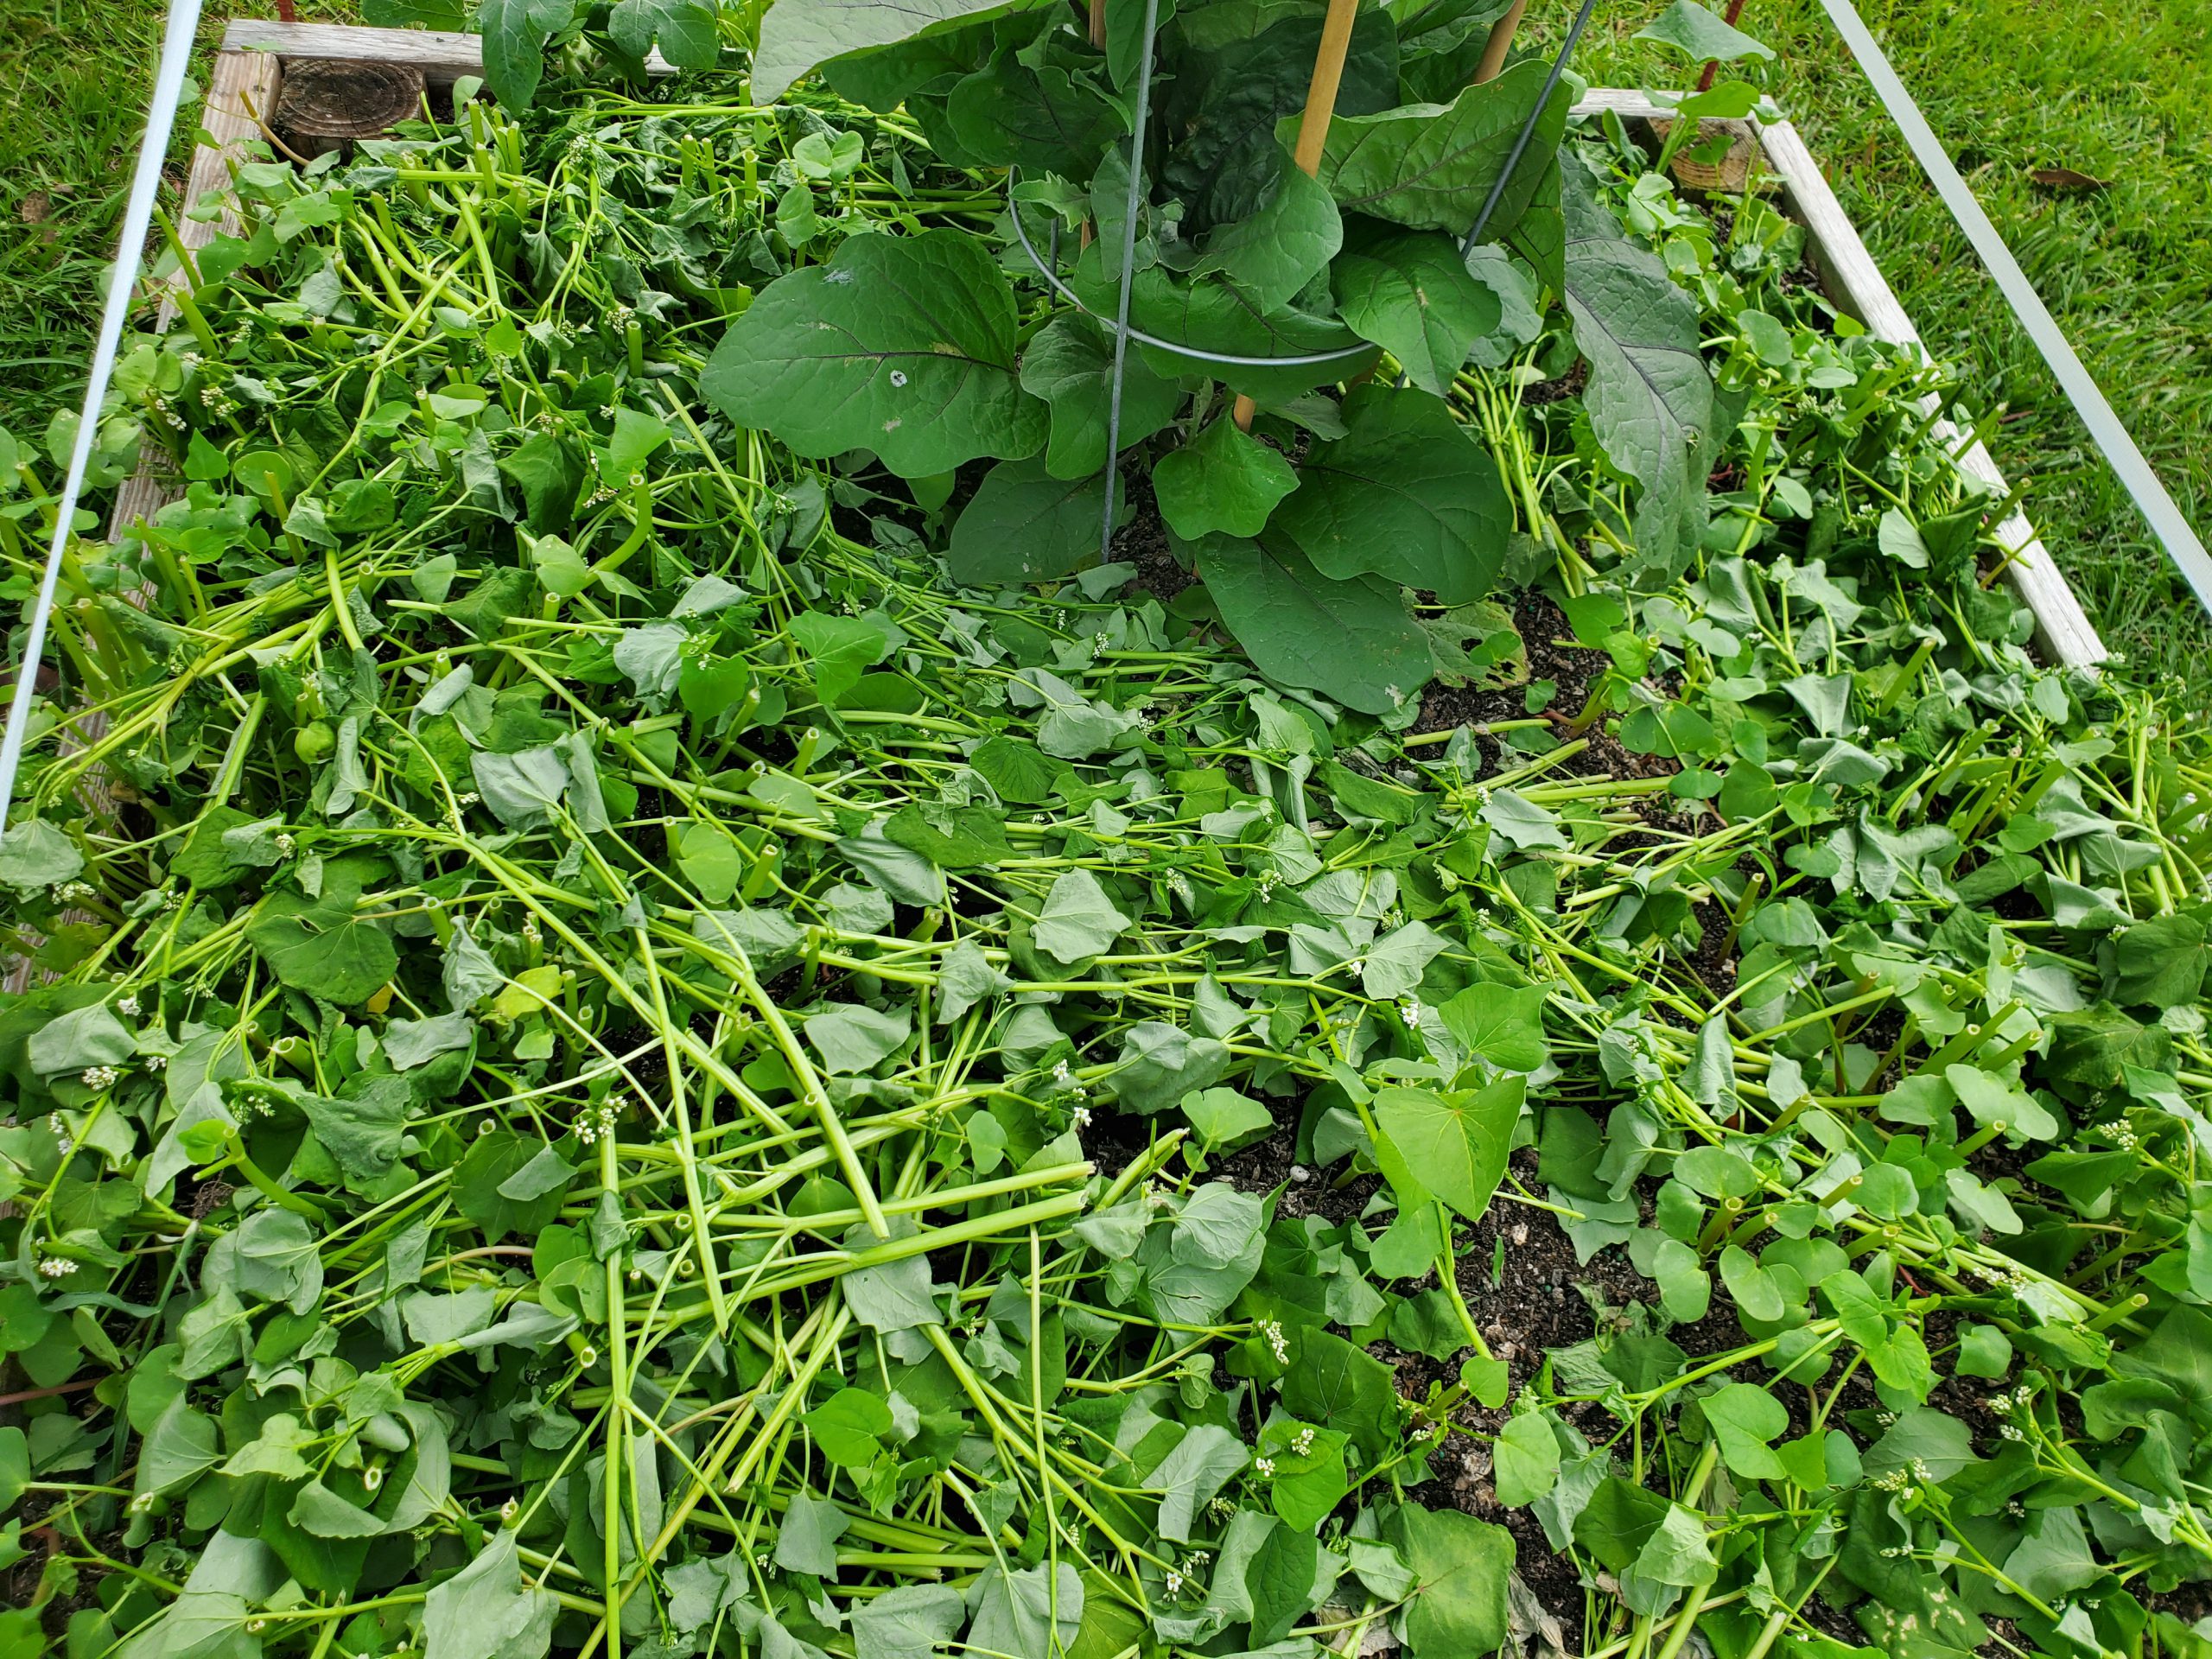
Buckwheat cover before termination (left) and after (right) interplanted with Eggplant. Photo courtesy Daniel Leonard, UF/IFAS Calhoun County Extension.
Now that I’ve convinced you of Buckwheat’s raised bed cover crop merits, let’s talk technical and learn how and when to grow it. Buckwheat seed is easily found and can be bought in nearly any quantity. I bought a one-pound bag online from Johnny’s Selected Seeds for my raised beds, but you can also purchase larger sizes up to 50 lb bags if you have a large area to cover. Buckwheat seed germinates quickly as soon as nights are warmer than 50 degrees F and can be cropped continuously until frost strikes in the fall. A general seeding rate of 2 or 3 lbs/1000 square feet (enough to cover about thirty 4’x8’ raised beds, it goes a long way!) will generate a thick cover. Simply extrapolate this out to 50-80 lbs/acre for larger garden sites. I scattered seeds over the top of my beds at the above rate and covered lightly with garden soil and obtained good results. Unlike other cover crops (I’m looking at you Crimson Clover) Buckwheat is very tolerant of imperfect planting depths. If you plant a little deep, it will generally still come up. A bonus, no additional fertilizer is required to grow a Buckwheat cover in the garden, the leftover nutrients from the previous vegetable crop will normally be sufficient!
Buckwheat “mulch” after termination. Photo courtesy of Daniel Leonard, UF/IFAS Calhoun County Extension.
Past the usual cover crop benefits, the thing that makes Buckwheat stand out among its peers as a garden cover is its extremely rapid growth and short life span. From seed sowing to termination, a Buckwheat cover is only in the garden for 4-8 weeks, depending on what you want to use it for. After four weeks, you’ll have a quick, thick cover and subsequent mulch once terminated. After eight weeks or so, you’ll realize the plant’s full flowering and beneficial/pollinator insect attracting potential. This lends great flexibility as to when it can be planted. Have your winter greens quit on you but you’re not quite ready to set out tomatoes? Plant a quick Buckwheat cover! Yellow squash wilting in the heat of summer but it’s not quite time yet for the fall garden? Plant a Buckwheat cover and tend it the rest of the summer! Followed spacing guidelines and only planted three Eggplant transplants in a 4’x8’ raised bed and have lots of open space for weeds to grow until the Eggplant fills in? Plant a Buckwheat cover and terminate before it begins to compete with the Eggplant!
If a soil building, weed suppressing, beneficial insect attracting, gorgeous cover crop for those fallow garden spots sounds like something you might like, plant a little Buckwheat! For more information on Buckwheat, cover crops, or any other gardening topic, contact your local UF/IFAS County Extension Office. Happy Gardening!
Whether it’s the warm or cool season of the year, vegetable gardening is as popular activity as any. In writing articles, I usually discuss best management practices on a backyard garden scale. But, what if you don’t have much of a backyard?
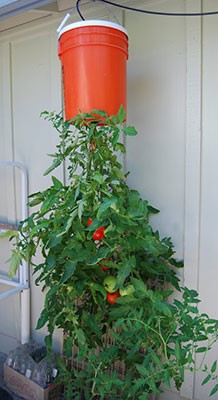
Many Floridians live in apartments, condominiums, mobile home parks, or simply homes built on small parcel lots with little open gardening space. This doesn’t mean you can’t grow vegetables. You just have to be a bit creative and that’s when the fun starts. In addition to being an enjoyable activity, mini vegetable gardening can be practical and ornamental. Containers can fit almost anywhere in the landscape, such as porches, balconies, roof tops and that spot on your property where nothing seems to fit.
There’s practically no limit to the kinds of containers one can use for mini vegetable gardening. Some examples are pots and pans, milk jugs, hollow concrete blocks, bushel baskets, trash cans, barrels, buckets and even plastics bags and “to go” food containers. As long as the container will hold soil and let excess water drain, you’re good to garden.
So, what can I use as a growing medium? Traditional garden soil will work fine. Mixing garden soil 1:1 with mushroom compost is also acceptable. Adding lightweight components to the soil mixture such as perlite or vermiculite will make it easier if you need move the container from time to time. This will also help with drainage. Sprinkling a handful of 6-6-6 or 8-8-8 fertilizer and gardening lime into the mixture will give plants much needed nutrients for development.
This growing medium will not require fertilizer applications very often. A small amount every two to three weeks should be adequate for most vegetable plants. Whether the fertilizer you choose is solution or dry form, be sure to use small amounts and water the product thoroughly into the root zone. A heavy application of fertilizer may cause plant burn.
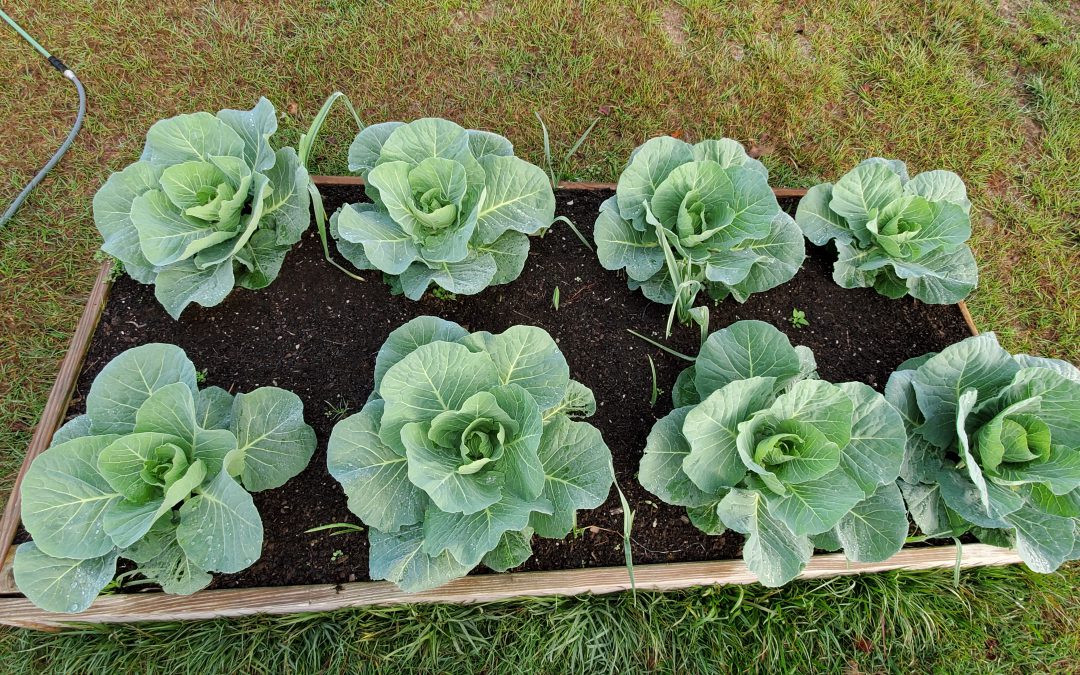
So what vegetable crops grow best in containers? Most any crop will do well in containers. Some examples are tomato, pepper, eggplant, collard, cabbage, turnip, mustard, strawberry, broccoli, cauliflower and many herbs. Container gardening is a fun and rewarding hobby. You’ll enjoy both the activity and the delicious produce you’ve grown.
For more information contact your local county extension office.
Supporting information for this article was provided by Extension’s Emeritus Vegetable Specialist Jim Stephens of UF/IFAS Extension. More information can be found at this website: http://gardeningsolutions.ifas.ufl.edu/plants/edibles/vegetables/growing-vegetables-in-containers.html
UF/IFAS Extension is an Equal Opportunity Institution.
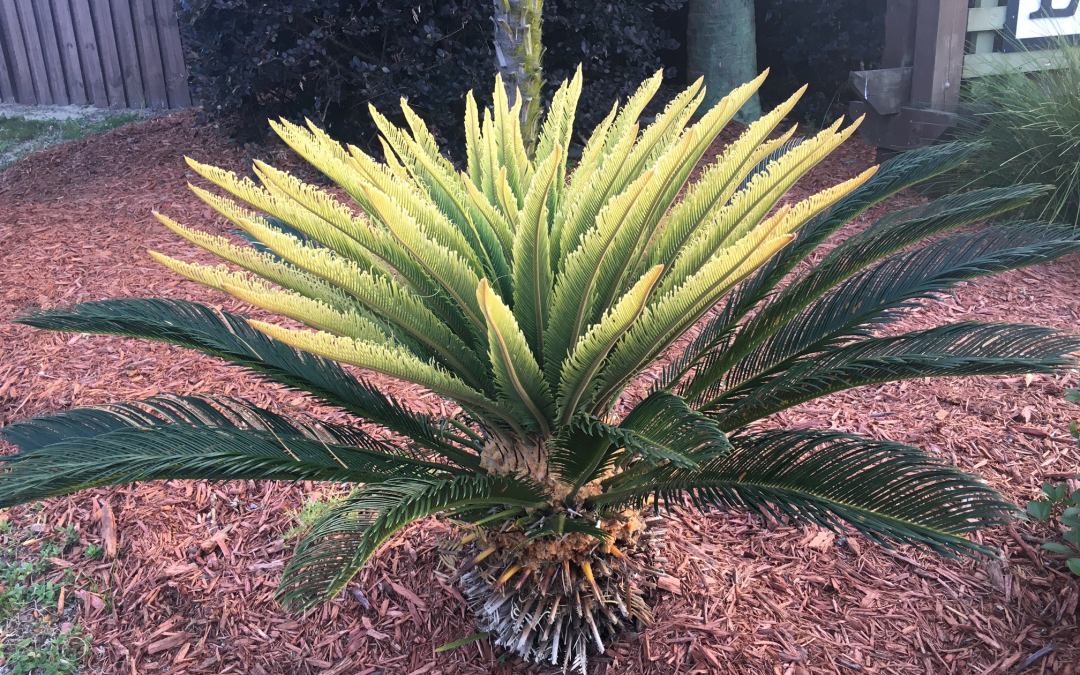
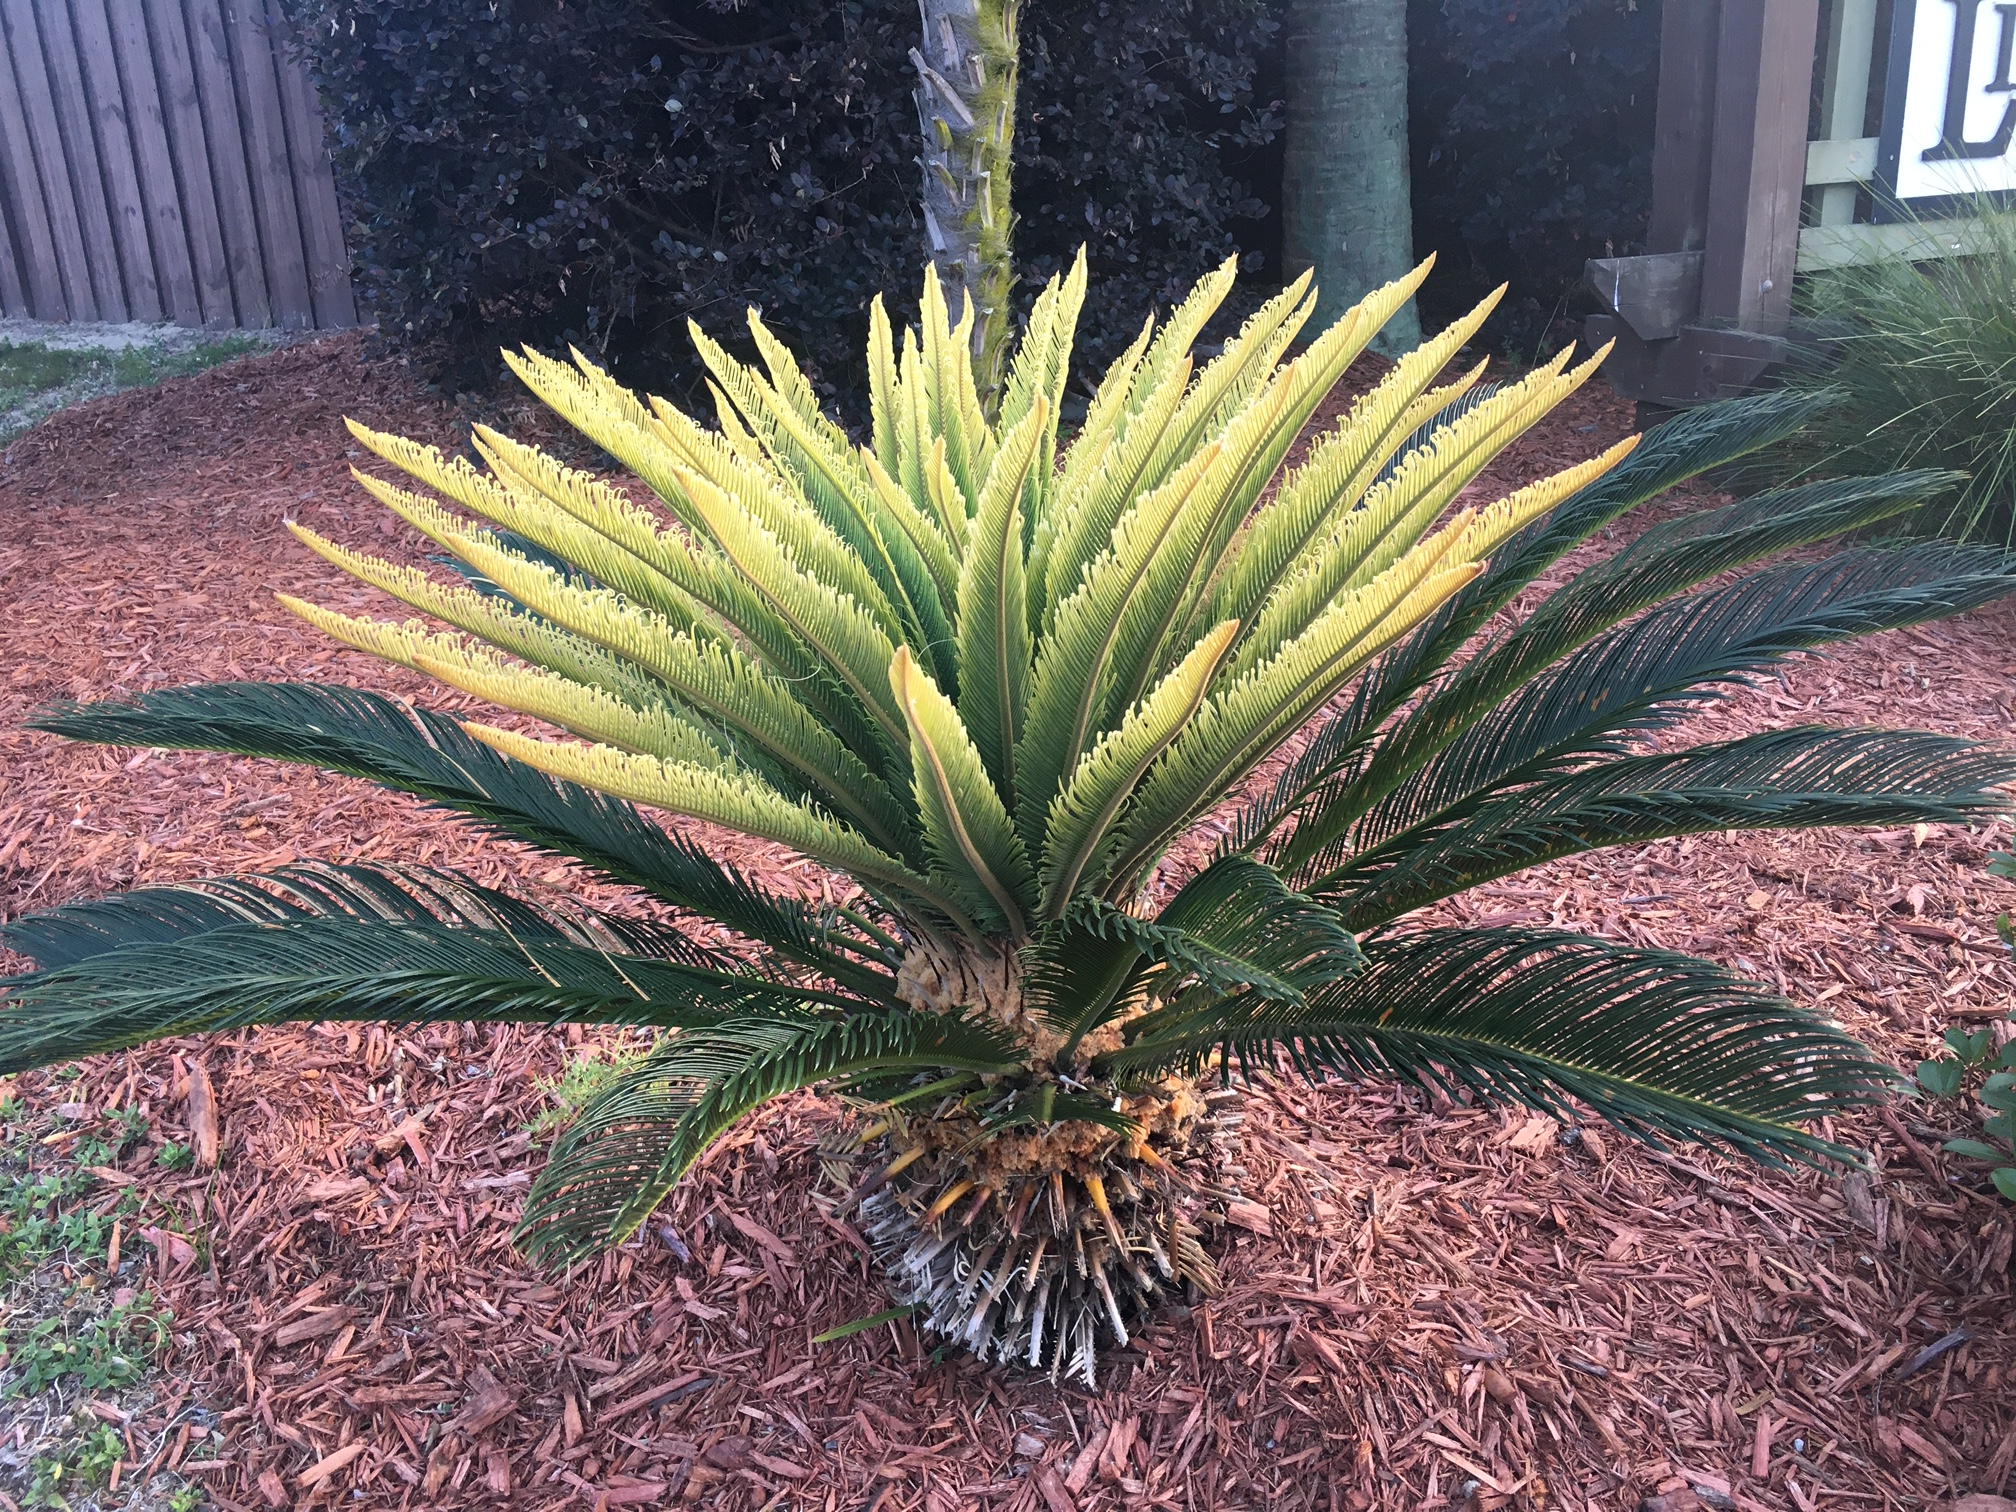
The first sign that something is going wrong in a plant is often a loss of the color green. When a sago is forming all new yellow leaves it is a matter of concern. Typically, this a common nutritional deficiency – manganese. Sandy soils of the Panhandle have a hard time retaining nutrients. Manganese and other micronutrient availability is highly influenced by soil pH. Being an essential plant nutrient, manganese is critical to growth. More specifically, it is the base of the metalloenzyme cluster of the oxygen evolving complex (OEC) in photosystem II (PSII). I hope that means more to you than it does me. Basically, manganese is part of the photosynthetic activity and since it isn’t very mobile in the plant, the new growth of sagos turns yellow.
If the nutrient deficiency isn’t corrected, the newly-formed leaves will become deformed and turn brown. In a sago this is referred to as “frizzle-top”. Many people believe the plant has a disease when they see the symptoms and may apply fungicides to no avail. Keep in mind the discoloration of the affected leaves cannot be reversed. However, manganese replacement in the soil will enable the sago to form normal leaves with the next growth phase. Damaged fronds can be removed later to improve the appearance of the sago over time.
Begin this process by determining the soil pH through a soil test. Your local Extension office can help you obtain lab submission forms and explain the collection procedure. Manganese is most available for uptake by sagos when the soil pH is between 5.5 and 6.5. If the pH is above 6.5, larger amounts of manganese will have to be present before the plant can utilize it. When the soil pH is below 5.5 the nutrient is quickly leached out of the soil during rain events.
To correct a manganese deficiency the sago plant will need to receive manganese sulfate. The product is readily available at local nurseries, garden centers and building supply stores. The amount needed for each plant will vary with the size of the sago and the existing soil pH. Sagos growing in sandy, acidic soil will require less manganese sulfate than those in high pH soils. Refer to the package label for application rates.