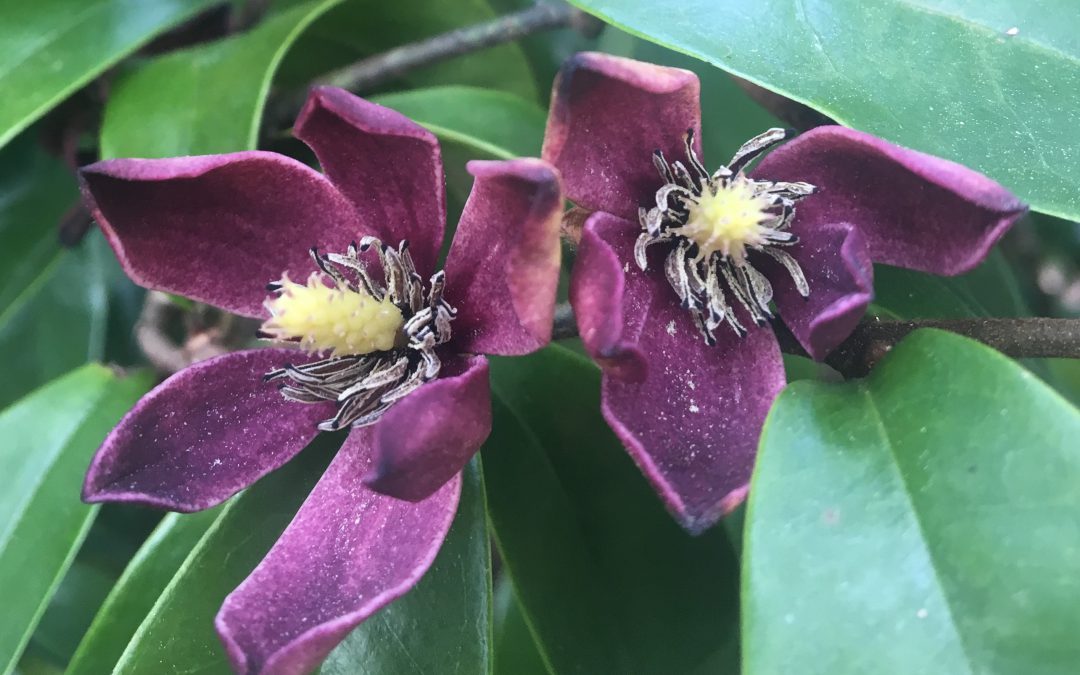
by Gary Knox | Sep 2, 2021
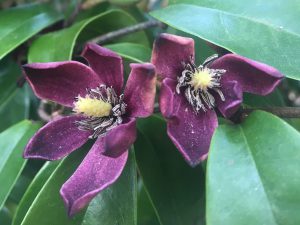
‘Stellar Ruby’ is a new purple-flowered hybrid banana-shrub that will soon be released nationally
You just learned about a fabulous new plant, and you HAVE to have it. How can you acquire this rare treasure?
Many of us gardeners have experienced this desire for a “new” plant but have quickly become frustrated with trying to locate and buy that particular plant. It’s not easy, or else that plant wouldn’t be new or rare, but the four P’s outline a few strategies for satisfying a “new” plant passion: plant societies, plant institutions, patience and payment.
Plant societies are one of the best avenues for acquiring new plants. Most plant societies consist of members with intense interest in particular plants or plant groups, so find the society that supports the plant that interests you. Plant society members often include breeders or plant explorers who introduce new plants. Whether magnolia or camellia or conifers or other plants, membership in such societies can give you a leg up on learning about, seeing, and accessing new plants. Consequently, fellow society members are often the first to acquire the newest plants, and that could be you!
Beyond this, participation in generalist plant groups can also give you unexpected benefits of networking with like-minded people. Thus, don’t overlook groups like Master Gardeners, garden clubs, or garden/park support groups. Their members often include passionate plant people like you who may have more connections (or special plants) than you realize.
Similarly, plant institutions such as universities or botanic gardens are another way to learn about and acquire new plants. These institutions often hold plant sales or fund-raising plant auctions that include new, unusual or rare plants. Online plant sales or auctions are becoming more common, so distance is less of an obstacle than it used to be. However, these institutions are less focused on particular plants, so it may be hit-or-miss to find that particular plant you want. To increase the chances of finding your desired plant, contact these institutions and ask to be notified about these events. You may even find a plant you didn’t know you wanted!
Patience is a virtue when trying to acquire new plants. Some plants take a long time to propagate or are not easy to propagate or grow. If you have the patience to wait, many plants will become more available – – – and at a more reasonable cost – – – as nursery production catches up to demand.
Finally, “payment”: let’s face it, money talks! If you have the funds, you can usually find the means to acquire the plants you desire. Most new or rare plants usually enter the market through specialty nurseries, operations that often maintain their own breeding or plant exploration programs or have exclusive arrangements with those who do. This is an expensive means of obtaining new plants, and therefore these specialty nurseries rightly charge more for their plants.
Another way money works to your advantage is the ability to travel. Many specialty nurseries, collectors, etc. often aren’t found in our part of Florida. If you can travel to these nurseries, botanic gardens, etc., it will be much easier to acquire unusual plants. If you can’t afford special trips to these sites, consider taking vacations to areas near these specialty nurseries, or to areas where these specialty nurseries are “on the way” to your vacation destination.
It goes without saying that you should learn about a “new” plant as much as possible before investing in an extensive hunt. Simple internet searches should tell you if that plant will be adapted to the climate and soil of your garden. At the other extreme, check resources like the IFAS Assessment (https://assessment.ifas.ufl.edu/) to make sure that particular plant won’t become invasive in your region of Florida.
Gardening is a very fulfilling activity, and the excitement of “new” plants just makes gardening more fun! Happy hunting!

by Sheila Dunning | Aug 26, 2021
Photos by Sheila Dunning
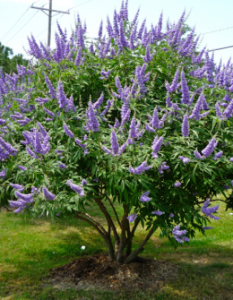
The showy chaste tree makes an attractive specimen as the centerpiece of your landscape bed or in a large container on the deck. Much more of them are being seen since the Florida Department of Transportation has recognized the tree as a desirable median planting. Easy-to-grow, drought resistant, and attractive to butterflies and bees, Vitex agnus-castus is a multi-stemmed small tree with fragrant, upwardly-pointing lavender blooms and gray-green foliage. The chaste tree’s palmately divided leaves resemble those of the marijuana (Cannabis sativa) plant; its flowers can be mistaken for butterfly bush (Buddleia sp.); and the dry, darkened drupes can be used for seasoning, similar to black pepper, making it a conversation piece for those unfamiliar with the tree.
Vitex , with its sage-scented leaves that were once believed to have a sedative effect, has the common name “Chastetree” since Athenian women used the leaves in their beds to keep themselves chaste during the feasts of Ceres, a Roman festival held on April 12. In modern times, the tree is more often planted where beekeepers visit in order to promote excellent honey production or simply included in the landscape for the enjoyment of its showy, summer display of violet panicles.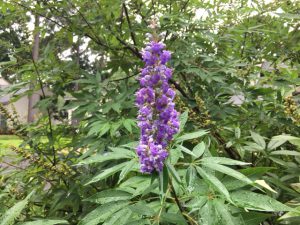
Chaste tree is native to woodlands and dry areas of southern Europe and western Asia. It will thrive in almost any soil that has good drainage, prefers full sun or light shade, and can even tolerate moderate salt air. Vitex is a sprawling plant that grows 10-20 feet high and wide, that looks best unpruned. If pruning is desired to control the size, it should be done in the winter, since it is a deciduous tree and the blooms form on new wood. The chaste tree can take care of itself, but can be pushed to faster growth with light applications of fertilizer in spring and early summer and by mulching around the plant. There are no pests of major concern associated with this species, but, root rot can cause decline in soils that are kept too moist.
by Carrie Stevenson | Aug 5, 2021
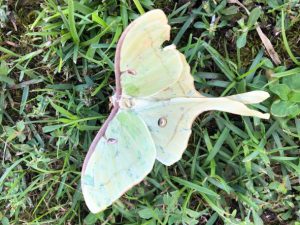
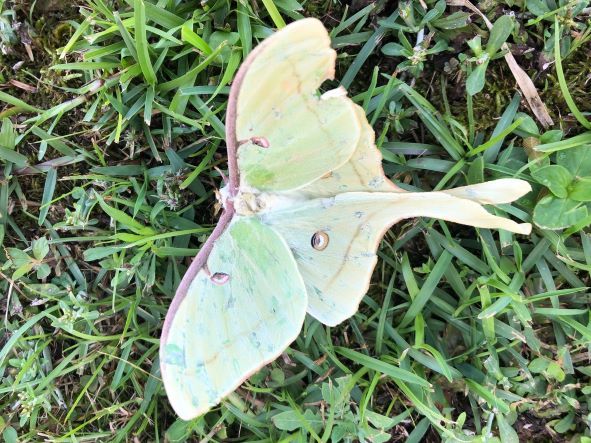
The moon-like eyespots and long tails on its wings are identifying features of the luna moth. Photo credit: Carrie Stevenson, UF IFAS Extension
We hear about butterflies all the time–their beautiful wing patterns, how to plant entire gardens for them, and the fascinating migration patterns of monarchs. But if you look around, you might just find their night-dwelling cousins, the moths, have some pretty incredible traits, too.
I find luna moths (Actias luna) just as interesting as many of the colorful butterflies native to our area. Luna moths are considerably larger than the little brown and black moths you see fluttering around streetlights. Their wingspan can be up to 4” wide, with long, tapering tails trailing behind them. The moth is native to the entire eastern portion of the United States, but has a longer life span the further south it resides. Luna moths live year-round in Florida, with up to three generations (trivoltine) born annually. They are pale green, and adults have a furry white underbelly. Lunas are so eye-catching that they have been featured on the cover of a field guide to moths, postage stamps from the United States and other countries, and as the mascot of the insomnia medication, Lunesta.

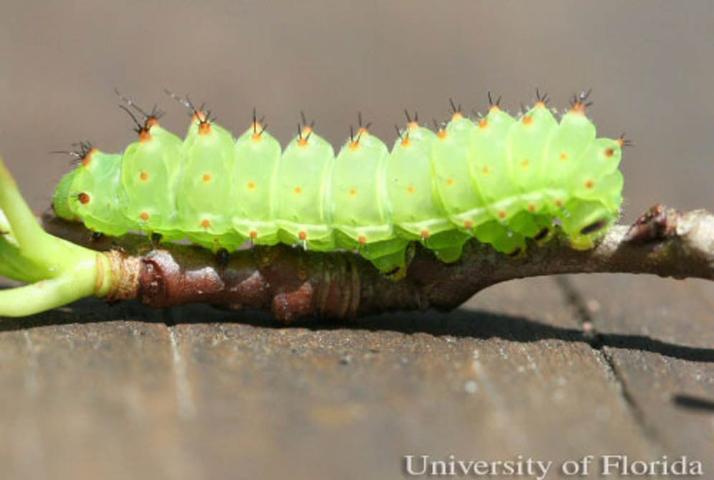
The caterpillar of the luna moth is bright green and warns off predators by making an intimidating clicking sound. Photo credit: University of Florida
Luna moths have several celestial ties in their name. All the moths in its larger family, Saturnidae, have round eyespots (which fool would-be predators) composed of concentric circles like the rings of Saturn. “Luna” comes from the Latin for moon, after the moon-colored eyespots on its back.
Luna moth caterpillars are fat and green—the classic caterpillar—and about 2.5” long. Their preferred host plants in the south are typically sweet gum, hickory, walnut, and persimmon trees. Interestingly, the caterpillars can make a sound, typically described as a clicking noise. Biologists believe this noise-making is a defense mechanism, performed as a precursor to spitting up unpleasant fluids to fend off predators. Several studies have shown that the twisting motion of the adult luna moth’s long tails in flight can interrupt the echolocation of bats, helping the moths evade predation.
by Ashley Stonecipher | Aug 5, 2021

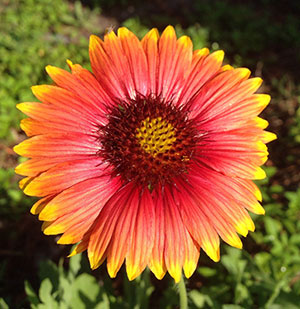
Native Gaillardia. Photo courtesy UF/IFAS.
The hottest days of the summer are here and you might be thinking, “There is no way something could survive this heat!”. You might also be wondering “What can I do in my landscape?” Well, you are correct – it is hot and there are not many plants that thrive in this type of weather, but the good news is we are at the end of the summer season and there are things we can begin to do to get ready for fall. It’s not too late to get the last of the summer vegetables going such as lima beans, cucumbers, eggplants, and peppers. Many cool season crops can also be planted by seed now and tomatoes will thrive going into the fall season. See Vegetable Gardening in Florida
There are some heat-tolerant annuals like vinca, gaillardia, bulbine, and coleus that can be planted now in the landscape. See Annuals. Any time of the year, even late summer, bulbs like Aztec Lily, Butterfly Lily, Walking Iris, and Spider Lily can be planted. See Bulbs for Florida. Not many herbs do well in our Florida sun this time of year, but Bay Laurel, Ginger, Mexican Tarragon, and Rosemary can be planted as transplants now but not as seeds just yet. See Herbs.
August and late summer is the time of year that you may be seeing damage in your lawns. This could be caused by insects, disease, or irrigation failure. It is important to determine the cause, so the proper remedy is used. Some ways to avoid lawn damage are checking your mower blades regularly and making sure they are sharp. Also only cut the top one third of the blade of grass to not stress it in the heat of the day. It is good practice to test your irrigation clock and have a rain sensor. Some municipalities in north Florida prohibit the application of fertilizer during the summer rainy season from June to September so check with your local extension office. See Insect Management in Your Florida Lawn
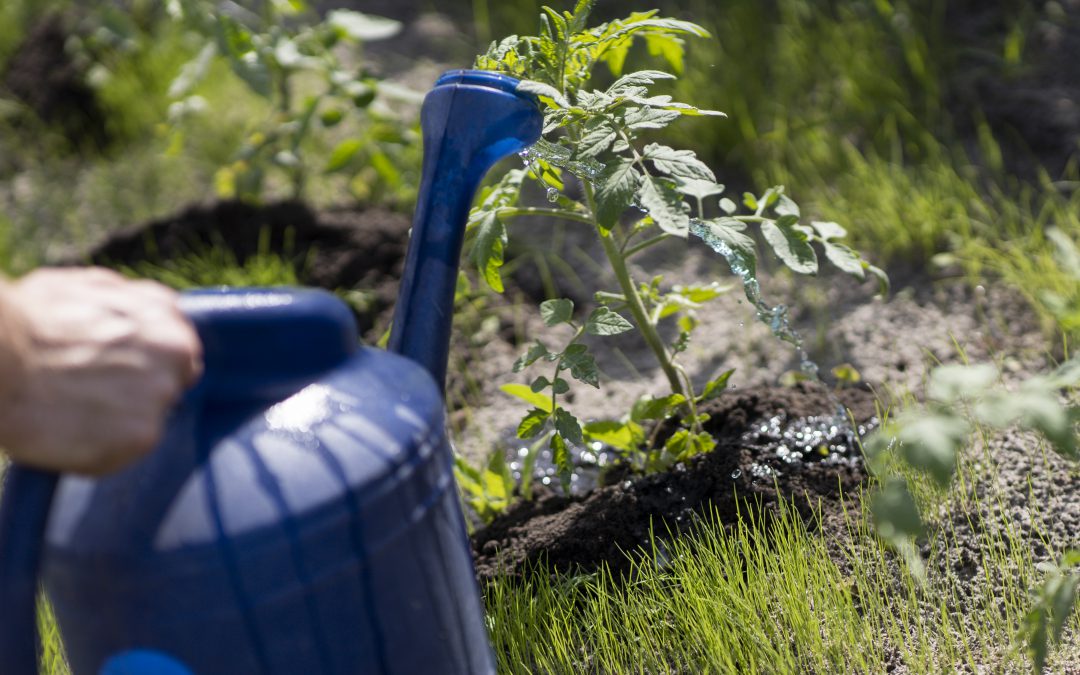
You can become more self-sufficient by growing your own healthy food in your backyard. Photo by Molly Jameson.
There are some other maintenance measures you can take in August to help your landscape and prepare for the fall season. If older palm fronds are yellowing, this could indicate a deficiency in magnesium or potassium. Talk to your local agent or visit your local store for an appropriate palm fertilizer. See Palm Nutrition and Fertilization. Are you holding on to those beautiful fall mums or decorative Christmas poinsettias? Now is the time to pinch them back to allow time for buds to set for winter blooms. Finally, it is a good time to deadhead (remove old blooms) and fertilize flowering annuals and perennials. We’ve had substantial rain this summer, so keep in mind that the soil could be lacking nutrients. A soil test can give you data that indicates what you need for the up-and-coming growing season.
Information for this article can be found in the UF/IFAS EDIS publication: “North Florida Gardening Calendar” by Sydney Park Brown: ENH1190/EP451: North Florida Gardening Calendar (ufl.edu)
by Daniel J. Leonard | Aug 5, 2021
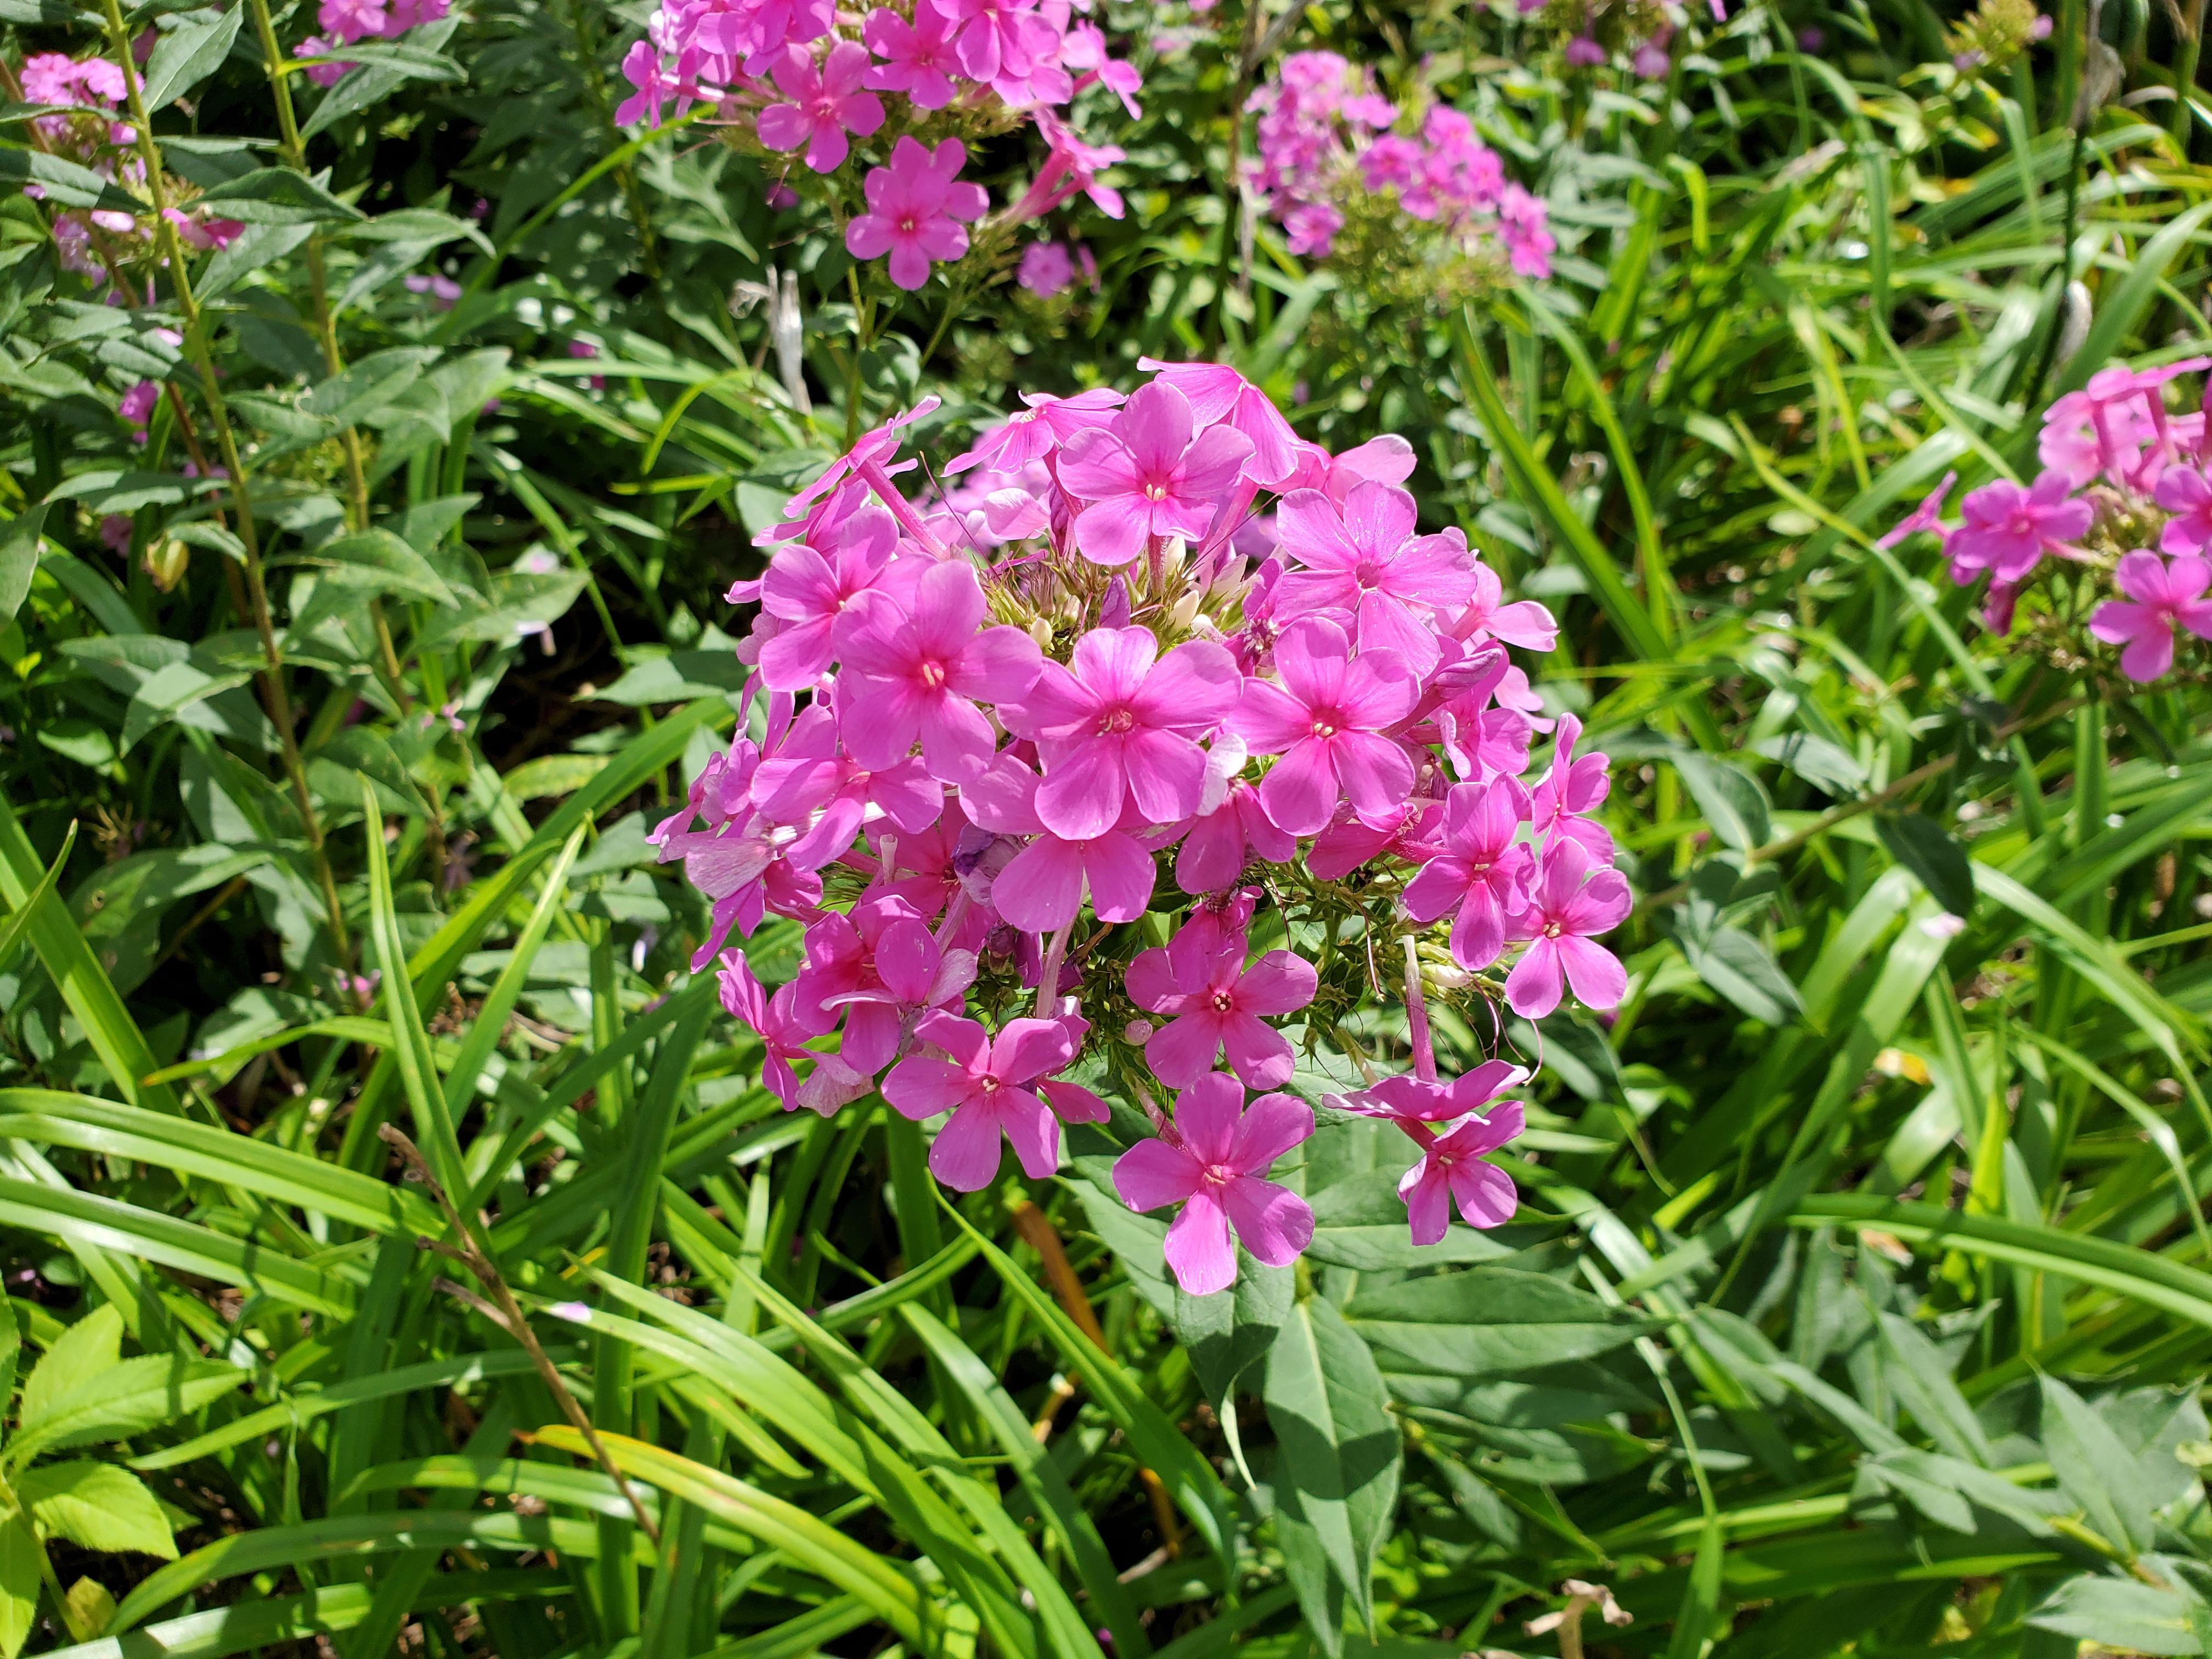
The number one request all would-be gardeners and budding landscape enthusiasts have is “I want something that I don’t have to take care of, tolerates the heat, blooms, and comes back every year”. That is a tall order in our climate but not an impossible one, especially if one is willing to take a step back in time and consider an old Southern passalong plant, Garden Phlox (Phlox paniculata)!

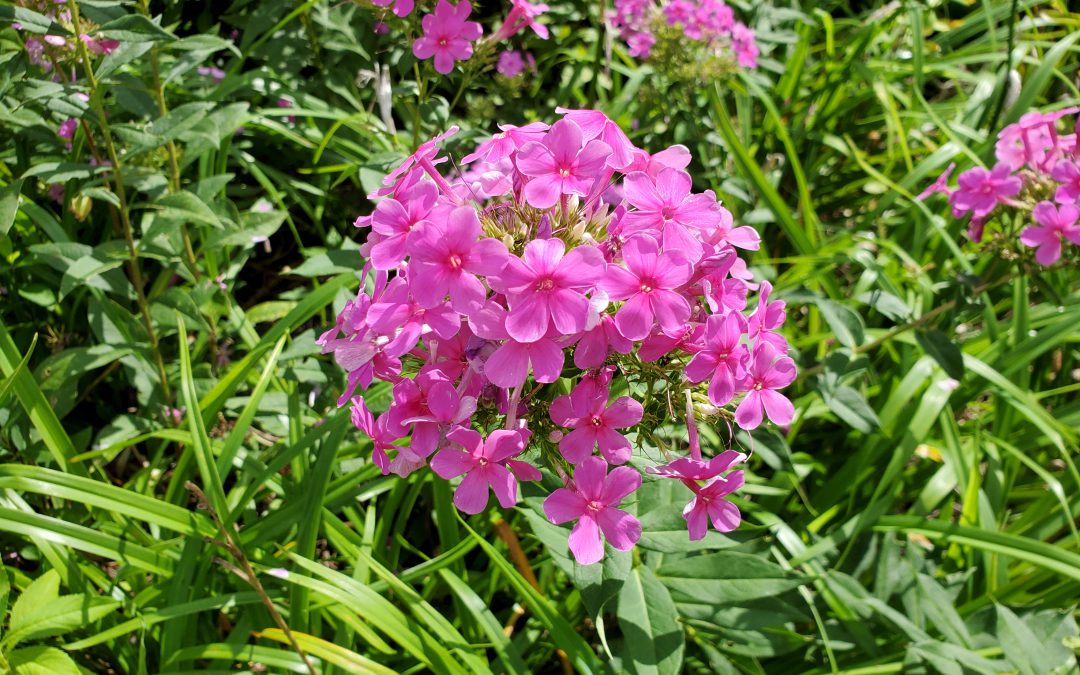
Garden Phlox (Phlox paniculata) in a Calhoun County landscape. Photo courtesy of Daniel Leonard.
This old heirloom perennial is an outstanding ornamental for Panhandle landscapes. Every spring, Garden Phlox emerges from a long winter sleep and shoots its attractive bright green foliage straight up, reaching 3-5’ in height. After hiding inconspicuously in the landscape all spring, Phlox then blasts into fiery magenta bloom during the heat of summer, beginning the show in late June. While individual Phlox flowers are only 1” wide or so, they are held prominently above the plant’s foliage in large clusters up to 8” in diameter and are about as eye-catching as flowers come. The flower show continues through July and August until finally fading out as fall rolls around. Plants then set seed and ready themselves for winter dormancy, repeating the cycle the following spring. A bonus, though individual Phlox plantings start off as small, solitary clumps, they slowly expand over the years, never over-aggressively or unwanted, into a mass of color that becomes the focal point of any landscape they occupy!
In addition to being gorgeous, Phlox is adaptable and demands very little from gardeners. The species prefers to be sited in full, blazing sun but can also handle partial shade. Just remember, the more shade Phlox is in, the fewer flowers it will produce. Site accordingly. Phlox is also extremely drought tolerant, thriving in most any semi-fertile well-drained soil. Though it can handle drought like a champ, Phlox will languish if planted in a frequently damp location. If water stands on the planting site for more than an hour or so after a big rain event, it is most likely too wet for Phlox to thrive. Once established, Phlox is not a heavy feeder either. A light application of a general-purpose fertilizer after spring emergence from winter dormancy will sustain the plants’ growth and flowering all summer long!

Clump of Garden Phlox in a Calhoun County landscape. Photo courtesy of Daniel Leonard.
Though the ornamental and low-maintenance attributes of plain Garden Phlox make it sound like a perfect landscape plant, it is uncommon in the modern nursery trade, having fallen out of favor as many old plants often do. The species is still a familiar site around old home places, cemeteries, abandoned buildings, and the like throughout the South, but is difficult to find in most commercial nurseries. The primary reason for this is that the commercially available modern Phlox hybrids sporting exotic flower colors and shapes are not tolerant of our growing conditions. These new Garden Phlox hybrids were bred to perform in the milder conditions of more norther climes and are extremely susceptible to the many fungal diseases brought on by Florida’s heat and humidity of summer, particularly Powdery Mildew. It’s best to avoid these newcomers and stick to the old variety with its pink flowers and ironclad constitution. Plain old Garden Phlox can be found in some independent and native plant nurseries, but the best and most rewarding method of acquisition is to make friends with someone that already has a clump and dig up a piece of theirs!
If you have been looking for a low-maintenance, high impact perennial to add to your landscape, old-fashioned Garden Phlox might be just the plant for you! For more information on Garden Phlox, other landscape perennials, passalong plants or any other horticultural topic, contact your local UF/IFAS County Extension Office. Happy Gardening!