by Ray Bodrey | Jul 1, 2020
Sunflowers, Helianthus spp., are a great choice for gardeners who are looking for some cheerful color in their landscape. Here in Florida, we have the main ingredient for success, lots of sunshine!
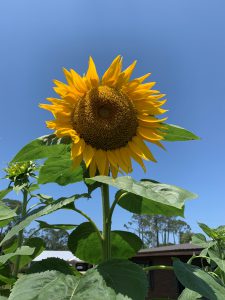
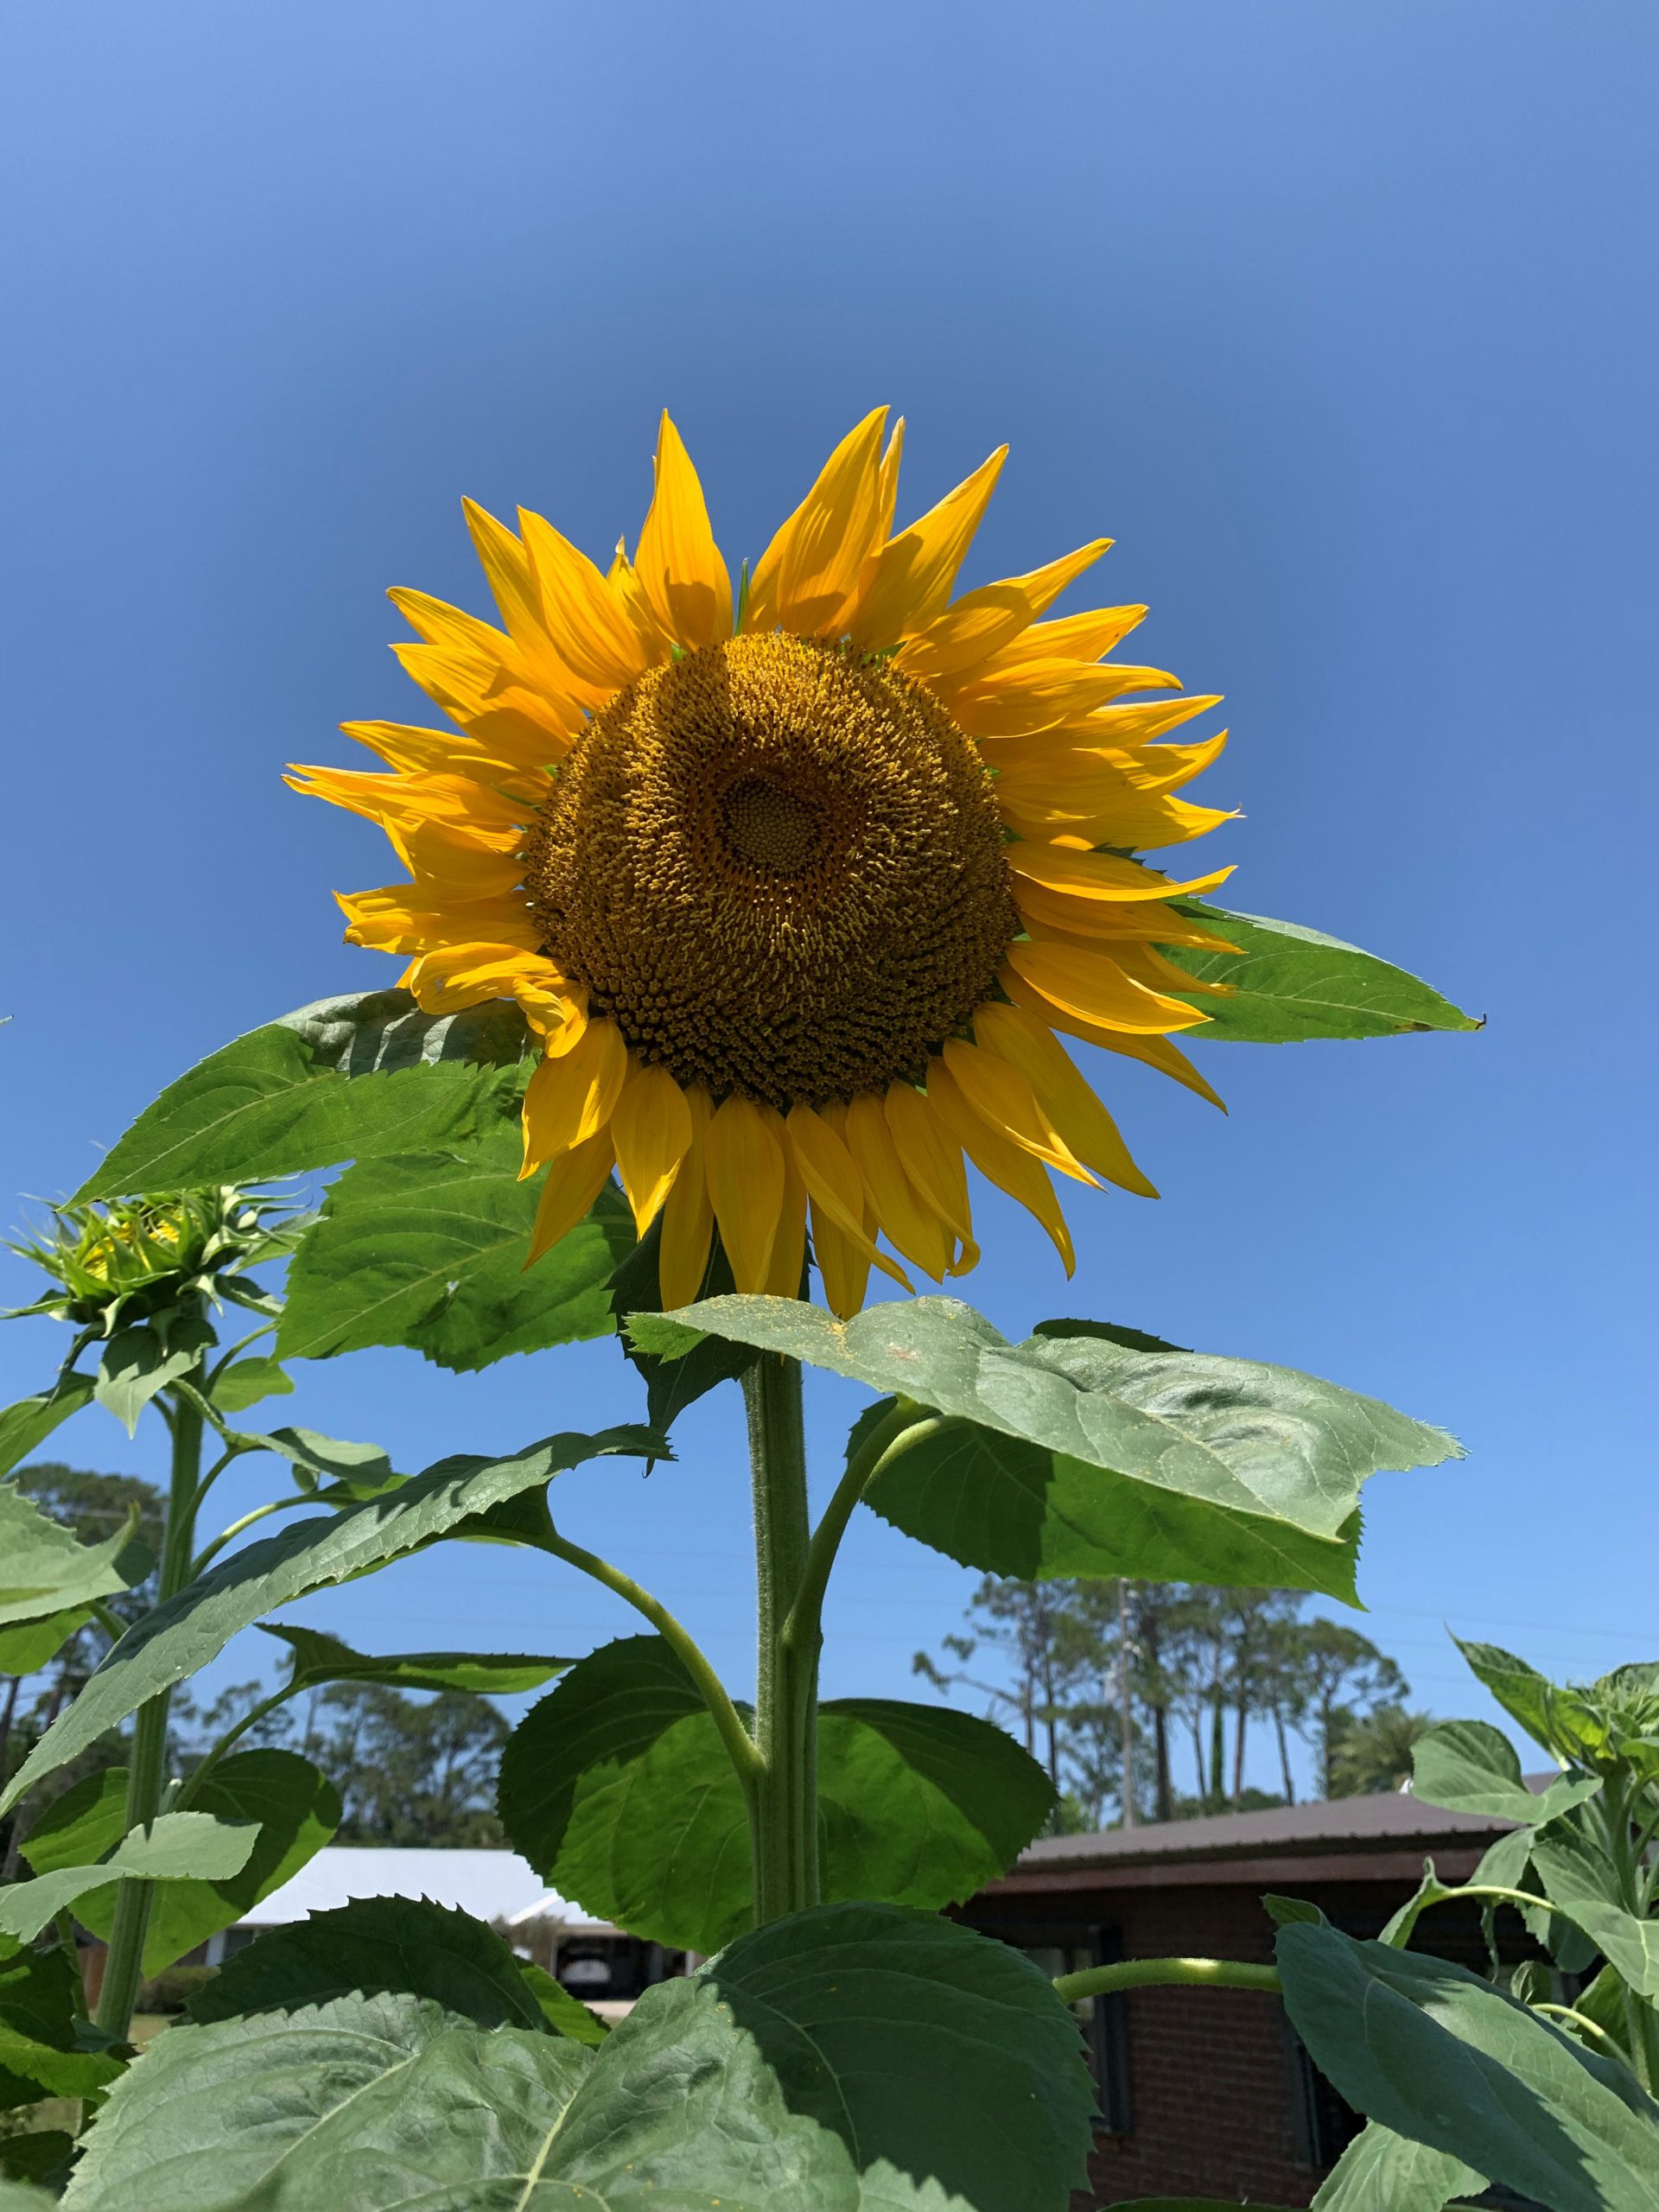
‘Skyscraper’ Sunflower bloom. Photo courtesy of Ray Bodrey.
Sunflowers are short-lived annuals. The average time between planting and bloom is roughly 65 days. You can typically plant sunflowers in Florida beginning in late winter until early fall. Only the coldest months cause problems, and for most years that’s only November – January. Sunflowers can be planted almost anywhere there is full sun. The major selling point with sunflowers is, of course, the impressive blooms (figure 1). These yellow to sometimes orange or red-petaled flowers develop a central seed disc, with most variety’s flowers having approximately an 8” diameter.
When planting, you may choose to plant in narrow rows with close seed spacing in order to cull weaker plants later. A final row and seed spacing of 2’-3’ is recommended for full height and development of most varieties. However, you may also choose to plant in a bed, using a close pattern as seen in the photo below. In any event, sunflowers are easy to propagate by seed and are very low maintenance. Occasionally, powdery mildew and spittle bugs can be a nuisance. A general garden fungicide and insecticide will help if problems occur.
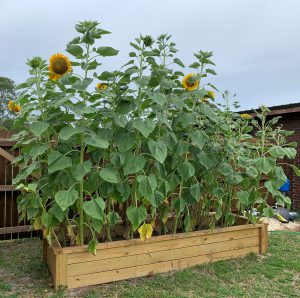
‘Skyscraper’ sunflowers planted on close spacing. Photo courtesy Ray Bodrey.
Sunflowers are available in many varieties, consisting of different color blooms and plant sizes. These sizes range from dwarf (1’-3’) to tall (10’-15’) varieties. You may wish to stake taller varieties at some point, as plants will tend to lean with no wind break in place. Here’s a few garden variety common names to look for: ‘Sunbright’, ‘Sonja’, ‘Sunrich Lemon’, ‘Sunrich Orange’ and ‘Autumn beauty’. Seed companies also have mixes available in packets. For tall plants, ‘Mammoth’ or ‘Skyscraper’ varieties will do the trick.
If you are fond of the sunflower bloom and looking for a groundcover, there are a couple of native perennials that fit this category. Beach sunflower, Helianthus debilis or swamp sunflower, Helianthus angustifolius, are groundcovers/ornamentals for landscapes and thrive in dry, hot climates and in a range of soil types. They also are great pollinator attractors.
For more information on growing sunflowers, contact your local county extension office.
Supporting information for this article and links to other publications on sunflowers can be found at the UF/IFAS Gardening Solutions website: https://gardeningsolutions.ifas.ufl.edu/plants/ornamentals/sunflowers.html
UF/IFAS Extension is an Equal Opportunity Institution.
by Carrie Stevenson | Jul 1, 2020
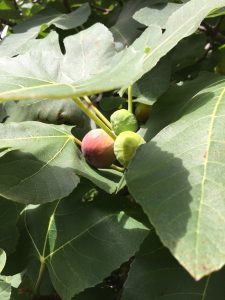
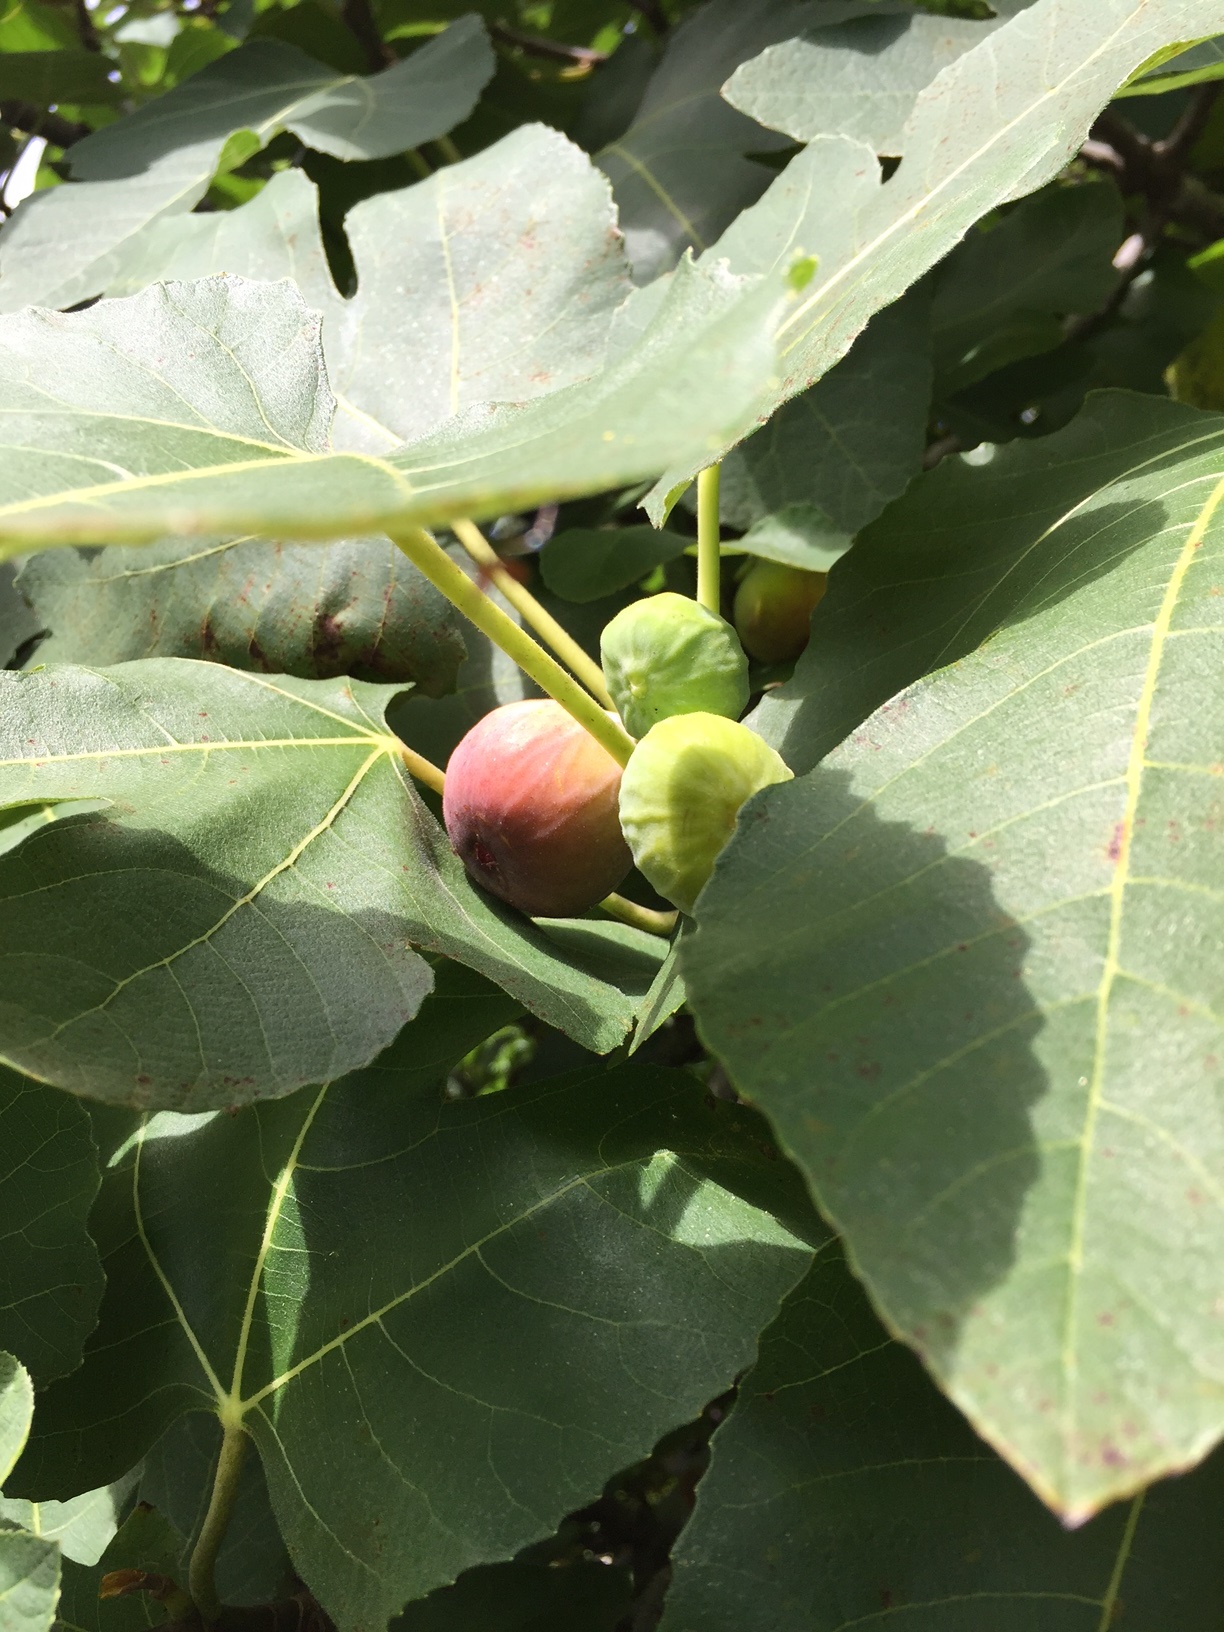
Ripe figs are a deep shade of pink to purple. Larger green figs will ripen in a few days. Photo credit: Carrie Stevenson
Summer is full of simple pleasures—afternoon rainstorms, living in flip flops, and cooling off in a backyard pool. Among these, one of my favorites is walking out my door and picking handfuls of figs right from the tree. Before we planted our tree, my only prior experience with the fruit was a Fig Newton—I’d never eaten an actual fig, much less one picked fresh. Now, they are my favorite fruit.
Native to Asia Minor and the Mediterranean, figs were introduced to Florida in the 1500’s by Spanish explorers. Spanish missionaries introduced these relatives of the mulberry to California a couple hundred years later. Figs are best suited to dry, Mediterranean-type climates, but do quite well in the southeast. Due to our humidity, southern-growing figs are typically fleshier and can split when heavy rains come through. The biggest threats to the health of the trees are insects, disease (also due to our more humid climate) and root-knot nematodes.
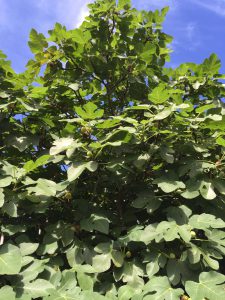
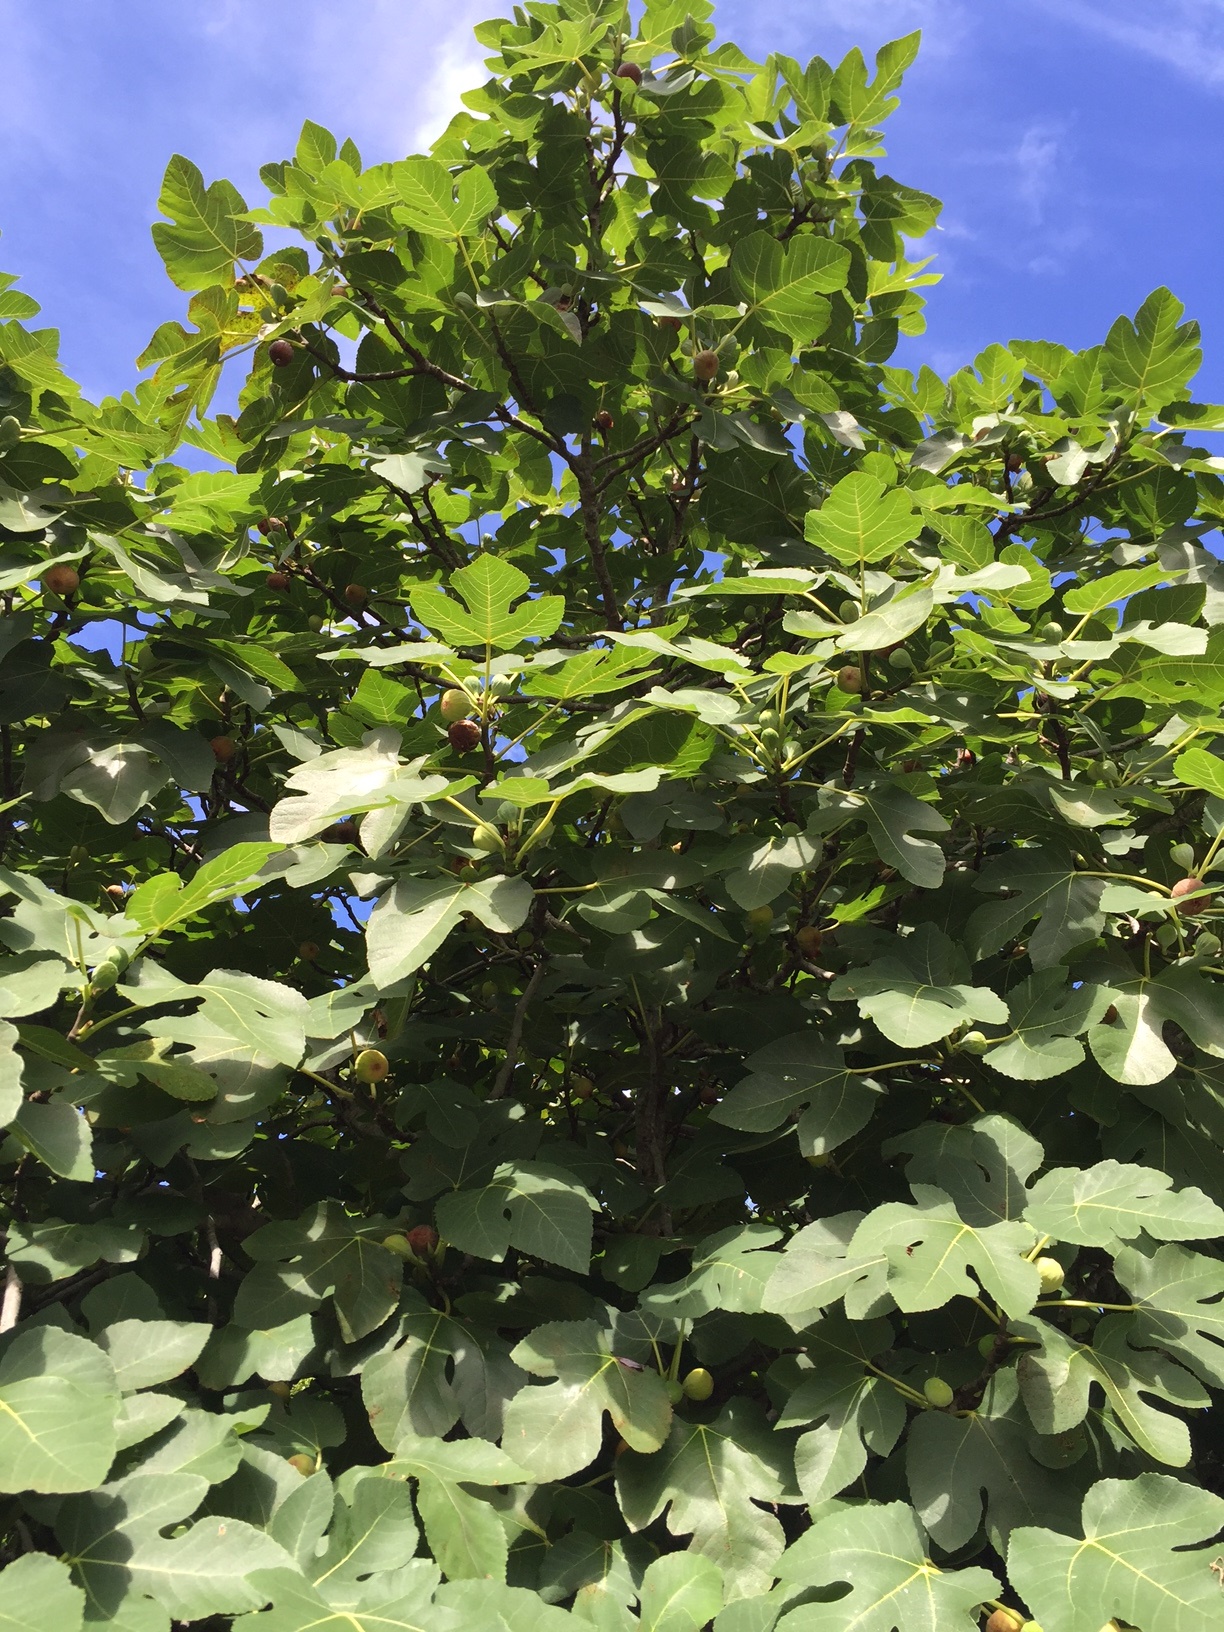
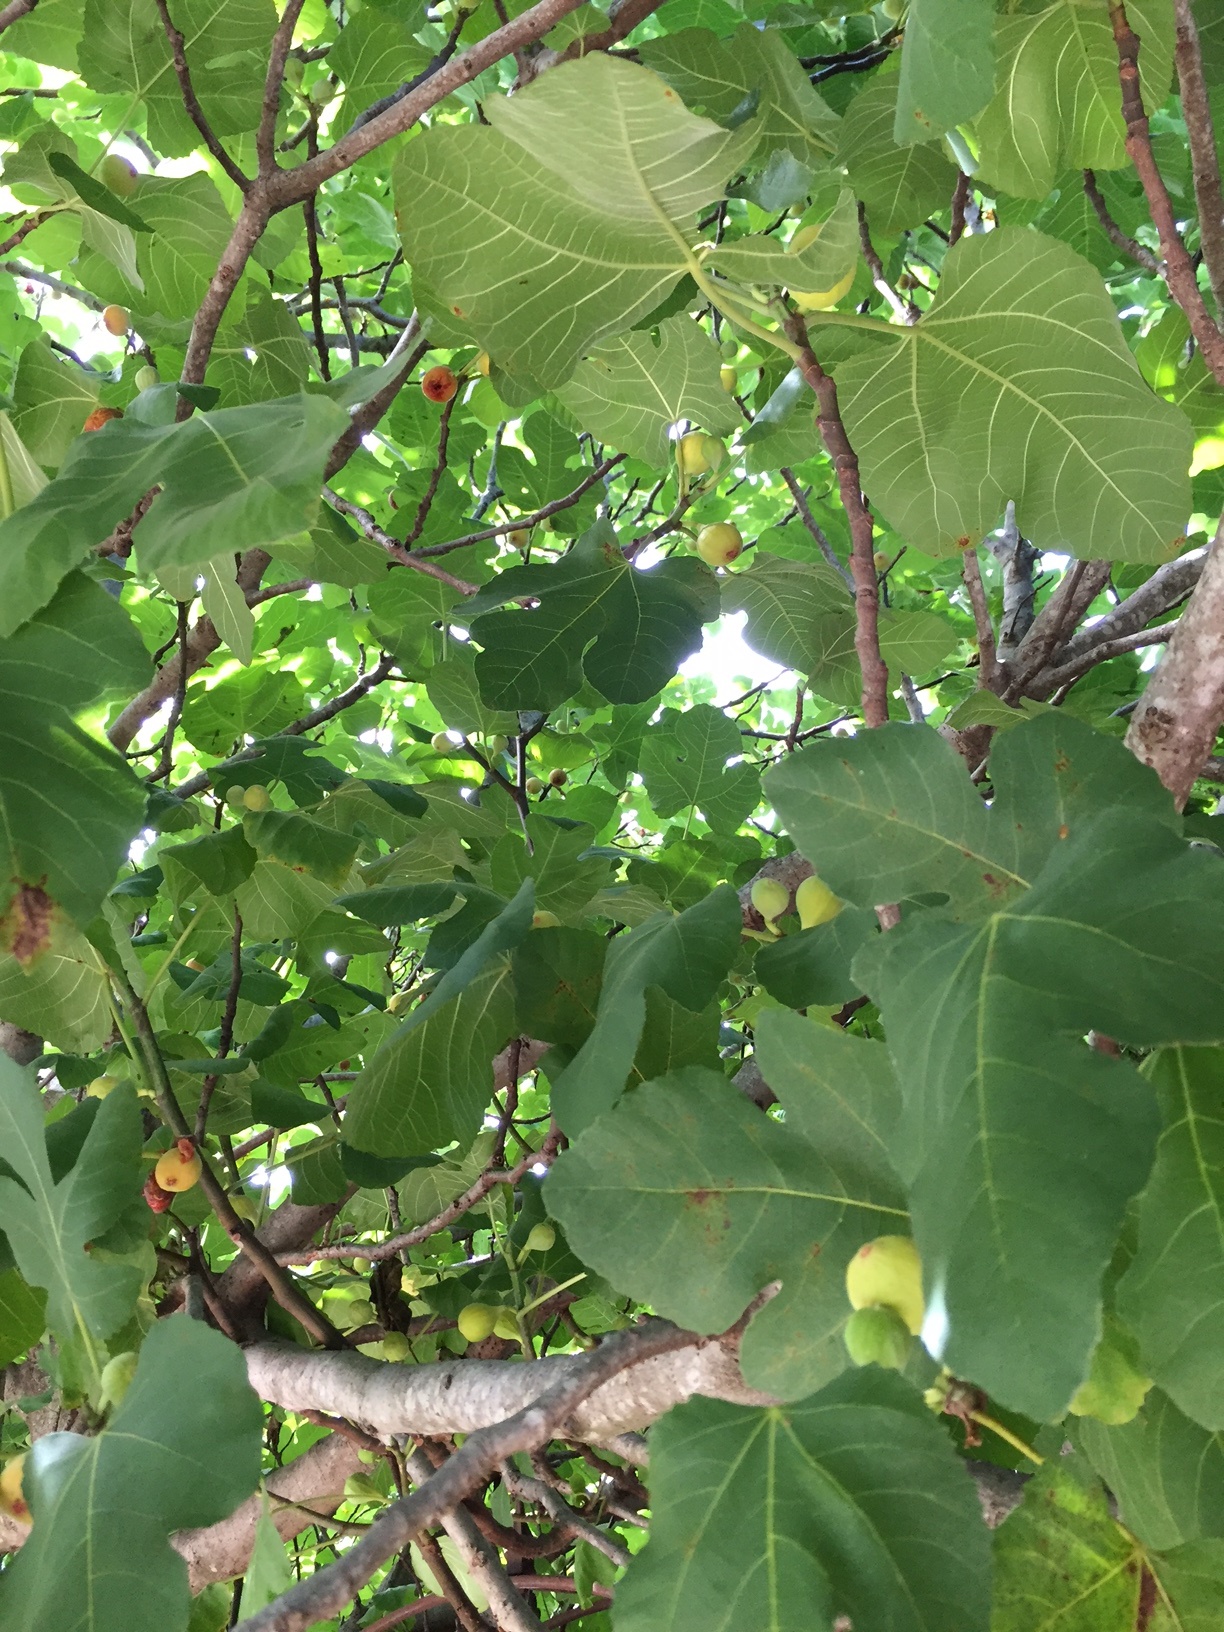
Fig trees can grow quite large and produce hundreds of fruit each year. Photo credit: Carrie Stevenson
Our tree started out just a couple of feet tall, but 15 years ago we replanted it along a fence in our back yard. It grew so large (easily 25 feet tall and equally wide) that it hangs over our driveway, making it handy to grab a few as I head out for a walk or hop in the car to run errands. The tree is in full sun at the bottom of a slope, and seems to be a satisfied recipient of all the runoff from our backyard. This position has resulted in a thick layer of soil and mulch in which it thrives. In the last year, we pruned it down to an arms-reach height so that we could actually get to the figs being produced.
We usually see small green fruit start to appear in early May, becoming fat and ripe by the second half of June. The tree produces steadily through early August, when the leaves turn crispy from the summer heat and there’s no more fruit to bear. The common fig doesn’t require a pollinator, so only one tree is necessary for production. The fiber-rich fig is also full of calcium, potassium, and vitamins A, E, and K. As it turns out, the “fruit” is actually a hollow peduncle (stem) that grows fleshy, forming a structure called a synconium. The synconium is full of unfertilized ovaries, making a fig a container that holds both tiny flowers and fruit in one.
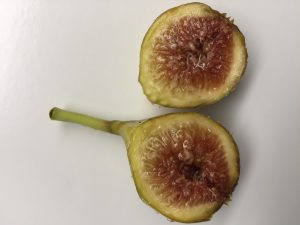
The insides of a fig show the small flowering structures that form the larger fruit. Photo credit: Carrie Stevenson
With the hundreds of figs we’ve picked, my family has made fig preserves, fig ice cream, baked figs and of course eaten them raw. We typically beg friends and neighbors to come help themselves—and bring a ladder—because we can’t keep up with the productivity. The local birds and squirrels are big fans, too. Often you can tell you’re near our tree from around the block, as the aroma of fermenting fruit baking on the driveway is far-reaching.
No matter what you do with them, I encourage planting these trees in your own yard to take full advantage of their sweet, healthy fruit and sprawling shade. As Bill Finch of the Mobile (AL) botanical gardens has written, “fresh…figs are fully enjoyed only by the family that grows them, and the very best figs are inevitably consumed by the person who picks them.”
by Julie McConnell | Jun 11, 2020
Why are the plants we are trying not to grow so hard to kill? Weeds can be quite frustrating to home gardeners as they struggle to get them under control. There are a few things you can do to help make your efforts more successful.
Identify the weed. It might seem like it doesn’t matter what the plant is if you know you want to get rid of it, but a big part of your strategy should be figuring out why that plant is being so difficult. Below are the reasons why weed identification is so critical in your fight to control it.
- Which plant are you favoring with your maintenance routine? All plants have similar basic needs: water, sunlight, nutrients, and a space to grow, but some perform better with varying amounts of each of these inputs. Sometimes we can influence these factors in a way that favors one plant over another. The best example is how we irrigate our landscape. If you plant drought tolerant shrubs, such as Indian Hawthorne, which can survive with little to no irrigation after establishment, and then continue to water 2-3 times a week, is it any wonder that you get water loving weeds such as dollarweed, torpedograss, or sedge? Only apply inputs that support your desirable plants and nothing more.
- Recognize the weed type. There are three main types of weeds we typically encounter: broadleaf, grass, or sedge. Some herbicides are broad-spectrum, which means they kill any type of plant, while others are selective. Selective herbicides generally target either broadleaf, grass or sedge weeds and have minimal impact on the other types. This can be very important information to have if you are shopping for an herbicide.
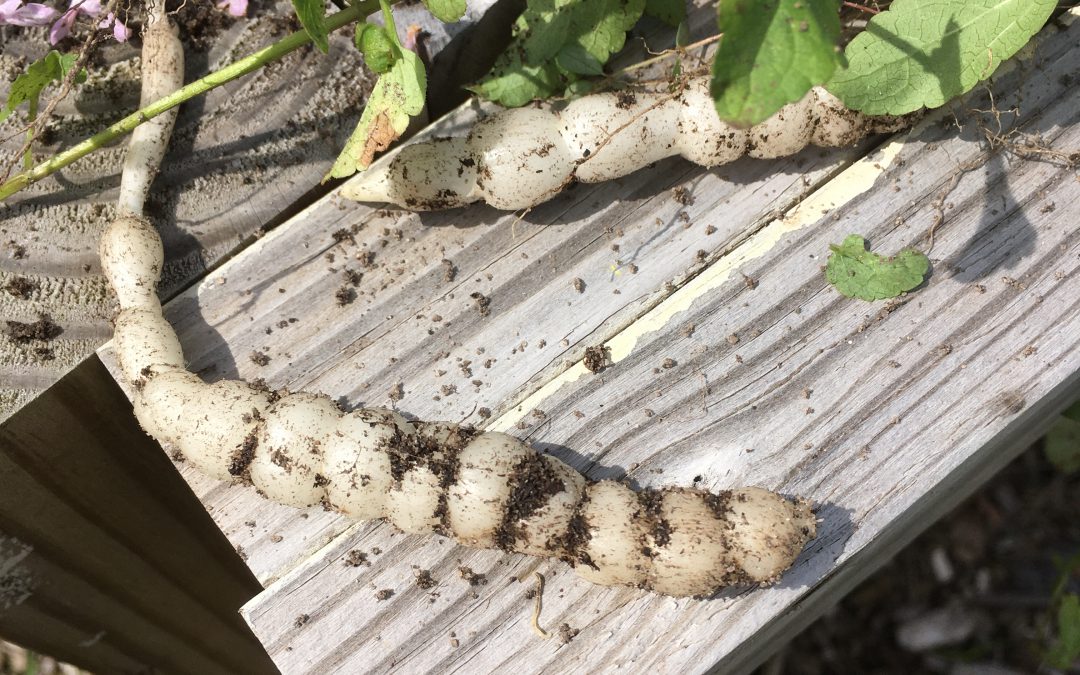
- Understand the life cycle. Herbaceous plants fall into three main life cycle categories: annual, perennial, or biennial. Annuals and biennials tend to reproduce primarily from seed. The annual plant completes its entire life cycle in one season or year and a biennial takes two years. When targeting these two, your goal is to get rid of the plant before it flowers and sets seed to reduce future crops. If you miss that window and the weeds go to seed, plan to use a pre-emergent herbicide prior to their next scheduled germination date (usually the next season). Perennials live for more than 2 years and tend to be tough to manage. They may reproduce by seed but many also multiply by vegetative means. To put this simply, they store everything they need in tiny pieces of the plant and if left in place, it will generate more plants. So, that little tiny root fragment from dollar weed you didn’t pull up – yep, it’ll grow a whole new one in its place!
For more information on weeds and weed control in lawns and landscapes, contact your local UF/IFAS County Extension Office!
by Ray Bodrey | May 27, 2020
Whether it’s the warm or cool season of the year, vegetable gardening is as popular activity as any. In writing articles, I usually discuss best management practices on a backyard garden scale. But, what if you don’t have much of a backyard?
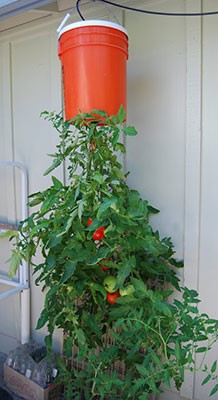
Many Floridians live in apartments, condominiums, mobile home parks, or simply homes built on small parcel lots with little open gardening space. This doesn’t mean you can’t grow vegetables. You just have to be a bit creative and that’s when the fun starts. In addition to being an enjoyable activity, mini vegetable gardening can be practical and ornamental. Containers can fit almost anywhere in the landscape, such as porches, balconies, roof tops and that spot on your property where nothing seems to fit.

Tomato Bucket Gardening. Photo courtesy UF/IFAS Gardening Solutions.
There’s practically no limit to the kinds of containers one can use for mini vegetable gardening. Some examples are pots and pans, milk jugs, hollow concrete blocks, bushel baskets, trash cans, barrels, buckets and even plastics bags and “to go” food containers. As long as the container will hold soil and let excess water drain, you’re good to garden.
So, what can I use as a growing medium? Traditional garden soil will work fine. Mixing garden soil 1:1 with mushroom compost is also acceptable. Adding lightweight components to the soil mixture such as perlite or vermiculite will make it easier if you need move the container from time to time. This will also help with drainage. Sprinkling a handful of 6-6-6 or 8-8-8 fertilizer and gardening lime into the mixture will give plants much needed nutrients for development.
This growing medium will not require fertilizer applications very often. A small amount every two to three weeks should be adequate for most vegetable plants. Whether the fertilizer you choose is solution or dry form, be sure to use small amounts and water the product thoroughly into the root zone. A heavy application of fertilizer may cause plant burn.
So what vegetable crops grow best in containers? Most any crop will do well in containers. Some examples are tomato, pepper, eggplant, collard, cabbage, turnip, mustard, strawberry, broccoli, cauliflower and many herbs. Container gardening is a fun and rewarding hobby. You’ll enjoy both the activity and the delicious produce you’ve grown.
For more information contact your local county extension office.
Supporting information for this article was provided by Extension’s Emeritus Vegetable Specialist Jim Stephens of UF/IFAS Extension. More information can be found at this website: http://gardeningsolutions.ifas.ufl.edu/plants/edibles/vegetables/growing-vegetables-in-containers.html
UF/IFAS Extension is an Equal Opportunity Institution.
by Daniel J. Leonard | May 7, 2020

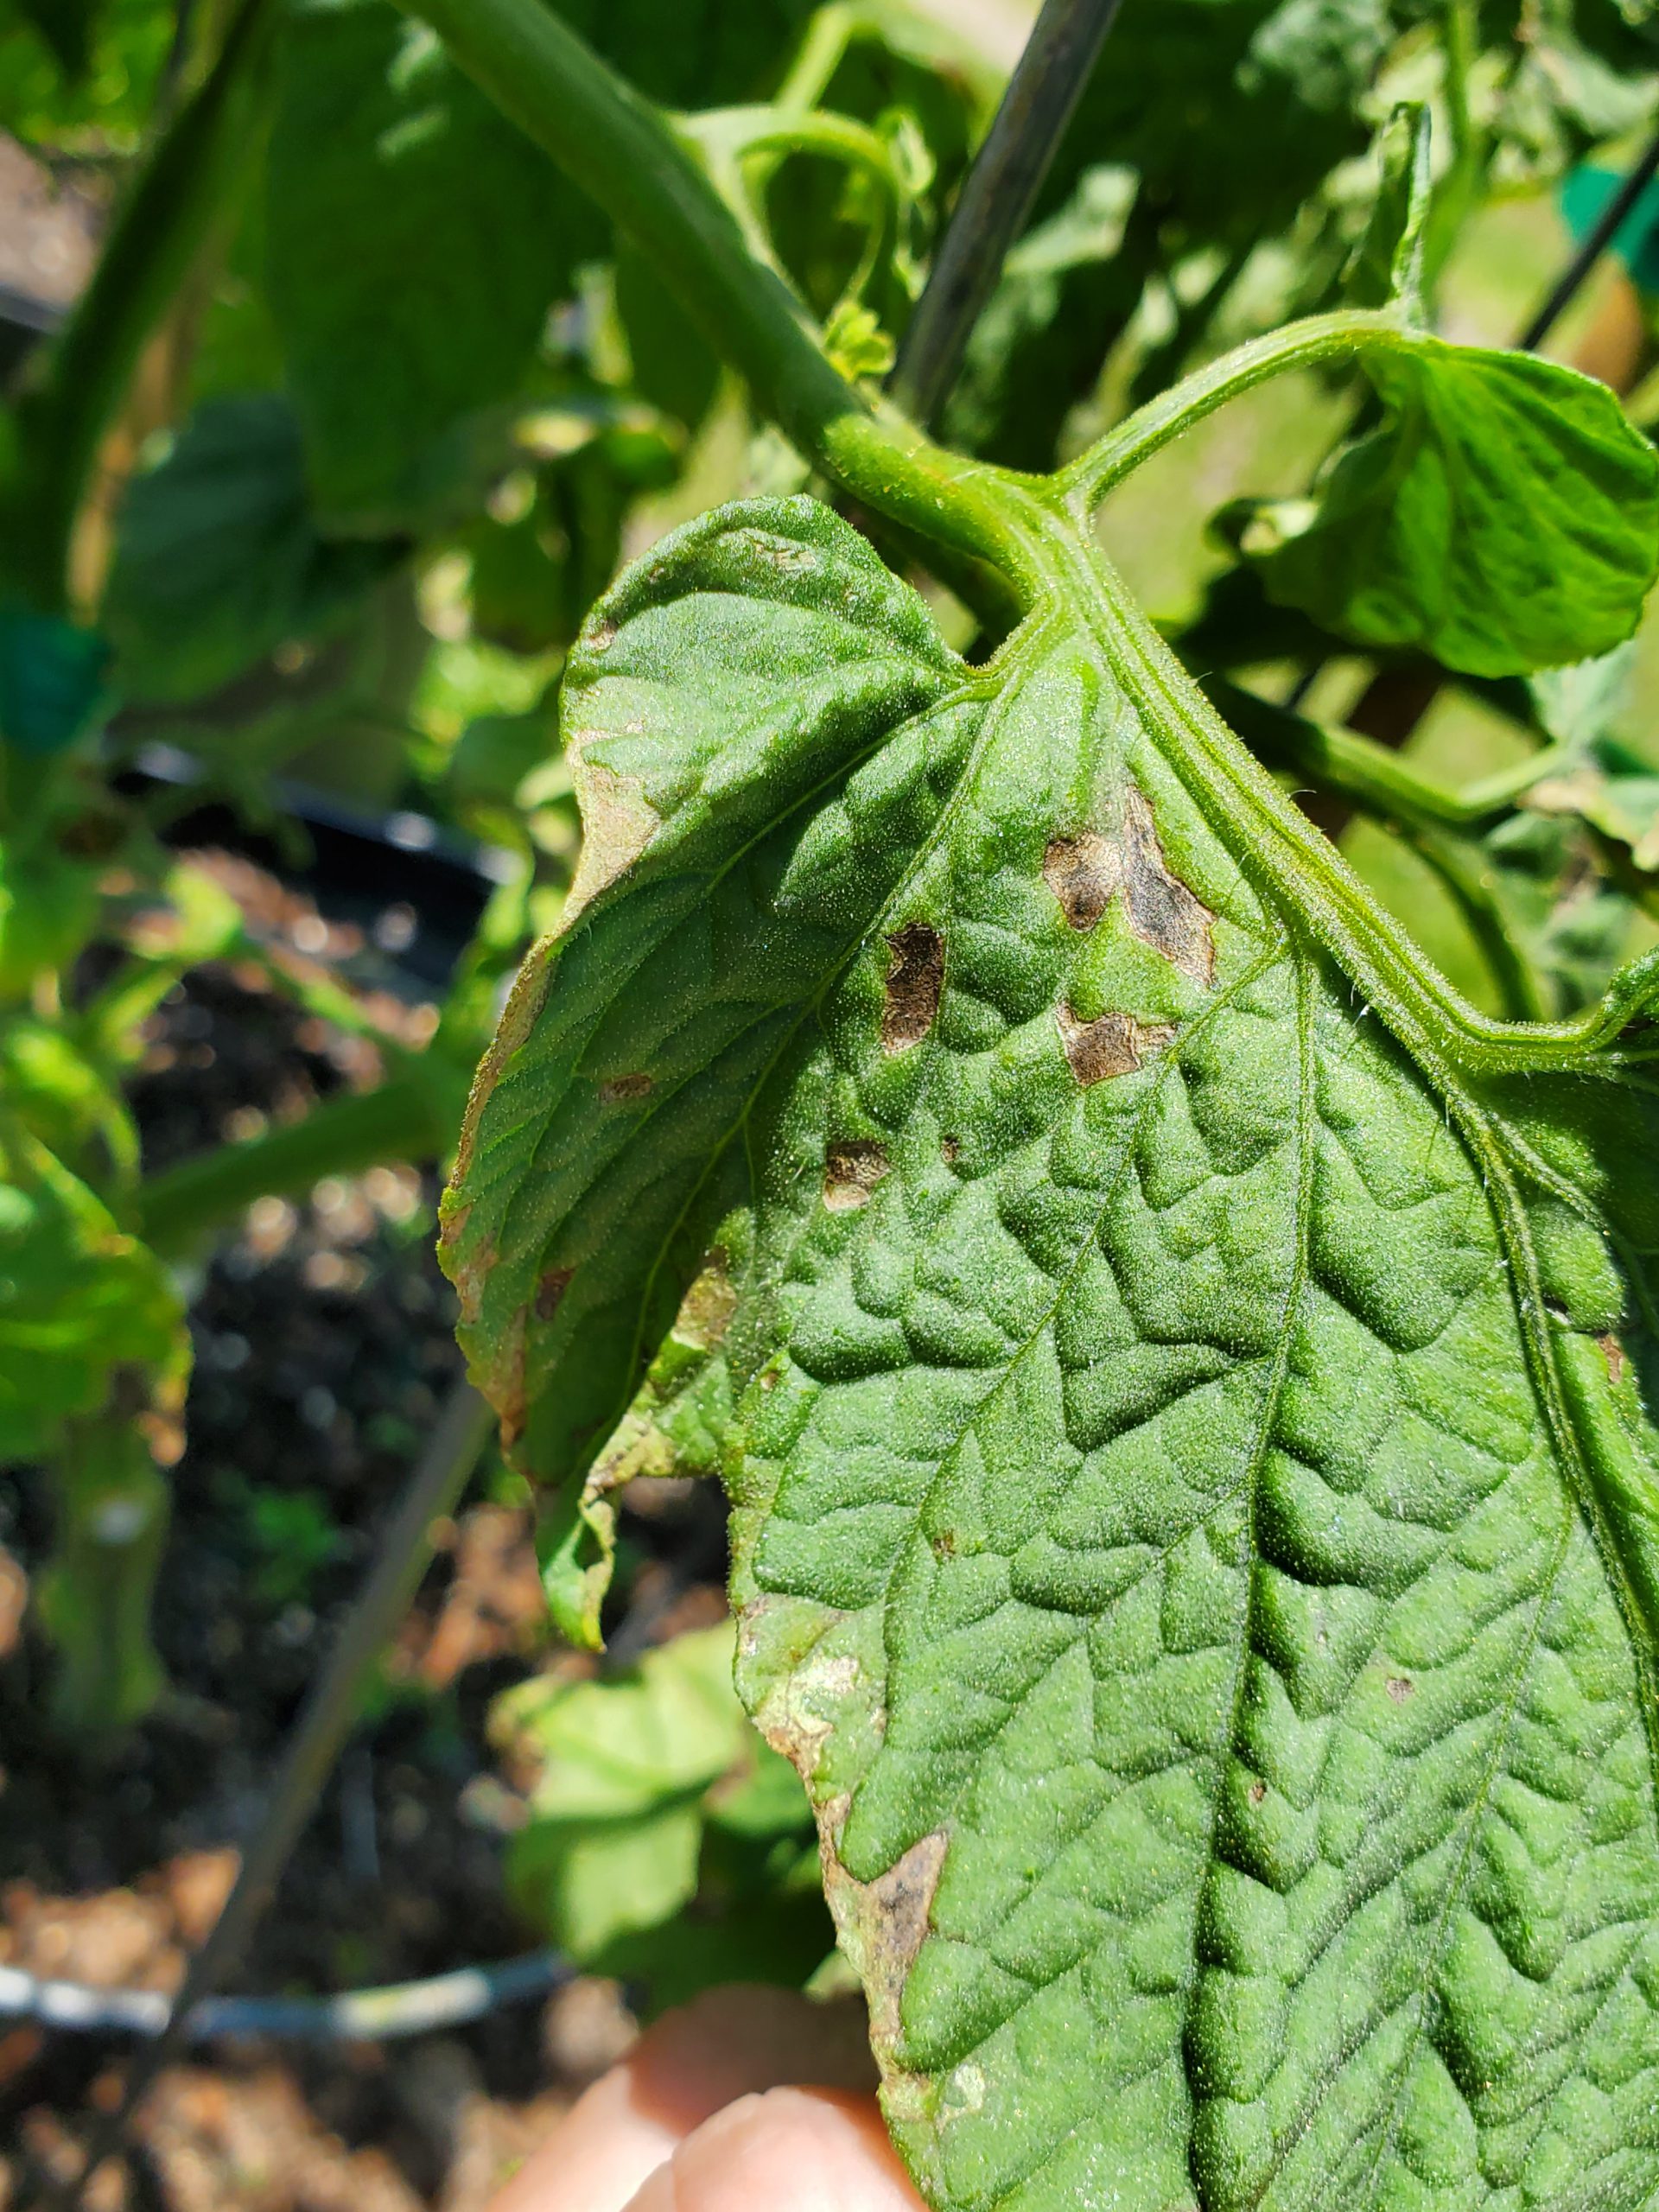
Early BLS symptoms appear on lower leaves. Photo courtesy of the author.
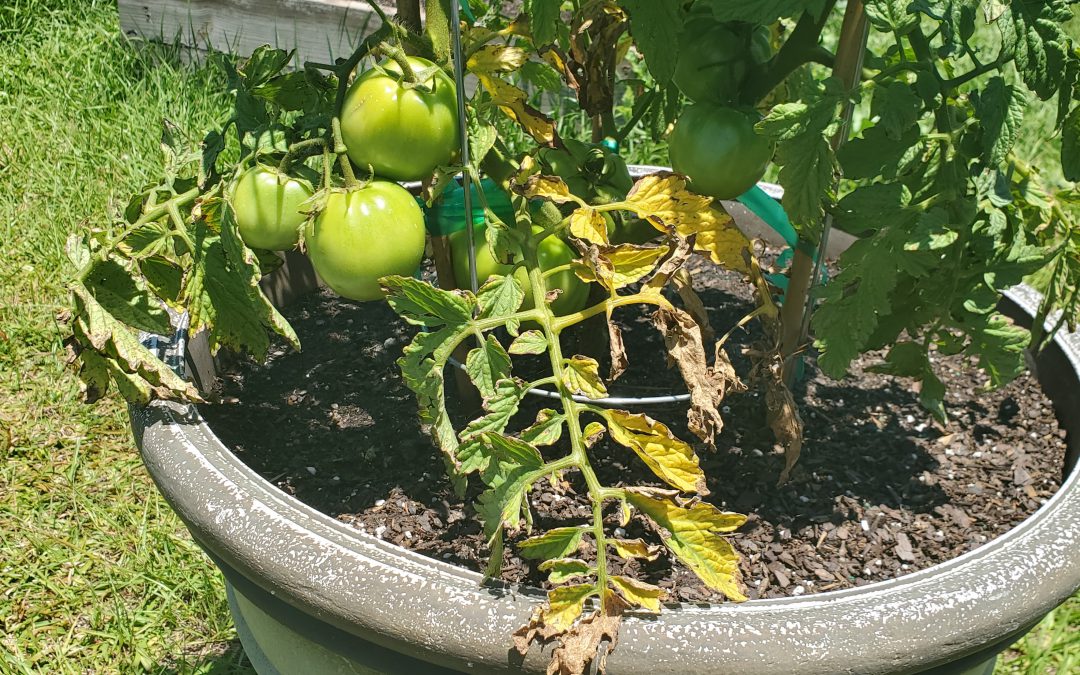
Tomatoes are among the most notoriously difficult vegetable species to grow in Florida. Even when you do everything right (choose disease resistant varieties, buy clean seed/healthy transplants, plant early, rotate crops, scout for insects, prune and support vines, etc), things can go wrong in a hurry. Bacterial Leaf Spot (BLS) caused by the pathogen Xanthomomas perforans, is one of those things. BLS often hitches a ride into gardens undetected on seed and transplants and presents itself as warm and humid weather arrives in late April/early May. Outbreaks typically happen in concurrence with the frequent heavy rainstorms that accompany these months and quickly wreak havoc on tomato plants.
BLS occurrence, much worse in some springs than others, has exploded this year in home gardens. First noticed on the plant’s lower leaves, BLS pathogens enter through natural openings in leaves called stomata, manifest as small, “water-soaked” leaf lesions and then develop within days into dark circular spots, sometimes surrounded by a yellow halo. As conditions worsen, all these individual infections cause a general yellowing or “blighting” of entire leaves. Though the issue begins on tomato leaves, BLS can affect all parts of the plant, including stems, flowers and fruit too! It’s at this point, when blighted leaves become obvious and lesion developing on flower stalks cause both flowers and small fruit to drop, that most home gardeners notice that something is up.

Advancing progression of BLS with “blighted” leaves. Photo courtesy of the author.
Unlike with many other pathogens, gardeners don’t have an abundance of options to control BLS. However, taking the following preventative measures can reduce the pathogen’s impact and stave off disease progression until ripe fruit can be harvested.
- Don’t irrigate overhead. Utilize drip/microirrigation or hand water beds and containers at soil level. This prevents the leaves from becoming wet; wet leaves become a perfect host for BLS.
- Never work tomato plants when leaves are wet. No staking, pruning, tying, or anything else until plant tissue is dry. Working wet tomato plants is an excellent way to spread bacteria!
- Sanitize pruning tools often and wash hands after working infected plants.
- Maintain airflow in plants by planting at correct spacing and thinning interior leaves as necessary to facilitate quicker drying of the plant.
- Prune lower leaves to at least 12” from the soil’s surface to prevent disease transmission from soil to leaves through splashing water.
- Remove infected leaves (when plants are dry!) to slow disease progression.
- Rotate crops and destroy infected plants to prevent buildup of BLS organisms in soil.
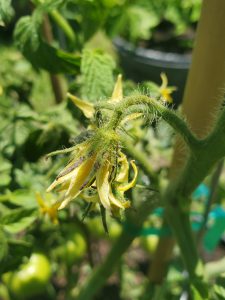
BLS lesions on tomato flowers. Photo courtesy of the author.
- Preventative measures are best, but if your garden has a history of BLS and local weather forecasts call for warm/wet/humid weather, it is best to spray fungicides proactively to protect your crop. A weekly spray with a tank mixture of copper and mancozeb is effective at keeping BLS at bay. This is the only chemical spray combination proven to be effective in controlling BLS.
- Unlike many common tomato pathogens that can be reliably avoided through planting resistant cultivars like ‘Big Beef’, ‘Celebrity’ and others, no varieties are resistant to BLS.
While BLS is an extremely destructive pathogen of both home and commercially grown tomatoes, growers can lessen the disease’s effects by following the preventative measures outlined above and spraying with a copper/mancozeb mix if necessary. Growing tomatoes this year hasn’t been easy, but it’s worth it to fight back and realize a harvest despite difficulties like BLS!
If bacteria have given you the blues or other garden issues are bringing you down, give your local UF/IFAS County Extension Agent a call! We’re here to help you be successful in all your horticultural endeavors. Happy gardening!