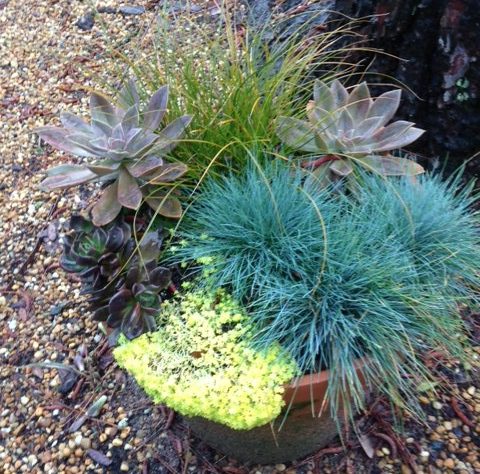
by Daniel J. Leonard | Jun 13, 2024
For those of us that don’t have the best landscape conditions or the time, money, or inclination to invest into a vibrant yard display of annual flowers, growing our flowers in containers is a great option! Growing in containers has several advantages over growing flowers in the ground. It gives gardeners control over the soil, fertility, and water conditions that the plants are grown in and the ability to add pops of color/texture anywhere – in an existing planting bed, patio, deck, porch, or even indoors. Let’s explore some simple tips to create containers that will offer low-maintenance explosions of color all summer long.
The easiest way to create full, colorful containers is by using the design scheme known as the “thriller, filler, spiller” arrangement. This design first utilizes a dramatic “thriller” in the back of the container, usually a plant that has a taller, upright growth habit and striking flowers or foliage. Commonly used thrillers are plants like Purple Fountain Grass, Salvia, Canna, and Hawaiian Ti. Next come the fillers. Fillers are plants that possess a mounding habit and generally provide the floral firepower in the container. Popular fillers include Vinca, Begonia, ‘Diamond Frost’ Euphorbia, Lantana, Pentas, Impatiens (for shady containers), and even foliage plants like Coleus, Caladiums, and Ferns. Finally, spillers round out the containers by “spilling” over the sides. These are typically vining or trailing plants and add a final dramatic touch to the overall container style. Some of my most-used spiller plants are Creeping Jenny, ‘Silver Falls’ Dichondra, ‘Gold Dust’ Mecardonia, Torenia (aka Wishbone Flower), and Sweet Potato Vine.
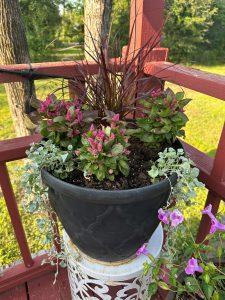
Example container using a thriller (Purple Fountain Grass), filler (Celosia), and spiller (‘Silver Falls’ Dichondra). Photo courtesy of Daniel Leonard.
Will all those plant options, how does one choose plants to combine in containers? When perusing the nursery to pick thriller, filler, and spiller plants, all you need to remember to be successful is the basic layout of the color wheel and the phrase “right plant, right place”. Knowing the color wheel is important because some colors look better than others in combination! For instance, most classic color combos are known as “contrasting colors”, just meaning opposite each other on the color wheel – think the Orange and Blue of the Florida Gators or the Purple and Gold of the LSU Tigers. It’s hard to go wrong pairing plants of contrasting foliage or flower colors. Another option is to use different shades or hues of the same color, this is known as a monochromatic color arrangement. Monochromatic arrangements create a stunning punch of color and can even be used to highlight colors or features around the container, like the brick or siding color of your home.
After choosing your color palette, it’s critical to make sure you have the right plant in the right place. For container gardening, this just means pairing plants with like needs. For instance, you wouldn’t want to grow shade loving Impatiens in the same container as sun loving Purple Fountain Grass. Likewise, pairing a succulent with a heavy water user like Coleus is a bad idea. Combine plants with like growing condition preferences and you’ll save yourself a major gardening headache!
Maintaining your summer containers is also relatively easy. At planting, fertilize with a slow-release fertilizer like Osmocote or other similar product at the label rate and water in. After the first month or so, I begin supplemental fertilizing every couple of weeks with a liquid fertilizer. As your container grows, the days get hotter, and there are more roots to suck up water, your watering frequency will increase from once every couple of days to every day, and, on very hot days, twice a day (morning and late afternoon/evening). All this watering and fertilizing sounds like a lot of work, but I enjoy getting out and spending a few minutes with my plants! It’s a great way to start your day/wind down after work and allows you to spot any issues before they become major problems!
Gardening with containers is without a doubt the easiest way to create summer long color on your deck, patio, or landscape. Giving us the ability to control soil, water, sun, and fertilizer conditions, growing our annual color in containers removes many of the variables that makes gardening difficult and provides pops of color and texture in any setting – design and plant a few containers this summer! For more questions about container gardening or any other horticultural topic, contact us at the UF/IFAS Calhoun County Extension office. Happy gardening this summer!
by Sheila Dunning | Jun 13, 2024
You may recognize the arrival of summer because of the intense buzzing sound coming from the trees. It can last all day long, with changes in the pitch and pattern of the screaming.
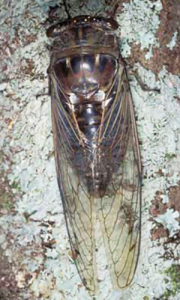
Dusk-calling cicada, Tibicen auletes (Germar). Total length (head to tips of forewings) is 64 mm (about 2 1/2 inches). Photograph by Lyle J. Buss, University of Florida.
Cicadas are large (3/4” – 2 ½”) winged insects with stocky bodies and bulging eyes. They spend the vast majority of their lives underground, emerging in massive numbers for just a few weeks to mate and lay eggs. This behavior often earns them the name “locusts,” which entomologically they are not.
In much of the eastern United States, periodical cicada (Magicicada spp.) broods rise up out of the ground every 13 or 17 years. In the summer of 2024, two different broods (one group of 13-year cicadas and one group of 17-year cicadas) will arrive at the same time across 16 states. The closest to us will be mid-lower Alabama. Approximately one trillion insects are anticipated. This only happens once every 221 years.
By emerging in large numbers, the cicadas are able to reduce the potential of being eaten by predators. Though many will be lost to birds and killer wasps, enough will survive to be able to reproduce.
Unlike the broods of periodical cicadas, populations of Florida’s 19 cicada species produce adults every year. However, the nymphs still spend several years developing underground. The nymphs use their piercing-sucking mouthparts to feed on the xylem sap in the roots of trees. The feeding can weaken already stressed trees. Most trees tolerate the damage quite well. After gaining enough nutrients, the nymphs wait for the soil to warm enough (approximately 64° F. at six inches deep) before crawling out of the ground, climbing up the tree trunk, and molting into adults with wings. You can often find the empty shed exoskeleton still hanging on the tree trunk.
The adult male spends all day being as loud as possible in order to attract the girls. Each species has its own song. Large numbers of insects create more noise. Male cicadas have a pair of tymbals located on the sides of their abdomen. Tymbals are corrugated regions of the cicada’s exoskeleton that can be vibrated so rapidly that the clicking sound becomes a high-pitched buzz. Cicadas with the best abs get the girls and reminds all the humans that summer is here.
To learn more about cicadas and train your ears to the different species call go to: https://entnemdept.ufl.edu/creatures/misc/bugs/cicadas.htm
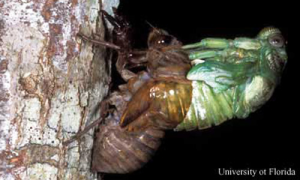
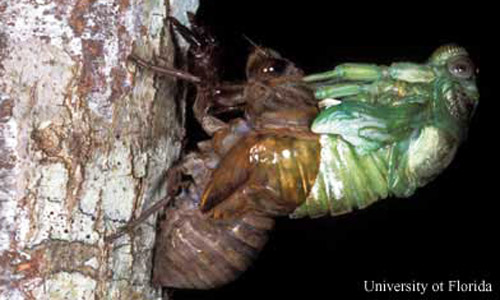
Cicada (Tibicen sp.) escaping its nymphal skeleton. The cast skeleton will remain attached to the tree. Once free, the adult will expand its wings, darken, and fly away. Photograph by Lyle J. Buss, University of Florida.
by Joshua Criss | Jun 13, 2024
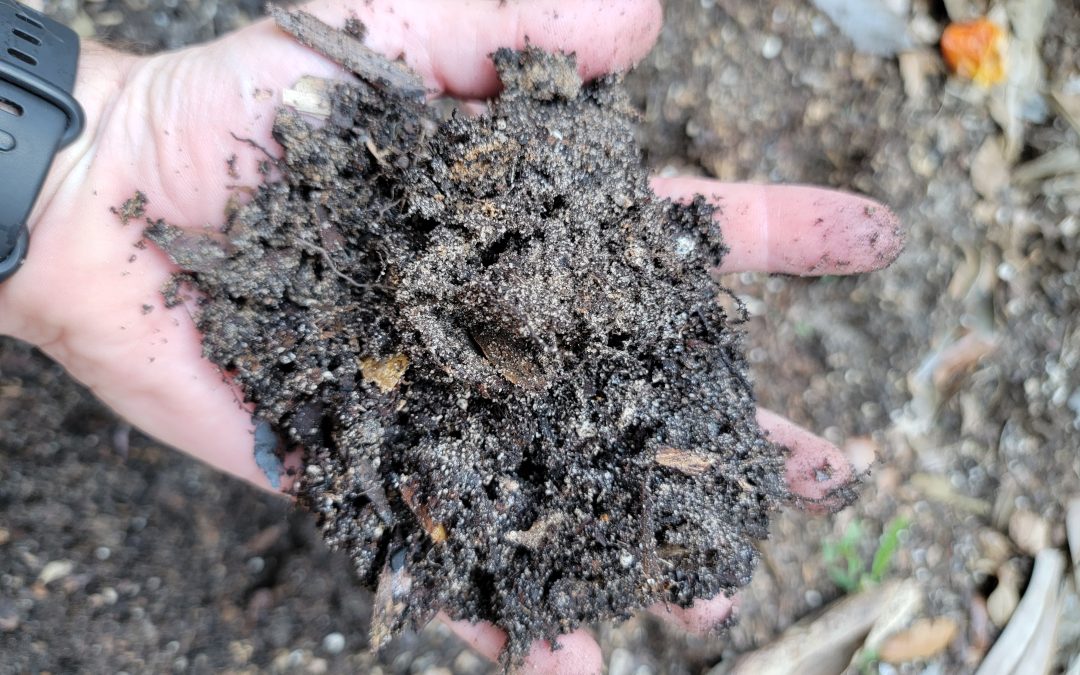
Understanding soil composition is crucial for successful gardening. Soil is the slow interaction of parent material with regional climates, topography, and soil biota over millennia. The breakdown of parent materials results in layers of material called horizons. A subset of soil science is dedicated naming soils with similar horizon development. In North Florida, three of these soil types predominate. Near the northern border, we find ultisols, these sandy soils have a higher clay content and are suitable for row crops with proper management. Through the center of the Panhandle counties, you’ll find entisols. These are sandy and undeveloped, thus requiring close attention to irrigation and fertilization. Finally, by the coast are spodisols rife with mineral pockets and known for being waterlogged. All are usable for plant growth, and with little knowledge of cultural practices can make your landscape thrive.
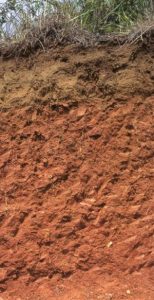
Soil horizons of ultisols
Photo: USDA/NRCS
The Panhandle Parent Material
In Florida’s panhandle, the parent material stems from the Citronelle formation transitioning into the Miccosukee formation around Gadsden County. The Citronelle formation consists of unconsolidated quartz (sand), gravel, clay, and mineral deposits from rock formations in the Appalachian Mountains. Clay associated with this formation is the basis for the ultisol concentrations in the northern portion of the state. Alluvial flow or deposits left by rivers washes the sandier particles down into the center portions of the panhandle, and siltier particles flowing to the coast depositing minerals as they settle. The Miccosukee formation is similar but has different textures and particle sizes in the quartz deposits. Knowing where your soils originate will help you understand two major aspects with regard to soil’s physical properties. Those being texture and aggregation.
Soil Texture
Soil, a blend of sand, silt, and clay, is not just the ground you walk on but the very foundation of your garden. These components, deposited in your location through natural processes (as outlined above), have been blended to create a soil unique to your garden. Sand is the largest of these particles, with silt considerably smaller and clay smaller still. This size difference, means there will be air spaces known as pore space within what appears to be a consistent material. These spaces comprise approximately 45% minerals, 25% air, 25% water, and 5% organic matter. Higher sand soils have larger pore spaces which facilitates water flow through that soil profile. What that means for your soil is less water holding capacity and higher losses of nutrients. In contrast, higher clay percentages have smaller pore spaces which coupled with charges at the atomic level are better at holding onto water and nutrients. Understanding your soil texture is key to determining the right timing for irrigation and fertilization while providing insight as to potential aggregation of your soils.
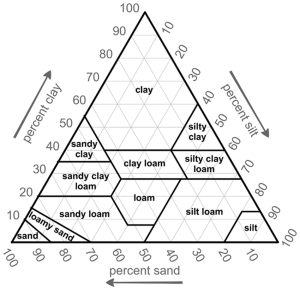
Soil Texture Triangle
Photo: USDA
Aggregation
Soil structure is an often overlooked aspect of garden management. Well structured soils resist compaction, hold on to water, and retain plant nutrients. They also provide growth space for roots which have access to the resources they need to fuel healthy plants. Conversely, poor soil structure makes your garden more susceptible to ponding and inhibited plant growth. Soil aggregation is what provides this structure. Aggregation is the conglomeration of soil particles bound through chemical bonds and physical forces bolstered by soil biota. Aggregates form through a few mechanisms both inherent and dynamic. Inherent factors include clay content which form and break with changing moisture levels. Other inherent factors include those minerals inherently present in the soil such as calcium. Dynamic factors include levels of organic matter, and those fauna present in that soil.
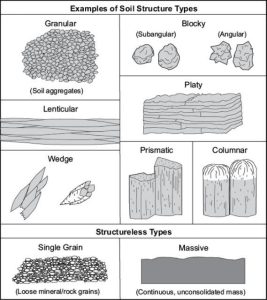
Types of soil structures
credit: USDA/NRCS
Maintaining Healthy Physical Structures
Many Florida soils are poorly structured which is why they need to be properly managed for homeowners to have successful gardens. Before you can begin to improve your soil, you must understand your soil’s story. Start with testing for compaction by pressing a screwdriver into the ground. If this is difficult, you need to take action to relieve the situation and increase the availability of air in your root zone. Tillage is a good way to do so, but be wary as excessive tilling can lead to higher compaction problems long term. Look into conservation tillage as a methodology to avoid this problem. Perform a jar test to understand the texture of your soil and thus its propensity to develop aggregates. For high sand soils, add organic matter to improve structure. Be careful to add smaller amounts at a time as organic matter has an inherent nutrition load and too much may begin to limit nutrients. Cover crop strategies are a great way to add organic matter while keeping soil covered during non-active growth periods.
Soil improvement and management will take multiple growing seasons. Stick to it and monitor your soil to keep your gardens healthy and thriving. For more information on soil, see these Ask IFAS documents, or contact your local extension agent for additional information on this and any topic regarding your gardens and more.
by Molly Jameson | Jun 5, 2024
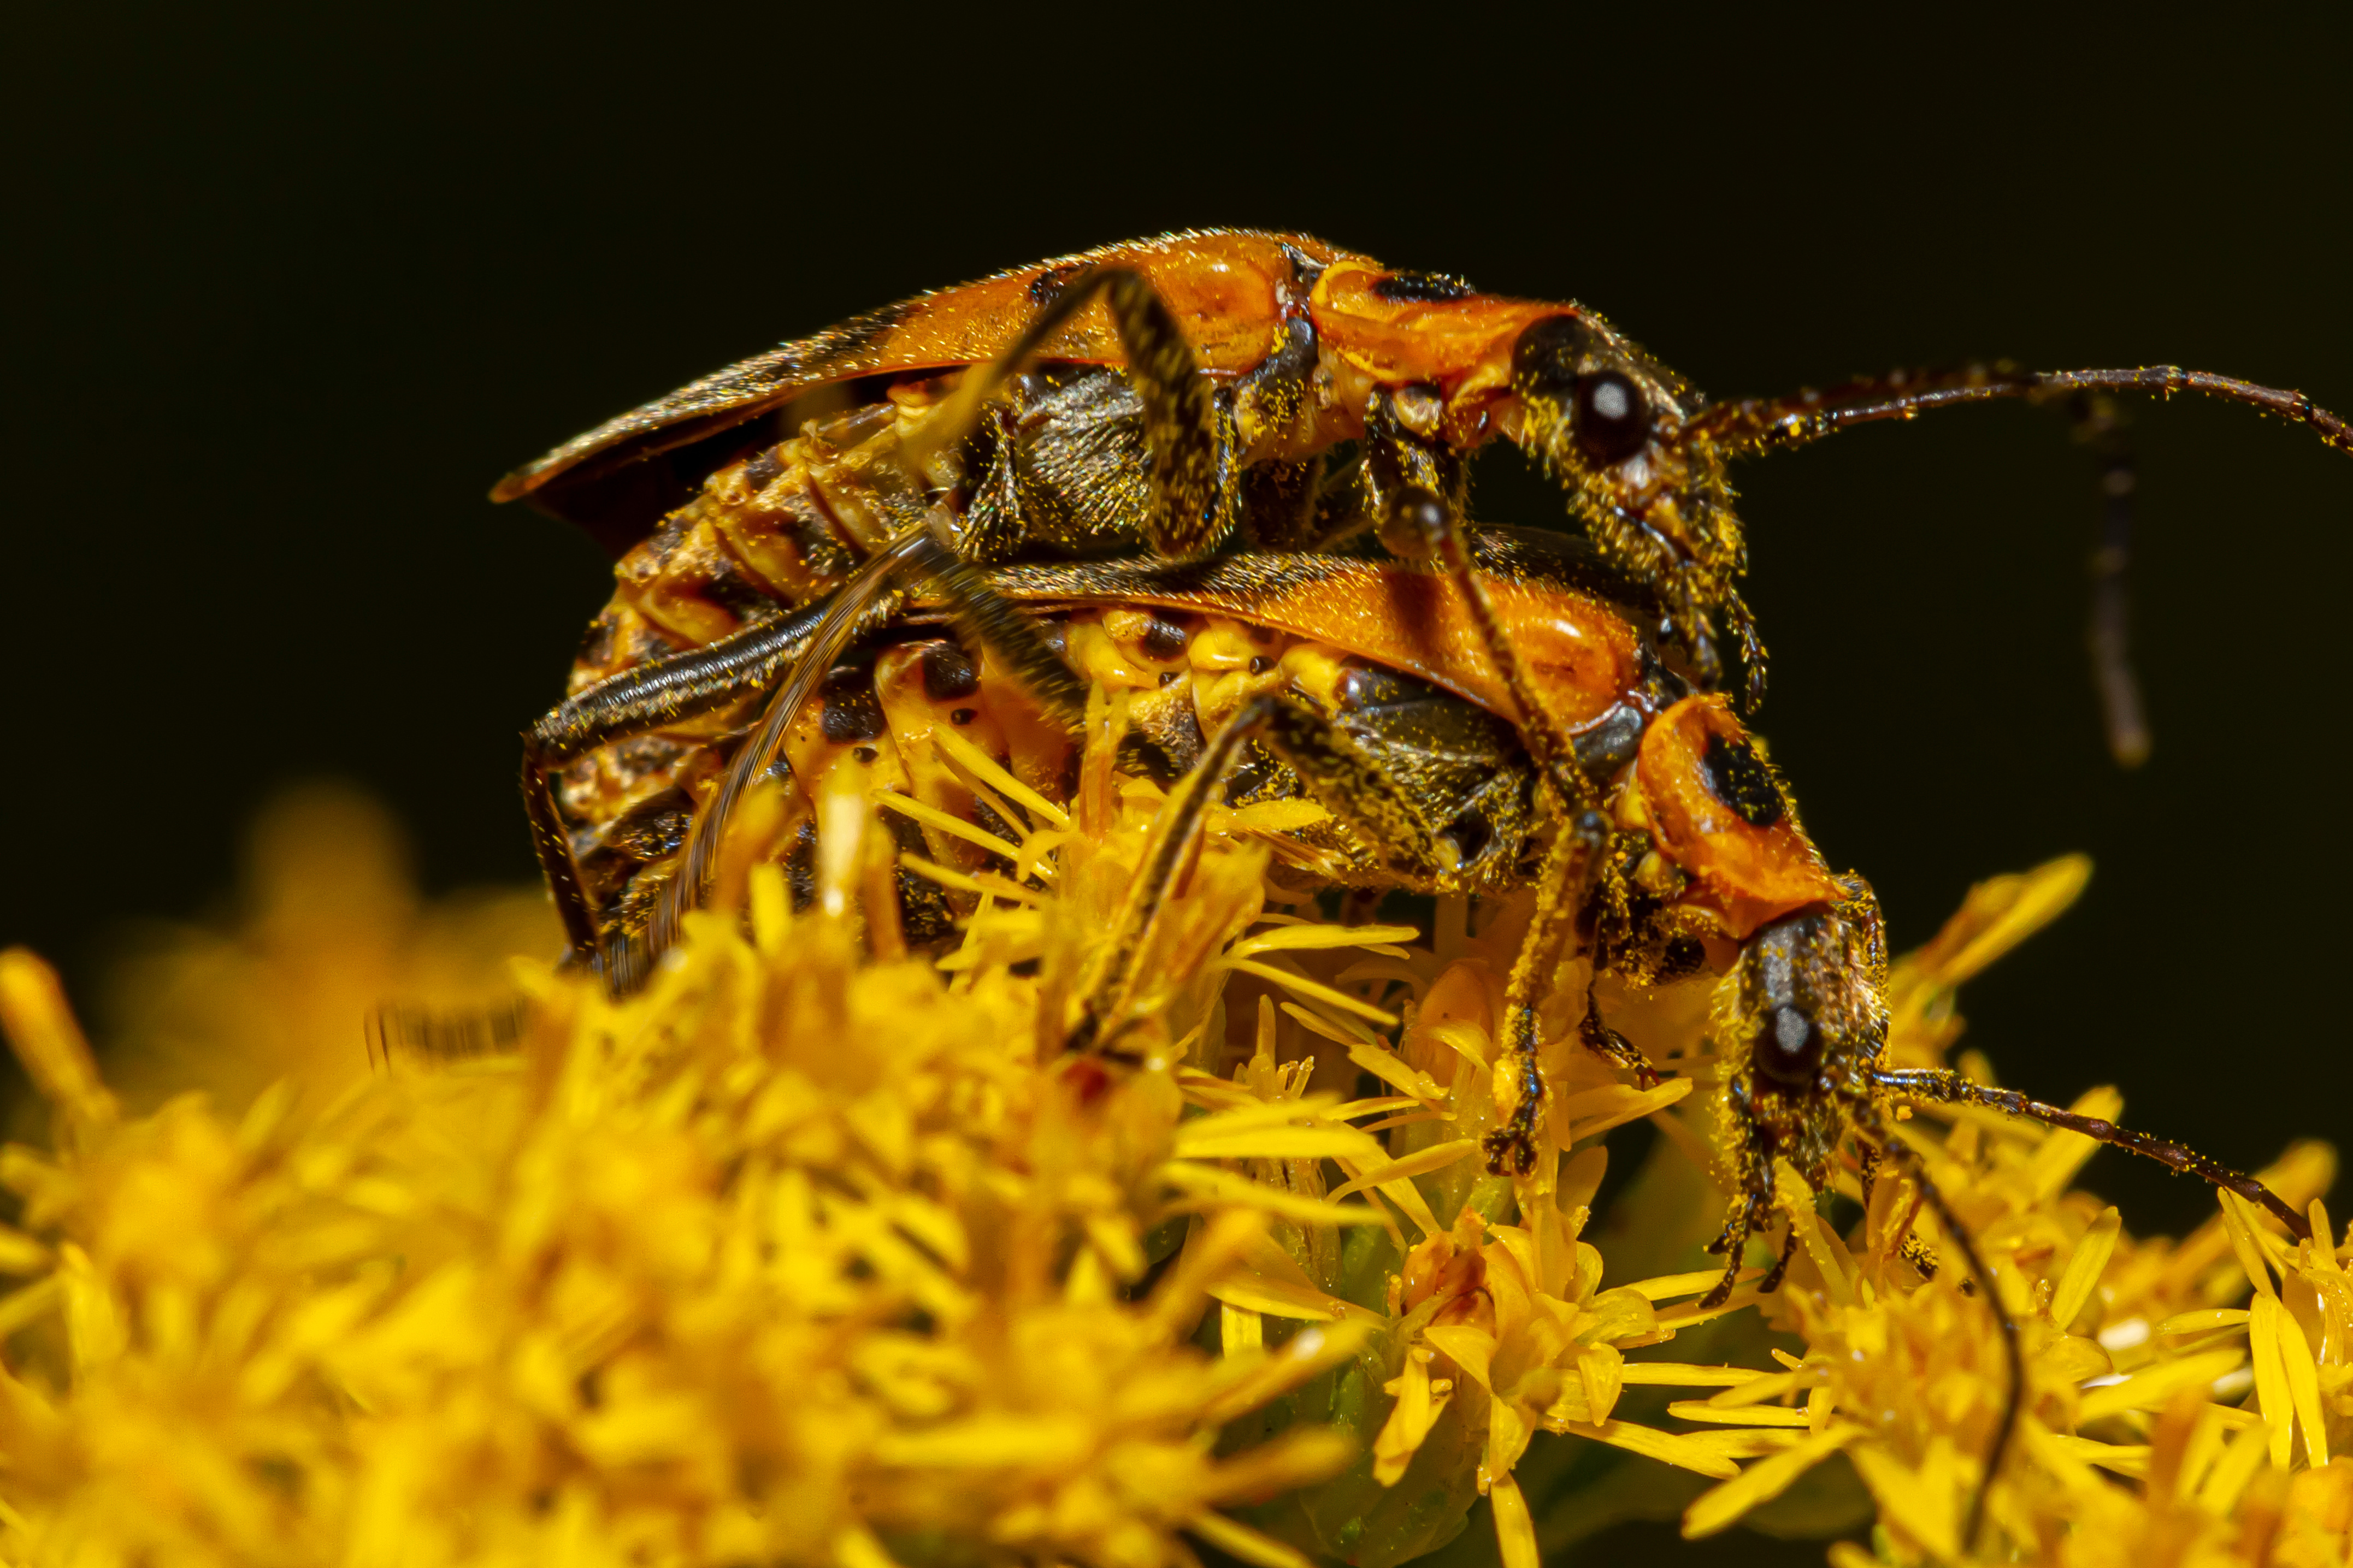
Goldenrod soldier beetles inadvertently transferring pollen while feeding on nectar and pollen grains. Photo by Grandbrothers, Adobe Stock.
Pollinators contribute to the reproduction of over 87 percent of the world’s flowering plants and are crucial for agriculture, with 75 percent of the different types of crops we grow for food relying on pollinators to some extent to achieve their yields. Perhaps most importantly, one-third of global food production is dependent on pollination.
While bees often take the spotlight in discussions about pollination, there’s a whole cast of lesser-known characters playing vital roles. From beetles, flies, ants, moths, and even birds and bats, a diverse array of creatures quietly ensures the fertility of our crops and the stability of our ecosystems.
Beetles as Pollinators
Beetles, often overlooked in the pollination process, play a crucial role as one of nature’s primary pollinators, especially for ancient flowering plants like magnolias and spicebush. These insects, which were among the first to visit flowers, are known as “mess and soil” pollinators due to their less-than-delicate approach. As they feast on petals and other floral parts, beetles inadvertently collect pollen on their bodies. They lack specialized structures for transporting pollen; instead, pollen grains adhere to their bodies as they move from flower to flower. The flowers that attract beetles tend to be large, bowl-shaped, and emit strong, fruity, or spicy scents to lure the beetles in. Despite their seemingly destructive behavior, beetles are essential for the reproduction of the plants they visit.
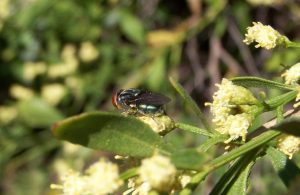
A fly lands on a saltbush, unintentionally aiding in pollination. Photo by Karan A. Rawlins, University of Georgia, Bugwood.org.
Flies as Pollinators
Flies, often dismissed as mere nuisances, are crucial pollinators. With their bustling activity around flowers, flies inadvertently transfer pollen from one flower to another as they search for nectar and other food sources.
Flies are particularly attracted to flowers with strong odors and dull colors, characteristics often overlooked by other pollinators. While they may not be as efficient or specialized as bees, flies make up for it in sheer numbers and ubiquity, contributing significantly to the pollination of a wide variety of plant species, including many crops essential for humans.
Moths as Pollinators
And then there are moths, the nocturnal counterparts of butterflies, silently pollinating flowers under the cover of darkness. Drawn to flowers with pale or white petals and strong fragrances, such as apple, pear, and cherry blossoms, moths play a role in pollinating various plant species, contributing to overall yield and quality of the harvest. Their long proboscis allows them to reach deep into flowers, accessing nectar sources that may be out of reach for other pollinators.
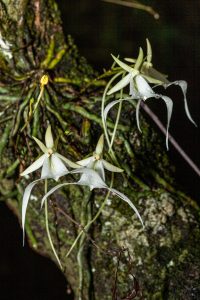
Ghost orchids (Dendrophylax lindenii) can provide shelter and nesting sites for arboreal ants, which in turn, may aid in pollination.
Ants as Pollinators
While ants are primarily known for their role as scavengers and defenders of their colonies, they also contribute supplementary to pollination of some plants in surprising ways.
In tropical forests, certain plants referred to as ant-plants or myrmecophytes, form close, sometimes obligatory partnerships with ants. These plants feature specialized hollow structures known as domatia, which serve as homes for ant colonies in exchange for protection and pollination services for the plant. Domatia vary by species, but can include stems, thorns, roots, stipules, petioles, or leaves. Some orchid species, such as the ghost orchid (Dendrophylax lindenii), which are native to Cuba and southwest Florida, provide shelter and nesting sites for an arboreal ant species called acrobat ants (Crematogaster ashmeadi). The ants, in turn, protect the orchids from herbivores and may aid in pollination.
Another strategy of some flowers is to develop nectaries on their exterior to entice ants, deterring other insects from stealing the nectar by accessing it from the side, thus compelling them to enter the flower in a manner more favorable for pollination. While ants can clearly contribute to pollination, researchers have also found that some ants secrete a natural antibiotic, which protects them from infections but harms pollen grains.
Birds as Pollinators
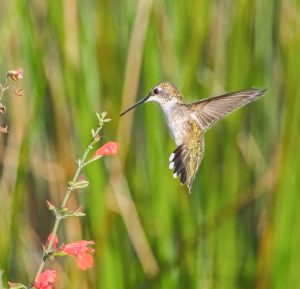
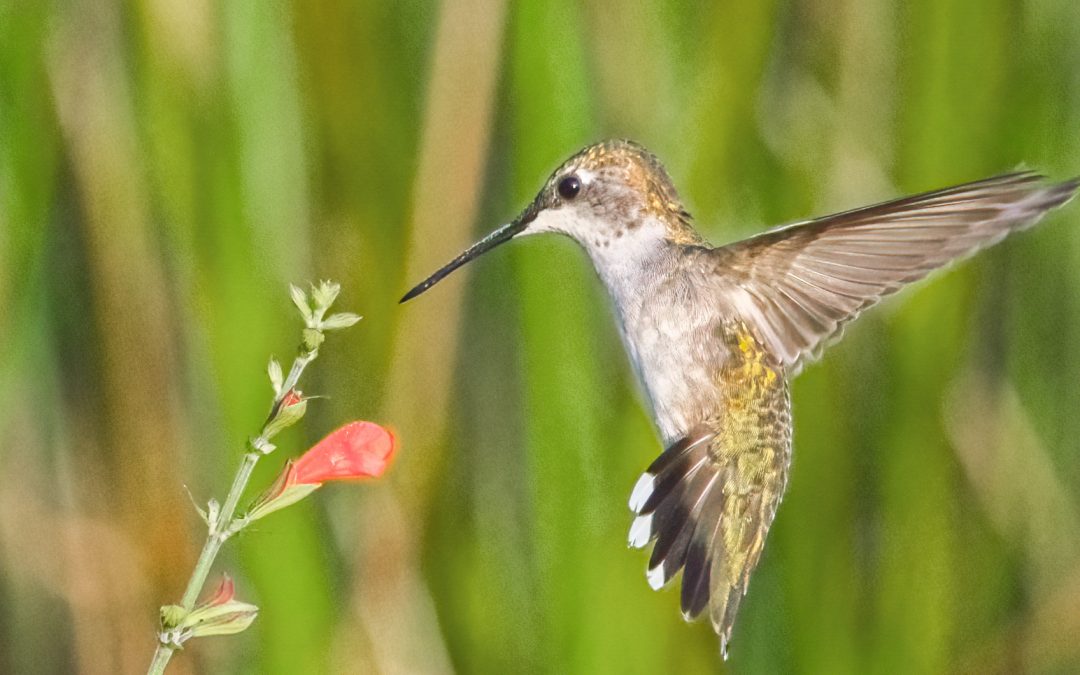
A juvenile male ruby-throated hummingbird serving as a pollinator as it flits from flower to flower, sipping nectar. Photo by Chase D’Animulls, Adobe Stock.
When we imagine pollinators, birds might not be the first creatures that come to mind. However, birds, comprising around 2,000 nectar-feeding species, play a significant role as pollinators among vertebrates.
Hummingbirds, with their tiny size and lightning-fast wings, are nature’s dynamos of pollination. Their slender bills and long tongues are perfectly adapted to extract the sugary nectar from flowers, inadvertently transferring pollen that adheres to their head and neck as they feed on other flowers. The ruby-throated hummingbird stands out as Florida’s prominent native bird engaged in plant pollination.
But it’s not just hummingbirds; other bird species, from sunbirds to honeyeaters, play their part in pollination too. Their behaviors, such as perching on flowers or probing deep into blossoms, can facilitate the transfer of pollen.
Bats as Pollinators
In the darkness of night, bats perform a vital ecological service: pollination. Particularly in tropical regions, bats have co-evolved with certain plant species, forming intricate mutualistic relationships. Surprisingly, over 500 plant species worldwide rely on bats for pollination, including important crops like agave, banana, cacao, guava, and mango.
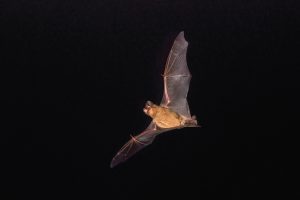
Even insect-eating bats, such as this Brazilian free-tailed bat, can inadvertently contribute to pollination as it feeds on insects within flowers. Photo by Phil, Adobe Stock.
In Florida, all native bats are insectivores, primarily preying on insects such as mosquitoes, moths, and beetles. However, recent research suggests that insect-eating bats may even outperform their nectar-feeding counterparts in certain cases when it comes to pollination efficiency. As these bats feed on insects inhabiting flowers, they inadvertently spread pollen during the process, highlighting the diverse and sometimes unexpected roles bats play in ecosystems.
Recognizing and conserving all pollinator species, from birds and beetles to bats and ants, is crucial for maintaining ecosystem balance and ensuring food security. By promoting pollinator-friendly practices and habitat conservation, we can safeguard the intricate web of life that sustains us all.
by Donna Arnold | Jun 5, 2024
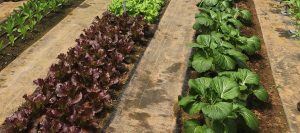
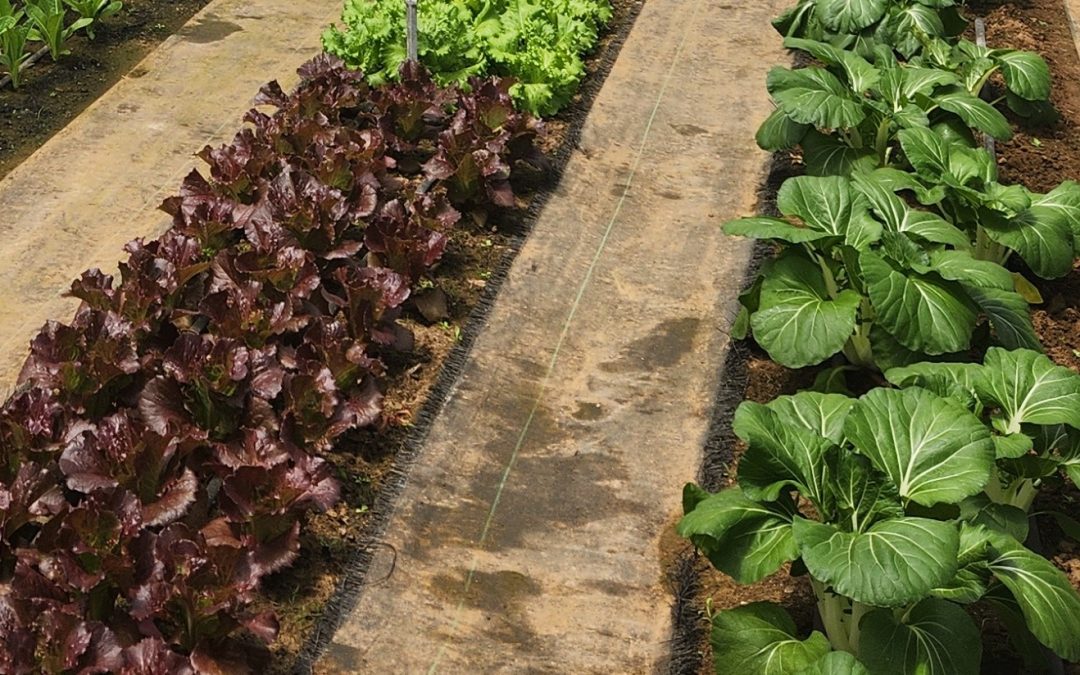
As you eagerly await the bountiful harvest from your spring and summer garden, remember that pests are also eyeing your crops. Scouting for pests is essential to maintain plant health and ensure a plentiful harvest.
The Importance of Scouting
Scouting involves the early detection of pests and plant diseases through regular and systematic garden inspections. This proactive approach helps identify pests early and assess the damage they might be causing. Missing just a few days of scouting can lead to significant plant damage due to the rapid life cycle of many plant-eating insects.
Understanding Your Garden Environment
To effectively scout for pests, familiarize yourself with the plants in your garden and their common pest issues. Different plants attract different pests, so knowing what to look for is crucial. Monitor your garden regularly, at least once a week, paying close attention to the undersides of leaves, stems, and flowers. Look for any leaf discoloration, such as yellowing or browning, and any unusual color changes. Note any insect activity, including the presence of eggs, holes in leaves, skeletonized foliage, insect frass (droppings), and entry holes.
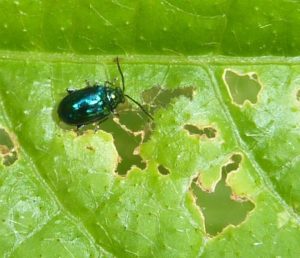
Photo: UF/IFAS
Tools Frequently Used in Scouting
Frequently inspecting your garden with the appropriate tools allows you to spot issues early and take steps to safeguard your plants. Common tools include:
- Traps: Used to catch and identify flying insects.
- Netting/Lures (Pheromones): Attract and capture specific pests.
- Sweep Net: Collect insects from plants.
- Containers: Collect samples to transport specimens for further examination.
- Hand Lens: For close inspection of small insects and eggs.
Common Garden Pests
Here are some common garden pests you might encounter while tending to your garden:
- Aphids: Small, soft-bodied insects that can be green, black, yellow, or brown. Often found on new growth, they cause curling and yellowing leaves and excrete sticky honeydew.
- Caterpillars (e.g., Tomato Hornworm): Large, green caterpillars with white stripes and a horn-like tail. They create holes in leaves, remove foliage, and damage fruits.
- Spider Mites: Tiny red or brown mites often found in clusters, creating fine webbing. They cause stippling on leaves, bronzing, and leaf drop.
- Whiteflies: Small, white, moth-like insects that fly up when plants are disturbed. They cause yellowing leaves, stunted growth, and secrete honeydew.
- Japanese Beetles: Metallic green bodies with bronze wings. They skeletonize leaves and damage flowers.
- Cutworms: Fat, brown, or gray larvae found curled under the soil surface. They cut off young seedlings at the base.
- Slugs and Snails: Soft-bodied, slimy creatures found in damp, shaded areas. They leave a trail of slime and create irregular holes in leaves and seedlings.
Scouting Techniques
Effective scouting techniques include:
- Visual Inspection: Check plants thoroughly, including the undersides of leaves and leaf axils.
- Sticky Traps: Place yellow sticky traps around the garden to catch flying insects like whiteflies and aphids.
- Shaking Plants: Gently shake plants over a white piece of paper to dislodge and spot tiny pests like spider mites.
- Soil Examination: Dig around the base of plants to look for soil-dwelling pests like cutworms.
Pest Management Strategies
Integrated Pest Management (IPM) relies on regular scouting for the most effective control. It combines several measures, including cultural, biological, mechanical, and chemical controls. gardeningsolutions.ifas.ufl.edu/…/integrated-pest-management.htm
Record Keeping
Maintain a garden journal noting the types of pests observed, population levels, and control measures taken. Track the success of different pest management strategies to refine your approach in future seasons.
By consistently monitoring your garden and employing a combination of these strategies, you can effectively manage pests and enjoy a healthy, thriving garden throughout the spring and summer seasons. For more information, contact your local extension office. Happy gardening!


