The Annual Tupelo Honey Festival will be held Saturday, May 15th from 9 am – 4 pm central time at Lake Alice Park in Wewahitchka. This is your chance to take part in a local treat. Area honey producers will be on hand to sell their honey in a variety of sizes. There will also be food, art and crafts, and live music.
For decades, tupelo honey has been synonymous with Gulf county. The nectar from the tupelo gum tree (Nyssa ogeche), produces some of the finest honey in the world. The common name “tupelo” is derived from language of the Muscogee Nation, also known as the Creek Indian Nation. The meaning of the word is “swamp tree”, as this tree flourishes in areas of wet soils and seasonal flooding. Gulf County is home to one of the largest tupelo forests on earth.
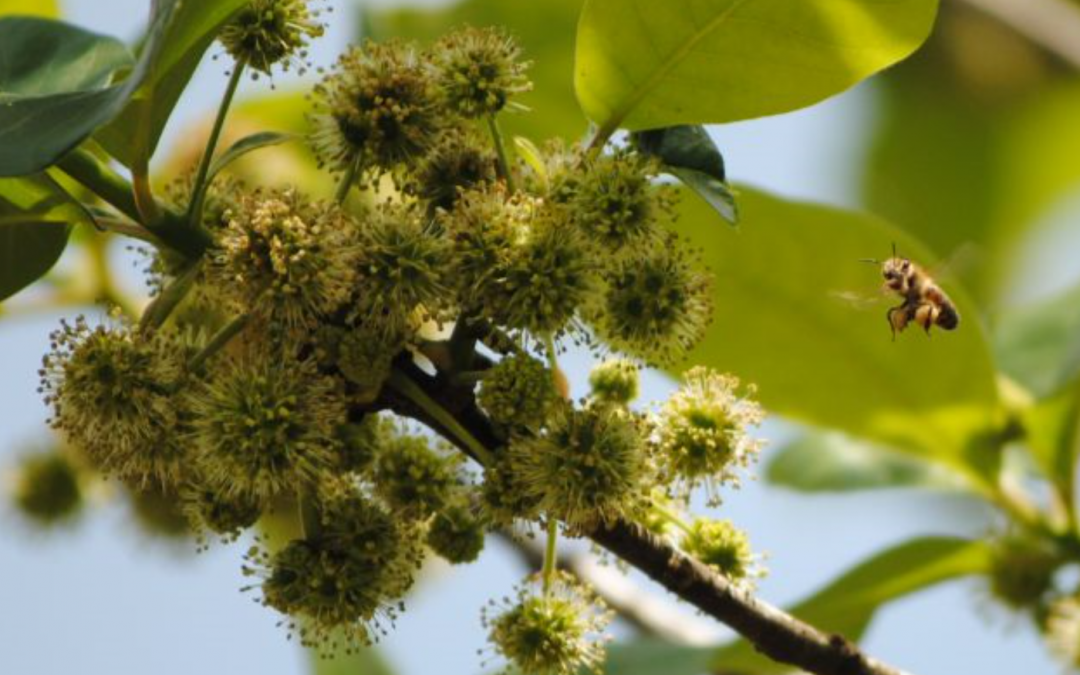
A honeybee visiting tupelo blossoms. Photo Credit: Gulf County Tourist Development Council.
The tupelo bloom season lasts from approximately mid-April to the end of May. This is an anxious time for beekeepers. Tupelo blooms are very temperamental and delicate in nature. For this short period, beekeepers hope for little wind or rain and no cold temperatures, as any of these factors can make or break tupelo honey production. Regardless of seasonal impacts, the demand for Gulf County’s tupelo honey never subsides.
National Arbor Day is April 30 and although we celebrate Florida Arbor Day in January you may find yourself planting trees right now as Spring Fever sets in. It is a little easier on the tree and the gardener caring for it to plant in the winter, but you can plant year-round if you implement proper care to ensure good establishment.
The most common problems with trees we see at our help desk are related to incorrect installation and establishment. Number one is incorrect planting depth and number two is incorrect watering during establishment. This article will cover a few pitfalls to avoid so that whenever you plant your tree you will increase your likelihood of success!
Planting Depth
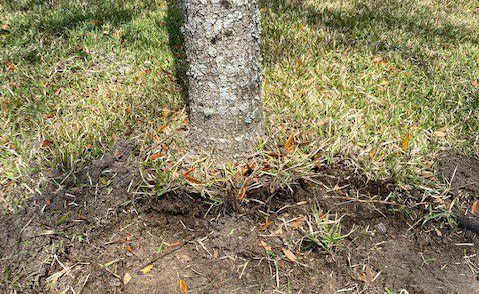
It is important that tree roots are not too deep so that they can adequately access both water and oxygen needed for survival and root generation. A good rule of thumb is to plant new trees with 10% of the root ball above the natural grade. Also check to be sure the root flare is exposed in trees that have this feature. This may require removing some soil from the top of the root ball as it came from the nursery.
A few common mistakes that lead to incorrect planting depth are listed below:
Leaving burlap and straps on the top of root balls of balled-and-burlap (B&B) trees
Piling soil on top of the root ball
Adding mulch to the root ball
Laying sod on top of root ball
Planting on a slope where soil can erode onto the root ball
Planting level with grade – trees settle and bark mixtures decompose which cause the tree to become deeper than originally planting
Creating a bed with added soil around trees (this is more common on mature trees and should be avoided)
When planting a tree, measure height and width of the corrected root ball. Dig the hole 90% as deep as the height and 125-150% as wide as the root ball. There is no need to add fertilizer or amendments to the hole, simply plant into the native soil and water appropriately.
Watering Until Tree is Established
The establishment period is the time it takes for a plant to create enough functional roots to adequately uptake water and nutrients needed to survive with little to no supplemental irrigation. In general, smaller/younger plants establish more quickly than larger ones so there are benefits to starting small when choosing trees.
Soil texture, rainfall, time of year, and tree species will factor into how long it takes for a tree to become established but there are a few guidelines to help you plan. Irrigate 2-5 gallons of water per inch trunk caliper during establishment period. Hint- your turfgrass irrigation output is not sufficient for optimum tree root growth. The chart below offers a range of irrigation frequency based on size of tree at installation and whether your goal is for fast growth or just enough to survive.
Size of Nursery Stock
Irrigation Schedule for Vigor
Irrigation Schedule for Survival
Less than 2” trunk caliper
Daily: 2 weeks
Every other day: 2 months
Weekly: Until established
Twice weekly for 2-3 months
2-4-inch trunk caliper
Daily: 1 month
Every other day: 3 months
Weekly: Until established
Twice weekly for 3-4 months
Gilman and Sadowski. “Planting and Establishing Trees.” This document is ENG 1061, one of the Urban Forest Hurricane Recovery Program series of the School of Forest Resources and Conservation and the Environmental Horticulture Department, UF/IFAS Extension. Original publication date September 2007. Reviewed February https://edis.ifas.ufl.edu/pdffiles/EP/EP31400.pdf
I’ll be the first to admit that North Florida lawns are frustrating. With time, most people discover this.
Why are lawns so difficult here? The answer involves a combination of factors.
We are not far enough north to benefit from the better soils. Florida is known for sandy, low fertility, low water holding capacity soils. Some areas of the country enjoy richer soils with better water and nutrient holding capacities. These better soils result in a more favorable lawn root environment with roots being more competitive and resilient.
Something else happens in more northern areas. The heavier soils and colder temperatures (sometimes resulting in the soil freezing) are natural means of inhibiting and/or controlling certain soil dwelling pests. For example, nematodes are not nearly the concern in northern lawns. Many people that move to our area have never heard of these microscopic roundworms that play havoc in our low fertility, warm, sandy soils. After a lawn has been in place for a number of years, allowing the nematode population to reach a threshold, the lawn begins to decline. And we have few legal, effective chemical control options for nematodes in Florida lawns.
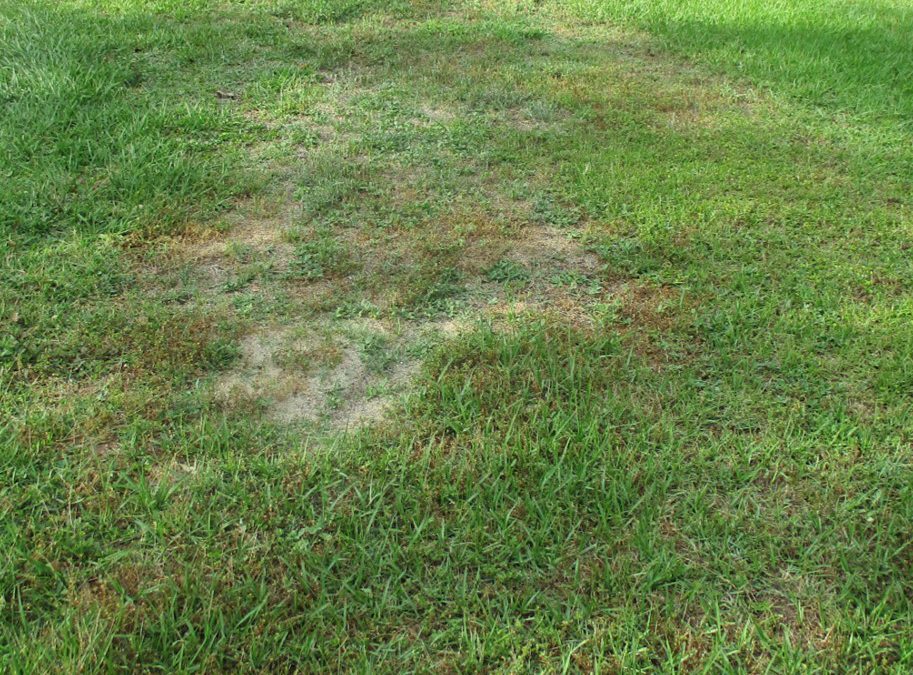
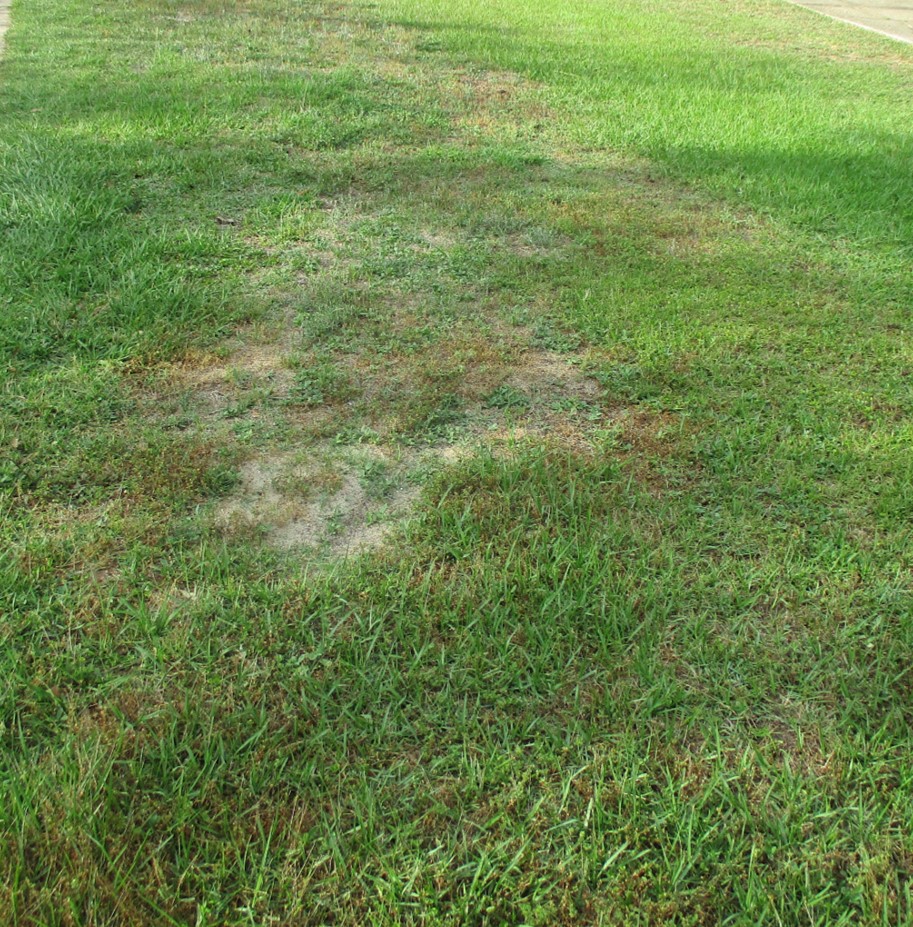
Declining area in lawn due to ground pearl. Photo credit: Larry Williams
Some other soil dwelling pests that northerners don’t have to deal with include ground pearls, small scale-like insects that bother centipedegrass roots. Mole crickets are not a pest much north of Central Alabama. Years ago, a representative with the company that manufactured the once popular mole cricket insecticide Oftanol told me that in the absence of the state of Florida, they would not sell enough Oftanol to keep it on the market. Take-all Root Rot, a common soil dwelling fungus, plays havoc in our Florida lawns and it is difficult to control.
We are not far enough north to use the more trouble-free northern grasses to create a permanent lawn. These include bluegrasses, fescues and perennial ryegrass. At best, these grasses can be used to overseed our lawns during the cooler fall and winter months to create a temporary winter lawn. But they will not survive our hot, wet summers.
We are not far enough south to benefit from the lack of freezing temperatures during winter. A late freeze that occurred on April 8 a number of years ago resulted in much lawn injury. I saw lawns with seventy percent kill from this late freeze. This is something that typically does not happen in Central and South Florida.
We deal with saltwater issues, high humidity, hurricanes and tropical storms, an array of lawn insects and diseases and extremes in rainfall and temperatures.
It’s no wonder most people become dissatisfied with their lawns. Perhaps we should lower our expectations and enjoy the natural flora and fauna of our state.
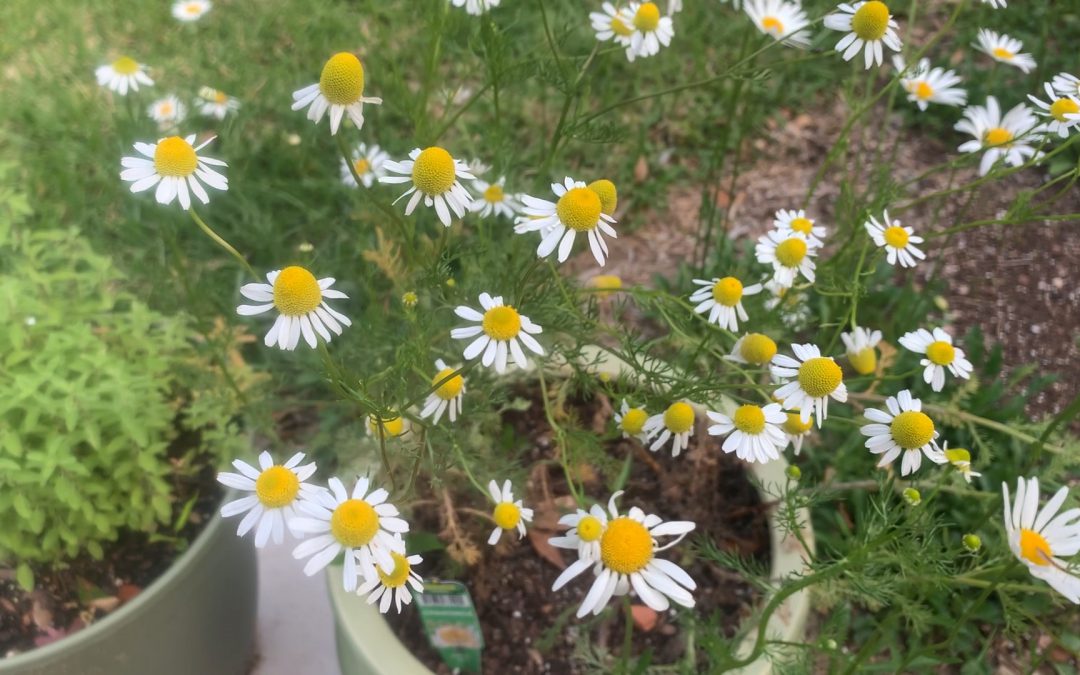
Chamomile is recognizable as a tea but not a common plant found in many Florida herb gardens. Learn about growing chamomile in order to make a cup of your own tea with UF IFAS Extension Escambia County.
With the traditional planting date of Good Friday behind us, the home tomato gardening season in the Panhandle is in full swing. While tomatoes are the most persnickety veggie we grow, there are several practices you can adopt to help you succeed: selecting an adapted variety; regularly scouting for insects and disease; and watering and fertilizing appropriately. However, the most overlooked practice for success gardeners can adopt is proper pruning.
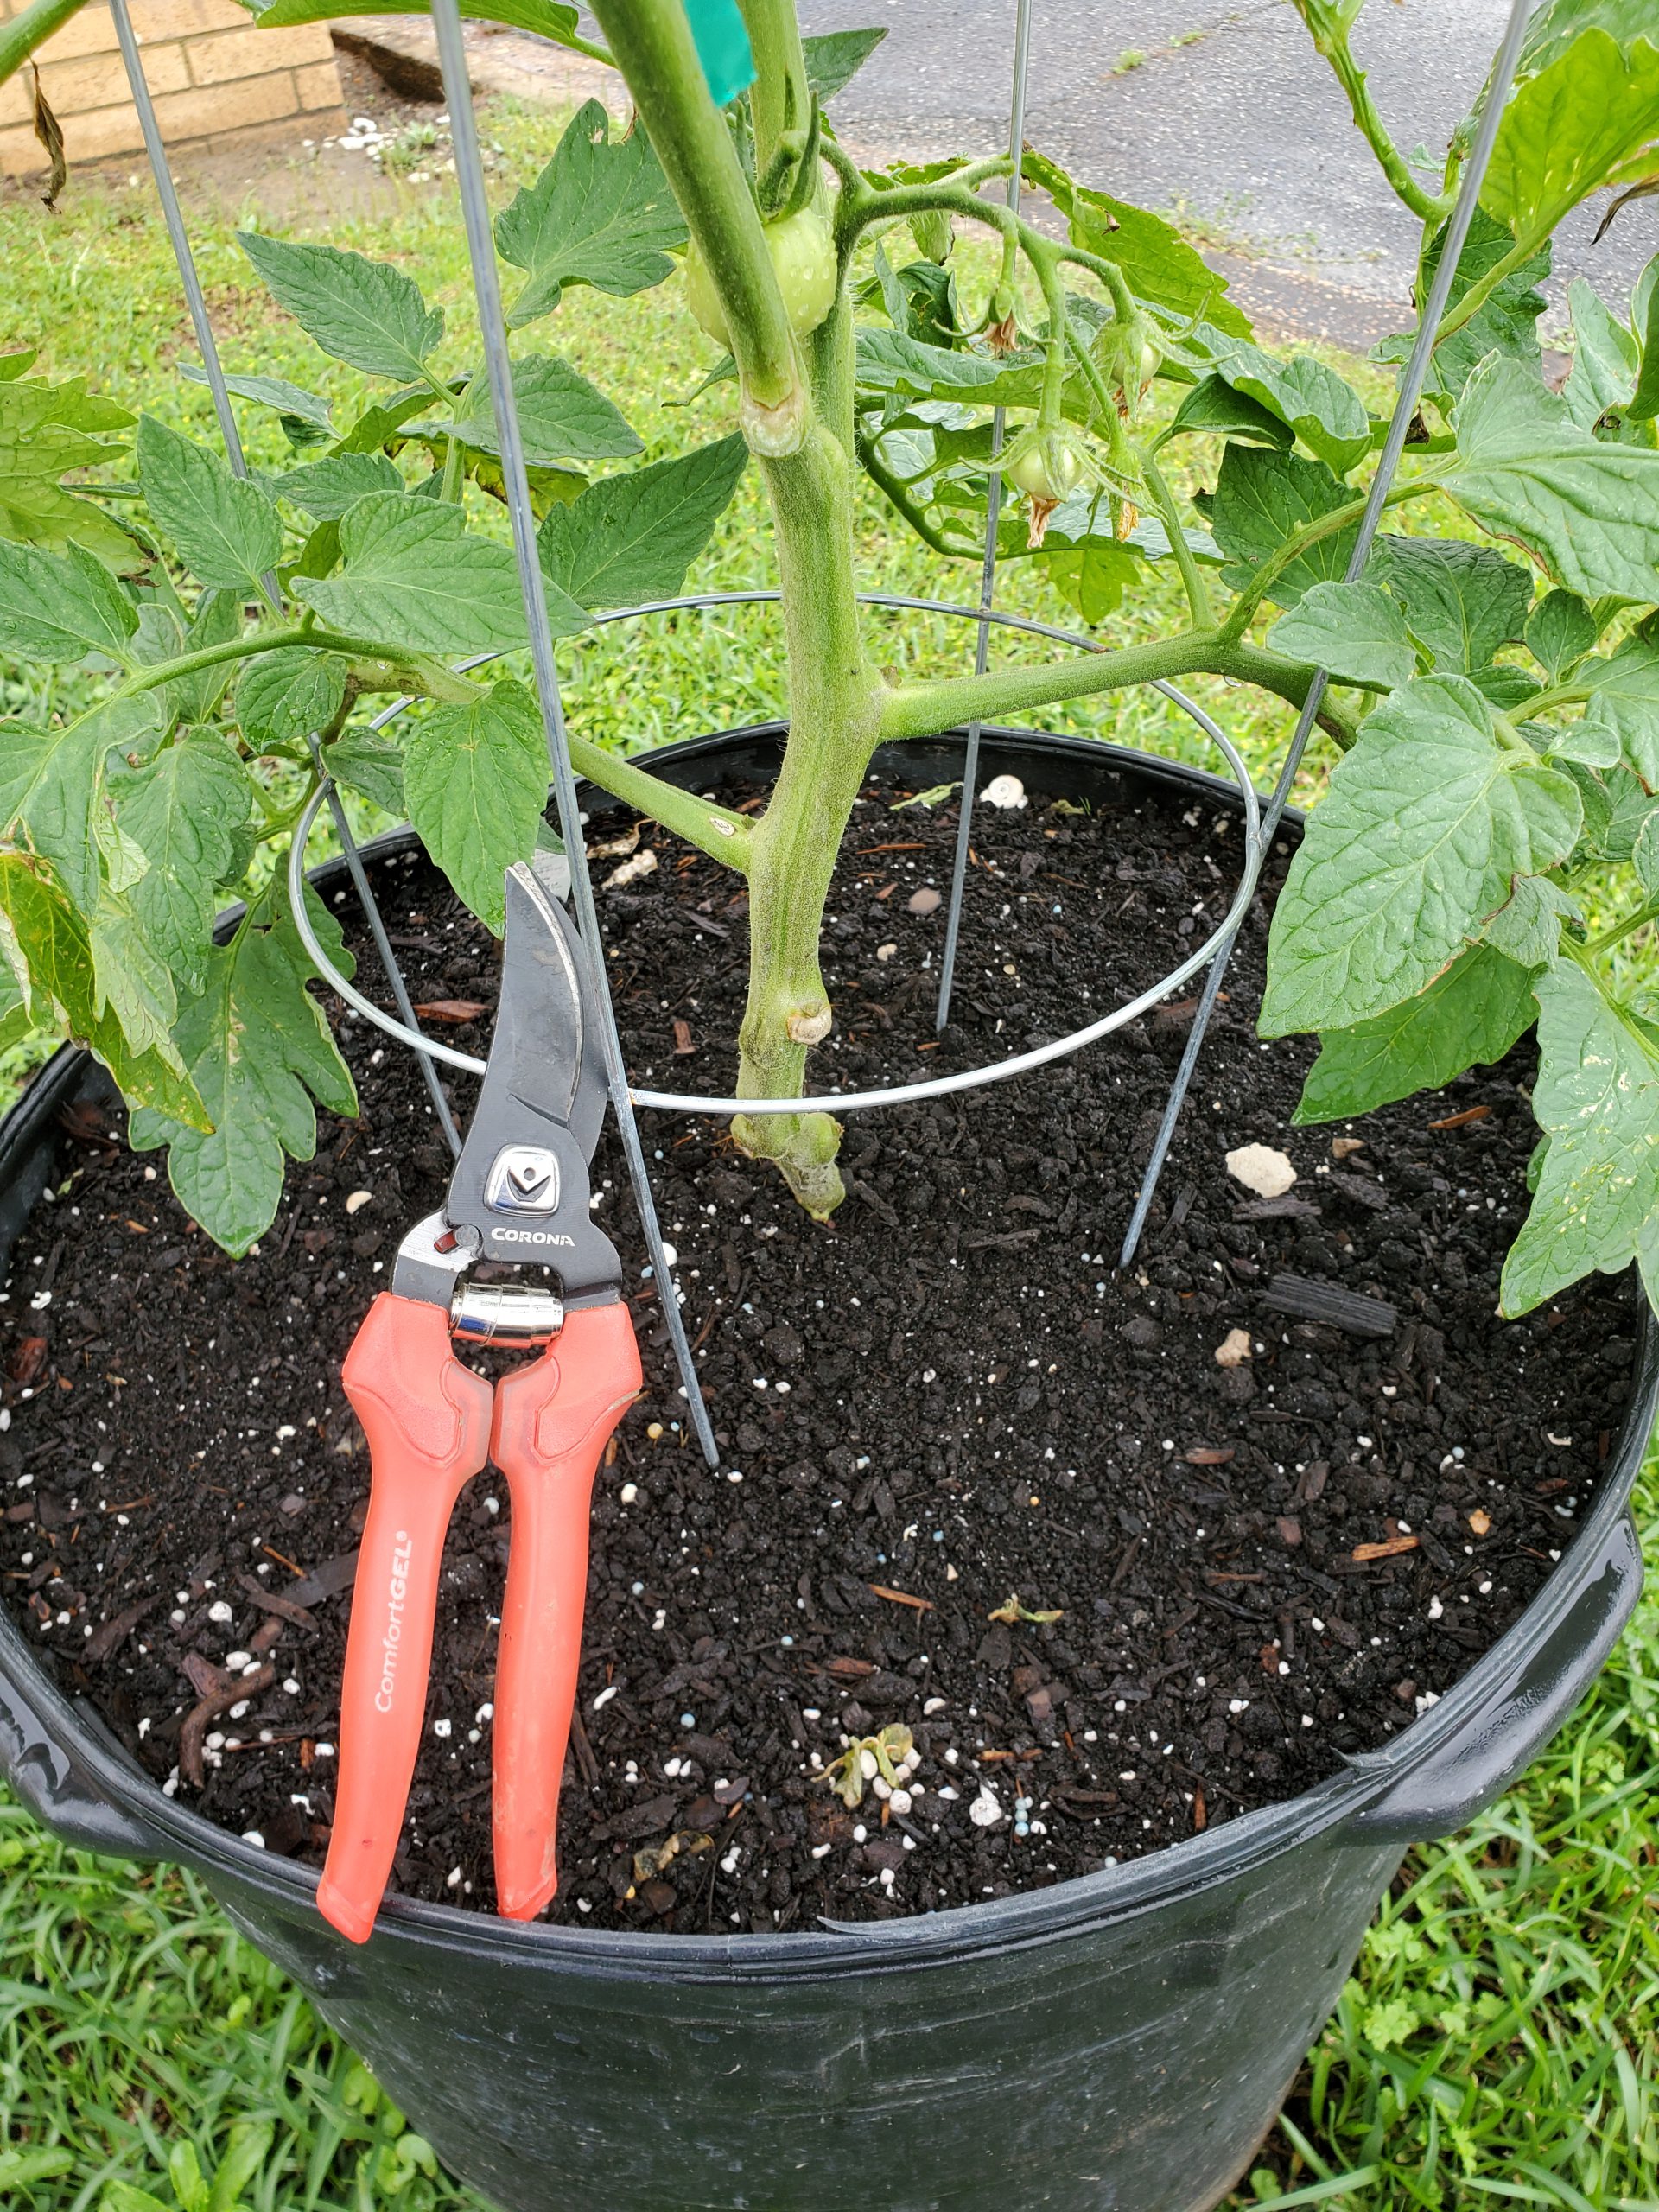
‘Big Beef’ Tomato with lower leaves removed. This is an excellent disease reduction practice. Photo courtesy of Daniel Leonard.
Correct pruning does a couple of positive things for tomatoes. First, it reduces the incidence of disease by preventing leaf contact with the soil, opening the interior of the plant, and allowing better airflow. This is important as many plant pathogens reside in the soil and only need a splash of water to travel onto plant leaves. Also, densely foliaged plants trap warm, moist air in their canopies, creating a perfect environment for disease to flourish. Letting the plant canopy “breathe” through pruning prevents that negative environment from forming! Second, correct pruning of “suckers” (extra growth points that can develop into shoots) helps tomato plants develop optimum yield and fruit quality. By removing suckers, more water, nutrients, airflow, and light are directed to the main stems, where the majority of tomato fruit production occurs. Failing to remove suckers (especially on indeterminate varieties) can result in reduced yields, increased disease, and generally messy plants!
With the reasons for pruning tomatoes established, the next step is learning exactly what to prune and how to do it in a sanitary matter.
Get rid of any foliage that could encounter the soil, generally all leaves occurring on the lower 12-16″ of the plant. All kinds of nasty tomato destroying diseases, like Early Blight and Bacterial Leaf Spot, reside in the soil and are just waiting to be splashed onto your plants – don’t let that happen.
Determine how many primary shoots you want your plant to have. Leave enough lower suckers to achieve that number (generally just one, two, or three as more than 3 primary stems gets hard to manage), and prune or pinch out all the rest. To prevent stress from pruning, be diligent in removing suckers when they are still small, 2” or less.
Always clean and disinfect your pruners before making a cut on a tomato plant. This is best accomplished by rinsing the blades with warm soapy water, drying, and following with by a quick alcohol spray. A 10% bleach solution will also work, but if not thoroughly rinsed after, bleach can corrode pruner blades and other working parts. If you make cuts on a plant that appears diseased, repeat the sanitizing process before you begin pruning another plant as “dirty” pruners are an easy way to spread pathogens in the garden.
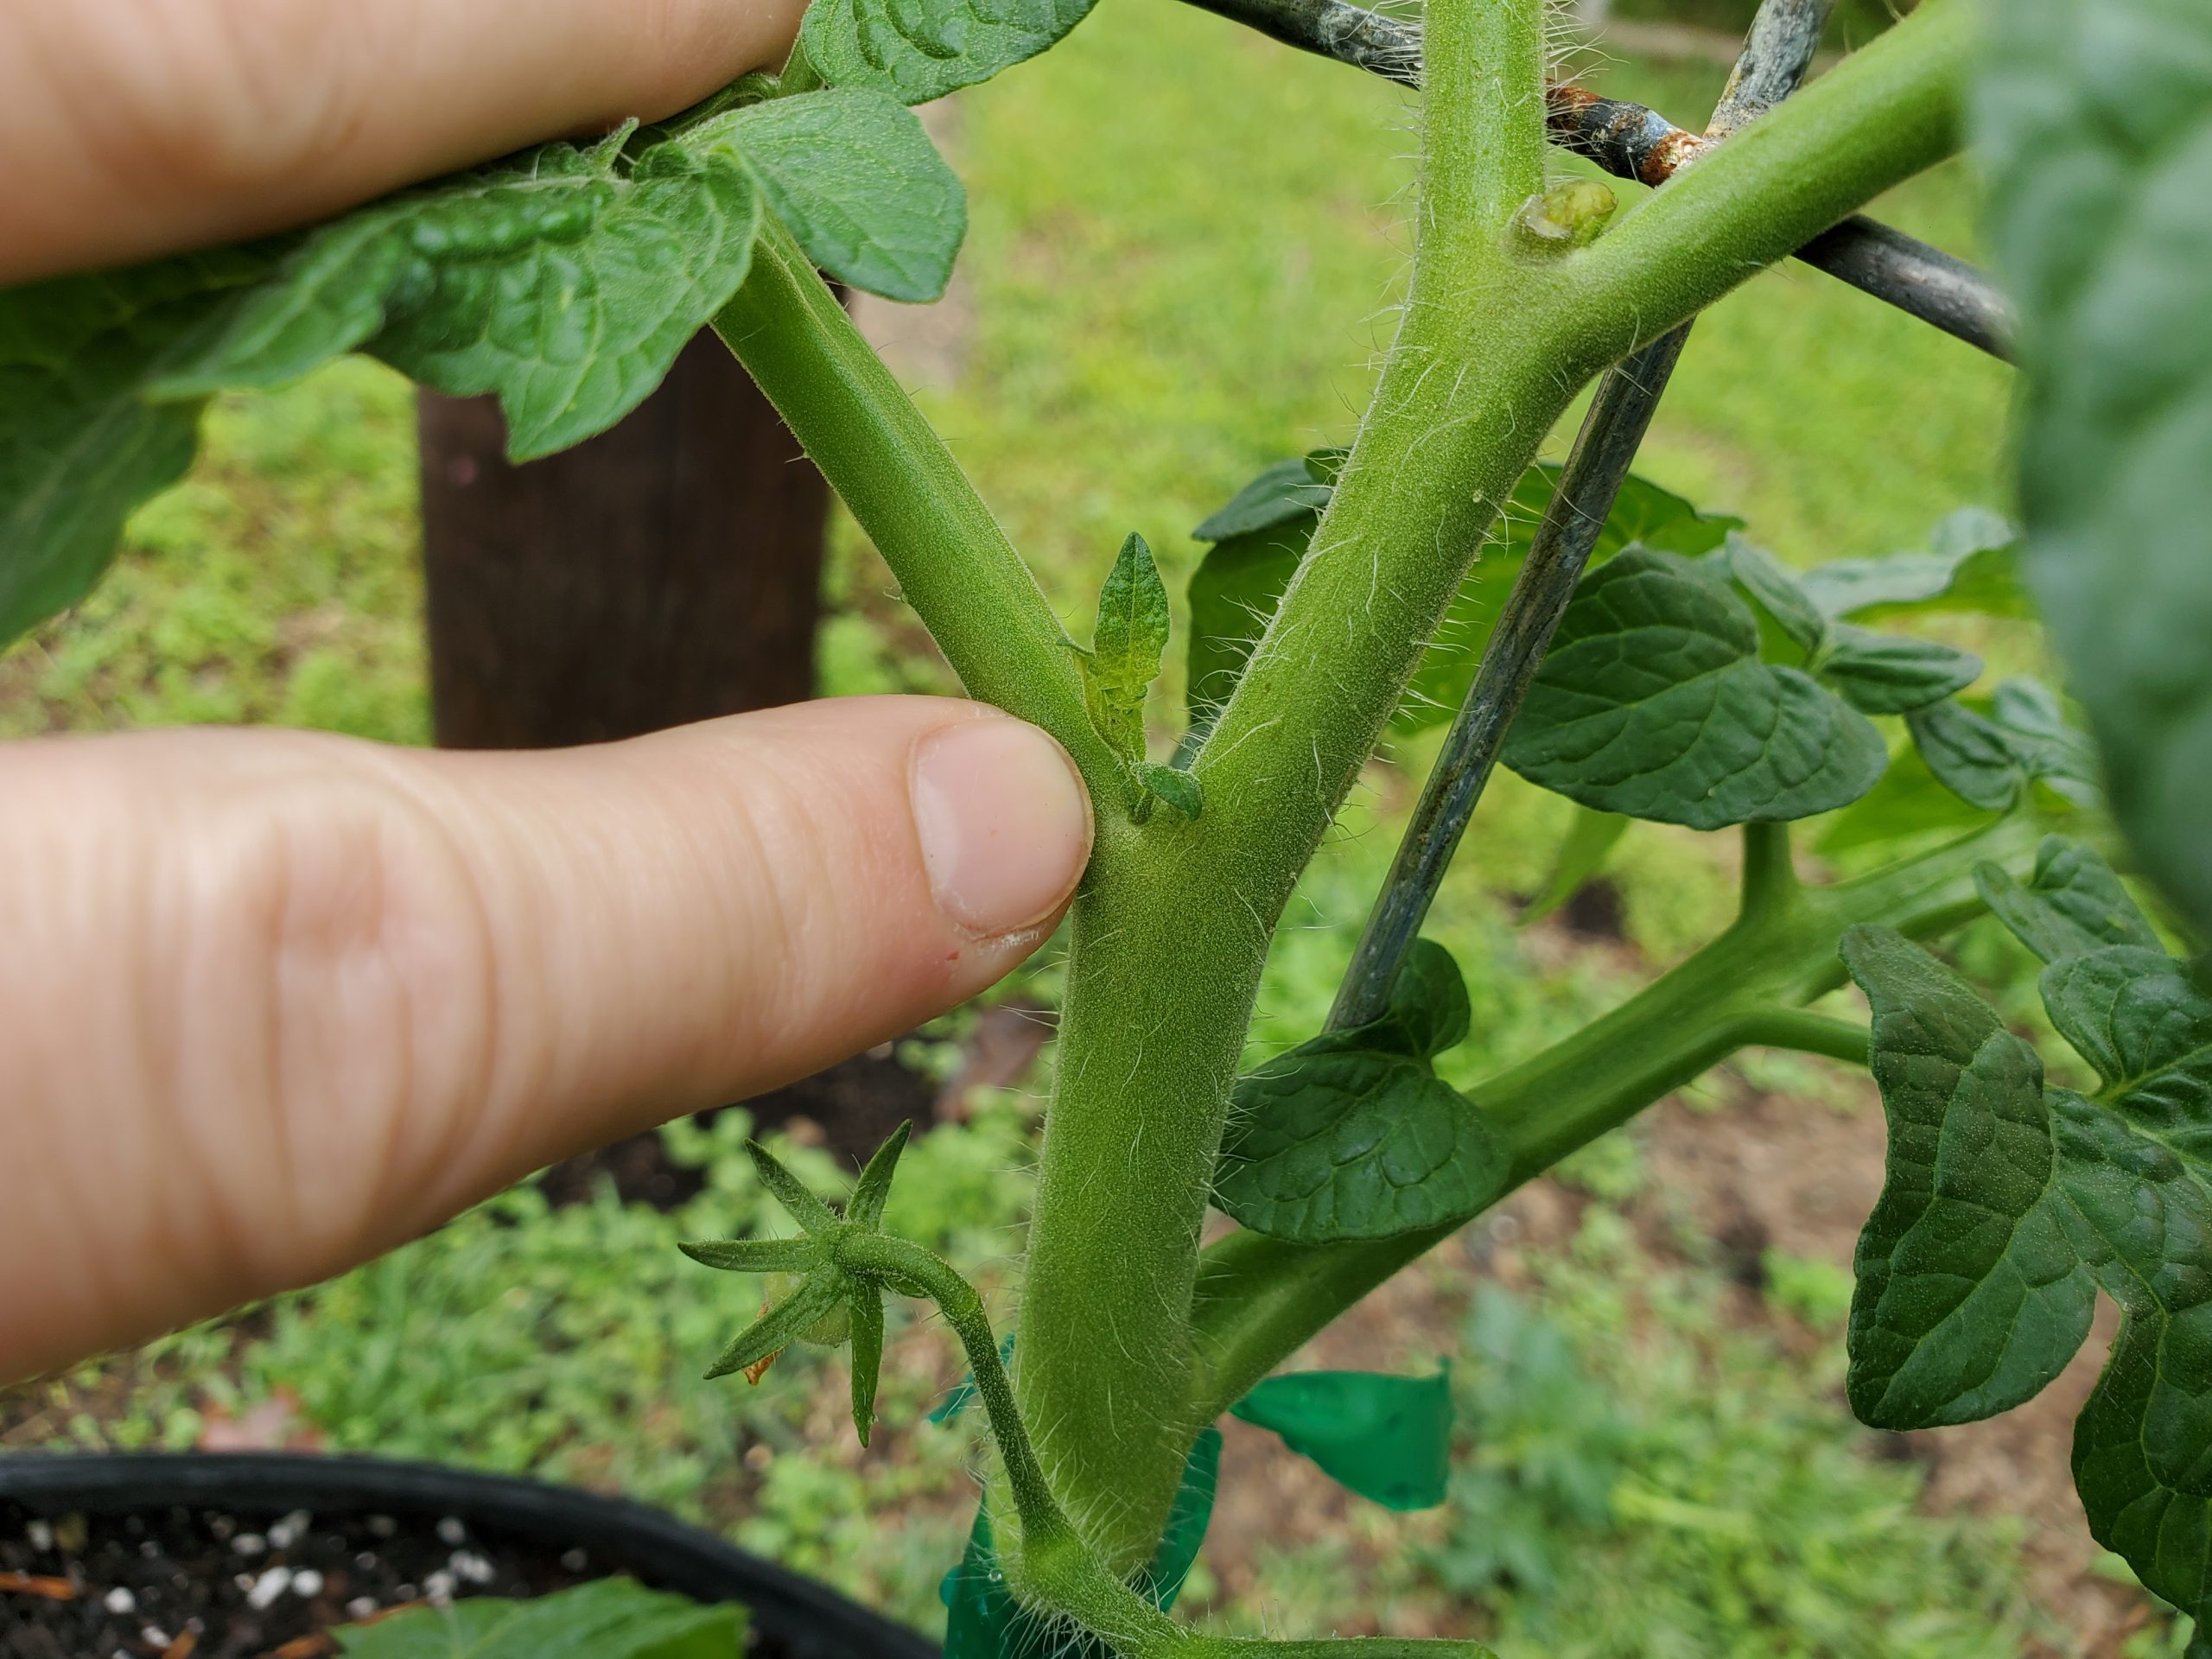
Developing vegetative “sucker” that will need to be removed. Photo courtesy of Daniel Leonard.
While tomatoes are indeed a difficult vegetable to grow, learning to prune them correctly will greatly help to make this a successful season. If you just keep leaves off the ground, suckers pinched, and pruners cleaned, you’ll be well on your way to less disease, prettier plants, and more tomatoes to pick. For more information on growing tomatoes and any other horticultural topic, please contact your local UF/IFAS County Extension office. Happy Gardening!