In the Panhandle, fall is the prettiest season for wildflowers. Our roadsides and woodlands are covered with pinks, whites, yellows, blues, purples, and even a little red here and there. Pretty as it may be, the beautiful wildflower look isn’t super appropriate for most yards. It would look unkempt, a little “wild” if you will, would be hard to manage and is probably best enjoyed in natural areas. However, we can bring some of the native colors of fall into our landscapes in a much lower maintenance, refined manner with two Panhandle species that pair excellently together, Muhly Grass (Muhlenbergia capillaris) and Darrow’s Blueberry (Vaccineum darrowii).
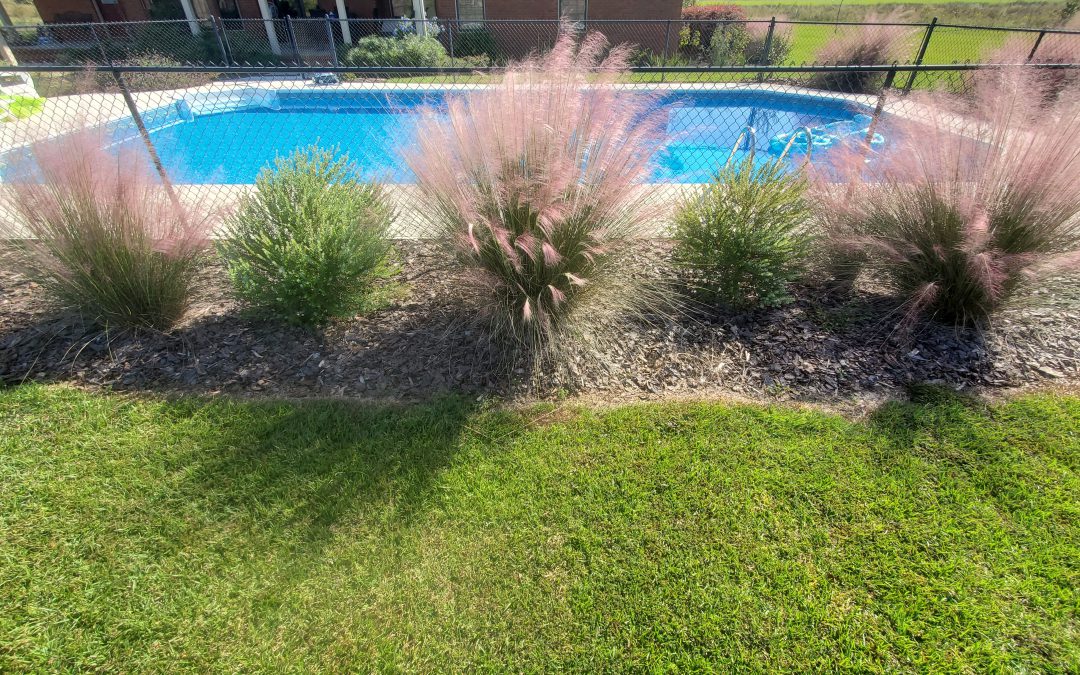
Muhly Grass and Darrow’s Blueberry in a local landscape. Photo courtesy of Daniel Leonard.
Muhly Grass, the native grass with the pinkish/purple panicles blooming right now, has gained much popularity in recent years, earning a reputation as a near pest/disease free, drought tolerant, attractive landscape plant. Operating in lieu of more traditional low growing shrubs in landscapes, Muhly is an airy, greenish gray bunch grass growing about 3-4’ tall and wide, lending informal, coastal texture to landscapes most of the year and really shining in fall during its flowering season. Once established, it never needs extra water, prefers little fertilizer, and only needs a rejuvenation prune (or burn – the Leonard preferred method. It’s fun and mimics the role of fire in Muhly’s native ecosystems!) every couple of years to keep it looking tidy.
Unlike Muhly Grass, Darrow’s Blueberry has not caught on broadly in the landscape industry but is no less deserving. This native blueberry species only grows a couple of feet tall, produces edible fruit that wildlife enjoy, and adds an unusual blue green color to landscapes via its tiny-leaved, evergreen foliage. It prefers the same sites as Muhly and is part of the reason they pair so well together. Our mostly sandy, well drained soils work just fine, but both plants can handle soils that are occasionally wet. A bonus, Darrow’s also has tiny, bell shaped flowers in spring that attract all manner of beneficial bee species. This makes it a must in any native pollinator garden!
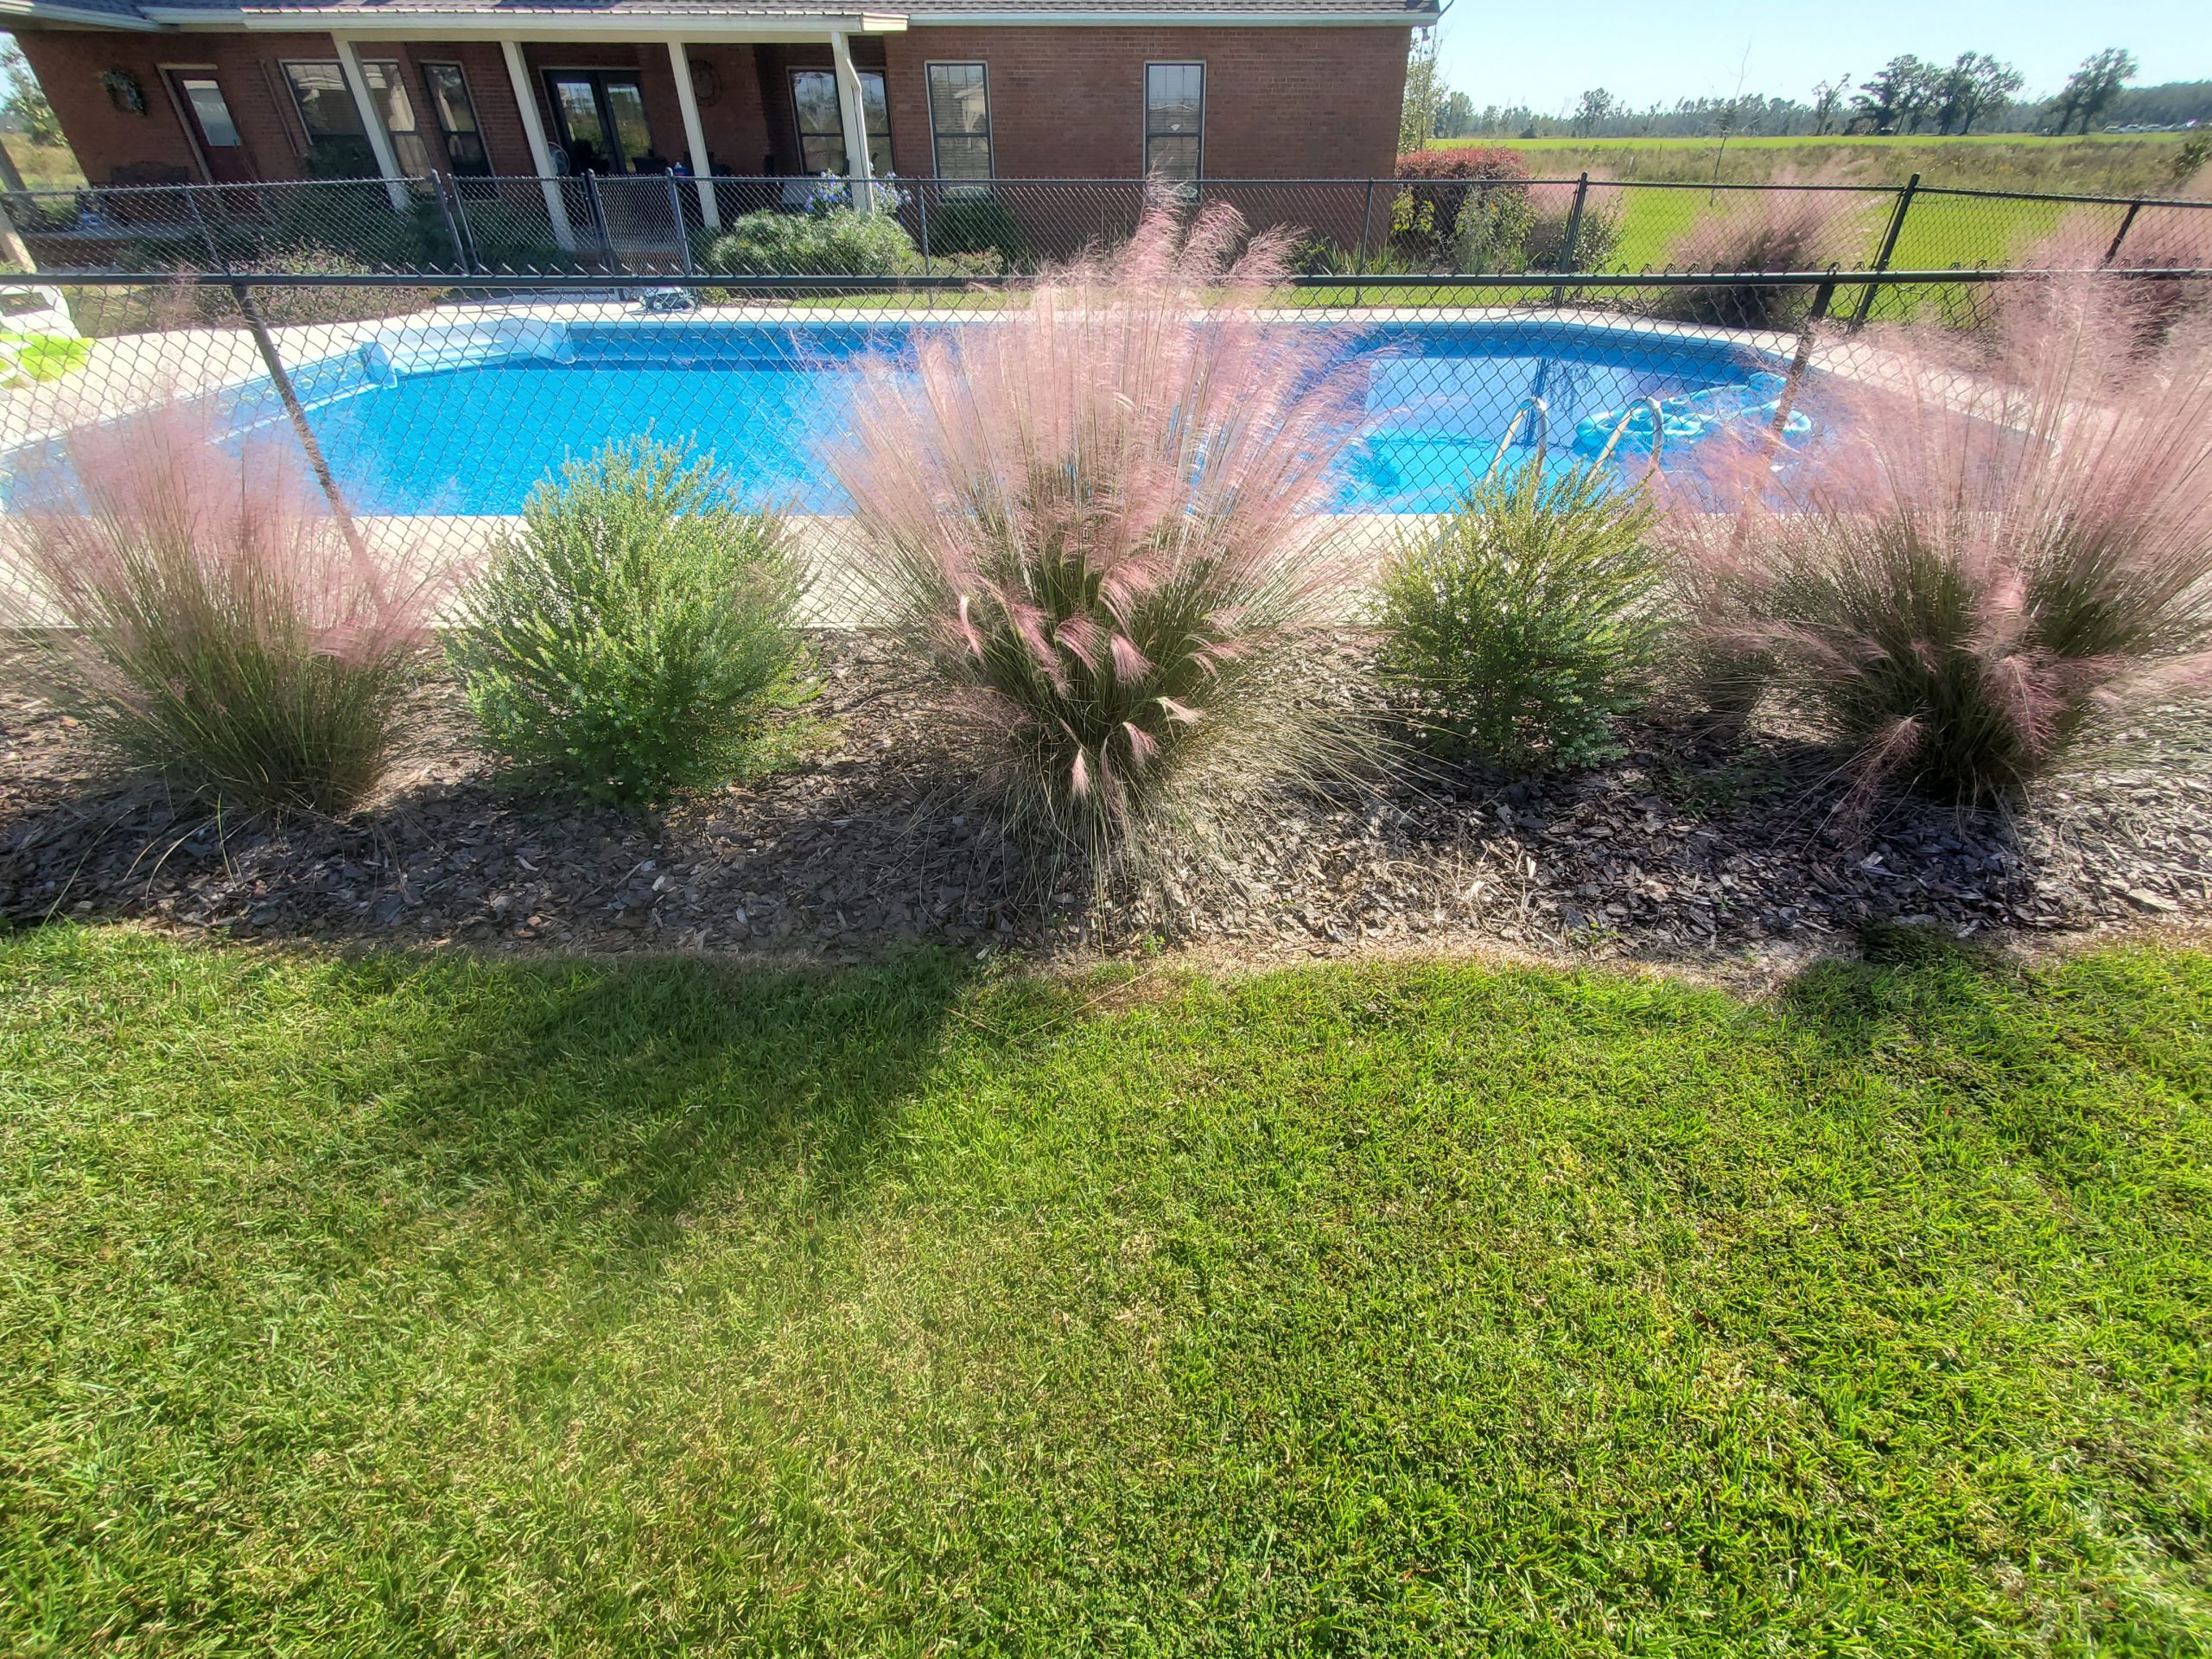
As good as these species are alone, I think they are better together. In my family’s yard, we created a loose screen of widely spaced (8’ apart) Muhly Grass specimens around a pool, in the spirit of giving the area a “coastal” airy feel, and interspersed Darrow’s Blueberry in between.
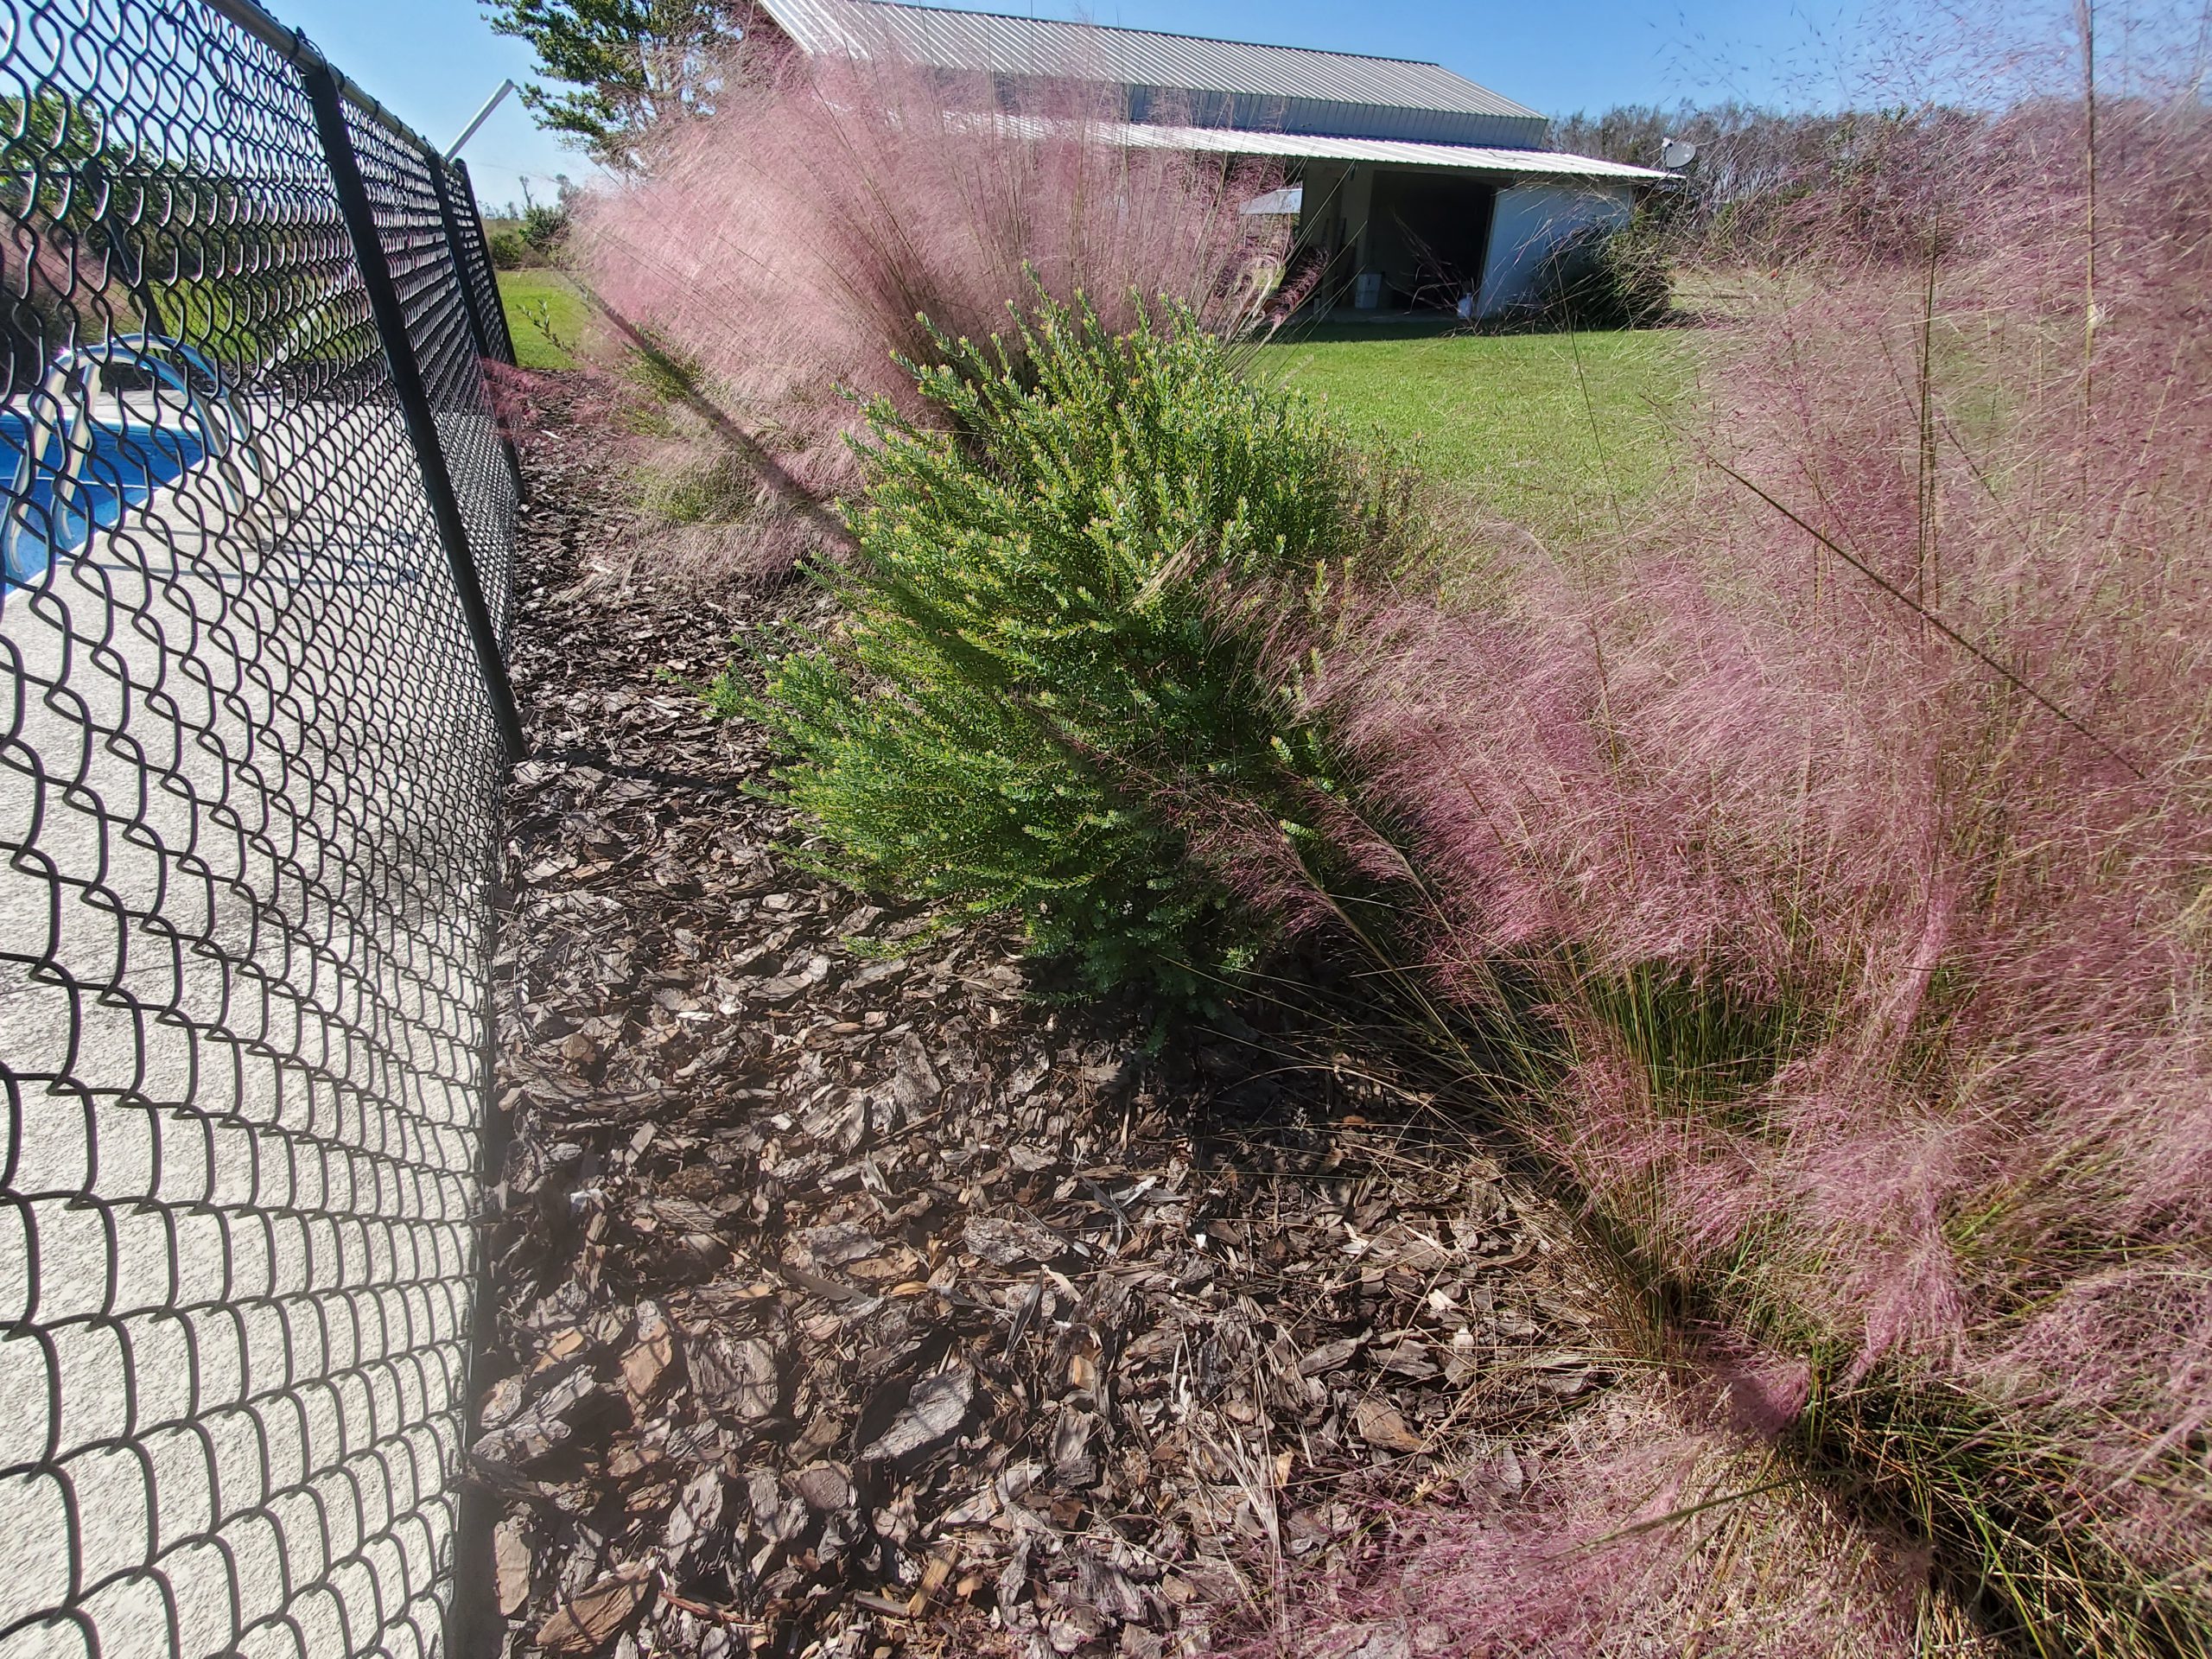
The pink Muhly Grass flowers pair nicely with the green blue foliage of Darrow’s Blueberry. Photo courtesy of Daniel Leonard.
The look has been outstanding, particularly in the late summer/early fall. The pinky purple flowers of Muhly Grass complement the green-blue foliage of the blueberries nicely and provide easy, lasting color without having to worry about planting finicky annuals or perennials each season.
Landscaping with natives does not have to look wild and unkempt, nor does it have to be drab and unattractive. Combining native yet showy plants like Darrow’s Blueberry and Muhly Grass makes for an unusual, refined, nearly no-maintenance feature in your landscape. Look for these and other neat native plants at native nurseries and independent garden centers around the Panhandle. If you’d like more information on native grasses, blueberries or any other horticultural topic, please contact your local UF/IFAS County Extension Office! Happy Gardening!
Daniel Leonard, Horticulture Agent at UF/IFAS Extension Calhoun County, answers commonly asked questions about raised bed gardening. In the video he discusses construction materials, the type of soil to use, fertilization, crop rotation, cover crops, and smaller container gardens.
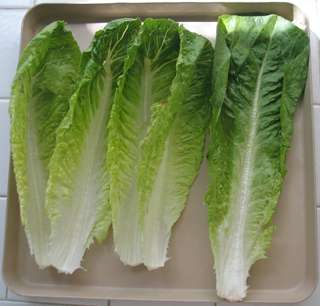
Who doesn’t enjoy a fresh, crisp bowl of salad? Lettuce happens to be a vegetable that is easily grown in Florida for fall & winter gardens. In Florida, four types of lettuce are commonly grown: crisphead, butterhead, leaf, & today’s topic, romaine.
Photo courtesy of Tyler Jones, UF/IFAS.
An interesting, little known fact about romaine lettuce is that it was cultivated extensively by the Roman Empire. By the fourteenth century, the Catholic Hierarchy had moved from Rome to Avignon, France bringing their prized lettuce along with them. During this period, the plant was known as “Avignon” lettuce. In England, romaine is called “cos” lettuce named after the Greek islands from which the lettuce was originally distributed. Of course, in the U.S., the name we give, Romaine, refers to the time when it was grown extensively in the Roman Empire.
Romaine is grown both commercially and in backyard gardens across the state. Like all lettuce, this is a cool season vegetable. September through March is a generally the extent of the growing season. Romaine can be grown from seeds or by transplants. If you are going the seeding route, just remember these seeds are very small and should be sown shallow and in a tight pattern, with 12”-18” row spacing and a light sprinkle of soil over the top. Newly planted seeds may require burlap or straw to help retain soil moisture for successful germination. Once plants reach a few inches in height, rows can be thinned to where plants are 8” apart.
Romaine needs adequate soil moisture throughout the season. Mulching around plants to retain moisture and adding a complete fertilizer such as 8-8-8 will help ensure a good yield. Lettuce is vulnerable to the usual suspects of garden pests. However, gardening in cooler months helps combat that threat.
Romaine lettuce is fun and rewarding to harvest, as well. You can pick a few leaves off a plant or harvest the entire head.
For more information, contact your local UF/IFAS County Extension office.
Supporting information for this article can be found in the UF/IFAS EDIS publication, “Romaine – Lactuca sativa L.” by James M. Stephens, Emeritus Extension Vegetable Crops Specialist, UF/IFAS: https://edis.ifas.ufl.edu/mv125
UF/IFAS Extension is an Equal Opportunity Institution.
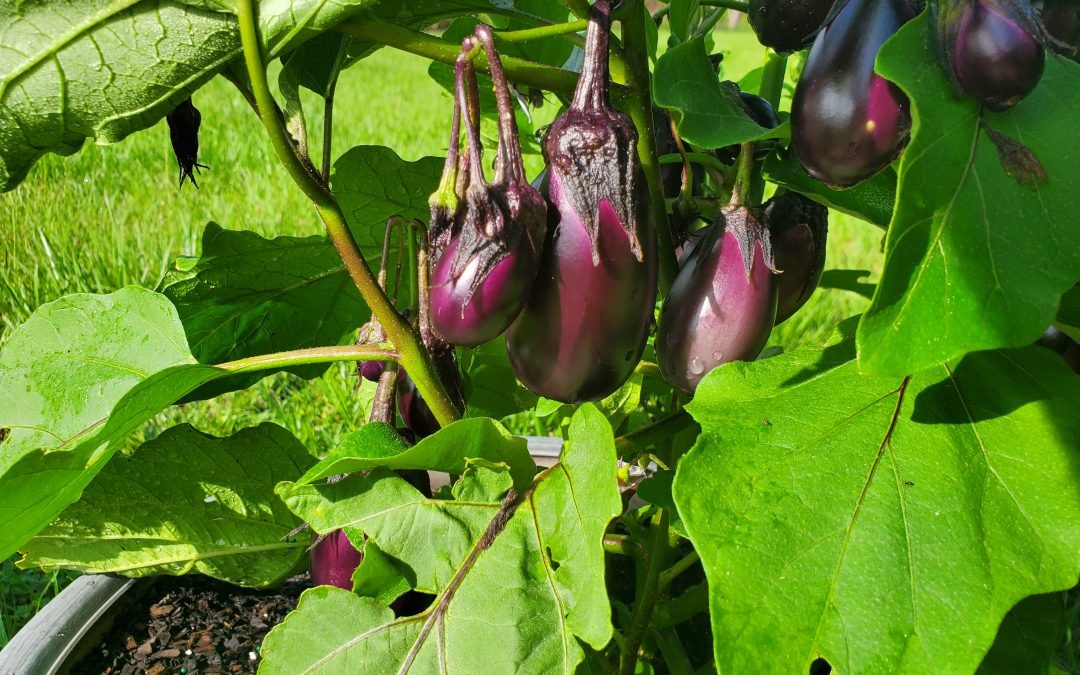
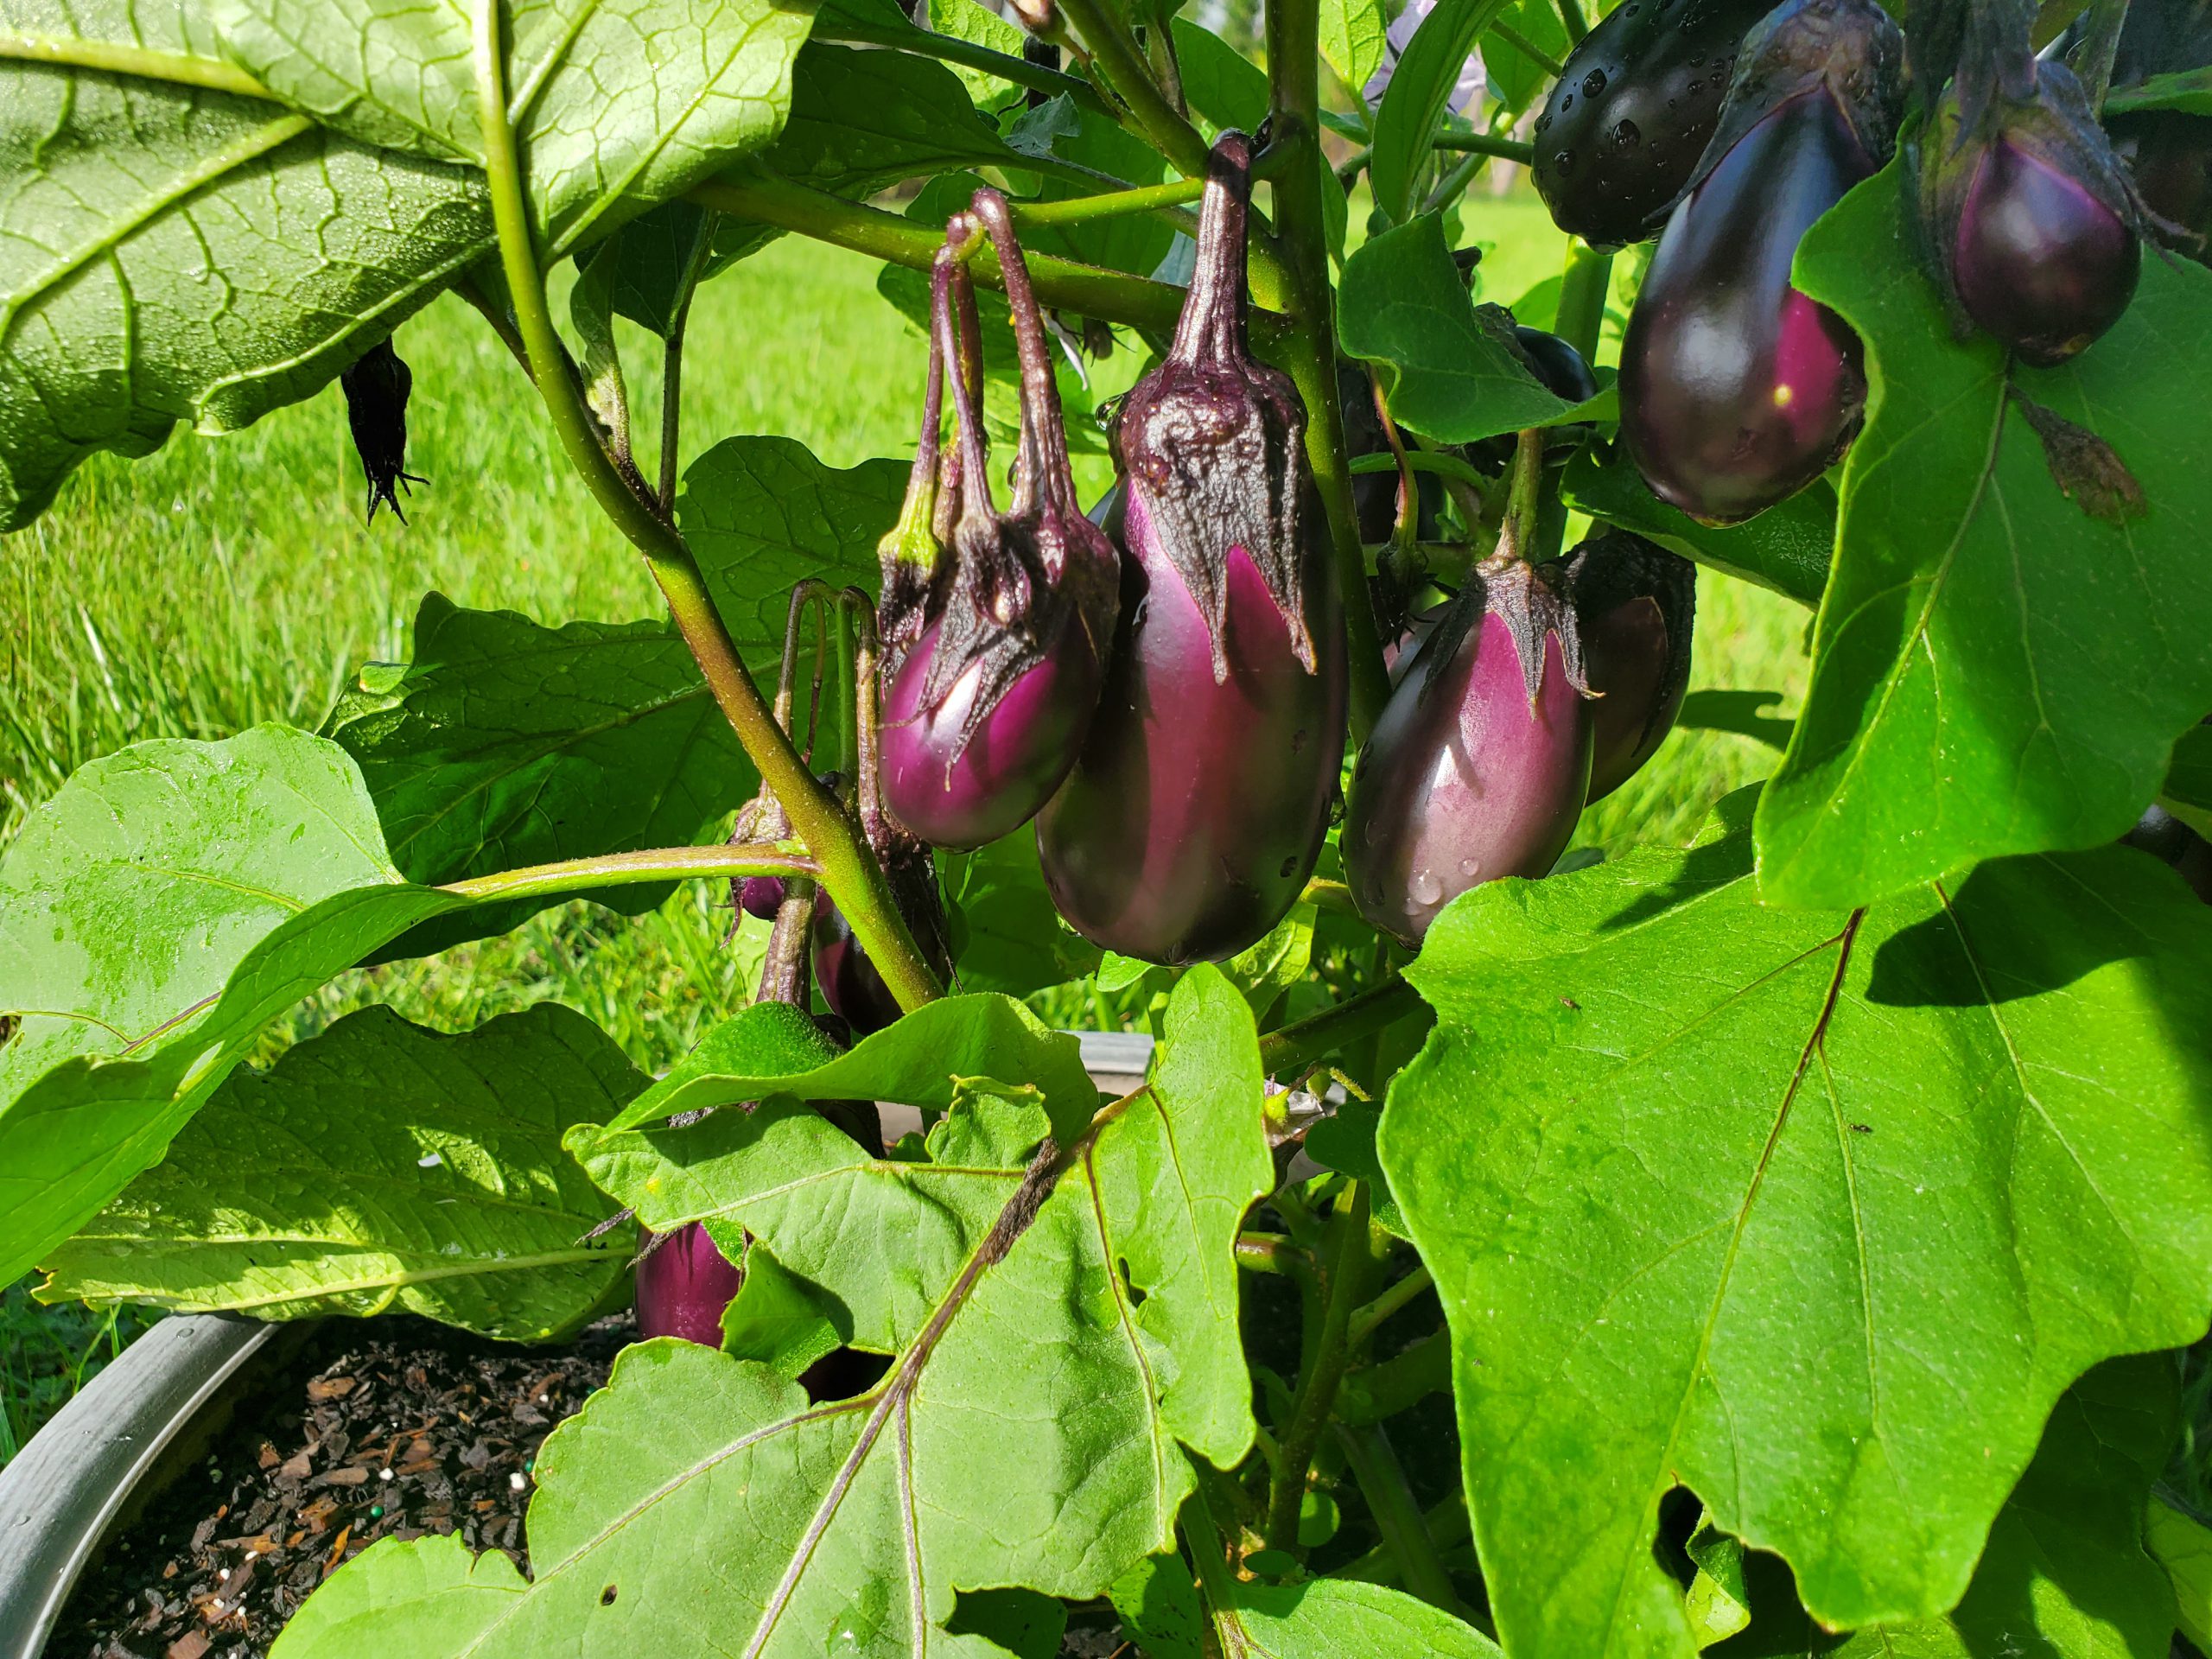
In my ongoing search for low-maintenance vegetable varieties that perform well in small spaces, like my raised bed garden, I decided to try a newish Eggplant variety called ‘Patio Baby’ this summer. Developed by PanAmerican Seed and winner of the 2014 All-American Selections Vegetable- edible category, I was drawn to ‘Patio Baby’ due to the advertising claims made that it was a true miniature variety, perfect for growing in containers, only reaching 20” or so in height and producing both “early” and abundant fruit. I’ve been very pleased with the performance of this extremely unique variety so far in my informal backyard trial and definitely think it deserves consideration in your garden too!
‘Patio Baby’ fruit ready for harvest in September 2020. Photo courtesy of Daniel Leonard.
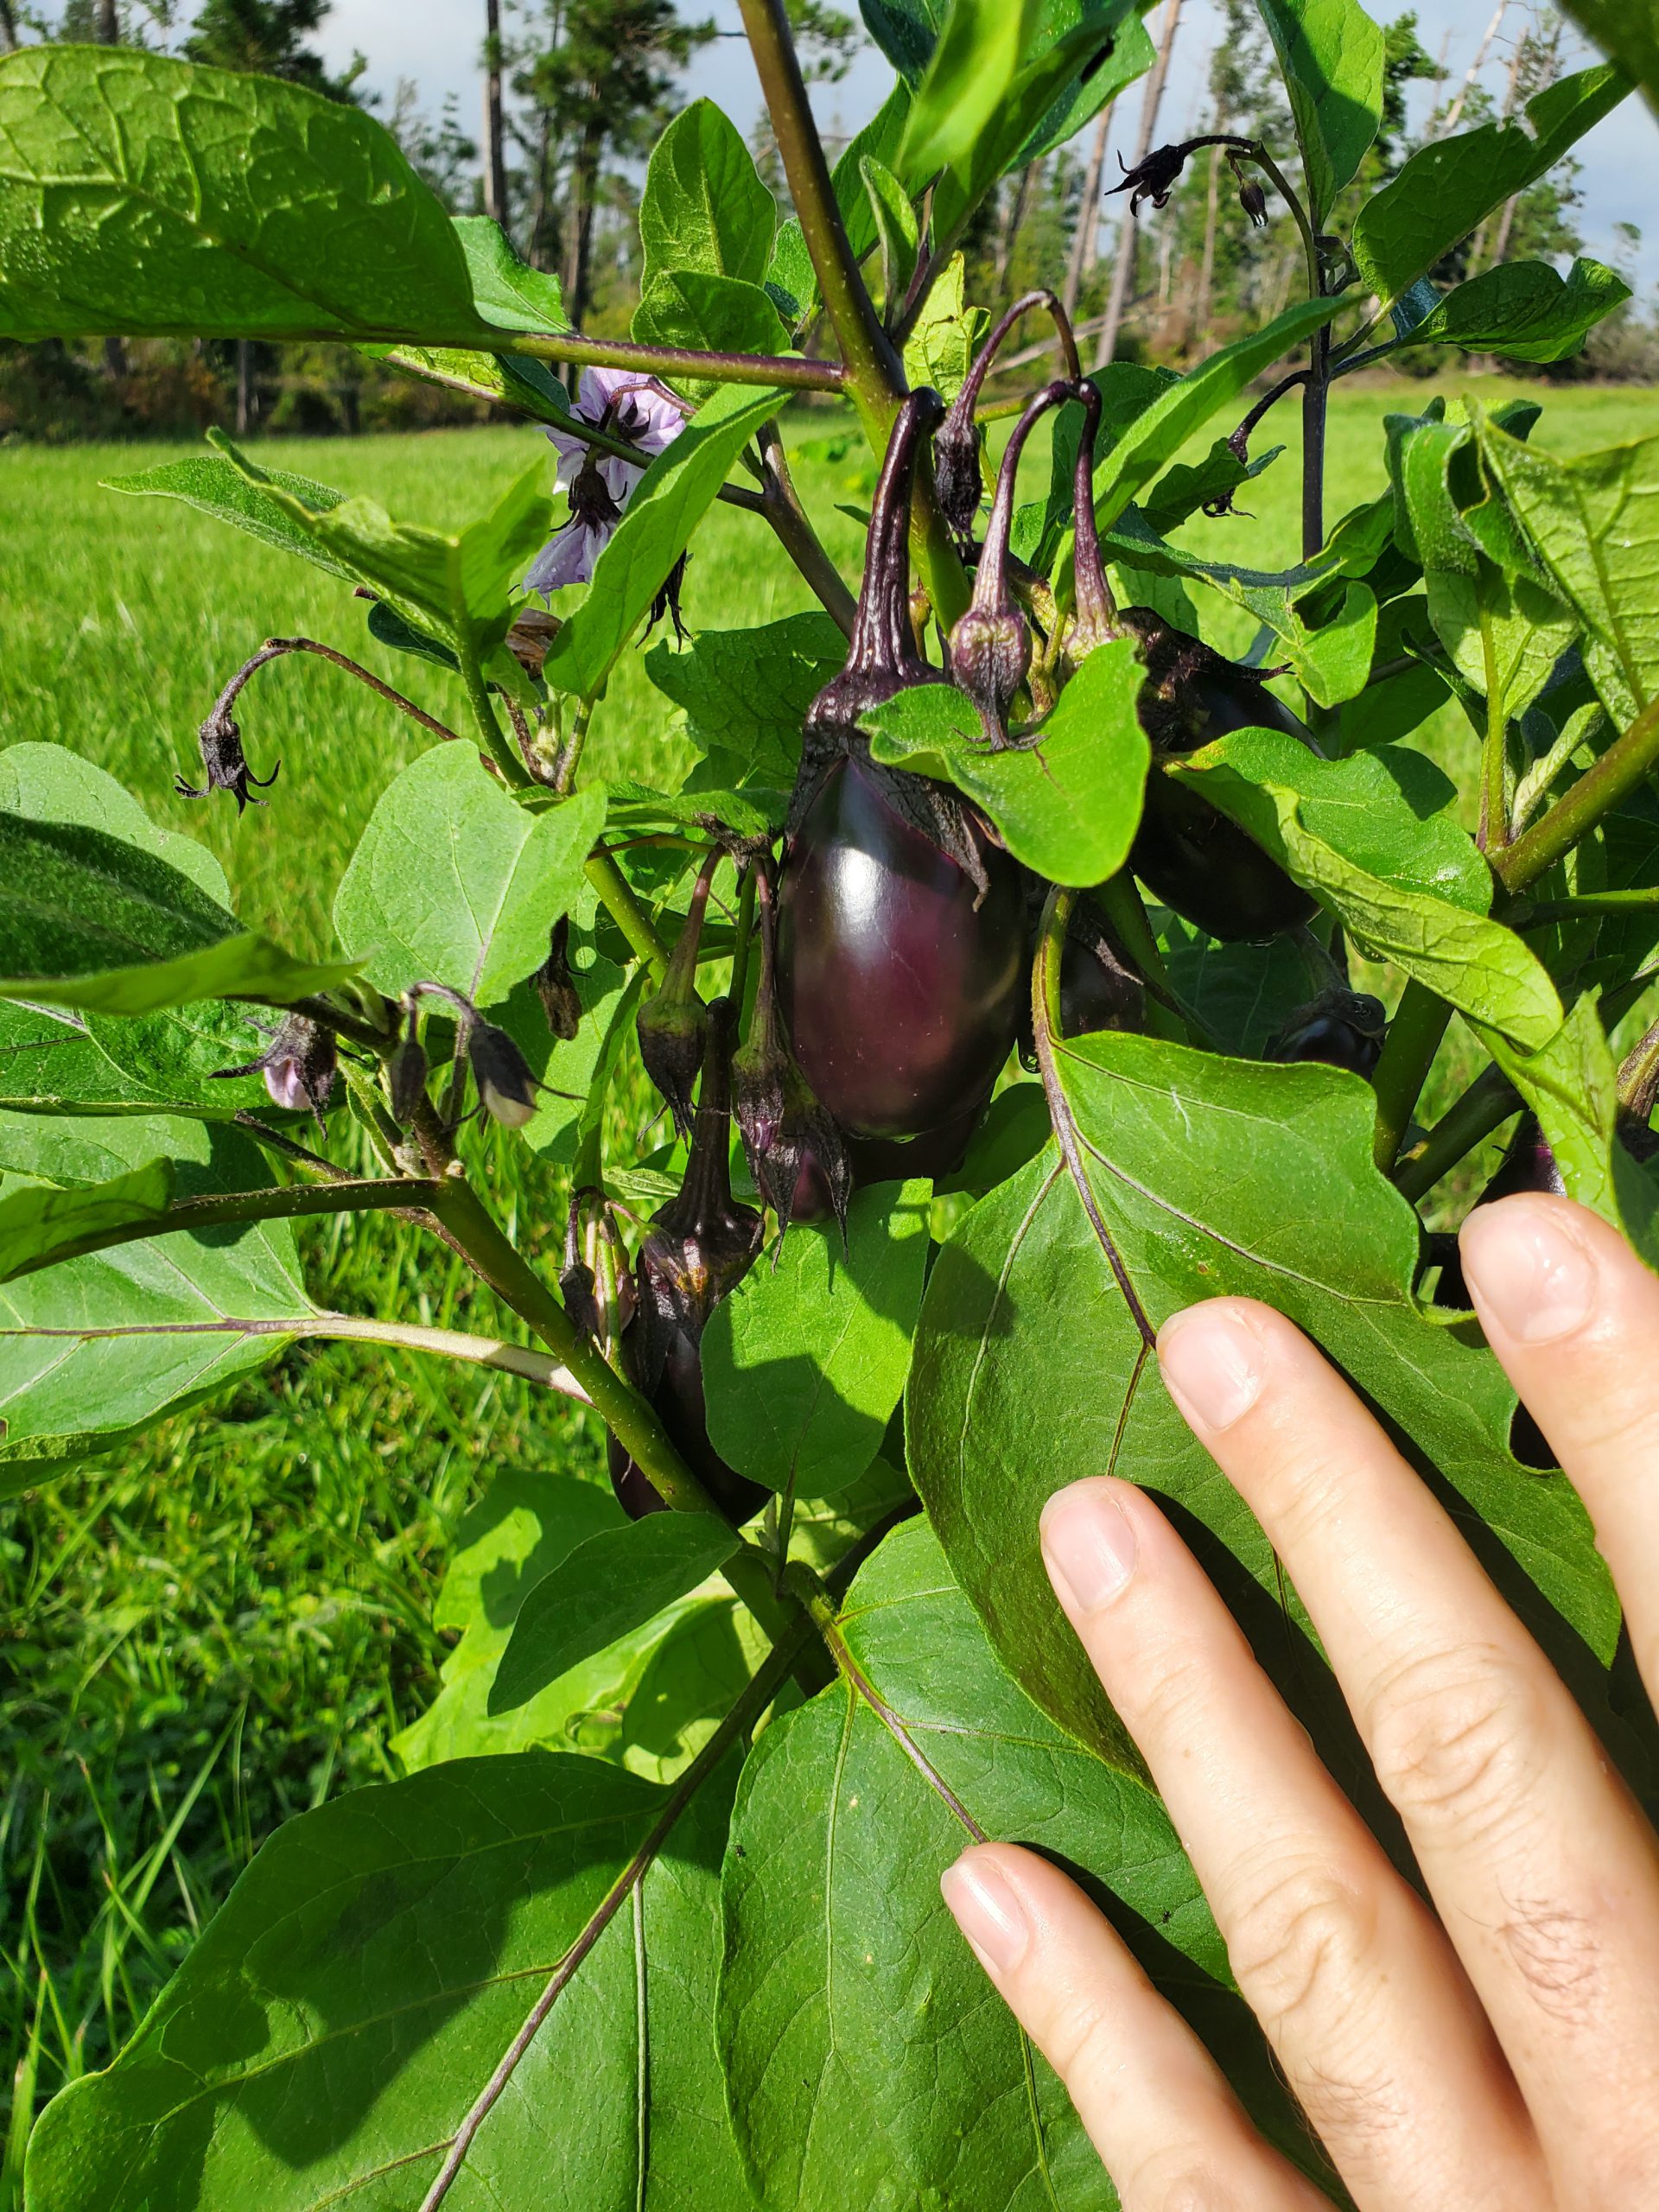
The first observation when seeing a mature ‘Patio Baby’ is how small the plant is, leaves, flowers, fruit, everything. Compared to a standard ‘Black Beauty’ variety, ‘Patio Baby’ plants measure maybe a third as tall and wide. Where a “normal” eggplant fruit might be slightly larger than a softball and often have spines on their calyxes (the green part that connects the purple fruit to the stems), ‘Patio Baby’ fruit are roughly the size of a large chicken egg and totally spineless! I find this smaller plant and fruit size to have several perks. Vegetable plants that grow 2’ tall and wide are just about perfect for raised bed gardening. If you don’t require a large quantity of eggplant, you won’t have to sacrifice an entire bed’s space to ‘Patio Baby’ like you would with the standard varieties. Also, ‘Patio Baby’ fruit won’t bend or break branches and are held strongly on the plants, with no need for staking, another bonus when space is at a premium. Finally, I find it much easier to harvest, handle and prepare the small, spineless ‘Patio Baby’ fruit in the kitchen. Think of them as a “personal pan” eggplant. As I’m the only one in my house who eats much eggplant, I waste a lot less fruit cooking these little guys!
‘Patio Baby’ mature fruit. Standard house key used as a size reference. Photo courtesy of Daniel Leonard.
‘Patio Baby’ Eggplant also lives up to its reputation of being exceedingly easy and quick to grow. I purchased a packet of ‘Patio Baby’ seed from Johnny’s Selected Seeds in June and planted three in a 20” diameter decorative pot next to my raised bed garden during the first week of July, behind summer squash that had recently expired in the heat of late June. After sprouting, the plants grew strongly and, true to form for most Eggplant varieties, were bothered by no serious pest or disease issues other than the normal stinkbugs and occasional caterpillar that plague summer gardens in Florida. Around 8 weeks from sowing seed in the soil, cute, egg-shaped fruit were ready for harvest! Over the next three or four weeks, my single plant produced around 50 of the cute little fruit. More than enough for me and plenty to share, the goal of my gardening endeavors.
‘Patio Baby’ produces lots of fruit in a small package! Photo courtesy of Daniel Leoanrd.
If you’ve run out of space in your raised bed garden, just want a single plant for your back porch or simply want to try a novelty vegetable variety, my experience this summer deems ‘Patio Baby’ Eggplant is an excellent option! For an eggplant that is space-efficient, very early and heavy producing, and comes in a more easily harvestable, kitchen-friendly package, try ‘Patio Baby’. For more information about raised bed gardening, vegetable varieties or any other horticultural topic, contact your local UF/IFAS County Extension Office. Happy Gardening!
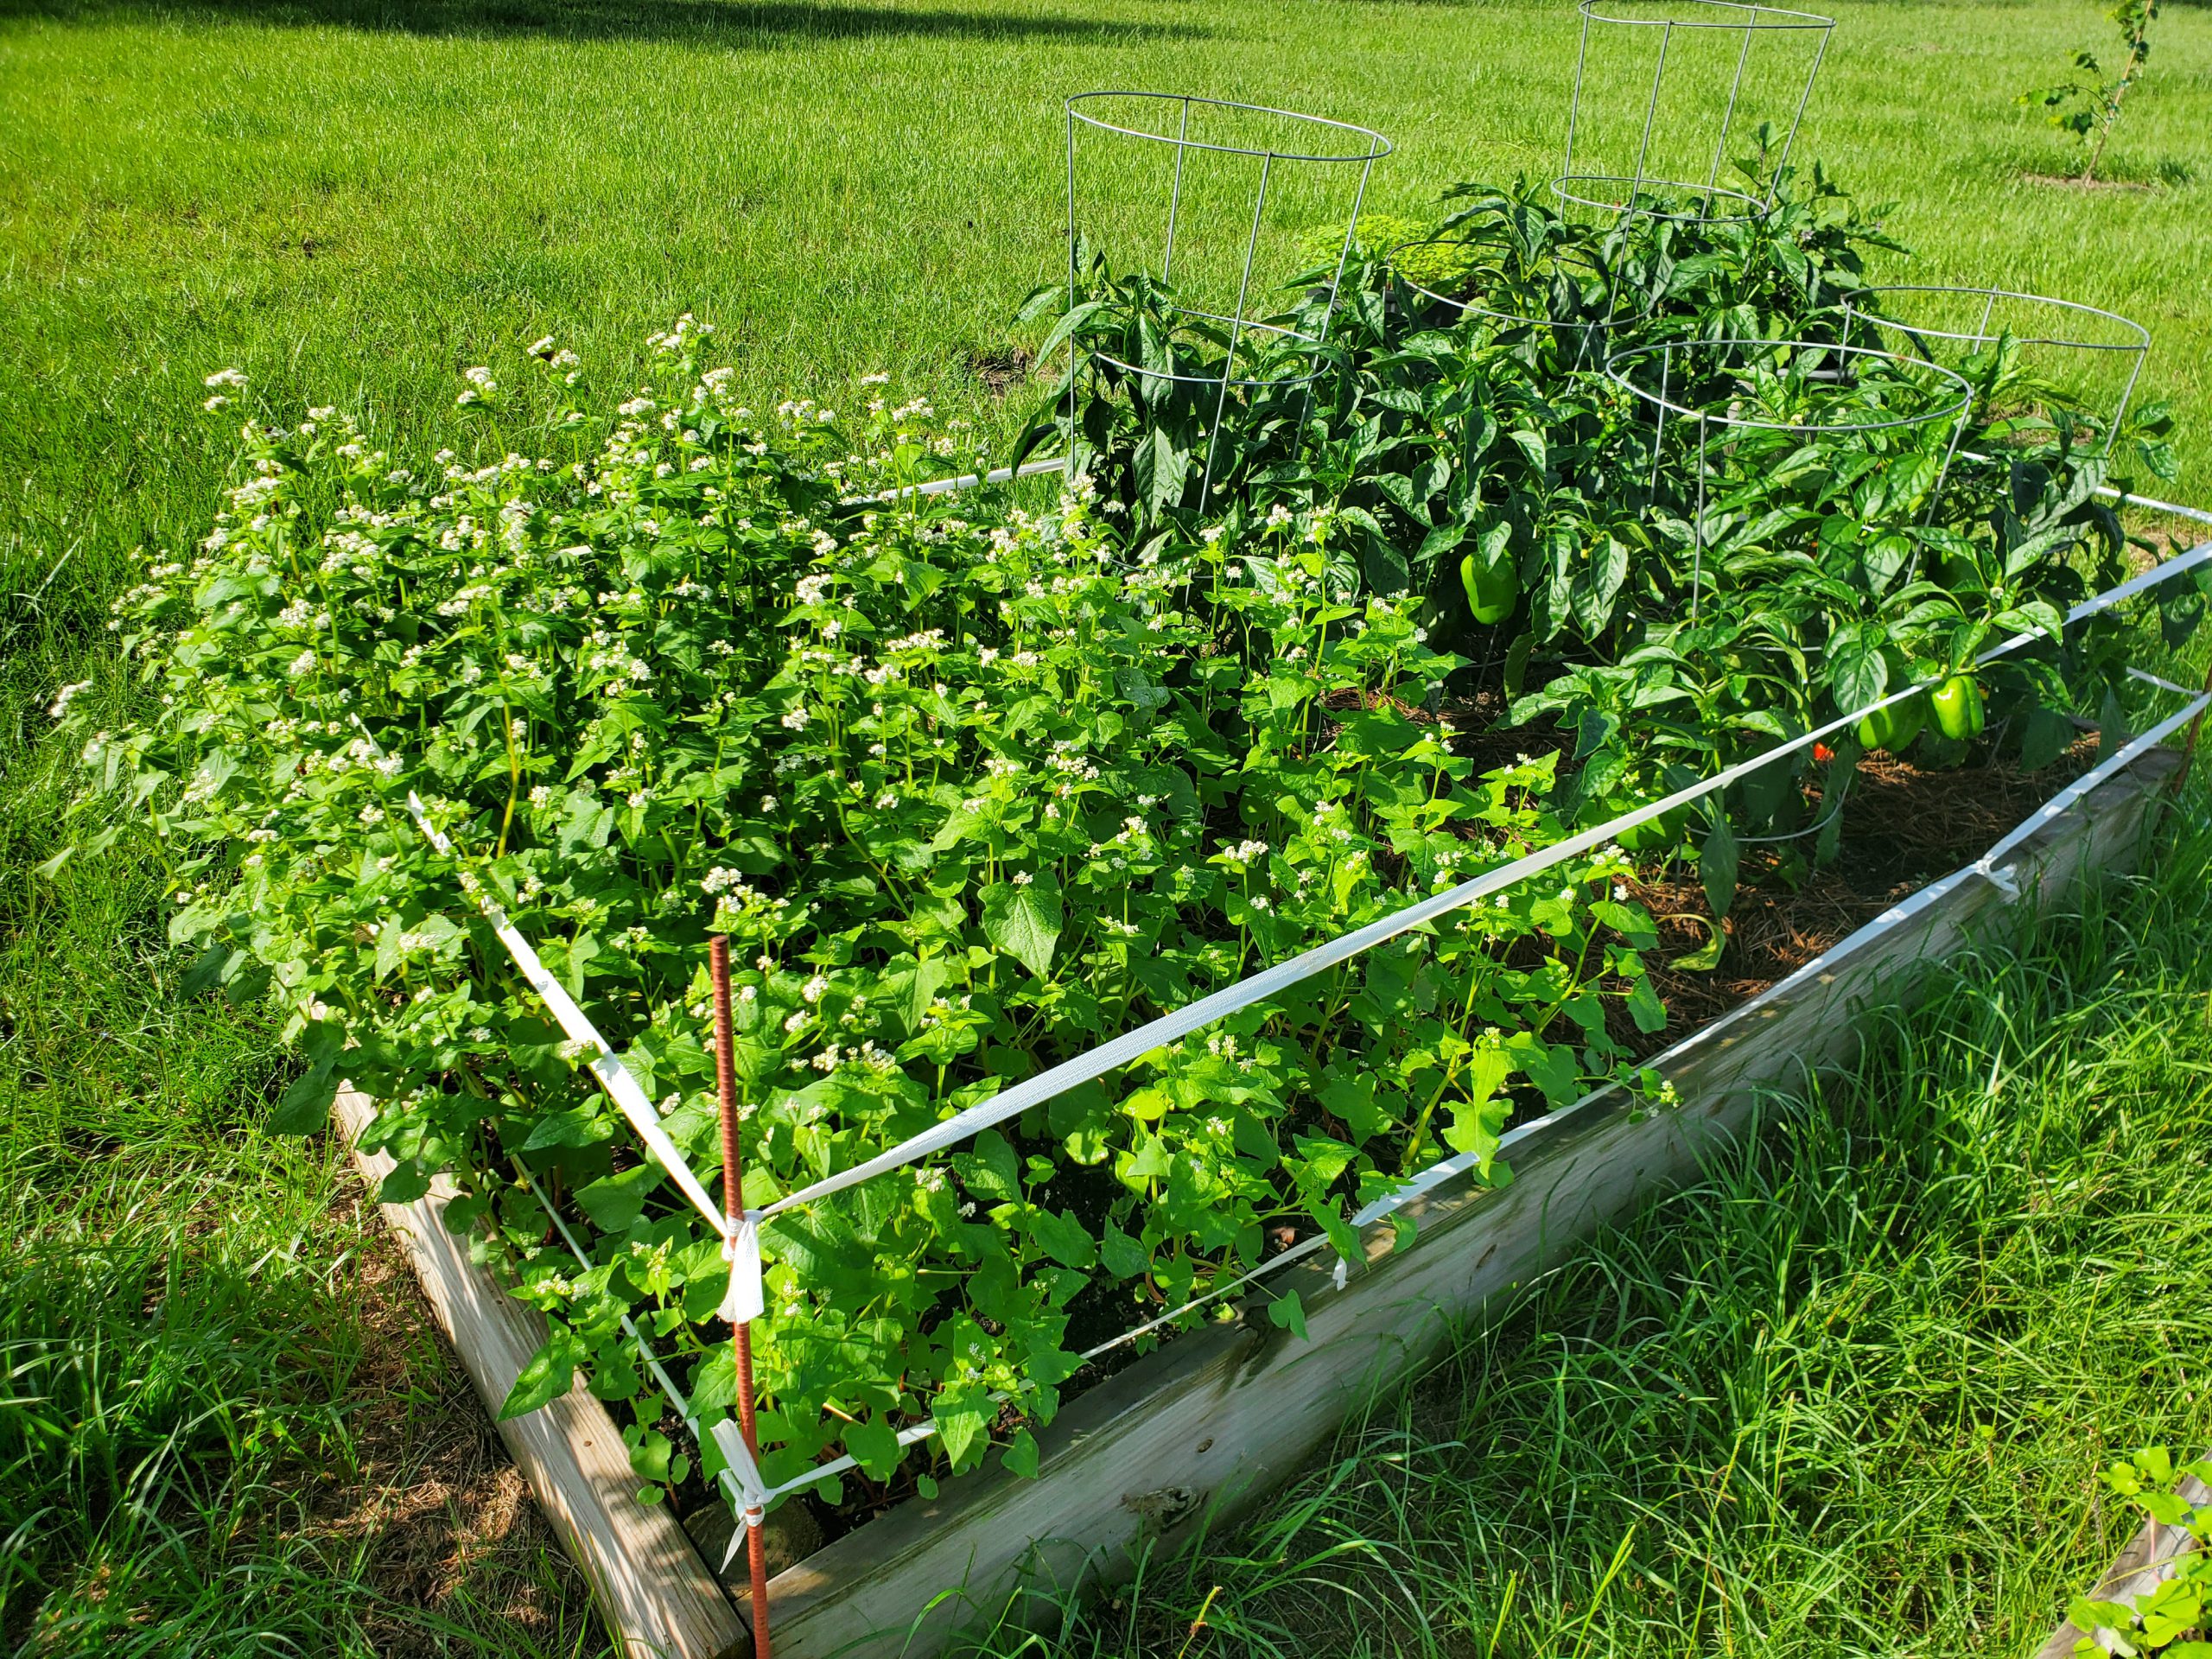
2020 has not been the most pleasant year in many ways. However, one positive experience I’ve had in my raised bed vegetable garden has been the use of a cover crop, Buckwheat (Fagopyrum esculentum)! Use of cover crops, a catch-all term for many species of plants used to “cover” field soil during fallow periods, became popular in agriculture over the last century as a method to protect and build soil in response to the massive wind erosion and cropland degradation event of the 1930s, the Dust Bowl. While wind erosion isn’t a big issue in raised bed gardens, cover crops, like Buckwheat, offer many other services to gardeners:
Buckwheat in flower behind summer squash. Photo courtesy of Daniel Leonard.
Covers, like Buckwheat, provide valuable weed control by shading out the competition. Even after termination (the cutting down or otherwise killing of the cover crop plants and letting them decompose back into the soil as a mulch), Buckwheat continues to keep weeds away, like pinestraw in your landscape.
Cover crops also build soil. This summer, I noticed that my raised beds didn’t “sink” as much as normal. In fact, I actually gained a little nutrient-rich organic matter! By having the Buckwheat shade the soil and then compost back into it, I mostly avoided the phenomena that causes soils high in organic matter, particularly ones exposed to the sun, to disappear over time due to breakdown by microorganisms.
Many cover crops are awesome attractors of pollinators and beneficial insects. At any given time while my Buckwheat cover was flowering, I could spot several wasp species, various bees, flies, moths, true bugs, and even a butterfly or two hovering around the tiny white flowers sipping nectar.
Covers are a lot prettier than bare soil and weeds! Where I would normally just have either exposed black compost or a healthy weed population to gaze upon, Buckwheat provided a quick bright green color blast that then became covered with non-stop white flowers. I’ll take that over bare soil any day.
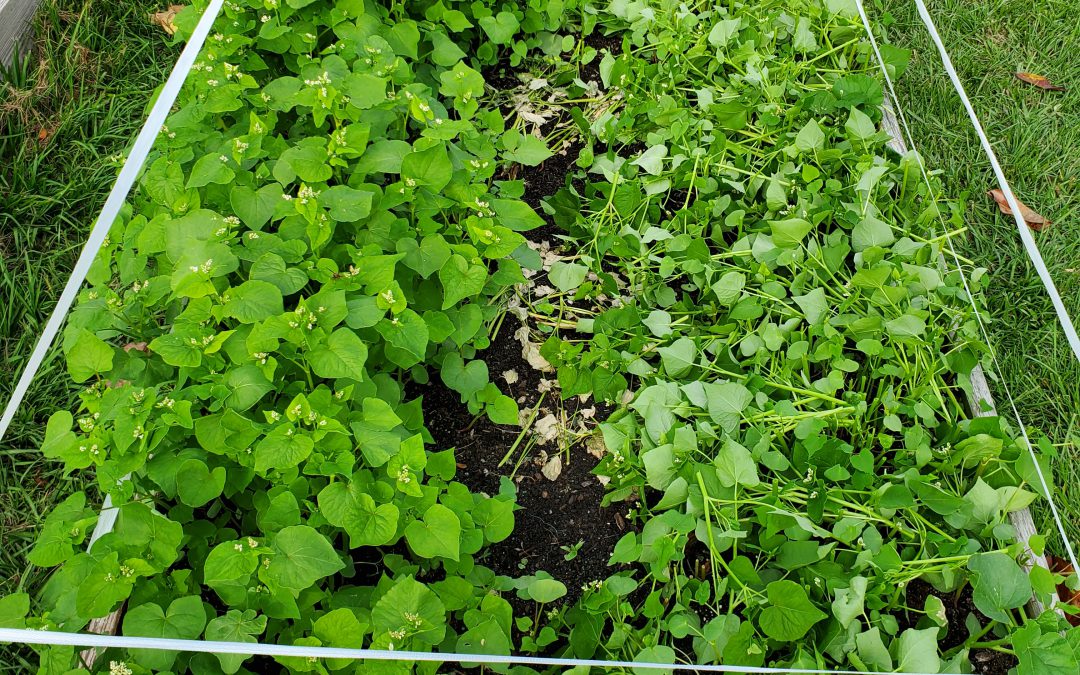
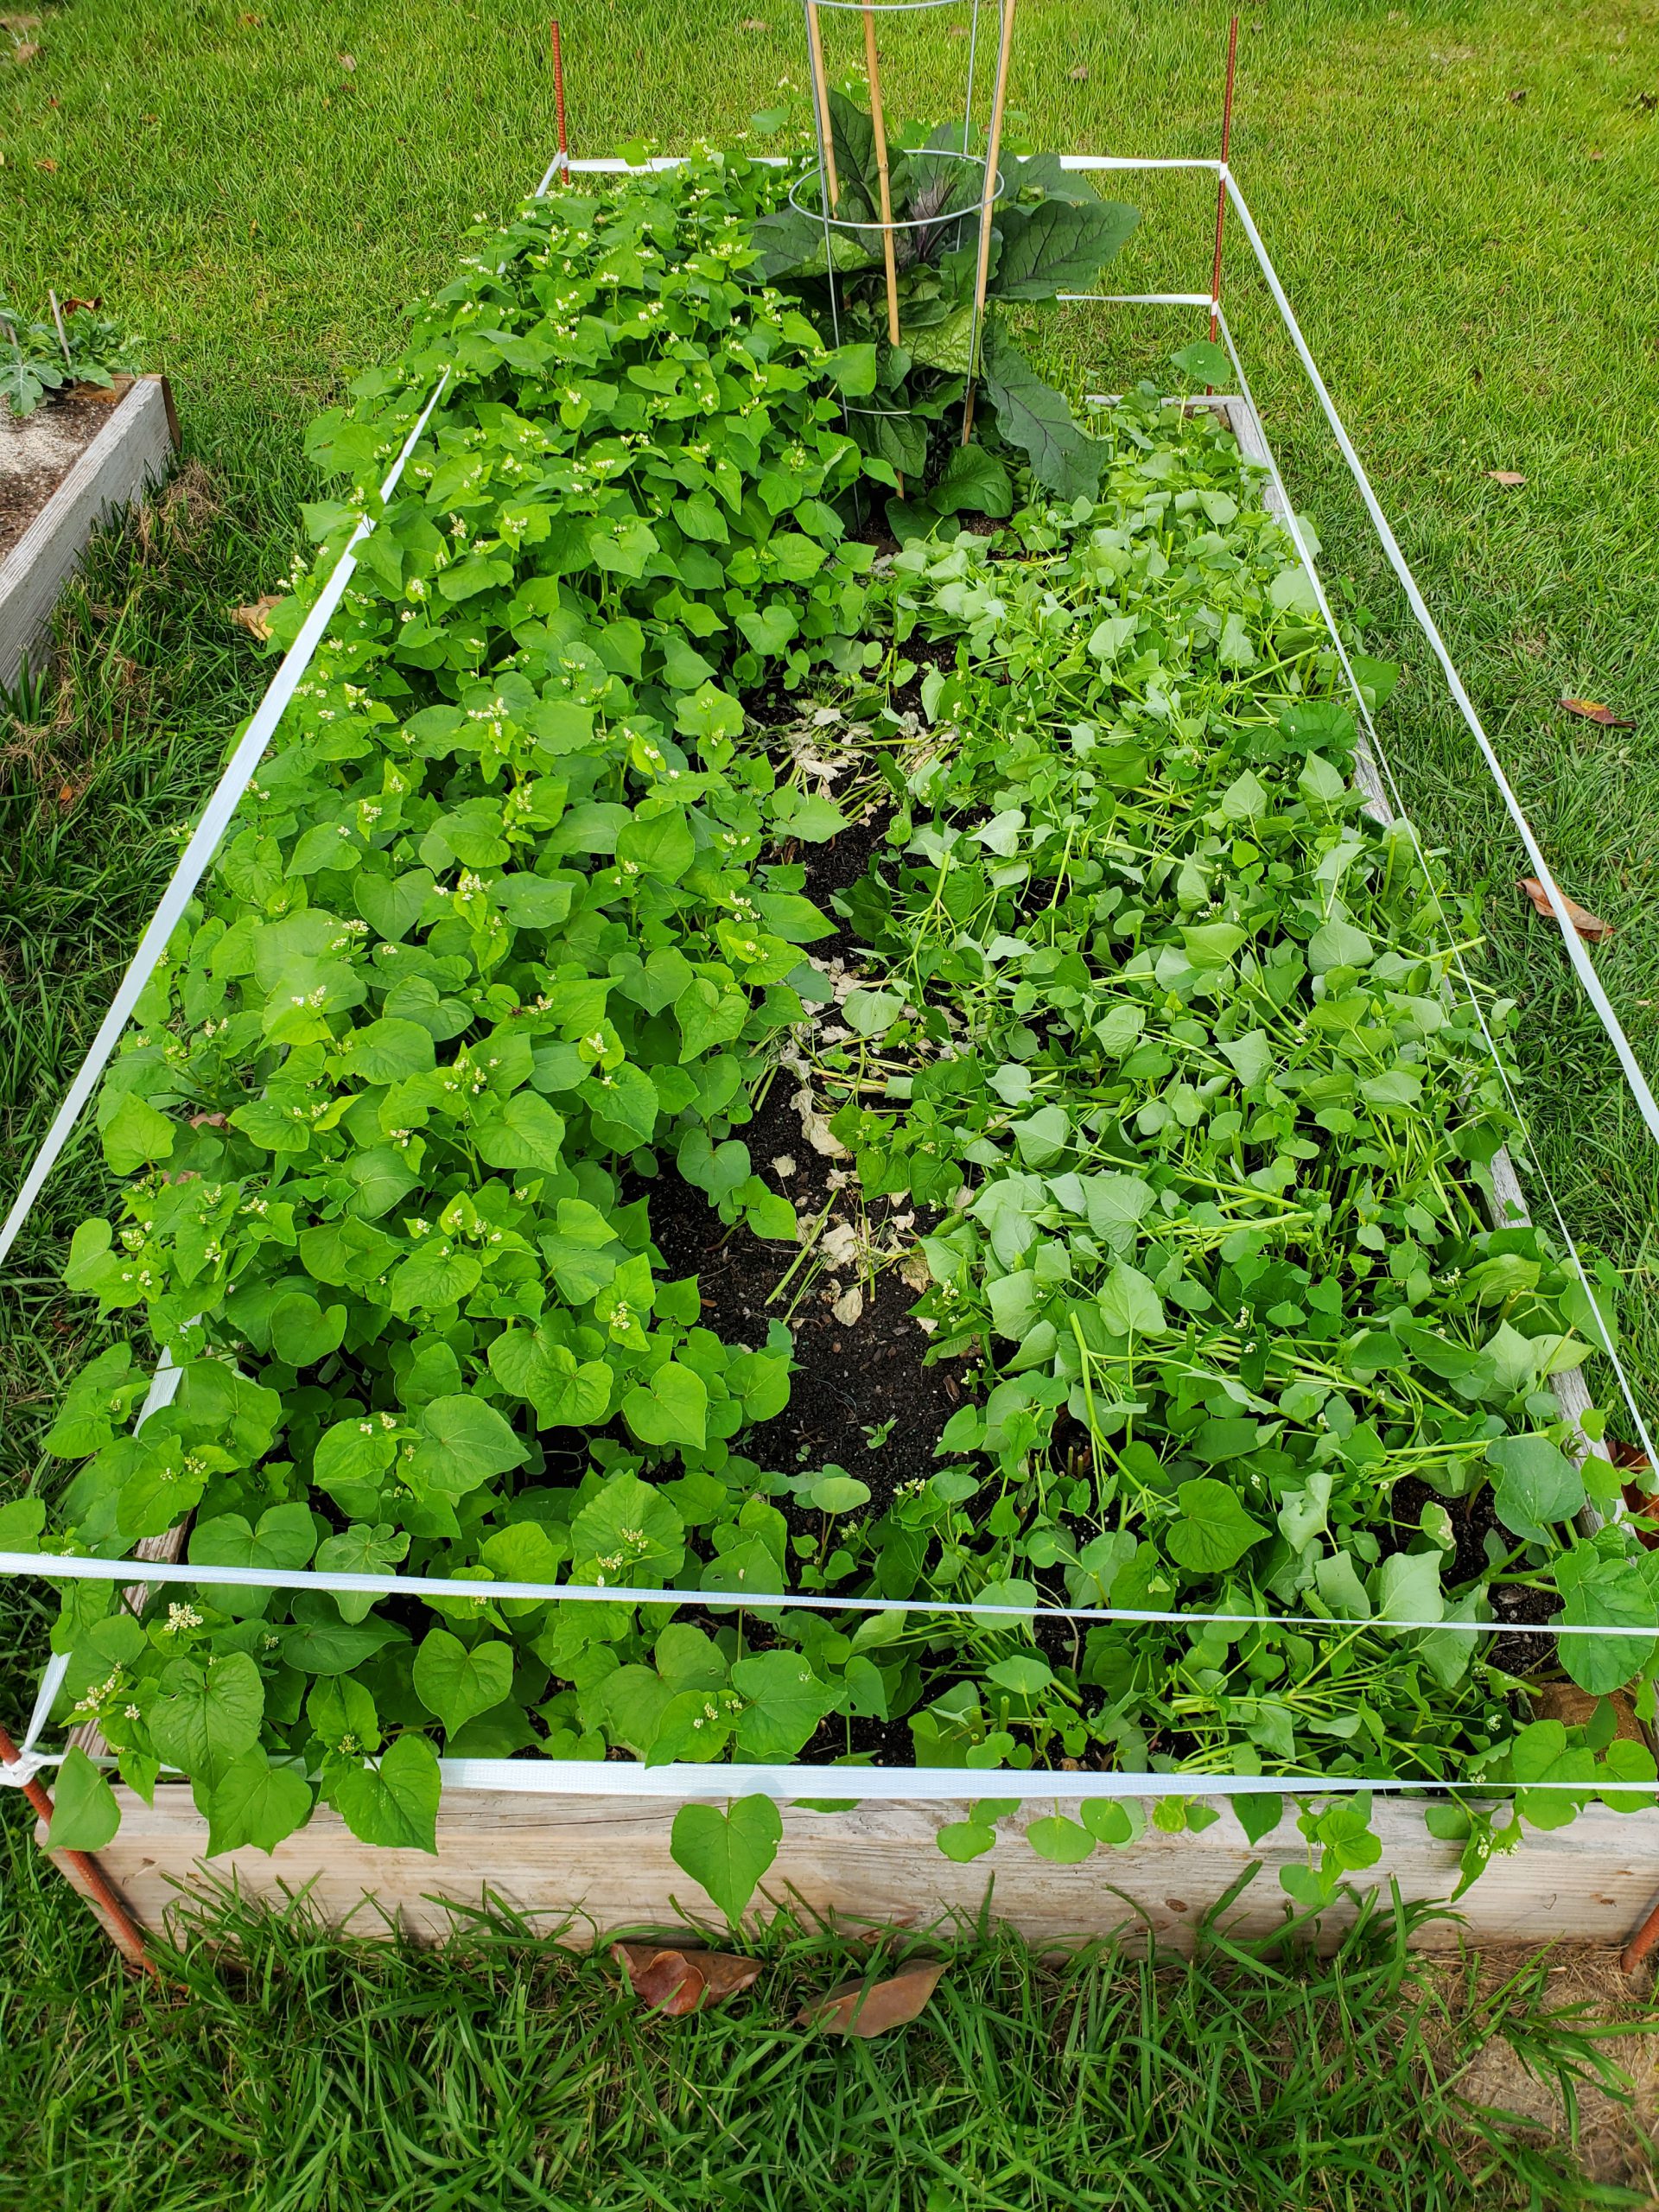
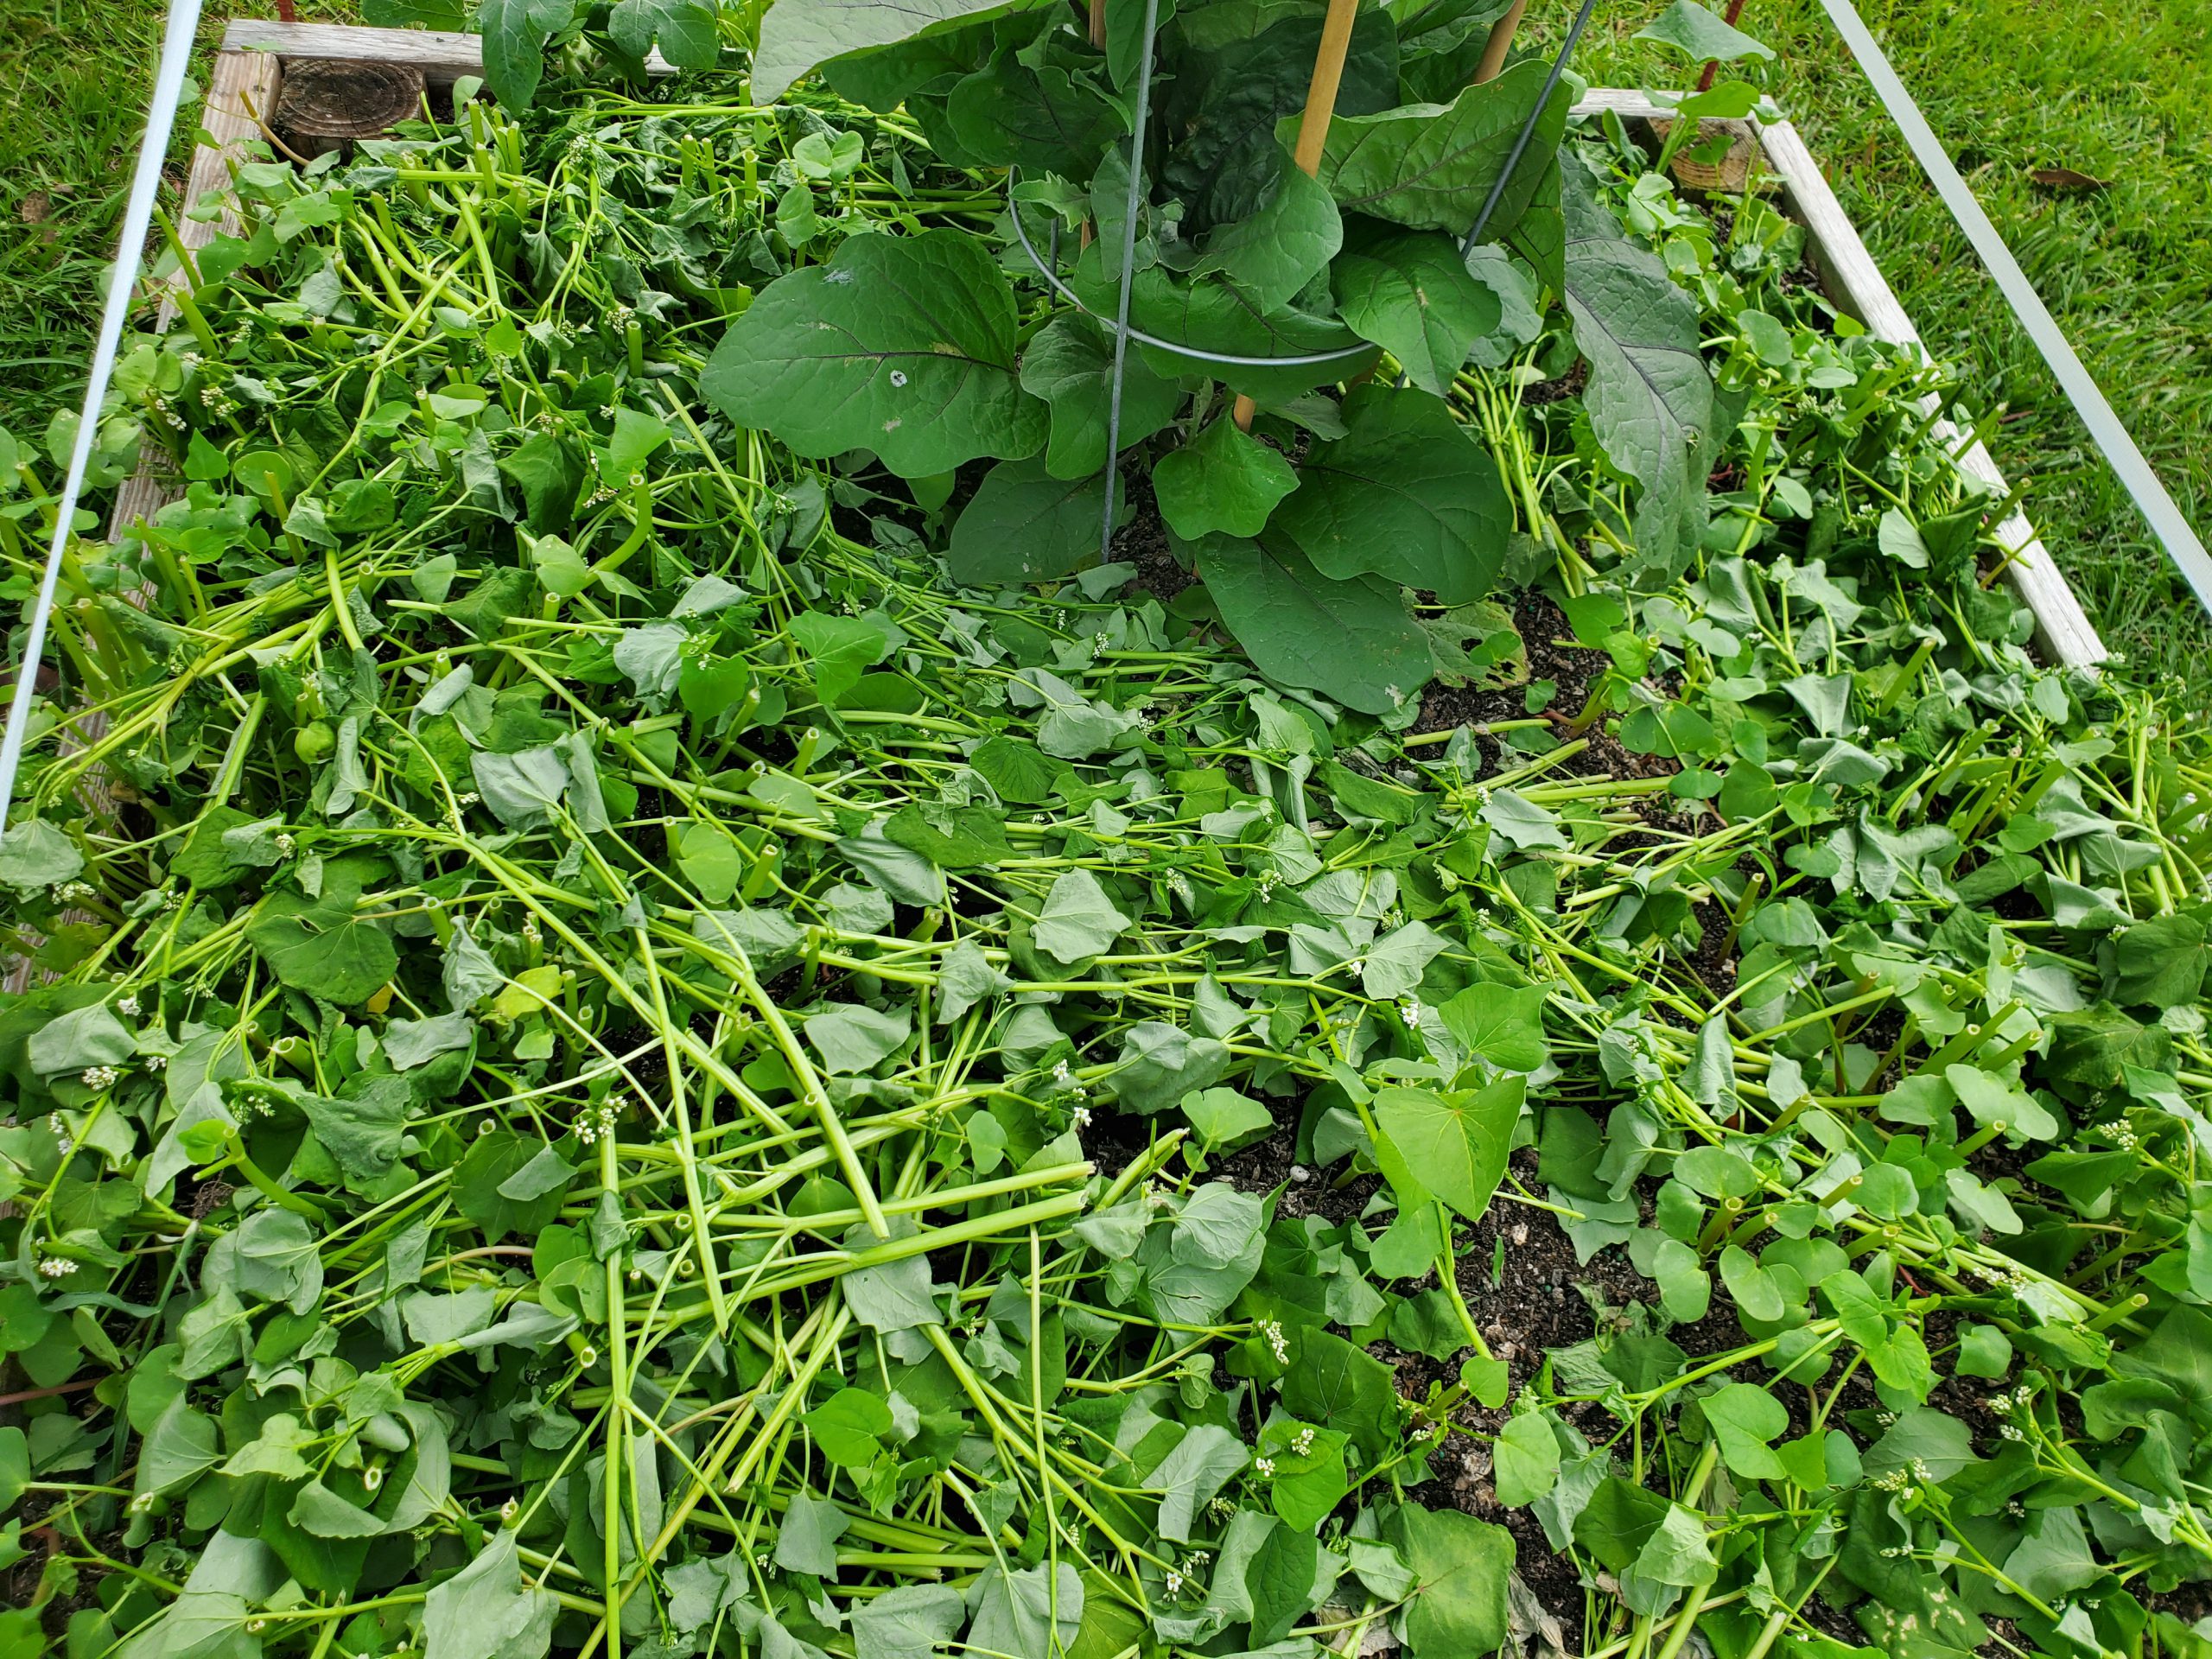
Buckwheat cover before termination (left) and after (right) interplanted with Eggplant. Photo courtesy Daniel Leonard, UF/IFAS Calhoun County Extension.
Now that I’ve convinced you of Buckwheat’s raised bed cover crop merits, let’s talk technical and learn how and when to grow it. Buckwheat seed is easily found and can be bought in nearly any quantity. I bought a one-pound bag online from Johnny’s Selected Seeds for my raised beds, but you can also purchase larger sizes up to 50 lb bags if you have a large area to cover. Buckwheat seed germinates quickly as soon as nights are warmer than 50 degrees F and can be cropped continuously until frost strikes in the fall. A general seeding rate of 2 or 3 lbs/1000 square feet (enough to cover about thirty 4’x8’ raised beds, it goes a long way!) will generate a thick cover. Simply extrapolate this out to 50-80 lbs/acre for larger garden sites. I scattered seeds over the top of my beds at the above rate and covered lightly with garden soil and obtained good results. Unlike other cover crops (I’m looking at you Crimson Clover) Buckwheat is very tolerant of imperfect planting depths. If you plant a little deep, it will generally still come up. A bonus, no additional fertilizer is required to grow a Buckwheat cover in the garden, the leftover nutrients from the previous vegetable crop will normally be sufficient!
Buckwheat “mulch” after termination. Photo courtesy of Daniel Leonard, UF/IFAS Calhoun County Extension.
Past the usual cover crop benefits, the thing that makes Buckwheat stand out among its peers as a garden cover is its extremely rapid growth and short life span. From seed sowing to termination, a Buckwheat cover is only in the garden for 4-8 weeks, depending on what you want to use it for. After four weeks, you’ll have a quick, thick cover and subsequent mulch once terminated. After eight weeks or so, you’ll realize the plant’s full flowering and beneficial/pollinator insect attracting potential. This lends great flexibility as to when it can be planted. Have your winter greens quit on you but you’re not quite ready to set out tomatoes? Plant a quick Buckwheat cover! Yellow squash wilting in the heat of summer but it’s not quite time yet for the fall garden? Plant a Buckwheat cover and tend it the rest of the summer! Followed spacing guidelines and only planted three Eggplant transplants in a 4’x8’ raised bed and have lots of open space for weeds to grow until the Eggplant fills in? Plant a Buckwheat cover and terminate before it begins to compete with the Eggplant!
If a soil building, weed suppressing, beneficial insect attracting, gorgeous cover crop for those fallow garden spots sounds like something you might like, plant a little Buckwheat! For more information on Buckwheat, cover crops, or any other gardening topic, contact your local UF/IFAS County Extension Office. Happy Gardening!