by Beth Bolles | Feb 5, 2019
Are you a patient gardener? If not, try you hand at growing microgreens. Why wait for at least a month or so for a harvest when you can enjoy fresh greens in as little as 7 days.
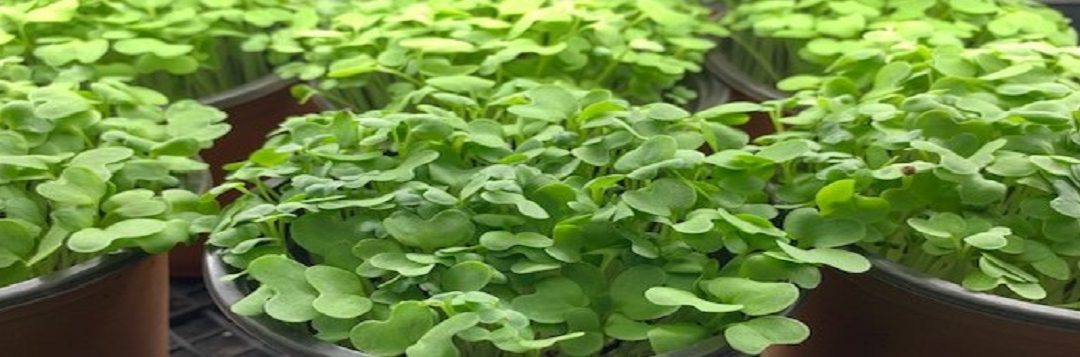
Microgreens are the tender seedlings of your favorite vegetable or herb. They are grown in containers or flats and harvested when the first seed leaves are fully emerged. You may also wait until you see the first true leaf. Unlike sprouts, microgreens require light and are cut when harvesting to only include the stem and leaves. Depending on the seeds you start, you may enjoy mild or spicy greens, or refreshing lemony flavors of a young herb.

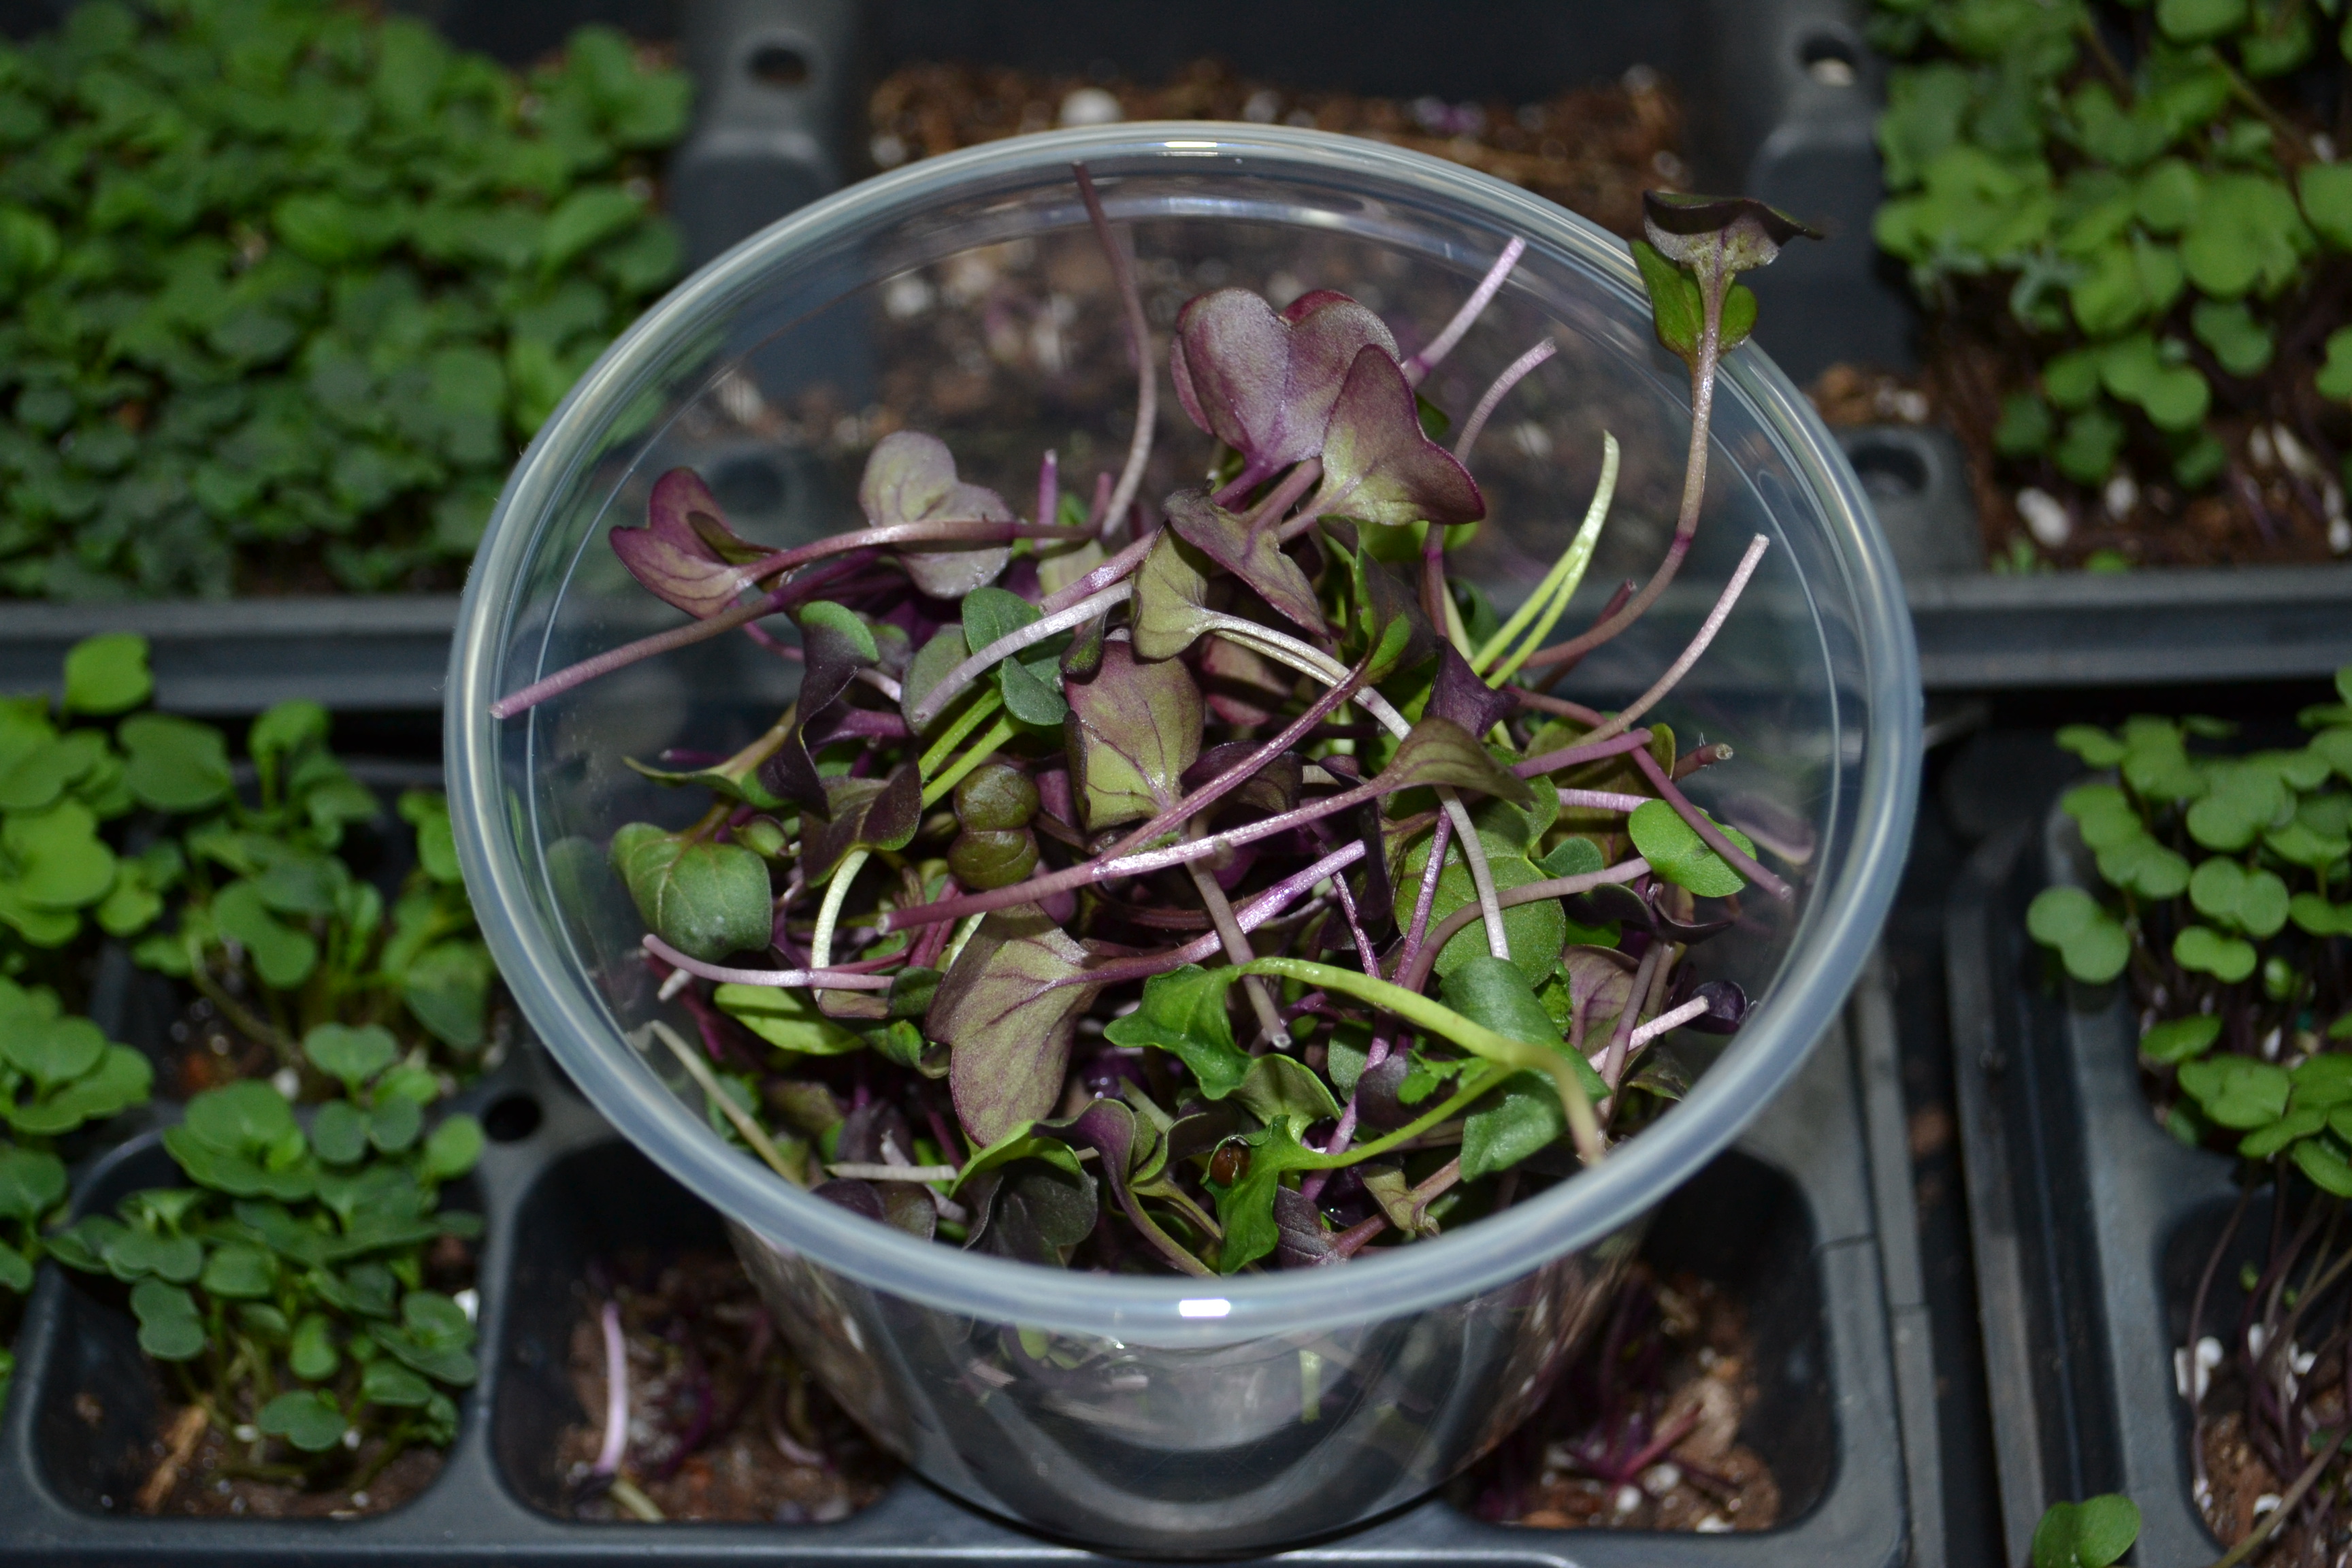
Microgreens can offer beautiful colors for your dish. Photo by Beth Bolles, UF IFAS Extension Escambia County.
Here are the basic steps to get started growing microgreens.
- Get a commercial tray or recycled container and sterilize it in a 10% bleach solution. Make sure your recycled containers have drainage holes.
- Choose a good seed starting potting mix that is more fine textured. Many seeds you will start are small and a mix with a lot of bark may affect seedling germination. Add one to 1.5 inches of the soil in your container. You don’t need more depth of soil since you will be harvesting in a week to 20 days.
- Decide which types of greens you like. Consider arugula, radish, mizuna, or mustard for some spice. Swiss chard and purple cabbage will give you color, while collards, broccoli, and kale will offer mild flavors. Don’t forget about herbs like dill, cilantro, or basil for good flavors too.
- Once you have chosen your seed, beginners should seed one selection per container. As you learn the growth rate of your favorite selection, you may can combine different varieties in a flat.
- Make sure your soil is moistened (but not soaking) and spread seed on top of the soil. You will be adding about 12 seeds per square inch of soil for small seeds and about 7 seeds per square inch for larger seeds.
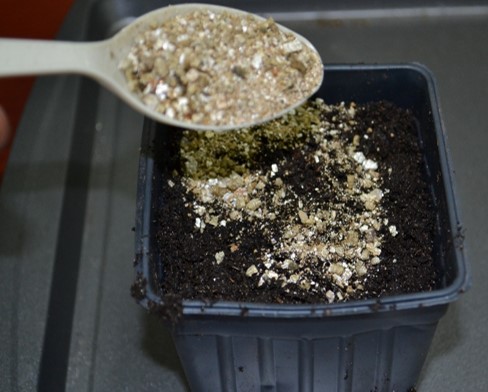
- Sprinkle vermiculite over the seeds and then use a spray bottle or nozzle mister to moisten the vermiculite.
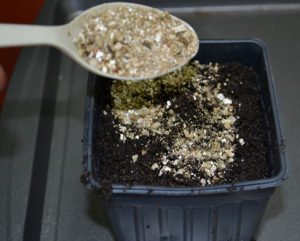
Vermiculite allows moisture to get to seeds and may reduce seedling disease pressures. Photo by Beth Bolles, UF IFAS Extension Escambia County
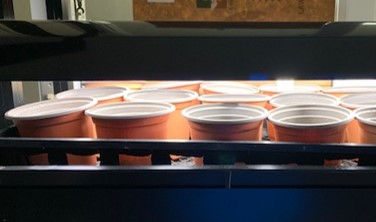
- Place containers in a greenhouse, window sill, or indoor growing tray. As soon as the seeds germinate, make sure they are receiving bright light. If growing indoors, the fluorescent or plant lights need to be a few inches above seedlings. Move the lights higher as your seedlings grow.

New seedlings need bright light. Indoor lights that are 2-3 inches from seedlings prevent thin, spindly stems. Photo by Beth Bolles, UF IFAS Extension Escambia County
- Maintain a room temperature of about 70 degrees F. Temperatures above 75 degrees F can lead to disease issues
- It is also best to water from the bottom to prevent disease issues. If this is not possible, carefully water seedlings so not to injure delicate plants.
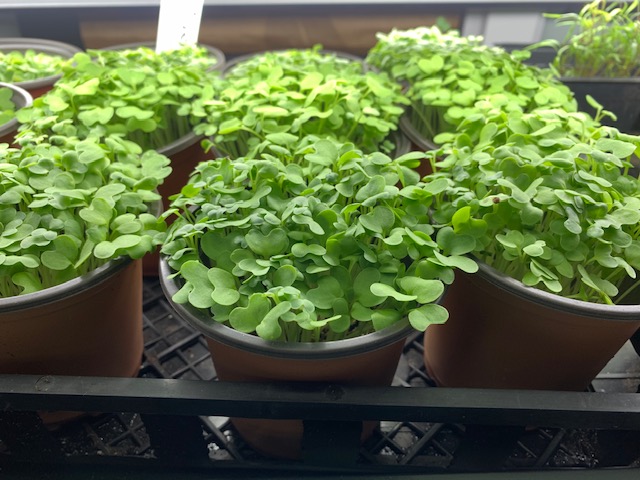
- Radish and kale will be ready for harvest in about 7 days. Swiss chard, basils, and cilantro may take 20 days.
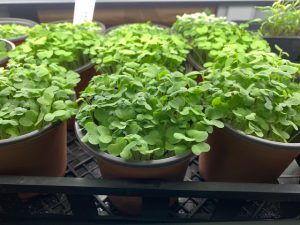
Microgreens are ready to harvest. Photo by Beth Bolles, UF IFAS Extension Escambia County
- Use clean scissors to cut stems, careful not to pull up any soil. Remaining soil and roots can be composted.
- When you are ready to use in a salad, sandwich or in juicing, place microgreens in a bowl of water to wash. Let them air dry on a paper towel.
The good news about growing microgreens, is if you find they are not to your liking or too much trouble, you it has only been a couple of weeks of effort.
by Matt Lollar | Dec 14, 2017

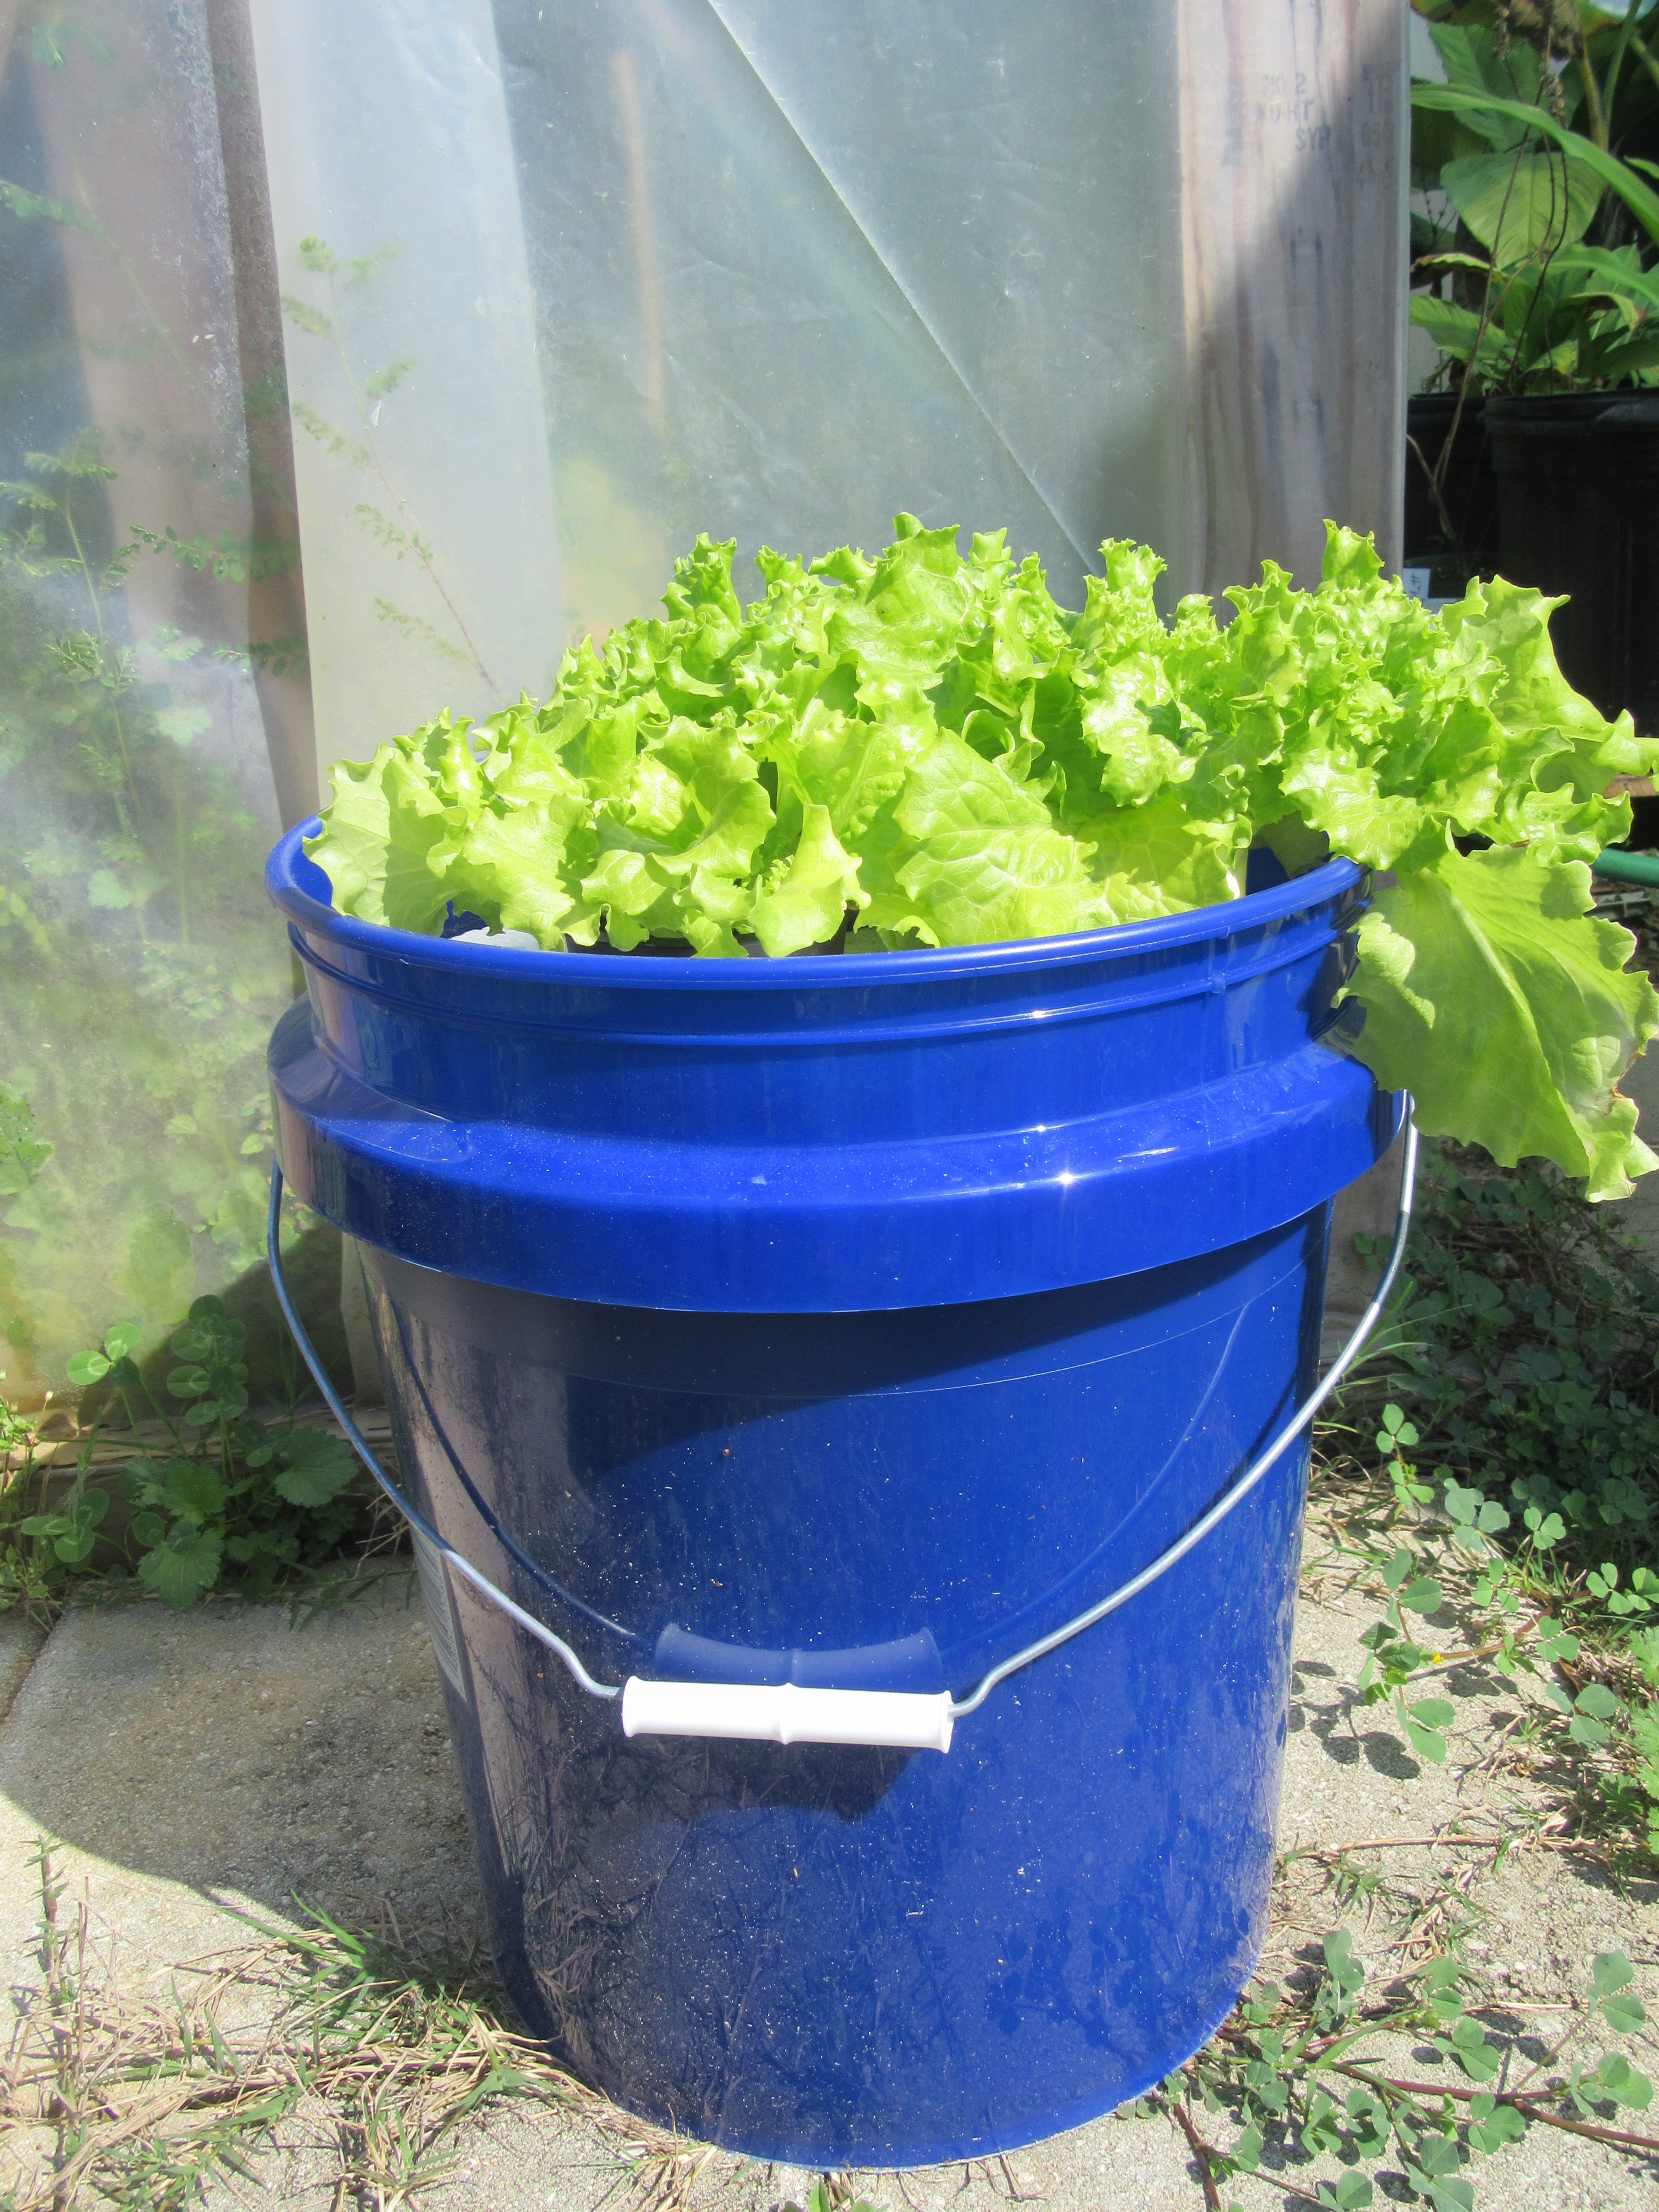
Leaf lettuce growing in a floating hydroponic system. Photo Credit: University of Florida/IFAS Extension.
Christmas is just around the corner and what better gift could you give other than the gift that keeps on giving…a hydroponic bucket garden! Floating hydroponic gardens are easy to build with supplies found at just about any home and garden center. A simple garden can be constructed with a 5-Gallon bucket, polystyrene foam board insulation, and “net pots” or other suitable containers to support the plants. Leaf lettuce and herbs are suitable plants for growing in a floating garden and will grow well indoors as long as there is plenty of natural light available.
SUPPLIES
- 5-Gallon Bucket
- Polystyrene Foam (1½ inch or thicker)
- Water
- Water-Soluble Fertilizer (10-10-10, 20-20-20, 24-8-16, or similar grade)
- Epson Salts (magnesium sulfate)
- Suitable Plants (leafy lettuce, greens, or most herbs – NOT rosemary)
- “Net Pots”, Polystyrene Cups with punctures, or other suitable containers
- Jigsaw, Drywall Saw, or Sharp Knife
- Hole Saw
CONSTRUCTION
- Cut, with a jigsaw, a 1½ inch board of polystyrene foam board insulation into 1-by-1-foot squares.
- Place the bottom of the bucket on a 1-by-1 foot square of foam and trace the shape of the bucket on the foam. Cut out the circle.
- Use a hole saw to cut evenly spaced holes out of the foam. (Typically 3 to 4 depending on “net pot”/plant container size.) The hole size should allow the bottom of the plant container to be level with the underside of the foam.
FERTILIZATION & PLANT CARE
Fill the bucket with approximately 2.5 gallons of water. Add 1 to 2 teaspoons of water-soluble fertilizer for each gallon of water to be used in the bucket (approximately 5 to 9 teaspoons for 4.5 gallons of water). Add ½ to 1 teaspoon of Epson Salts for each gallon of water to be used in the bucket (approximately 2.5 to 4.5 teaspoons for 4.5 gallons of water). Mix the fertilizer and Epsom Salts with the water in the bucket. Continue to fill the bucket with water to within 1½ inches of the rim of the bucket. Set “net pots” or plant containers in the hole cutouts in the foam circle. Lay the foam circle, with inserted containers, on the surface of the water/fertilizer mixture in the bucket. Place the young starter plants in the containers. Do not remove the potting mix from the plant roots. The most critical aspect is the depth of the transplant’s root ball in the solution. The bottom of the root ball should be flush with the surface of the water. As the water/fertilizer mixture is taken up by the plants and evaporated, the water level in the bucket will decline.
FURTHER INFORMATION
A bucket garden may just be the beginning of your hydroponic ventures. For additional publications on growing hydroponic vegetables please visit the University of Florida/IFAS EDIS website hydroponic production page. If you want to start your own hydroponic farm then you may also be interested in attending the “Starting a Successful Hydroponic Business” training at the Suwannee Valley Agricultural Extension Center in Live Oak in March.

by Mary Salinas | Nov 13, 2017
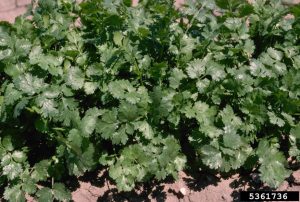
Cilantro ready for harvest. Photo credit: Howard F. Schwartz, Colorado State University, Bugwood.org
Cilantro (Coriandrum sativum) is a short-lived annual herb with bright green, feathery, flat leaves that look very similar to flat-leaved parsley. Leaves can be harvested at will after they grow to a mature size and then continuously as needed. The flavor of cilantro compliments many Latin American, Indian and Asian dishes and is a great addition to salads. The ripe seeds are known as coriander and used as a spice.
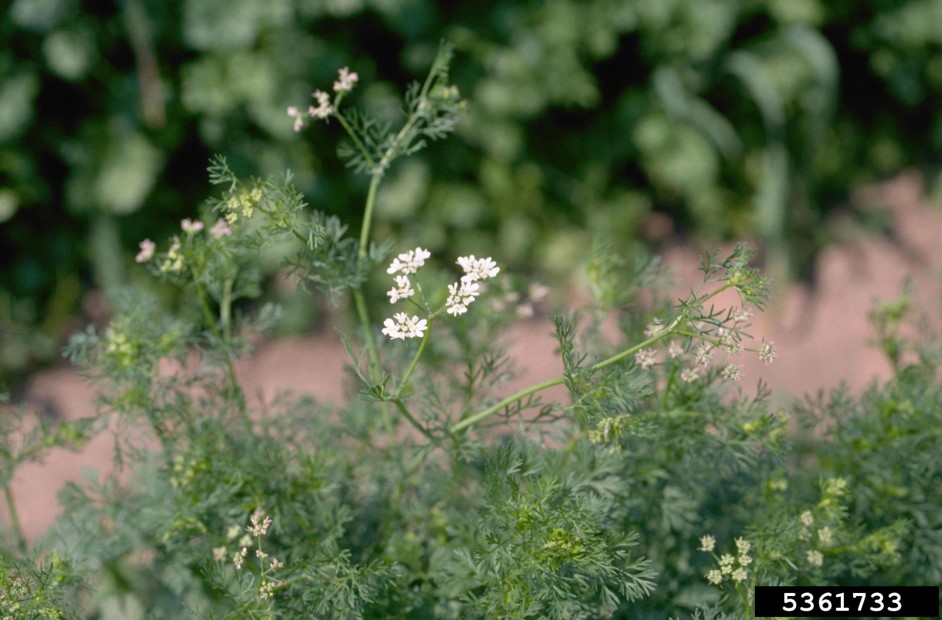
Maybe some of you have grown cilantro, harvested a time or two and then watched in horror as it quickly flowered, went to seed and died. Me, too. This scenario most likely happened in the warm summer months. Hot weather and long days stimulate this annual herb to quickly complete its life cycle. When temperatures increase, it causes plants to bolt which is a sudden switch to producing flowers and seeds, often on tall stalks. After cilantro bolts, the leaves become smaller and less palatable.

Cilantro bolting and blooming. Photo credit: Howard F. Schwartz, Colorado State University, Bugwood.org
The solution is to grow cilantro in the fall and winter. The cooler weather encourages more leafy growth, so you can harvest the leaves for a longer period of time. The warmer weather in the spring will bring flowers, and then seeds to start next autumn’s planting. Collect the seeds and store for planting the following season.
Start cilantro in your garden from seed or transplants. A benefit of growing from seed is that a few seeds can be sown every two weeks to extend your harvest season. Like most herbs, cilantro likes rich, well-drained soils, regular moisture and full or part sun. If the weather is getting warmer, full sun in the morning with some afternoon shade will help keep the herb cooler and less likely to bolt.
For more information:
Herbs in the Florida Garden
Seeding the Garden
by Beth Bolles | Jul 5, 2017

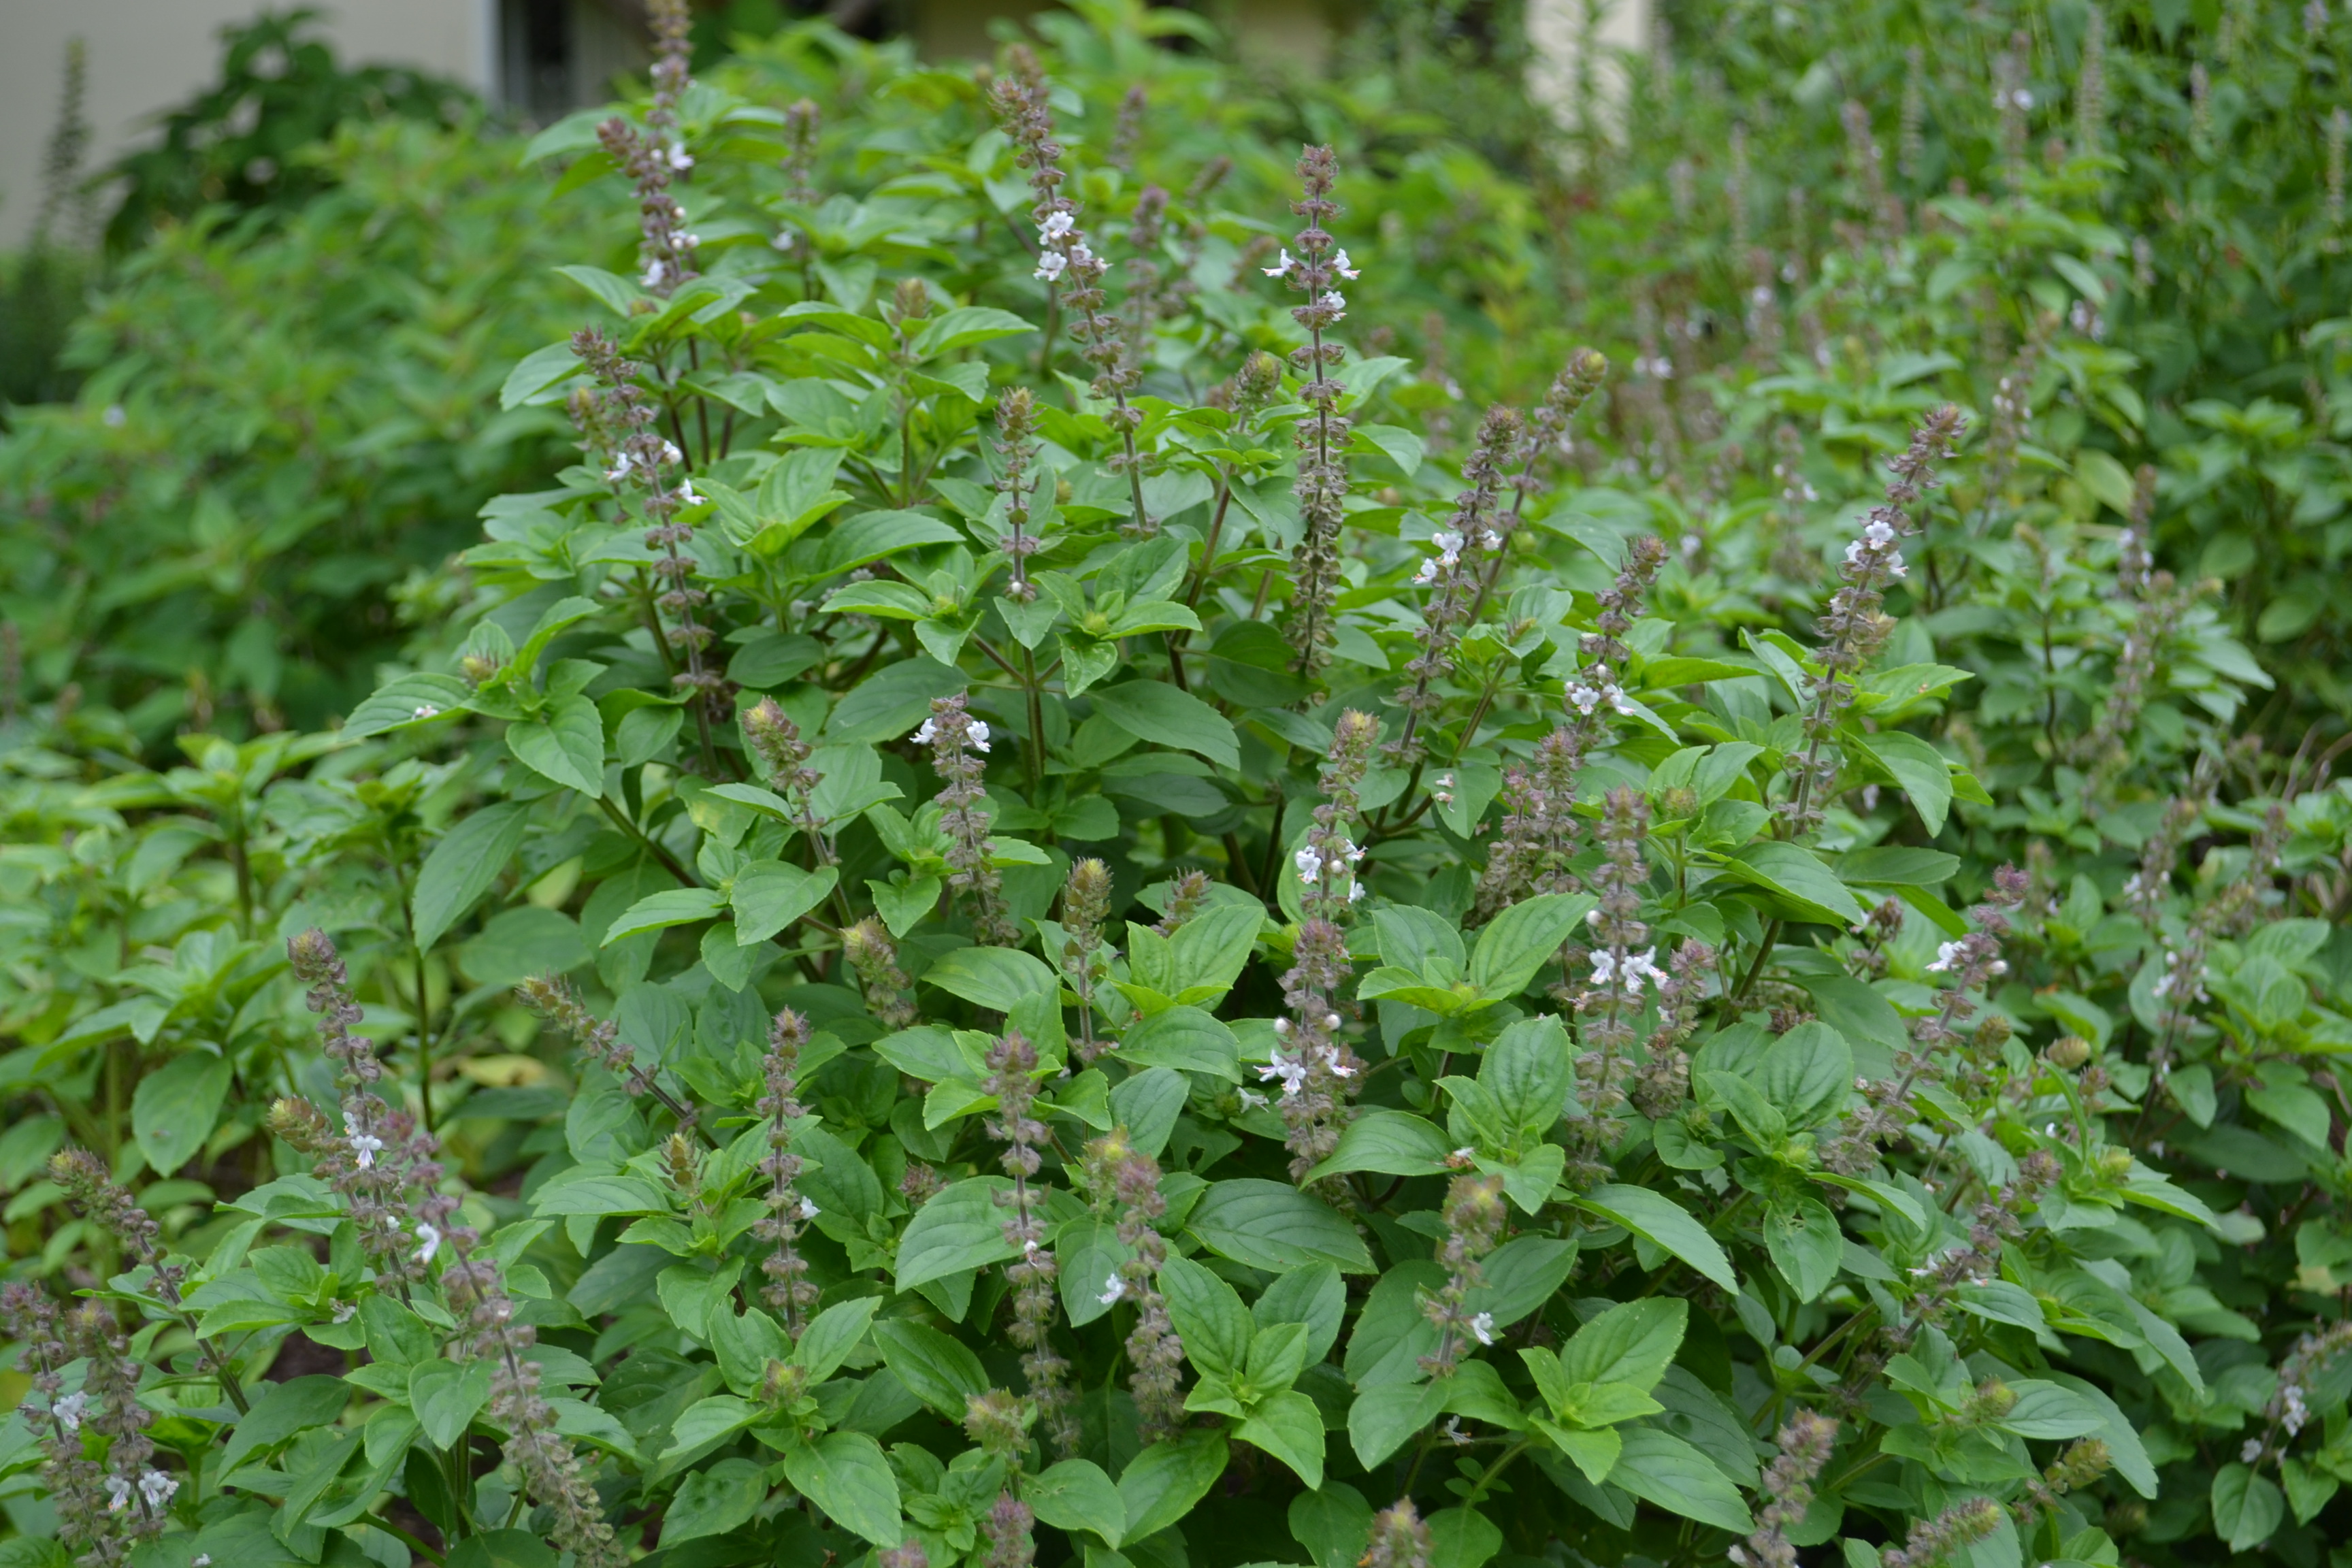
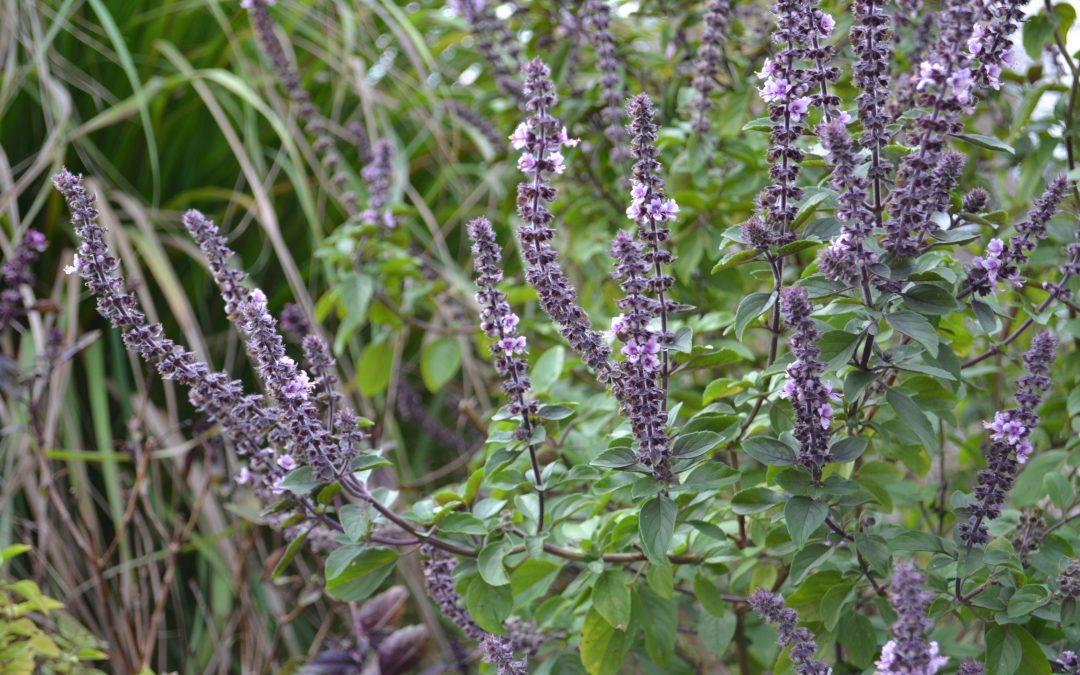
Many bees and beneficial wasps will be attracted to African blue basil. Photo by Beth Bolles, UF IFAS Extension Escambia County
Basil is a favorite plant in the summer herb garden and an absolute must for those who enjoy fresh leaves for a sandwich or delicious homemade pesto. While we grow basils as a food enhancer, an added benefit is that those basil selections that form flowers are very attractive to pollinators. If you would rather not let your favorite basil form flowers, consider adding a specific species that is grown more for its attractiveness to pollinators than its culinary uses.
African blue basil is a hybrid of two basils that has inherited a camphor flavor from one of its parents. Although edible, the flavor may not be appealing to those who are familiar with more traditional basil flavors. Plants produce abundant flowers that are pink with a dark purple base, although flowers are sterile so no seeds will be formed. If you want more African blue basil, you must purchase transplants or start your own from cuttings off the main plants.

African blue basil enhances gardens and landscapes. Photo by Beth Bolles, UF IFAS Extension Escambia County
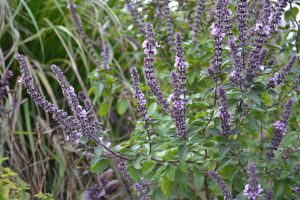
Flowers of African blue basil are also showy in the garden. Photo by Beth Bolles, UF IFAS Extension Escambia County
Like other basils, African blue basil does like soils amended with composts that are well-drained. Plants thrive in full sun and will form rounded mounds that will be much larger than more culinary basils, up to five feet in some gardens. Plants do form woody stems and although frost tender, some plants may return in the spring in more protected areas.
Although some edible gardeners may not want to allow space for a basil that they will not use in the kitchen, the amount of pollinator activity on this selection makes it a benefit to any edible garden for all the frost-free months.

by Julie McConnell | Aug 12, 2016
Chocolate mint has fragrant, dark green foliage and works well as a groundcover. Photo: Julie McConnell, UF/IFAS
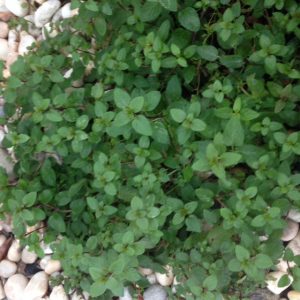
Mint is very easy to grow in the right place, sometimes a little bit too easily. It’s reputation for being aggressive is well deserved. As with any other plant you use in your landscape, you need to be sure you have the right plant for the right place and there just might be such a spot in your garden for mint!
Garden areas with part sun/part shade and moist soil are perfect environments for mint. Like most herbs, it does not require much fertilizer and there are very few insects that bother it. Because mint forms runners where it touches the ground it is an ideal plant to use in areas that need soil stabilization as the dense growth habit will prevent erosion and sediment runoff.
Mint grows rapidly in the right conditions and can spread further than a gardener might want. However, it is not difficult to manage with a little maintenance. Because the plant is herbaceous rather than woody, it can be pulled or trimmed with little effort. Another method to keep it in bounds is to chemically edge using an herbicide on the portions that are growing beyond the bed border. Just keep in mind that if you plan to use your mint in food or drink you should only use chemical products labeled for edible crops and follow all label instructions closely.
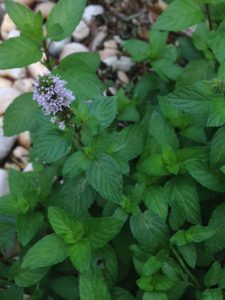
Mint flowers are attractive to pollinators. Photo: Julie McConnell, UF/IFAS
There are many different mints available such as chocolate mint, spearmint, and peppermint. Each has a slightly distinct flavor and may have different sized leaves or coloration. Mints are prolific bloomers and are attractive to pollinators such as bees and beneficial wasps.
To read more about mints please see http://gardeningsolutions.ifas.ufl.edu/plants/edibles/vegetables/mint.html