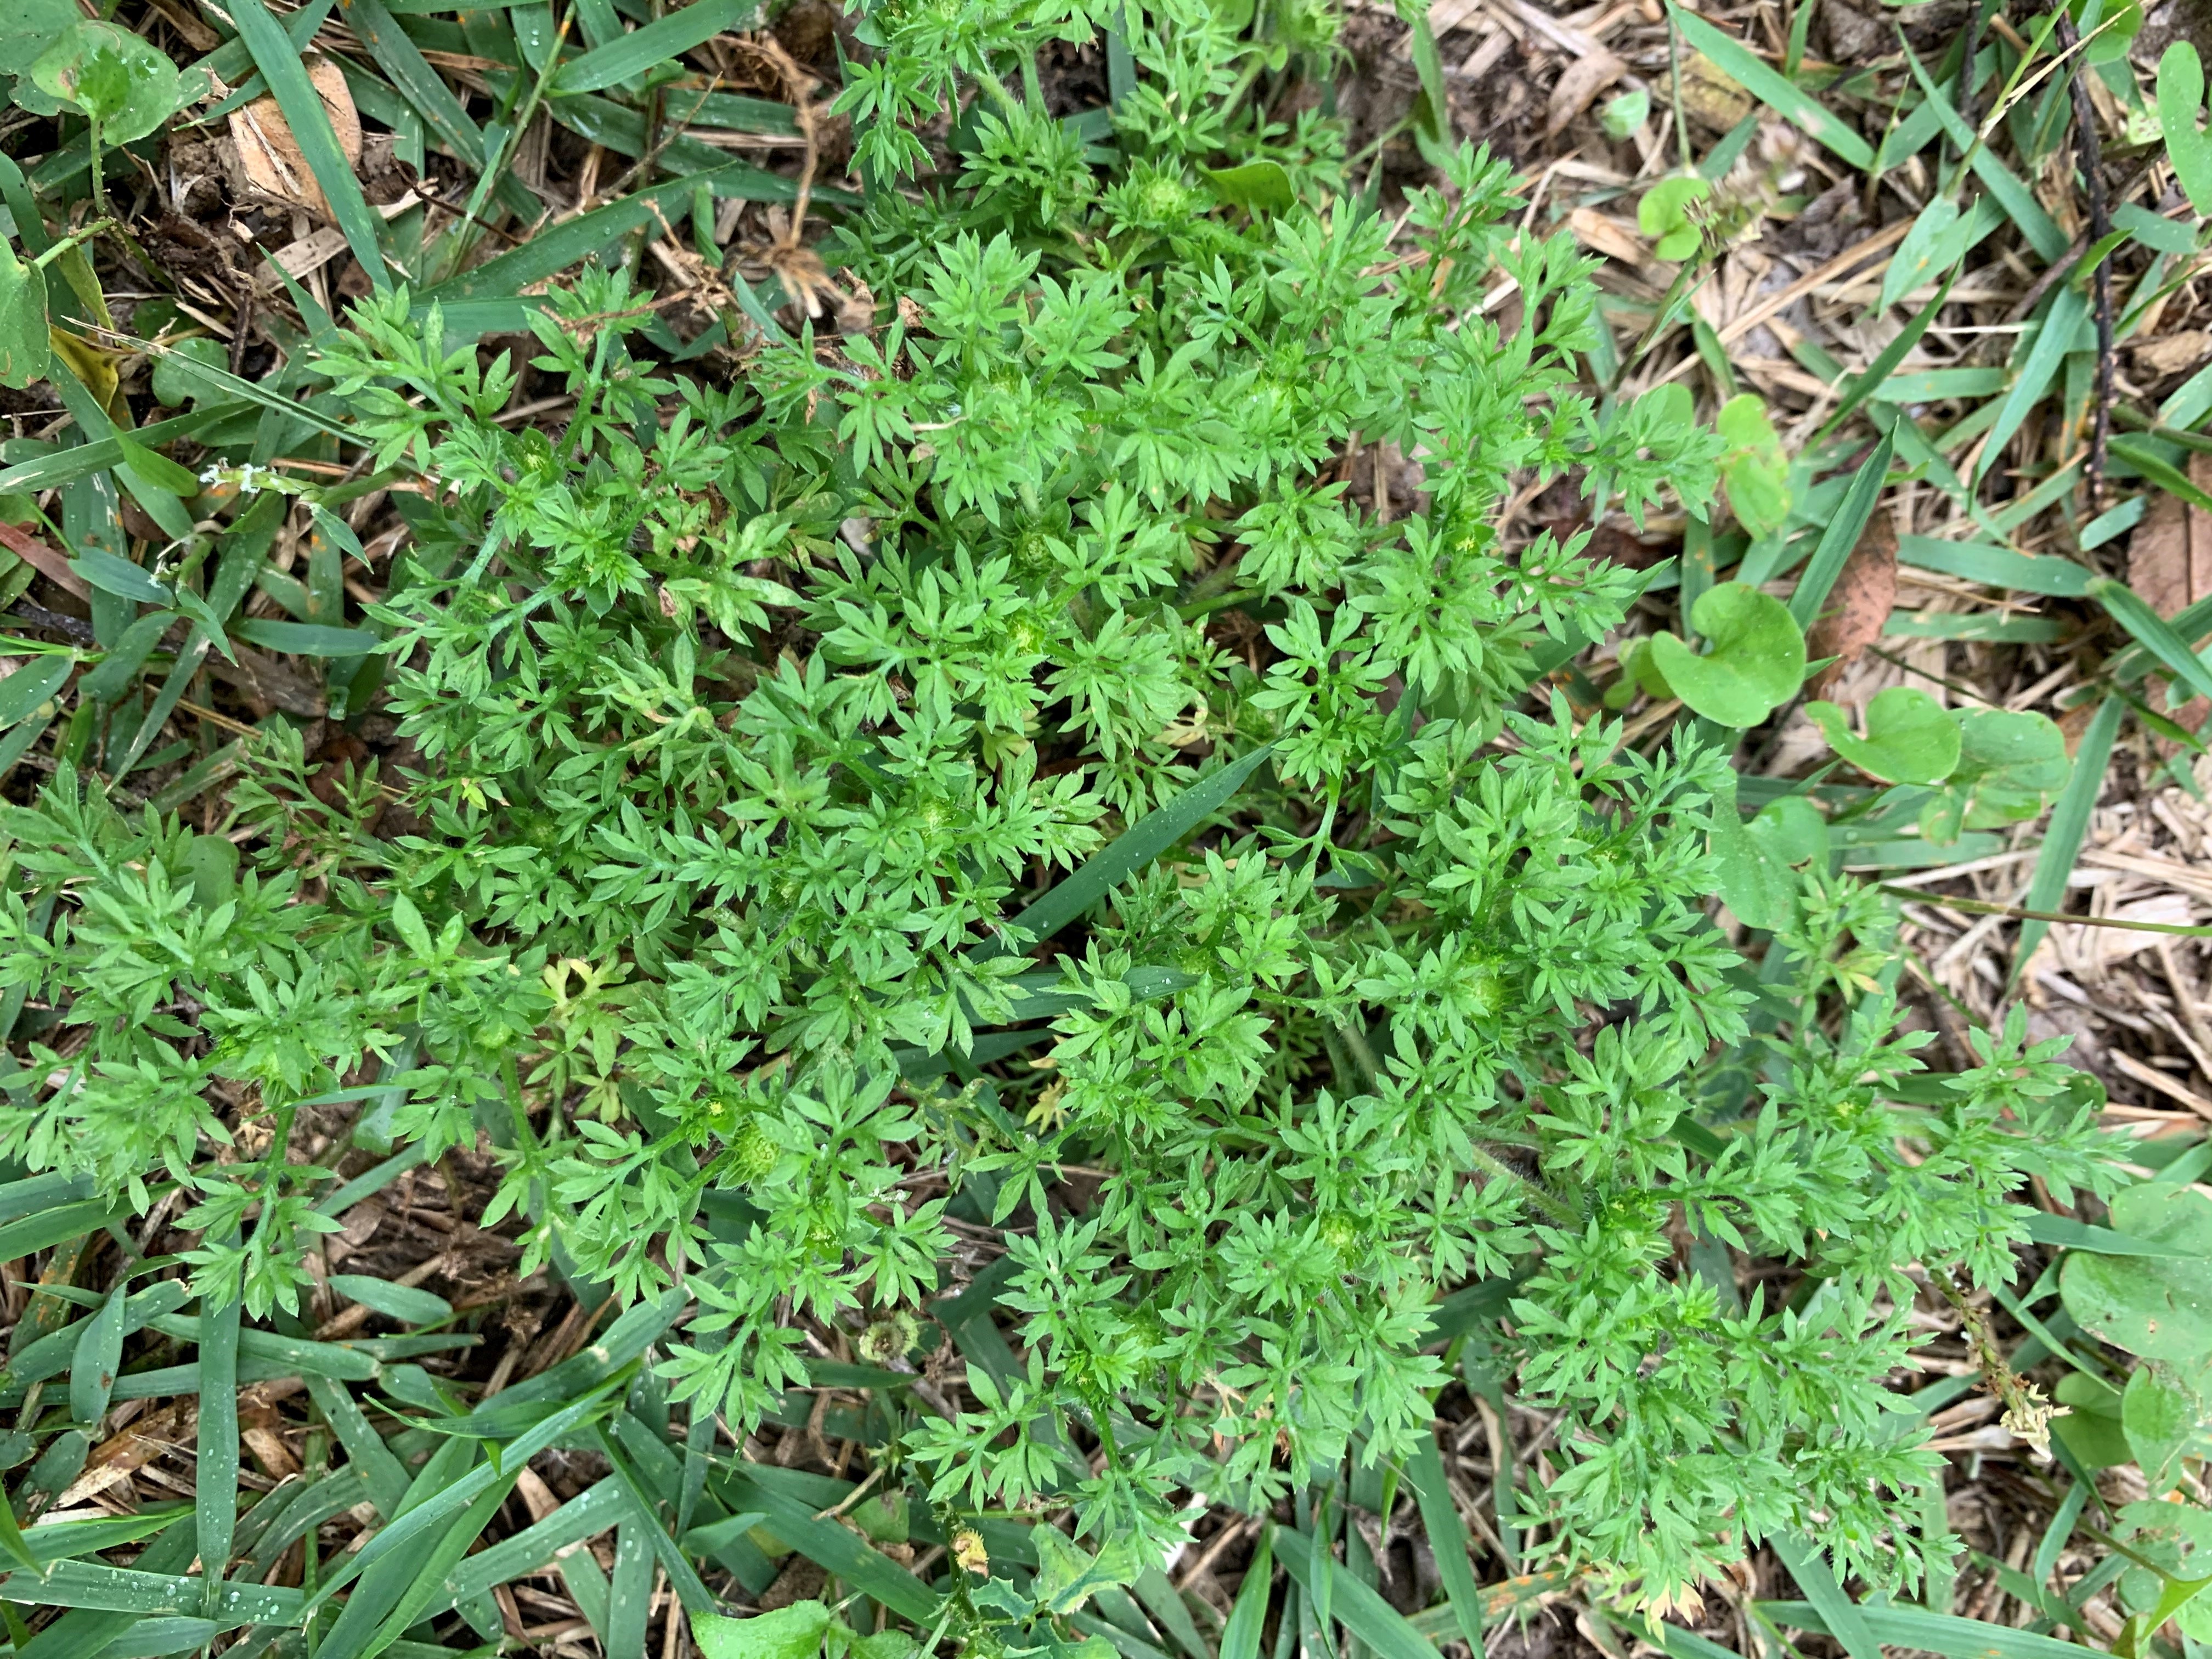
If you’ve ever walked barefoot through a patch of burweed, you know this is a very unpleasant experience. Lawn burweed, also called spurweed or stickerweed, is a low growing winter annual that produces hard, spiny burs that contains the plant’s seeds. These burs or stickers make walking on grass extremely painful for not only people walking barefoot, but pets as well.
Lawn Burweed. Photo: Danielle Williams.
Dealing with lawn burweed can be tricky. Because lawn burweed is a winter weed, seeds actually germinate when temperatures are cool in the fall (late October-November). It then remains unseen during the cold months but as temperatures warm up in the spring, lawn burweed initiates a period of rapid growth and forms the spiny burs which may be hard to see but are easily felt. At this stage, the plant has set seed for next year and killing the remaining foliage won’t remove the burs. Moving forward, there are some things to consider.
Cultural Control
Burweed tends to be prominent in high traffic areas or areas where grass is declining so it is important to prevent infestations by maintaining a healthy, dense lawn. This can be achieved by fertilizing and liming according to soil test results as well as mowing at the proper height and frequency for your specific turfgrass. A healthy lawn can outcompete burweed for light, water, and nutrients and reduce the level of burweed infestation. For more information on maintaining your lawn visit: https://hort.ifas.ufl.edu/yourfloridalawn/
If burweed is only in isolated areas, you can always dig it up and dispose of it. Be sure to wear gloves and watch out for the stickers!
Chemical Control
Post-emergent control: Post-emergent herbicides are most effectively applied when burweed plants are young, actively growing, and haven’t set burs yet from December – February. Controlling burweed now is not impossible, but the burs have likely already formed and will remain present even after the weed dies. Additionally, since burweed is a winter annual, it will begin to die as temperatures reach 90 ◦F and above.
Look for herbicides containing the following active ingredients to help with post-emergent control:
Atrazine – sold under many brand names and safe in centipede, St. Augustine, and bermudagrass. Do not use in zoysiagrass or bahiagrass lawns.
Dicamba, mecoprop, 2,4-D – commonly sold in three-way formulations through many brand names. Generally safe in centipede, St. Augustine, bermuda, zoysia, and bahiagrass lawns.
Metsulfuron – sold under several brand names and safe in centipede, St. Augustine, zoysia, and bermudagrass. Do not use in bahiagrass. Be careful if used around ornamentals.
Thiencarbazone, iodosulfuron, dicamba. Safe in centipedegrass, zoysiagrass, bermudagrass, and St. Augustinegrass. Do not use in bahiagrass.
Pre-emergent control:If you are struggling with a lawn burweed infestation this spring, plan to do a pre-emergent herbicide application this fall. A herbicide containing the active ingredient, isoxaben can be used to control lawn burweed in centipedegrass, St. Augustinegrass, bermudagrass and zoysiagrass. In order for a pre-emergent herbicide application to be effective, it must be applied before the plant sprouts. For burweed, isoxaben can be applied in October or once temperatures fall to 55-60 ◦F and winter weeds begin to germinate.
Of course, before using any type of herbicide, always read the label instructions! If you have questions about lawn burweed control, please contact your local Extension Agent.
Lawns are as American as apple pie, and Granny’s cookies. It’s where you play ball with your kids, and have summer cookouts. It’s also quite likely a huge source of frustration. How much water, how much fertilizer, how much work, and why bother? All of these are valid questions, and ones this article seeks to clarify. We’ll delve into the benefits of healthy lawns, and cover some easy cultural practices you can implement right now for a green and lush lawn all summer long.
The Benefits of Lawns
Turfgrass provides a number of ecological services. These are defined by the USDA as “direct and indirect benefits provided to humans by an ecosystem to include provisioning, regulating, supporting and cultural services”. This term has multiple categories, which are outlined below.
Provisioning (AKA Material and Energy Output)
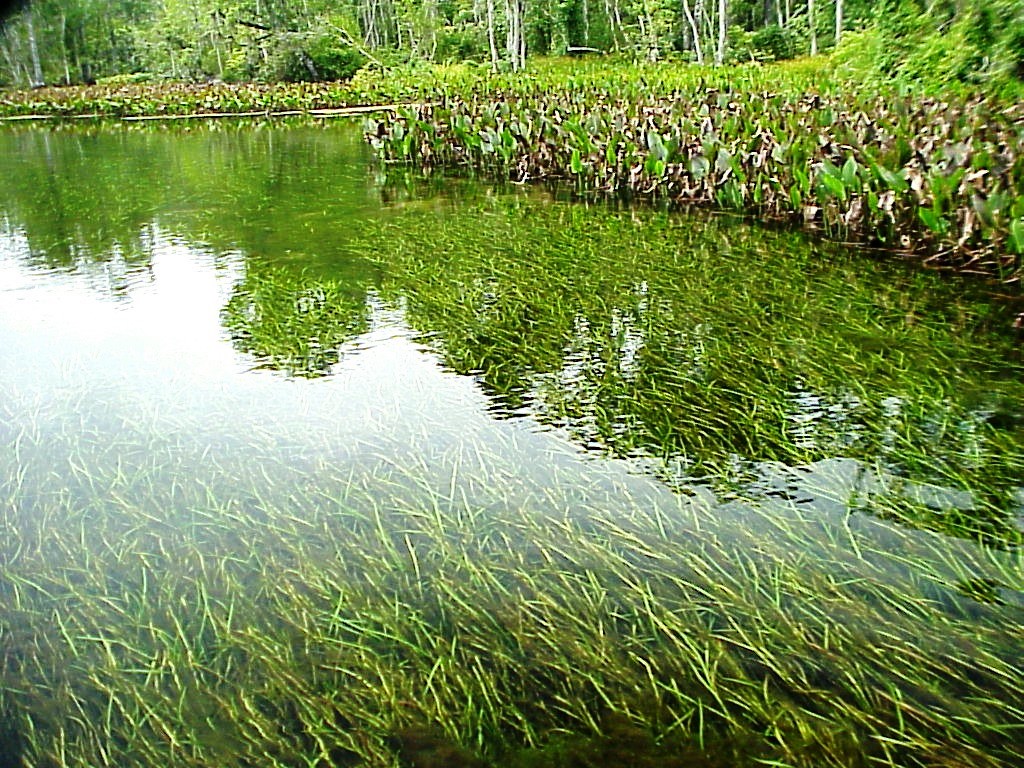
Provisioning or material/energy output is linked to a grass’ bio-filtering capability. Grasses remove pollutants from applied water including stormwater, while enabling ground infiltration. This recharges surface reservoirs, and by removing pollutants, mitigates eutrophication while providing clean drinking water to communities.
UF/IFAS Photo: Jess Van Dyke
Regulating (AKA Moderation and Control of Ecosystem Processes)
Grasses are known to cool the surrounding environment, capture dust, and prevent erosion.
Water absorbs heat as it vaporizes as it does in the evapotranspiration processes in plants. As Ben Franklin taught us many years ago, that process cools the environment around through heat absorption as water vaporizes. This cooling effect can be quite significant, and translates to saving through reduced air conditioning of your home.
Grasses remove dust and pollen particles from the air as well. This is usually a process by which wind blows the dust onto the grass, the dust settles and is captured beneath the grass canopy.
To complete the trifecta, grass has a thick root mass locking soil in place. The two main methods for soil erosion are through wind, and water flow. The grass’ root system negates both of these.
Supporting Services (AKA Maintaining Fundamental Ecosystem Processes)
Supporting services, as this sections title suggests, are those which support life processes. In the case of grasses, this comes in the form of organic matter. As I hear often, soils in Florida are quite sandy and lacking in the aforementioned organic matter.
It may surprise you to hear that grass is probably the easiest method to make these additions. As we leave clippings on the lawn and root systems slough off only to regrow the following spring we actually are adding organic matter from two directions. Hence grass’ reputation as a great soil builder.
This organic matter is where our supporting services really shine. Your turfgrass acts as habitat for microbiota, and macrobiota. These terms refer to the bacteria, fungi, algae, earthworms, and other insects which help cycle soil nutrients while breaking down the same organic matter you’ve added simply by not removing your grass clippings.
Cultural Services (AKA Societal Benefits)
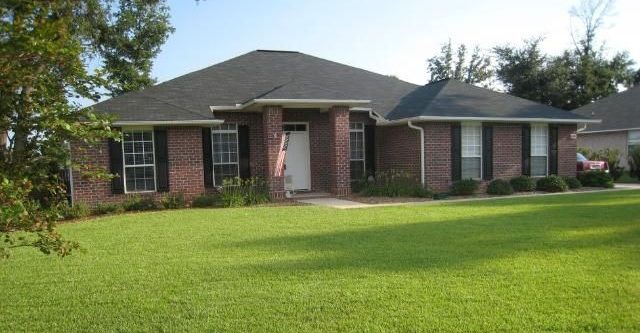
These are somewhat self explanatory. It is in this realm where we begin to discuss those neighborhood block parties. Lawns are an excellent place to meet with neighbors and build communities. Well maintained lawns can also affect home prices, improve neighborhood aesthetics, and even effect crime rates in a given area.
UF/IFAS Photo
It Starts with Cultural Practices
Hopefully by now, you are sold on keeping a healthy stress free lawn. The real question is how to achieve one? You’ve likely heard that lawns are difficult to maintain, but you’ll be happy to know it’s much easier than advertised. You’ll see rapid results if you start paying attention to three practices.
Irrigation
Easily the biggest killer of grasses in North Florida is irrigation. Often too much is applied, and is at the wrong time of day. All turfgrass species in Florida require only ½ -3/4 inch of water per irrigation event. Water your grass before dawn when you notice bent grass blades, slight color changes, and a lack of rebound when stepped upon.
Not sure how much you’re applying? Place some containers in your watering zone spread evenly and run the system for 15 minutes. Measure that outcome with a ruler, adjust your timing as necessary to hit the right amount.
Fertilization
Fertilization is based on turfgrass species. Overdoing things can be quite harmful to your lawn, so make sure you check the Florida Lawn Handbook for the specifics on your grass species.
Before you get started fertilizing, there are a few bits of information of which you should be aware. The first is your soil’s pH, as it dictates nutrient availability for your grass. The second factor in fertilization is timing. Apply fertilizer in multiple applications beginning April 15th and ending in September. This ensures your grass will have enough root mass to utilize the nutrients.
Mowing
Our final cultural practice is mowing. It is critical to mow plant to the appropriate height. Mowing to proper height keeps grass stress free reducing susceptibility to insects, disease, drought or sunscald. Here again, height is dependent on grass species. Consult the Florida Lawn Handbook for greater detail.
Whatever the height required. Make sure to mow grass with sharp blades, only when dry, and weekly to avoid damage to your plants.
To Sum it All Up
Turfgrasses are an integral part of any landscape when sited correctly. They provide a wealth of functions both ecological and cultural. Take a little time to integrate the practices outlined above and you’ll discover an easy to maintain groundcover primed for your next family cookout. As always, if you have any questions or need any help on this topic and more, contact your local Extension Office.
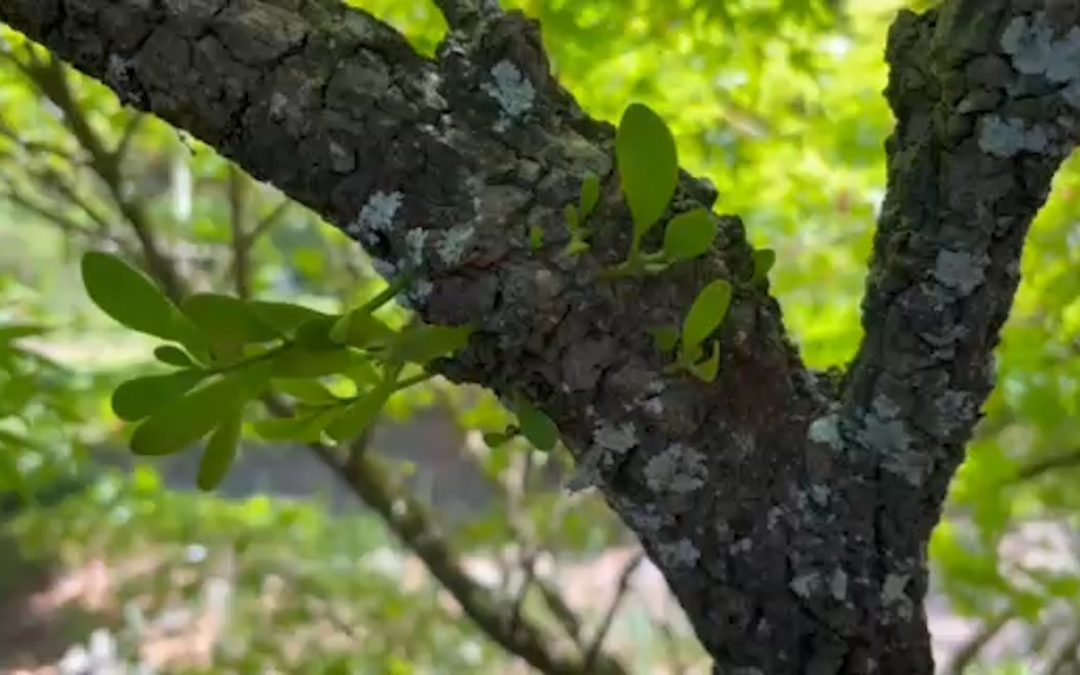
In the garden, mistletoe is not a plant we want to see. This parasitic plant can cause issues for some of our trees and we need to address the issue when we are able. Learn more about mistletoe in our landscape plants with UF IFAS Extension Escambia County.
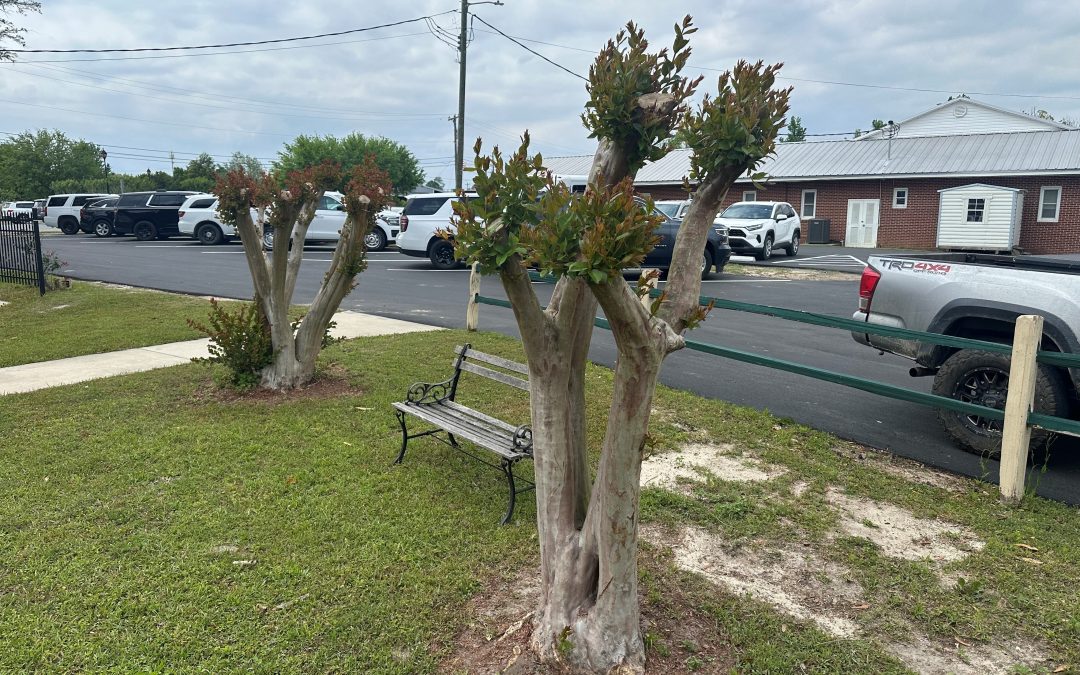
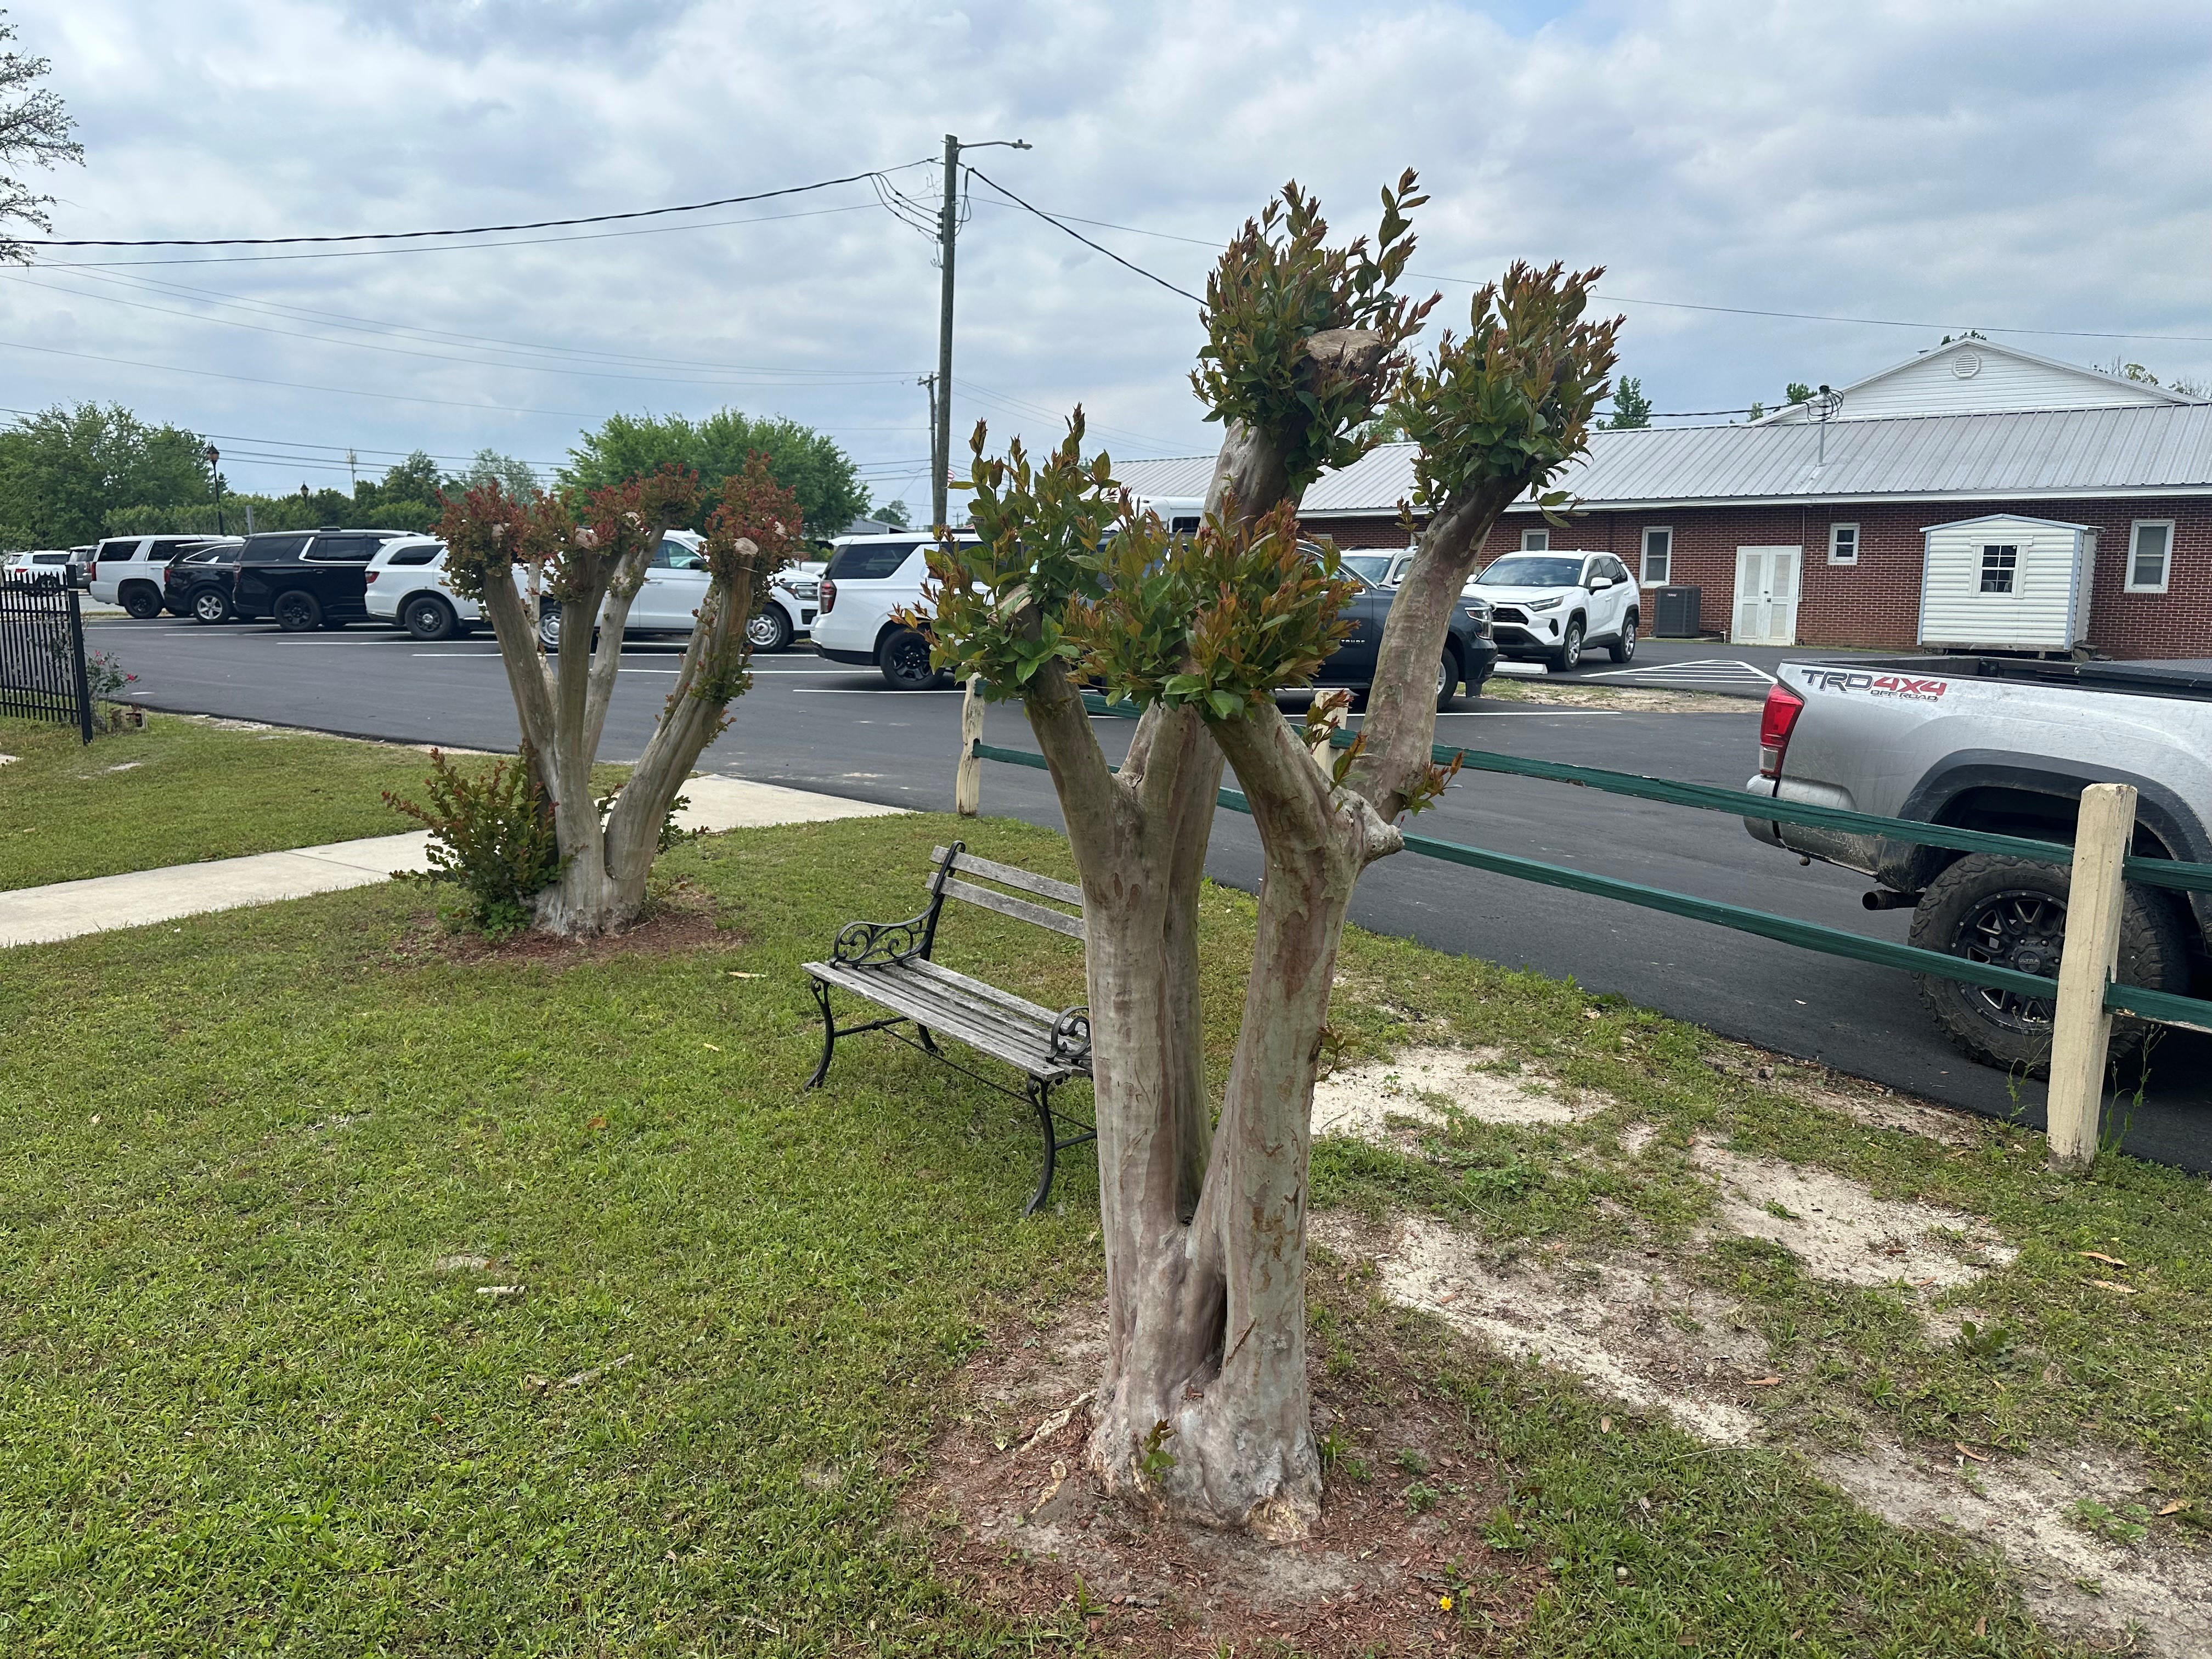
Crape Myrtle is likely the most popular landscape tree in the South, for good reason. This species, comprised of varieties in all sorts of shapes, sizes, and colors, is tough as nails, thriving from the most manicured landscape to neglected parking lot islands. Though they’re easy to grow, beautiful, resilient little trees, they aren’t invincible and only as pretty as gardeners allow them to be. In fact, one of the best ways to ensure a poorly formed, bizarre-looking, disease-prone, short-lived crape myrtle is to commit Crape Murder.
Crape Murder is the twisted art of “pruning” specimens back into horrid shapes. Once shapely trees with well-developed crowns and attractive branching structure are reduced to a ghastly, sawed-off, fence post-like appearance. The large, generally jagged wounds that result from crape murder are slow to heal, if they ever do, and are a prime spot for insect and disease entry. Making matters worse, crape murder is rarely a one-time offense, rather practiced for years on end, never giving the tree a chance to heal, and leading to an early demise.
Previously beautiful ‘Muskogee’ Crape Myrtle murdered in spring 2025. Photo courtesy Daniel Leonard.
So, if the process is so obviously harmful to trees and an affront to evidence-based landscaping, why is it still so widely practiced? There are two primary reasons. First, large crape myrtle varieties like ‘Natchez’, ‘Muskogee’, and others are planted in areas without considering their mature size. These large growing cultivars can reach 30-40’ in height over time and outgrow many landscapes. To prevent this from happening, simply pay attention to the plant tag and consider the mature height of the cultivar. There are many great Crape Myrtle options, like ‘Acoma’, ‘Catawba’, the entire ‘Magic’ Series, and others, that top out at 15-20’ or shorter and many newer dwarf varieties that are smaller still. Second is the common belief that crape murder promotes a heavier bloom. This rationale at least contains some truth. Heavy pruning does tend to stimulate vegetative growth and subsequent flowering in plants – crape myrtle is no exception. However, though you may get larger blooms, they will be fewer than a properly grown crape would have, and the larger blooms often cause the whippy shoots they rest upon to sag and break, especially in wet and windy weather – the juice isn’t worth the squeeze.
Crape murder ruins the aesthetics of Crape Myrtle trees, creates a weak branching structure, and shortens the trees’ lifespans. Photo courtesy Daniel Leonard.
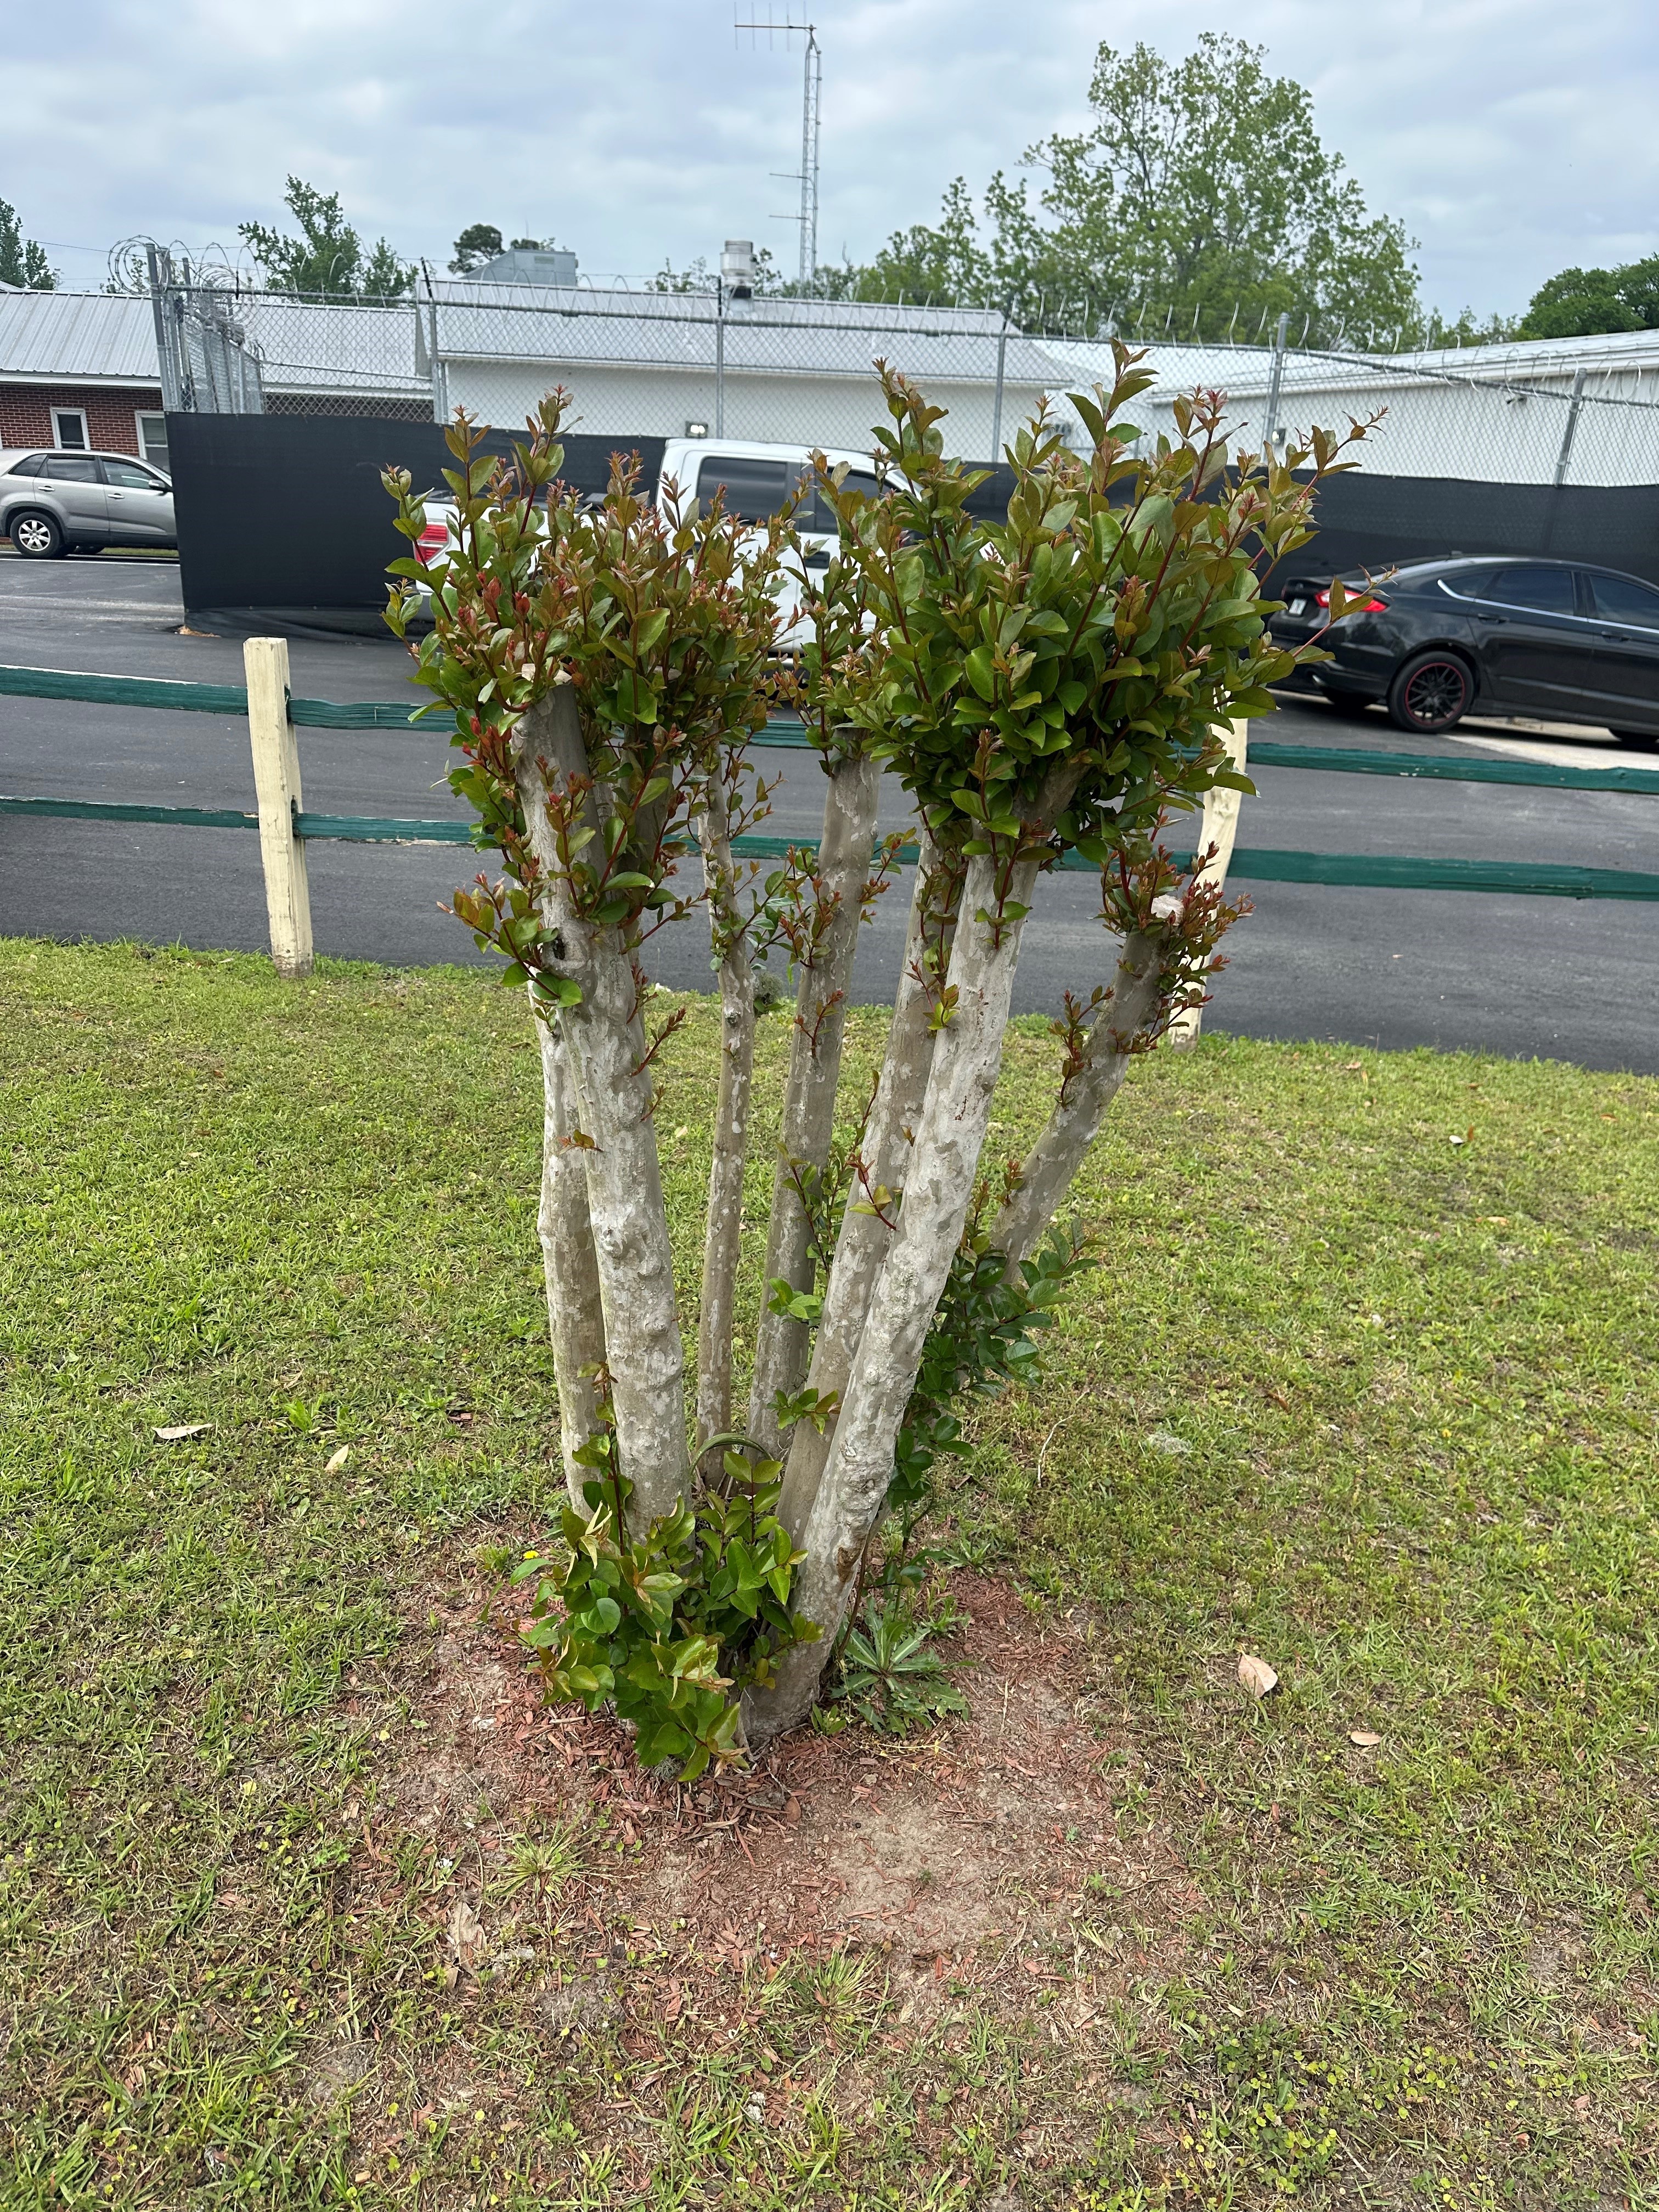
So, if you or someone you know have fallen victim to the above reasoning and dabbled in dendrological decapitation with your own crapes, it may comfort you to know that the damage can be undone over time. The simplest method of fixing crape murder damage is to simply stop doing it and let the tree grow as is. The tree will slowly heal itself but will always be misshapen, with a large, low trunk or two below the scene of the crime and dozens of limbs emerging from the same spot above. It isn’t ideal but I have seen some crapes rehabbed in this manner and they enjoyed a nice, long life. The better method is to wait until the next winter dormant season, break out a chainsaw (the suspected murder weapon), and cut the entire tree back to the ground. The following summer, allow the crape to flush out from the stump (there will be dozens of new shoots) and grow as much as possible. Then, the following winter when the recovering tree sheds its leaves, select 3-5 evenly spaced canes to leave and remove all the rest at the stump. Those 3-5 canes will form the primary branching structure of the rejuvenated tree. From there, you’ll only have to prune lightly each year to remove dead or crossing branching. Then, put up the chainsaw, enjoy your status as an enlightened gardener, and resolve to never prune your crape myrtles ever again.
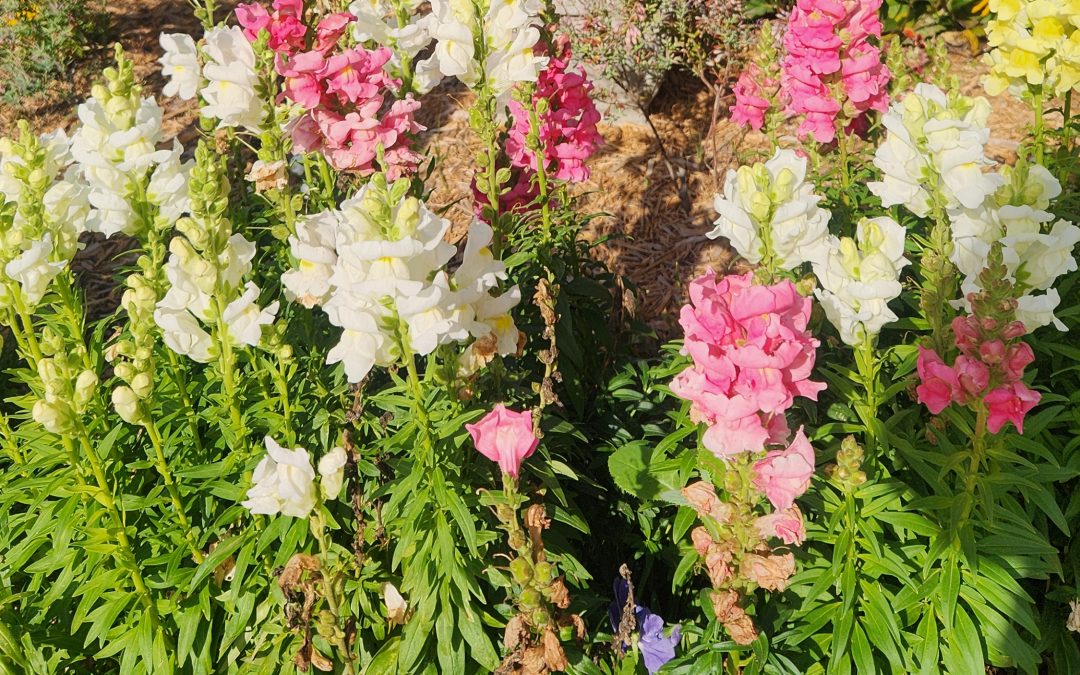
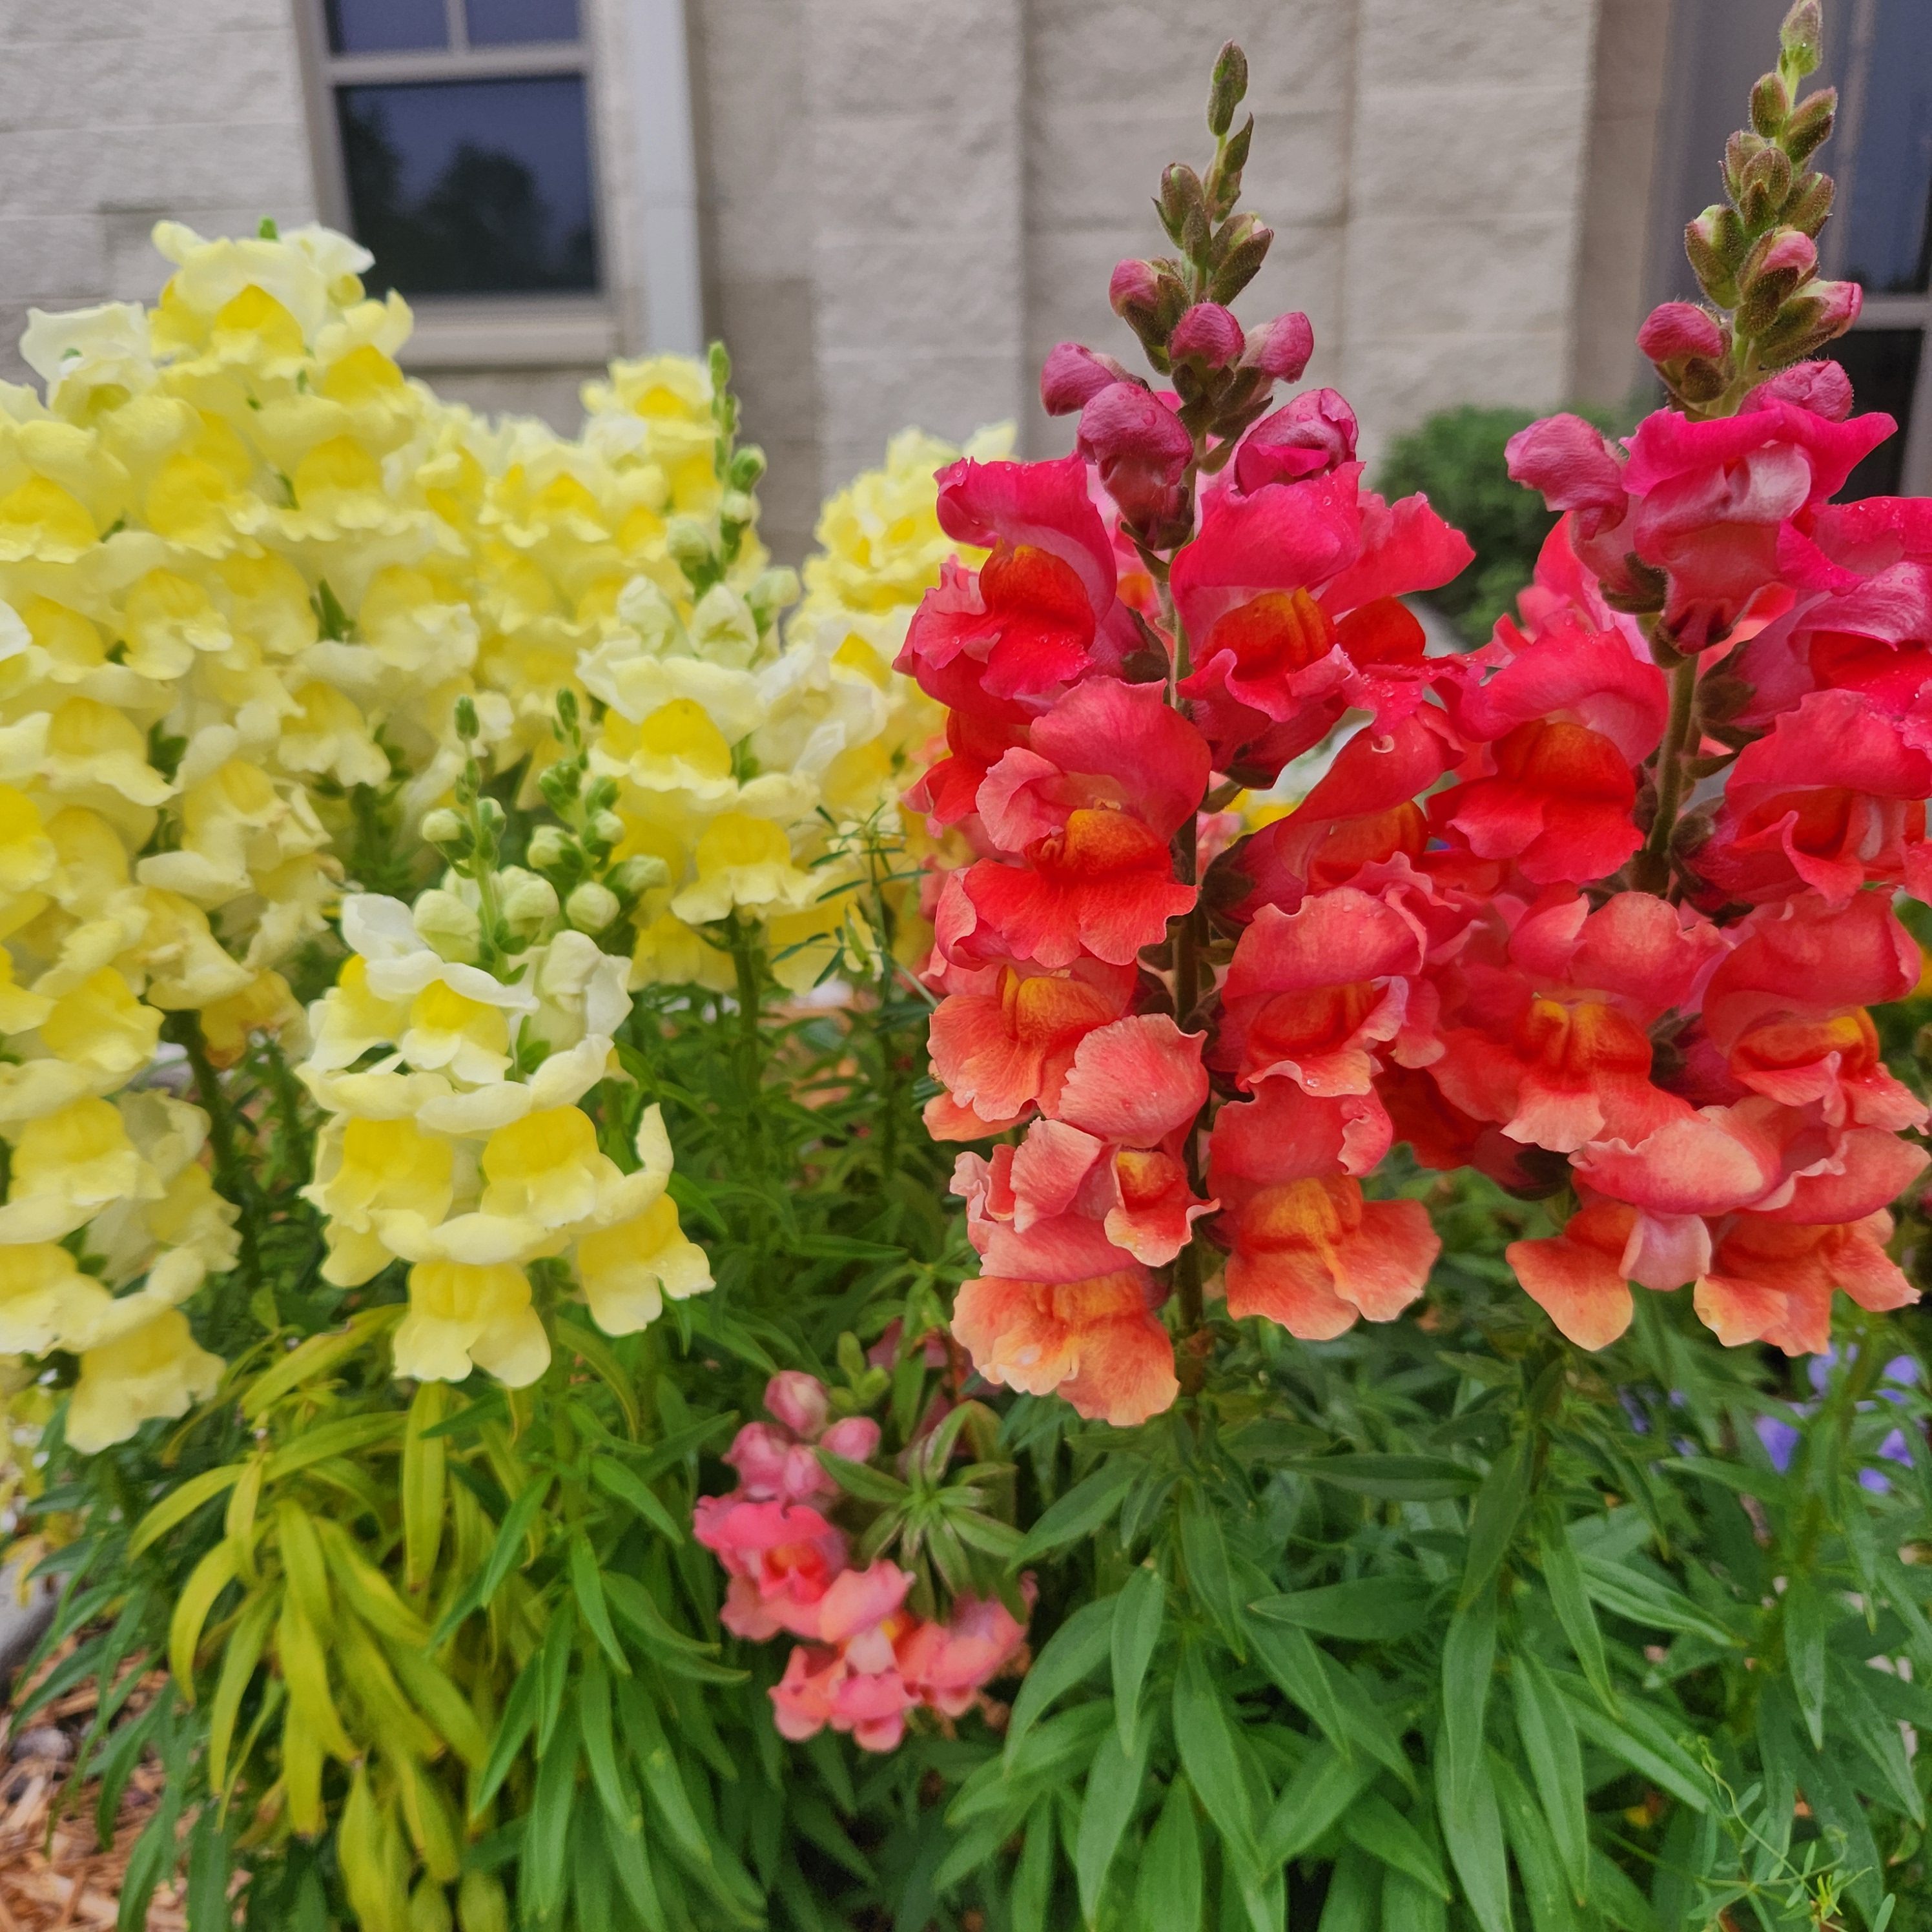
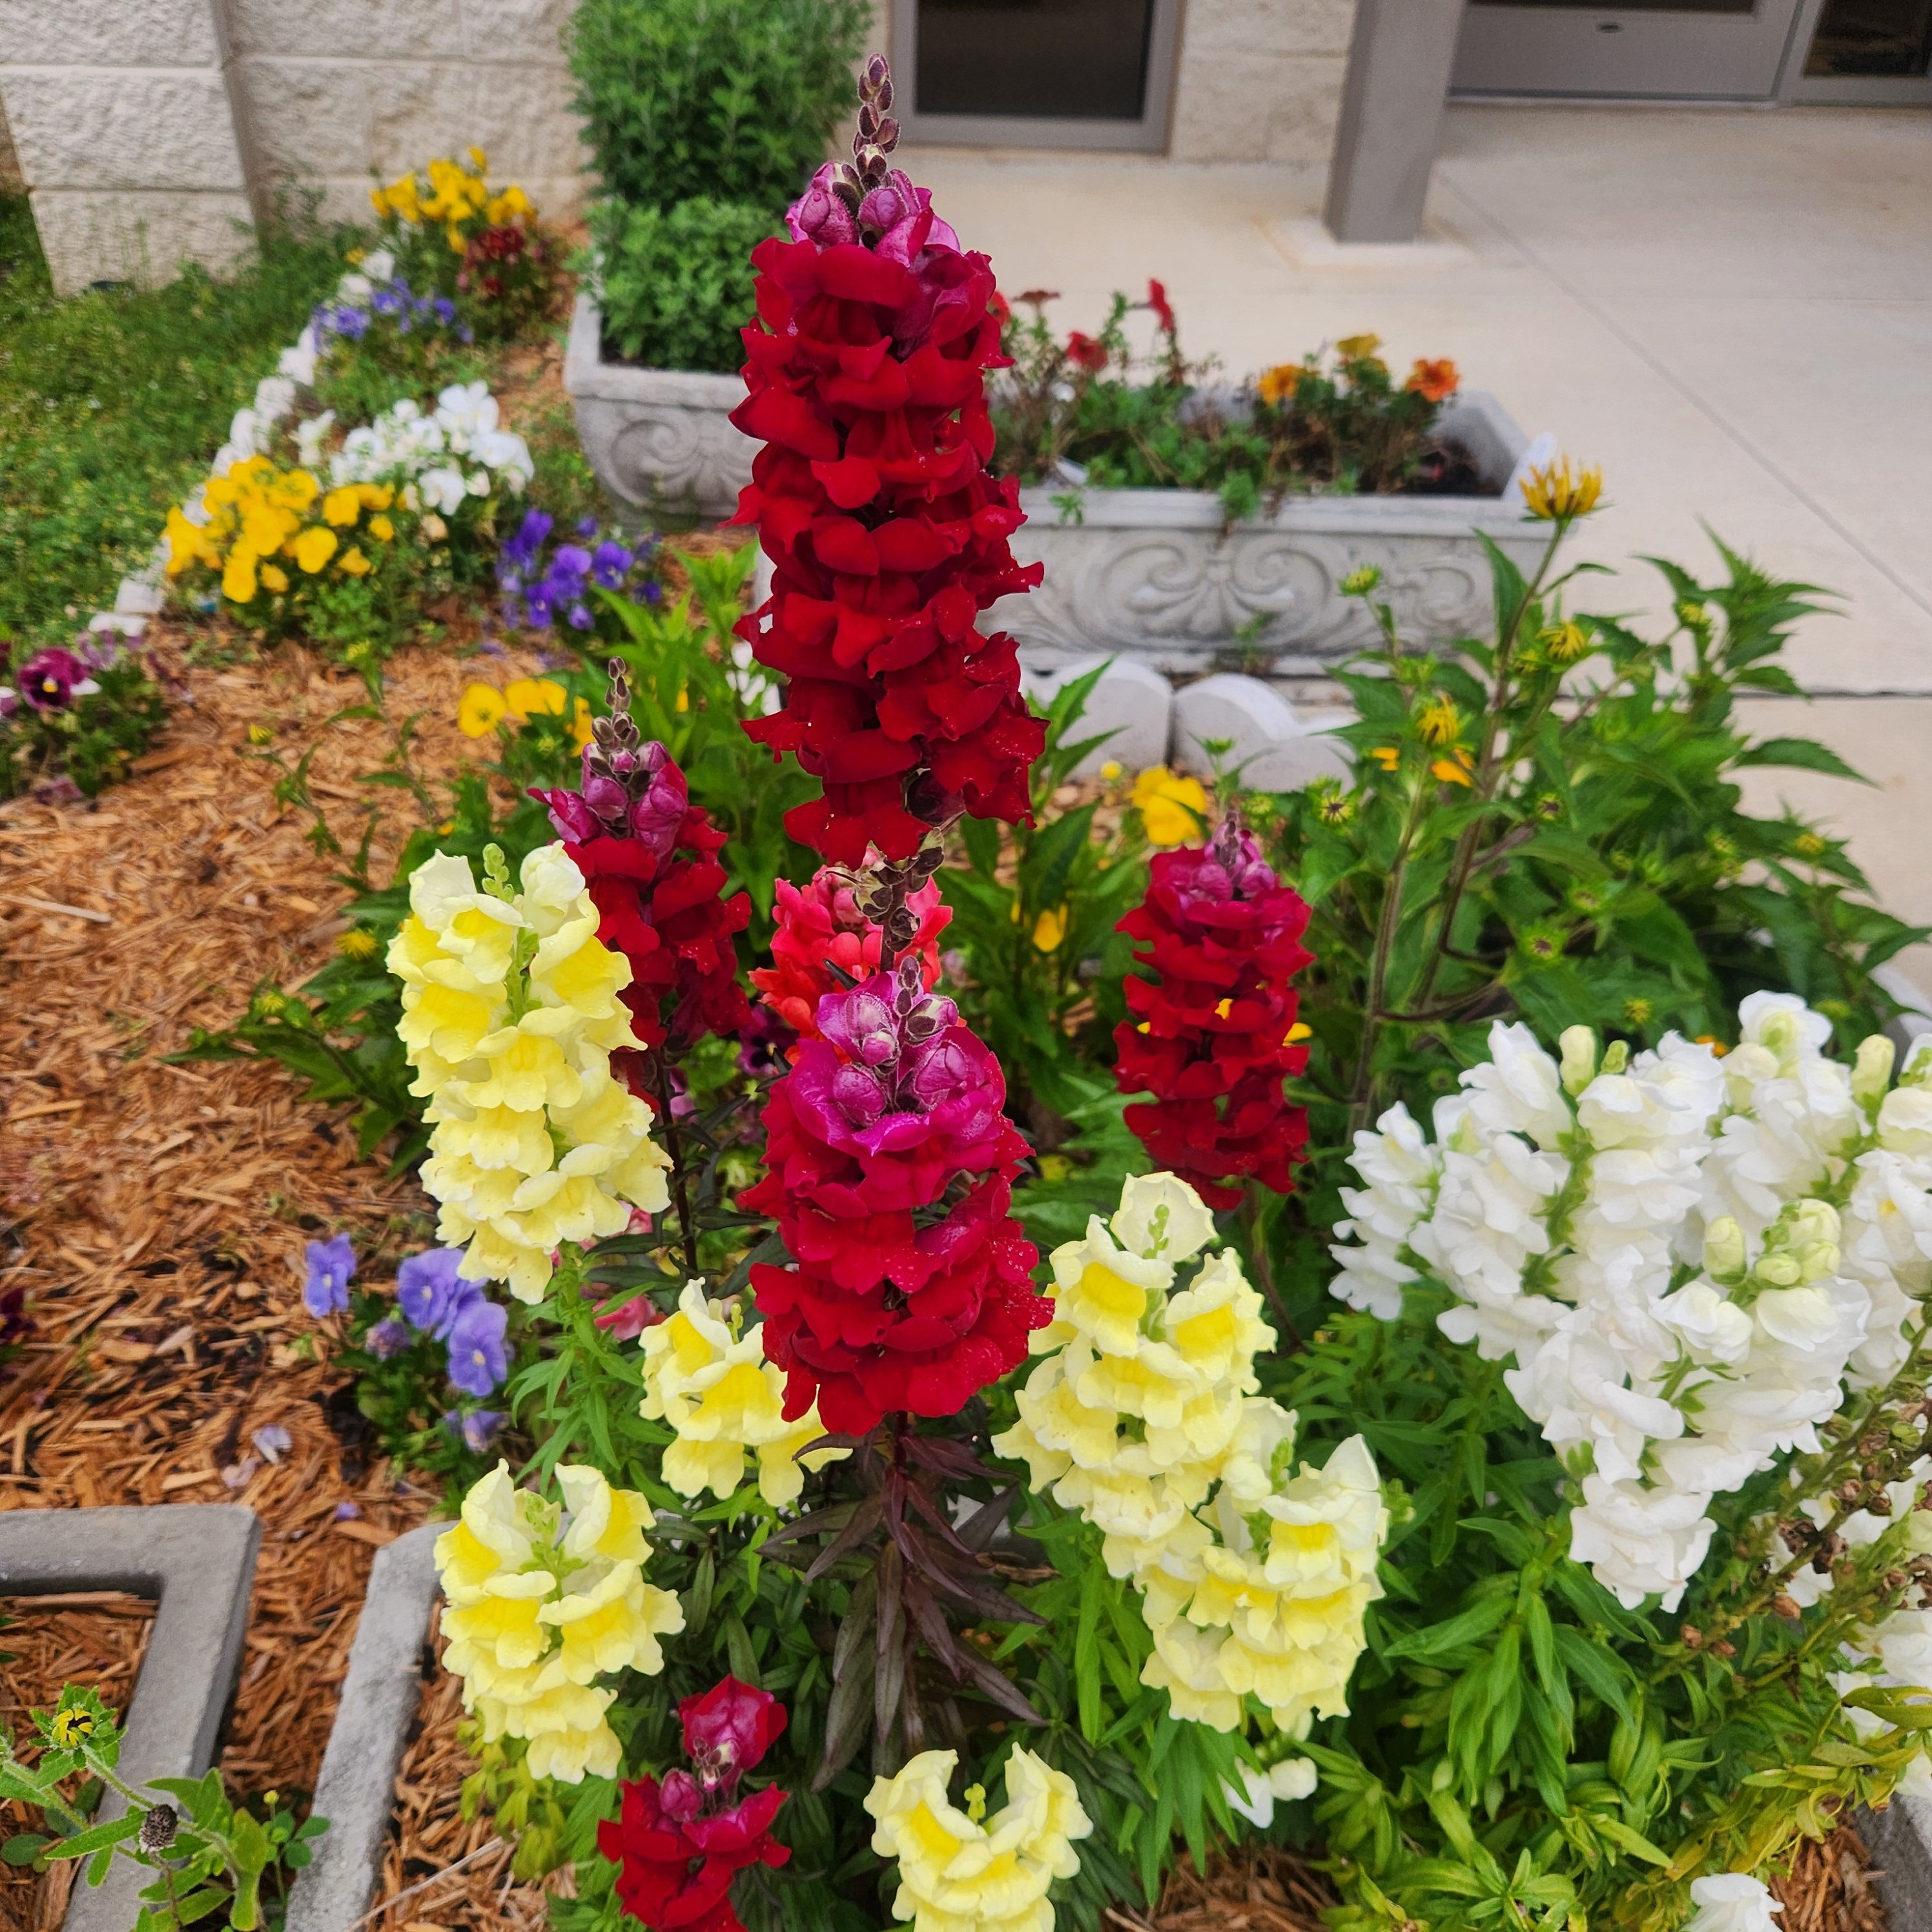
Snapdragon in bloom: Photo credit Donna Arnold FAMU Extension.
Snapdragons (Antirrhinum majus) add vibrant color to fall and winter gardens in North Florida with their wide range of hues. Colors include red, orange, yellow, and maroon. Their growth varies; tall varieties reach 2–3 feet, intermediates 1–2 feet, bedding types 6–15 inches, and rock garden hybrids about 6 inches. Dark-colored flowers often have reddish stems, while pale blooms grow on light green stems. Snapdragons’ warm-colored flowers stand out in garden beds, especially when paired with white flowers, enhancing their red, orange, and maroon tones. Their fine-textured foliage contrasts nicely with large-leaved plants and compact shrubs.
Though not native to North America, they are widely cultivated and are not considered invasive. Snapdragons are versatile and ideal for mass plantings, containers, cut flowers, and edging. They are generally available within their hardiness range, making them a popular gardener choice.
Caring for Snapdragons requires minimal work. They thrive in slightly acidic garden soil but struggle in unamended clay. Therefore, ensuring the soil remains acidic is key to their survival. They require full sun and moist soil. After the first bloom, cutting plants back to five or six nodes encourages a second flowering. Also, fertilizing at bud formation improves growth.
You can increase numbers through propagation. Propagation can be done through seeds or cuttings. Seeds germinate in 10–14 days at 70°F and should not be covered with soil. Prechilled seeds germinate best. Pinch seedlings with two to three leaf sets, except for dwarf varieties. Plant in fall for winter blooms in zones 9–11. In zone 8b and south, snapdragons may survive mild winters. Space plants 6–10 inches apart.
Pests and Diseases
Aphids: Feed on young growth, weakening plants.
Greenhouse leaf tier: Chews and webs leave; pesticides are ineffective once leaves roll.
Mites: Cause bronzed, stippled foliage, especially in hot weather.
Common Diseases
Rust: Brown pustules with yellowed leaf tissue; use proper spacing and resistant varieties.
Anthracnose: Causes sunken spots on stems and yellowing leaves; destroys infected plants.
Gray mold: Leads to wilting and stem browning; worsens in wet conditions. Remove infected stalks.
Stem rot: Cottony growth near soil line; infected plants should be removed.
Snapdragons offer rich color, versatility, and seasonal interest in gardens, making them a valuable addition for novice and experienced gardeners.
For more information contact your local extension office or click on the following links.