by Carrie Stevenson | Apr 15, 2021
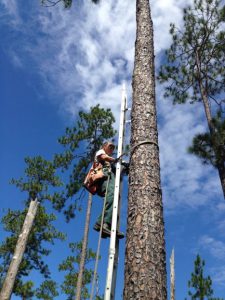
A biologist with Blackwater State Forest checks longleaf pines for signs of red cockaded woodpecker nests. Photo credit: Carrie Stevenson, UF IFAS Extension
Longleaf pine is a granddaddy among the trees of the Southeastern United States, once covering up to 90 million acres throughout the coastal plain. Tall and stately, slow-growing and dense, it was one of the most desirable trees in the forestry and shipbuilding industry for two centuries. Its sap was used to produce turpentine, tar, and pitch, especially to coat and waterproof the bottoms of wooden ships. Its tall, upright form made for a perfect ship’s mast. Between the years 1830 and 1935, approximately 90% of the Southeast’s old growth longleaf trees were harvested, and much of the land was used for farming or development.
Besides its commercial uses, the longleaf ecosystem supports a wide diversity of other plants and animals. The endangered red-cockaded woodpecker nests only in the wood of old (100-500 years!) longleaf pines, and the canopy shades a grassy groundcover often dominated by wiregrass. Gopher tortoises, the endangered indigo snake, and quail also thrive in longleaf pine ecosystems.
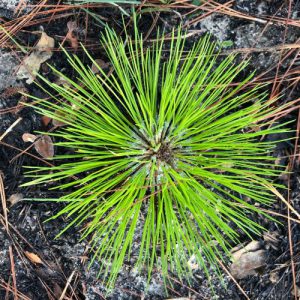
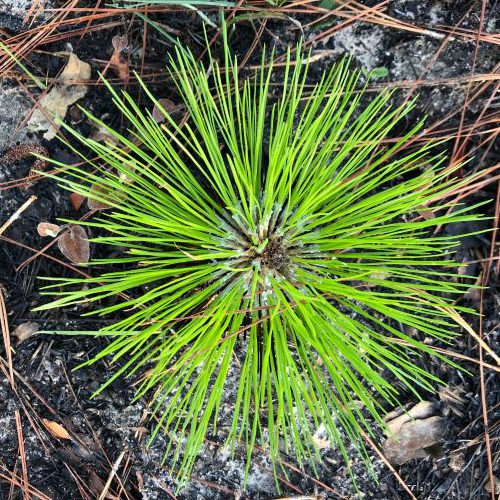
A longleaf pine in its grass stage. Photo credit: Carrie Stevenson, UF IFAS Extension
The longleaf pine is highly adapted to fire while in its “grass” stage and as an older tree, allowing it to tower over smaller hardwoods that are cleared out in natural and prescribed fires. This clearing allows its own seeds to sprout and thrive, and for low-growing grasses to dominate the understory. Pines can be difficult to differentiate in the southern forest, but longleaf pines have deep (up to 8-12 feet) taproots and long needles—up to 18 inches—in fascicles of two or three. The needles grow in spherical bunches that look like cheerleading pom poms.
As ecologists and foresters have realized the important role these trees play in the landscape, significant efforts have been undertaken to restore much of that habitat on both public and private land. Locally, Blackwater State Forest and neighboring Eglin Air Force Base have replanted and managed thousands of acres of longleaf habitat. Foresters and nonprofits also work with private landowners to reestablish these stately pines.
by Stephen Greer | Apr 15, 2021
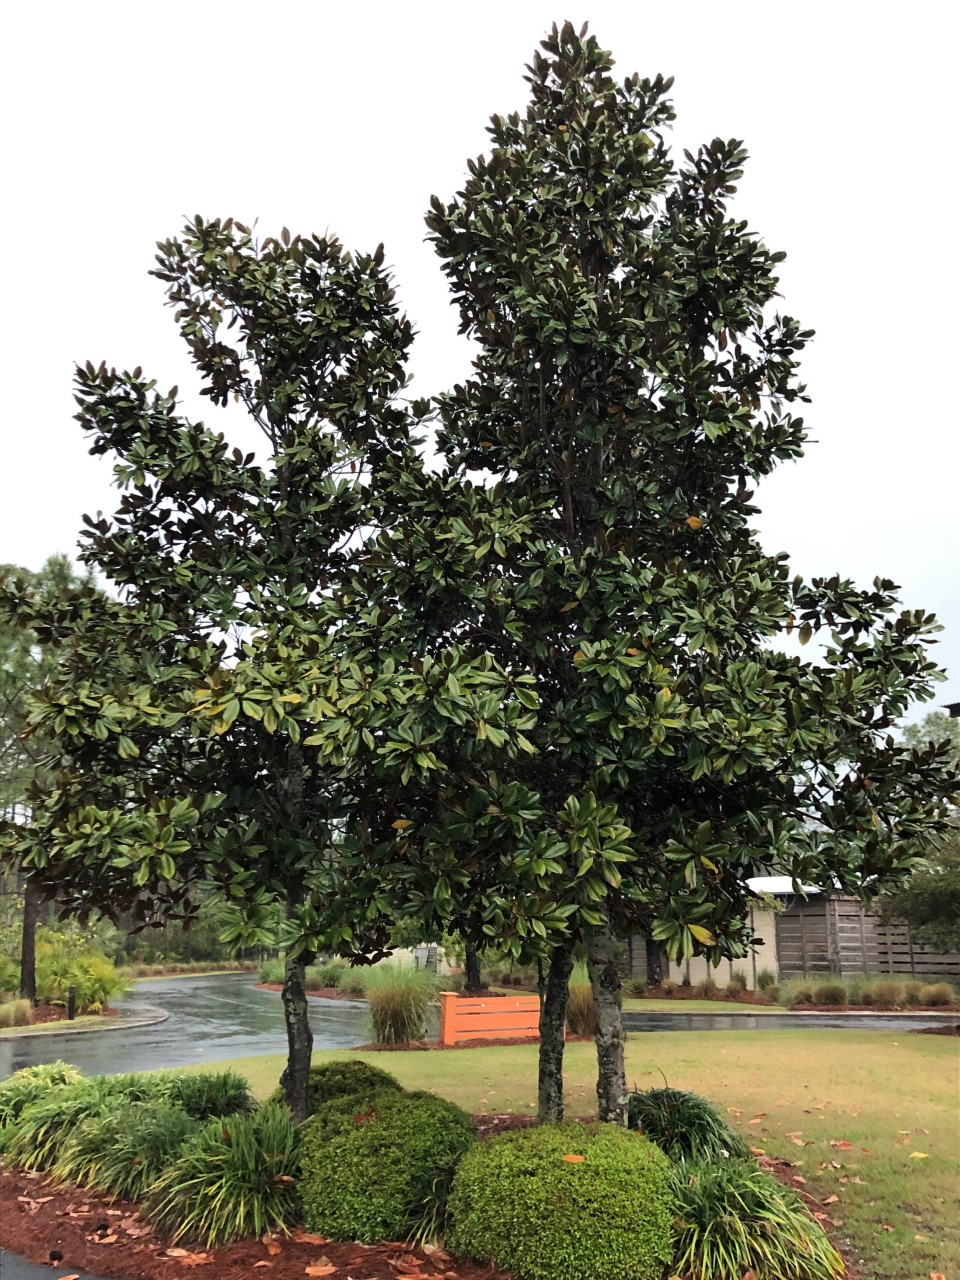
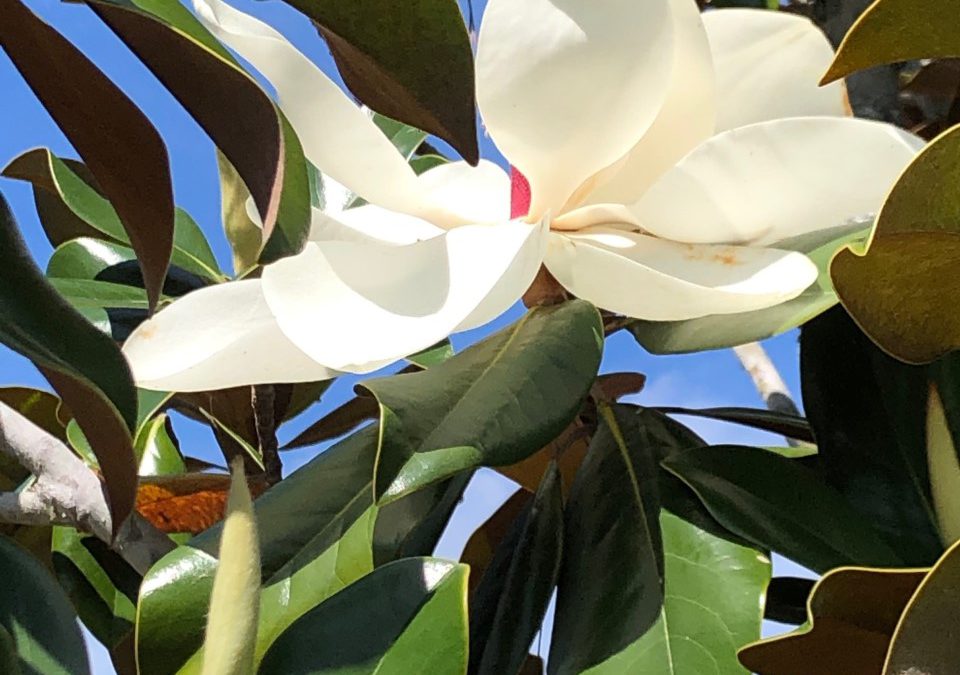
There is a tall stately tree that can be found throughout the southeastern states, native in nature with a lustrous green leaf the southern magnolia is like no other tree. This amazing tree can be found from the edge of deep woodlands to the back of the tall sand dunes in the panhandle of Florida, all the way down the Florida Peninsula. The leaves provide a consistent evergreen providing a year-round presence in the landscape. Spring brings up small plate sized creamy white blooms with a wonderful fragrance with multiple blooms opening over 3 to 5 weeks. The magnolia can serve as a specimen tree or a back drop to allow other plants to be enjoyed.

Magnolia Tree in the Landscape. Photo courtesy Stephen Greer
Often the magnolia is envisioned to be this 80-foot tall by 40-foot-wide tree with an upright pyramidal shape with the branches reaching to the ground and up to 8-inch-long shiny green leaves. There are other shapes and sizes in the landscape industry that have been found in many different ways from seedling research that has taken place at several of our land grant universities including the University of Florida. Other magnolia with different growth and bloom habits have been found growing in nature. Below are a few of these exceptional species that were selected by the keen eye of a nurseryman or a plant specialist. Next come decades of field grown observation to determine if the plant characteristics are consistent with cuttings taken and rooted to grow more trees. This is one way to see if the same look and growth continues in multiple plants.

Magnolia Bloom. Photo courtesy Stephen Greer
If you grow trees from collected seeds, the new seedlings will show variable growth patterns and likely not present a consistent growth or leaf form from tree to tree. This is the reason for taking cuttings from a magnolia with the desired growth habit, leaf size and color, bloom color and fragrance.
Several cultivars have risen to the top in popularity in the landscape industry over the last 30 to 40 years. One of the most popular large magnolias is ‘Bracken’s Brown Beauty’. It was selected in a seedling field when one of the universities had completed research and invited a local nurseryman to come take any he wanted before the field was turned under for other plant research. Many were dug and field planted at the nursery with one showing many desired characteristics. With its dark rusty brown lower leaf and deep green top. It was observed for a number of years with cuttings taken. One major observation was its tolerance to cold weather. They had a winner and began to introduce it into the plant industry. ‘Little Gem’ is another magnolia that is quite popular for its dwarf (slower) upright growth habit. It first was considered a hedge plant with a dense leaf canopy from bottom to top. The challenge is the plant density opens up as it matures with it ultimately reaching approximately 30-foot tall by 20-foot wide. The surprising part of this smaller magnolia is its bloom is similar in number, yet 3 to 5 inches in size in large numbers as the other southern magnolias. Next there is a few weeks rest period and then sporadically blooms all summer and early fall. There are so many magnolias that could be mentioned I just don’t have enough article space, so it will stop with ‘Claudia Wannamaker’. This magnolia is an old stand by that has been found to be moderately salt tolerant and can be found growing near coastal settings. The leaf wax layer is slightly thicker allowing for a little more protection from the salt. It has a more open multi-truck growth allowing for wind to pass through more easily. The challenge is finding one in the landscape industry.
Contact your UF IFAS Extension office in your county with questions. Enjoy this wonderfully unique tree.
by Daniel J. Leonard | Apr 8, 2021
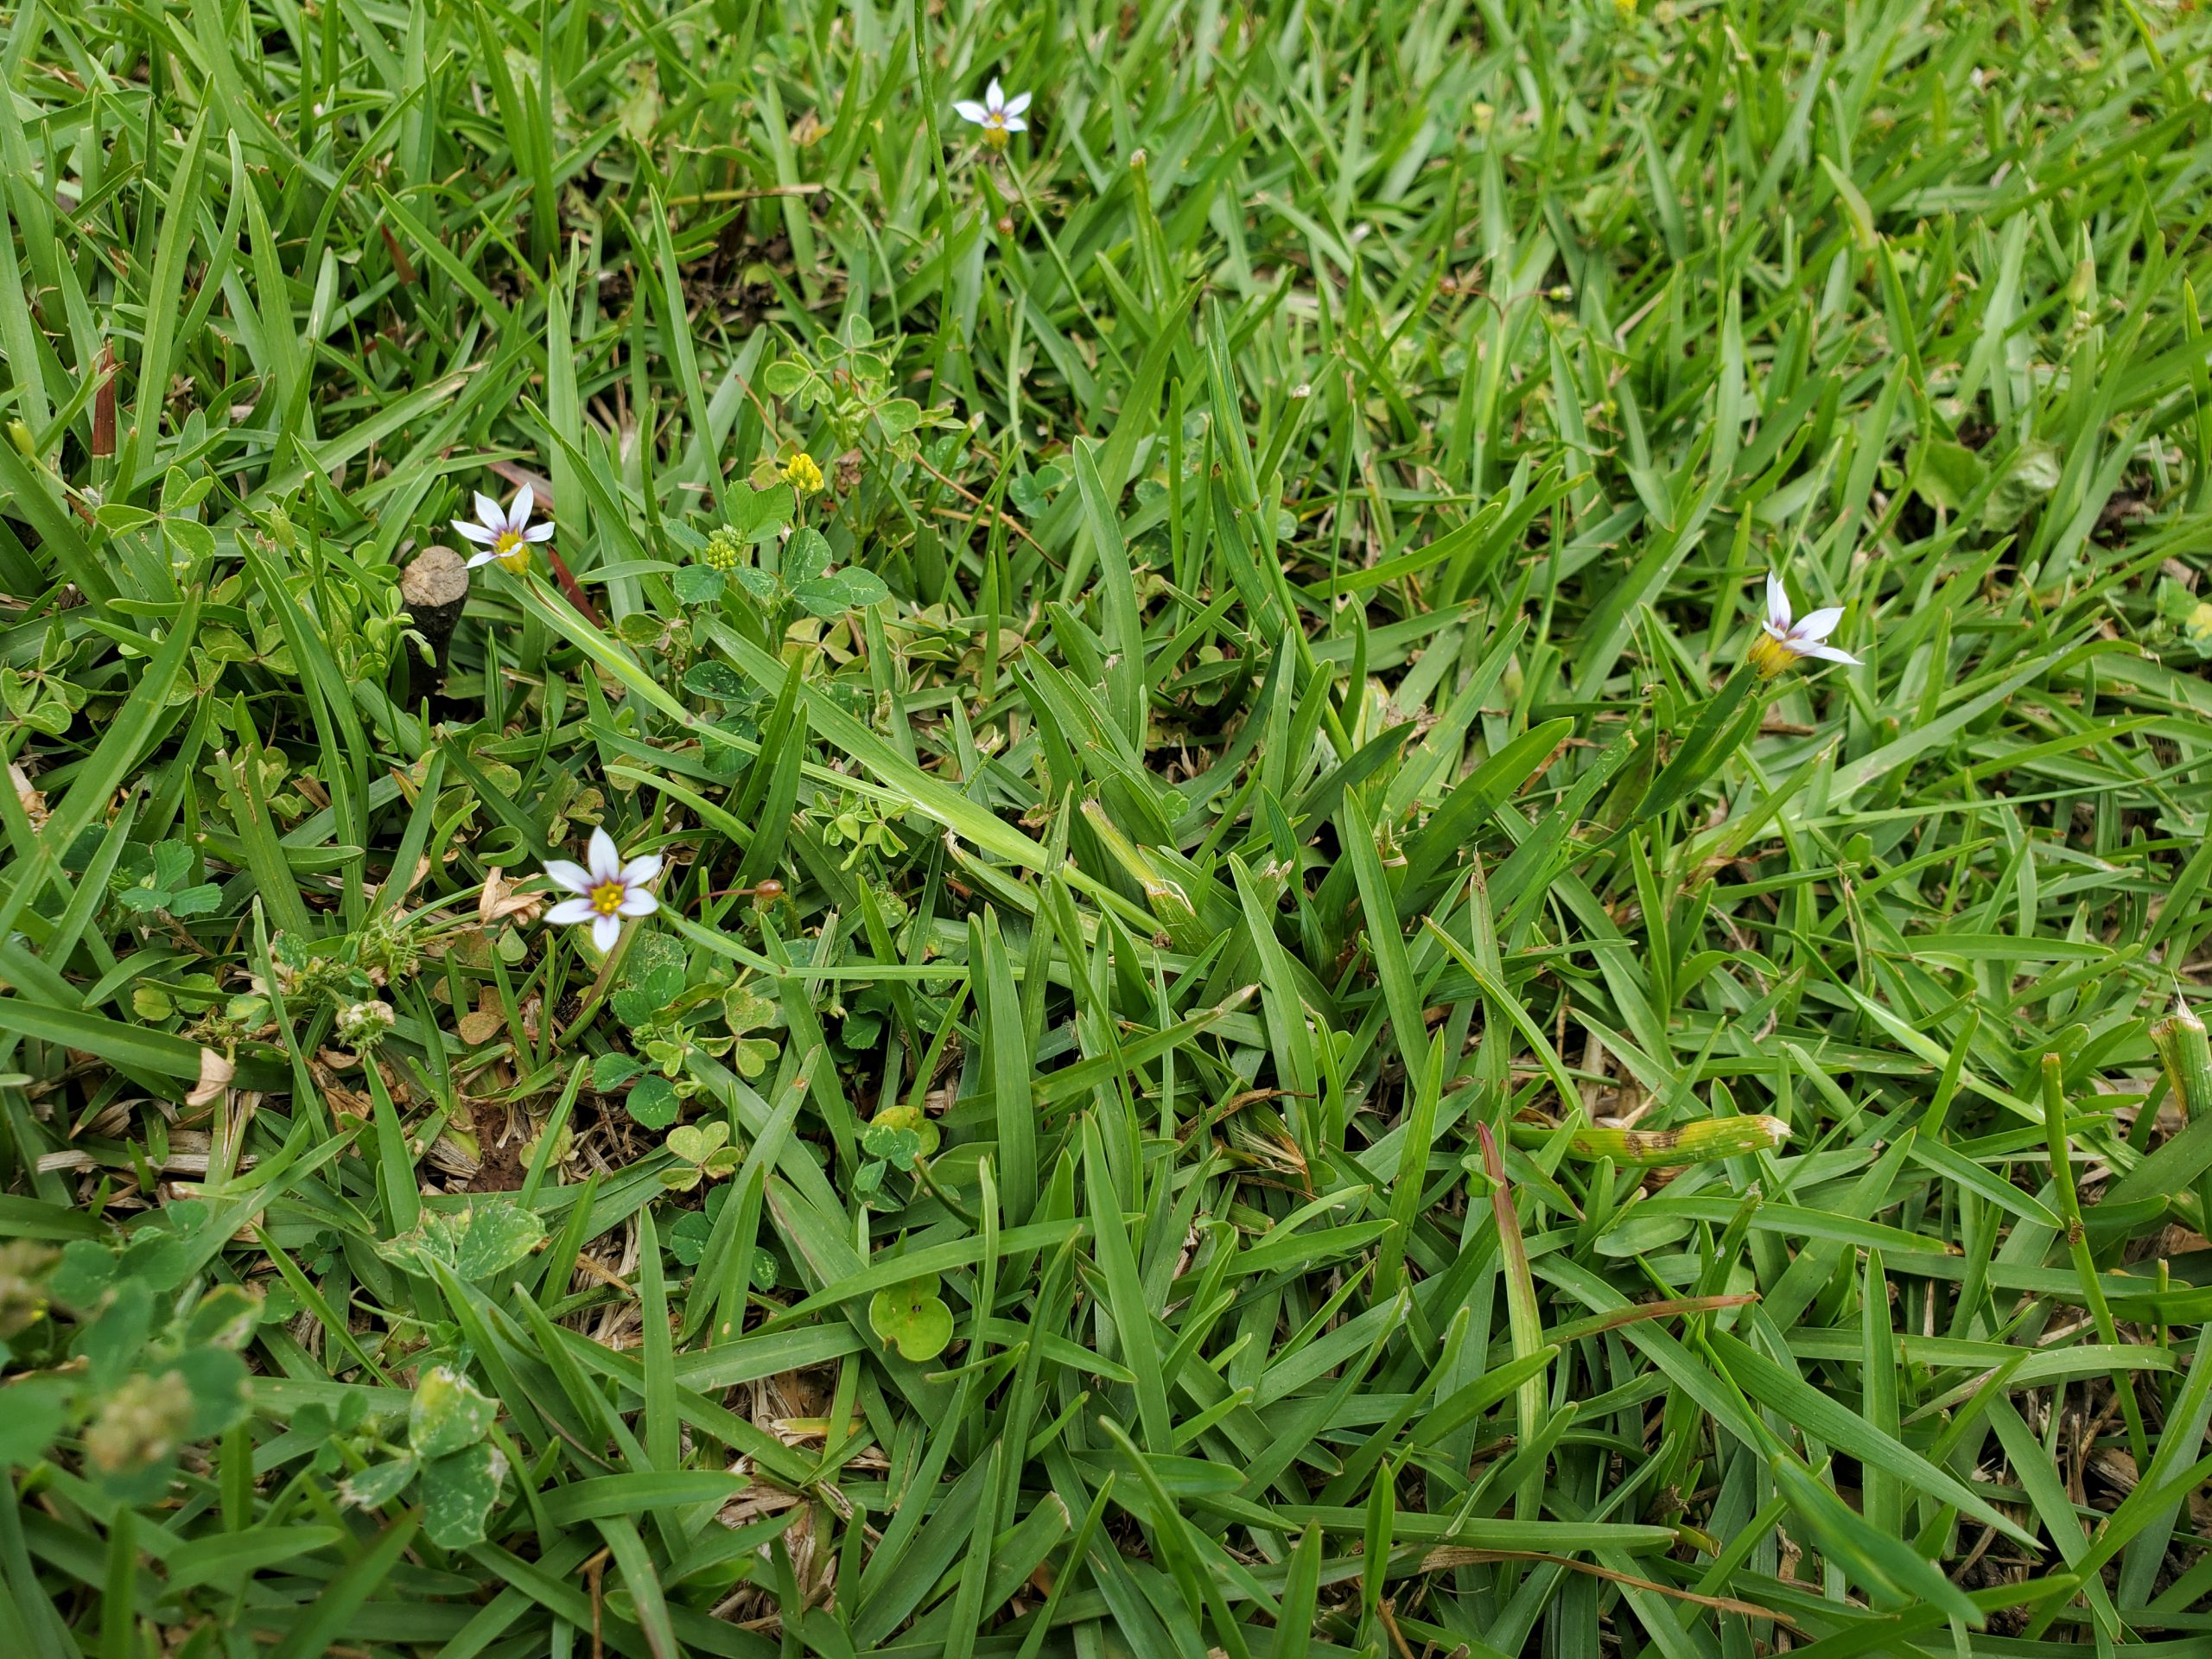
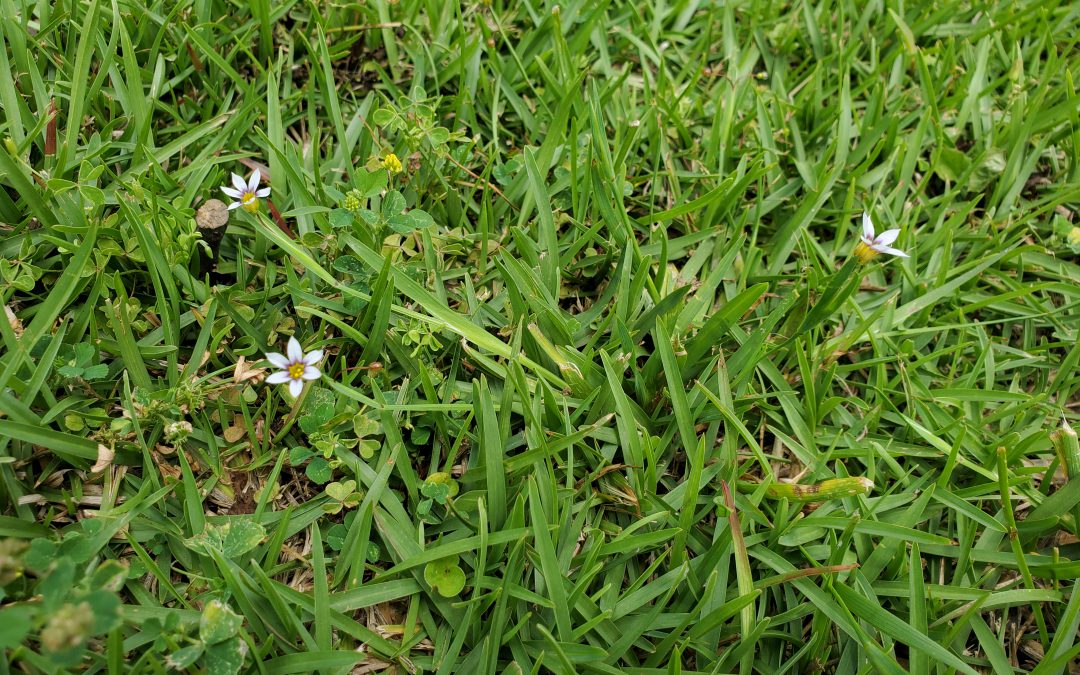
The line separating what is a weed and what isn’t often comes down to where the “weed” is growing and who is managing the area it’s growing in. Blue Eyed Grass (Sisyrinchium rosulatum), one of the most complained about lawn weeds this winter/spring falls squarely in that category! Native plant enthusiasts and homeowners looking to add native wildflowers to their landscape value the plant for its low maintenance, star-shaped blue blossoms in spring. Professional and home turfgrass managers, however, loathe the plant as it masquerades as grass to the untrained eye, looks messy in the cool months, and can displace turf during spring green up. While Blue Eyed Grass can be a pretty landscape plant, our focus today is on learning why it is such an annoying weed in turfgrass areas and exploring control options if it becomes a problem!

Blue Eyed Grass (Sisyrinchium rosulatum) in a Centipedegrass lawn in late March. Photo courtesy of Daniel Leonard.
For starters, Blue Eyed Grass (BEG) is not even a grass, though it does look an awful lot like one! It is actually a member of the Iris family and is more closely related to spring beauties like Gladiolus, Iris, and Crocus than any turfgrasses. The flowers, appearing late March through April, are a dead giveaway that we aren’t dealing with a grass, as are the flat leaves arranged in bunched fan-shaped rosettes. BEG is considered a winter annual plant in Florida, meaning it sprouts from seed in the fall, grows through the winter, then flowers and sets seed in the spring. Because it grows while lawn grass is dormant, it is very noticeable during its entire lifespan. Though BEG can tolerate a range of soil types, it prefers to grow in moist areas, making it right at home in Panhandle lawns and landscapes in the winter as we experience regular to excessive rainfall throughout our cool season.
All the above characteristics make BEG an annoying weed in lawns. It hides in turfgrass very well until the turf goes dormant in the dead of winter, leading most homeowners to ignore it until it becomes a problem in the spring. At this point, BEG is nearing maturity and is more difficult to control without damaging the turfgrass. BEG also thrives in our climate and can outcompete poorly managed turfgrass, especially if the lawn exhibits the soggy, compacted conditions that heavy lawn foot traffic and winter/spring rainfall cause. So, what is a homeowner to do?
The first step in controlling BEG is maintaining a healthy turf. Ensure you’re treating your turf well during the growing season by fertilizing appropriately, mowing frequently at the correct height, and irrigating properly. Sending turf into the dormant season stressed by poor growing season management is an invitation to winter weeds. Other cultural practices that can help mitigate troublesome winter weeds like BEG are periodic mowing during the cool season to prevent weeds from going to seed and being diligent about not frequently driving on, parking cars on, or otherwise excessively compacting the soil, a common cause of unhealthy turfgrass.

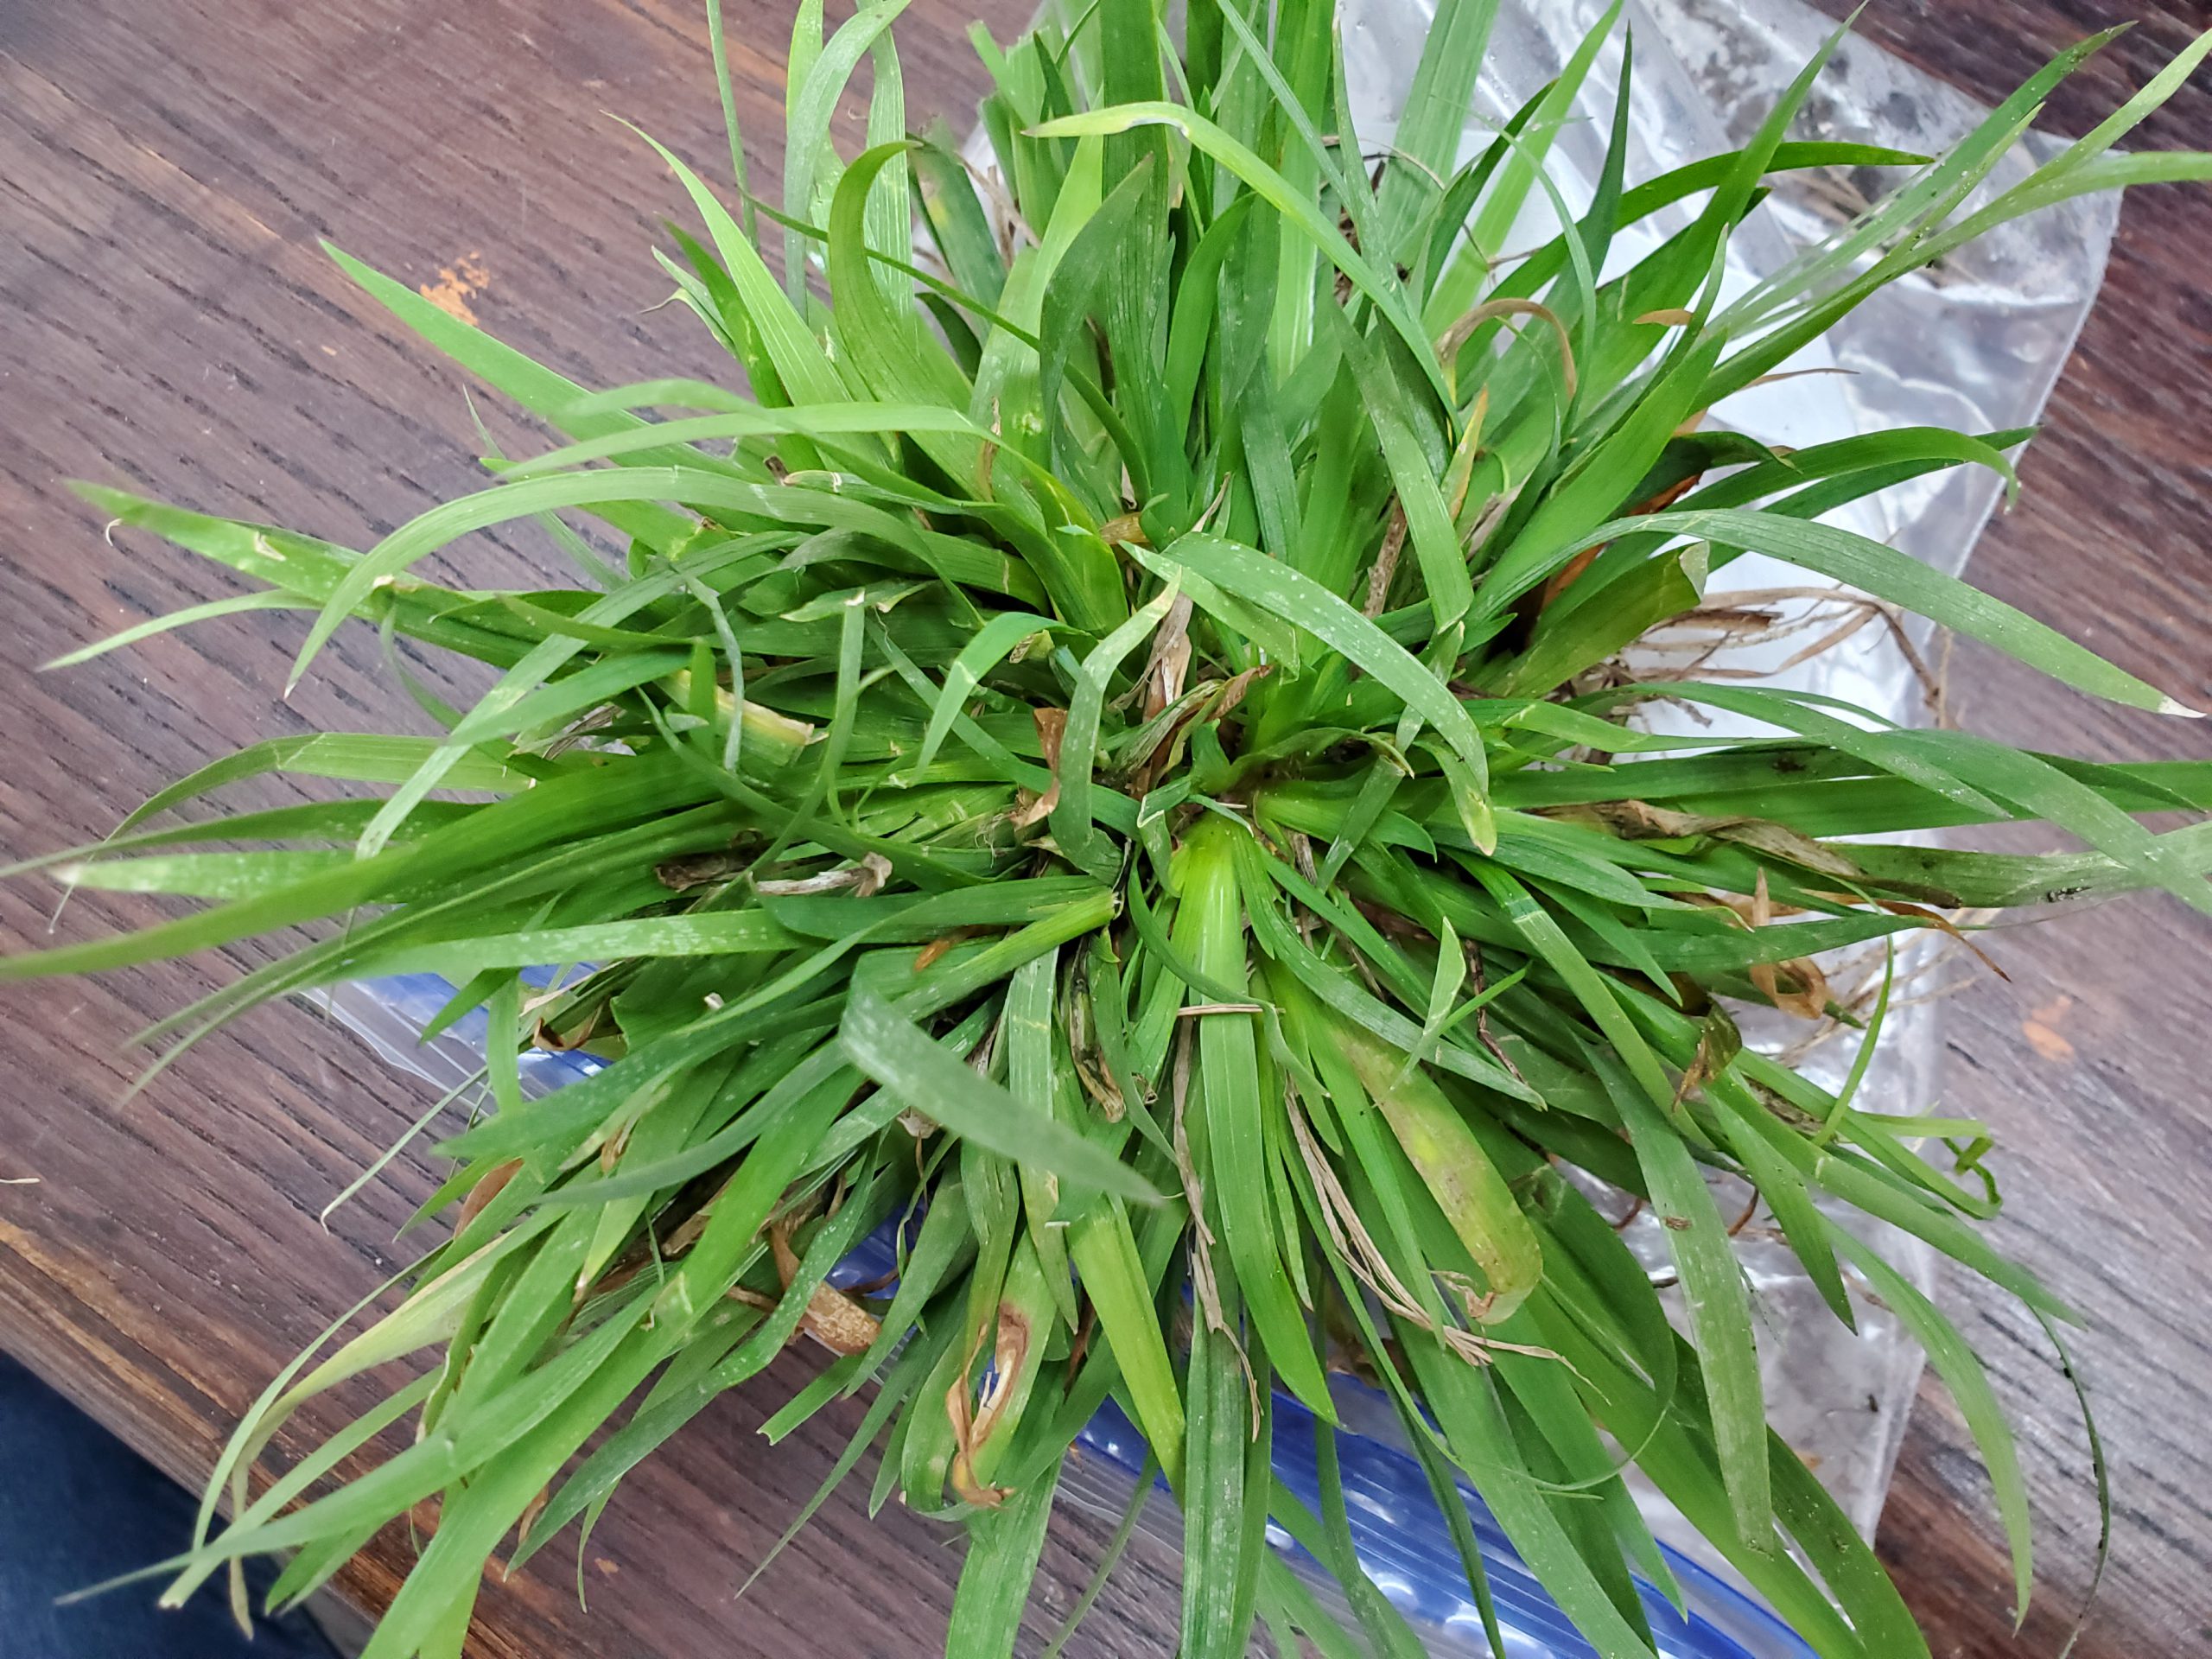
Blue Eyed Grass clump brought into the Calhoun County Extension office for identification and control recommendations in February 2021. Photo courtesy of Daniel Leonard.
After implementing the above cultural practices in your lawn management regime, you may also need chemical herbicides to achieve a clean cool season lawn. There are two basic options for BEG control. First, a fall (mid-late October) application of a pre-emergent herbicide like dithiopyr, prodiamine, or pendimethalin can be very effective at preventing winter weeds from occurring at all. If you happen to miss this fall pre-emergent application, a timely post-emergent application of 2,4-D or other general broadleaf herbicides works nicely as well. (BEG and other cool season weeds are best controlled with post-emergent herbicides in December and January before they mature and begin to set seed. Plan applications accordingly!)
While Blue Eyed Grass can be an attractive addition to the landscape, it is never welcome in turfgrass! To prevent this and weeds from becoming a problem, use smart cultural practices to maintain a healthy turf and make timely herbicide applications when needed. For more information on controlling Blue Eyed Grass and other winter weeds, contact your local UF/IFAS Extension office!
by Mark Tancig | Apr 8, 2021
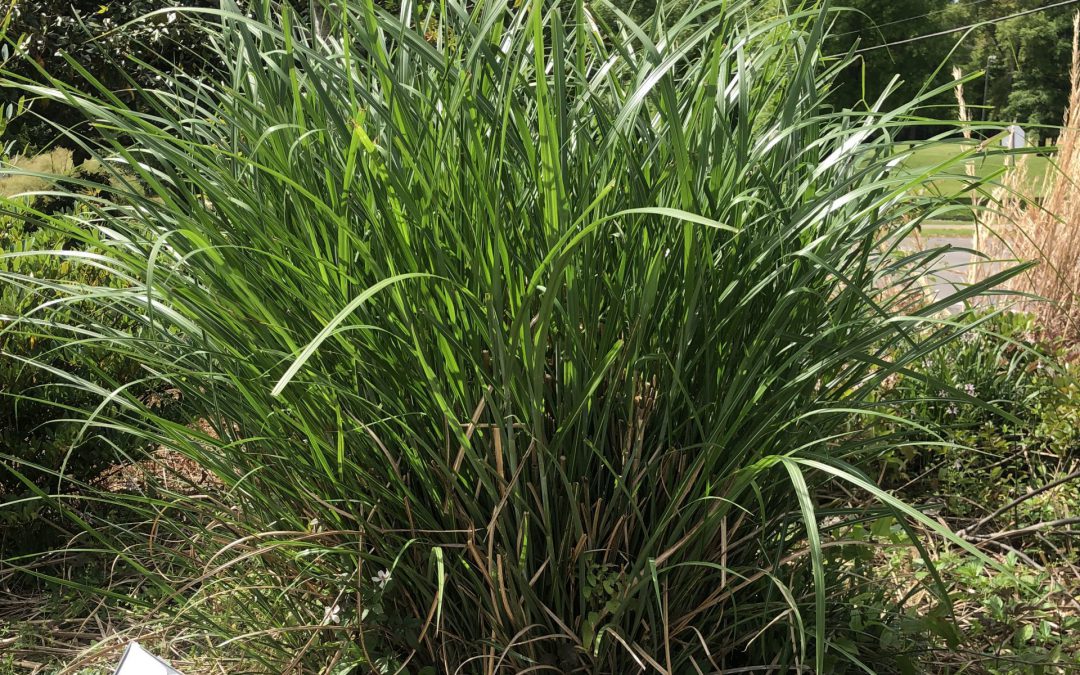
Ornamental grasses are a great addition to the landscape. Most are usually easy to establish, need little water and fertilization, provide different textures, and are generally low maintenance. The one main maintenance activity that is necessary for most of our north Florida ornamental grasses is a good “haircut” in the spring.
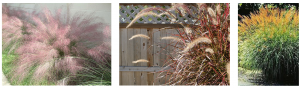
Ornamental grasses for north Florida, such as muhly grass, purple fountain grass, and Miscanthus (l to r), add texture, color, and winter interest to a landscape. Credit: UF/IFAS.
Pruning grasses removes the spent flowers and seed heads, as well as all of the brown leaves, which provided the fall and winter interest that ornamental grasses bring to the landscape. These leaves also serve as a sort of natural wind-chime during the cold, windy days of our winters and may even provide cover and nesting material for wildlife. However, now it’s spring, and lush green growth is waiting to pop through that dead mix of leaves and stems. Pruning clears all that out, allowing for good air movement and a rejuvenation of the plant that can help minimize pests and disease.
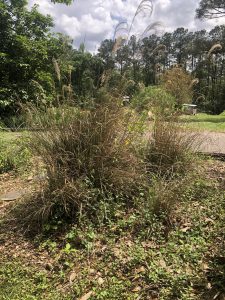
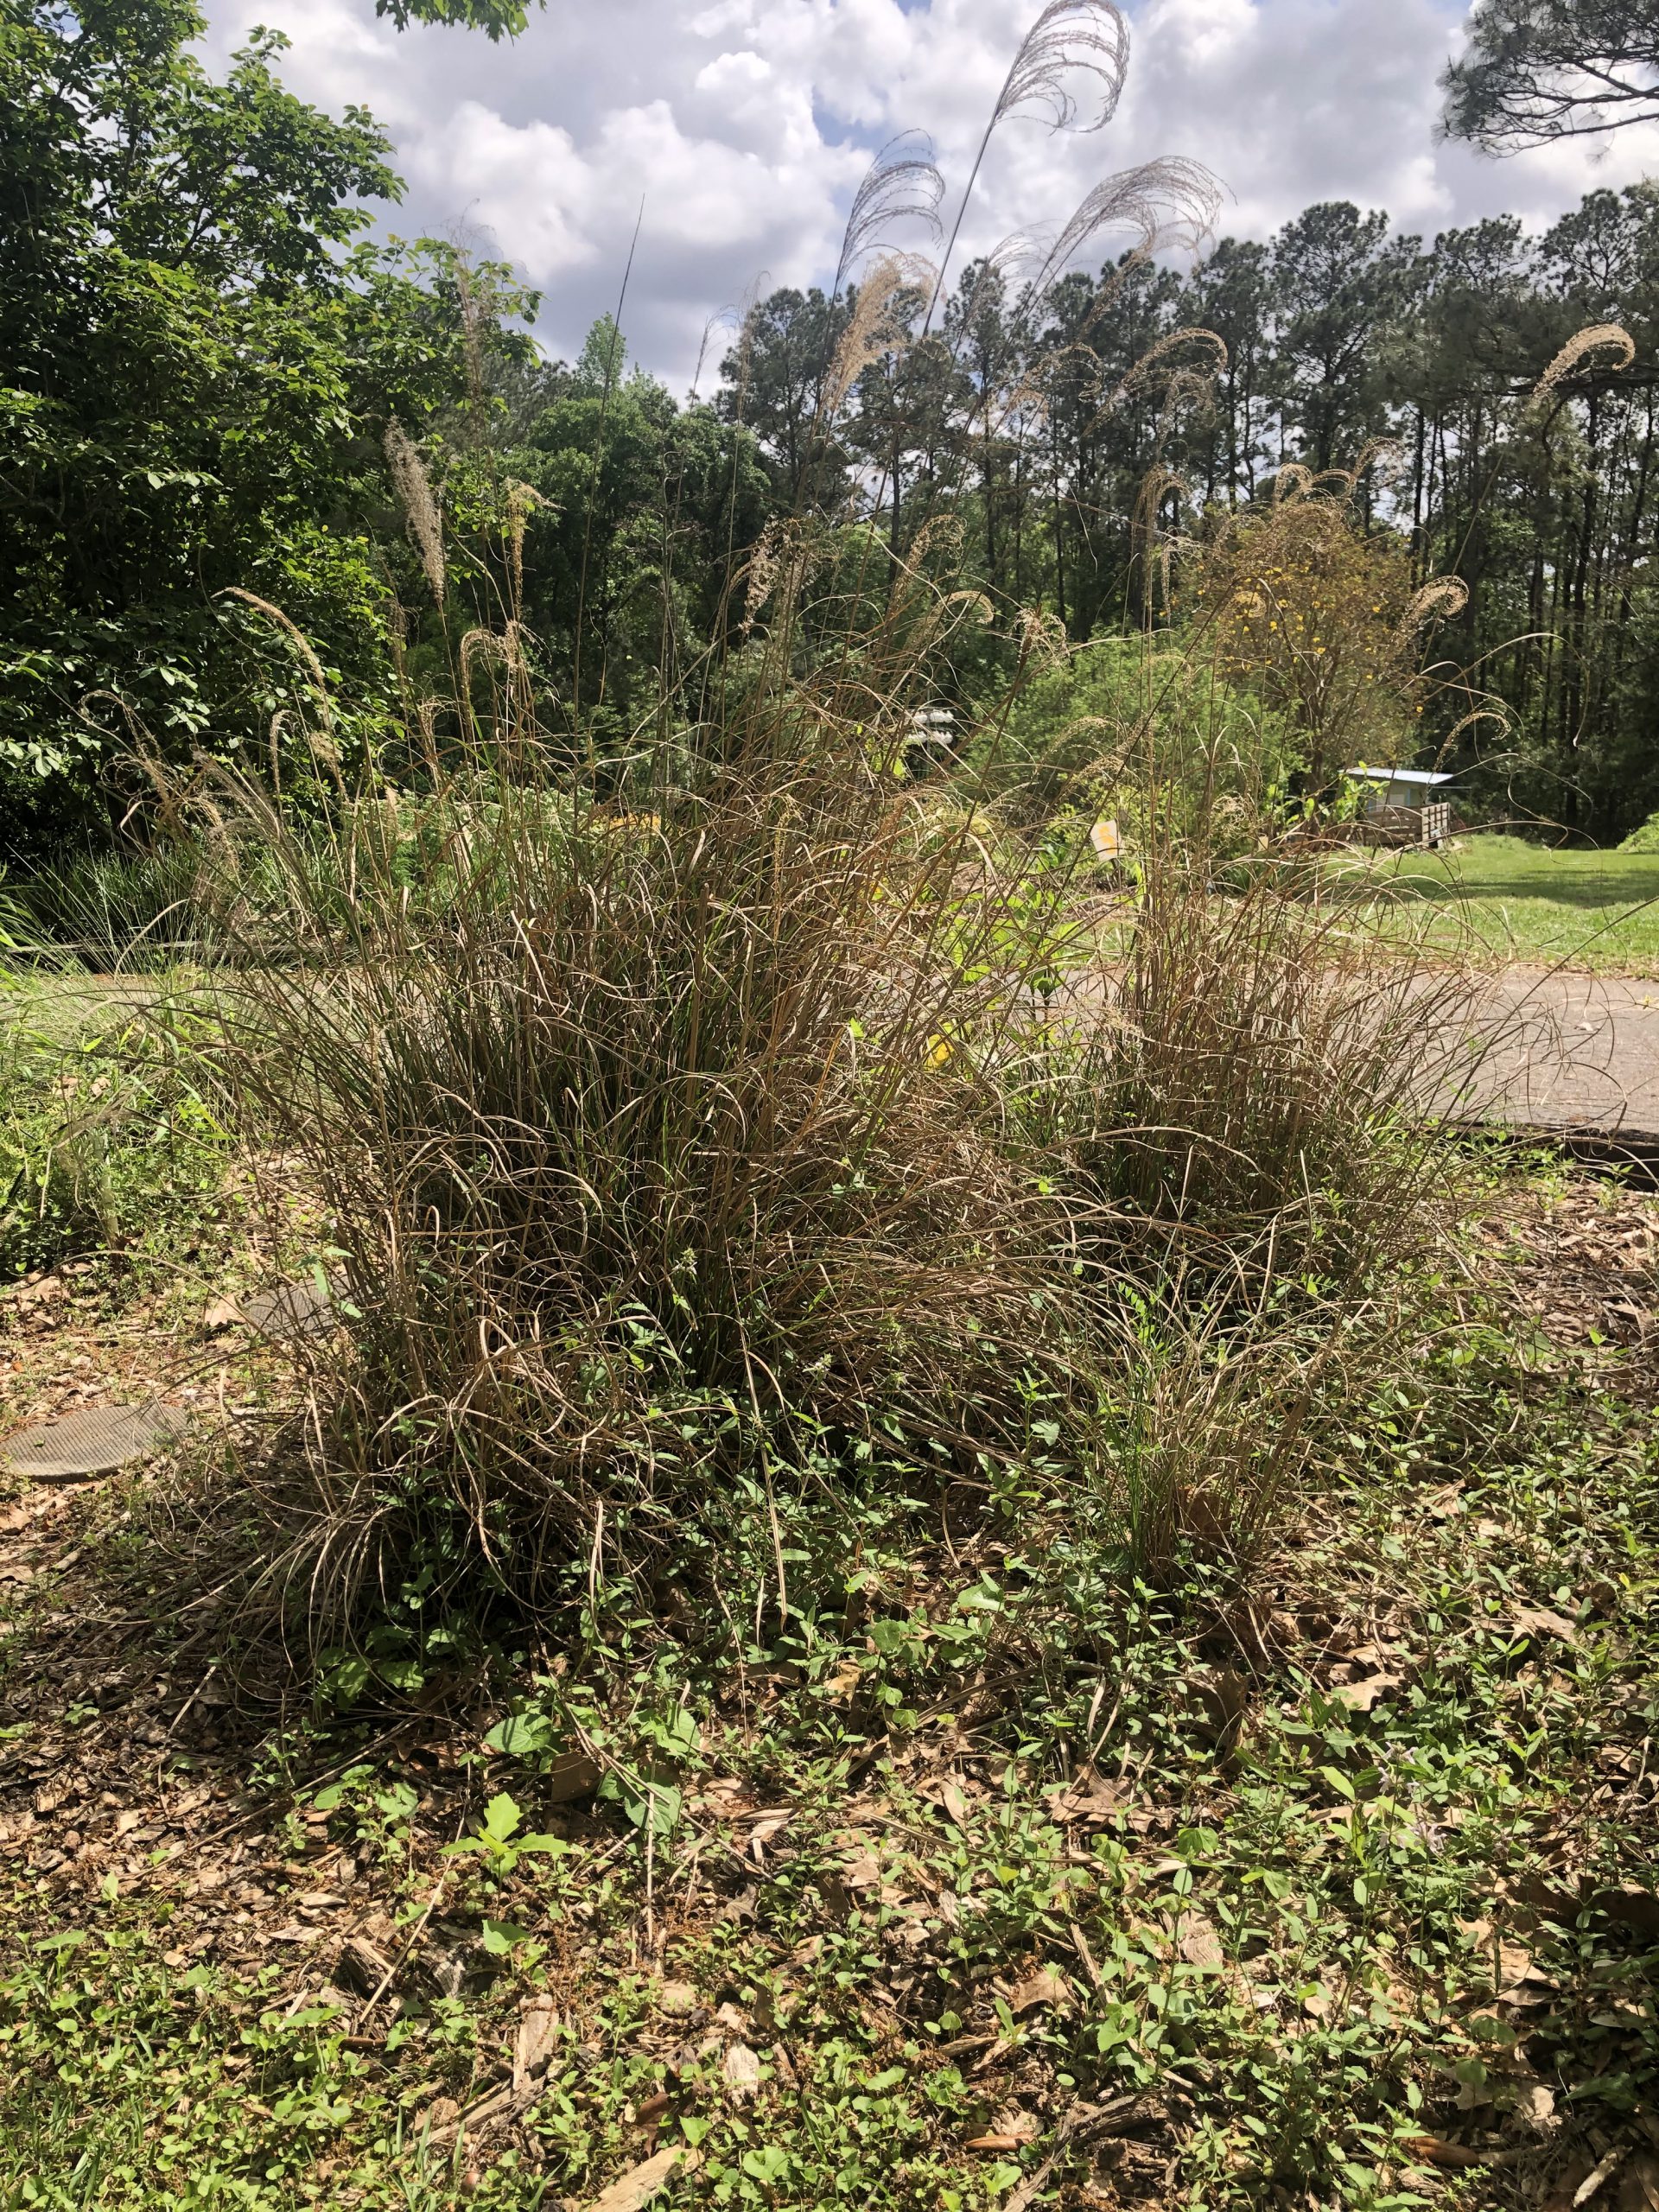
Miscanthus grass before a spring “haircut”. Credit: Mark Tancig, UF/IFAS.

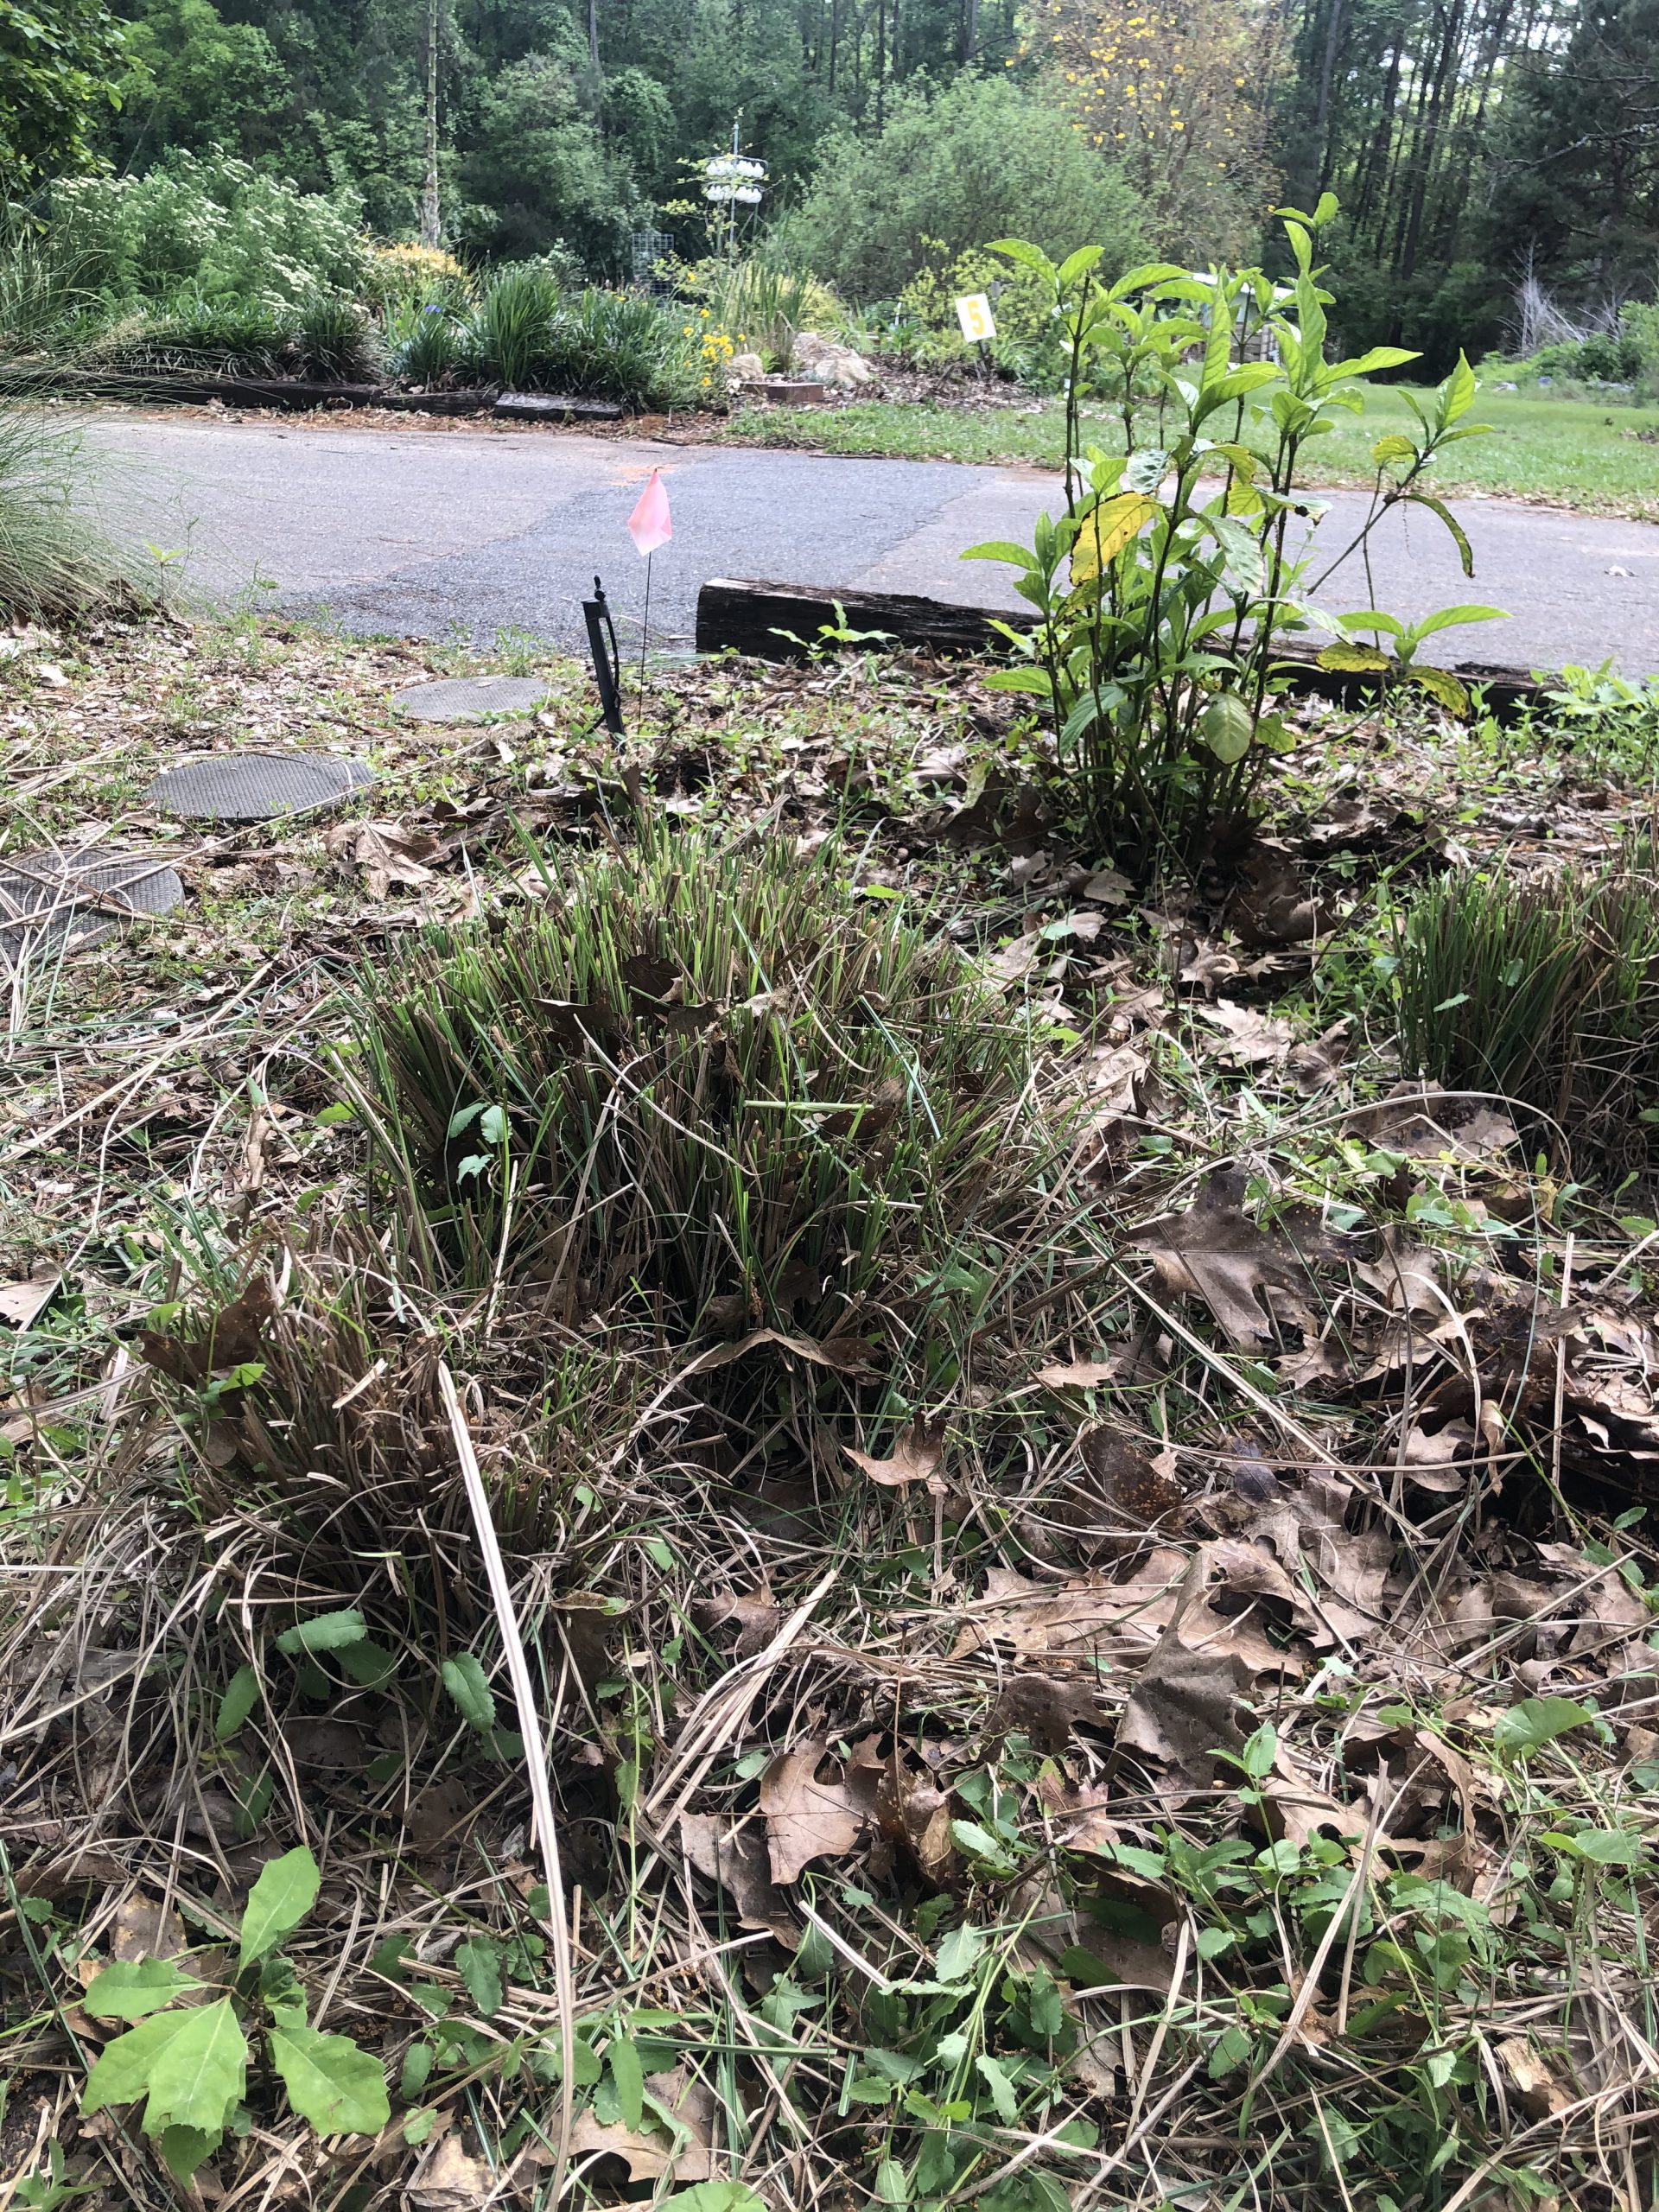
Miscanthus grass after a spring “haircut”. Credit: Mark Tancig, UF/IFAS.
To prune ornamental grasses, wait for after the last average frost date and grab some nice sharp shears. Next, just shear the clump about six inches above the soil line working from the outside towards the center with a slight angle, creating a sort of fade effect. For larger specimens you may need to adjust the cut a bit higher and may even want to use a hedge trimmer. Nice clean cuts are preferred.
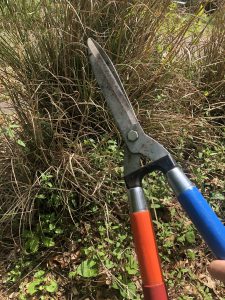
Shears are the way to go when pruning ornamental grasses. Orange and blue handles optional! Credit: Mark Tancig, UF/IFAS
One good pointer I saw online is to also bring along an old belt or a piece of rope to cinch up the dead material before pruning to easily collect the debris. I tend to use a cut and swipe motion that pushes the large material to one side of the plant, and I follow up with a metal garden rake to pull out more of the old, coarser material.
Within no time, new growth will flush out from the mound and often surprise you with how quick it can grow. This proves just how dynamic ornamental grasses can be in the landscape, showcasing lush green growth during one season and providing stark, whimsical interest during another.

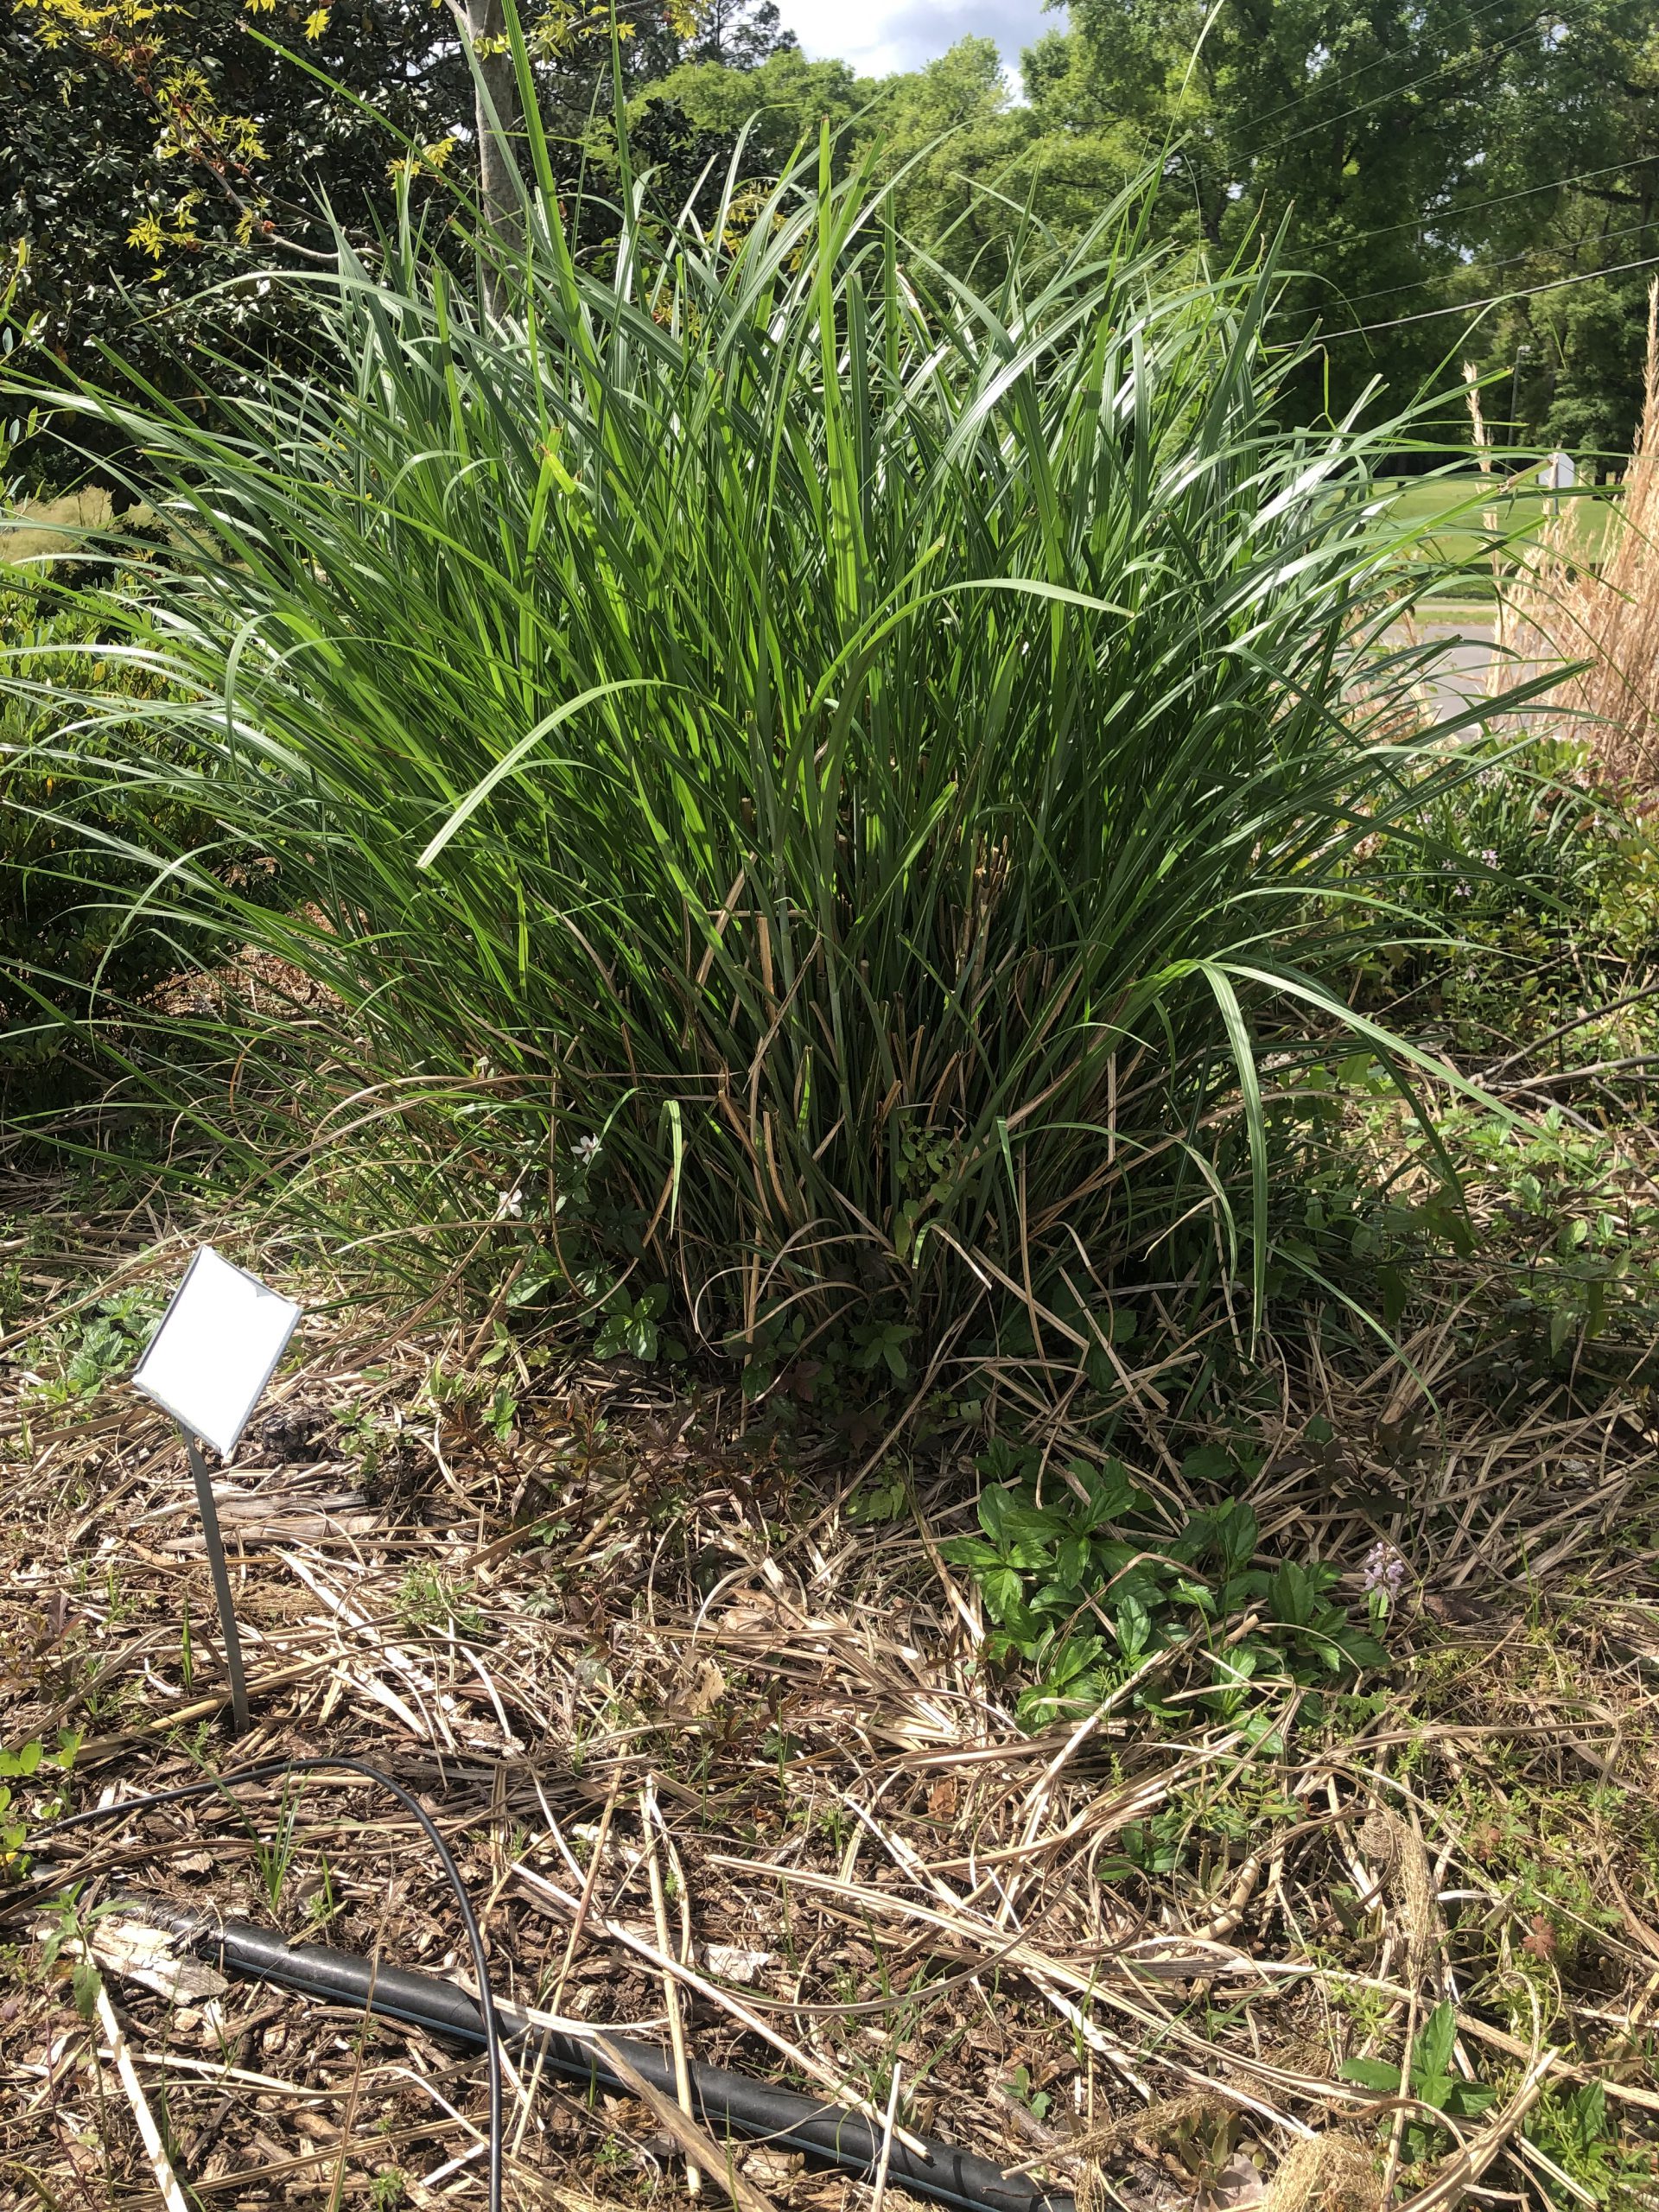
Miscanthus grass two weeks following pruning. Credit: Mark Tancig, UF/IFAS.
by Ray Bodrey | Apr 8, 2021
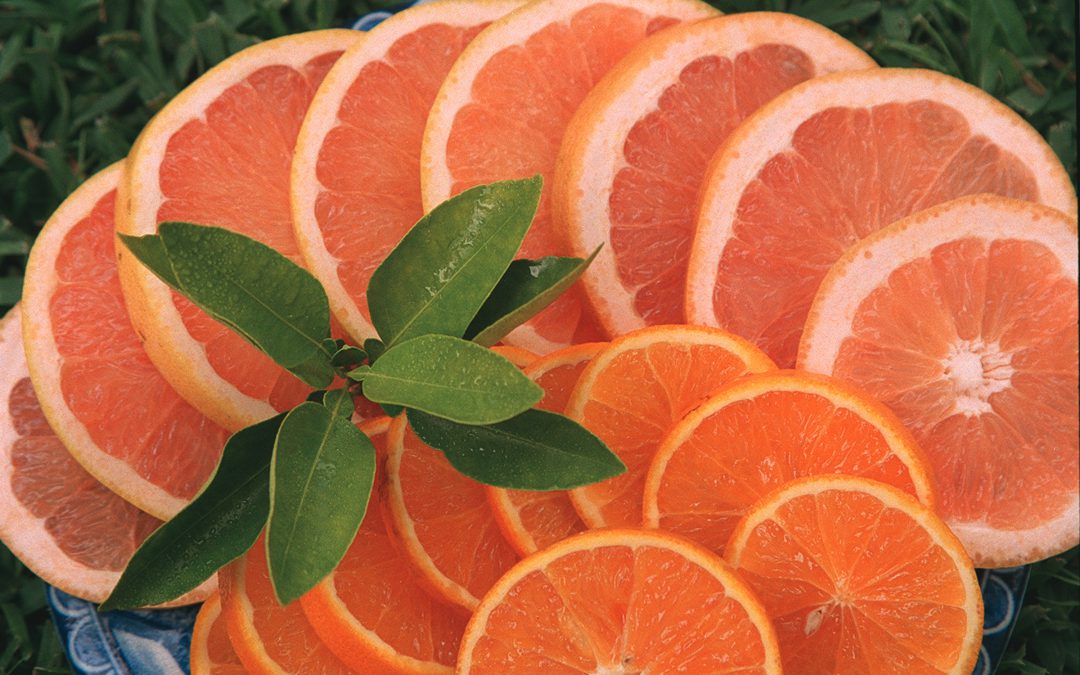
The Sunshine State produces a wide selection of citrus, with a number of varieties that can be grown right here, in your Panhandle dooryard. And, what is more satisfying than picking fresh fruit from your very own trees? So, are you looking for a different variety to plant? The ‘Parson Brown’ sweet orange may be of interest. It can certainly add uniqueness to your dooryard citrus grove.
Originating in China, orange varieties began being introduced in Europe in the fifteenth century. As for introduction to America, Columbus brought orange seeds to the new world on his second voyage in 1493. The first plantings in Florida were around 1513 in the settlement of St. Augustine. For the ‘Parson Brown’, a chance seedling originated at the home of Reverend N.L. Brown near Webster in 1856. Sumter and Seminole counties are still home to some of the largest densities of ‘Parson Brown’ orange trees in the state.

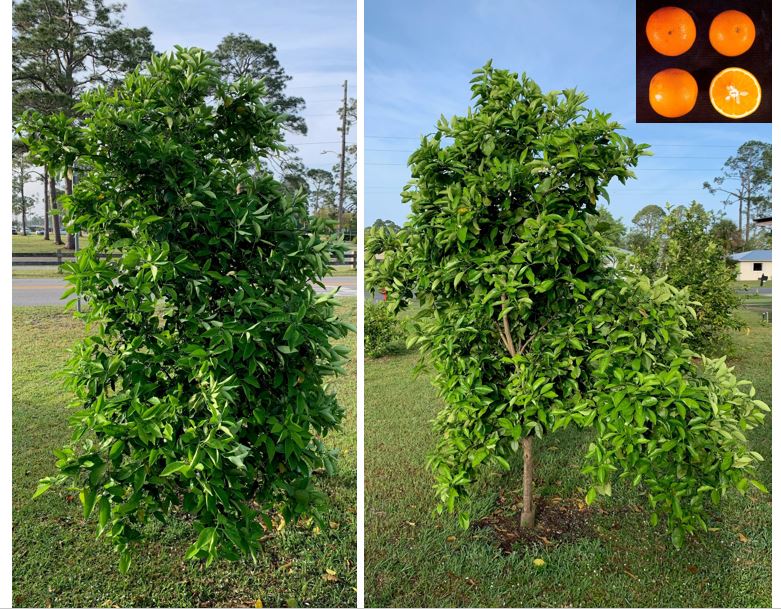
Figure 1: ‘Parson Brown’ Sweet Orange. Credit: D.P.H. Tucker, Ray Bodrey, UF/IFAS.
The Parson Brown, however, is often overlooked. The most popular dooryard sweet orange varieties grown throughout Florida are Navel, Hamlin, Valencia and Pineapple. Availability of this variety in our region is not easily found either, as you may have to search to find a tree.
Unlike the short, round appearance of many citrus trees, the Parson Brown tends to grow tall and slim. The Parson Brown’s more upright tree structure is very distinctive. A specimen will certainly stand out in a grove. The fruit and yield rival a Hamlin orange, particularly when grown in heavy, hammock soils rather than sandy soils with low organic content. The variety is also not as marketable as the Hamlin on a commercial level, due to the heavier seediness. You can expect at least 10 seeds per fruit. Average diameter of fruit is between 2 ½” to 2 ¾”. Harvest season for fruit is generally between October and January. Evidence suggests that along with the ‘Sugar Belle’ variety, the ‘Parson Brown’ may be more disease resistant, specifically more tolerant to citrus greening. HLB or citrus greening is a disease that has devastated both commercial production and dooryard citrus across the state.
Contact your local county extension office for more information. Also, for more information on growing citrus in Florida, see the UF/IFAS Extension EDIS publication, “Citrus Culture in the Home Landscape” by Robert E. Rouse and Mongi Zekri.
UF/IFAS Extension is an Equal Opportunity Institution.