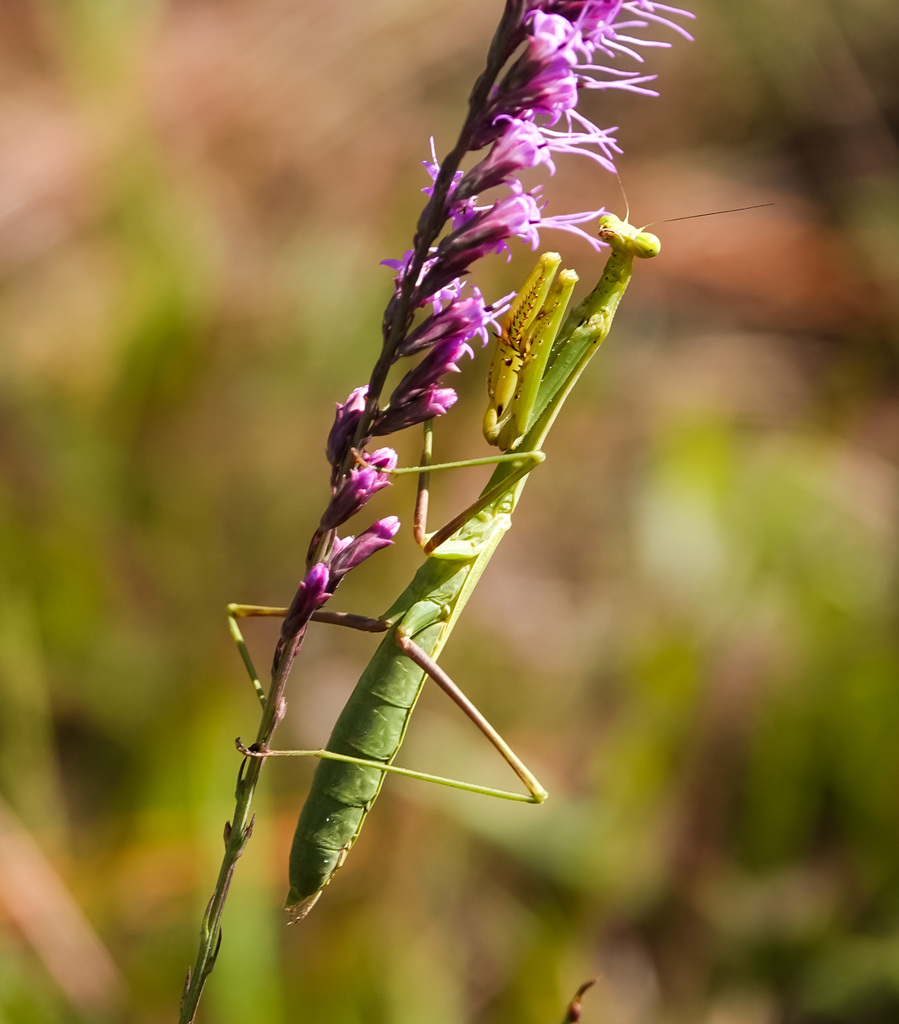
A tiny juvenile praying mantis stalks prey on a gloriosa lily. Photo credit: Carrie Stevenson, UF IFAS Extension
The gloriosa lilies have been in full glory, so to speak, in our garden at the Extension office the last few weeks. While photographing them, I noticed a tiny visitor hidden in plain sight among the flower’s frilly petals and stamen. A bright green juvenile praying mantis, no more than an inch long and the same shade of green as the plant, stood still directly in front of me.
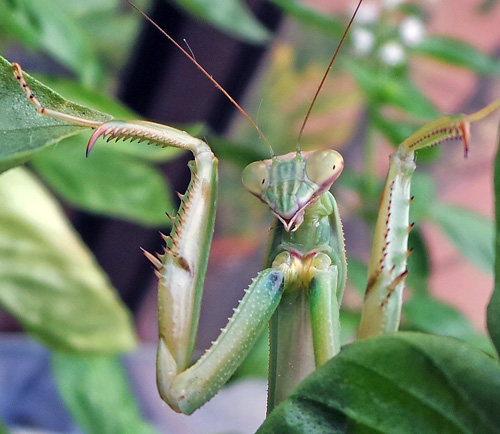
A Larger Florida Mantis perches on blazing star flowers in Sarasota. Photo credit: chaseyb via iNaturalist
Praying mantids are often recognizable and well-known due to their interesting body shape and posture. They have other wild features, too, like gigantic folding “raptorial” (grasping/predatory) front legs and the ability to swivel their big-eyed, alien heads 180°. The large European mantid’s Latin name, Mantis religiosa, comes from the insect’s posture when hunting. It sits or stands with its forelegs folded up as if in prayer, before deploying them rapidly for a meal. All mantid species are ambush predators, capturing prey by sitting in wait, camouflaged in color and shape. They’ve even been observed swaying gently to appear like leaves in the breeze. But when they spring to attack, they are deadly accurate.
The charismatic praying mantis, in stealth attack position. Photo credit: University of Wisconsin Extension
The insects are known for their infamous (but rare in the wild) post-mating male beheading. Mantids are not alone in that cannibalistic behavior—many insects and spiders exhibit this conduct to boost the energy of females as they produce the next generation. Most mantid species are tropical, but of the 2400 known worldwide, only about 20 live in the United States (11 in Florida).
Mantids are considered natural pest control in a garden, although they are generalists and will prey on both beneficial and pest insects. With those spiky front legs raised in the air, they drop down and grasp prey ranging in size from aphids to—rarely—hummingbirds. Their effective predatory behavior doesn’t make them immune from becoming prey themselves, however. Mantids are a food source for many species, including bats, birds, spiders, and fish.
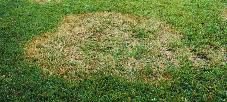
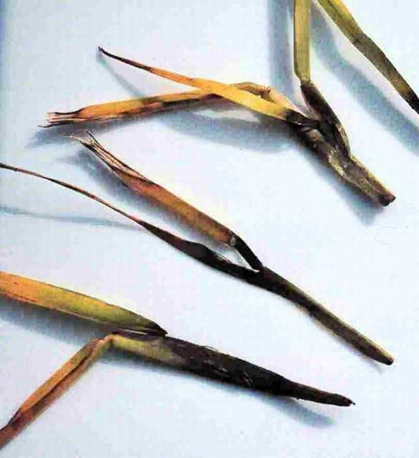
As the temperatures warm into the 60’s (or greater) and the rain chance remains good, keep an eye open for disease in your lawn. Large patch disease is common in turfgrass this time of the year. It is caused by the fungus Rhizoctonia solani. The fungus is present in the soil and thatch layer year-round. When the temperatures rise into the 60’s and 70’s it begins to spread. Large patch thrives under these conditions, especially when the soil is wet. With frequent showers the disease spreads quickly. The first symptom of large patch is circular, discolored areas within the lawn. The outer borders of the patches are orange to yellowish in color. In the center of the circle there are grass blades trying to green up again. They are usually unsuccessful, resulting in odd-shaped patches of dying grass that begin to connect to each other.
Picture from UF publication
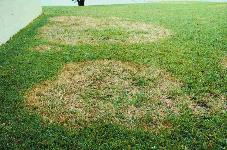
A simple field diagnostic techniques to confirm large patch disease is to pull on the diseased grass shoots near the edge of the circle. The blades will come loose from the stolon easily. At the base of the leaves the stem and sheaths will appear dark brown and rotten. Yes, it is large patch.
Photo from UF publication
If the weather gets colder or hotter very quickly, the disease will go back into dormancy. Looking at the long-range temperature predictions, the rest of February will be going up and down. Remember, the groundhog said six more weeks of winter. So, start looking for a fungicide or two or contact your pest control service. However, remember fungicides don’t cure existing problems. They are utilized as a protectant for the unaffected portions of the grass. When favorable conditions are present, the turf should be sprayed in order to keep the fungus from penetrating the grass blades. Repeat applications will be needed for as long as the weather is cool and wet. Check the product label for the correct intervals. Several cultural practices promote large patch infection including over-fertilization, over-irrigation, low mowing height, poor drainage and excess thatch. This spring, after the grass has greened-up on its own, is a good time to look at these factors and make corrections. Keep a close eye because as soon as the temperatures drop again in the fall, large patch can reappear if the corrections were not complete. For more information: https://edis.ifas.ufl.edu/lh044
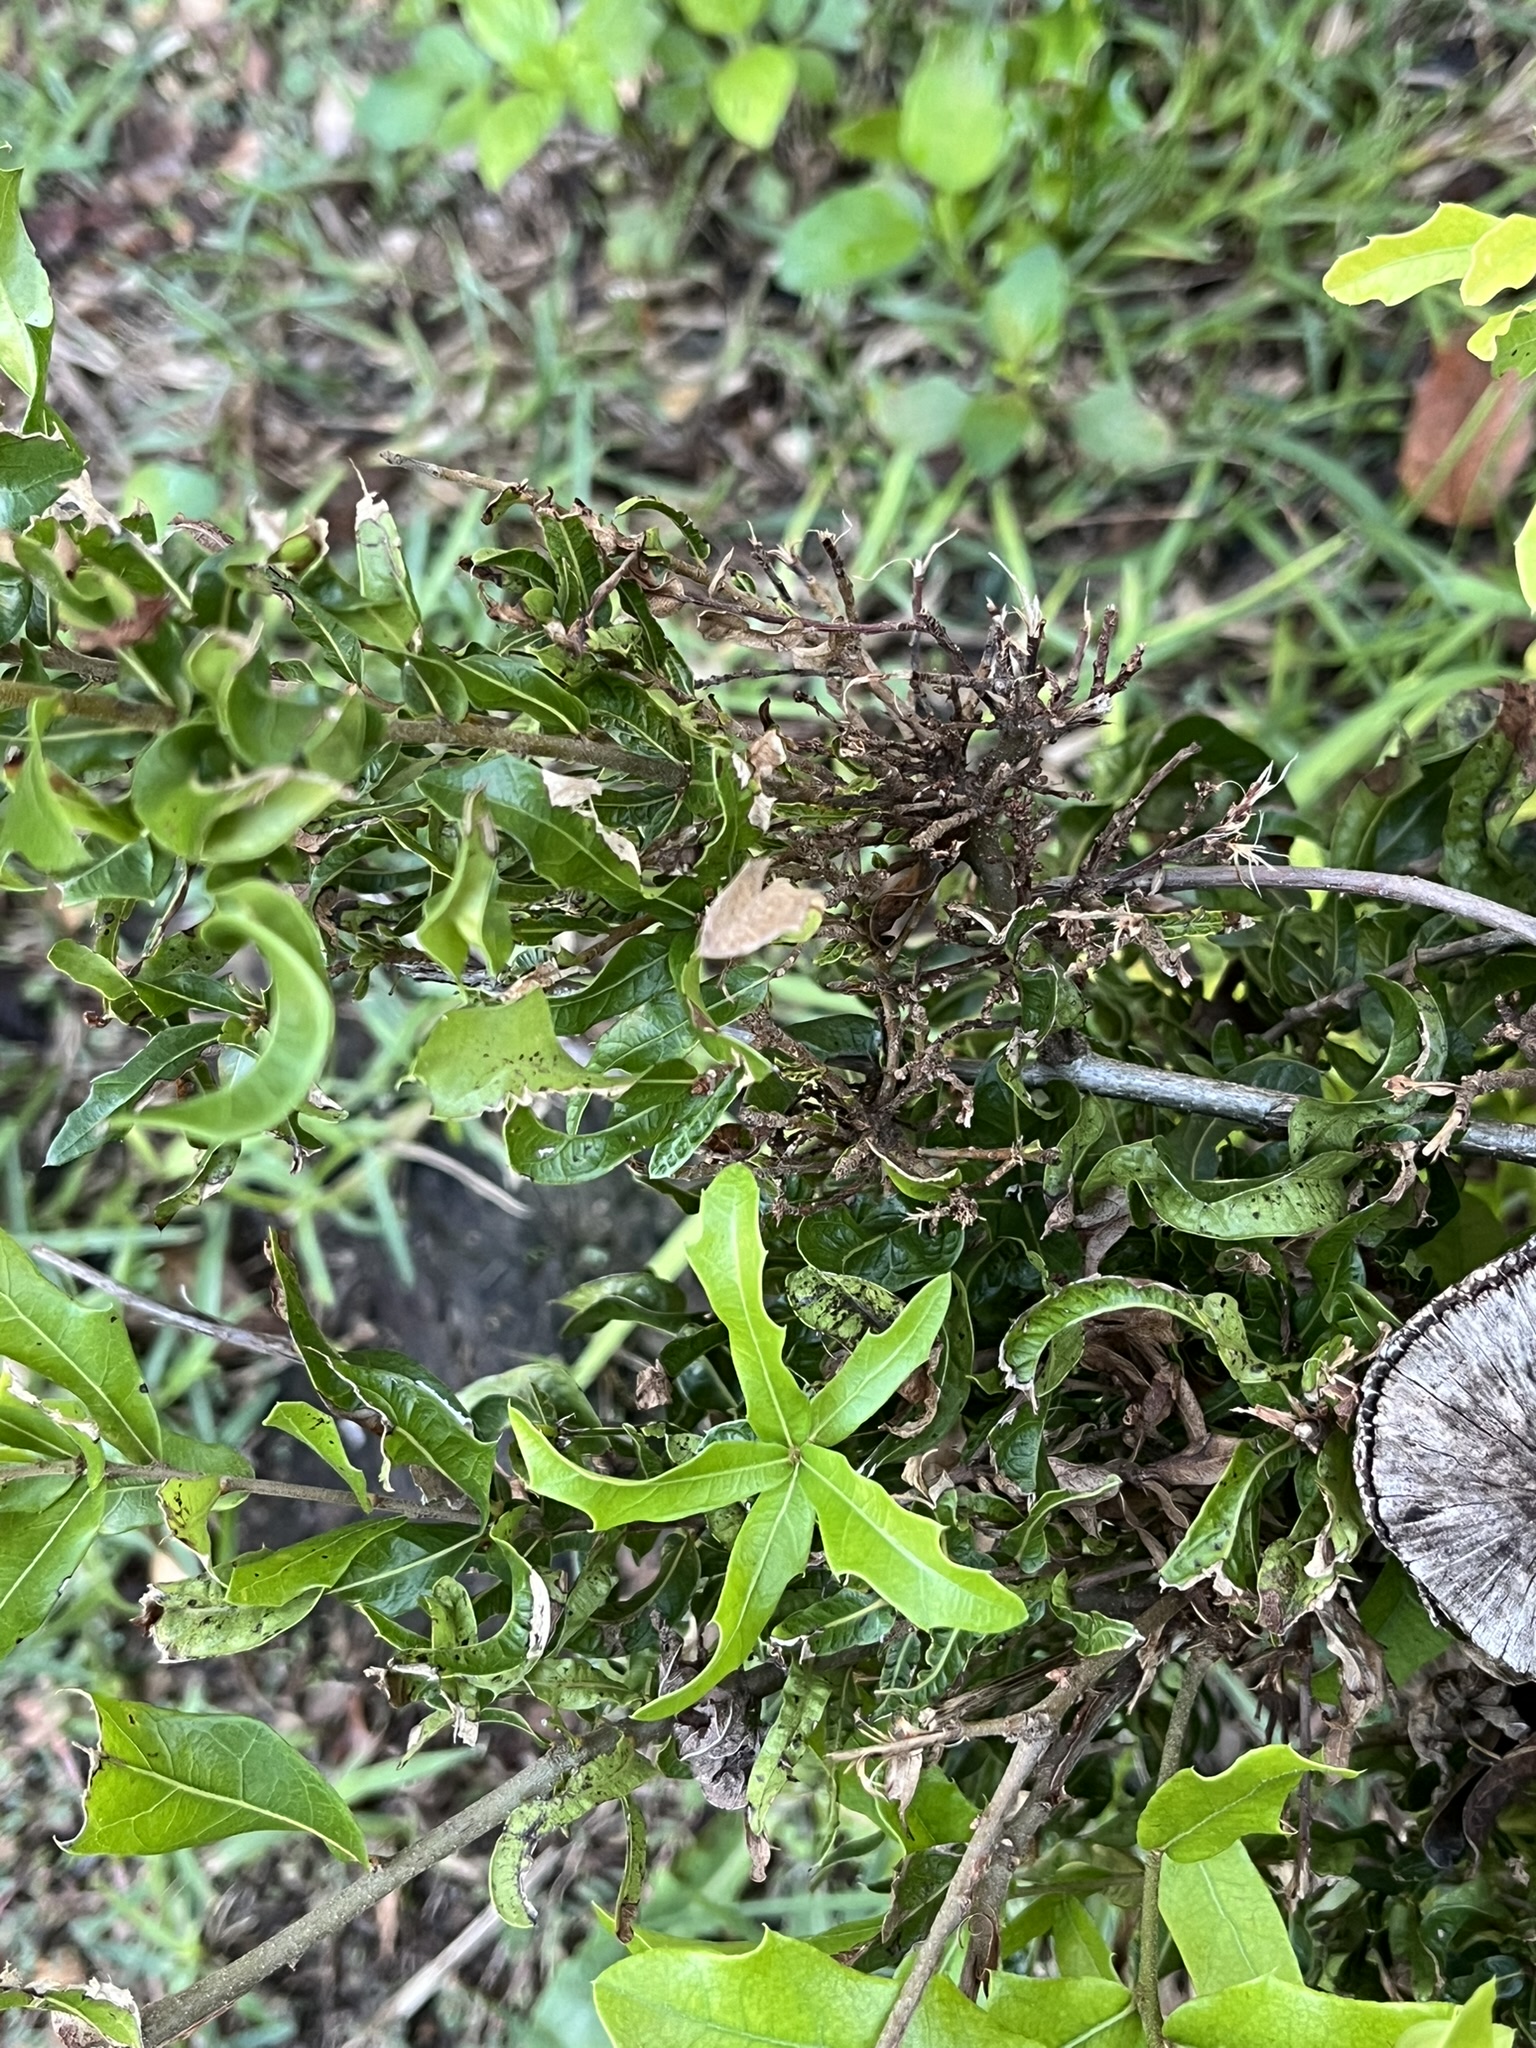
Not all trees and woody species are welcome in the landscape. In fact, some woody species can be pesky and problematic and for lack of a better term “weeds”. Despite the fact that some of these species are native trees, bushes, and vines, many can be aggressive and problematic in the home landscape and urban settings. If you have ever cared for a flower bed or garden in the Panhandle, you are probably well acquainted with these and have pulled seedlings and small saplings out of beds, hedges, and seemingly any other nook and cranny of your landscape. If you cut them off using loppers or a saw you also know how aggressively they resprout and how extensive their root system can become. Vegetation grows quickly and often aggressively in our humid sub-tropical climates. If you leave an area of land vacant for very long here, it quickly becomes a thicket in no time. Some of our oaks, particularly water and laurel oaks, can be pesky and troublesome. It seems like I am constantly battling problem oaks in my home landscape, with varying degrees of success. I will pull out, cut out, and apply herbicide only to look up and see a substantial oak sapling rocketing up through azaleas or other hedges. Without fail this is a water or laurel oak nearly 100% of the time, with some other hardwood trees and shrub species thrown in occasionally.
Oak sapling overtaking shrubbery in a local landscape Escambia County, FL Photo Credit: Ian Stone
What is the best way to tackle these pesky woody “weeds” when they cause persistent problems and pop up in undesirable spaces? The answer is to either mechanically removal them or employ very careful and targeted herbicide application. As a professional forester I have spent a large part of my career controlling these brush species using a host of mechanical and herbicide control methods and very well planned prescribed fires. Obviously using large heavy machinery and prescribed fire in urban and suburban settings and landscapes is not an option but using hand tools for mechanical removal and herbicides where needed and best suited is a winning combo for the home landscape.
First you want to determine what species you are dealing with and what stage of development it is in. As I mentioned, water oak and laurel oak are usually the problem oaks we encounter and can reproduce at extremely high rates and create undesirable crowded stands of stunted oak. These species are what foresters call early successional, meaning they tend to establish in forest openings and areas impacted by a disturbance such as a hurricane or windstorm. They produce large amounts of small acorns and grow very fast and they also have poor characteristics where they are susceptible to wind throw and disease. Effectively, they reproduce heavily, grow fast, and die young; that is their natural adaptation and life cycle and what causes them to be pesky and weedy in the home landscape. We don’t realize it, but our home lawns and flower beds create the perfect early successional habitat for these oaks and other brush species such as yaupon holly, titi, wax myrtle, and others. It doesn’t stop there – in heavily shaded areas, very shade tolerant oaks, brush, and vines tend to become established. Vines such as Virginia creeper, greenbriers (Smilax spp.), pepper-vine, and others are particularly annoying as these woody species also love to grow up in fences, particularly chain link, and are difficult to remove.
So what are the best methods to handle problem woody species in the home landscape? The best option is to catch them as seedlings and young plants and pull them up by the roots and all. If you can do this, you will avoid issues with resprouting. If you have larger, more well-established brush and small trees in your landscape, you can cut them back close to the ground, but you are likely to have issues with resprouting. This can be very frustrating and can result in a persistent problem. By consistently cutting these back you may be able to exhaust the plant’s reserve, but this is unlikely. Depending on the size of the root system you may be able to dig up the roots using some elbow grease and a shovel or mattock, but if significant roots are left behind, some woody species can resprout from the remaining roots. This is when simply cutting off the main stem or other mechanical methods often are not sufficient for long term control.
When dealing with well-established woody species with a significant stem size, using a properly labeled and effective herbicide can be a big time and hassle saver. You want to use a herbicide that is labeled for hack and squirt applications and/or cut stump applications. Many brush control and tough brush herbicides are labeled this way and can be applied using these methods. Herbicides with the active ingredients of triclopyr or glyphosate are the most effective for these methods and readily available for home use. Triclopyr products are usually the most effective on tough brush and woody species. Make sure the species you are targeting is listed on the label and follow the label directions exactly for the methods and concentrations to apply the herbicide correctly.
Oak resprouting from stump after herbicide treatment. Note the deformed leaves on the regrowth showing herbicide damage. Photo Credit: Ian Stone
Cut stump and hack and squirt applications require a bit of a different method of application. Instead of spraying foliage, you apply the herbicide into fresh cuts using a squirt bottle or a paint brush. You should wear proper protective equipment when working with any herbicide and this is also listed in the label. Long sleeves and pants along with chemical resistant gloves and eye protection is usually the minimum recommended. For hack and squirt, make a series of connecting cuts in a ring around the problem stem and squirt the herbicide mixture into the fresh cuts using the squirt bottle. For cut stump treatments cut the stem(s) of the problem tree or shrub off slightly above the ground and apply the mixture using a paint brush or squirt bottle, focusing on the outer portion of the stump right next to the bark. These methods work by introducing the herbicide to the cambium layer, which is the actively growing and live tissue just under the bark in woody plants. By doing this it will travel through the tissue and kill both the roots and stems. It is very important that the cuts are fresh, and the application must be made as soon as possible after the cuts are completed. Once the brush is killed back, you can wait for the stem or stump to rot or remove it once it has completely died. This method is effective at controlling resprouting but is not 100% effective on all applications. If the woody plant in question continues to resprout, you can make fresh cuts and reapply. An advantage of this method is it can be done in winter even when the plant is dormant, as it does not rely on foliage to uptake the herbicide. That means you can use it year-round, and you can take advantage of the cooler winter weather to do this labor-intensive work.
With careful work and proper technique, these methods can be beneficial to control persistent brush problems in the home landscape. When using herbicides it is very important to be aware of off target damage to desirable plants. One of the advantages of hack and squirt and cut stump applications is that they are very targeted and minimize issues with off target damage and drift. Care should be taken not to get the herbicide mixture on the stems of desirable shrubs and trees, and they can penetrate the bark and do damage, especially on thin barked species. If you have questions about how to properly use a herbicide or reading the label contact your local extension office.
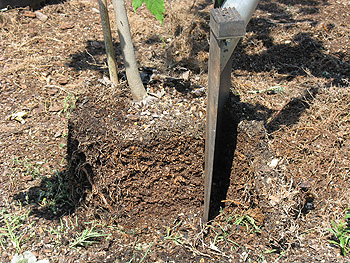
Though the calendar says November, the weather in Northwest Florida is still producing summer or at least spring-like temperatures. The nice days are wonderful opportunities to accomplish many of those outside landscape chores. But, it is also a good time to start planning for next month’s colder temperatures. Since we don’t experience frozen soil, winter is the best time to transplant hardy trees and shrubs. Deciduous trees establish root systems more quickly while dormant; versus installing them in the spring with all their tender new leaves.
Remove an inch or more for extremely rootbound trees.
Here are a few suggestions for tasks that can be performed this month:
Plant shade trees, fruit trees, and evergreen shrubs.
Do major re-shaping of shade trees, if needed, during the winter dormancy.
Check houseplants for insect pests such as scale, mealy bugs, fungus gnats, whitefly and spider mites.
Continue to mulch leaves from the lawn. Shred excess leaves and add to planting beds or compost pile.
Replenish finished compost and mulch in planting beds, preferably before the first freeze.
Switch sprinkler systems to ‘Manual’ mode for the balance of winter.
Water thoroughly before a hard freeze to reduce plants’ chances of damage.
Water lawn and all other plants once every three weeks or so, if supplemental rainfall is less than one inch in a three week period.
Fertilize pansies and other winter annuals as needed.
Build protective coverings or moving devices for tender plants before the freeze warming.
Be sure to clean, sharpen and repair all your garden and lawn tools. Now is also the best time to clean and have your power mower, edger and trimmer serviced.
Be sure the mower blade is sharpened and balanced as well.
Provide food and water to the area’s wintering birds.
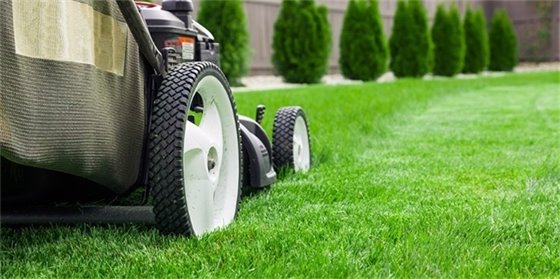
Mowing a lawn. Photo Credit: University of Florida/IFAS
It’s hard to have a great yard full of Centipedegrass isn’t it? All the fertilizer, watering, aerating, weed spraying, fungicide spraying, insect spraying, the list is never-ending and wallet draining. Except, it’s not hard and doesn’t have to be expensive. It’s easy. In fact, it’s so easy that people even make it hard because they think it should be. The list of basic tips to achieve a great yard of Centipedegrass is very short, let’s get into it.
FertilizingProperly – Keep it to a minimum! Centipedegrass has a very low Nitrogen (N) requirement for optimum growth and development (0.4 lbs – 2 lbs/1000 ft 2 per year). Centipede is naturally light green in color and trying to force the deep green of Kentucky Bluegrass upon it will almost certainly do it harm. There are many excellent quality Centipedegrass lawns in the Panhandle that have never received a single prill of fertilizer. Don’t take my word for it though, the UF/IFAS publication Centipedegrass for Florida Lawns says, “Established centipedegrass lawns require about 50% less nitrogen fertilizer than other lawn grasses grown in Florida. Centipedegrass is a low maintenance turfgrass and does not respond well to excessive use of fertilizer, especially nitrogen.”
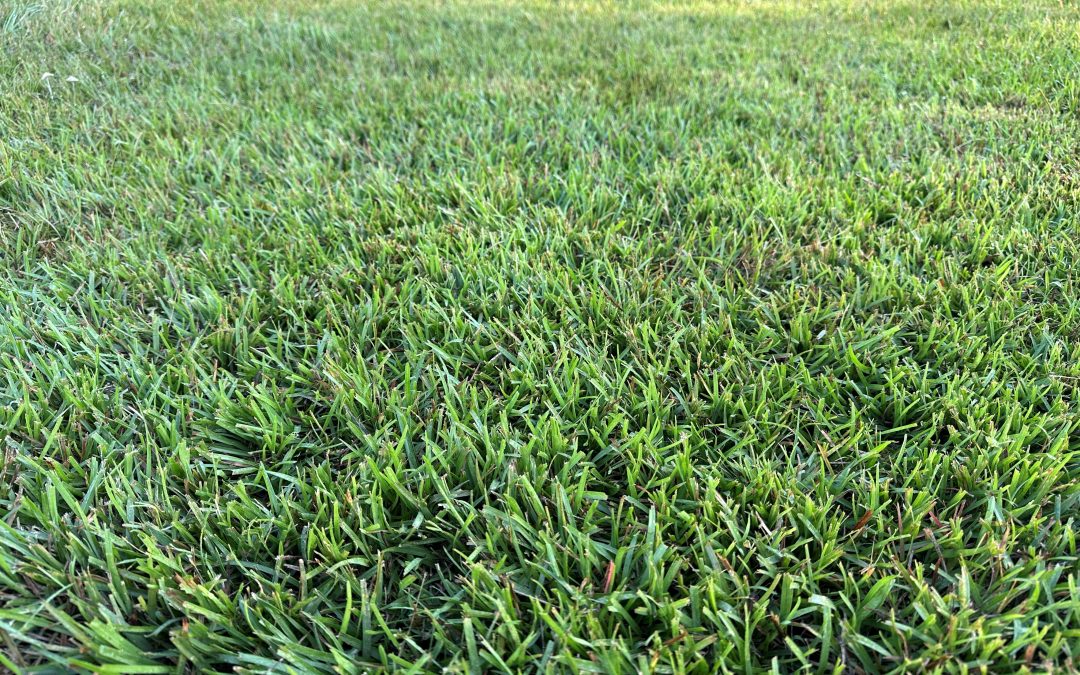
Centipedegrass lawn that has never been fertilized and mowed regularly when it reaches 3″ to achieve a 2.5″ cut height. Photo courtesy Daniel Leonard.
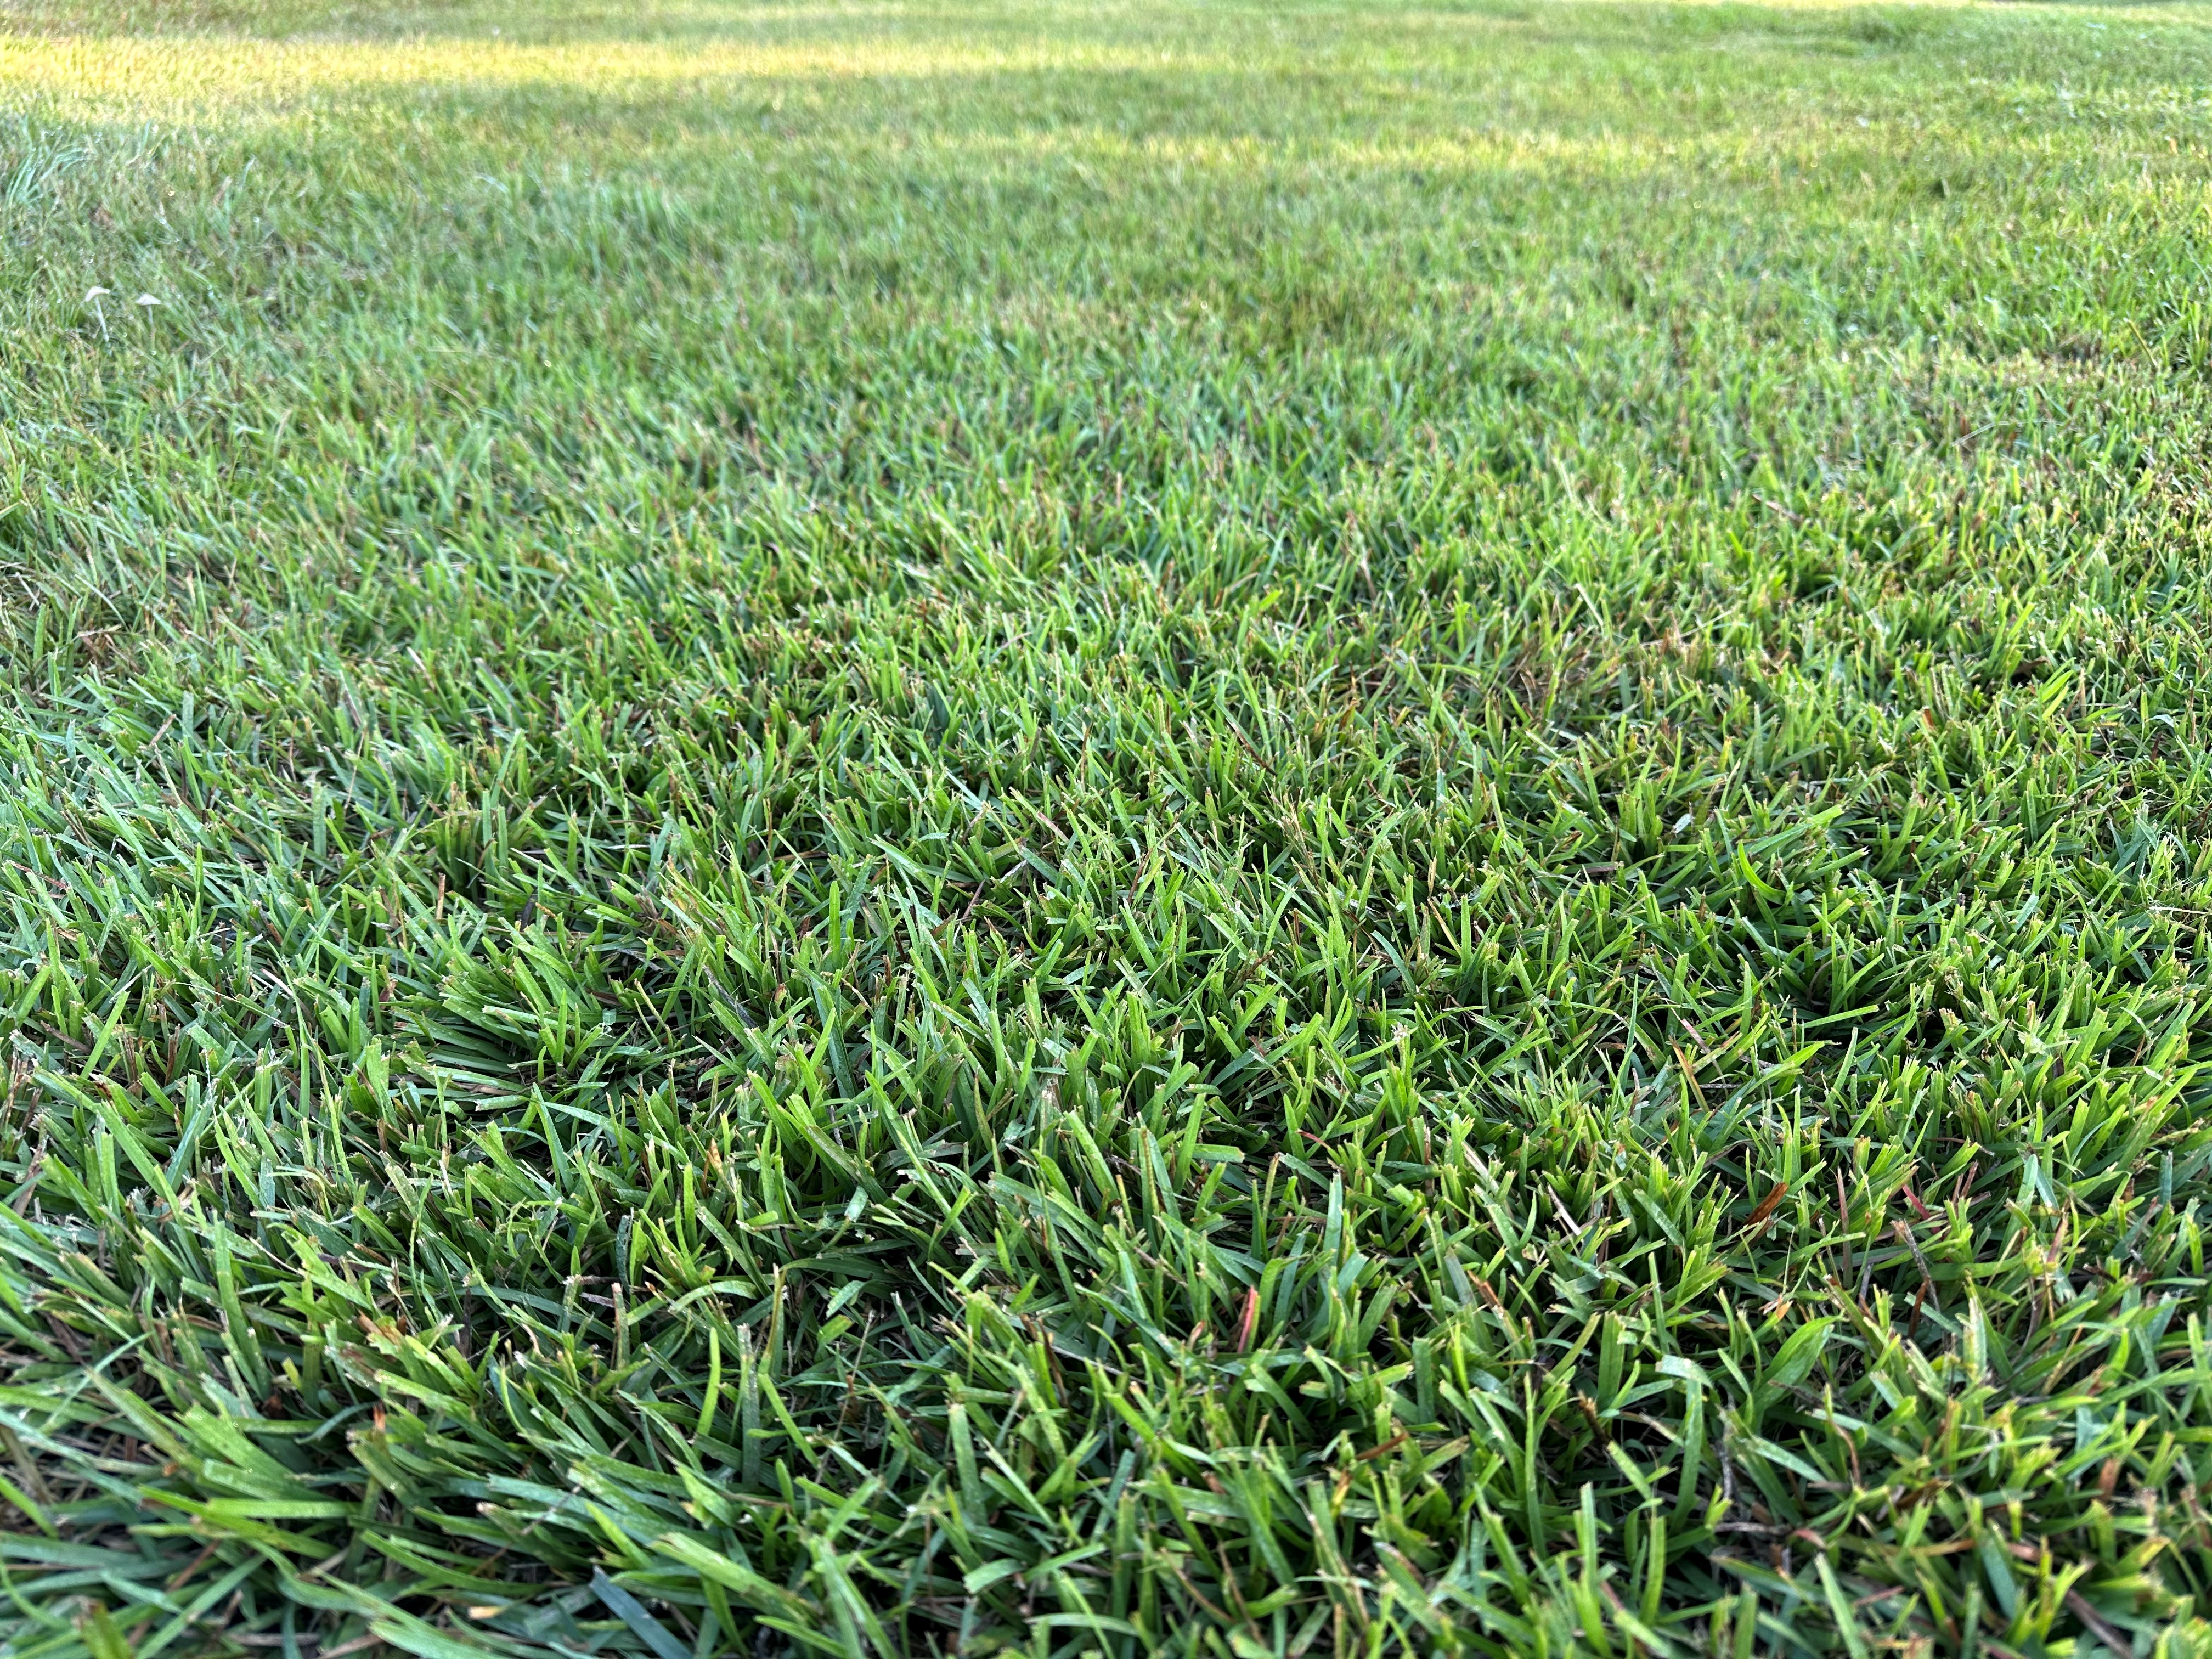
Timely Mowing – Other than overfertilizing, the next easiest way to cause significant damage to a Centipedegrass lawn is to mow it incorrectly. Centipede prefers a mowing height of around 2.5” and actively growing grass should be mowed every 7-14 days, removing no more than 1/3 of the grass blade. In my experience, this is much higher and often less frequent than many people mow their lawns. All too often, I see Centipede lawns that are allowed to grow tall and unkempt and then mowed to near golf course fairway height with the occasional bare “scalped” spot where the mower ran across an unlevel area of lawn. Mowing short and infrequently is harmful because mowing is inherently a major stress to the grass. You’re asking a lot of a plant by removing a large chunk of photosynthetic leaf tissue and then repeatedly asking the plant to regrow. Be kind to your grass and mow correctly. *Additionally, try to not mow your lawn in droughty conditions as this can exacerbate mowing stress and cause serious lawn issues.
Right Plant, Right Place – Much of the bad rap turfgrass receives comes from people trying to force it to grow where it shouldn’t be. If your yard has areas of significant shade or receives significant foot or vehicle traffic, Centipedegrass (or most any grass for that matter) may not be for you, in those areas at least. Like all turfgrasses (though some are more shade and traffic tolerant than others), Centipedegrass does best in full sun and detests having the soil its roots are going in repeatedly trampled and compacted. In areas with those conditions, maybe having a mulched landscaped bed with shade tolerant plants or a rocked walking path would be more appropriate. You and the grass will certainly be happier working with those options than fighting against your site conditions.
Though maintaining a Centipedegrass lawn is simple, that isn’t to say that if you follow all these tips that your yard will be perfect all the time. There will still be the occasional dieback, weed ingression, mole cricket infestation and the like, however, following the above tips will make your grass much more resilient and equipped to handle those stresses. For more information about Centipedegrass or other horticultural topics, contact your local UF/IFAS Extension office. Happy gardening!